本文我會介绍 MongoDB 的基本操作和概念。
Reference Link
NonSQL?
非數據庫(NoSQL)是關係數據庫(SQL 數據庫)以外的數據庫管理系統的總稱。 NoSQL 數據庫的數據模型和架構與傳統關係數據庫有不同的概念。
Mongo DB?
MongoDB 是一種非關係型數據庫管理系統(NoSQL DBMS)。 MongoDB 以一種稱為Document的 JSON 格式存儲數據。數據模型是可以輕鬆添加或更改字段。
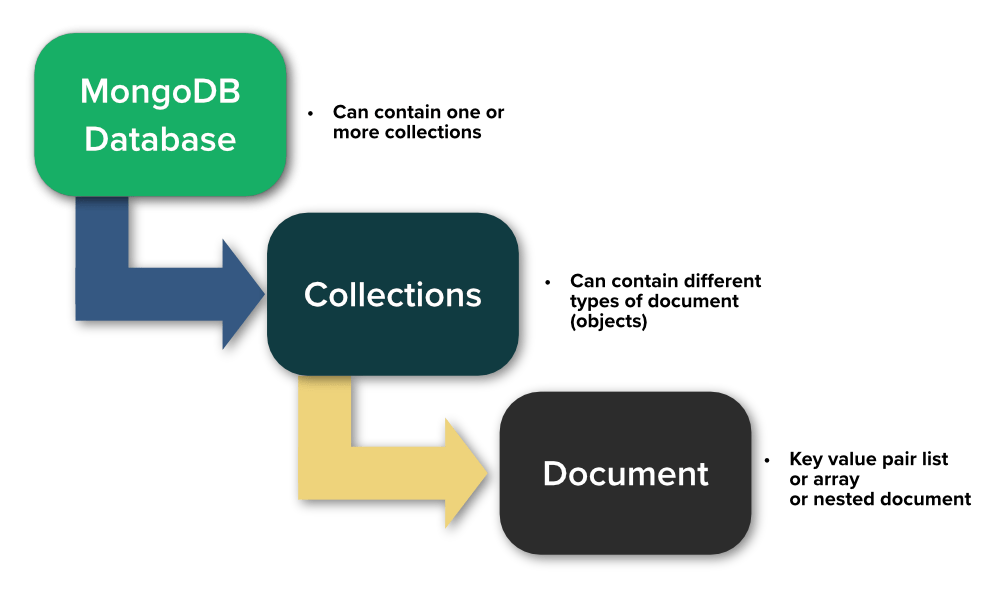
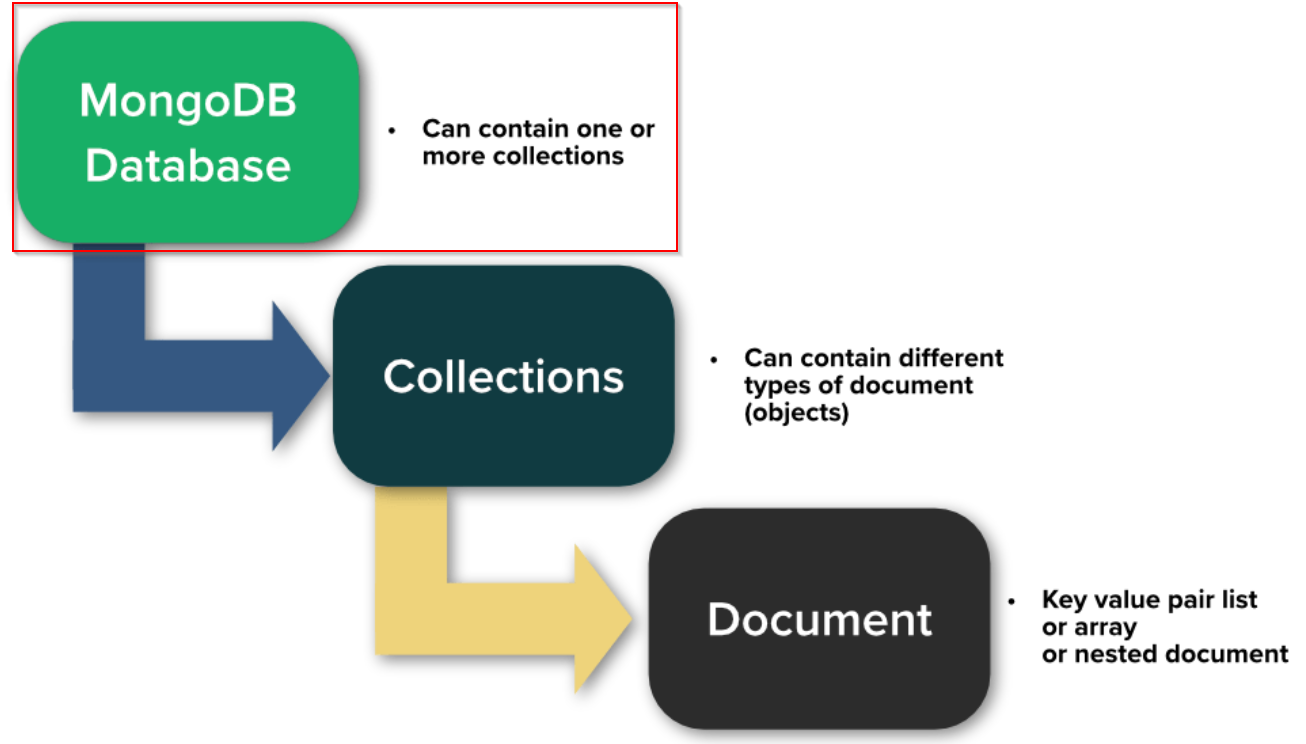
Database
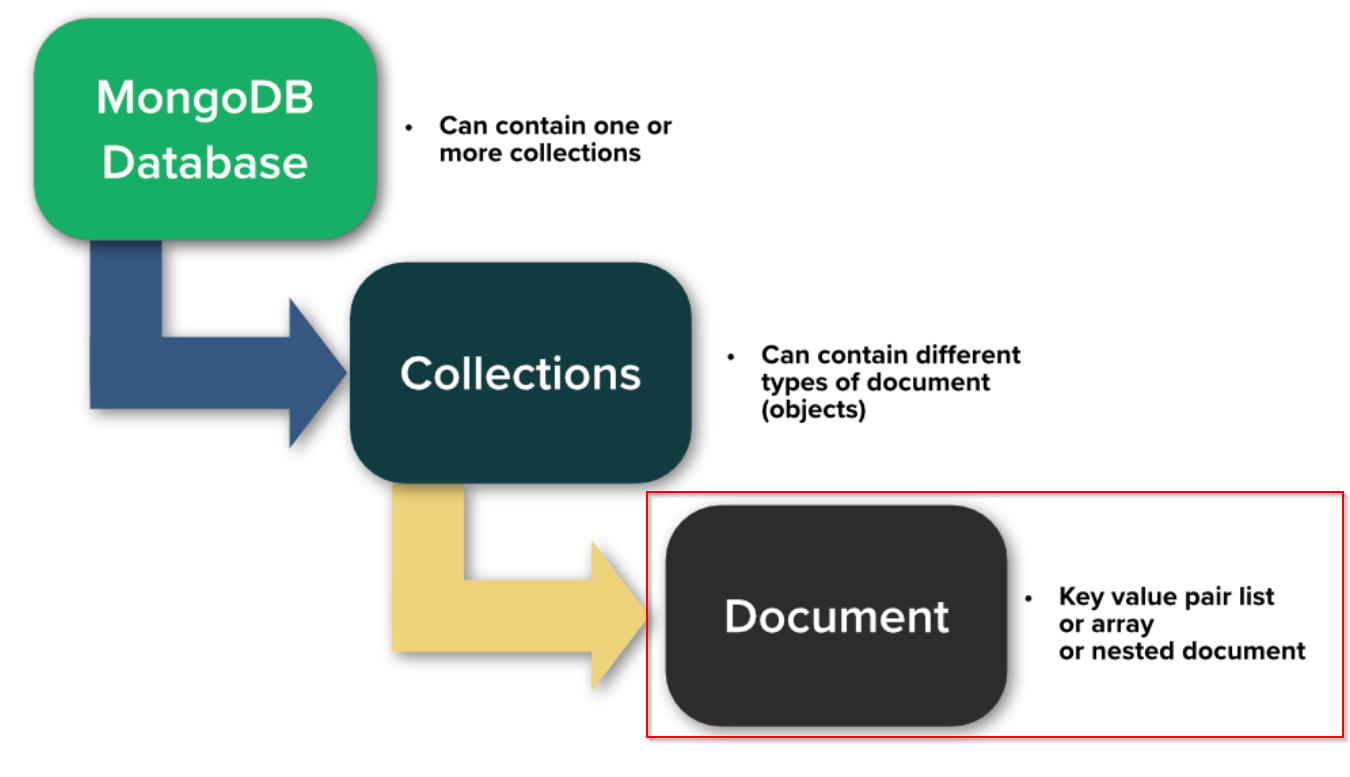
MongoDB 中的數據庫是 MongoDB 數據管理的頂層,它將相關集合(相當於表)分組。
每個數據庫都有一個名稱,並可包含多個集合。
它們還能為不同的應用和用例維護和管理獨立的數據。
我們可以執行以下命令來創建名為 “mydb “的數據庫。
| use mydb |
該命令以指定名稱創建數據庫。如果數據庫已經存在,則切換到現有數據庫。
Collections
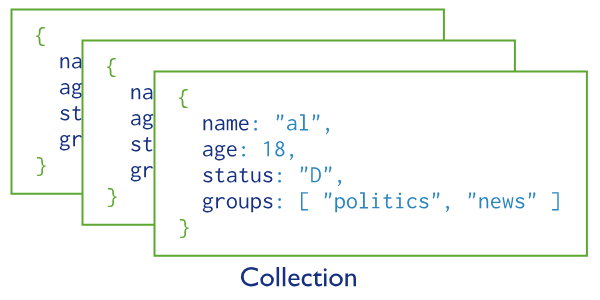
MongoDB Collections是 MongoDB 數據庫中Document(數據記錄)的分組。集合用於對相關Document進行邏輯分組。
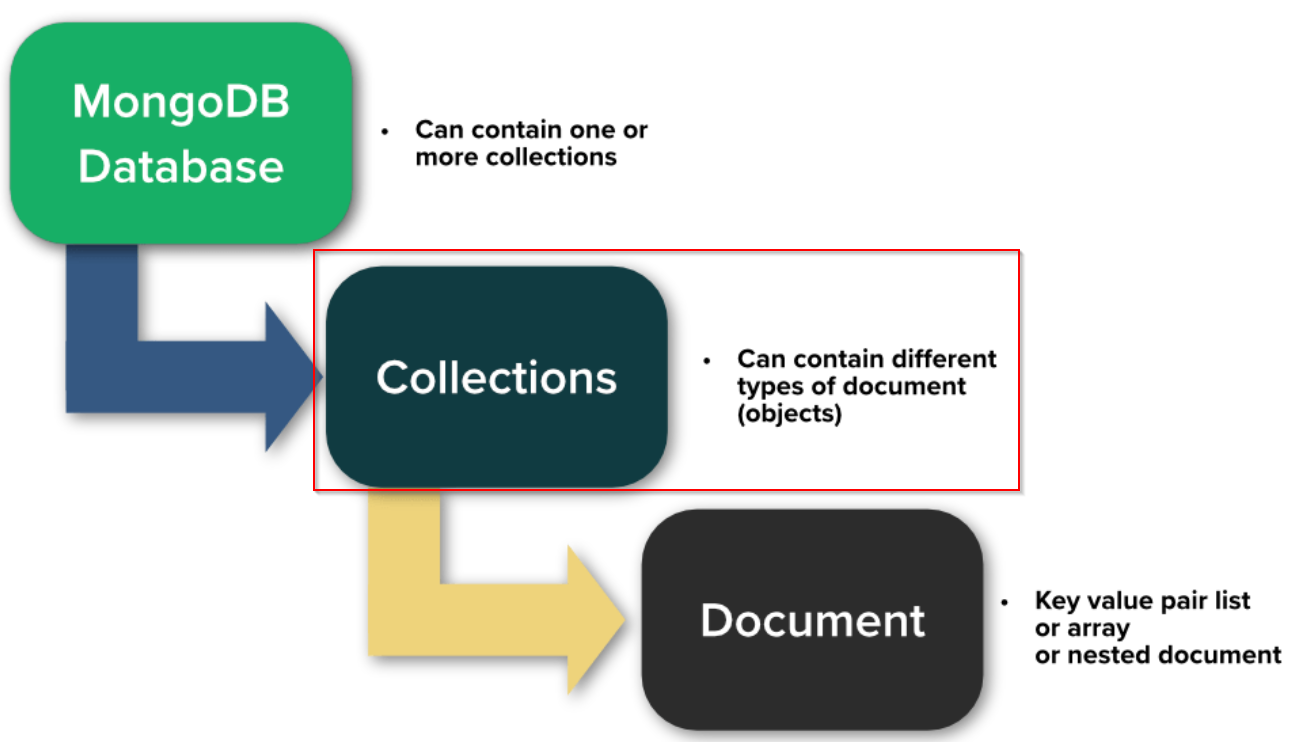
Collections與關係數據庫表類似,但有一些重要區別。具體來說,MongoDB 集合不需要預定義特定字段或結構。每個Document都可以有不同的字段和結構。
例如,我們想像一下博客應用程序的數據模型。博客數據庫中可能有多個集合。
- “users” Collections存儲用戶信息
- “posts” Collections可能包含博客文章
每個Collections中的Document都以 JSON(或 BSON)格式表示。每個Document對應該集合中的一條數據記錄。文檔具有字段-值對,每個字段在Document中都是唯一標識的。
在 MongoDB 中,Collections是動態創建的。如果你向一個還不存在的Collections中插入數據,MongoDB 會自動創建它。
Documents
MongoDB Documents是在 MongoDB 數據庫中處理的數據單元。 Documents以 JSON 格式表示並存儲在 MongoDB 中。
Documents是與關係數據庫中的記錄相對應。每個Documents都被視為Collections中的一個數據記錄,而 MongoDB 的特點之一就是Documents是無模式的。這意味著單個Documents可以有不同的字段和結構。
Documents由成對的字段及其值組成。
- 字段是名稱(鍵)和值的組合
- 可有任意數量的字段
- 字段值可以有不同的數據類型
- 字符串
- 數值
- 數組
- 嵌入文件
- 等等
例如,下面是一個用戶文Documents例:
該Documents包含 “姓名”、”年齡 “和 “電子郵件 “等字段。 “地址”字段包含一個嵌入文檔,”興趣 “字段包含一個數組。
| { “name”: “John Doe”, “age”: 30, “email”: “john@example.com”, “address”: { “street”: “123 Main St”, “city”: “New York”, “country”: “USA” }, “interests”: [“reading”, “music”, “sports”] } |
在 MongoDB 中,Documents是靈活的,可以根據需要添加或更改字段。靈活更改數據模型的優勢在於,它很容易適應應用程序開發和數據演進。
Operation
現在我們來看看 MongoDB 的簡單操作。
mongodb Shell
使用 mongo 命令啟動 mongodb shell。
| ubuntu@ubuntu:~$ mongo — > |
use db
使用 use 命令創建數據庫。
| > use testdb switched to db testdb |
show dbs
使用 show dbs 命令來表示數據庫,如果數據庫為空,則不會顯示數據庫。
| > show dbs admin 0.000GB config 0.000GB dbStation 0.000GB local 0.000GB myDB 0.000GB tanks 0.000GB |
Create Collections
使用 db.createCollection() 創建Collections(相當於 SQL 中的表)。
下面的示例創建了一個名為 MyCollections1 的Collections。
| > db.createCollection(“MyCollections1”) { “ok” : 1 } |
Insert Documents
下一步是使用 insertOne() 向剛剛定義的Collection中插入Documents(相當於 SQL 中的記錄)。
| >db.MyCollections1.insertOne({plc:”Beckhoff”,model:”CX6920″,TwinCATVersion:3}) { “acknowledged” : true, “insertedId” : ObjectId(“64a0ad21cf8d3947804e3616”) } |
| >db.MyCollections1.insertOne({plc:”Mitusbishi”,model:”IQR”,GXWORKSVersion:3}) { “acknowledged” : true, “insertedId” : ObjectId(“64a0adc0cf8d3947804e3617”) } |
| >db.MyCollections1.insertOne({plc:”Keyence”,model:”KV8000″,KVStudioVersion:”11.6.G”}) { “acknowledged” : true, “insertedId” : ObjectId(“64a0ade1cf8d3947804e3618”) } |
Find
現在使用 find() 在Collections中搜索數據。
| > db.MyCollections1.find() { “_id” : ObjectId(“64a0ad21cf8d3947804e3616”), “plc” : “Beckhoff”, “model” : “CX6920”, “TwinCATVersion” : 3 } { “_id” : ObjectId(“64a0adc0cf8d3947804e3617”), “plc” : “Mitusbishi”, “model” : “IQR”, “GXWORKSVersion” : 3 } { “_id” : ObjectId(“64a0ade1cf8d3947804e3618”), “plc” : “Keyence”, “model” : “KV8000”, “KVStudioVersion” : “11.6.G” } |
Find with Conditions
您可以通過將記錄連同鍵一起傳遞給 find() 來檢索想要檢索的記錄。
在下面的示例中,plc=Beckhoff 的記錄能在Collections中檢索到的。
| db.MyCollections1.find({plc:”Beckhoff”}) { “_id” : ObjectId(“64a0ad21cf8d3947804e3616”), “plc” : “Beckhoff”, “model” : “CX6920”, “TwinCATVersion” : 3 } |
Update
如果要在Collections記錄中插入新數據,請使用 Update()。
在下面的示例中,project:Myproject 對已被添加。
| db.MyCollections1.updateOne({plc:”Beckhoff”},{$set:{projectname:”Myproject”}}) { “acknowledged” : true, “matchedCount” : 1, “modifiedCount” : 1 } |
Find Again
讓我們再檢查一次數據。
| > db.MyCollections1.find({plc:”Beckhoff”}) { “_id” : ObjectId(“64a0ad21cf8d3947804e3616”), “plc” : “Beckhoff”, “model” : “CX6920”, “TwinCATVersion” : 3, “projectname” : “Myproject” } > db.MyCollections1.deleteOne({plc:”Keyence”}) { “acknowledged” : true, “deletedCount” : 1 } > db.MyCollections1.find() { “_id” : ObjectId(“64a0ad21cf8d3947804e3616”), “plc” : “Beckhoff”, “model” : “CX6920”, “TwinCATVersion” : 3, “projectname” : “Myproject” } { “_id” : ObjectId(“64a0adc0cf8d3947804e3617”), “plc” : “Mitusbishi”, “model” : “IQR”, “GXWORKSVersion” : 3 } |
Exit
使用Ctrl+C 退出 mongodb Shell。
| > ^C bye |