前回はCodesysを使ってどうやってRapbserryからOPCUAサーバを立ち上げる方法を書きました。もしもう一度みたいならこちらへ:
今回セキュリティ証明書を使うにはどうすればよいのか説明します。
OPC協会(2017年のもので少し古いかもしれませんが)によりますと、
トランスポート層のセキュリティ
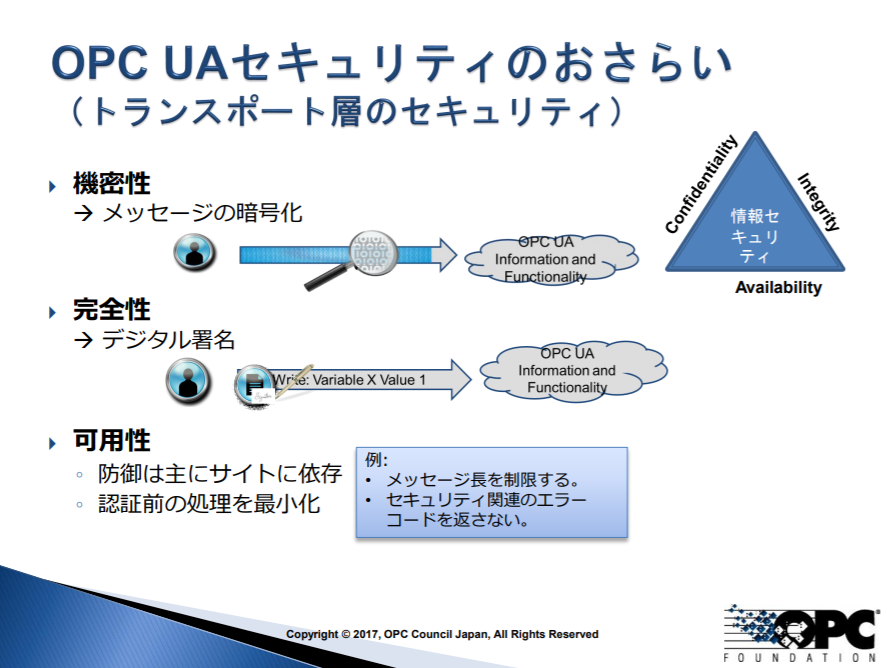
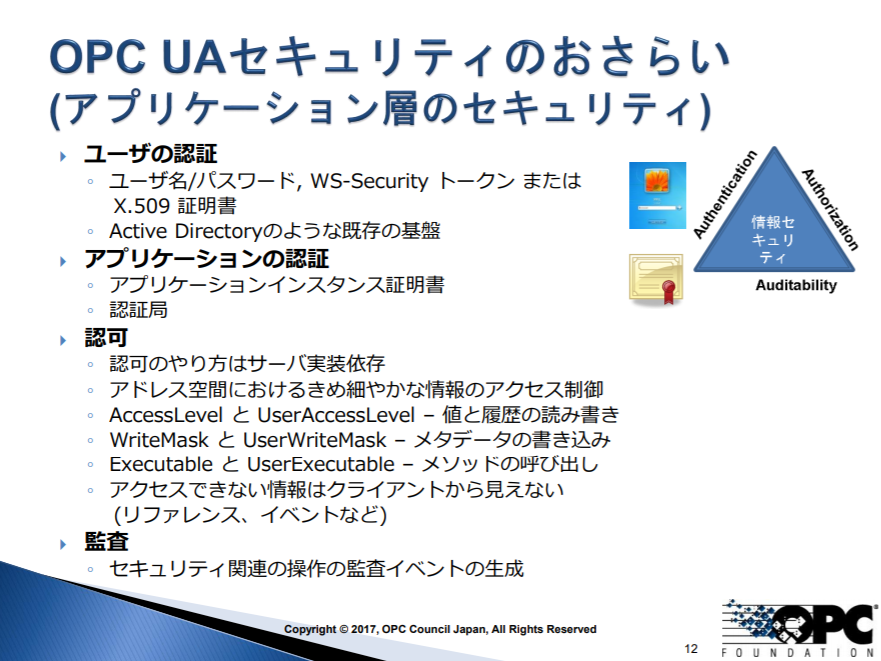
アプリケーション層のセキュリティ
https://jp.opcfoundation.org/wp-content/uploads/sites/2/2017/12/OPCDay2017_04_OPC_UAsec.pdf
実装
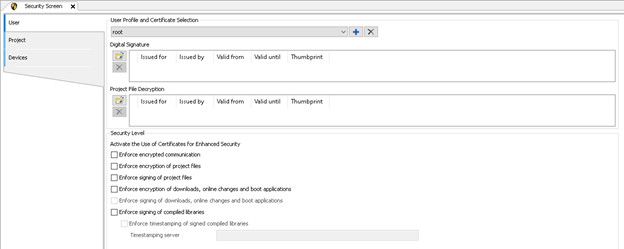
Codesysを開いて、View>Security Screen。
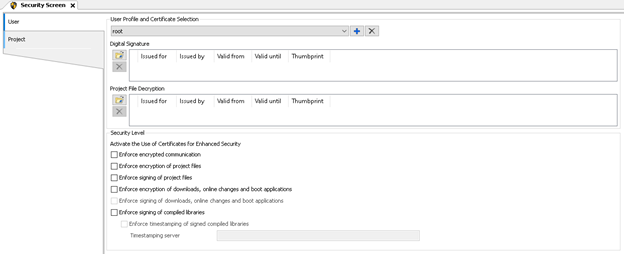
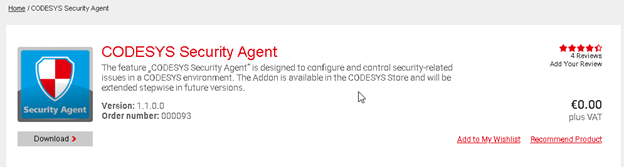
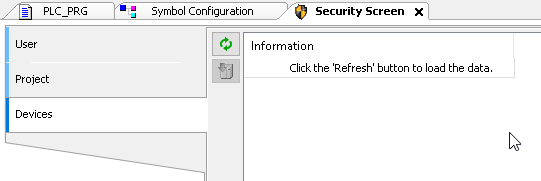
本来ならここでUser、Project以外に”Devices”という3つ目の設定Tabがありますが、このリングでPackageをダウンロードしインストールおねがいします。
https://store.codesys.com/codesys-security-agent.html?___from_store=default&___store=en
こっちらはCodesysで新しいPackageダウンロードする方法です。
インストール完了し、再起動したらView>Security Screenで”Devices”という3つ目のTabが見えました。
DevicesのTabをクリックし、緑のぐるぐるICONでRefreshします。
もし見つからないのであれば、まずActive Pathがあってるかどうか確認してください。
次は、DevicesのTreeを展開し>OPC UA Server(Not available0を選んで、数字3にあるICONをクリックします。

Certificate Settingsの画面が出てきます。こことりあえず2048Key Lengthで、Validty periodは365日にします。
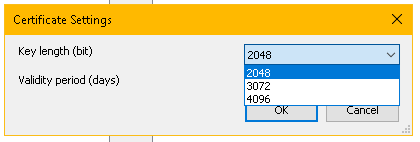
そうすると、証明書が作りました。

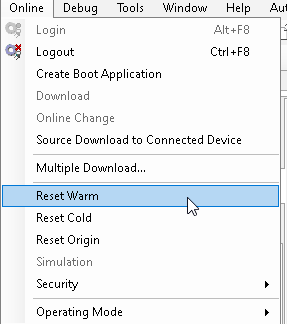
最後はPi3をリセットしてください。多分ですが、私がテストした場合は再起動でも次で書いてる-UAExpertで確認するとき、Basic256のConnection出てこれなかった。そしてApplicationを”全削除”しDownload入れ直ししたらOKになりました。うん~わかりませんね。一時間かかりました。WTF。
テスト
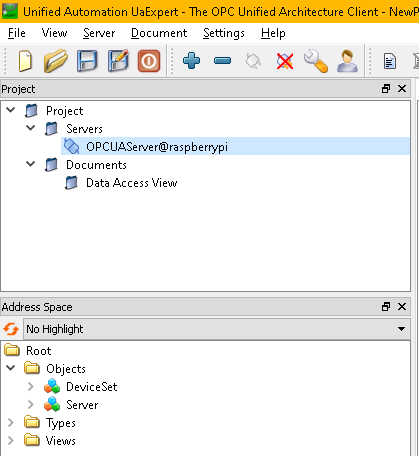
次はUaExpertを使って検証します。
Basic256Sha256 – Sign & Encrypをあるかどうかを確認します。もしなかったらApplicationをもう一度全削除しDownloadをおねがいします。
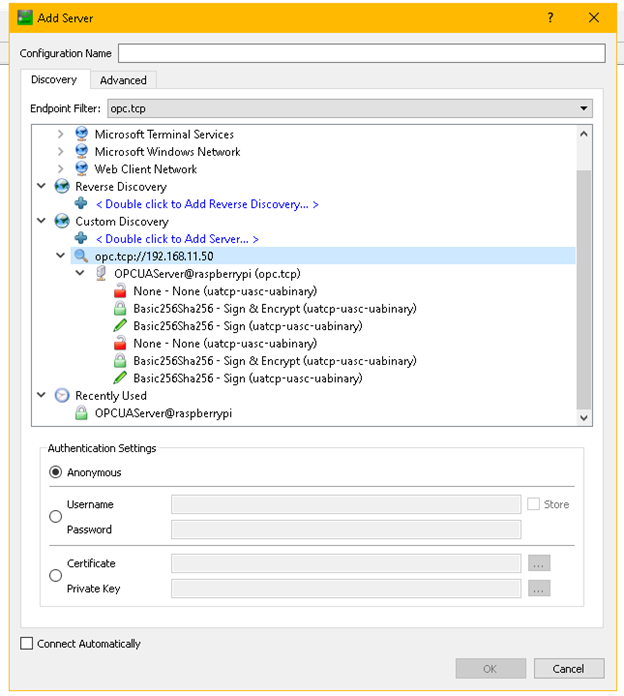
Basic256Sha256 – Sign & Encryptを選びます。
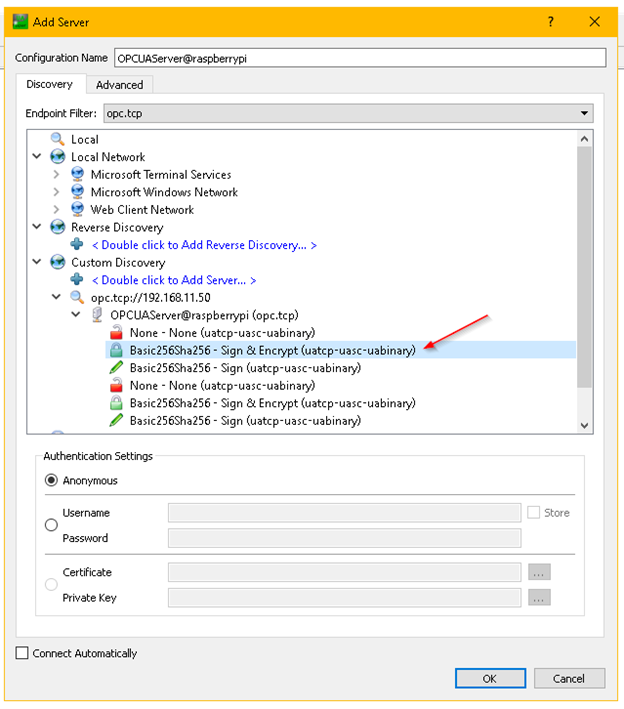
Server名選んで、Connect。
しばらく待っていたら、Errorが出てきます。
うん?BadCertificateTimeInvalid?
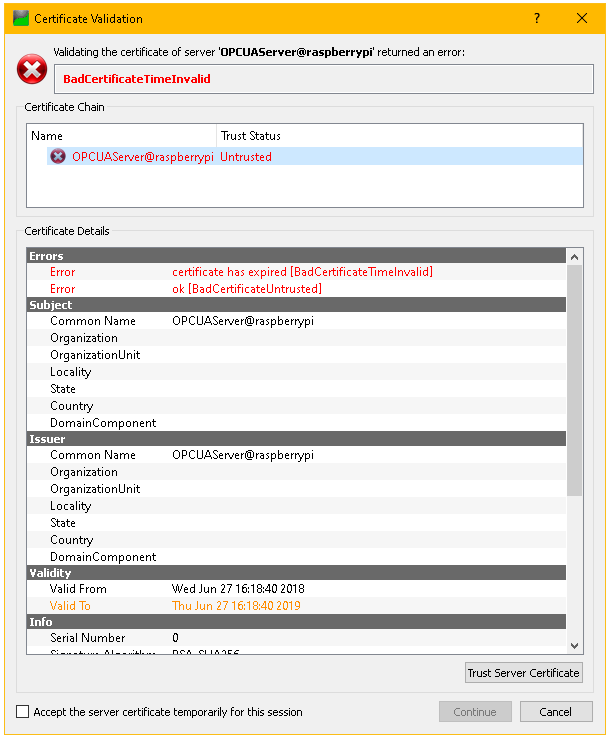
少し調べましたが、どうやら私のRaspberryの時間があってないみたい。
このリングで詳しく教えてくれます。まぁ、一番早いのはRaspberryをインタネットを接続すること、ですね。
sudo date -s "Thu Aug 9 21:31:26 UTC 2012"https://www.raspberrypi.org/forums/viewtopic.php?t=13313
そうしてもう一度Certificationを作り直します。うん~先一回め作ったとき証明書の日付がおかしいなと思ったがきをしなかった…

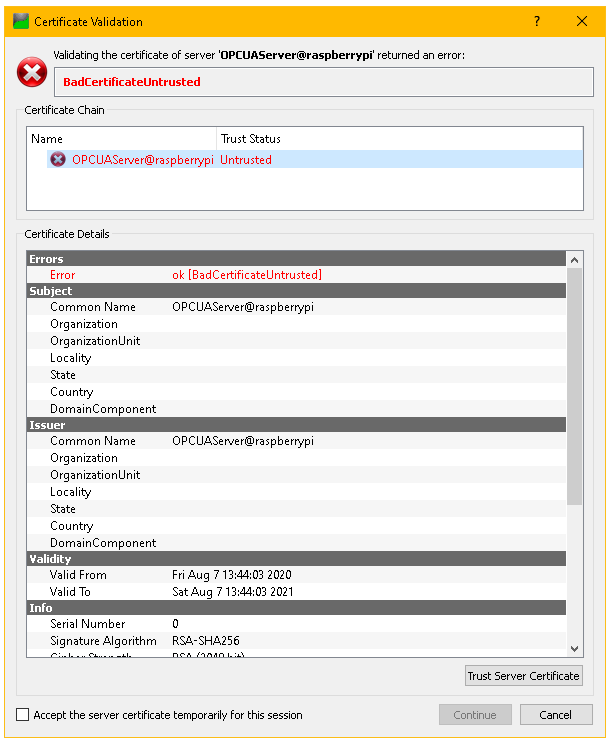
もう一度接続したら、今度はBadCetificatUntrustedのエラーが出てきます。
Trust Server Certificateをクリックし、OK。
最後はView>Securityもう一度みて、Quarantined Certificateのところみたら、先UaExpertで自分の証明書がみえます。

この証明書を選んで、Trusted Certificateほうへ引っ張ります。

こんな感じでOKです。

最後もう一度ConnectしたらOKになりました。なかのNodeもみえるようになります。
お疲れ様ですー