今回の記事ではBeckhoff TwinCAT3 Message pragmasという機能を紹介します。この機能は、コンパイル中にMessage Windowsにメッセージを出力することができます。
さ、はじめよう!

Message pragmas
Message pragmasは、コンパイル中にMessage Windowsにメッセージを出力させるために使われる。このMessage pragmas命令は、POUのテキストエディタで、別行または既存の行に挿入することも可能です。
Text
こちらはMessage Windowsに文字列を出力するときのExampleです。
| {text <‘textstring’>} |
Message Windowsにこのような文字列が表示されました。
| Text: Output of <text string>. |
info
こちらはMessage WindowsにInfo状態付きの文字列を出力するときのExampleです。
| {info <‘textstring’>} |
<<Message OutputにこのようなICONと設定した文字列が表示されます。
| Message pragmas 1: Information: Output of <text string>. |
Warning
こちらはMessage WindowsにWarning状態付きの文字列を出力するときのExampleです。
| {warning <‘textstring’>} |
<<Message OutputにこのようなICONと設定した文字列が表示されます。
| Message pragmas 2: Warning: Output of <text string>. |
Error
こちらはMessage WindowsにError状態付きの文字列を出力するときのExampleです。
| {error <‘textstring’>} |
<<Message OutputにこのようなICONと設定した文字列が表示されます。
| Message pragmas 3: Error: Output of <text string>. |
Implemenation
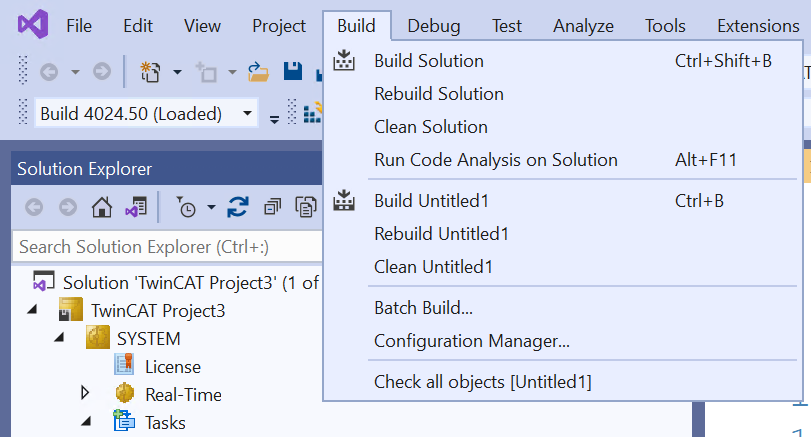
では、実際にTwinCATからBuild>Build Solutionでプロジェクトをコンパイルしてみましょう。
Exmaple1
こちらのExampleはコンパイルするときMessage Windowに文字列のみ出力するようにします。
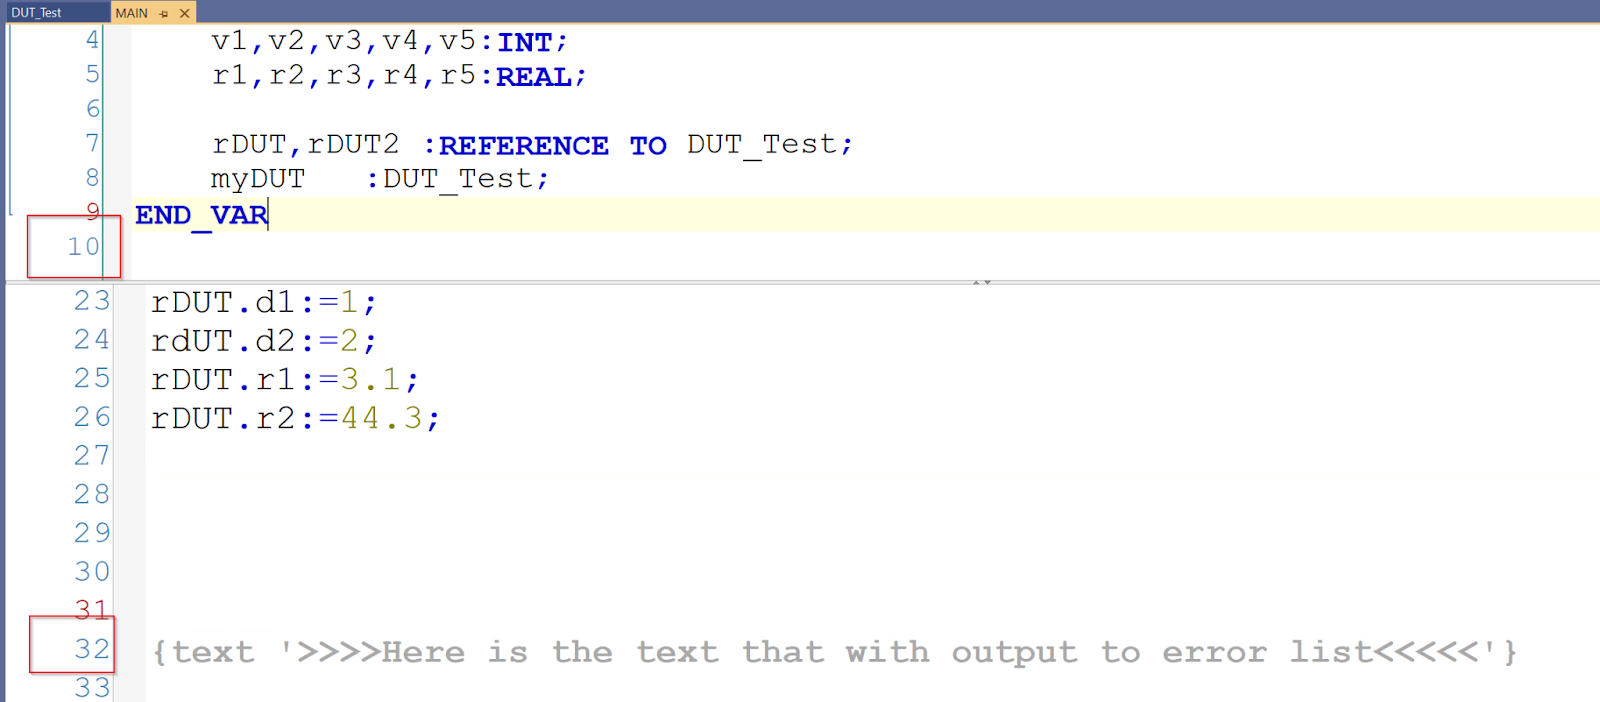
| PROGRAM MAIN VAR b1,b2,b3,b4,b5:BOOL; v1,v2,v3,v4,v5:INT; r1,r2,r3,r4,r5:REAL; END_VAR {text ‘>>>>Here is the text that with output to error list<<<<<‘} |
Result
Done!コンパイル完了した後、Message Windowsに先程プログラムで定義した文字列が表示されました。

LineのRowに42だと表示されます。

ここは少しややこしいですが、Line42であるのはVARの変数定義部分も含めてCountされたので、実際文字列出されたLine数は10+32=42になります。
Example2
次のExampleは一気にInfo/Wanring/Error文字列をMessage Windowsに出力するようにします。
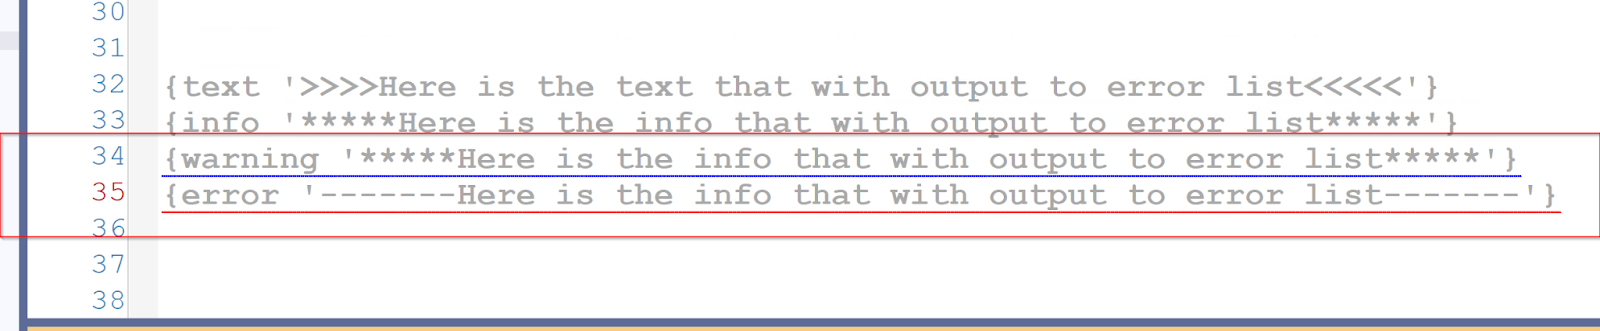
| PROGRAM MAIN VAR b1,b2,b3,b4,b5:BOOL; v1,v2,v3,v4,v5:INT; r1,r2,r3,r4,r5:REAL; END_VAR {text ‘>>>>Here is the text that with output to error list<<<<<‘} {info ‘*****Here is the info that with output to error list*****’} {warning ‘*****Here is the info that with output to error list*****’} {error ‘——-Here is the info that with output to error list——-‘} |
Result
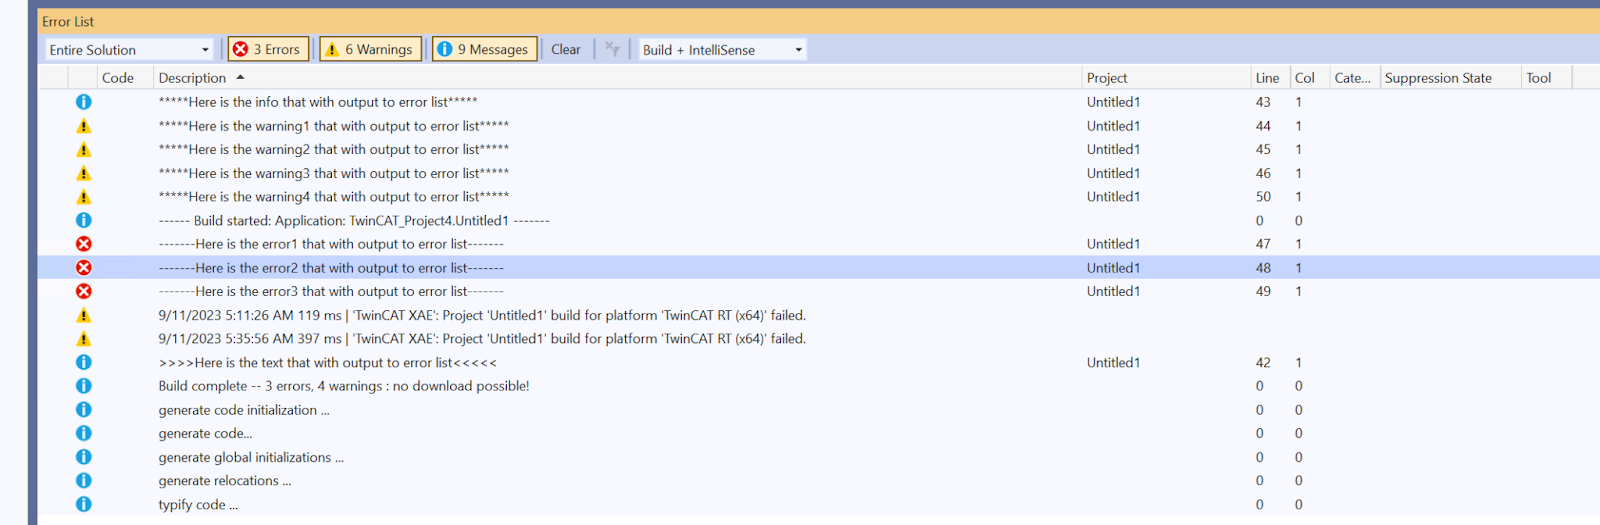
まずTwinCAT EditorからはWarningが青い線・Errorは赤線でUnderlineされています。
Message Windowsにも同じく文字列のみ/Info/Warning/Error のメッセージが表示されるようになります。

Example3
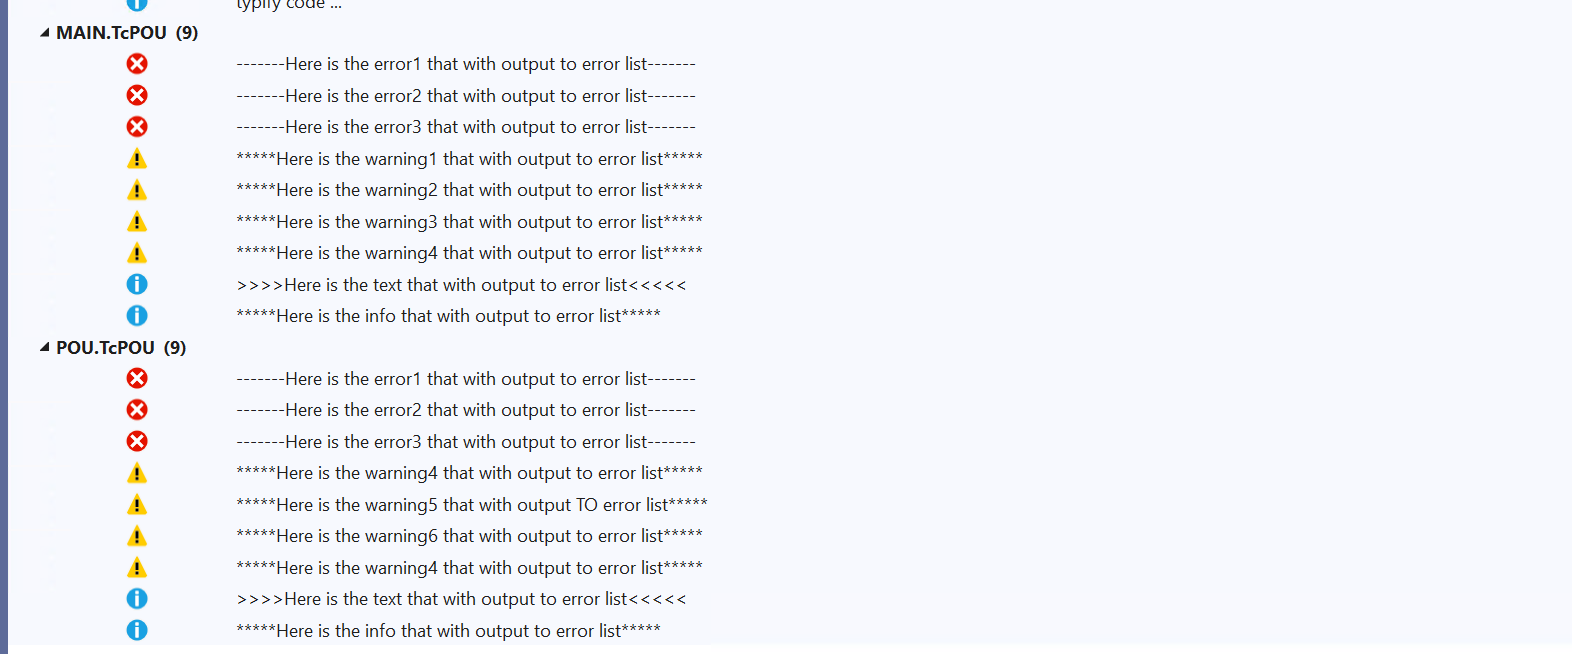
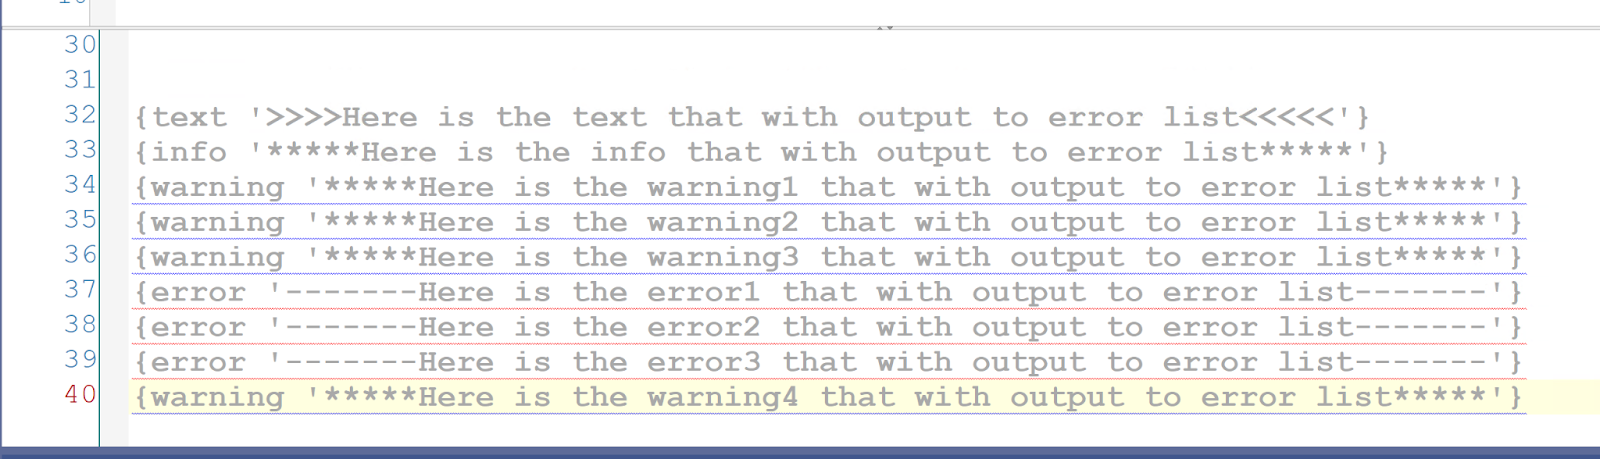
最後のExampleではもう少し現場に近い使い方を紹介します。まず下図のように複数のWarning・Error・Infoなどがいろんな箇所に定義されたとしよう。
Result
このように、Message Windowsに複数のテキストが表示されますね。
Messageを選び>右クリック>GroupingのMenuを展開するとMessageの種類によってMessageをGroup表示に変えることができます。
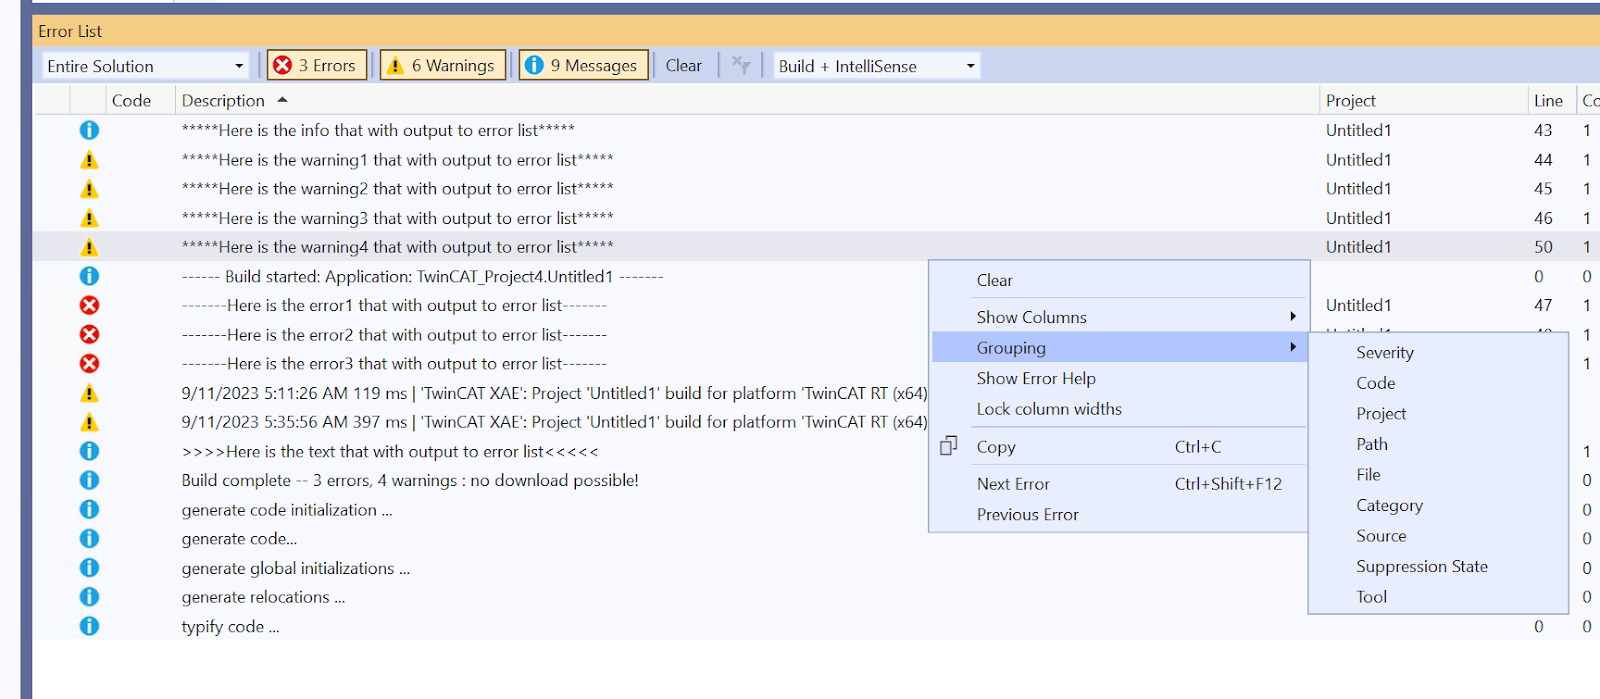
下図のようにSeverityに分け表示されました。

そしてGroupsの折りたたみも可能です。

Example4
最後のExampleでは複数のPOUを作成し、Message pragmasを定義します。

Result
Message WindowsにCodeというGrouping方法もあります。
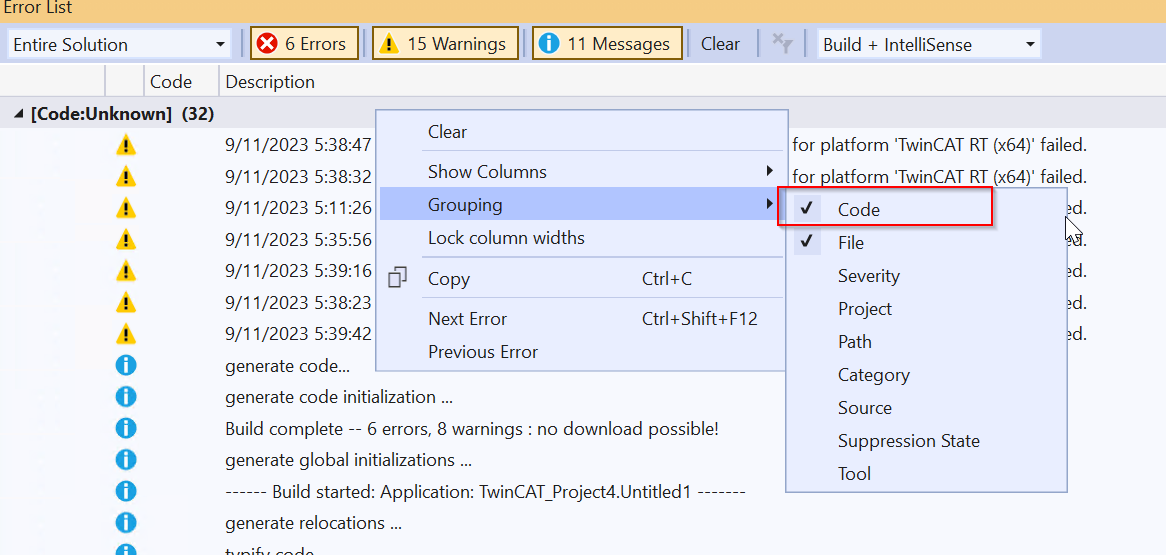
それにより、Message Windowsがプログラムに分けてGroupingするようになります。