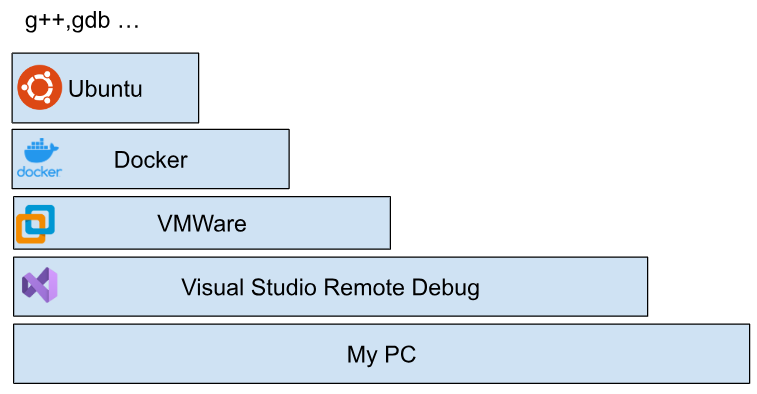
今回の記事ではDocker上でC++アプリケーションを実行する環境を作り、Visual StudioからRemote Debugするまでの構築手順を1から説明します。
また、私はソフトウェアに関してあまり深い知識がないので、間違えたところも多いと思います。そのとき指摘していただければ嬉しいです。
さ、はじめよう。
Reference Link
https://learn.microsoft.com/en-us/cpp/linux/?view=msvc-160
https://www.linuxquestions.org/questions/programming-9/running-a-out-files-158541/
Docker Installation
DockerFileを作成します。
| # our local base image FROM ubuntu LABEL description=”Container for use with Visual Studio” # install build dependencies RUN apt-get update && apt-get install -y g++ rsync zip openssh-server make # configure SSH for communication with Visual Studio RUN mkdir -p /var/run/sshd RUN echo ‘PasswordAuthentication yes’ >> /etc/ssh/sshd_config && \ ssh-keygen -A # expose port 22 EXPOSE 22-9999 |
Built the Images
DockerFileを利用しImagesをビルドします。
| mkdir yourTestingEnv cd yourTestingEnv docker build -t ubuntu-vs . docker run –p 5000:22 –i -t ubuntu-vs /bin/bash |
Confiugre the User
最後はOSのConsoleにLoginし、SSH Serverを起動し、Userを作成しましょう。
<user-name>はUser名に変更してください。
| service ssh start useradd -m -d /home/<user–name> -s /bin/bash -G sudo <user–name> passwd <user–name> |
G++
g++はGCCのGNU C++コンパイラです。
https://stackoverflow.com/questions/1516609/difference-between-cc-gcc-and-g
rsync
rsyncファイルやディレクトリをバックアップ/同期するツールであり、変更を検出して差分のみを転送するため、バックアップや同期をネットワーク経由で効率的に行うことができ、sshなどのリモートシェルからも利用できる。バックアップやミラーリングの目的では、基本的にコピー元とコピー先にはわずかな差分しかないはずで、ファイルの差分だけを転送するrsyncは効率的に動作する。
Ubuntu on remote Linux systems
ターゲットのLinuxシステムには、openssh-server、g++、gdb、makeをインストールする必要があり、またninja-buildはCMakeプロジェクトにのみ必要です。
zip と rsync は、Intellisense をサポートするために、リモート・ヘッダーをローカル・マシンと自動的に同期するために必要です。これらのアプリケーションがまだインストールされていない場合は、以下の手順でインストールしてください:
| sudo apt-get install openssh-server g++ gdb make ninja-build rsync zip |
Configure the Visual Studio
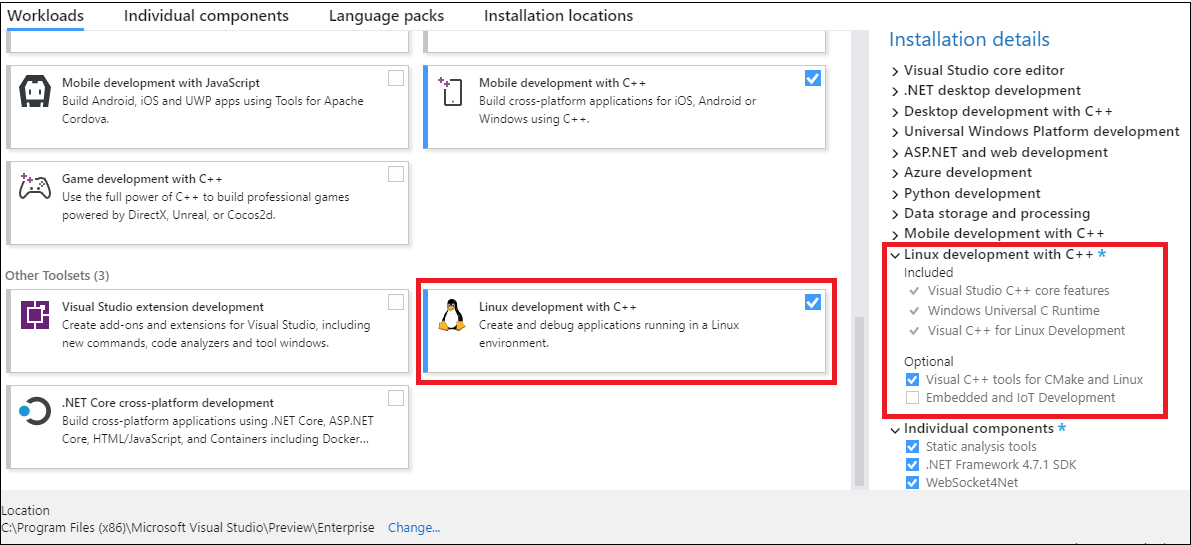
CPPをプログラムするPCにVisual Studioをインストールし、またOther ToolsetsにあるLinux Development with C++のオプションも入れましょう。
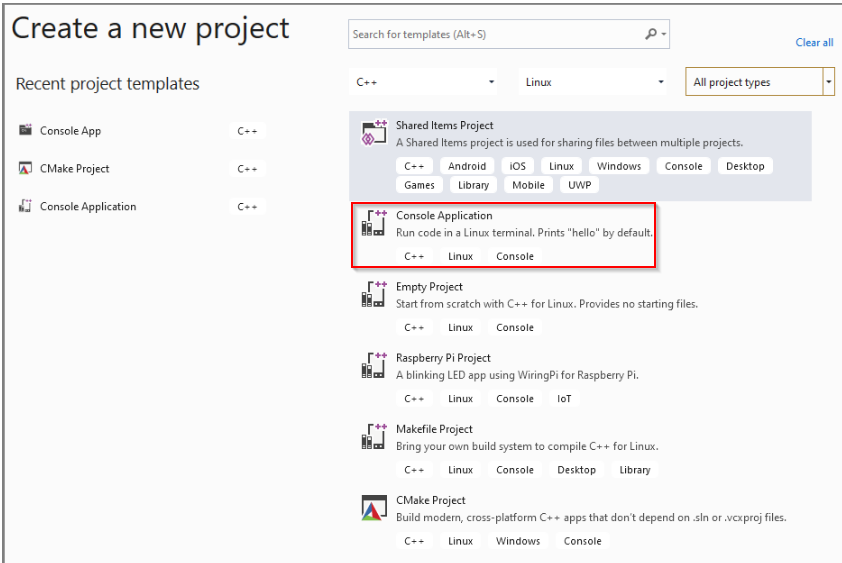
今回は試しにConsole Applicationを作成します。
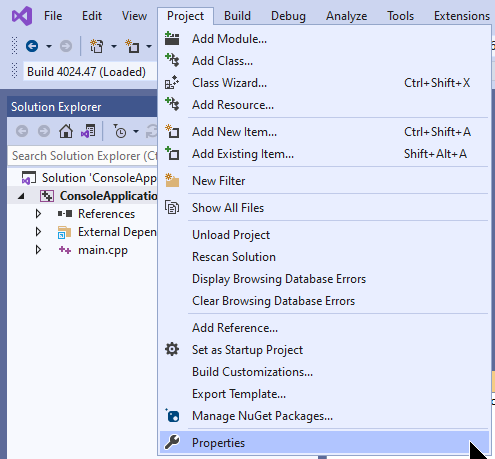
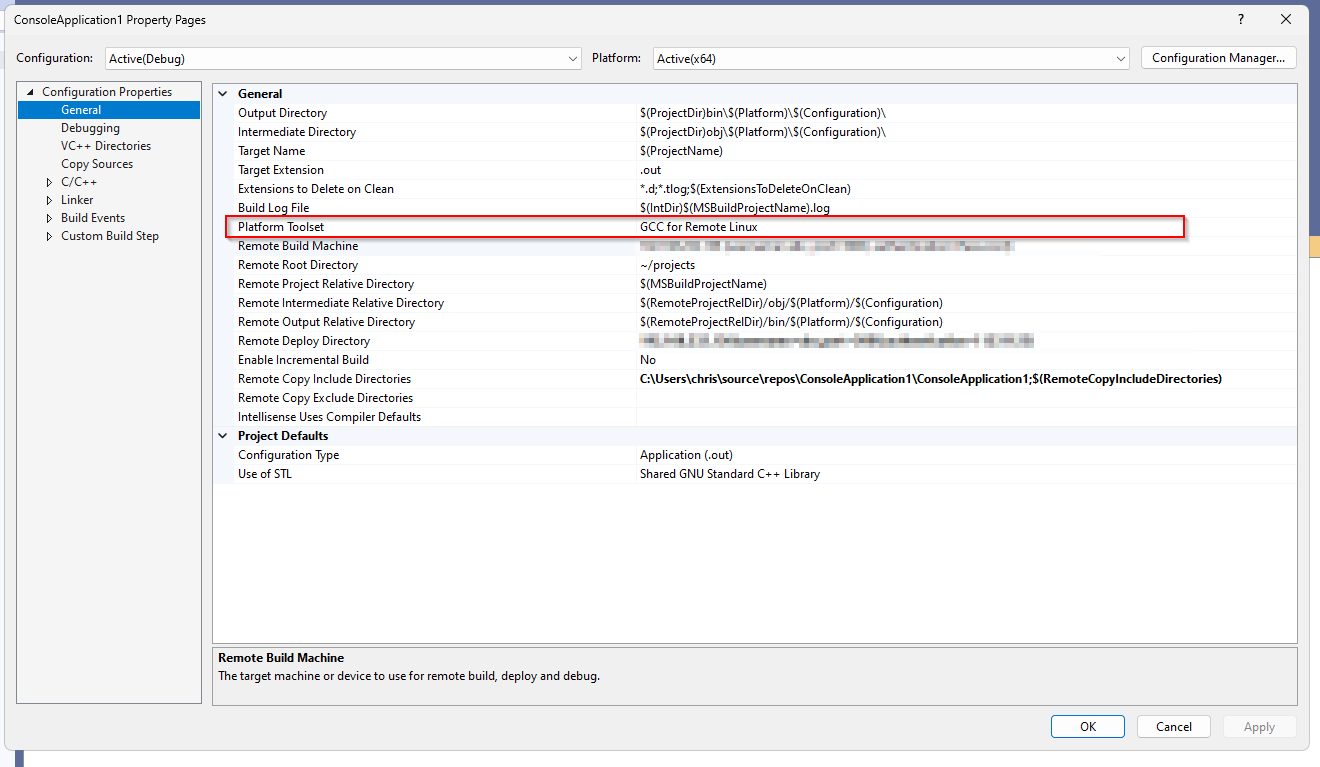
Project>Propertiesを開きます。
Platform Toolset
Platform ToolsetでGCC for Remote Linuxを選びます。
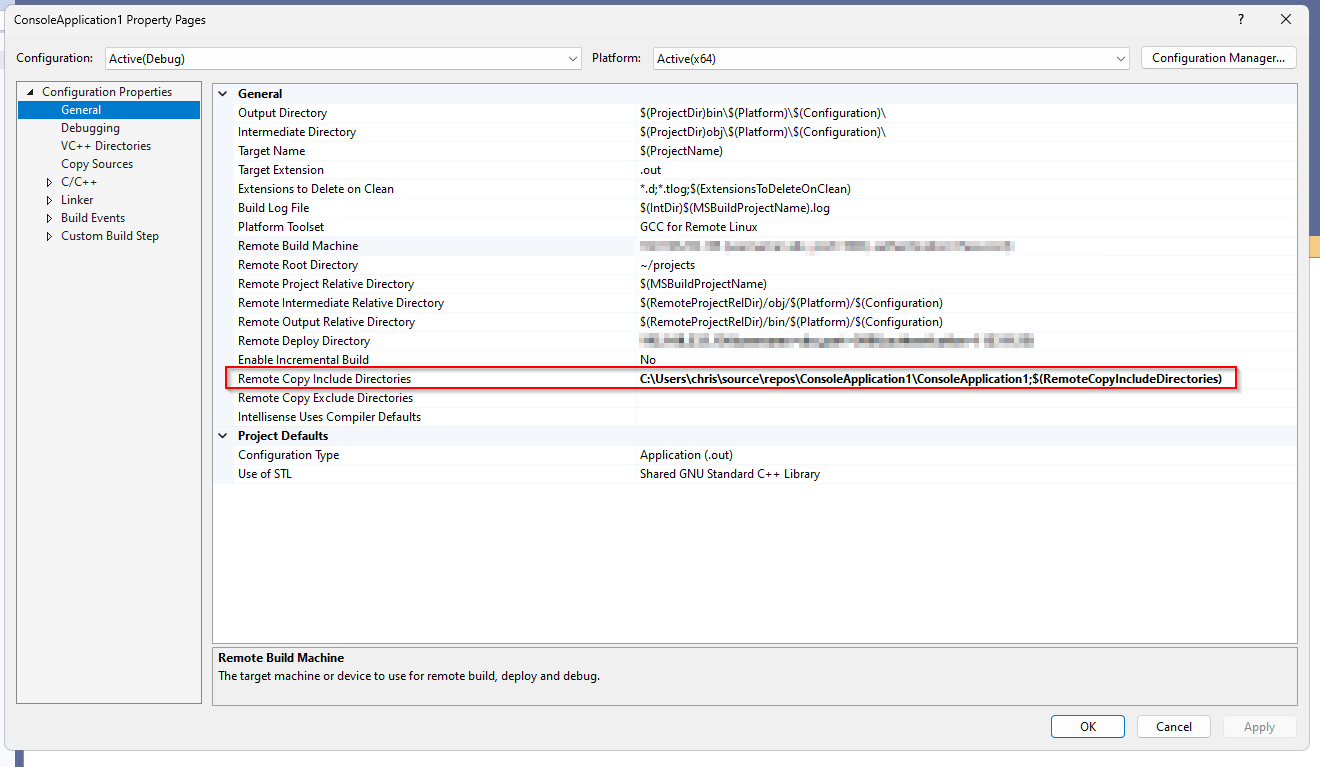
Remote Copy Include Diretories
Remote Copy Include Diretoriesにはリモート環境にCopyするプロジェクトFileを設定します。
Drop-ListからEditをクリックします。
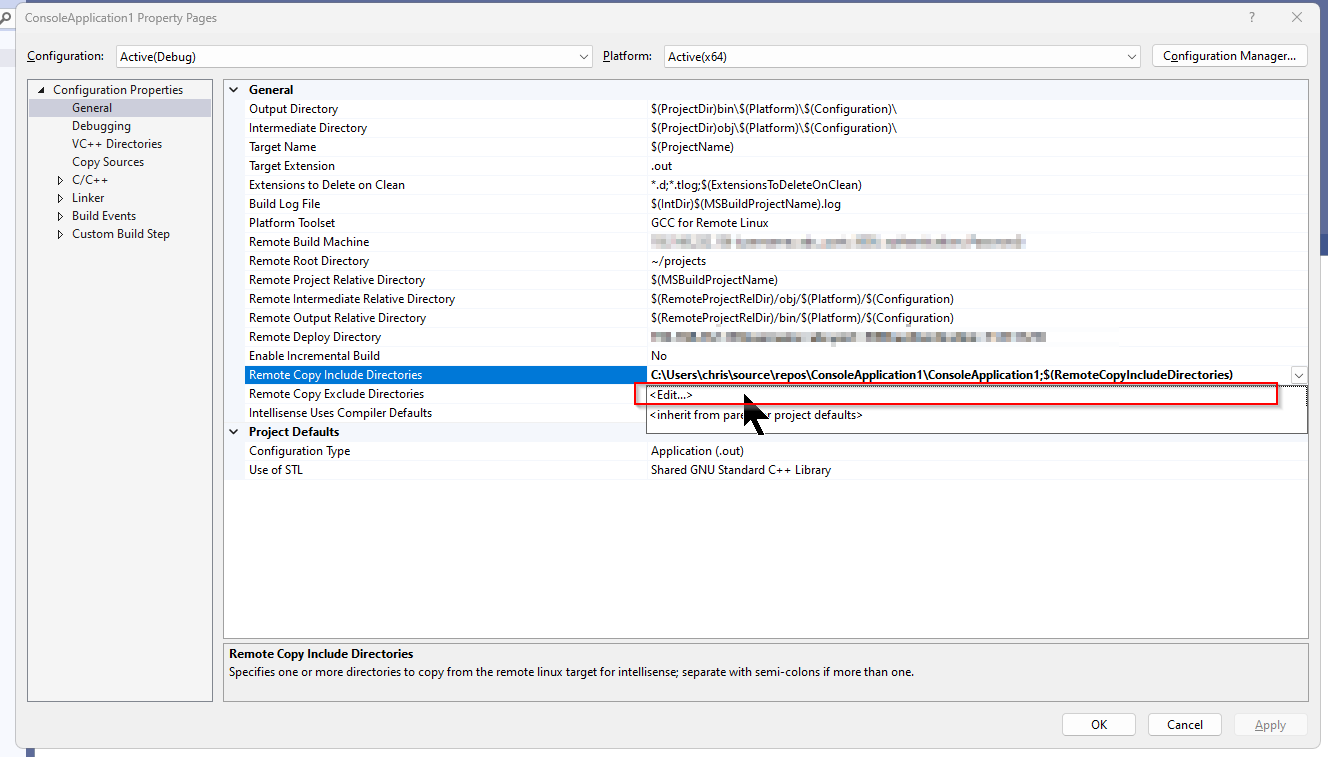
赤枠のICONをクリックします。
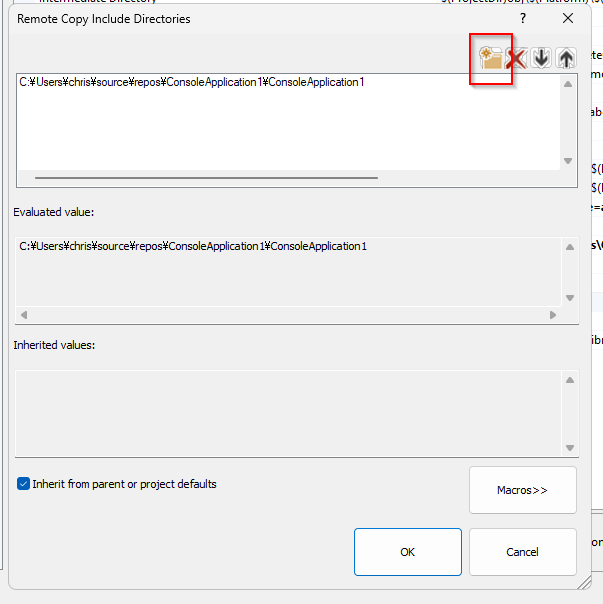
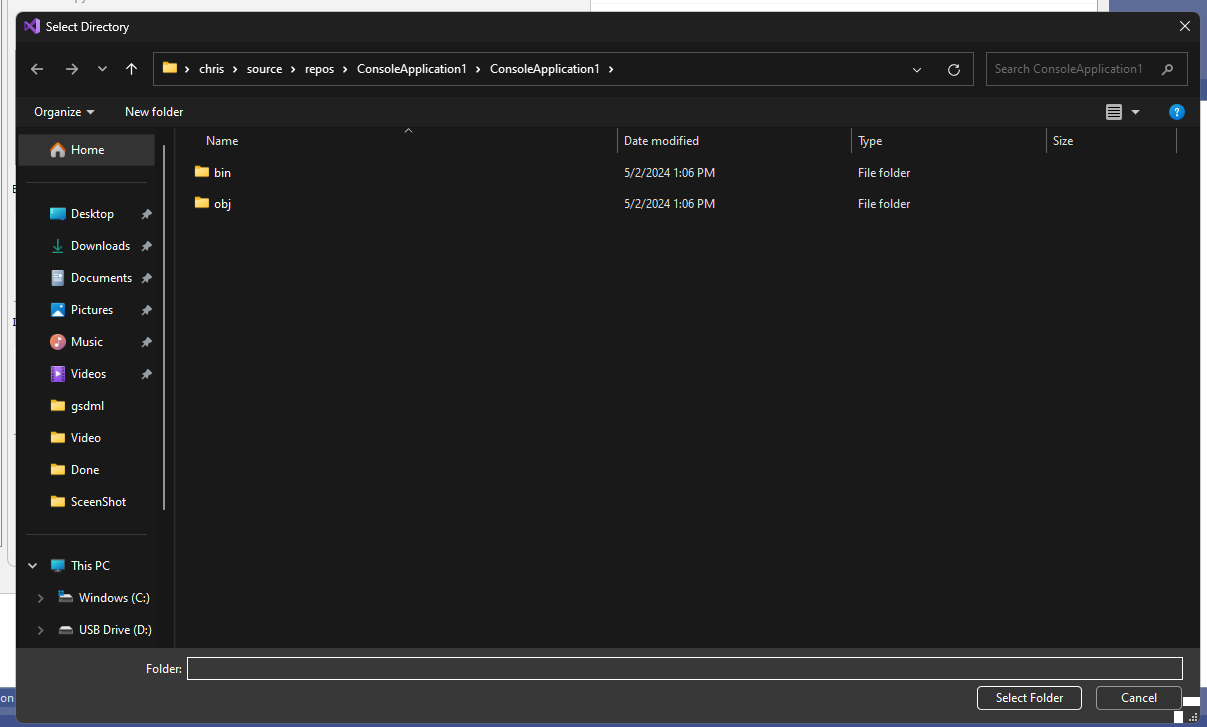
新しいCOPY元が追加され、…ボタンをクリックします。
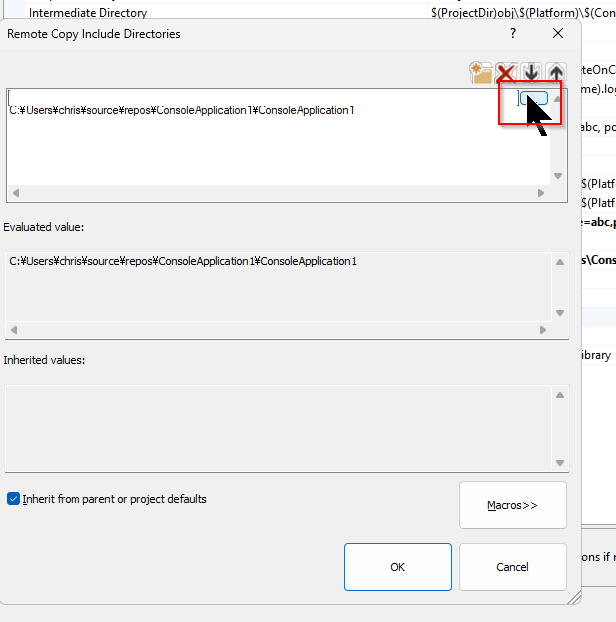
Directoryを設定します。
もしRemote Copy Include Diretoriesを設定しなかった場合、以下のエラーが発生しますので、必ずRemote Copy Include Diretoriesを設定しましょう。
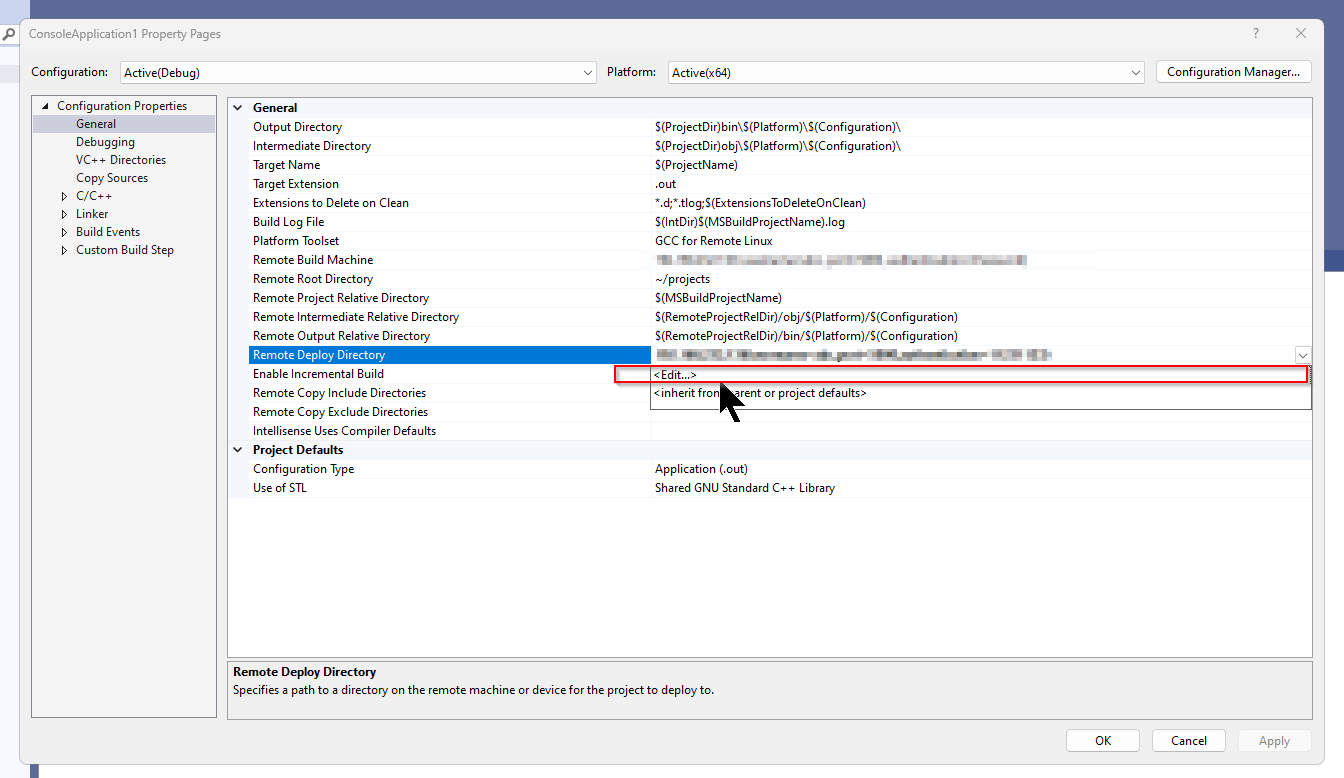
Remote Deploy Directory
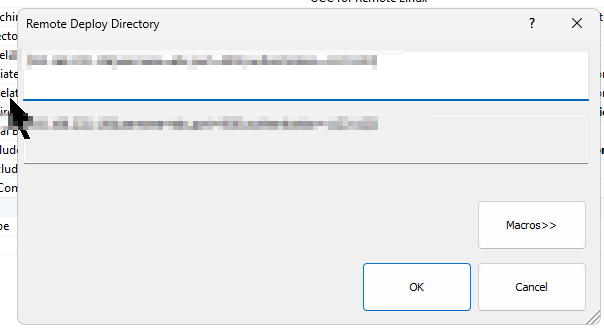
次はRemote開発環境の接続環境を設定するため、Remote Deploy DirectoryのDrop-ListからEditをクリックします。
SSH Serverの接続情報を入力しましょう。Formatは以下になります。
| your ssh server ip(username=your username,port=your port,authentication=yourpassword) |
こちらは設定例です。
| 192.168.232.136(username=abc,port=5000,authentication=0000000) |
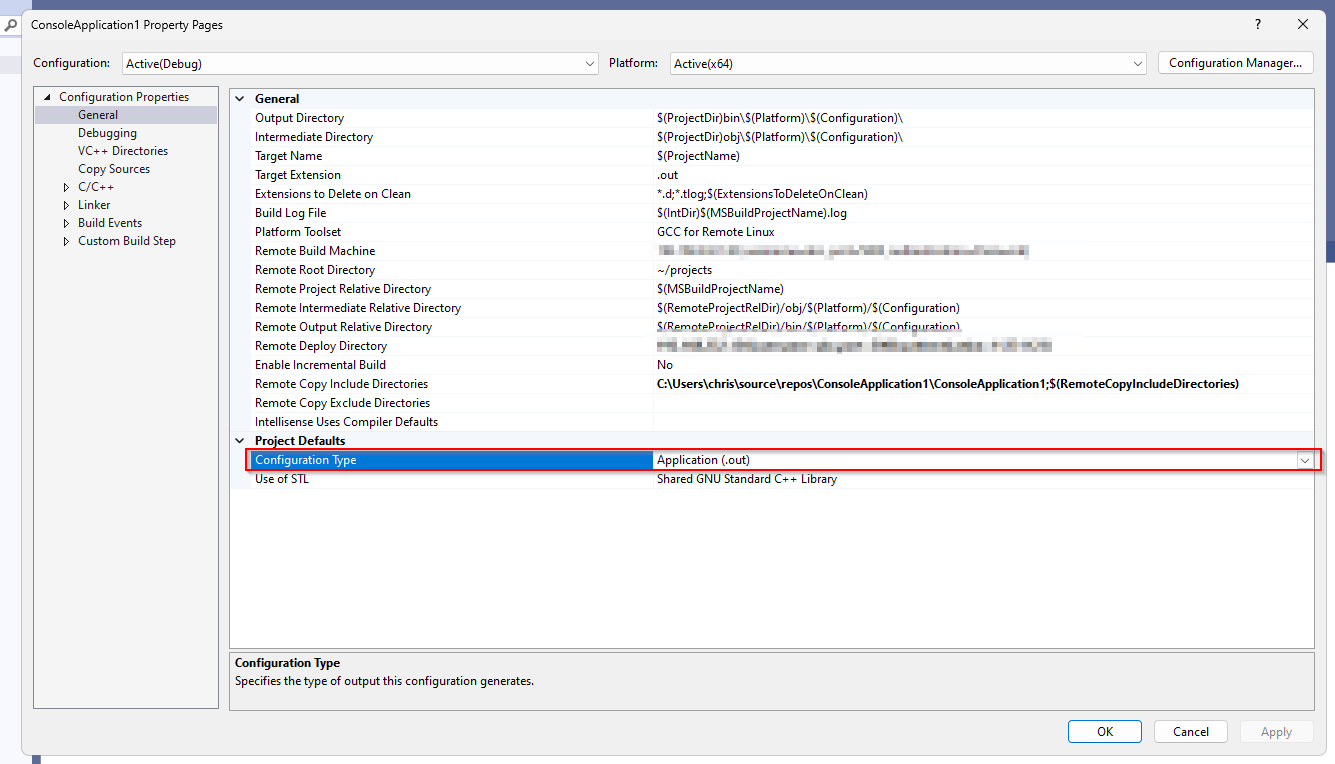
Configuration Type
Application(.out)のままにします。
Remote Debug Machine
Debug>yourappname Debug Propertiesを開きます。
Debuggingの項目に接続するRemote Debug Machineを確認しましょう。
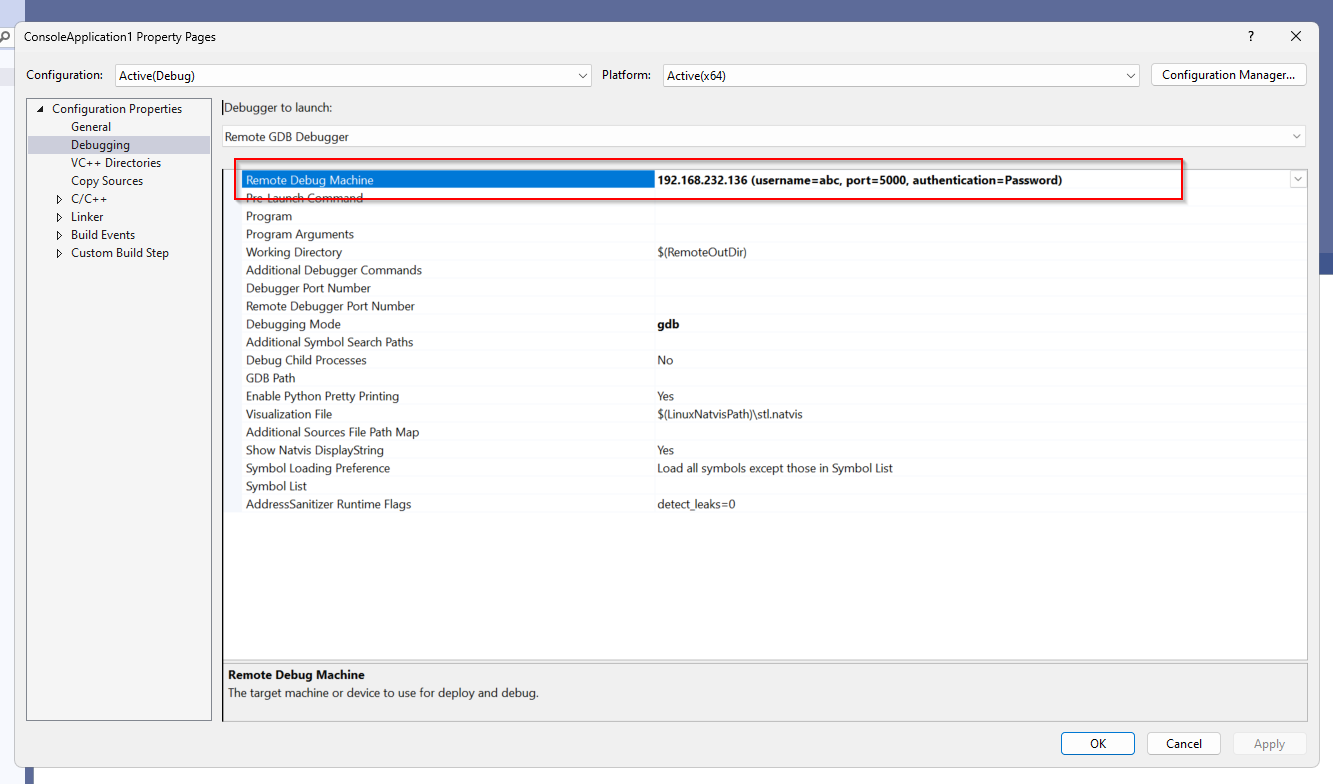
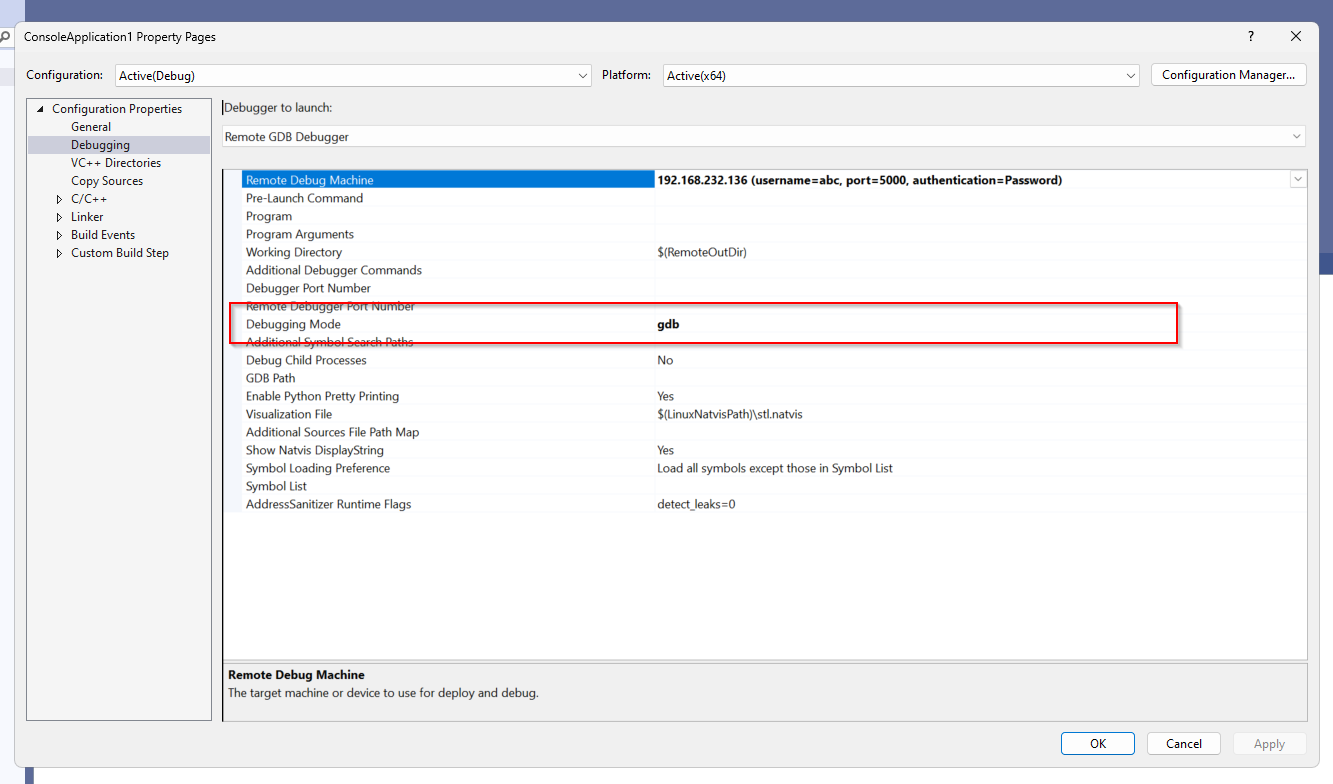
Debugging Mode
Debugging Modeをgdbに設定します。
Test the Connection With Remote Machine
Remote Debug Machineの接続をテストするため、Tools>Optionsをクリックします。
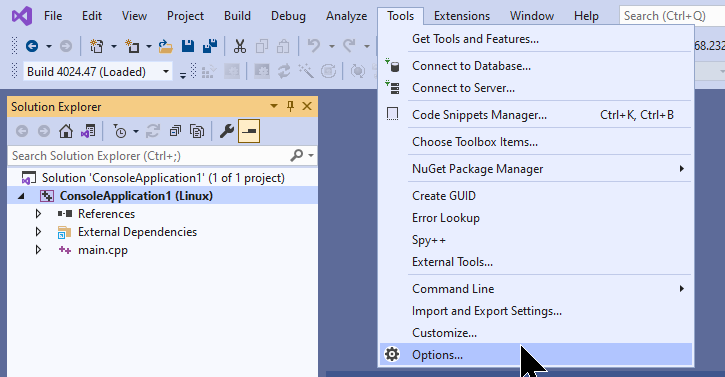
Cross Platform>Connection Managerを開くと、先程設定したSSH接続が表示されます。
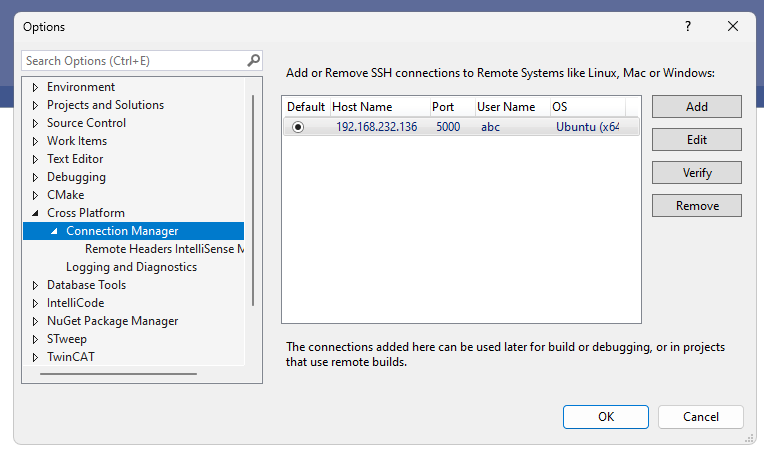
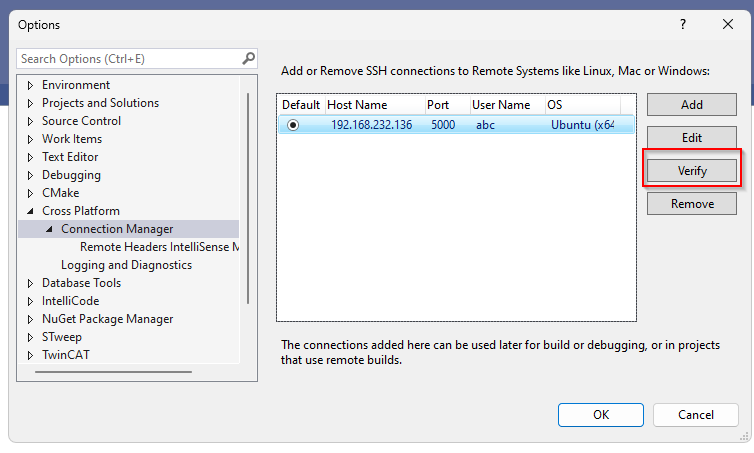
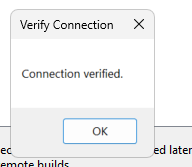
Verifyをクリックし、Remote SSH Serverの接続をCheckします。
Done!
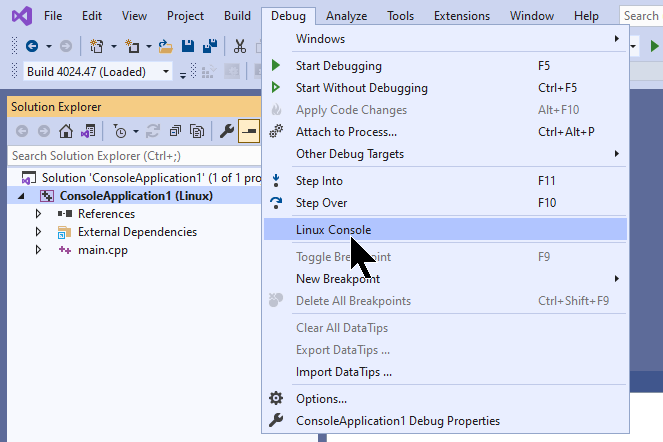
Open Linux Console
Remote Debug Machineの出力も確認したいので、Debug>Linux Consoleをクリックします。
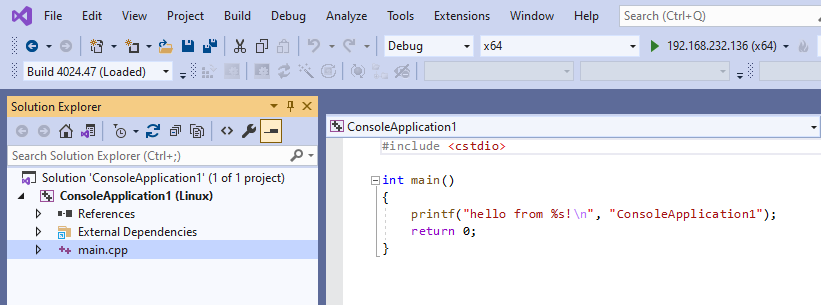
Applications
今回は環境の構築だけなので、Hallo Worldのプログラムしか入っていません。
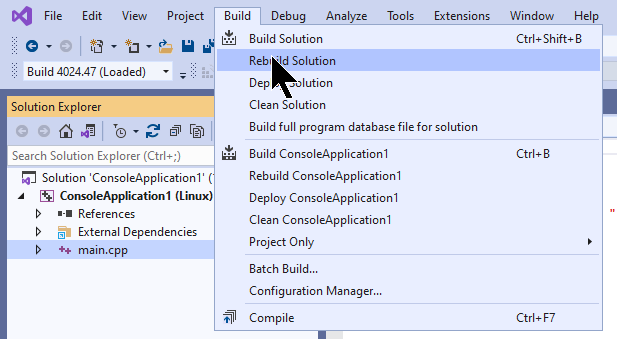
Build Solution
Build>Rebuild Solutionでプロジェクトをビルドしましょう。
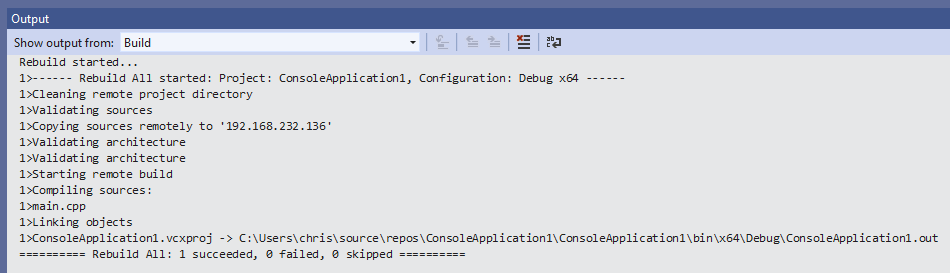
Done!FileもRemote Debug Machineに転送しました。
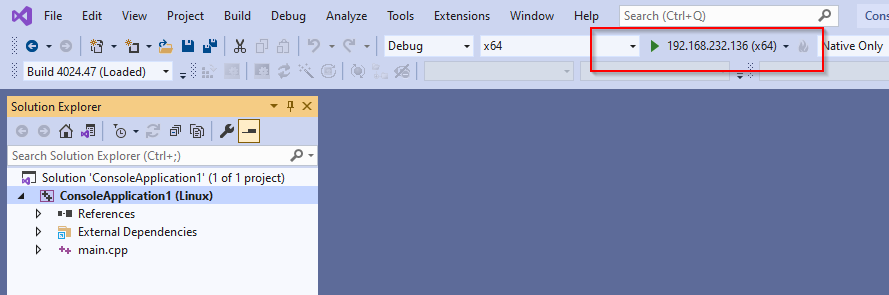
Start Debug!
赤枠のボタンでDebugをスタートします。
Done!!!Linux Consoleからアプリケーションの出力を確認できました。

念の為、Remote Debug Machine側にも確認しましょう。ConsoleApplication1.outというFileがあります。
| abc@ad1d4c4feb56:~$ ls projects/ConsoleApplication1/bin/x64/Debug/ ConsoleApplication1.out |
下記のコマンドでアプリケーションを実行しましょう。
| abc@ad1d4c4feb56:~/projects/ConsoleApplication1/bin/x64/Debug$ ./ConsoleApplication1.out hello from ConsoleApplication1! |