みなさんはEthernet/IPのConnectionを設定するとき、Connection TypeにいつもPoint to PointとMulticastがありますね。このType実際なにか違うの?と思ったことありますか。
今回はそのConnection Typeについてお話しします。
よろしくお願いします。

Reference Link
http://soup01.com/ja/category/protocol/ethernet-ip/
I/O Connection?
Ethernet/IP Networkで I/Oデータ交換するのはI/O Connectionと言います。そのI/O Connectionの設定は特定のツールなく自由自在。例えばエンジニアツールはScannerとそれぞれのAdapaterの接続設定でき、Devices間にI/O Connectionを生成させます。
Connection Type
Point-to-Point
Point-to-Point Connectionは1対1のConnectionでつまりScannerとAdapterの間にConnectionが生成されます。ScannerがAdapterに接続を要求し、Adapterがそれに対して返答します。
Multicast
そしてMulticast Connectionsがあり、Multicastは1対N(特定Group)と通信ができます。それだけでは説明が足りませんので、MulticastなどのNetwork知識も少し話したいと思います。
Multicast/Broadcast/Unicast
では実際Multicastの動きを説明する前にまずUnicastとBroadcast伝送を説明したいと思います。そしてMulticast・Unicast・Broadcastキャストがなにが違うのかわかっていただけます。
Unicast?
いわゆる1対1の通信で、全ての受信者に対して別々にPacketを送信します。
小さいなMail CheckやFile Downloadに問題ありませんが、動画配信になると送信側には負荷重くなり、無駄な帯域消費が出てきます。送信先が1つや1つならまだなんとかなりますが、多数のClientがあるアプリケーションでは向いてません。
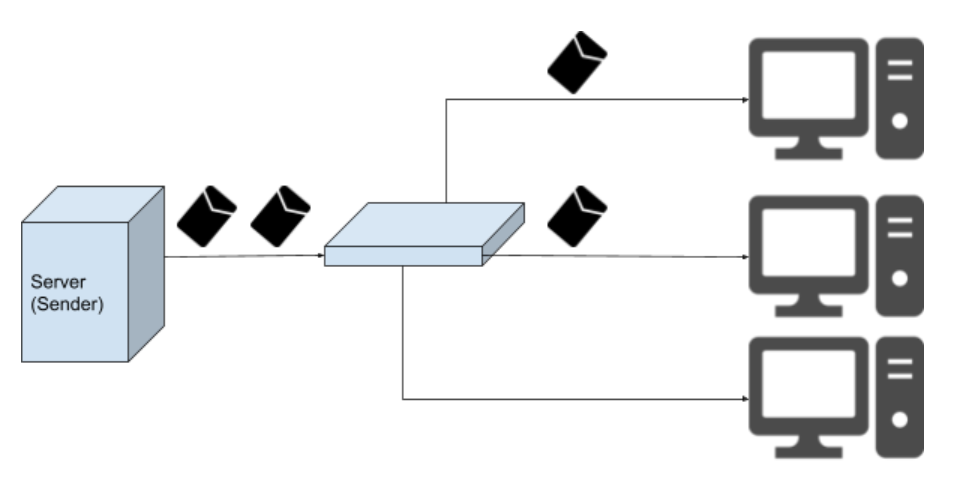
Broadcast?
いわゆるネットワーク上にあるNodeに対して全部Packetsを送信します。ネットワーク上のNodeに全部送信しますので、本来非受信のDevicesが無駄な処理や帯域消費が出てきます。
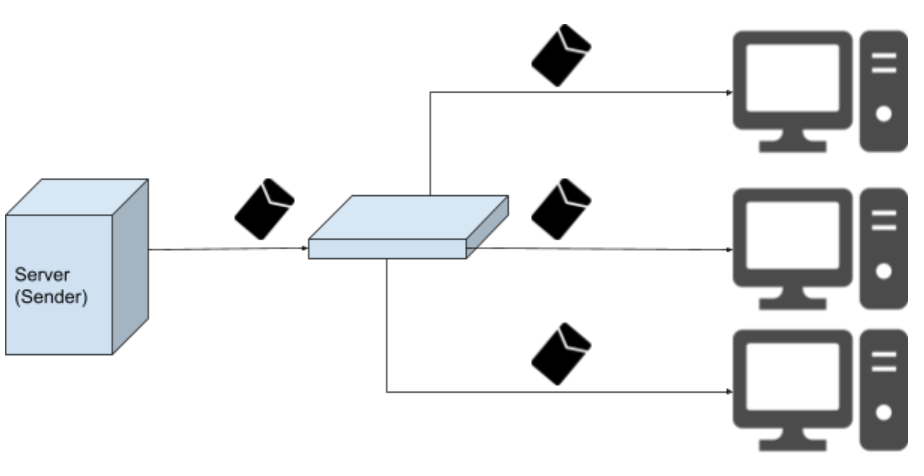
Multicast?
Wikiによりますとコンピュータネットワークにおいて、決められた特定の複数のネットワーク端末(ノード)に対して、同時にパケット(データ)を送信すること。 一対多で通信することです。

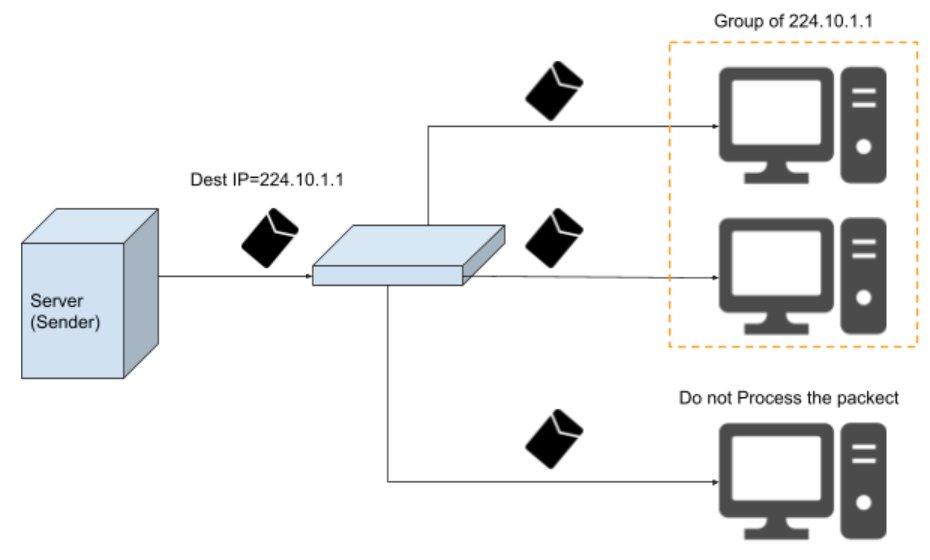
Multicastは1対特定のClient通信し、送信するPacketsが1つに済みます。それにより、BroadcastやUnicastのような無駄が発生しません。
でもスイッチではBroadcastやMulticastのデータをそのまま転送するので、やっばりGroup以外のClientも受信できます。
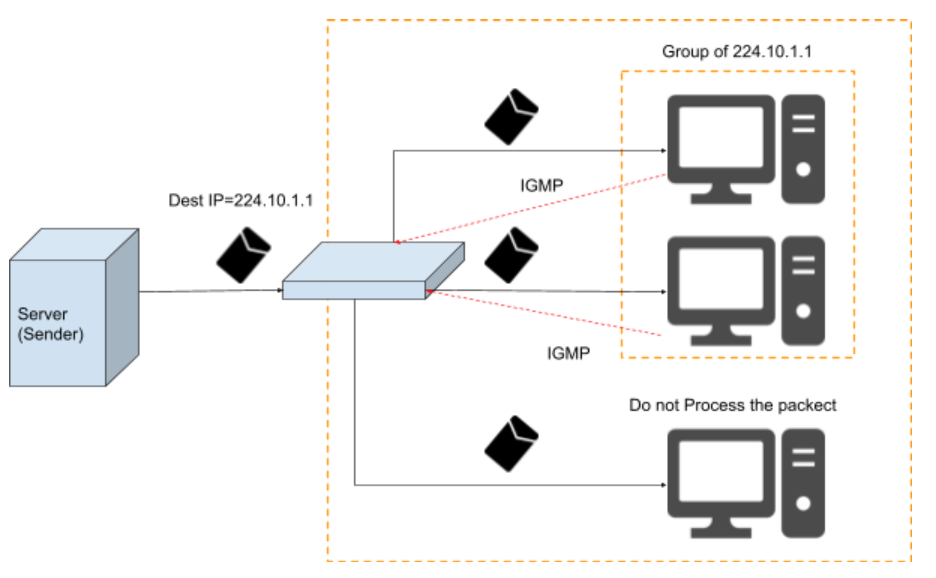
そこで出てきたのはIGMPスヌーピングです。
その機能で、非受信クライアントに対する無駄なトラフィック転送を防げます。
IP
MulticastIPは主に3種類に分かれています。
| Range | Type |
| 224.0.0.0 ~ 224.0.0.255 | リンクローカル |
| 224.0.1.0 ~ 238.255.255.255 | グローバルスコープ |
| 239.0.0.0 ~ 239.255.255.255 | プライベートスコープ |
MAC
MulticastIPのMAC Addressは同じく48Bitで構成し、前頭は00000001 00000000 01011110 0 となり、残りは使うことになります。16HEXだと0x01-00-5Eです。
IGMP?
IGMPは受信者が送信者に対してMulticastのGroupにMulticast Packetsを受けたい、やめたい、続けたいという動作のためのProtocolです。
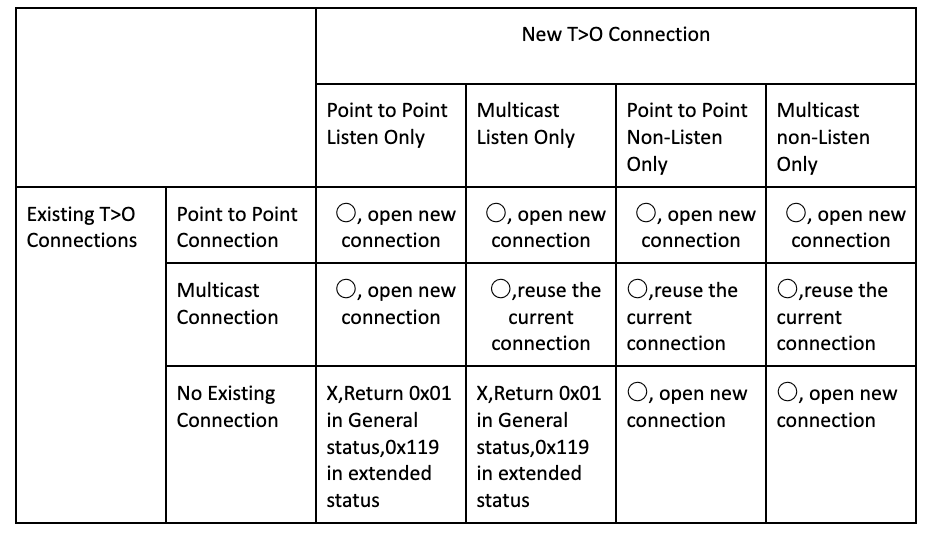
Ethernet/IP T>O Connection Rules
T>OのConectionには大体2つのCaseがあります。それは、新規接続(Exclusive Owner・Input Only)既存にある接続に参加(Listen Only)です。簡単にまとめるとこのようです。
Test
ではEthernet/IPでPoint-To-PointとMulticastの設定は、実際Network上でどう変化するのか見てみましょう。
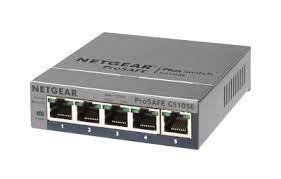
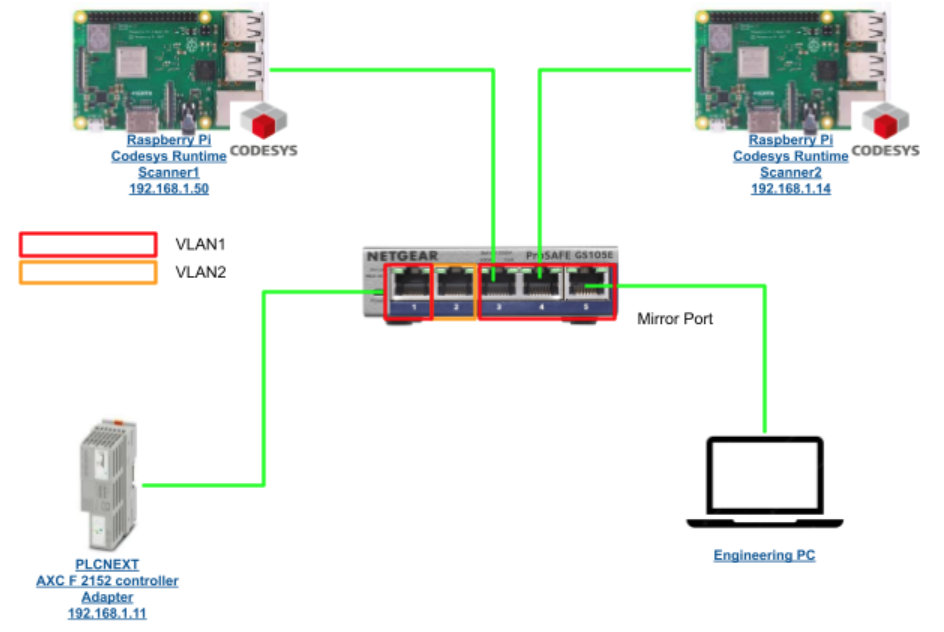
Netgear
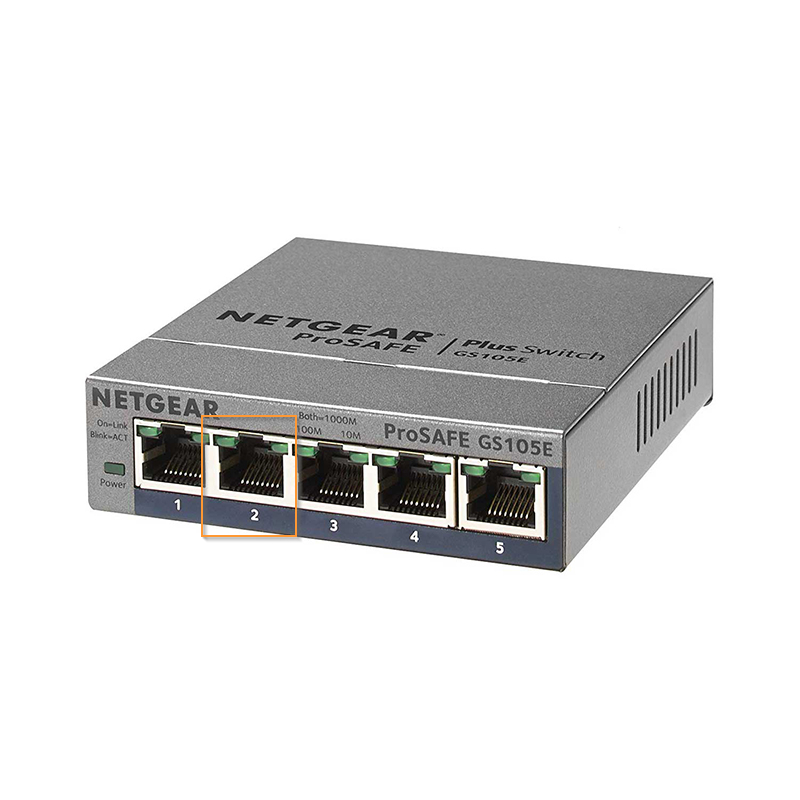
こちらは今回使用するSwitchです。Netgear GS105Eです。
出荷のままであれば、Default IPは192.168.0.239です。
Setup-IP
ChromeなどのBrowserからIPを入力しSwitchのWebserverにアクセスします。
Switch information>DHCP ModeをDisableし、IPを固定します。

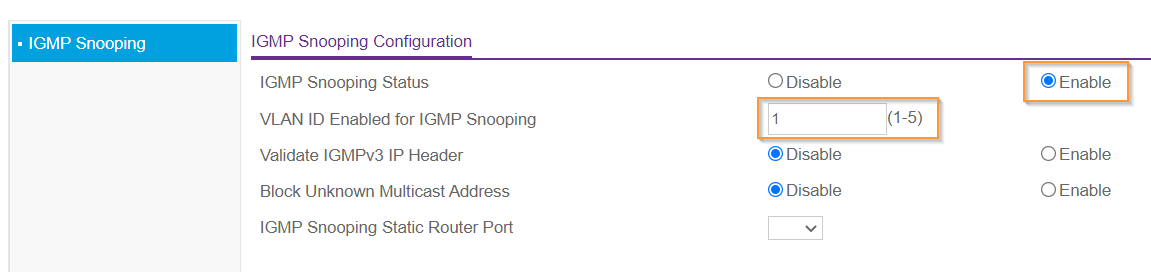
Setup-Mutlicast
System>MulticastでMulticast設定します。

IGMP Snooping ConfigurationをEnableし、VLAN ID Enable to IGMP Snoopingに1を設定します。
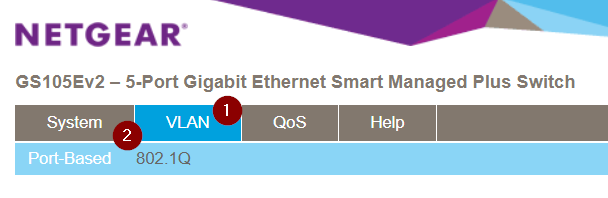
Setup-VLAN
VLANをクリックし>Port-Basedします。
Advancedをクリックし>Advanced Port-Based VLAN StatusをEnableします。
そうすると下の設定項目が出てきます。

このようにPortをクリックすると該当するPortを選択できます。
まずPort1,3,4,5を選択します。
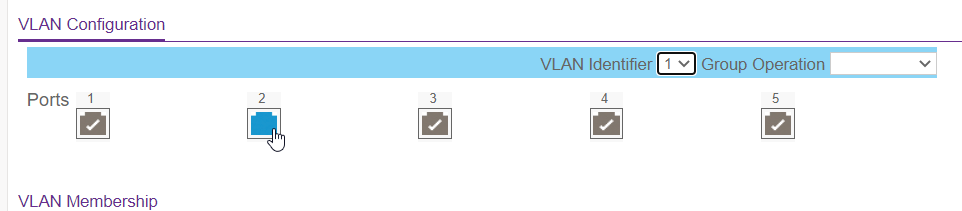
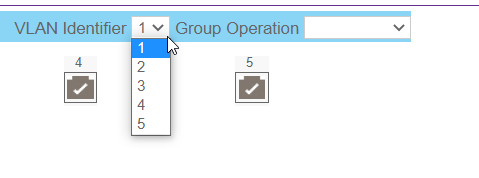
VLAN Identifierに1を選択し、Applyします。
いまPort1,3,4,5がVLAN ID 1のGroupになります。
同じくPort2をVLAN ID2に振り分けてください。このPortは検証用です。

Setup-Mirroring Port
System>Monitoringをクリックします。

Mirroringをクリックします。

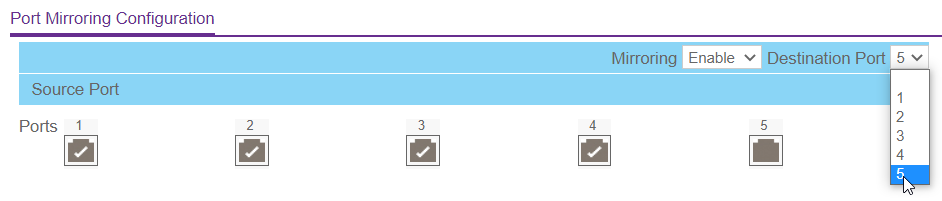
まずMirroring機能を有効にします。

Source PortをPorts1,2,3,4を選択します。
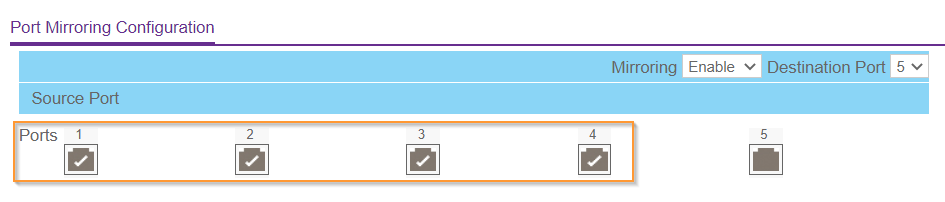
Destination Portを5選択し、ApplyすればOKです。
Configuration
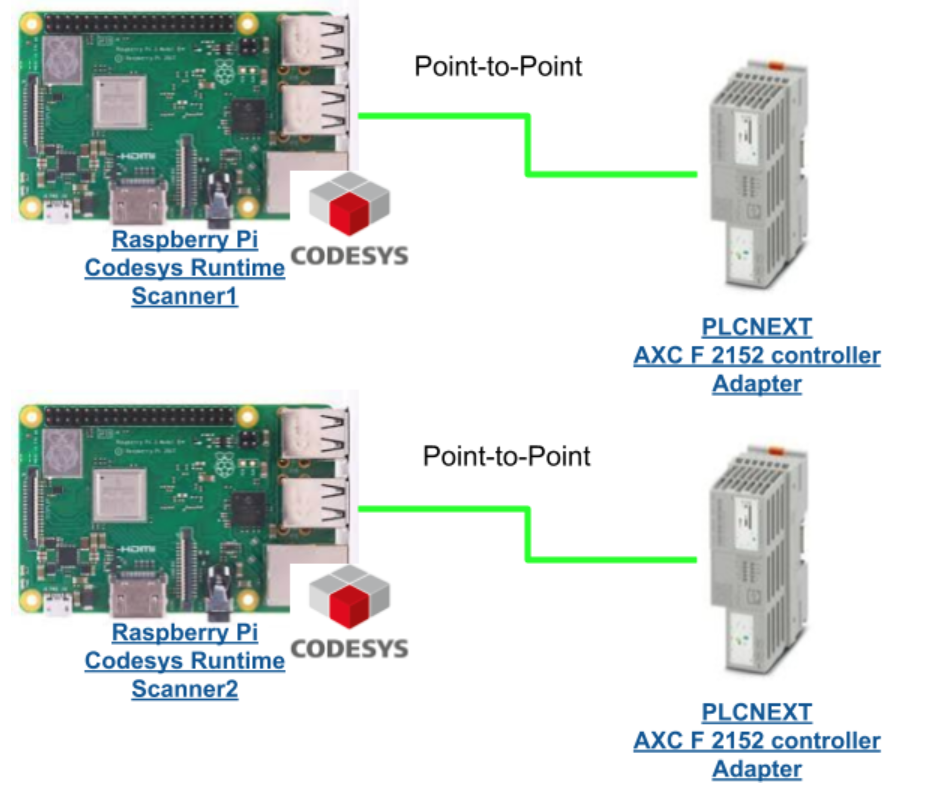
Test1-Point to Point Connection only
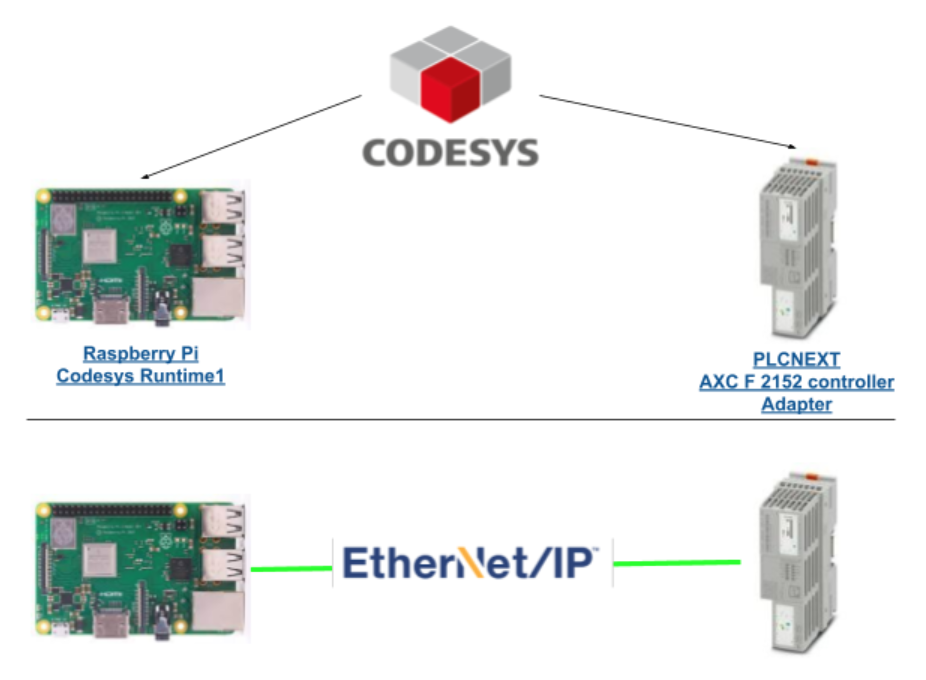
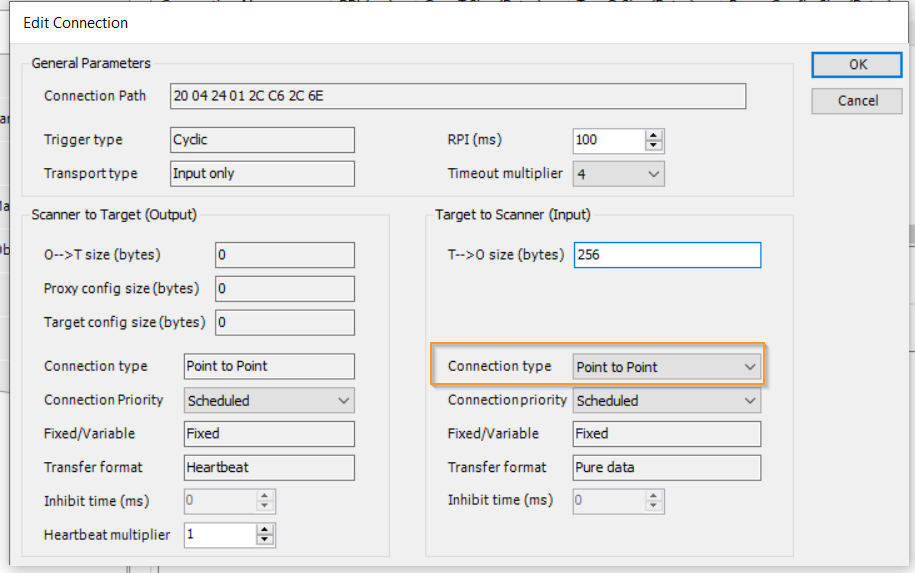
まず2つのCodesys RuntimeにあるEthernet/IP ConnectionをPoint to Point だと設定します。
よし。両方ともPLCNEXT AXC F2152Controllerと通信確立しましたね。

WireSharkから見るとPLCNEXT AXC F2152Controller が2つのCodesys Runtime のEthernet/IP IP ScannerにT>OのPackets送信してるのが見えますね。

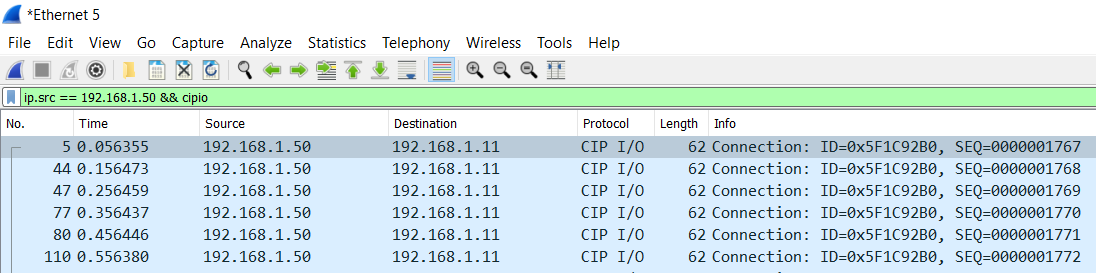
そしてO>Tは必ずPoint-to-Pointなので、192.168.1.50 Codesys Runtime1からPacketをPLCNEXT AXC F2152Controllerに送信しています。
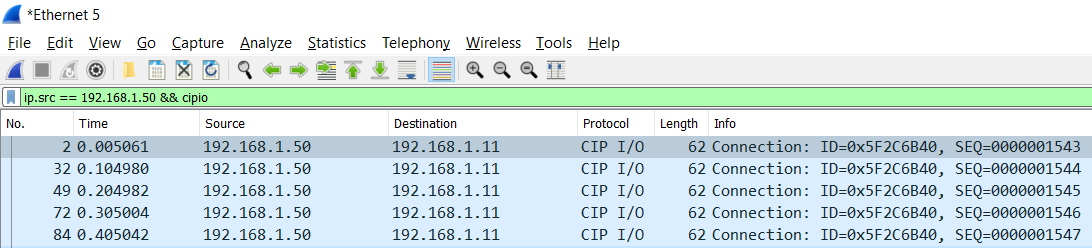
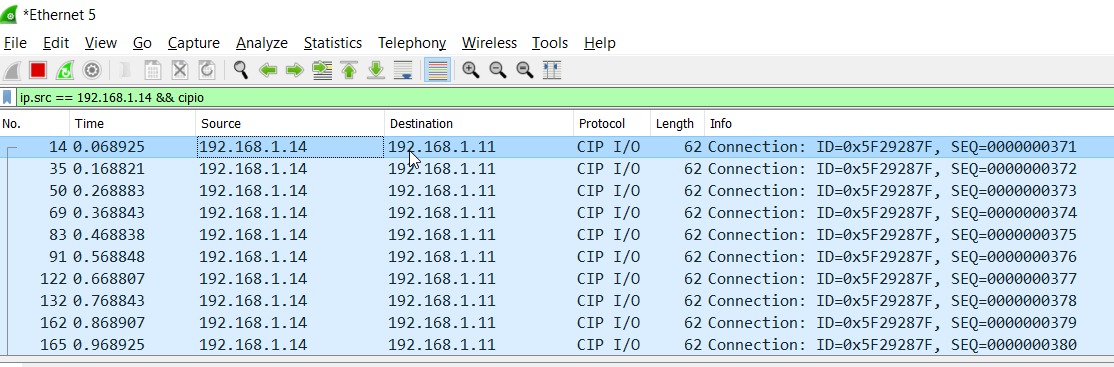
同じく192..168.1.14 Codesys Runtime2からもPacketをPLCNEXT AXC F2152Controllerに送信しています。

Totolは、6Packetsになりますね。
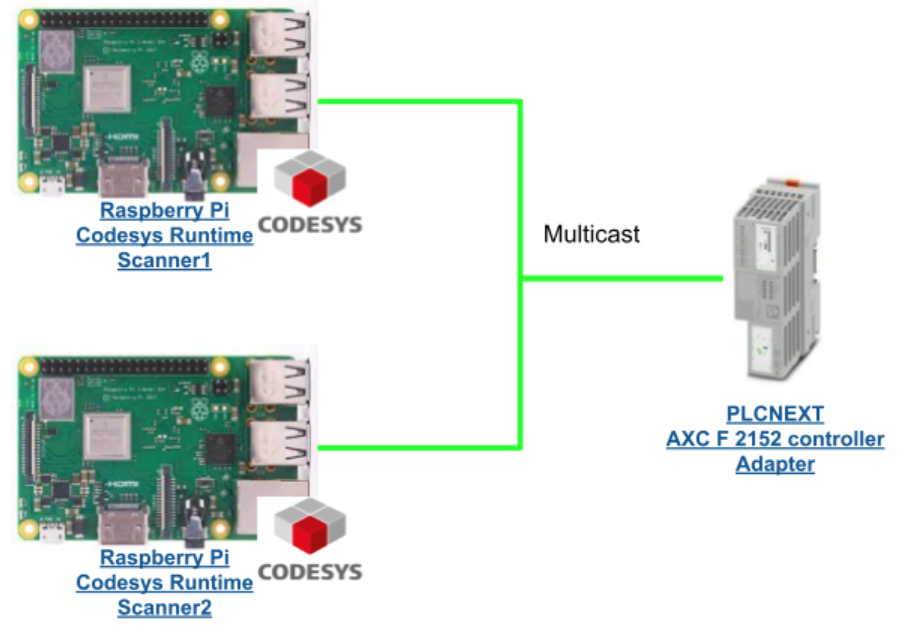
Test2-Multicast Connection
次は2つのCodesys Runtime Ethernet/IP ScannerがPLCNEXT AXC F2152 Controllerに対してMulticast Connectionを設定します。

よし。両方ともPLCNEXT AXC F2152Controllerと通信確立しましたね。

WireSharkから見ますと、PLCNEXT AXC F2152 Controller(192.168.1.11)がMulticastのIP Address(239.192.2.64)だけにPacketを送信しています。
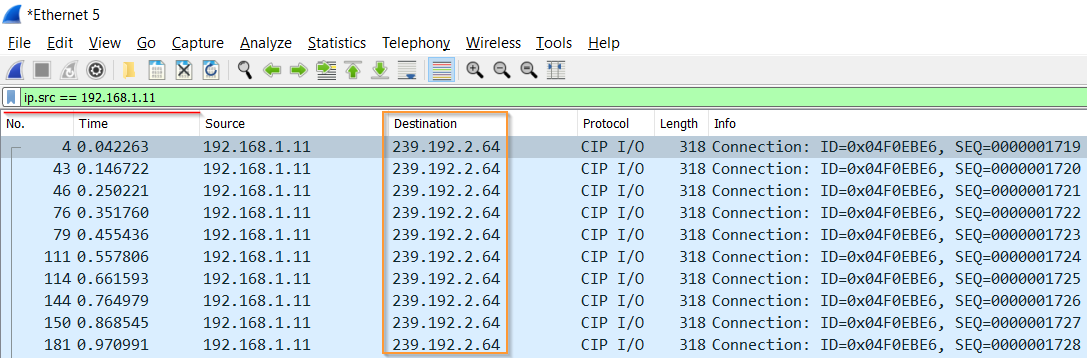
中身を見ますと、Lengthは258であってます。なぜ256ではないのかまた次の記事で説明しますね。
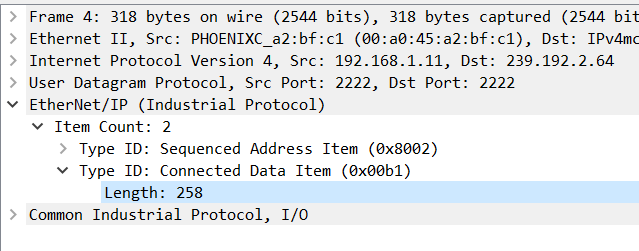
MAC AddressもMulticastのMac addressになってます。

O>TはPoint-to-Pointなので、192.168.1.50はずっと192.168.1.11(PLCNEXT AXC F2152 Controller)にPacketを送信しています。
192.168.1.14も同じく。
Test3-Change the Connection to VLAN 2
最後は192.168.1.50のRaspberrypiをPort2(最初にVLAN2だと設定したPort)にConnectしどうになるかを見てみます。
…そもそもCodesysからもOnlineできないです。