Hello! This is the new B&R Automation Studio Tutorial series. First, we will look at how to Download, Install and Trial license Automation Studio, and then create a Hello World project.
Now, let’s get started!

Download
The first step is to download B&R’s engineering tool Automation Studio. You can download LinkV4.12 below.
Alternatively, go to the Downloads tab on the B&R website.
https://www.br-automation.com/en/downloads/
Set Product groups to Software.
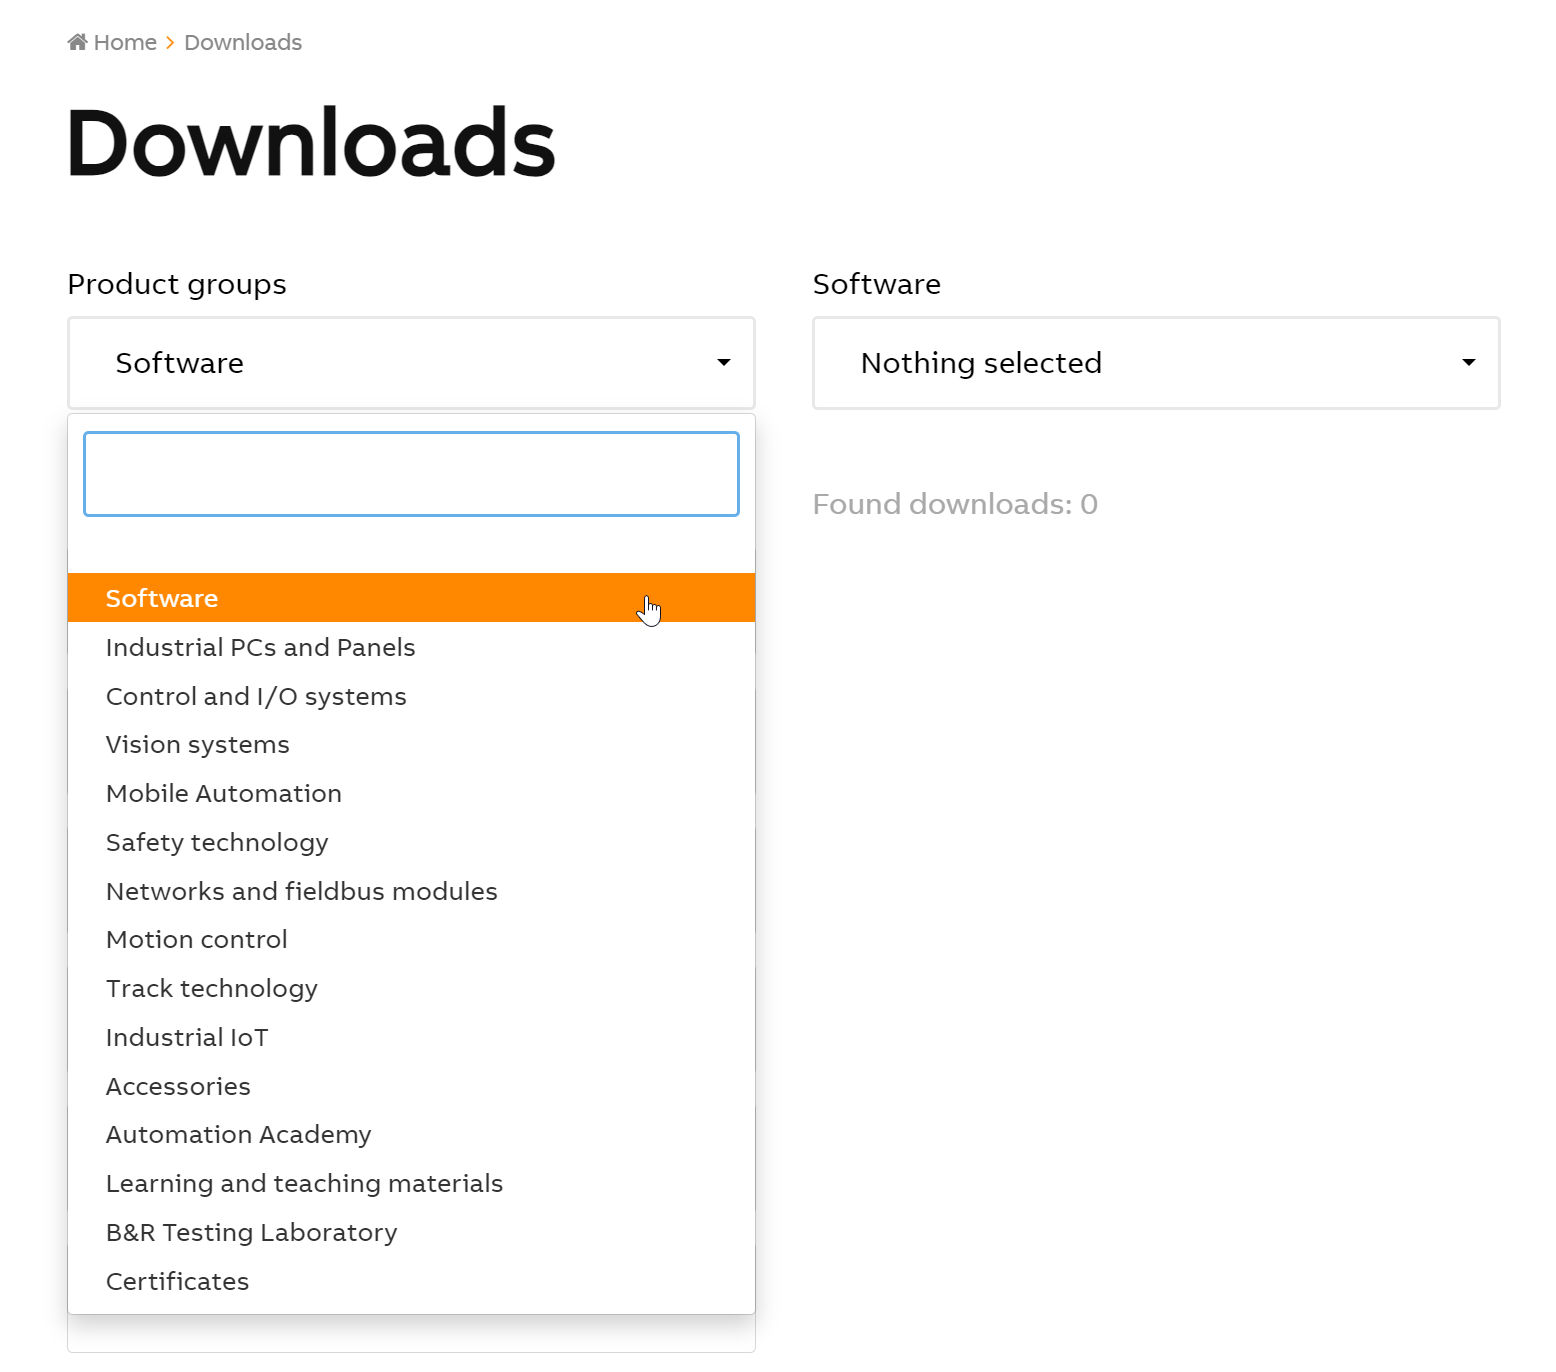
Software is of course set to “Automation Studio”.

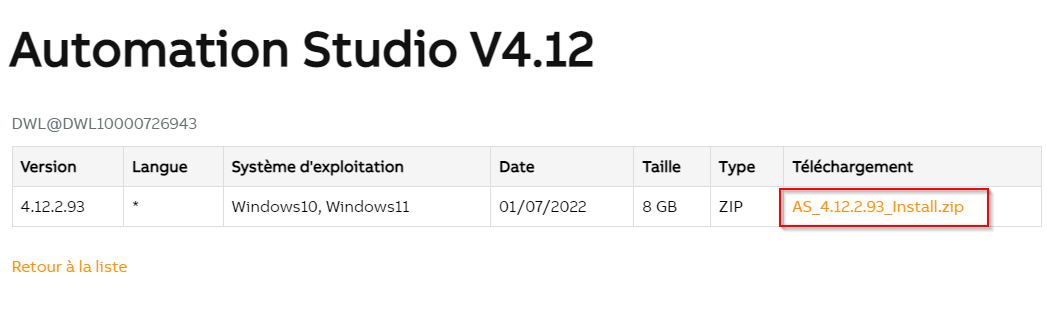
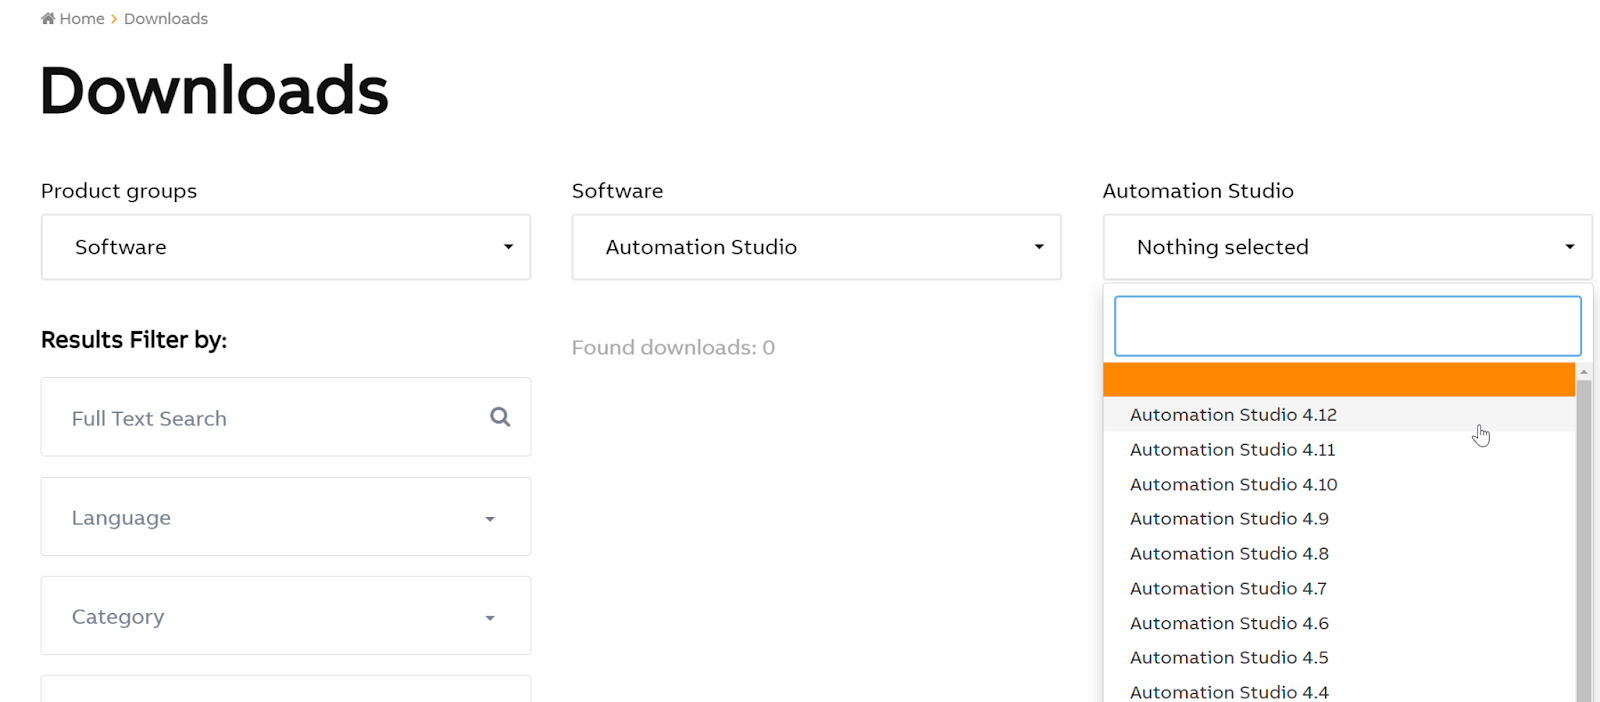
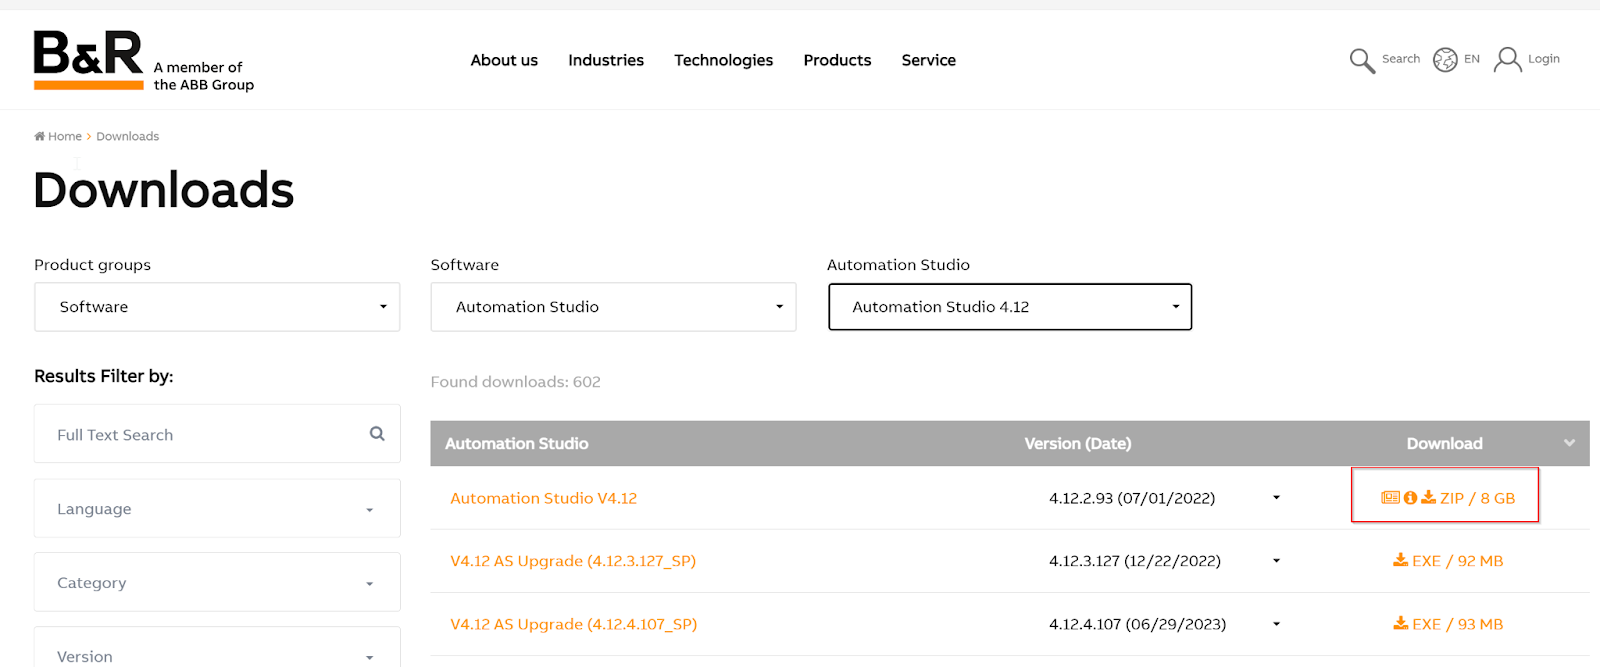
Finally, select the Version you want to Download.
Download location of 8 GB SetupFile found.
Installation
Unzip the Downloaded ZIP and launch Install.exe.

You can choose the language of the installation. English, of course.

Install B&R’s engineering tools in the “Install Automation Studio”.

Proceed with Next>.

Agree to the licence and Next>.

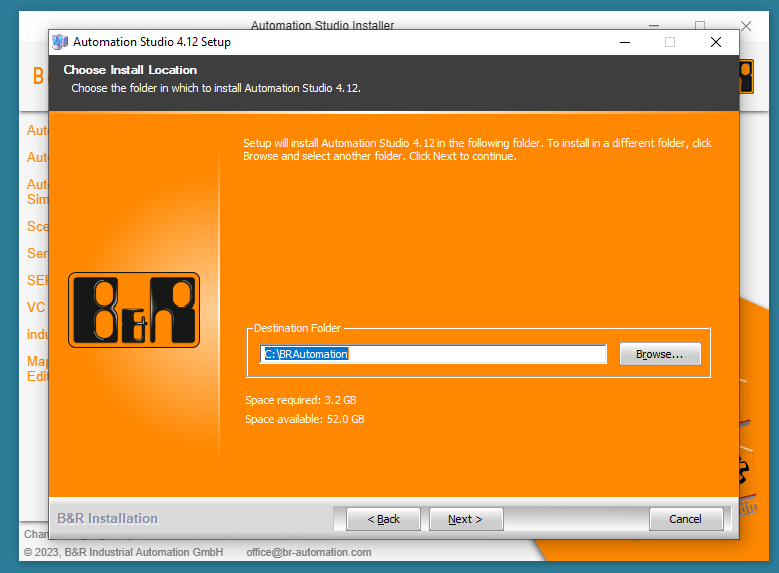
Specify the installation location and proceed with Next>.
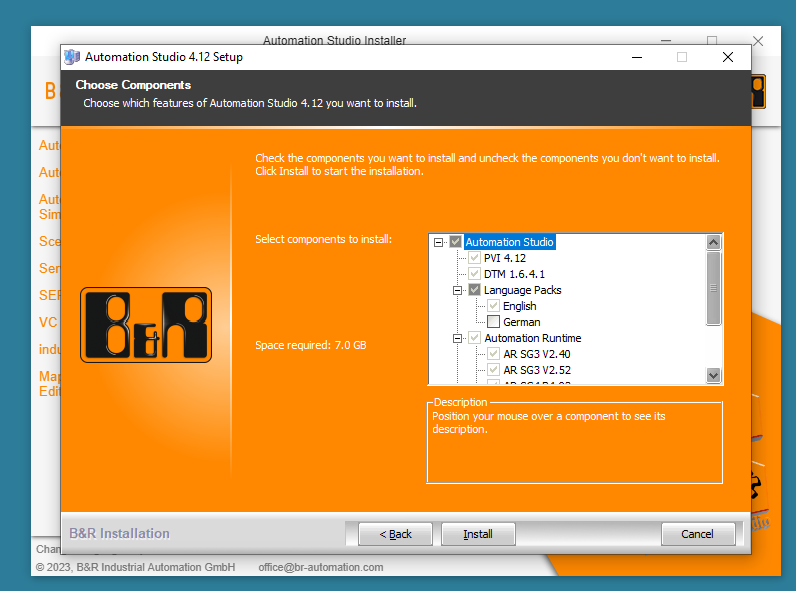
For now, select all components and proceed with Install.
Just a seconds..

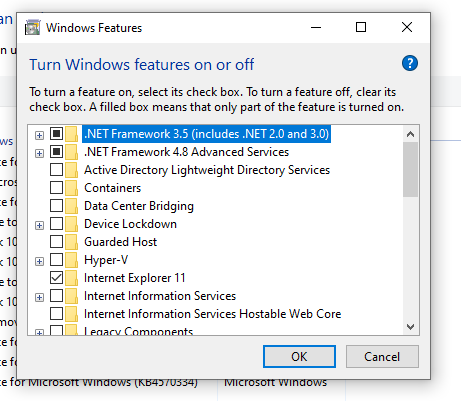
Error Code 4735
In some cases, an installation error with Error Code 4735 occurs.
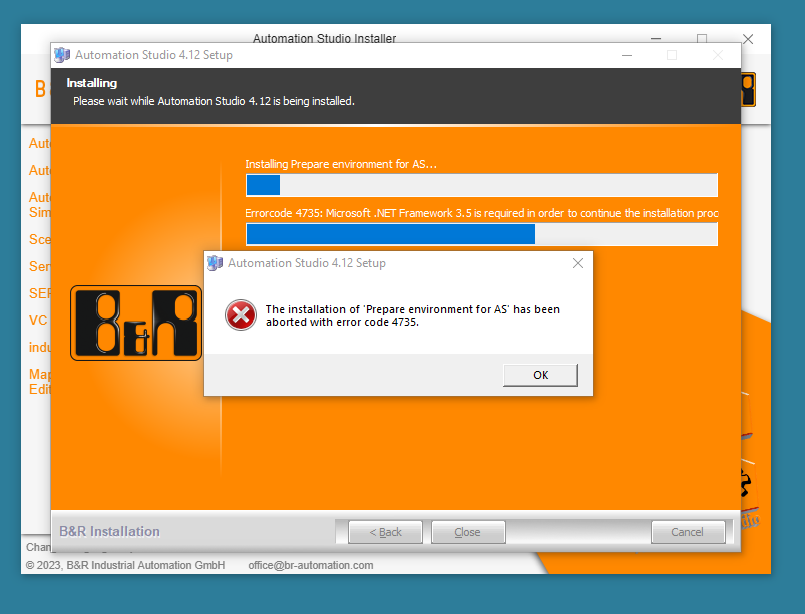
Install .NET Framework 3.5 on your operating system.
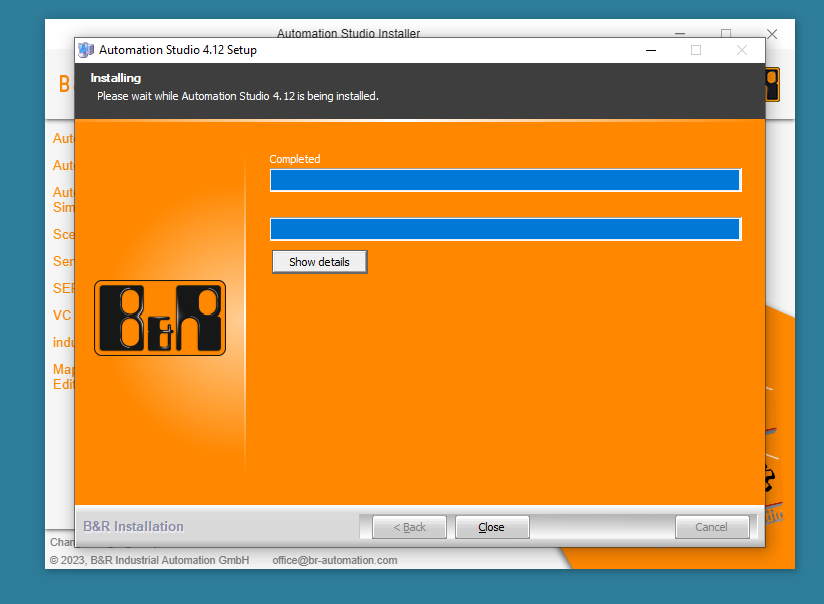
Done!Automation Studio has been installed.
Your First Project
Start Automation Studio.

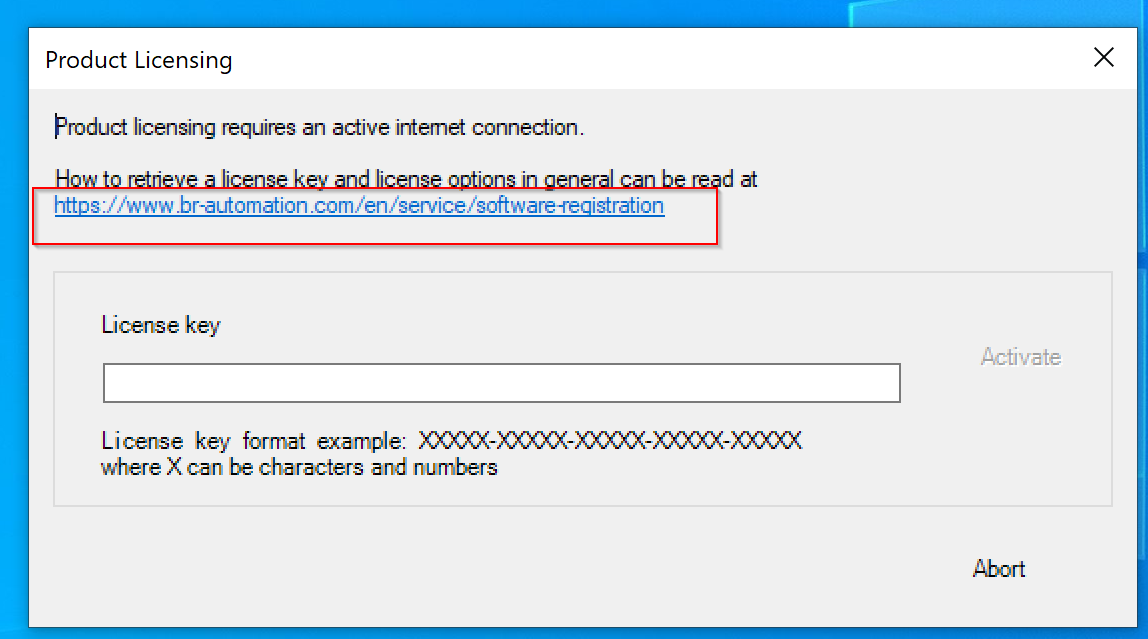
Activate License
The first time the licence has to be entered.

Click on Link to obtain a Trial licence.
Click on Evaluation licence for Automation Studio.

Enter your personal details.
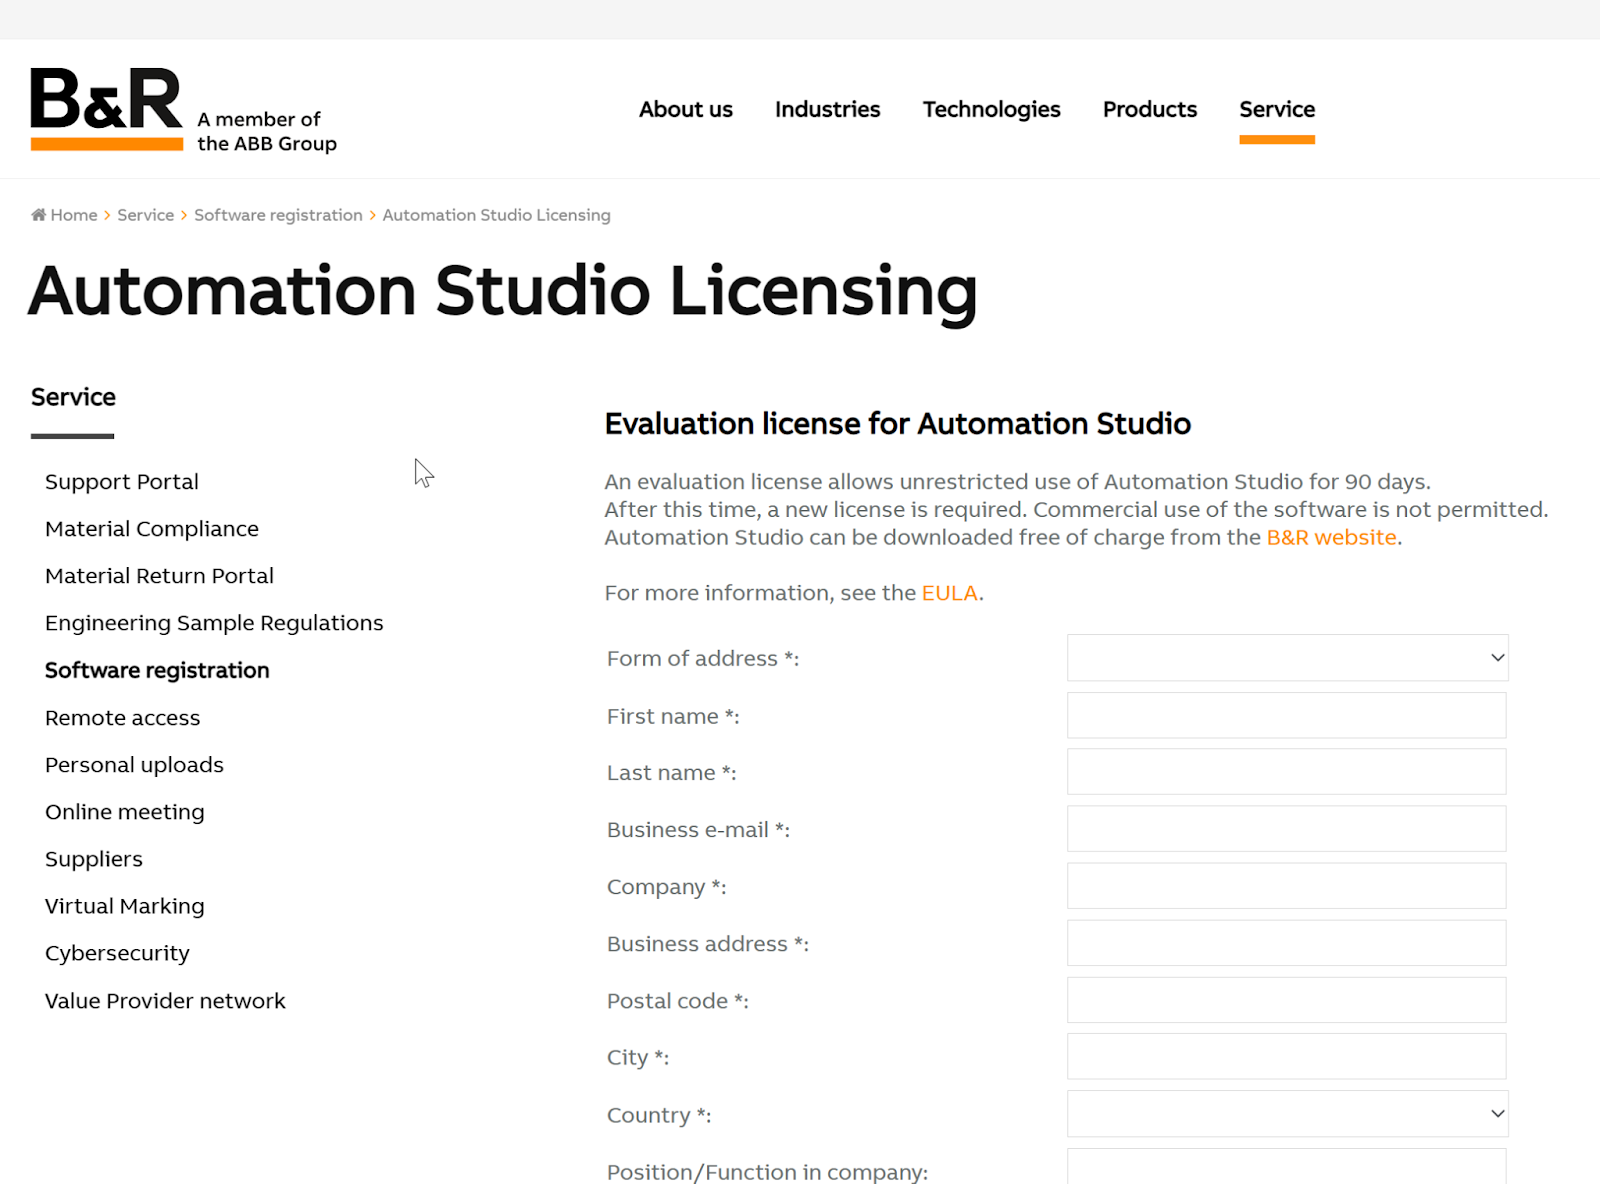
When you have completed the form, click on the Send Request button to request a Trial license from B&R.

You will receive a licence email from B&R.
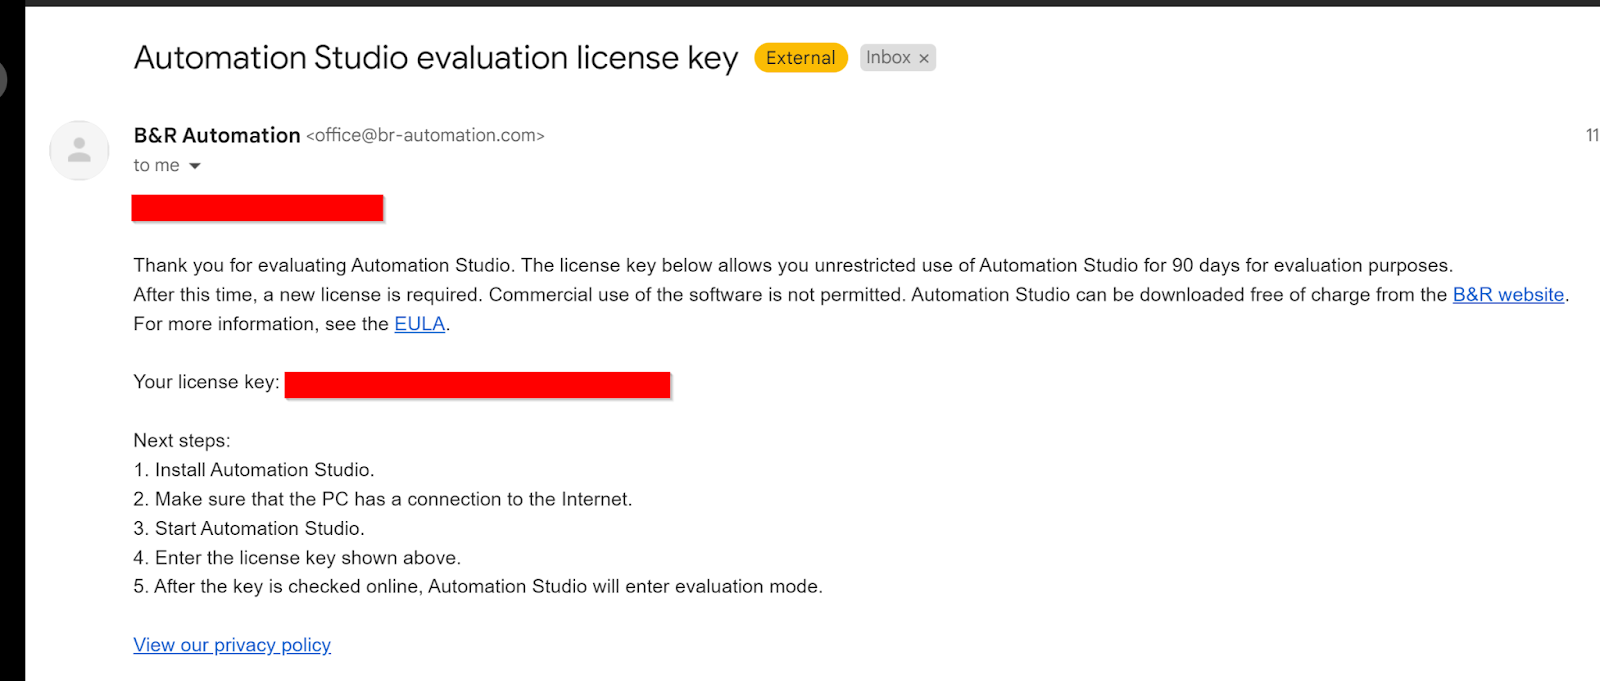
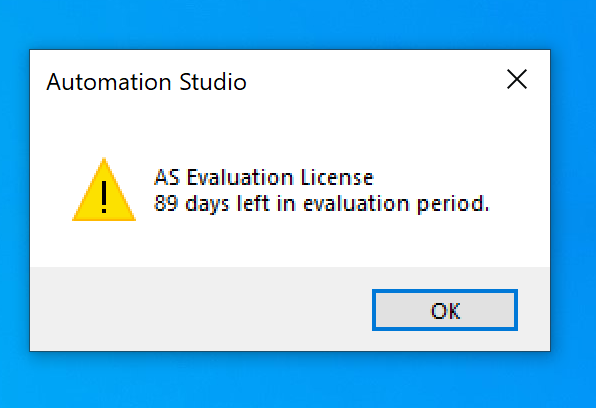
Enter the Code into the License Key and click the Activate button.

Done!A 90-day Trial licence has been issued.
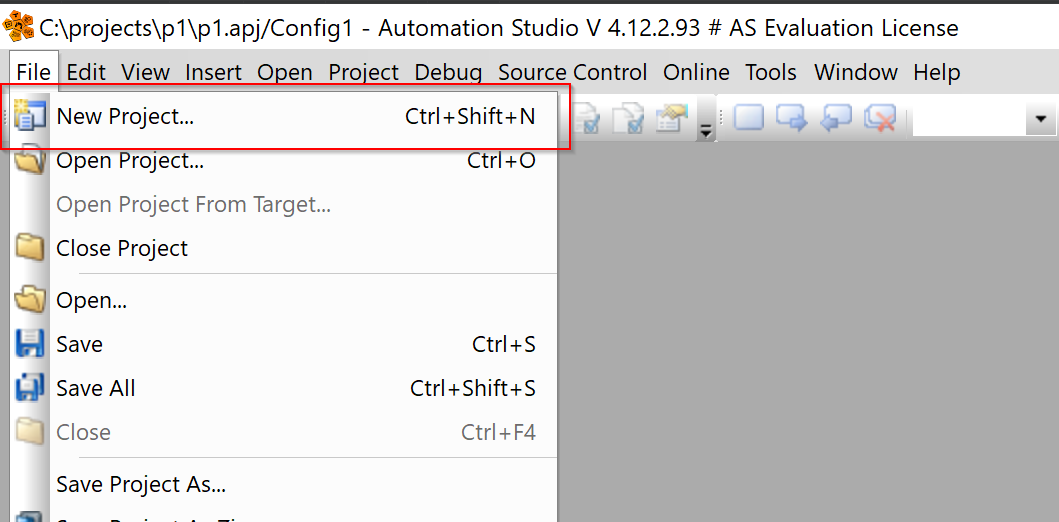
Create new Project
Now let’s create a new Project.

Create a new project under File>New Project.
The Project Wizard is displayed.

Enter a project name in Name of the project and press Next> to continue.

The Configuration screen appears next.

I do not have a real device, so select ‘Define a new hardware configuration manually’ and press Next> to continue.

The next screen is for selecting a Controller.

As I said before, I don’t have the real device, so I just need to be able to select Hardware that I can Simulate for now.

This time, set X020CP0441, tick the “Activate Simulation” checkbox and press Next> to continue.
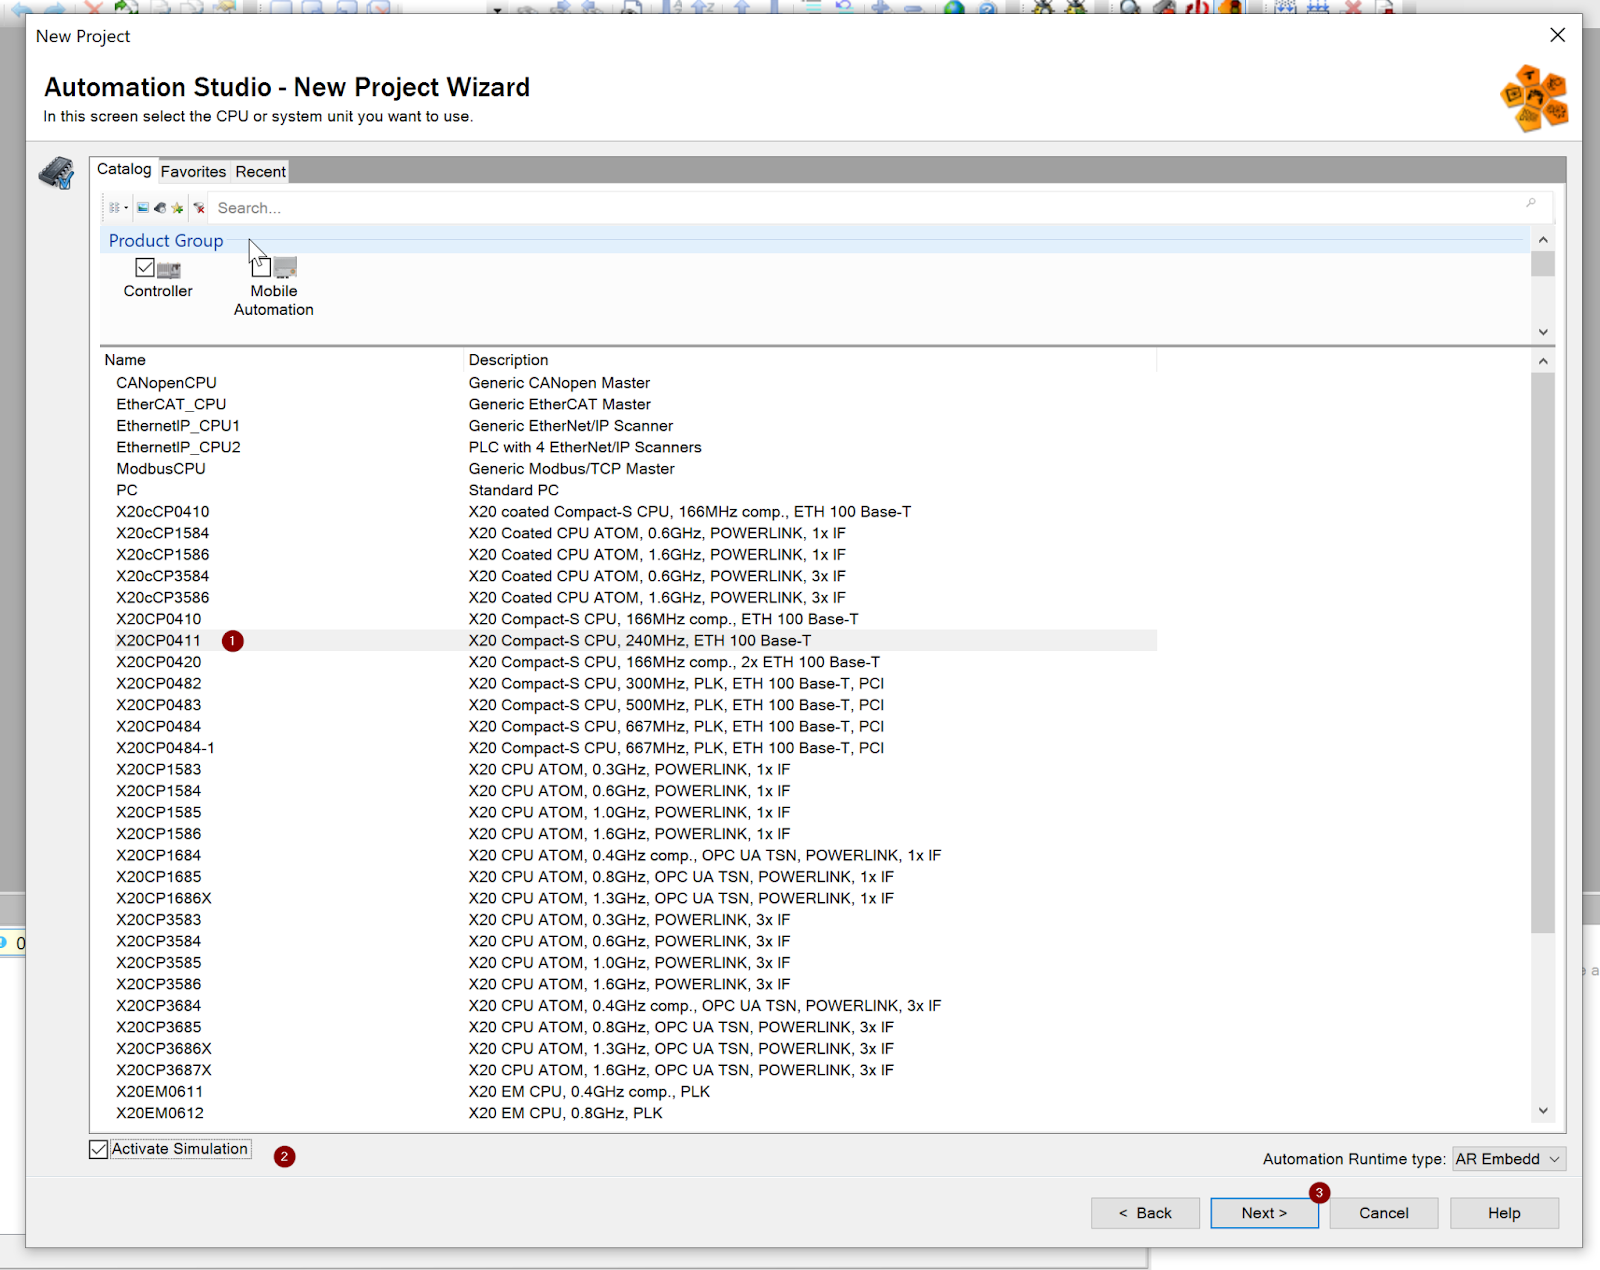
The Accessory selection screen is displayed. As there is no real device, proceed with Finish as is.

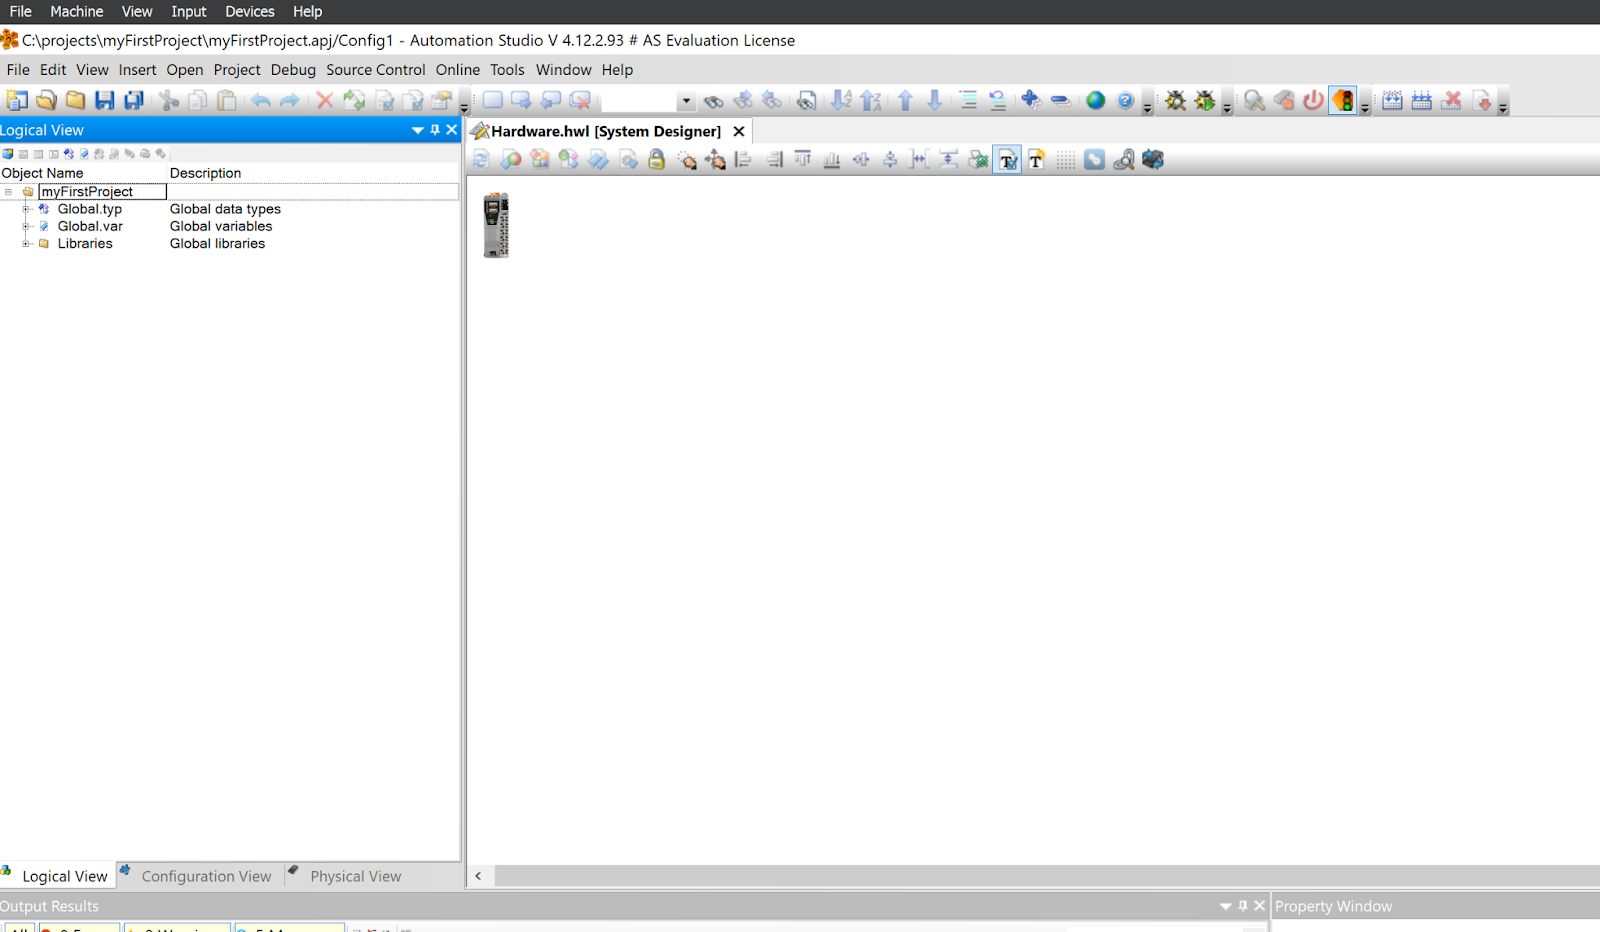
Done!New projects have been added.
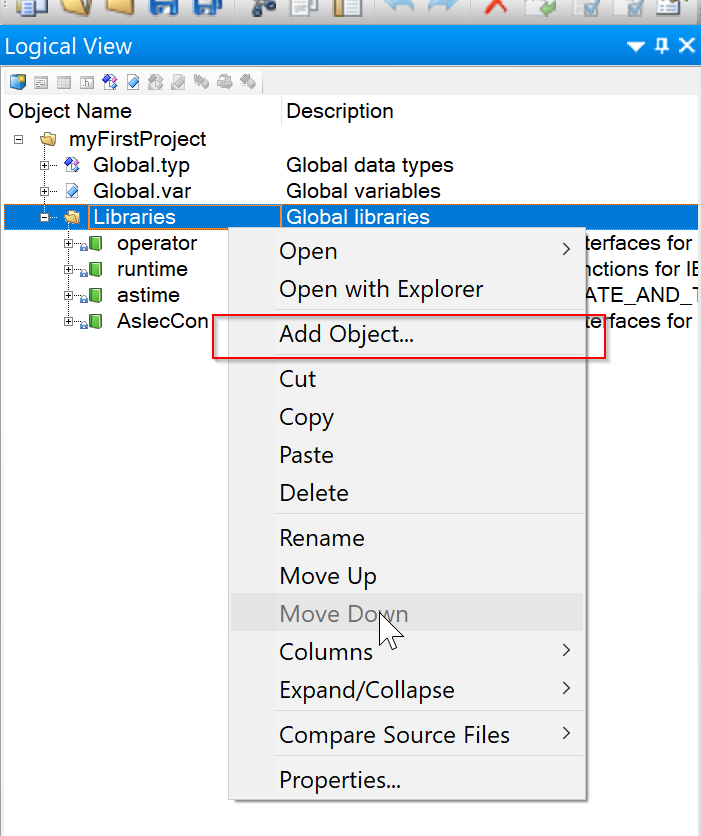
Add Ladder Program
Add a ladder programme; go to Libraries>Right click>Add Object.
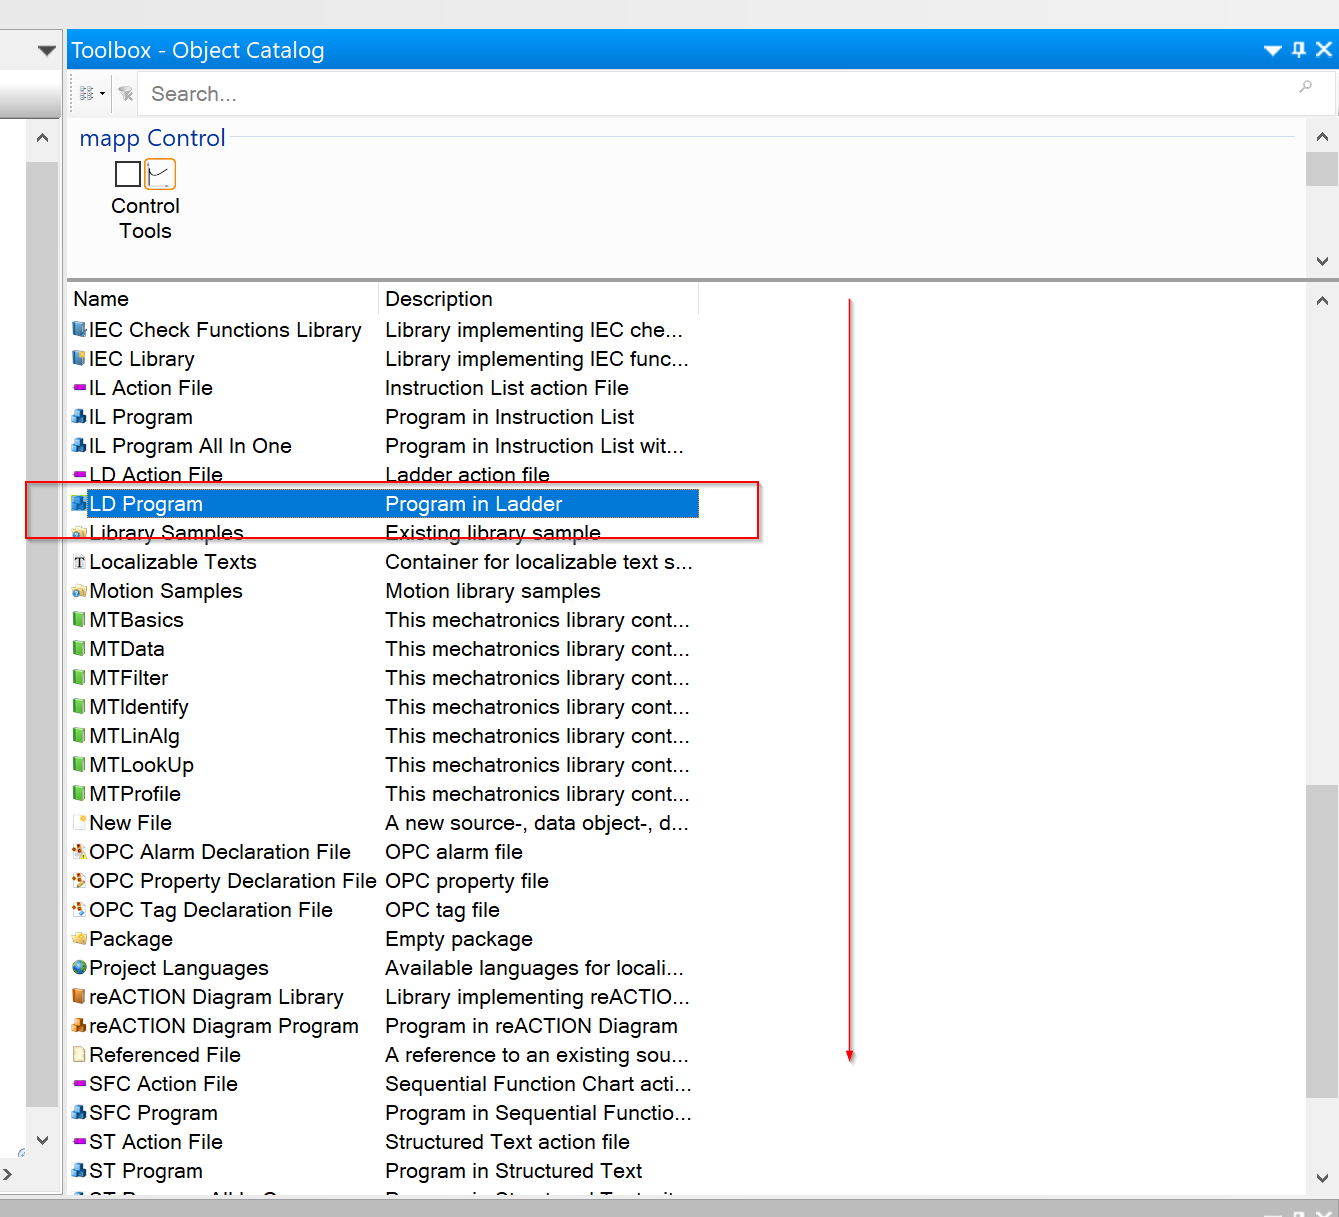
The Toolbox on the right lists the Objects that can be added.

Scroll to LD Program below and double-click to add it to Libraries.
Done!A new ladder programme has been added.
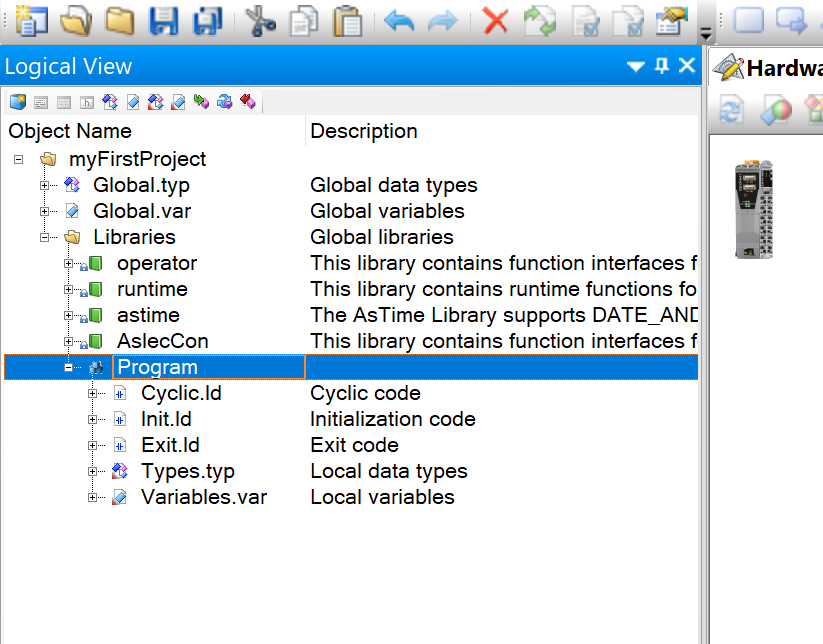
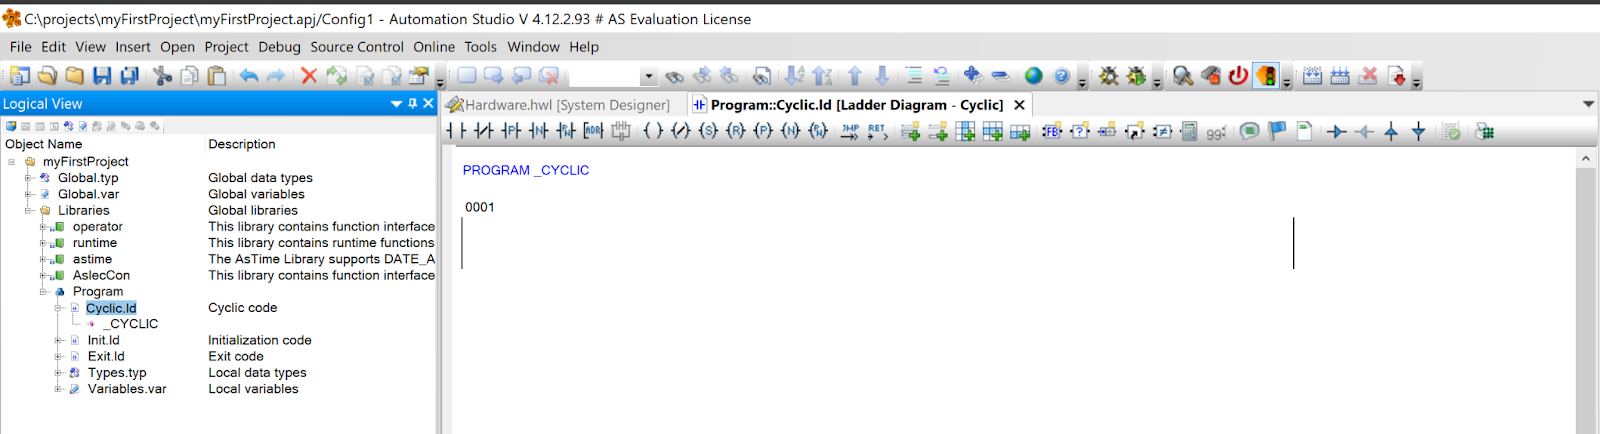
The B&R programme concept has various Items such as Cyclic, Init and Exit, and as this is the first episode of the Tutorial, we will not explain the complexities. For now, double-click on Cyclic.ld to open it. This File will be the program to run the cycle.

The Ladder Editor is now open.
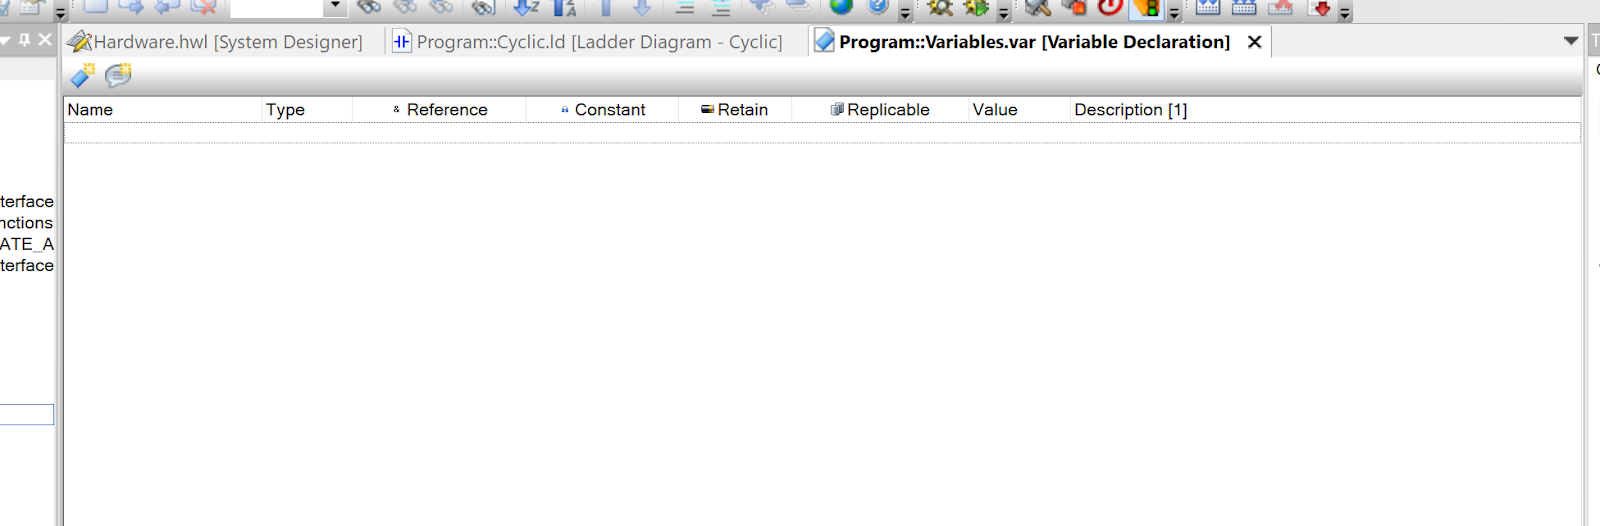
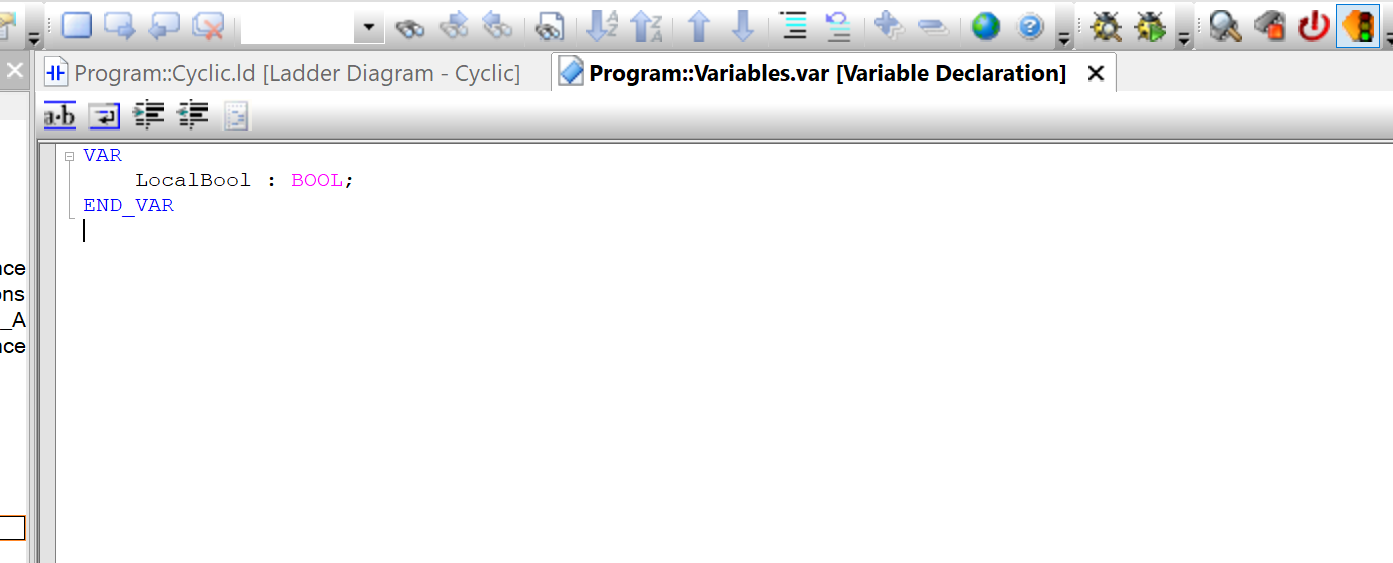
Define Local Variables
Now we can define the local variables in the Program. Open Variables.var. You can define local variables from this File.

Done!The Define Local Variables screen is now displayed.
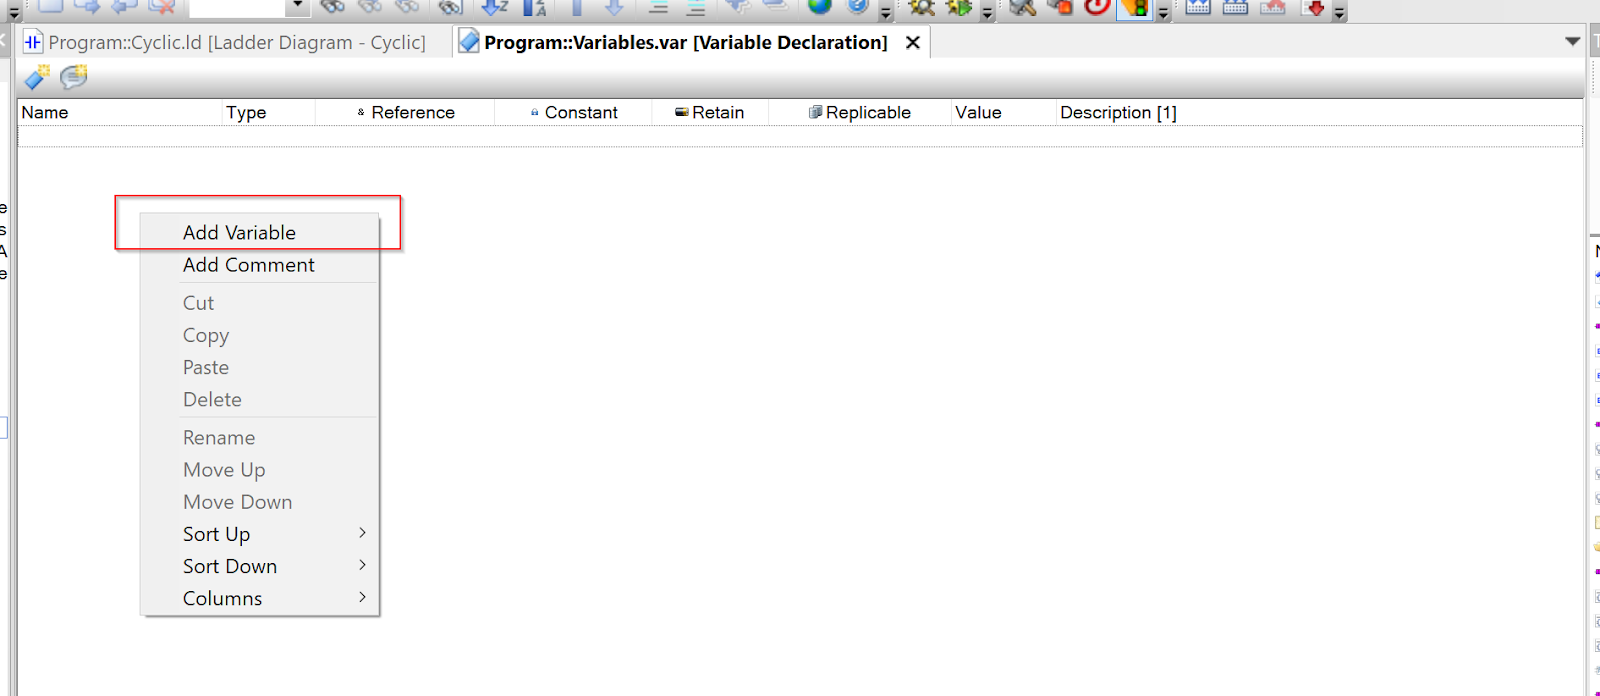
Add Variable
Right-click>Add Variable from the Variables List.
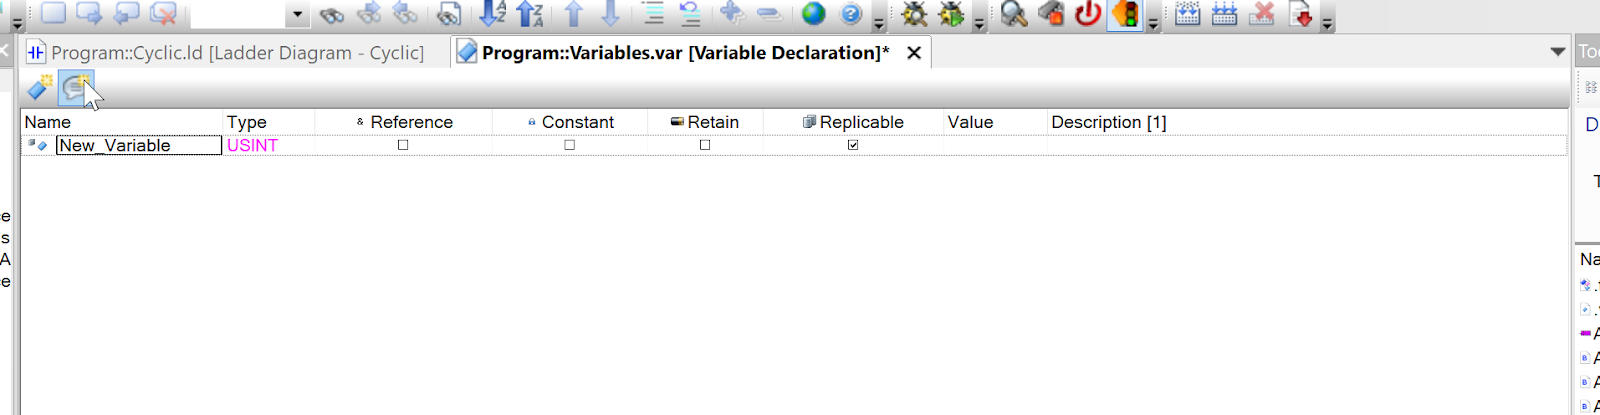
New local variables have been added.
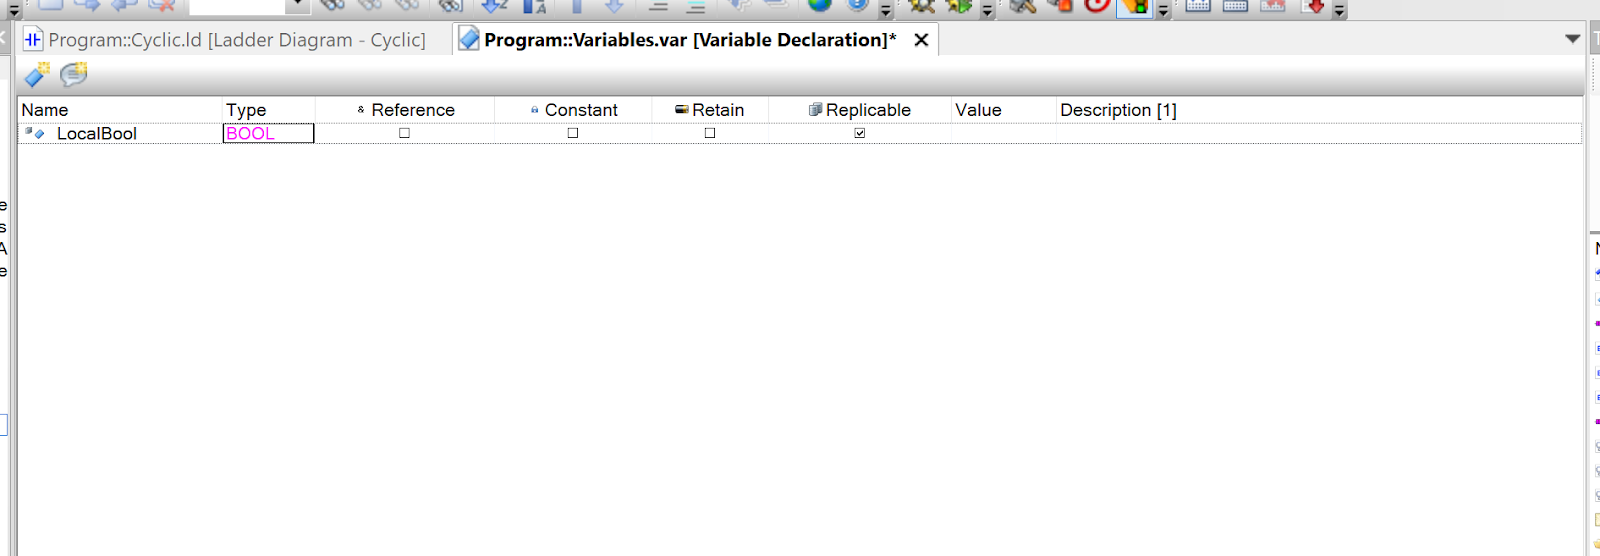
Change Name to LocalBool and Type to BOOL.
Change as TextView
If you think the Table View is inconvenient, close the current Variable edit screen and right-click Variable.var>Open>Open As Text.

The screen changes to a text-based variable definition screen like Codesys.
Defines LocalInt variables of type INT.

Edit Ladder Program
Now we can edit the ladder programme.
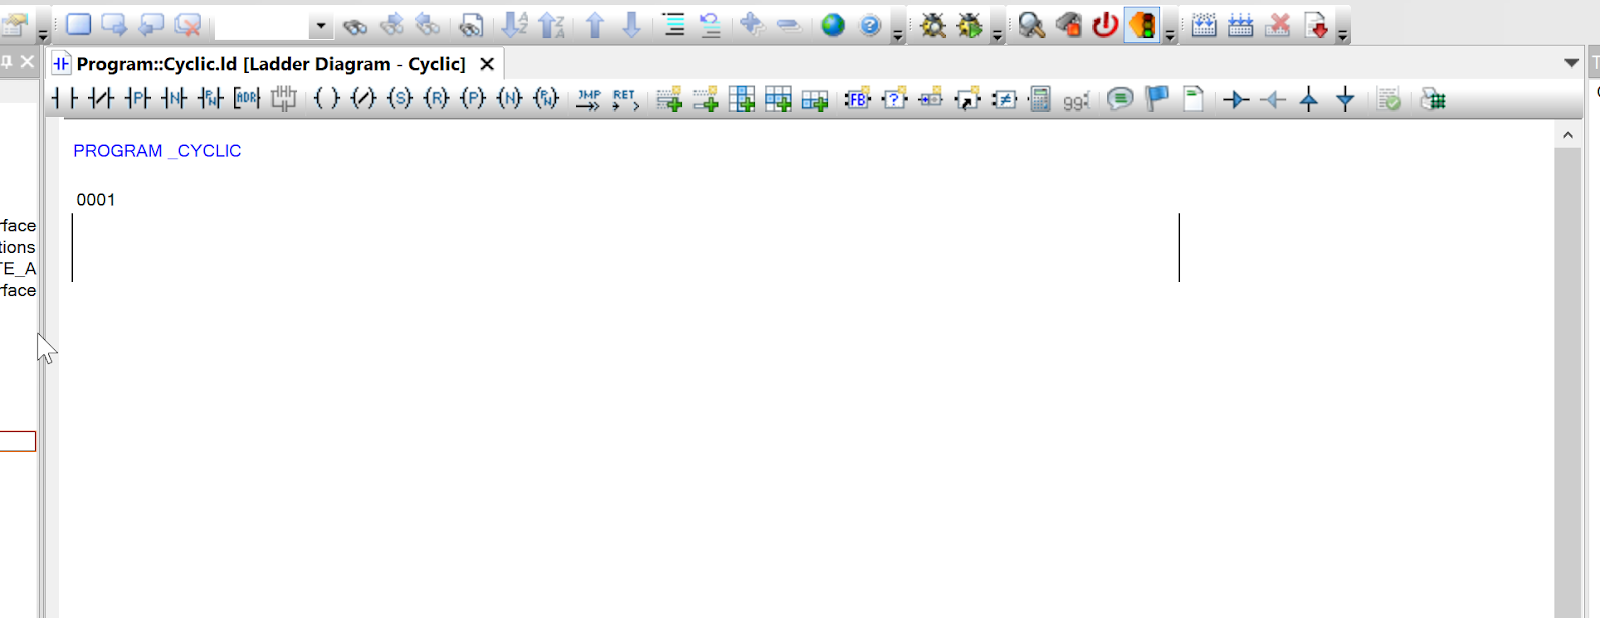
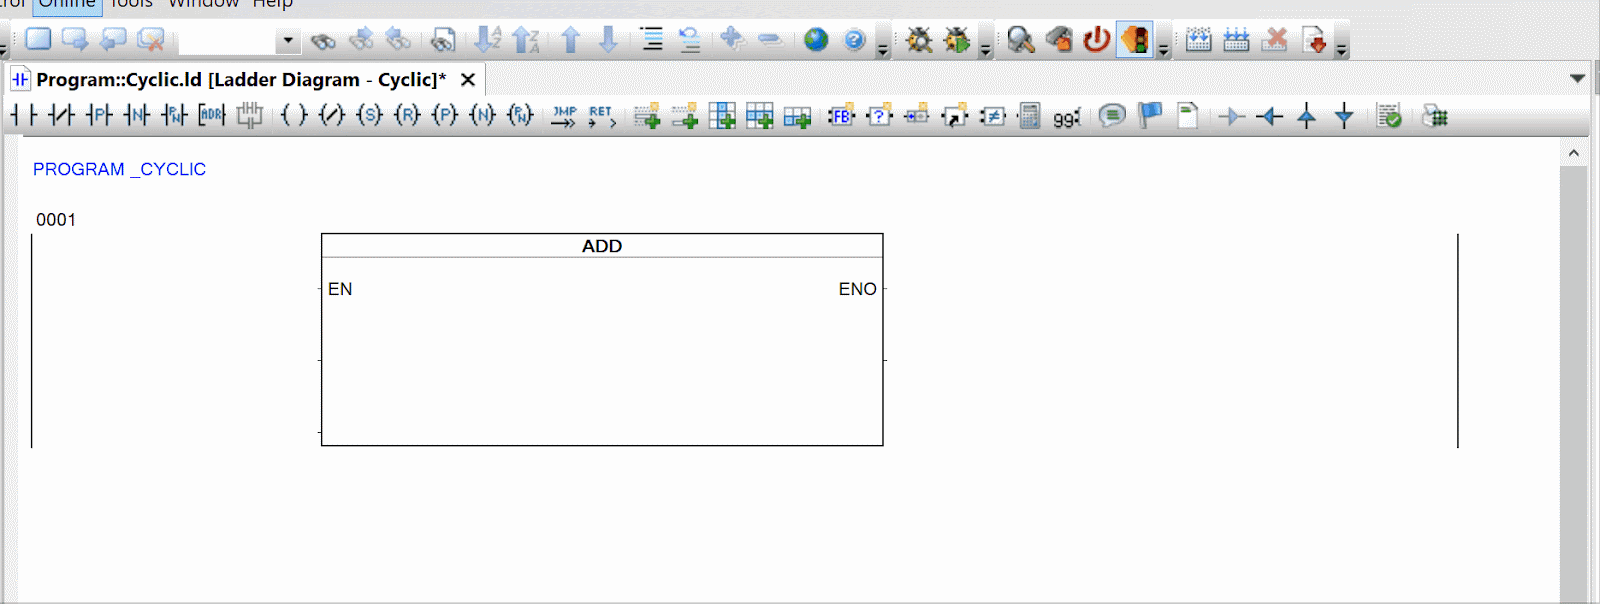
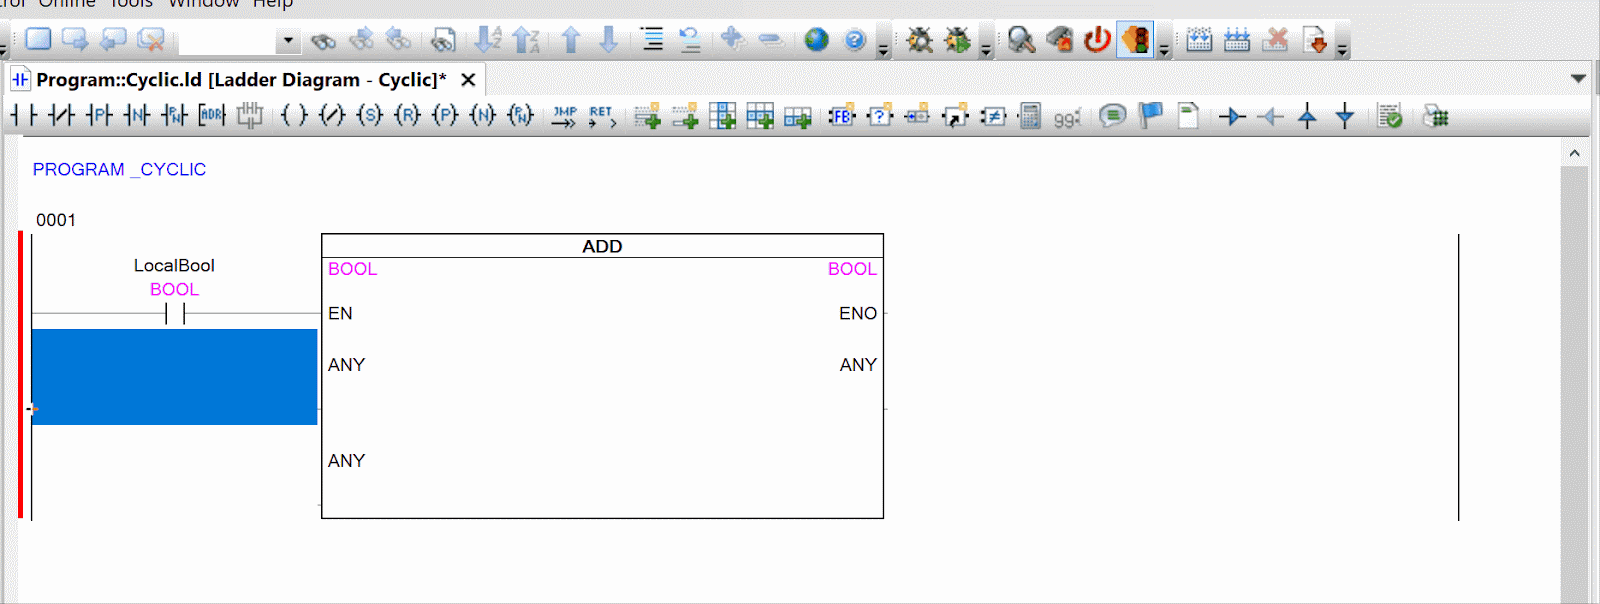
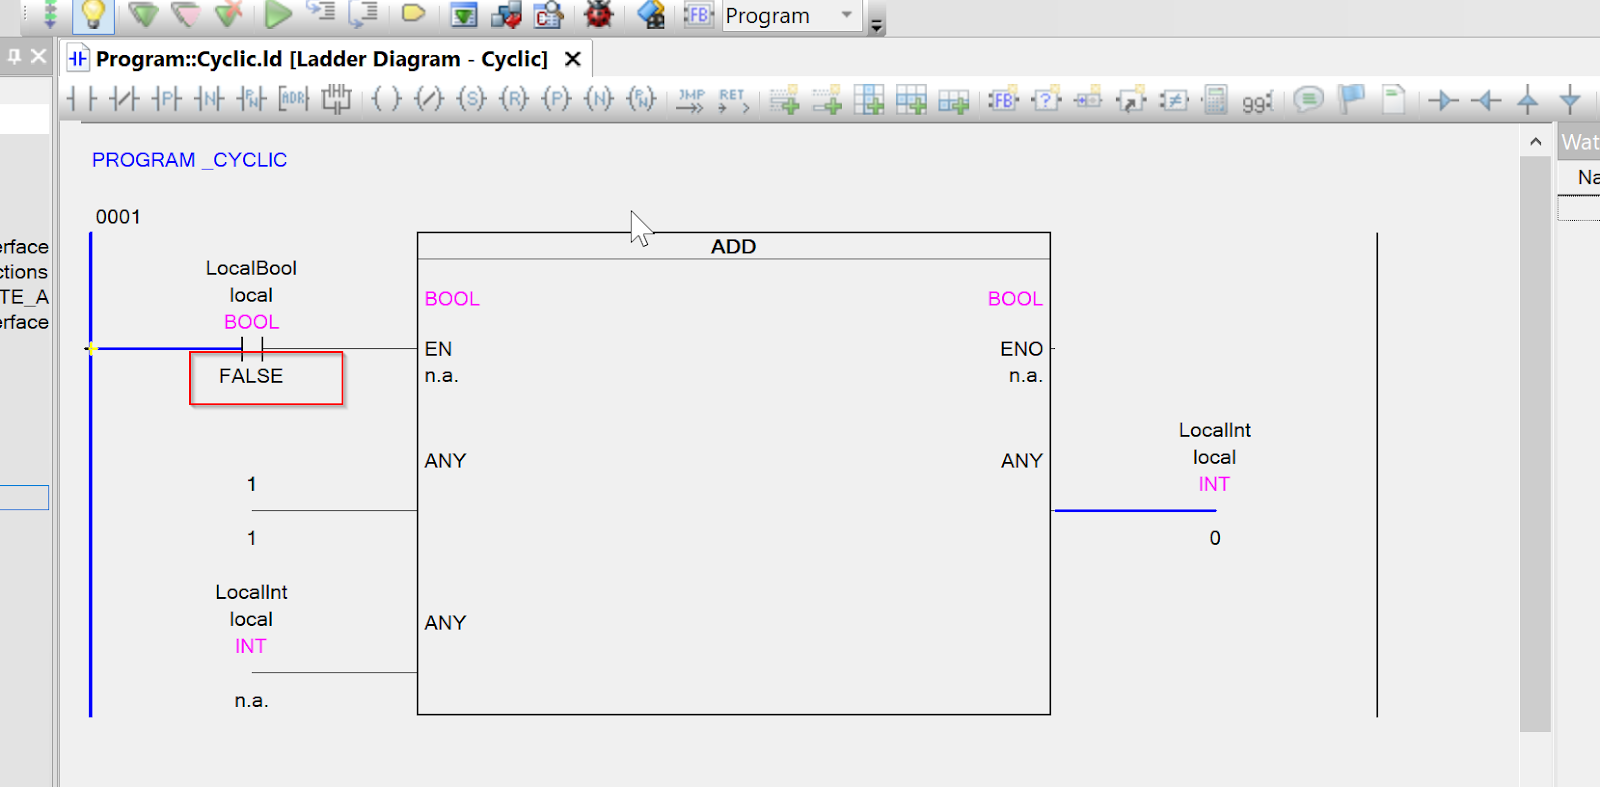
Add Function
Add the ADD function from the Toolbox on the right to Ladder Network1.
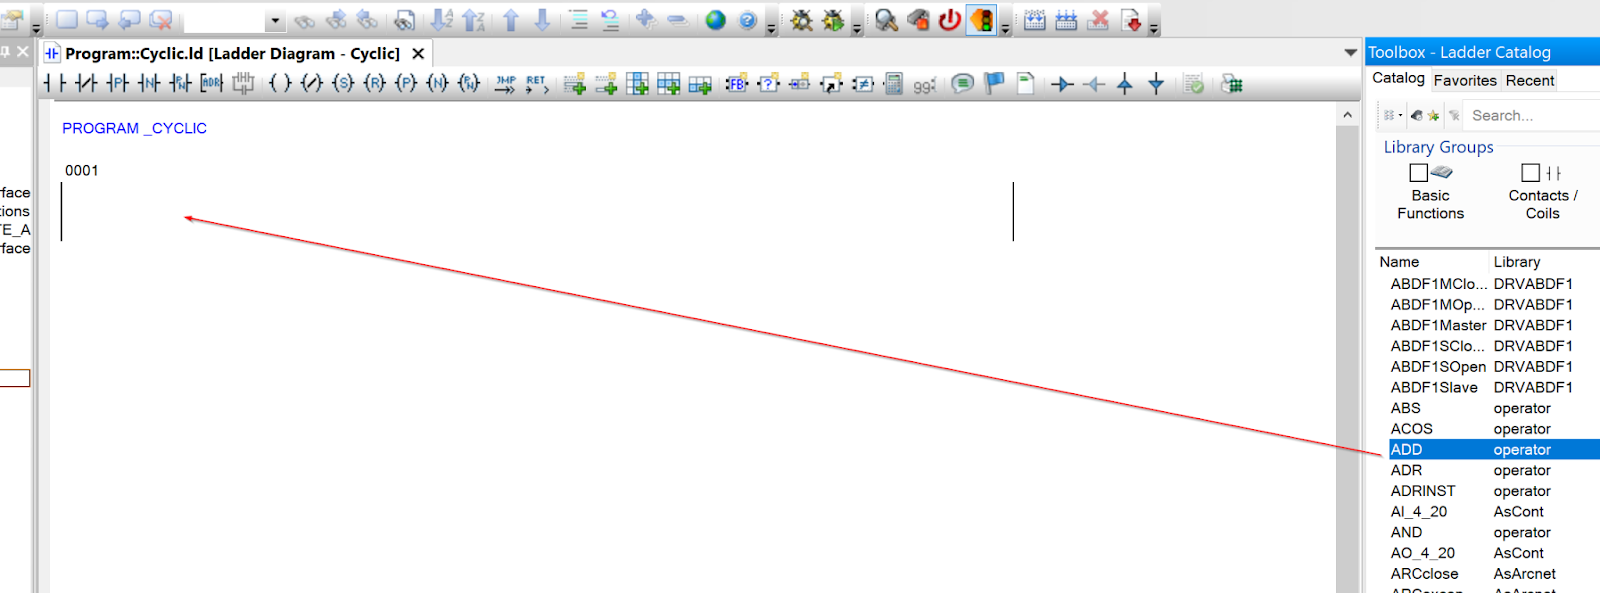
The operation is shown in the diagram below.
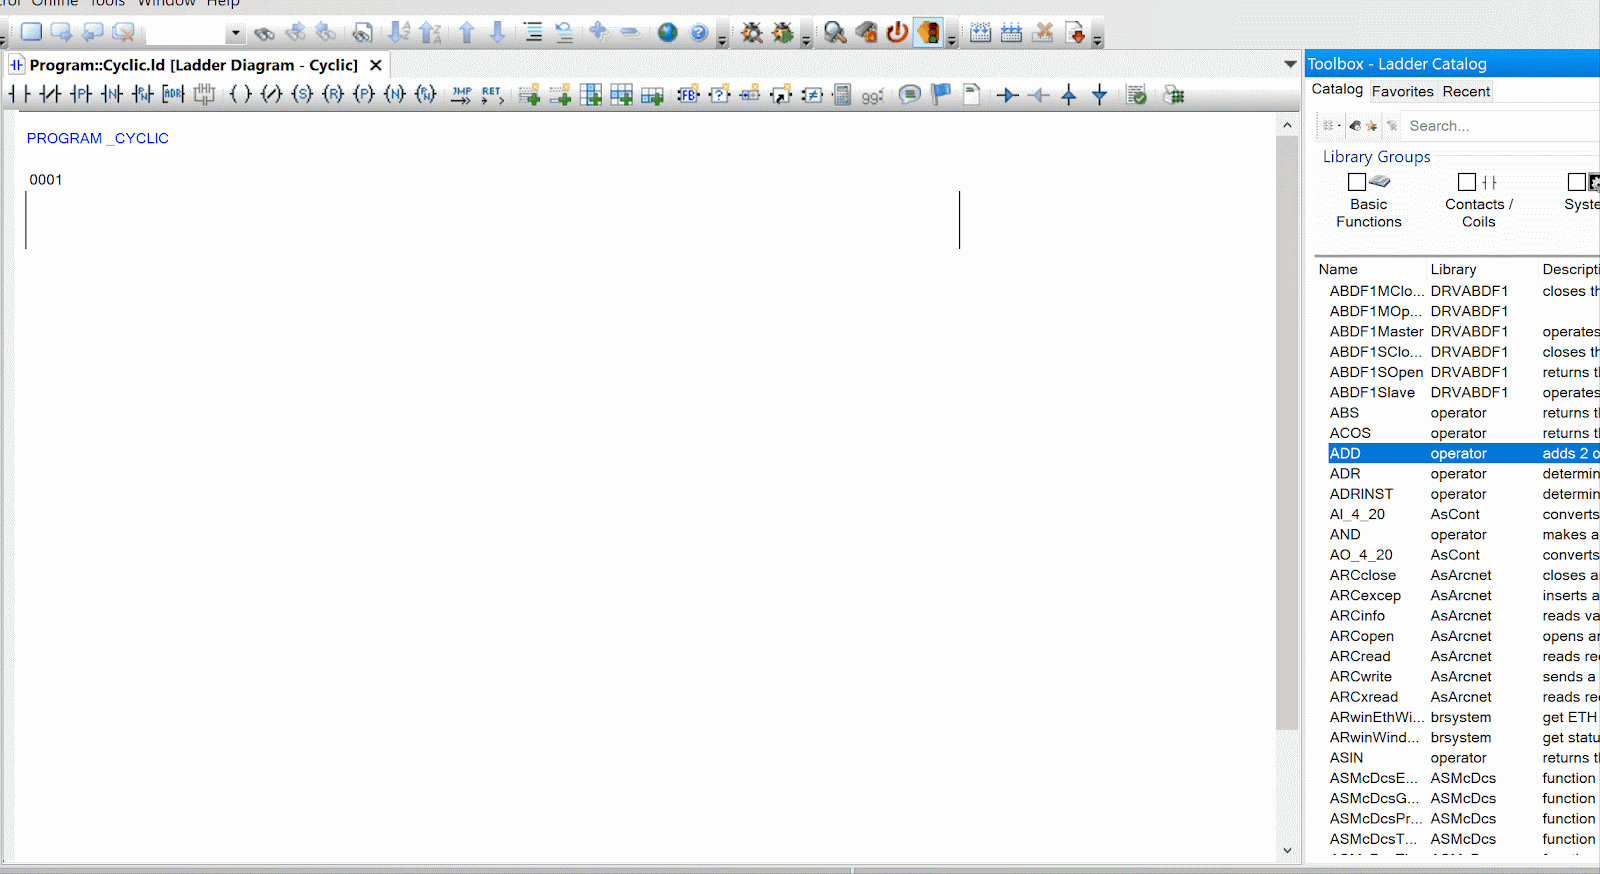
The Done!ADD function has been added.

Add NO Contact
Next, add a NO contact to the EN parameter.

The operation is shown in the diagram below.
Done!Now all you have to do is enter the LocalBool you have just defined.
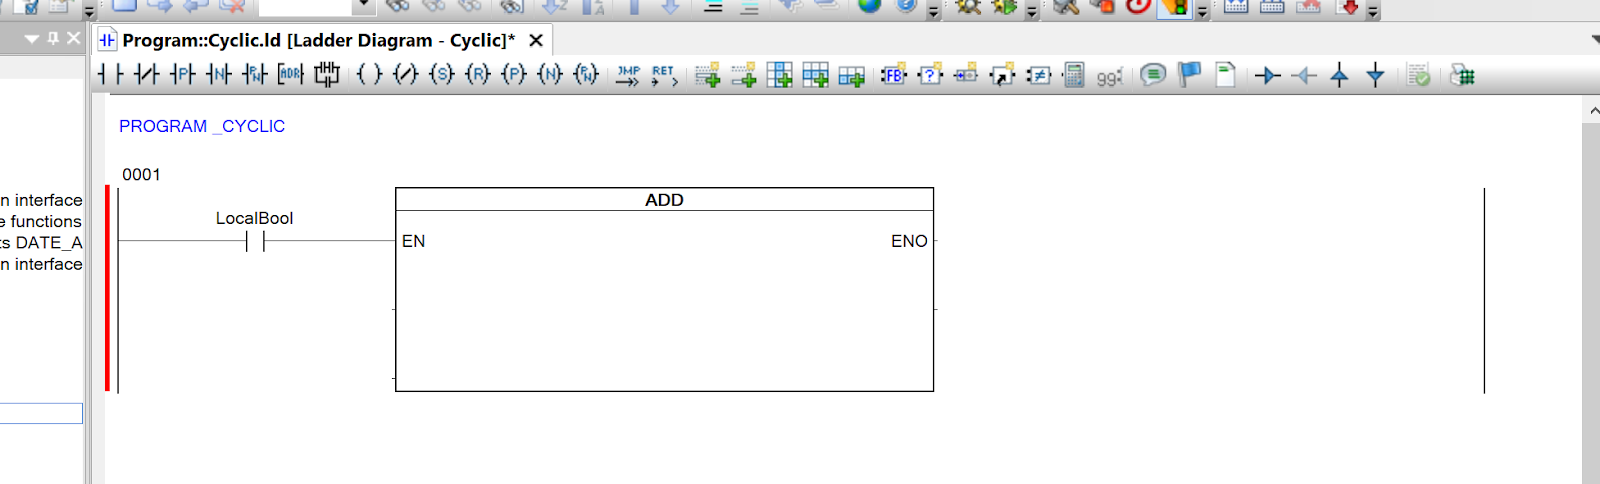
The red line to the left of Network1 indicates that there is an error in the program of the corresponding Network.

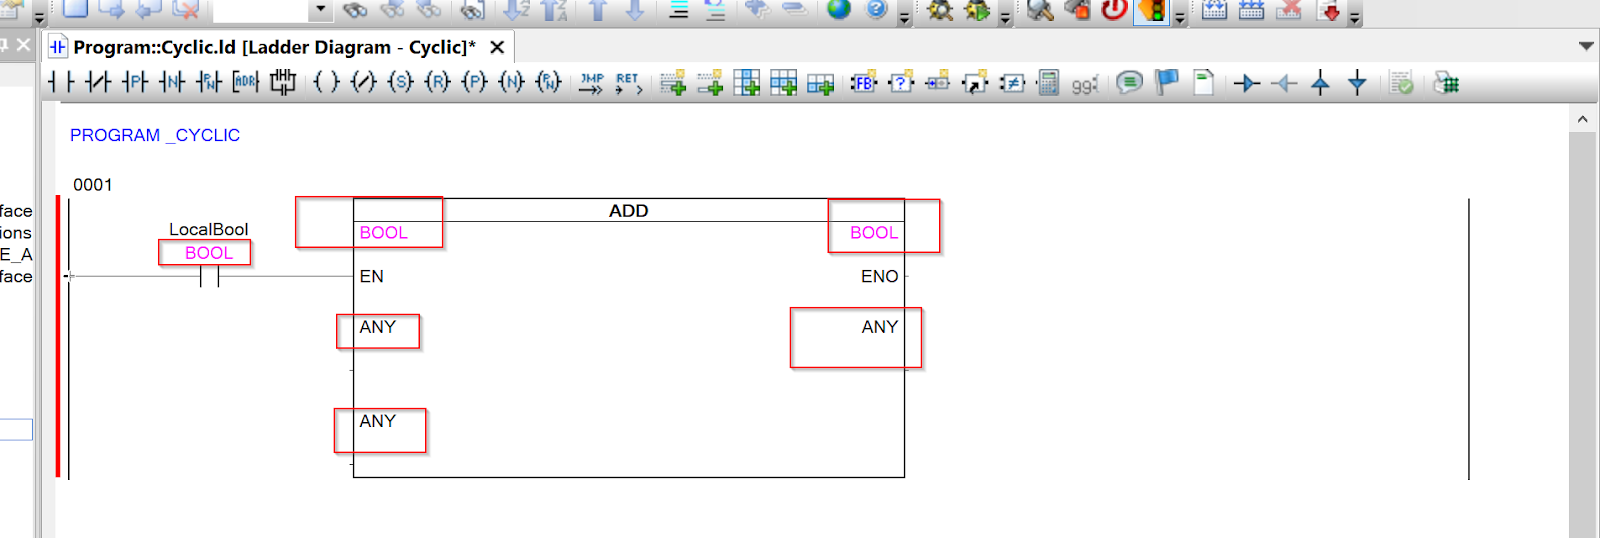
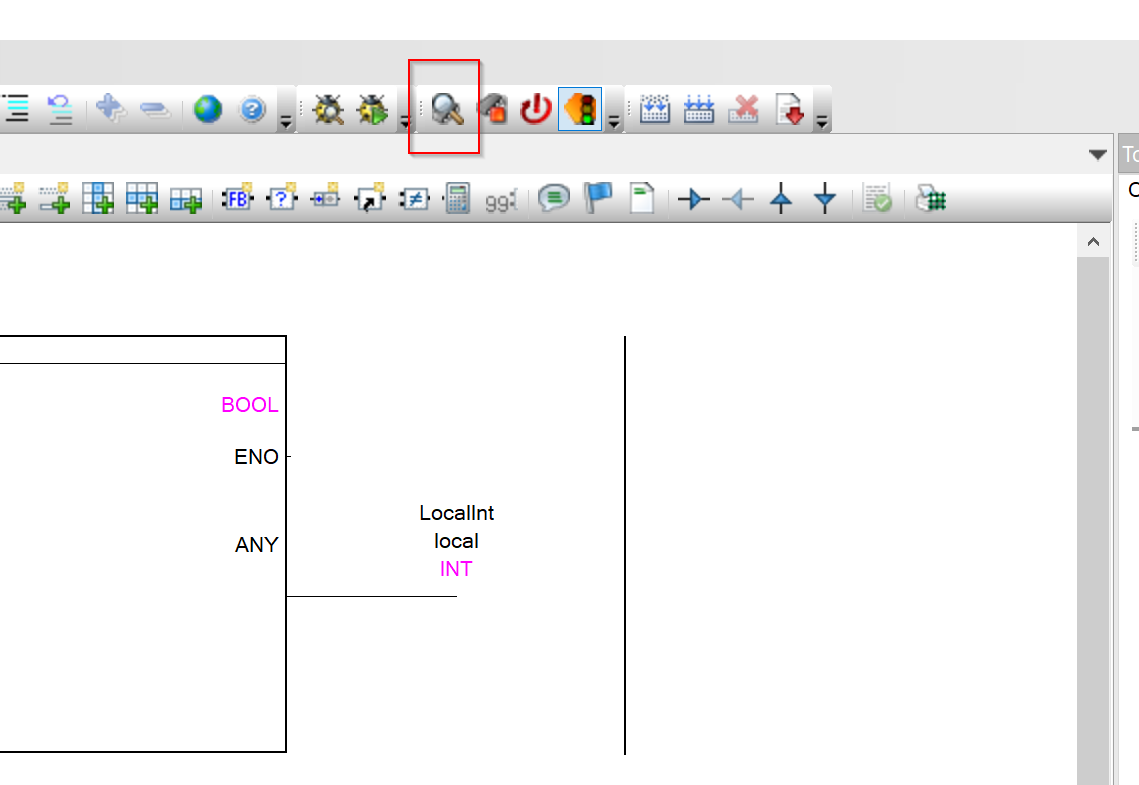
Show Type
As it is not clear what Data Type variables are needed for function parameters on its own, right-click on the function>Type.

ADD functions are marked with a pink letter, which is the data type of the respective function or variable.
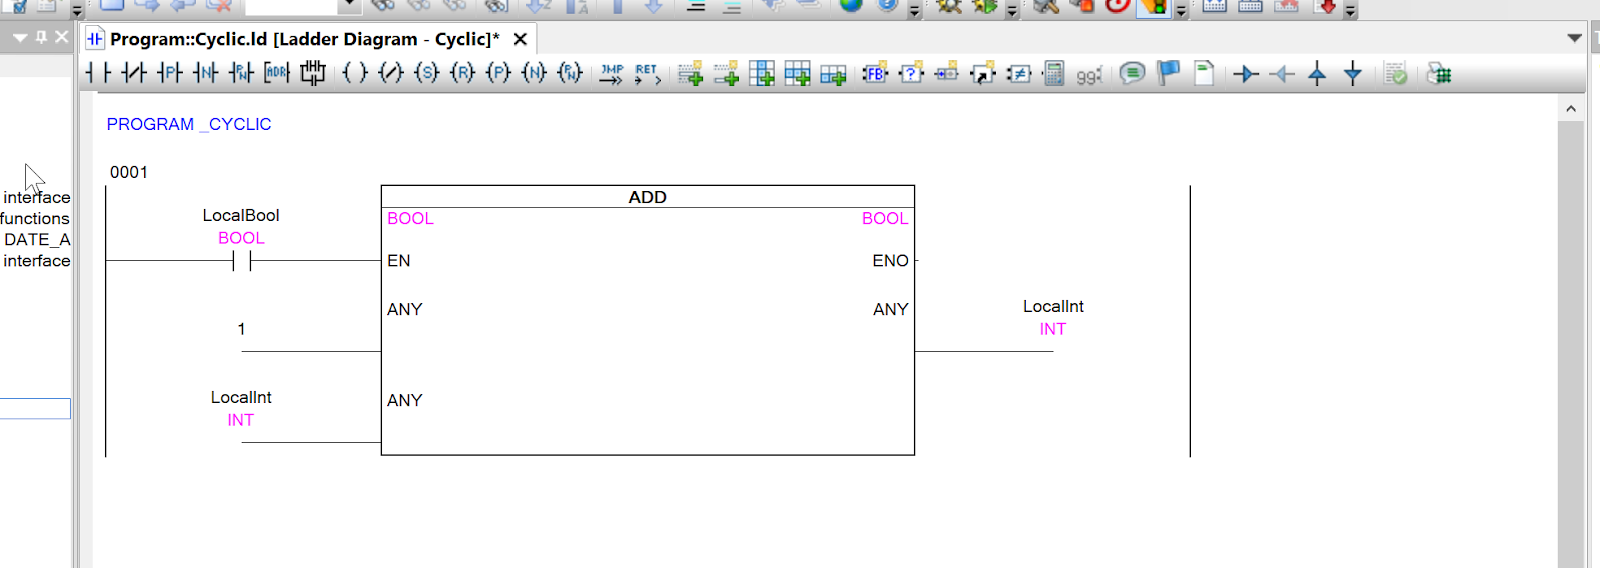
Assign Parameters
As this is an ADD function, two parameters are required. Enter the first ANY parameter.
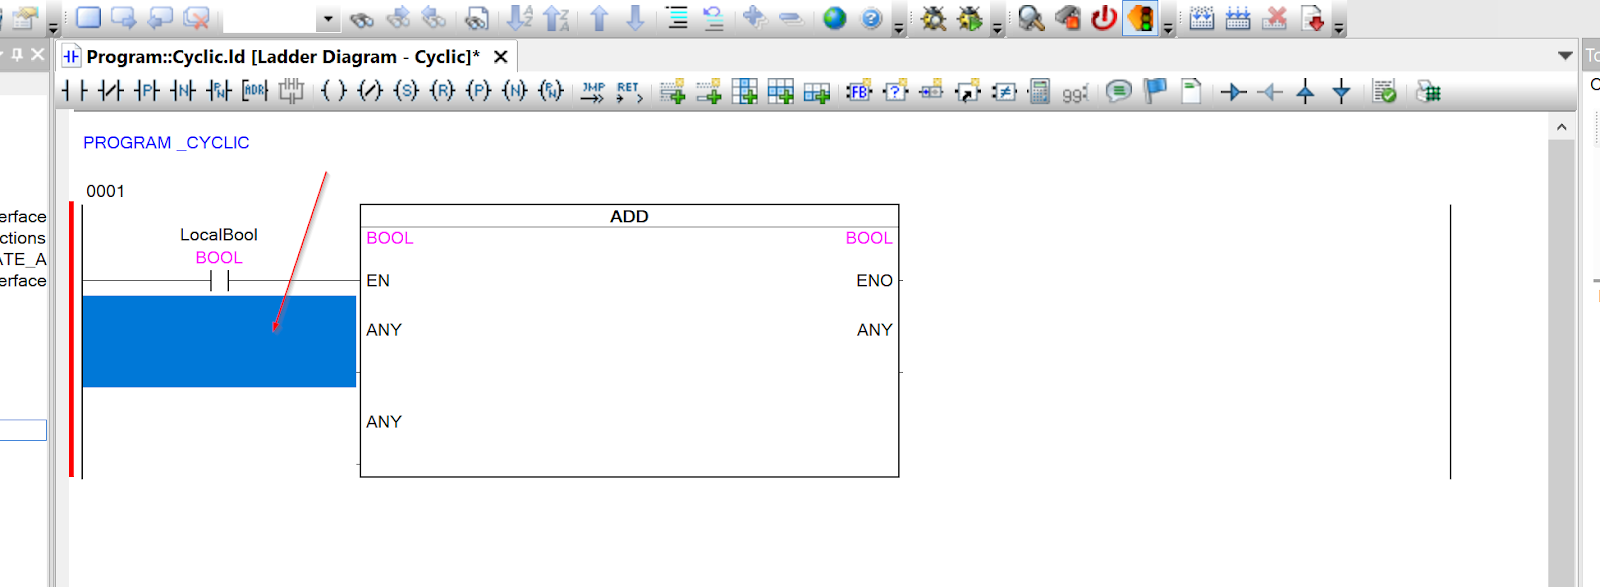
For constants, just enter the number directly.
Done!

This completes the process.
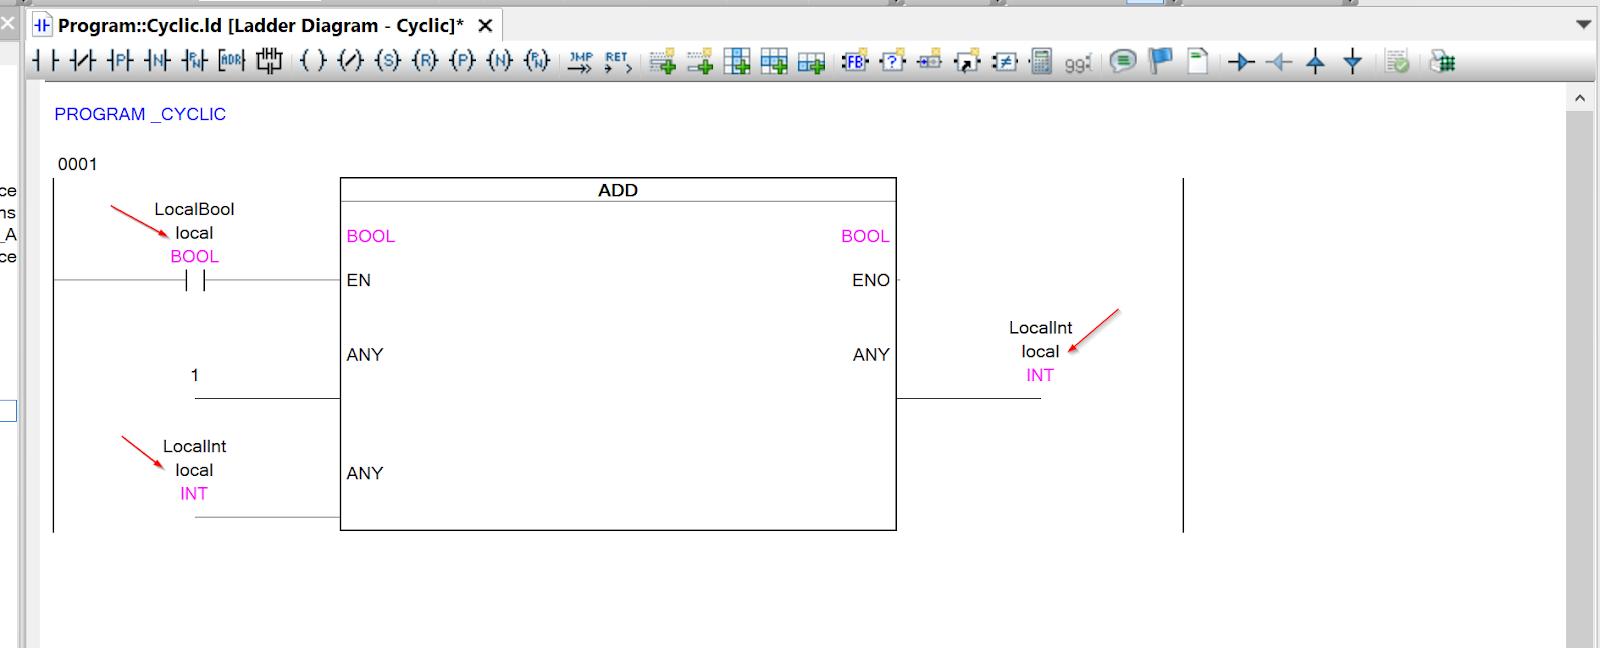
Show Scope
You can check the Scope of the relevant variable by using the Scope display. Right-click on the function > Scope.

The Local character display indicates that it is a Local variable.
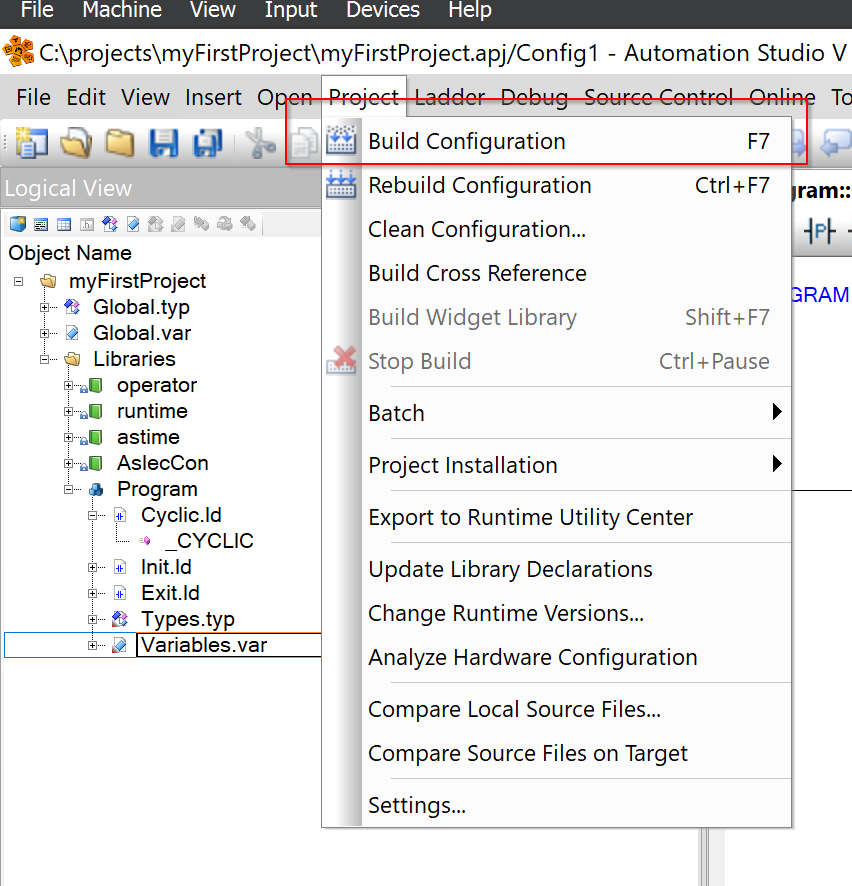
Build Configuration
We can compile the project under Project>Build Configuration.
Make sure there are no Errors.

Do you want to transfer the project directly to Runtime? popup is displayed.

Checkbox Don’t Show again and click Don’t Transfer.

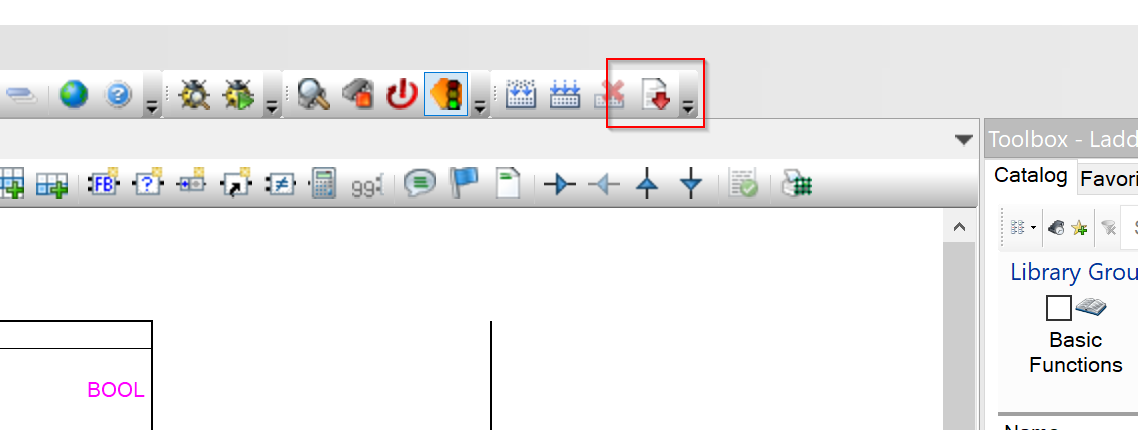
Transfer
Finally, click on the button in the red frame to transfer the project to Runtime.
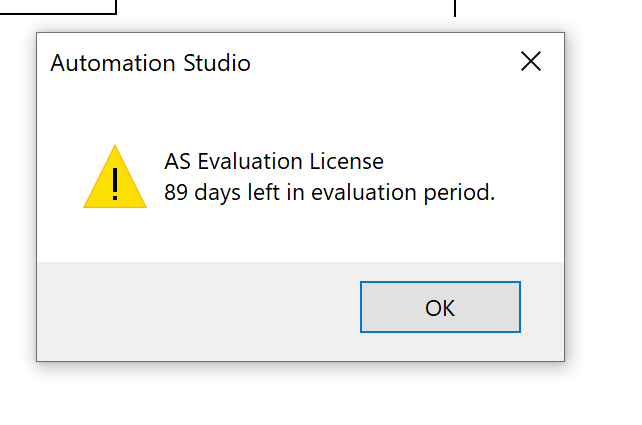
…I always get Warnings because I’m an evaluation licensee. Ignore it.
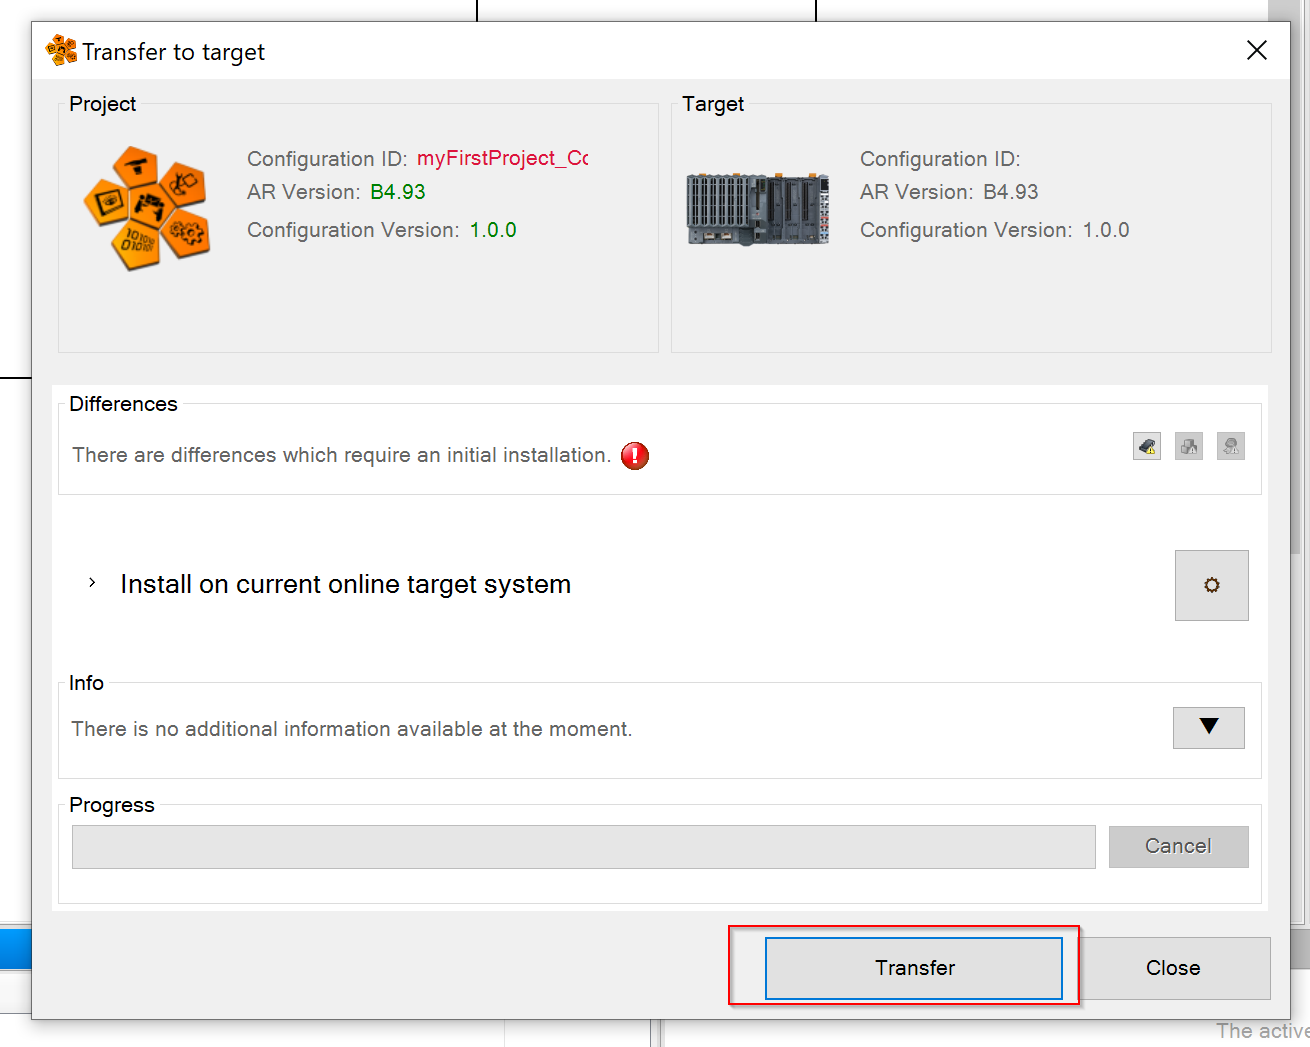
The project transfer screen appears.
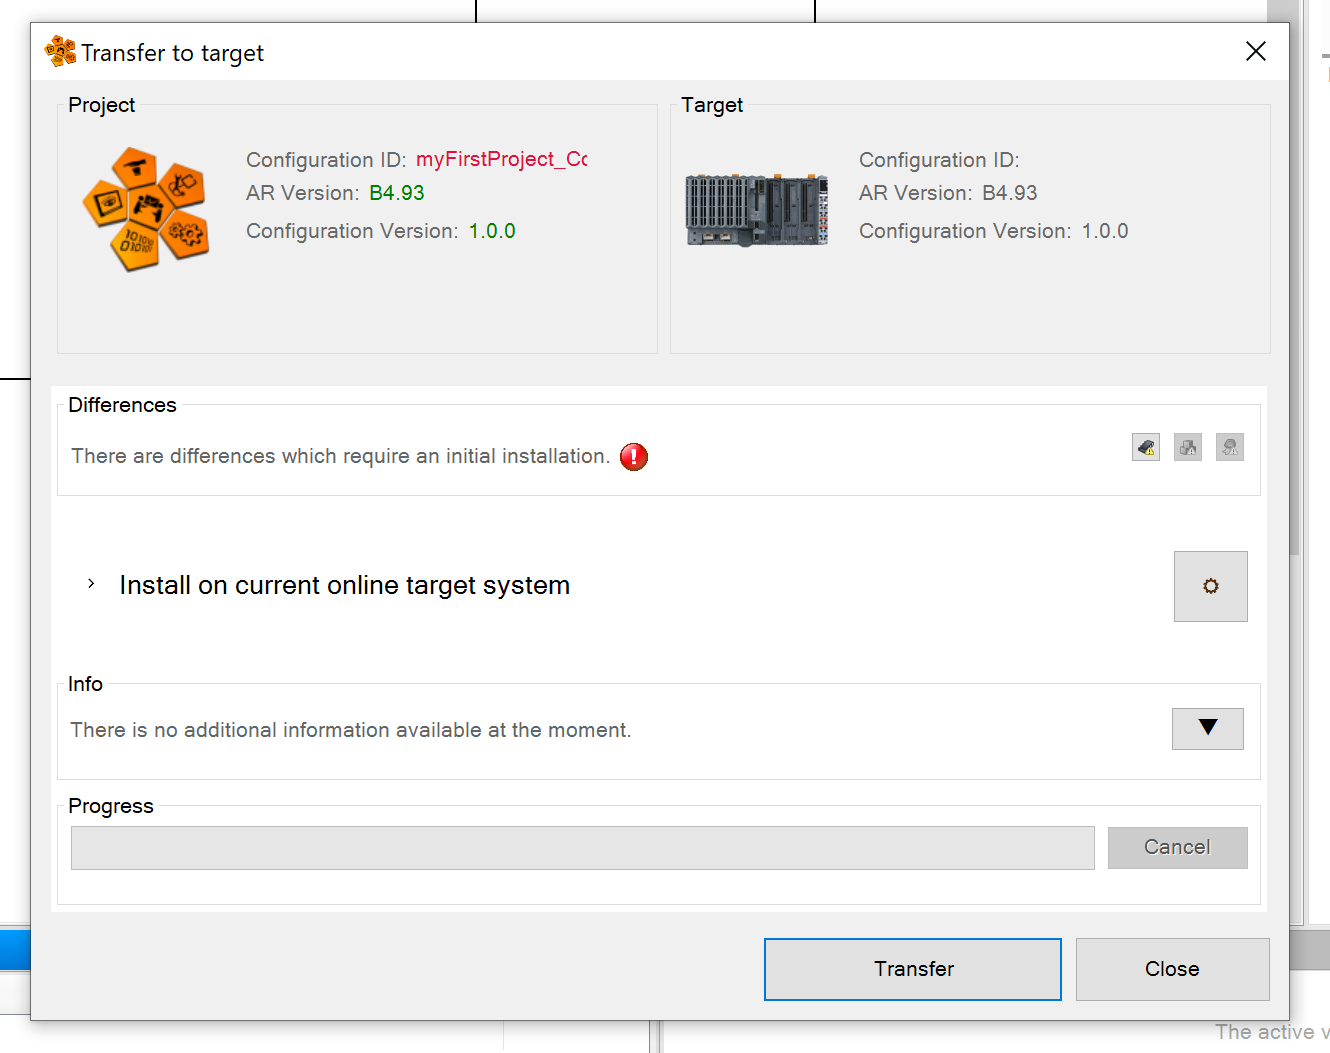
Click on the Transfer button to transfer the project.
Proceed with Yes.

Just a seconds..
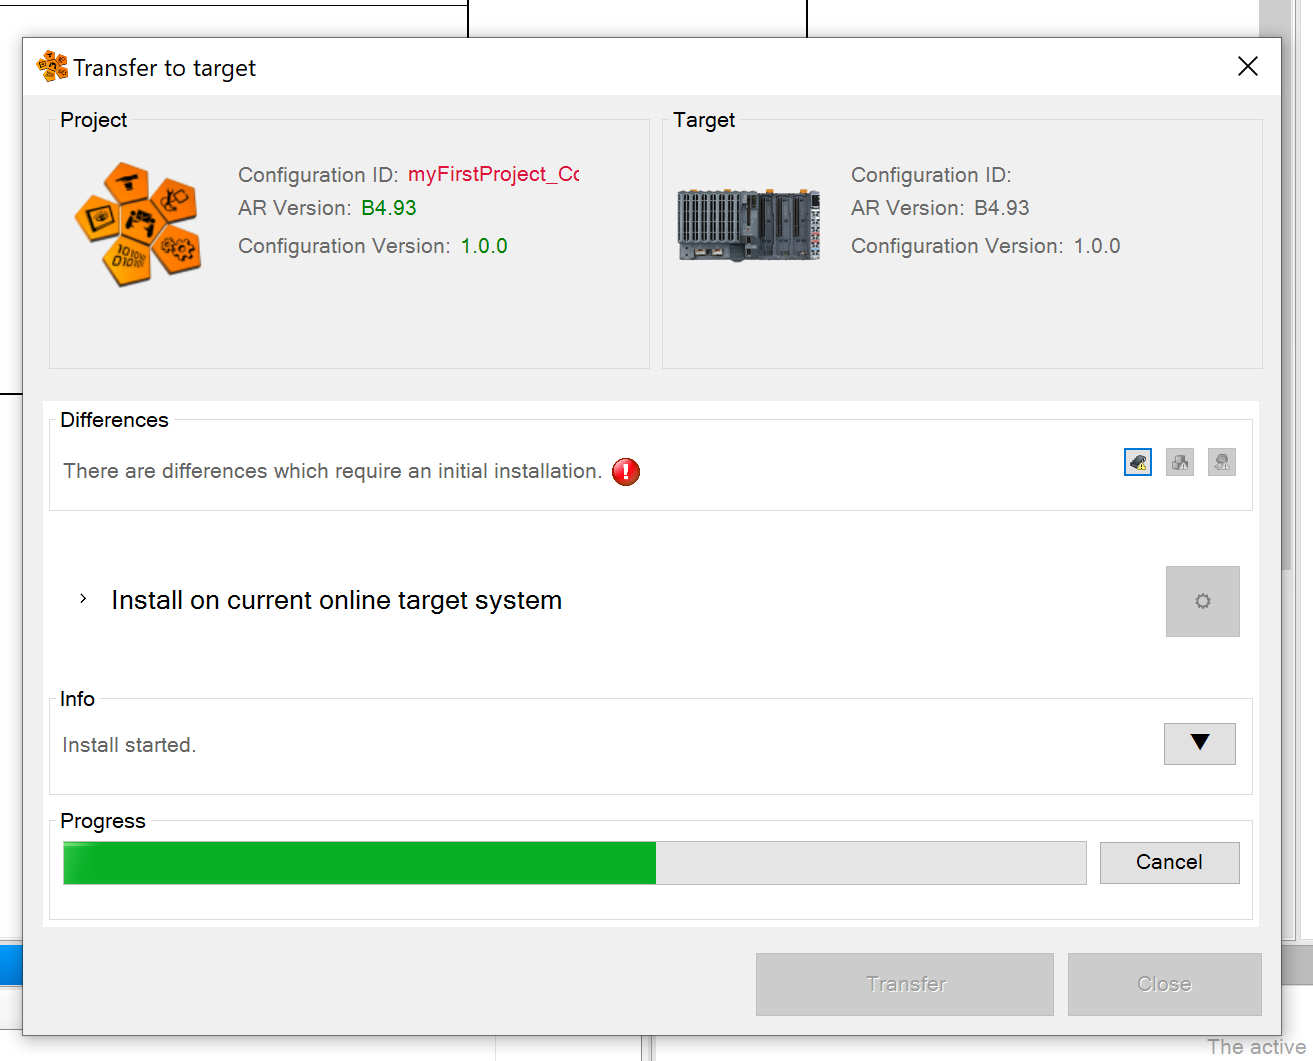
Complete with Done!Close.

Monitor
Finally, use the button in the red frame to Monitor the programme.
Done!
Modify Online
If you want to change the current value of a variable, simply click on it and enter the number you want to change.

The operation is shown in the diagram below.

コメント
Dear sir:
Can you please tell me how can I test acopos 1090 in workshop with automation studio?
Does anyone know how can I test acopos 1090 with using AS?