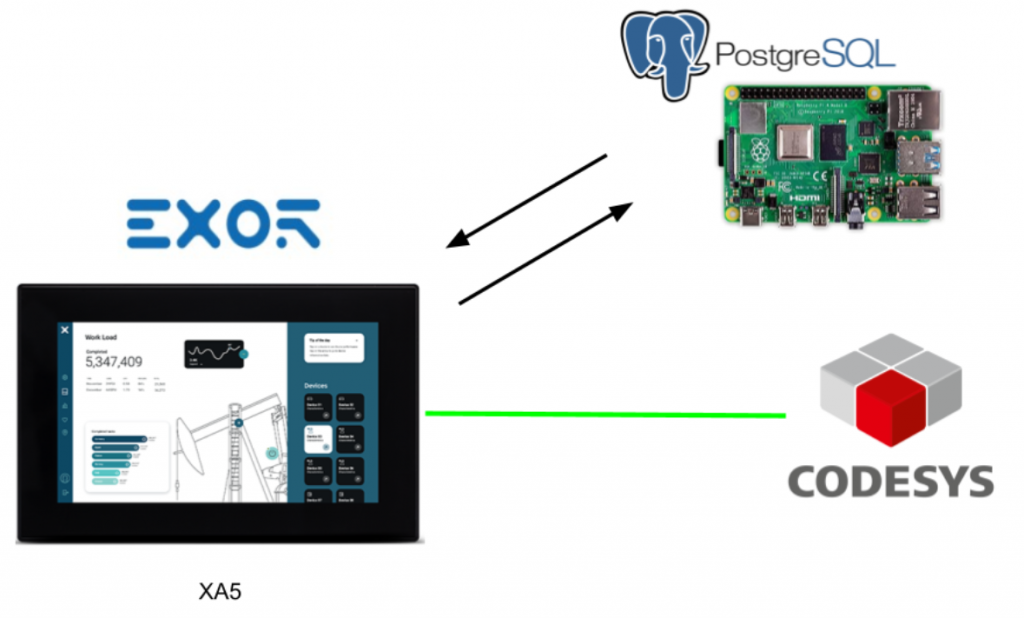
In this article, we will show you how to use EXOR XA5 connected to the Codesys CPU to connect to and send commands to the PostgreSQL Server installed on your Raspberry.
Let’s get started!
Reference link
PostgreSQL
http://soup01.com/en/category/postgresql_en/
EXOR
http://soup01.com/en/category/exor/
Implementation
EXOR Side
Enable Database
First, the Database Links feature must be enabled by going to Configuration>Database Links>right click>Enable.
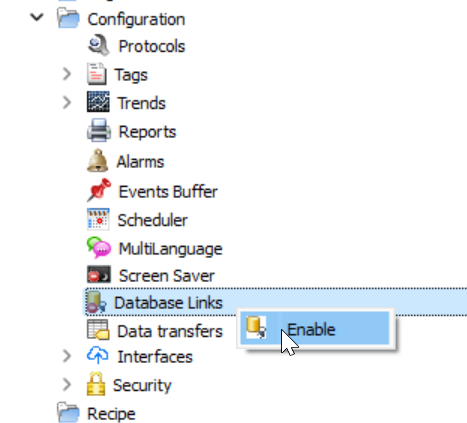
The Database link screen is now displayed.

Add Link
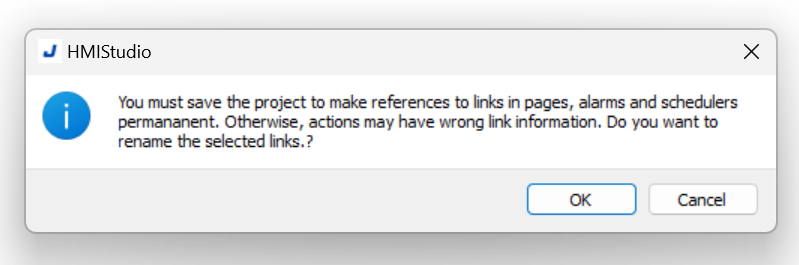
Add a new Database connection with the + Add Link button.

Done!A new Database Link has been added.

Property
Configure the connection settings for the Database you just added.

Name
Here is the Database Link name. A simple name is OK here.

Press OK to proceed.
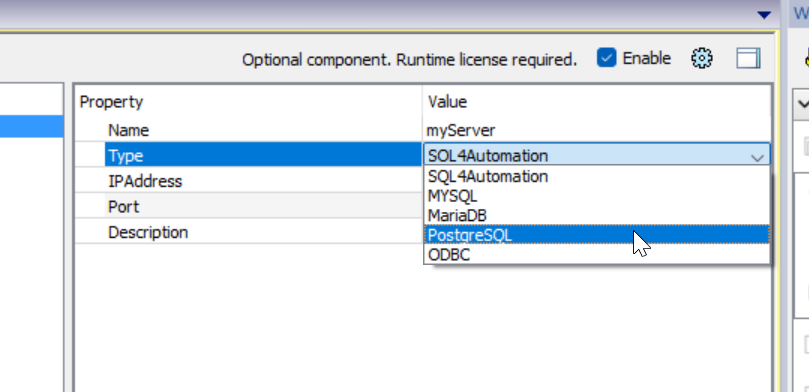
Type
The type of Database to connect to Jmobile Runtime.
In this case, we will use PostgreSQL.
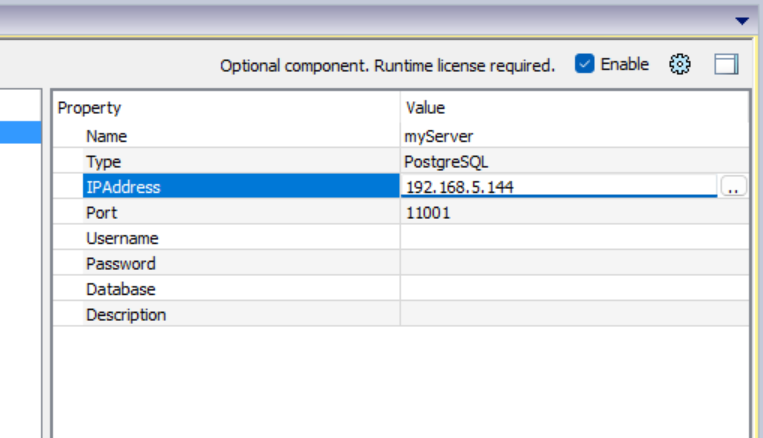
IP Address
Set the IP address of the PostgreSQL Server.
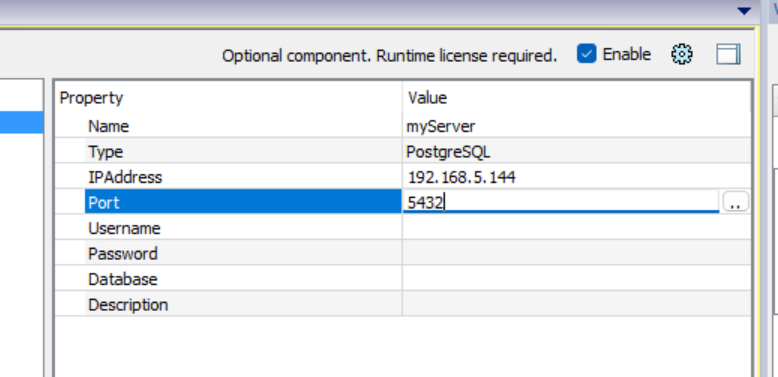
Port
Set the connection Port for PostgreSQL Server. (Default is 5432.)
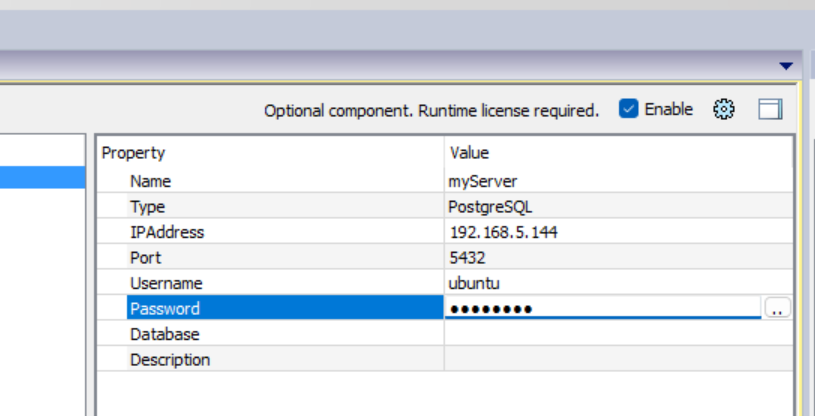
User name/Password
Set User Name/Password to login to PostgreSQL Server.
Database
Database is set to the name of the Database that the EXOR panel wants to access the PostgreSQL Server. (If there is no corresponding Database name, it will automatically create a new one.)

Add Protocols
Next, we can add the Protocols.
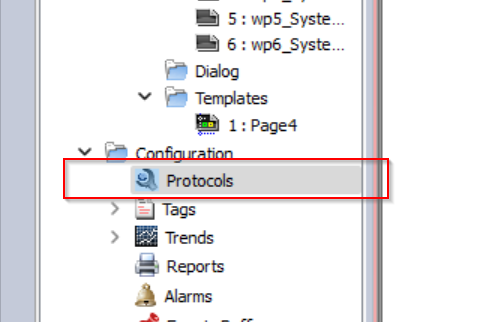
Add a new Protocol to your project with Add Protocol.

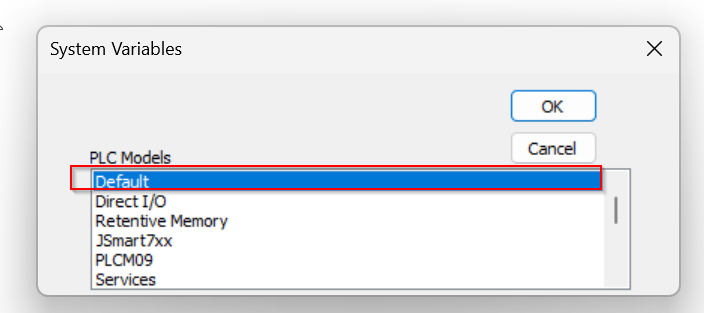
Select System Variables.

Set PLC Models to “Default” and press Ok to proceed.
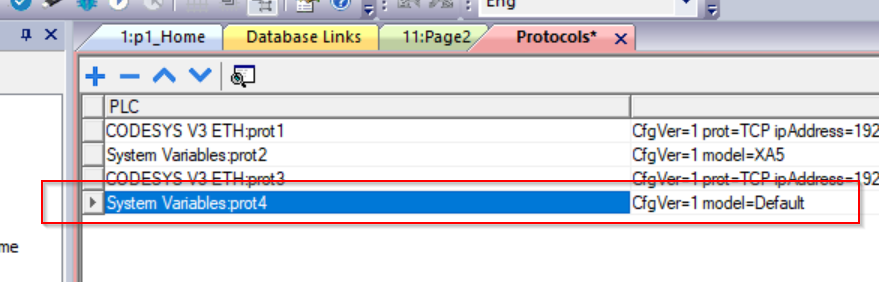
Done!Protocols for System Variables have been added.
Add tags
Next, we can add the Tags.

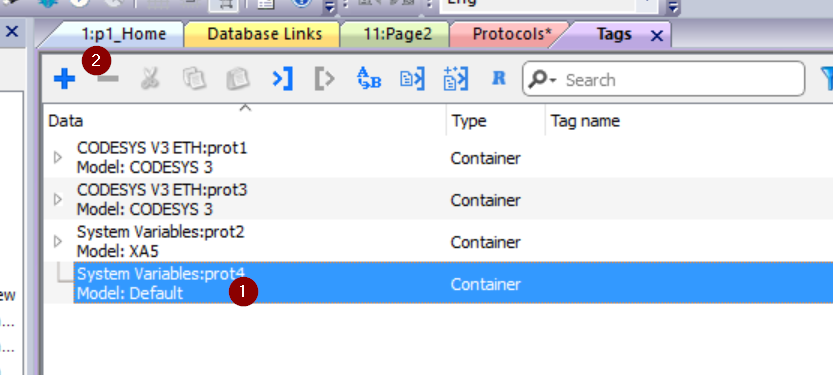
Select System Variables and press the + button to add a new Tag.
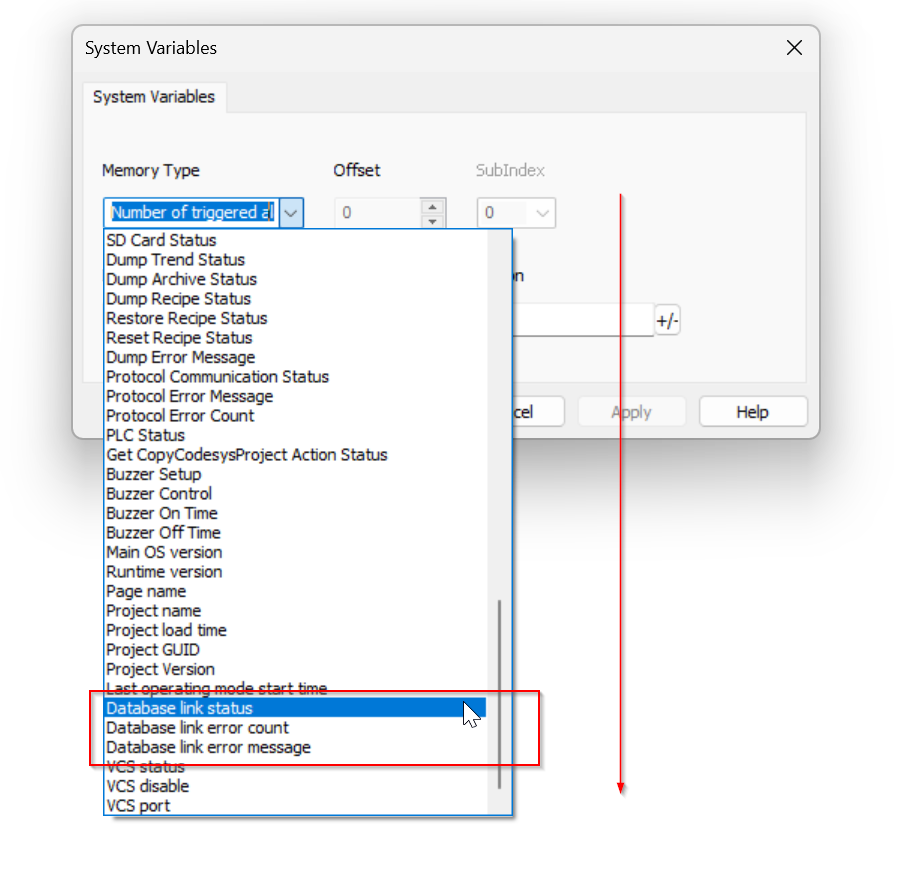
The System Variables definition screen will appear.
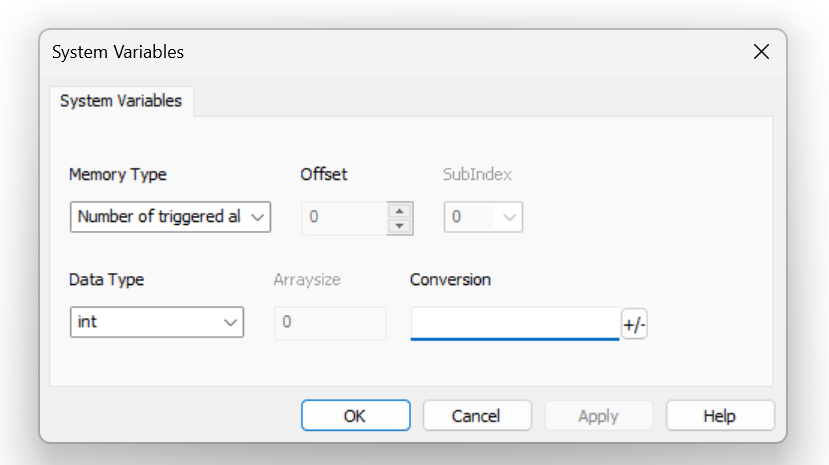
The following Database variables are available from the Memory Type Drop-List.
- Database link status
- Database link error count
- Database link error message
Done!

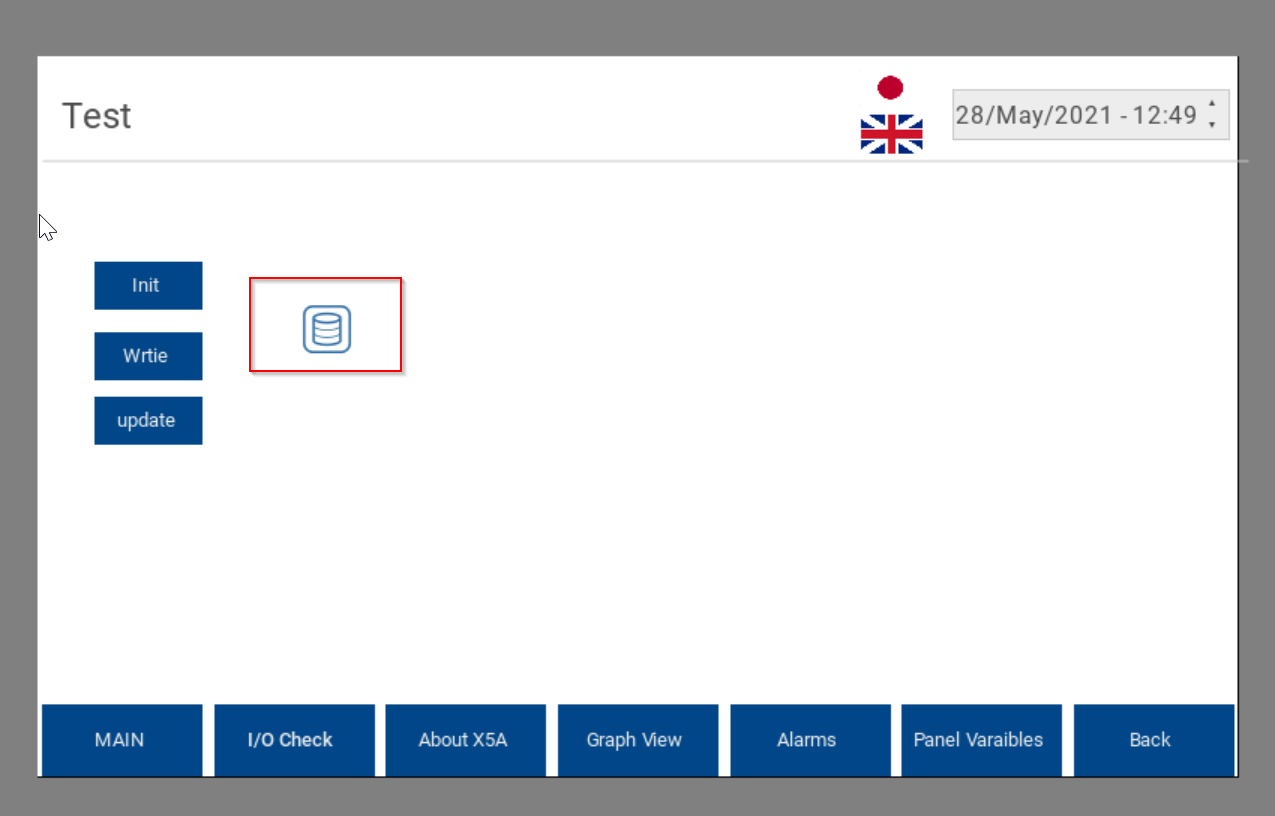
Screen
The next step is to define the screen.
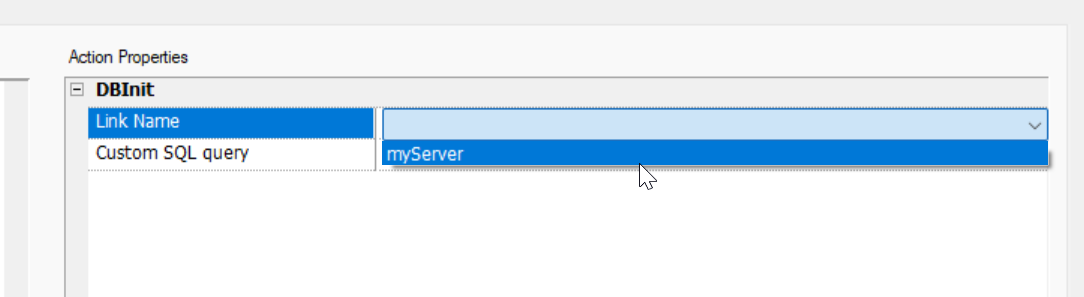
DBInit
Initially, set up a button to initialize the database.
You can find the DBInit Action from the Database Actions List.

In the Link Name section of the Action Properties, select the connection server you have just set up.
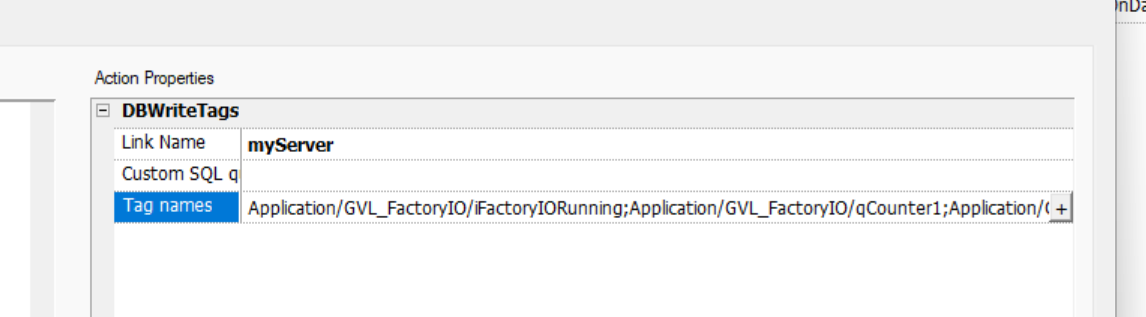
DBWriteTags
Next, select “DBWriteTags” to set the behavior of writing tags in the corresponding Database.

LinkName is set to the same Database as before.
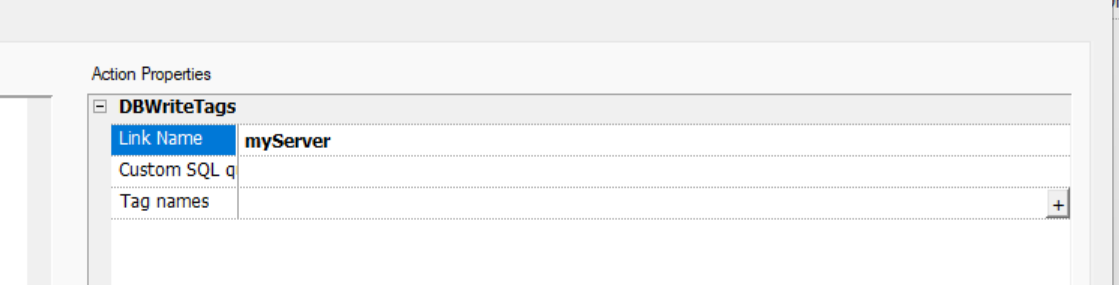
Set Tag names to Tag names to write the corresponding action from the + button.

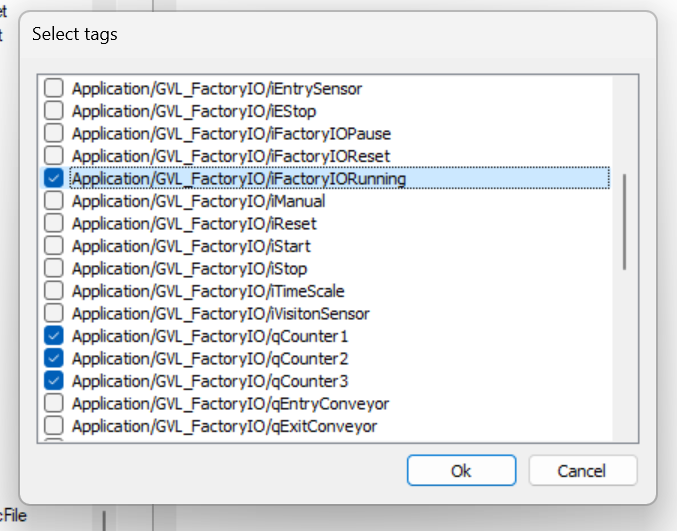
The Select Tags screen will appear.

This time, check the three Tags and proceed with “Ok”.
Done!
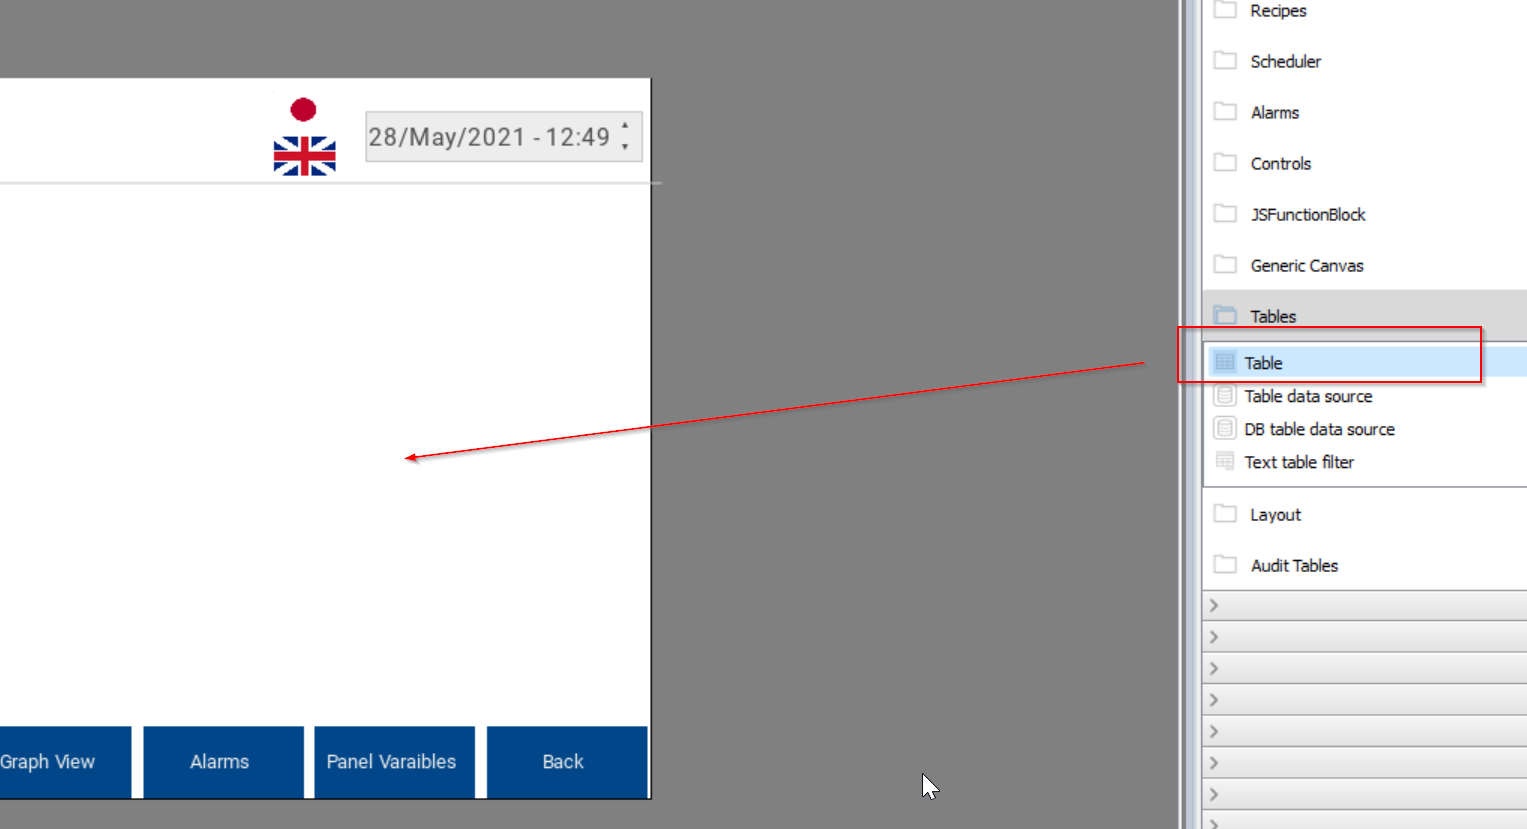
Add DB table
Now we can add Tables>DB table data source to the screen to display DB on the screen.

Done!A DB ICON component has been added, but this component will not appear on the actual screen.
Database Link
This is the TableDB Table setup screen.

Set the database to connect to from Database Link. In this case, “MyServer” is selected.

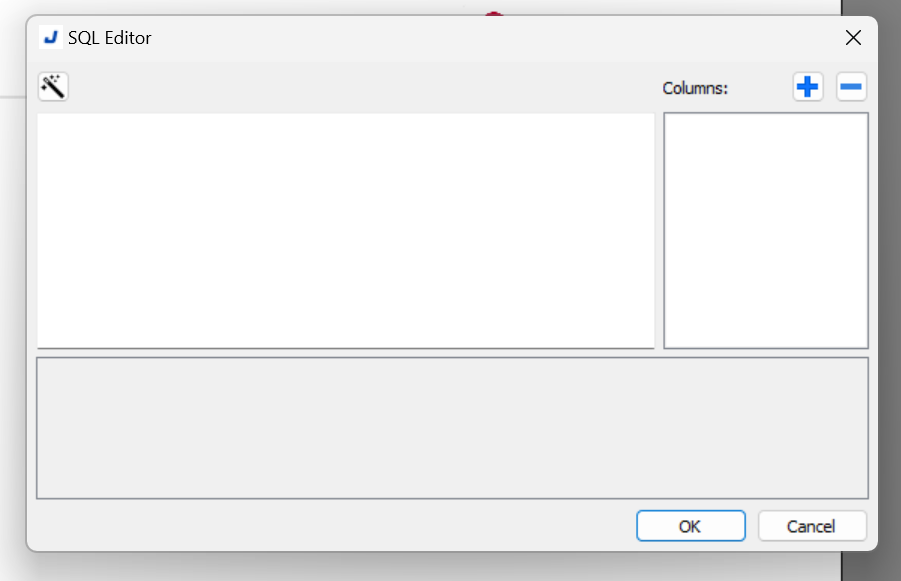
DB Query
Since TableDB sends a Query to the database behind the scenes, you need to enter the Query command. Click the … button for this.

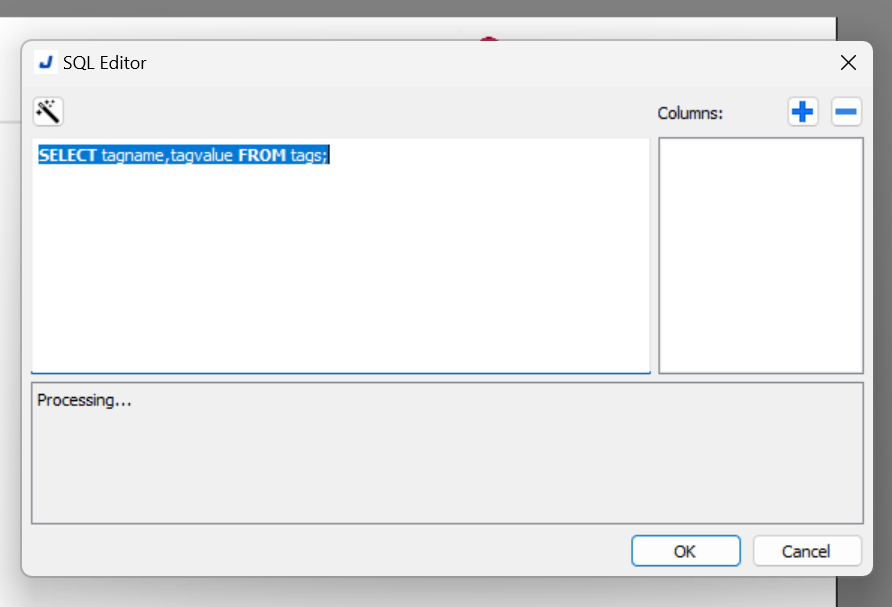
The SQL edit screen will appear.
In the Editor, use the following command to retrieve all tagname and tagvalue values from the tags table.
| SELECT tagname,tagvalue FROM tags; |
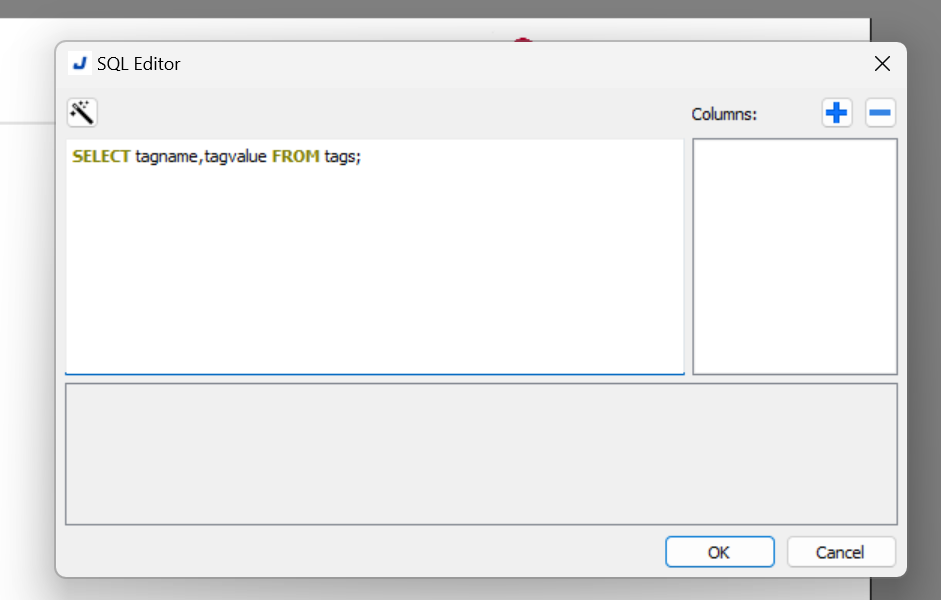
You can validate the query with the button Detect columns in the query.

The message “Processing…” will appear.
Done!If you see the tagname and tagvalue items in Column, it indicates that the command is successful and that the data can be successfully retrieved.
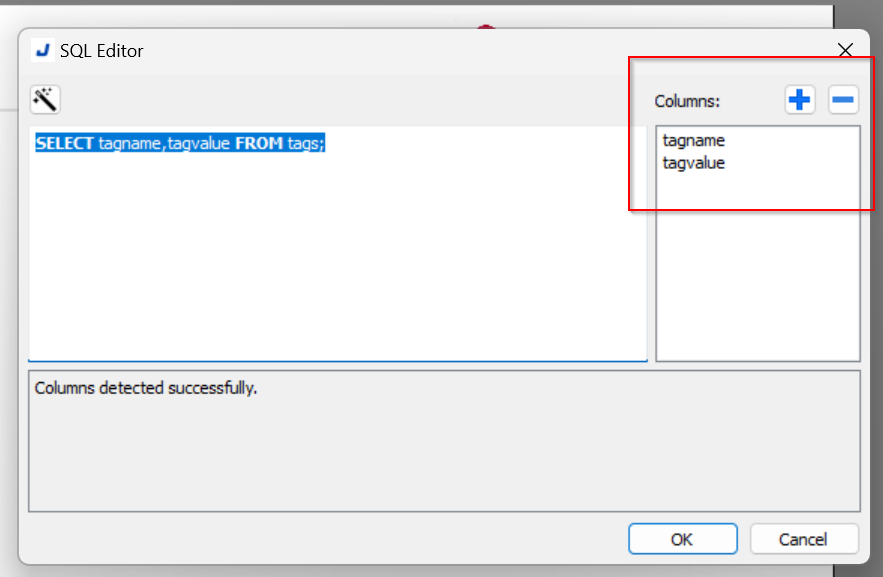
Done!This is OK.

RefreshDBTable
Next, select “ReflreshDBTable” to set up a behavior that triggers an update of the Tags in the Database.
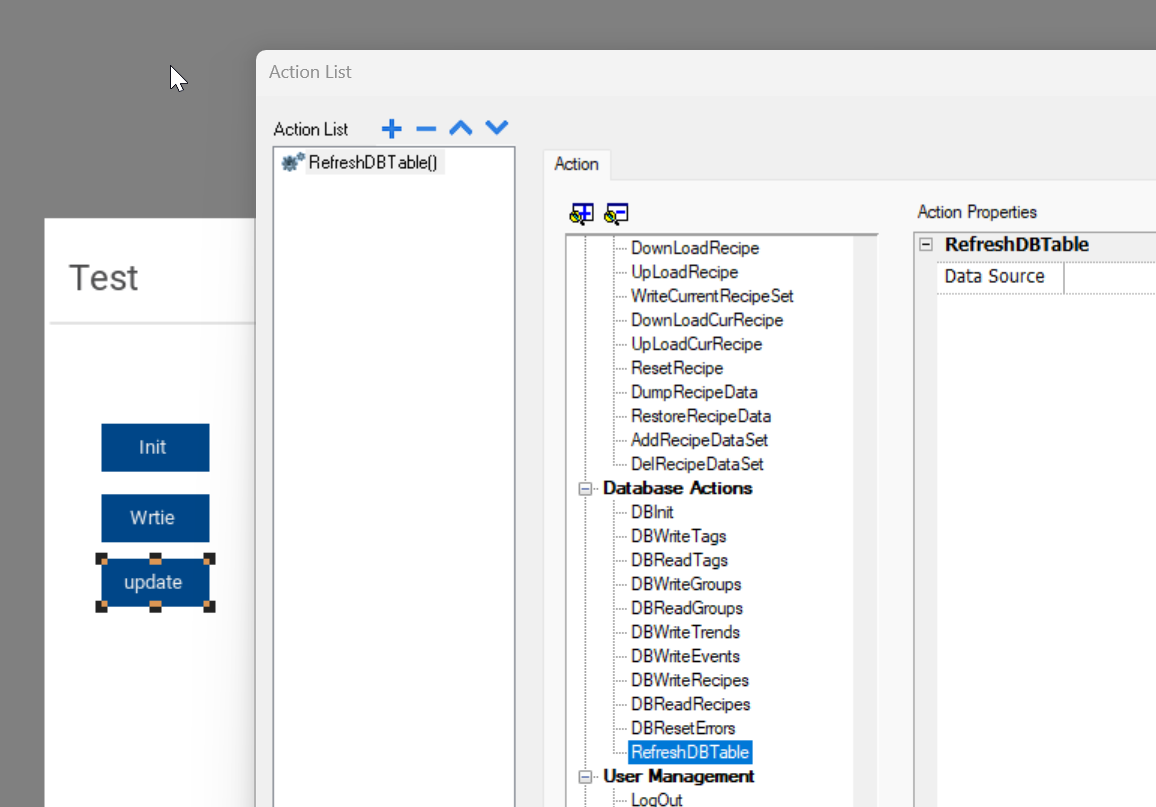
Data Source should be set to the database to be Refreshed.
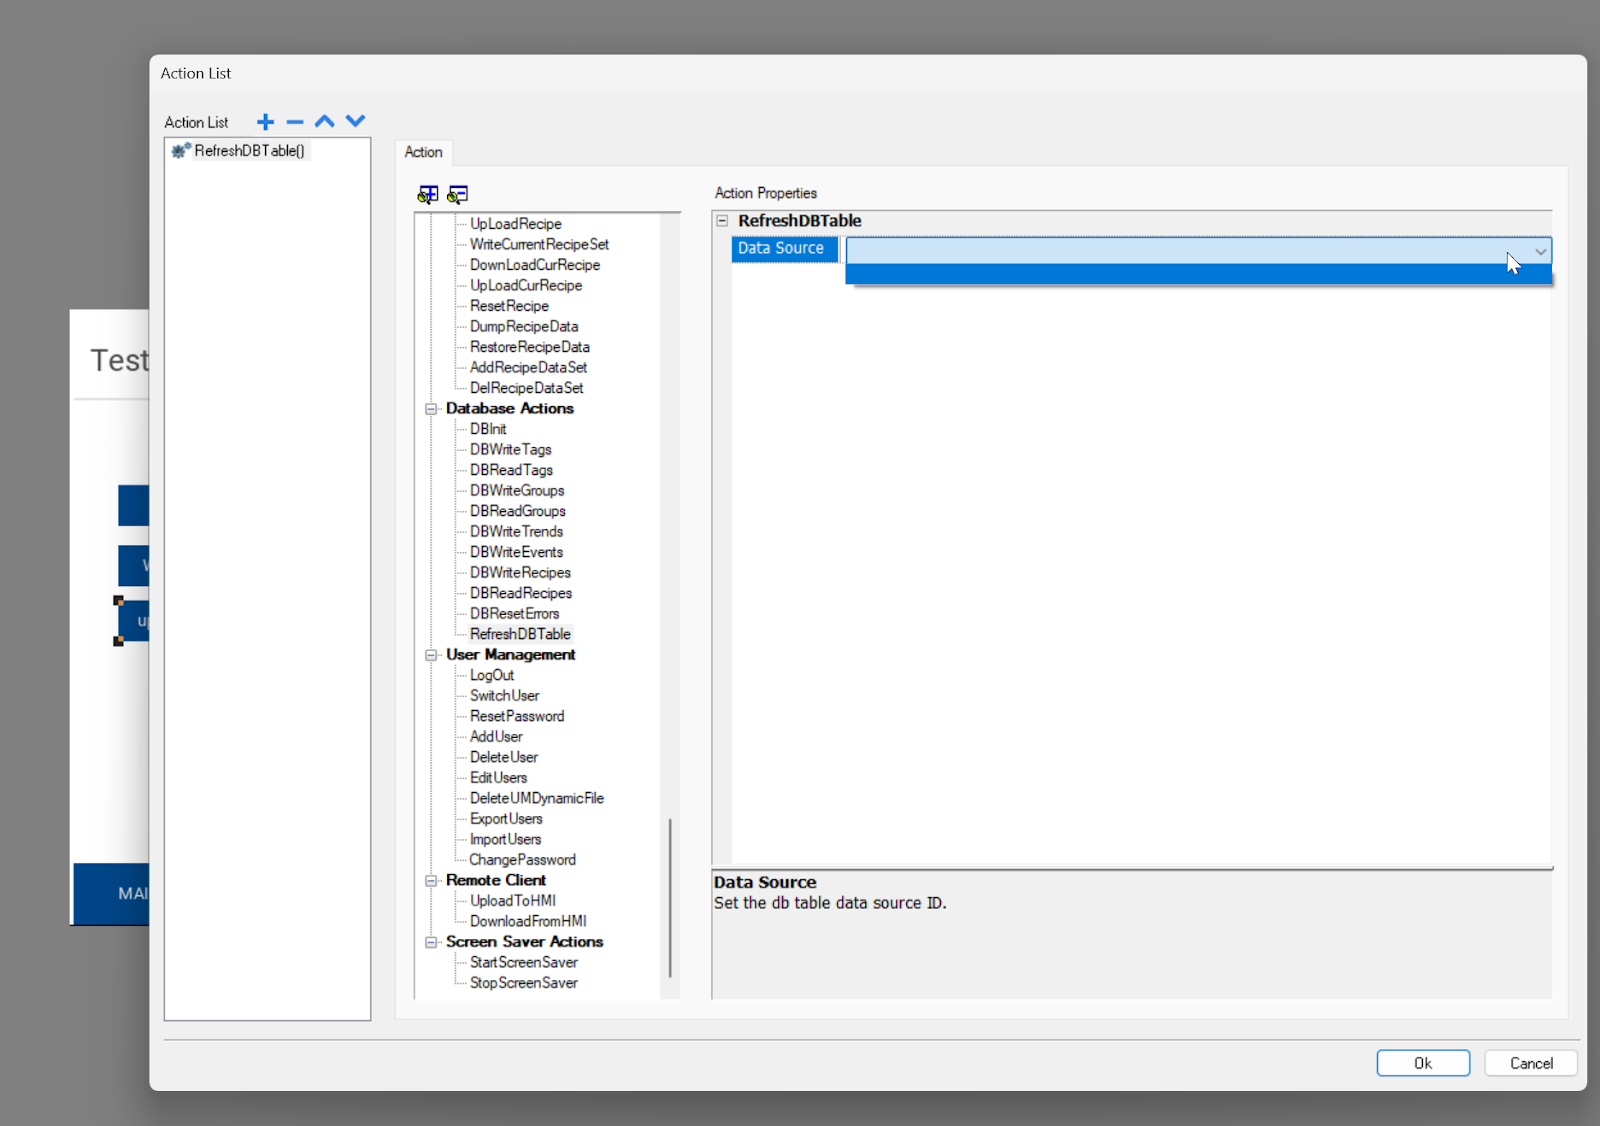
For Data Source, set the DB Table you just added.

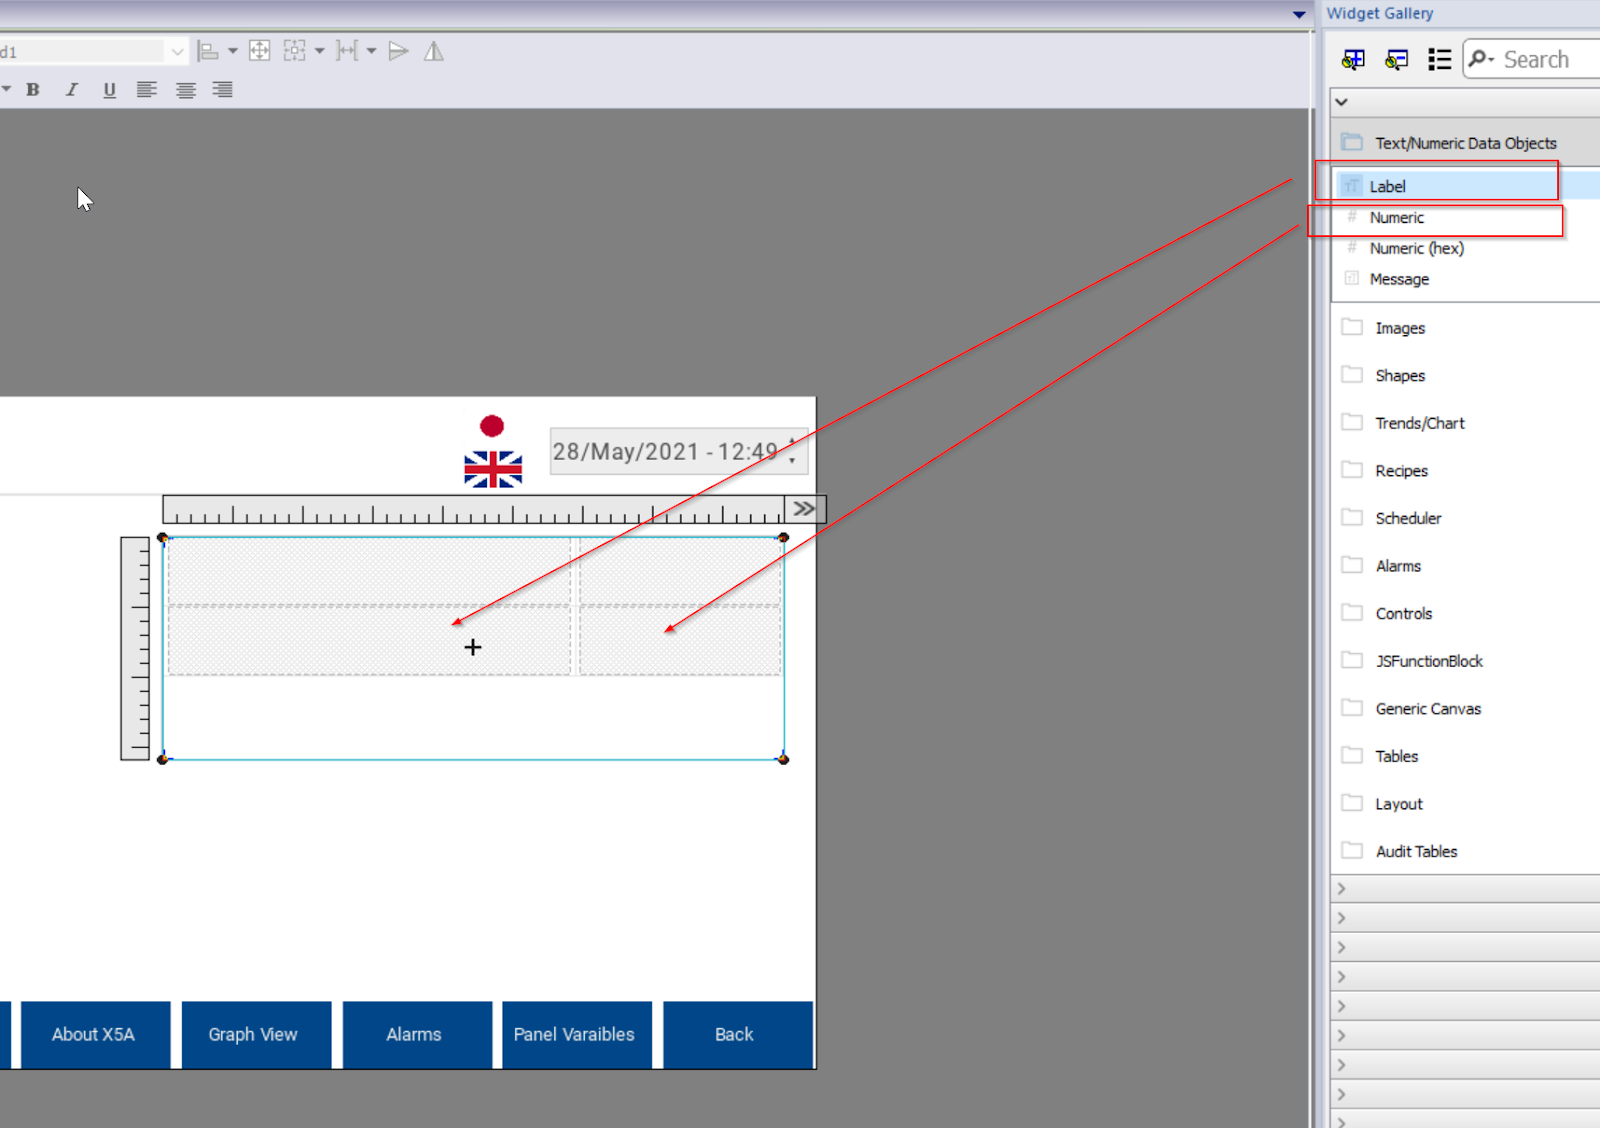
Add table
Now add a Table to display the database items.
Done!Table has been added.

Adjust the Table to a size that is easy to read.

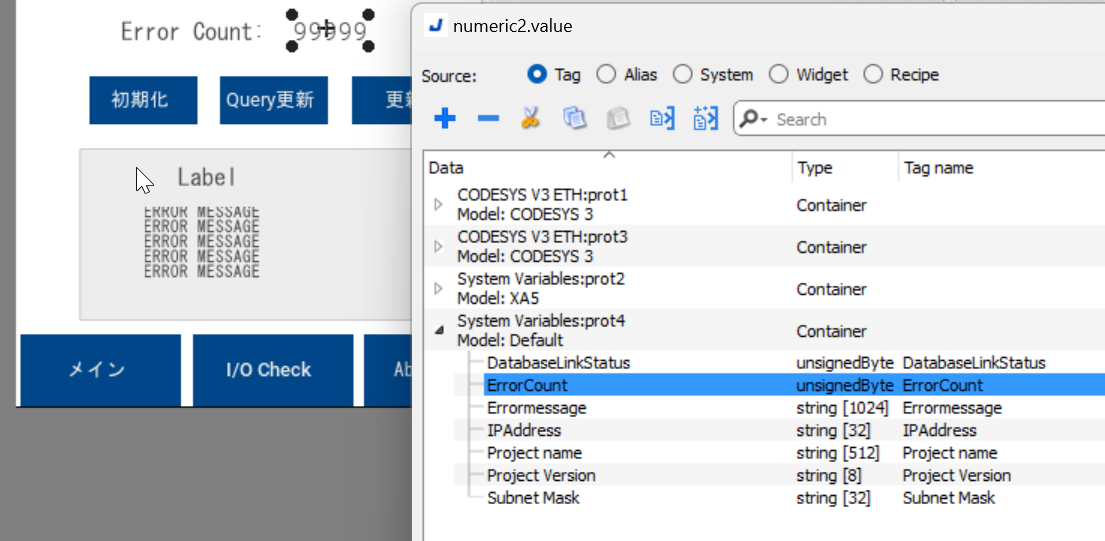
Add Display Item
Add a Label component to display the Tag name and a Numeric component to display the Tag Value.
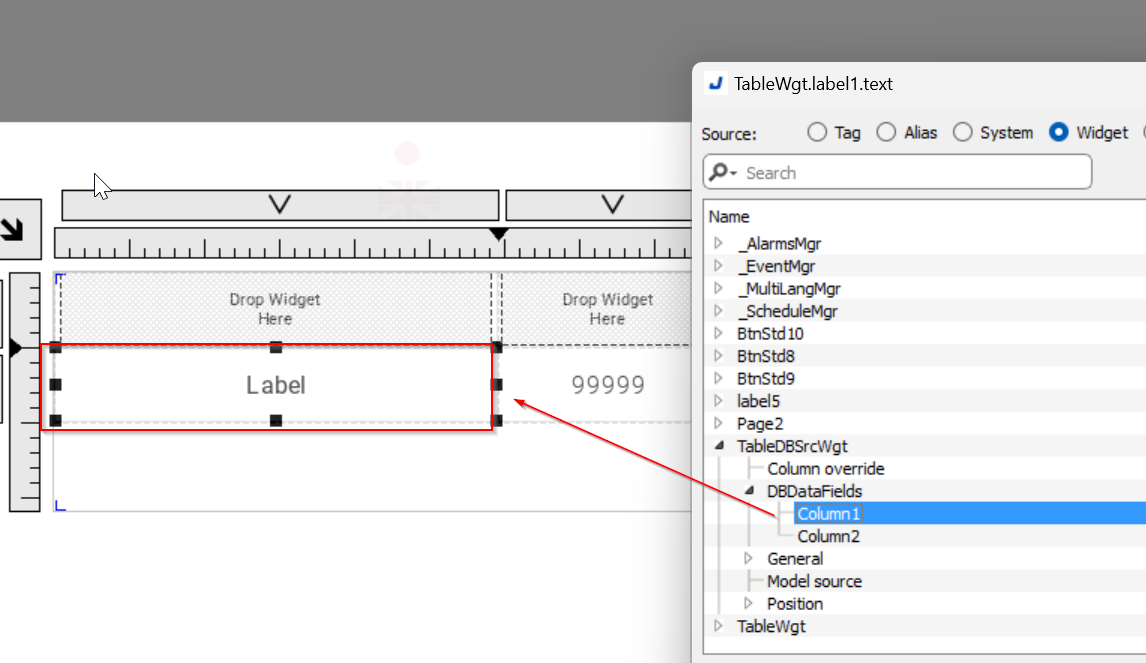
Set TableDBSrcWgt (the database table added in the previous Step) >DBDataFields>Column1 for the Label display item.
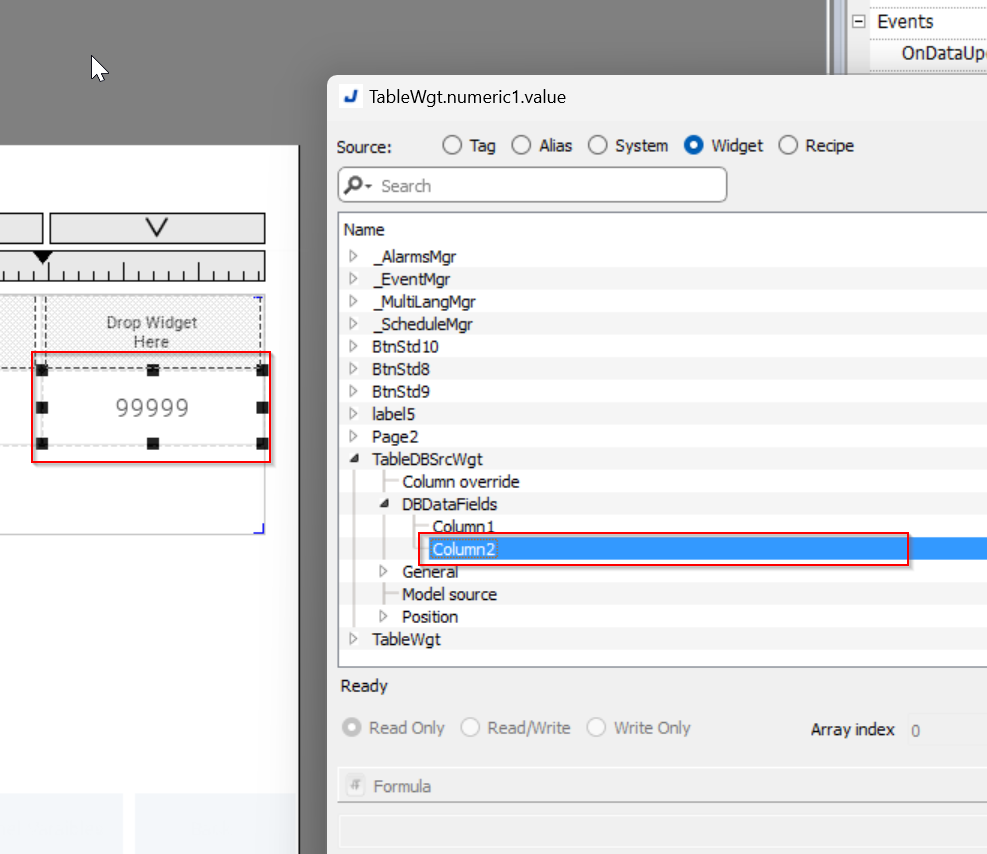
Set TableDBSrcWgt (the database table added in the previous Step) >DBDataFields>Colum2 for the Numeric display items.
Errormessage is set for Error Message string display.
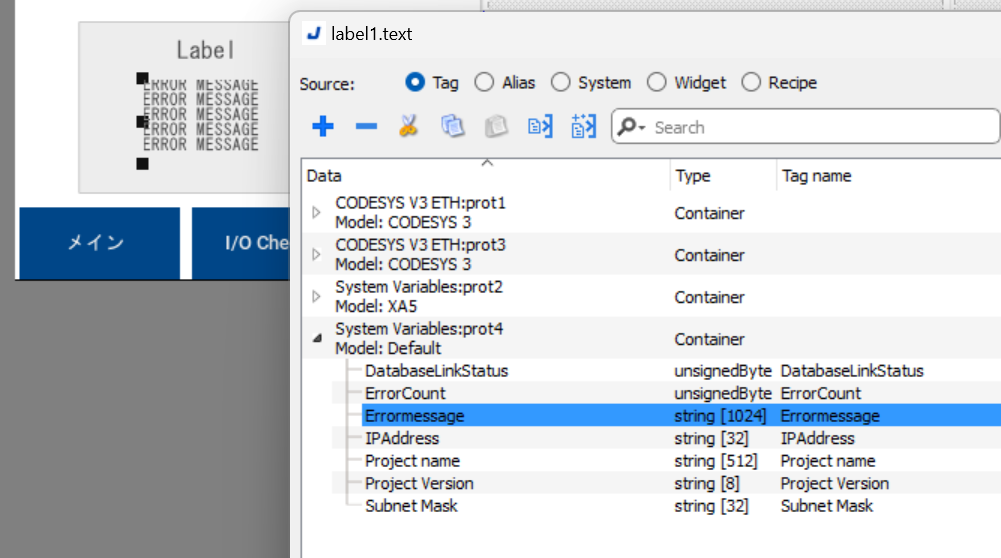
Set ErrorCount to the Error Counter display item.
Add DB Status Message
Add a Message Text component that displays the string corresponding to the number.

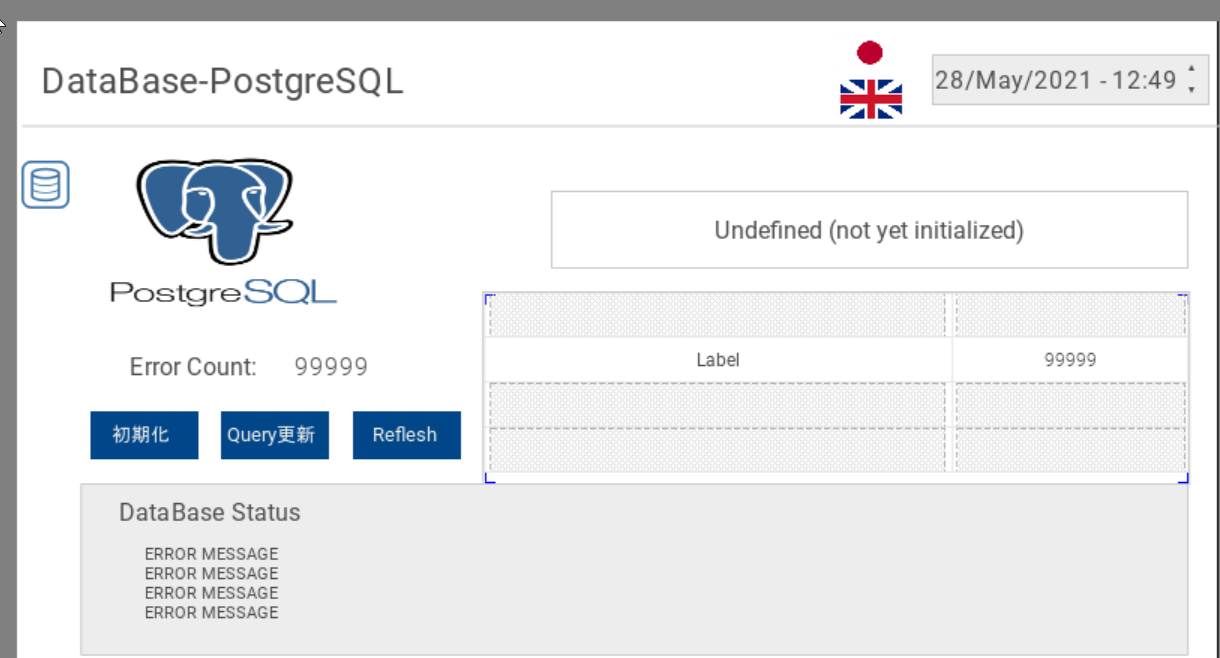
Finally Screen
This is the last Screen.
Configure Scheduler
Next, use JMobile’s Scheduler function to send a Query to the database on a periodic basis.
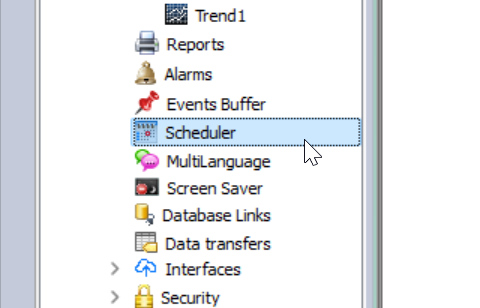
The Scheduler screen will appear. Add a new Schedule with the + button.
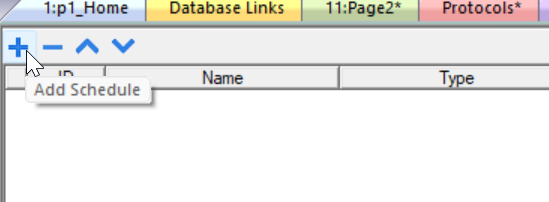
A new Schedule has been added.

Click the … button in the Schedule Field to set the tasks to be scheduled.

The Schedule setup screen will appear.
Set Type=Every for cyclic execution.
If Time=00:00:01 is set, it will be executed in a cycle of 1s.
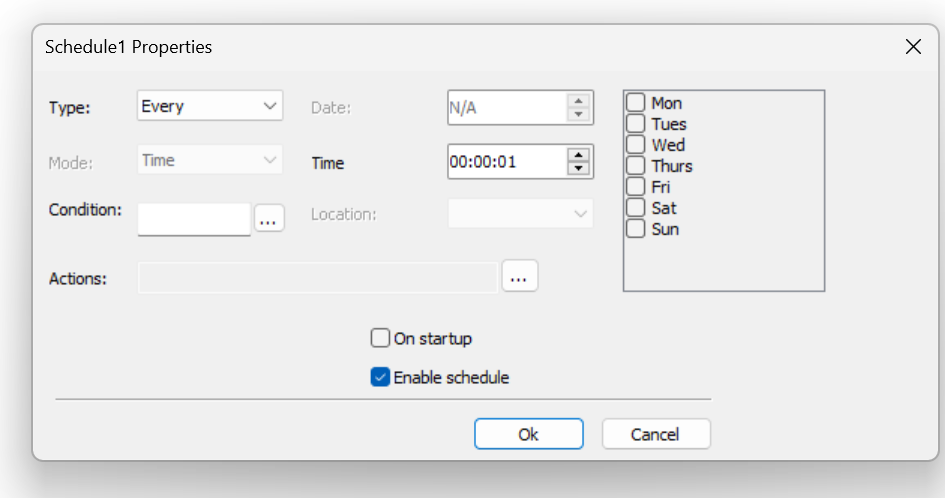
The next step is to set the Action to be executed in cycles.

Query can be sent to database in 1s cycle by setting Action of DBWriteTag.

The Action of DBWriteTag is the same as the behavior set in the previous Table.

Result
From EXOR Display
Variables in PLC Runtime have been written to the database.

And now Status is OnLine(Ready).

The operation is as follows

From Terminal
Use the following command to switch xa5 Database.
| postgres=# \c xa5 You are now connected to database “xa5” as user “postgres”. |
The following command will retrieve the tagname,tagvalue entries.
| xa5=# SELECT tagname,tagvalue FROM tags; tagname | tagvalue ———————————————+———- Application/GVL_FactoryIO/iFactoryIORunning | 1 Application/GVL_FactoryIO/qCounter1 | 137 Application/GVL_FactoryIO/qCounter2 | 117 Application/GVL_FactoryIO/qCounter3 | 87 (4 rows) |
