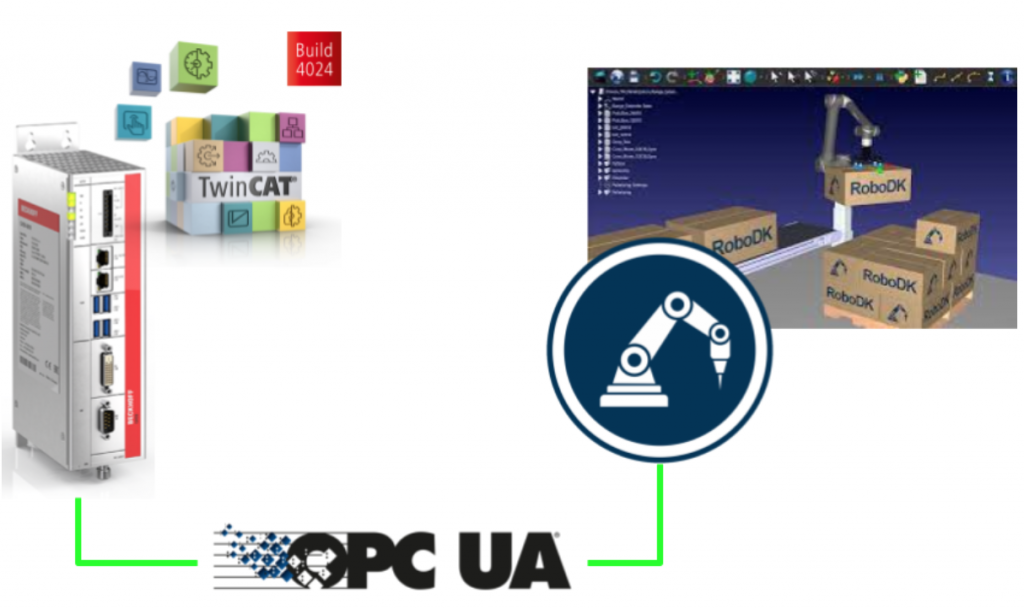
この記事ではRoboDKからOPC UA Serverを立ち上げ、Beckhoff TwinCAT3 TF6100からOPC UA Clientを作ってサーバーにアクセスします。TwinCATではOPC UAのServerアクセスに対して自動でOPC UA Methodや変数を生成でき、非常に便利な機能は揃えています。
よろしくおねがいします。
RoboDK Side
Download and Install it
下記のLinkからOPC UA Server/Client Plug-inをDownloadできます。
https://eu.robodk.com/library-addins/?RDK&

OPC-UA を選択し>”Install and Open in RoboDK”をクリックすれば自動的にDownloadとPluginをインストールできます。

Popupが表示され”RoboDKを開く”でRoboDKアプリケーションを起動します。

Package Installerが表示され”Install” ButtonからInstallationを開始します。

“Loading finished”のメッセージが表示されれば、OPC UA Pluginが導入完了です。

Activation
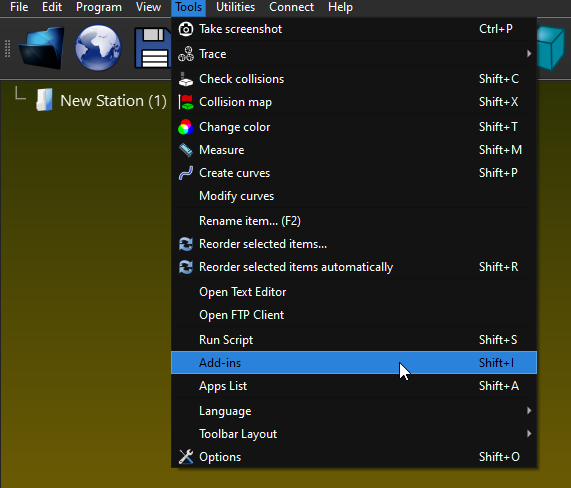
次はOPC UA Server 機能を有効にします。Tools>Add-insをクリックします。
OPC-UA.dllをダブルクリックしOPC-UA機能を有効にします。

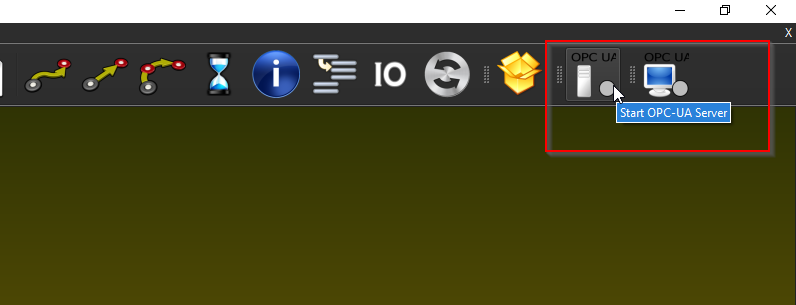
LoadedのLEDが赤から緑になります。

ToolbarではOPC-UA 関連のボタンが増えました。
OPC-UA のMenuボタンも表示されます。

OPC UA>OPC-UA SettingsでOPC UAの設定を行います。

OPC UAの設定画面は左側に表示されます。
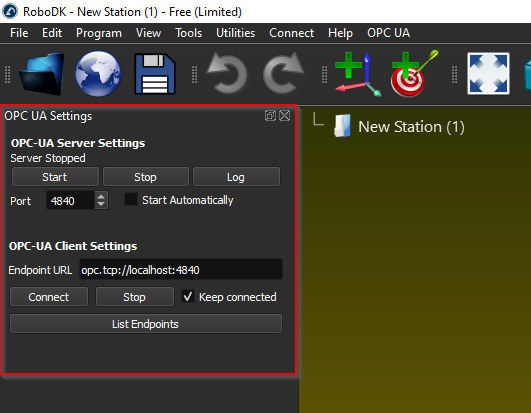
OPC UA Serverを立ち上げるときのPortを設定し、”Start”ボタンでOPC UA Serverを起動します。

Done!If you see a “RoboDK’s OPC UA server running on port XXXX”, the OPC UA server that integrated in RoboDK is started.
P.S. Please make sure the OPC UA port configured in the previous, is enabled in the security settings .
Done!“RoboDK’s OPC UA server running on port XXXX”が表示されれば、OPC UA Serverが正常に立ち上げられます。

Create stations
Here is the station that I created in this tutorial.

Test it First
Here is the robot program.
Implementation
For the first Implementation, I will show you how to test it with UaExpert.

Add Server
Launch the UaExpert and Click the “+” Button to Add the RoboDK OPC UA Server.
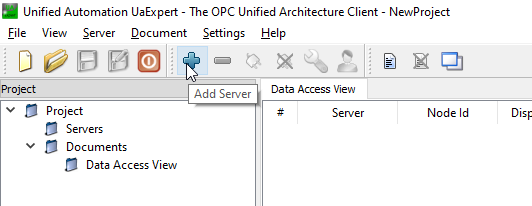
Expand the Custom Discovery>click the <Double click to Add Server..> to Add the RoboDK OPC UA Server.

Enter the URL of OPC UA, opc.tcp://127.0.0.1:48440 in configured in the previous step.
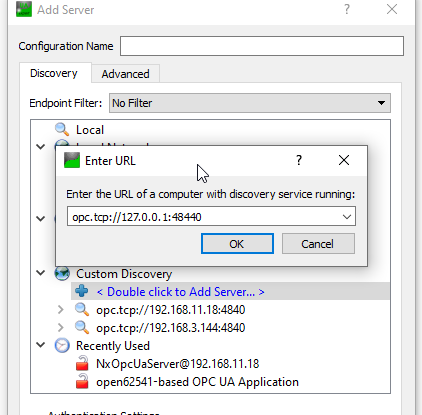
Connect the OPC UA Server with “None” Security.
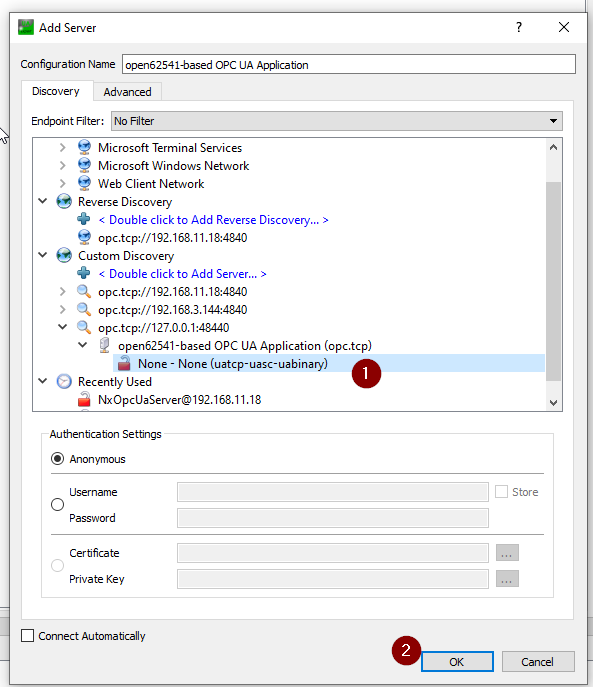
Done! Server is configured.

Connecnt it
Now we can connect the RoboDK OPC UA Server from UaExpert.

Great! you can see the Node and Method inside now.
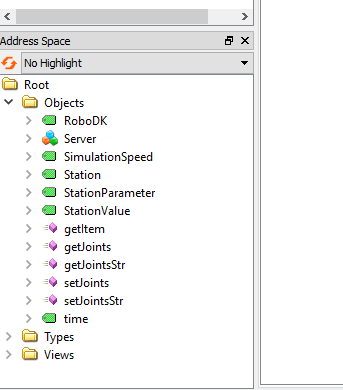
Nodes
There are some nodes inside the OPC UA server to let you receive some basic information about your station.
RoboDK
RoboDK node is a Node that provides the Actual Version of your RoboDK Software.

RoboDK 64 Bit v5.5.3.23031 is used in my OS.

SimulationSpeed
Simulation Speed is a node that shows the actual Simulation Speed and allows the user to overwrite the current Simulation Speed setpoint.

The node value is referenced to the Slide bar of simulation speed.
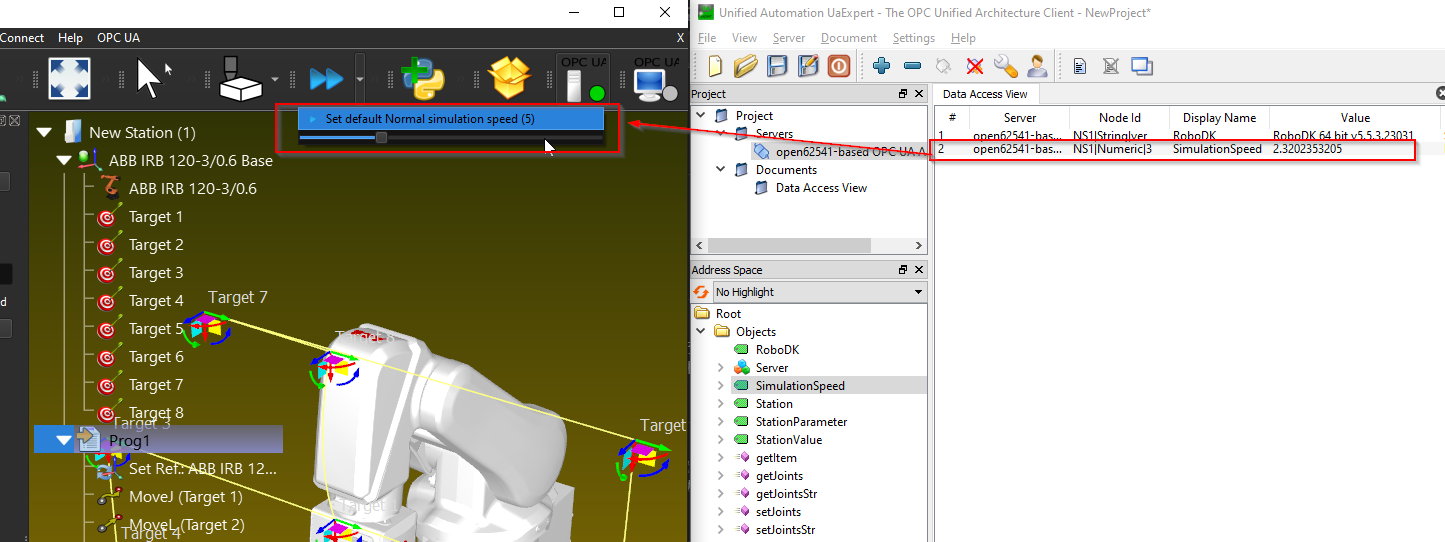
As you see in the below gif, The current Simulation can be read from this node.
And also, the user can overwrite the simulation speed.
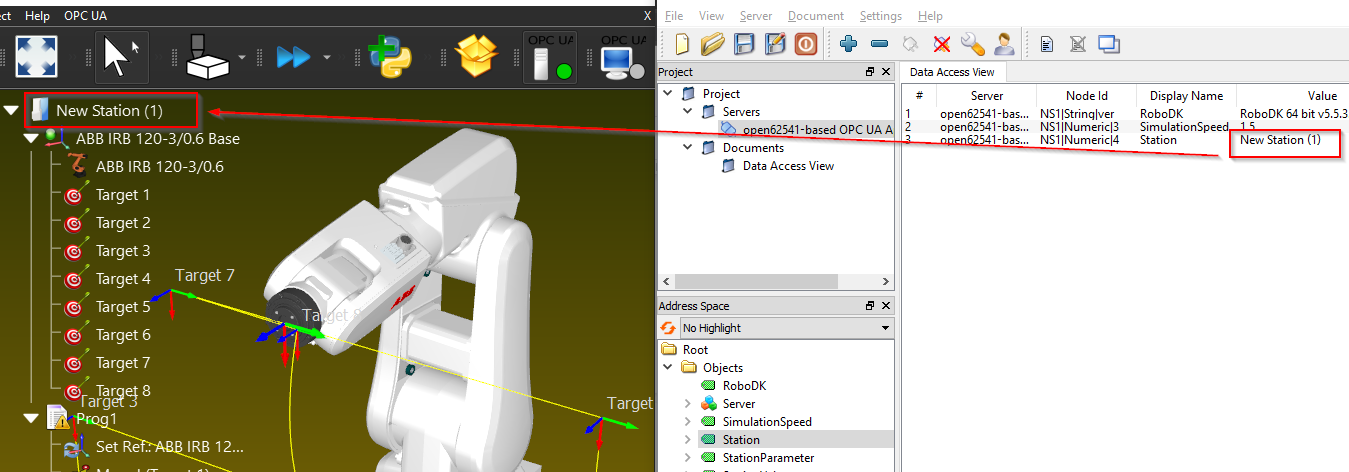
Station
Station Node is a node that allows the user to get the Station name.

As you see below, the Station node is referenced to your “Station Name” in RoboDK.
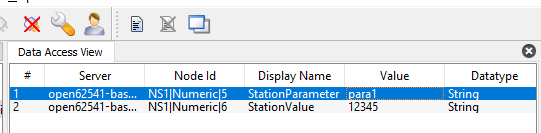
Station parameters/Station Value
StationParameter and StationValue is a pair set Node that allows the user to access the Parameter inside your Station.The RoboDK OPC UA Server will continuously monitor the actual value of “StationParameter” and return the Value of that “StationParameter”, from the StationValue Node.
P.S. Empty String is returned if the Station Parameter is not found.

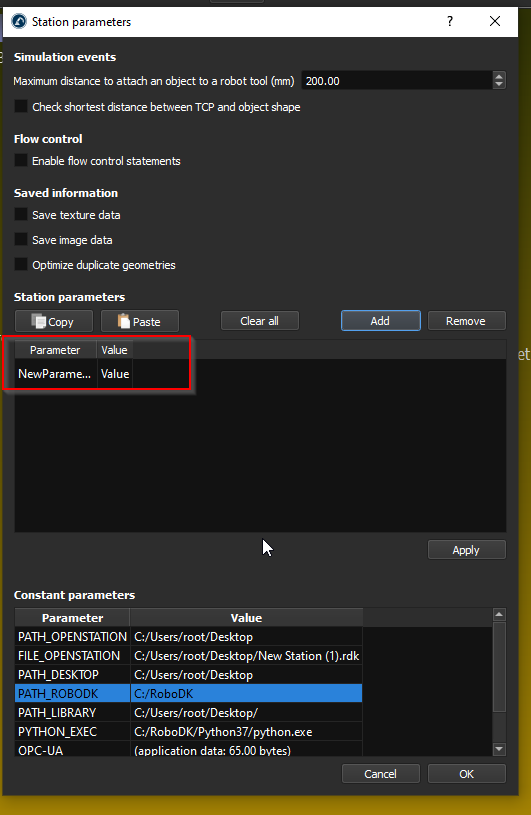
You can view your Station parameters by Right Click your RoboDK Station>Station parameters.
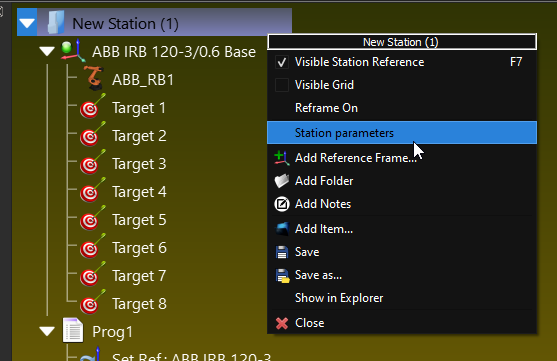
In the Constant parameters field, you can see the default station parameters and the value.
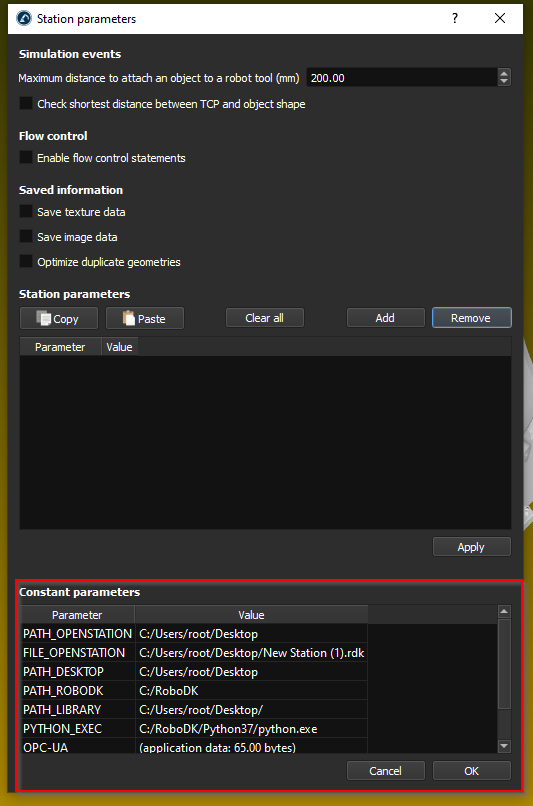
Station parameter is referenced to the “Parameter” field and Station Value is referenced to the “Value” field.

And also, we can create our own Parameters by clicking the “Add” Button.

A new Station parameter is added.
Enter your Parameter name and the Parameter Value, then press Apply to save it.
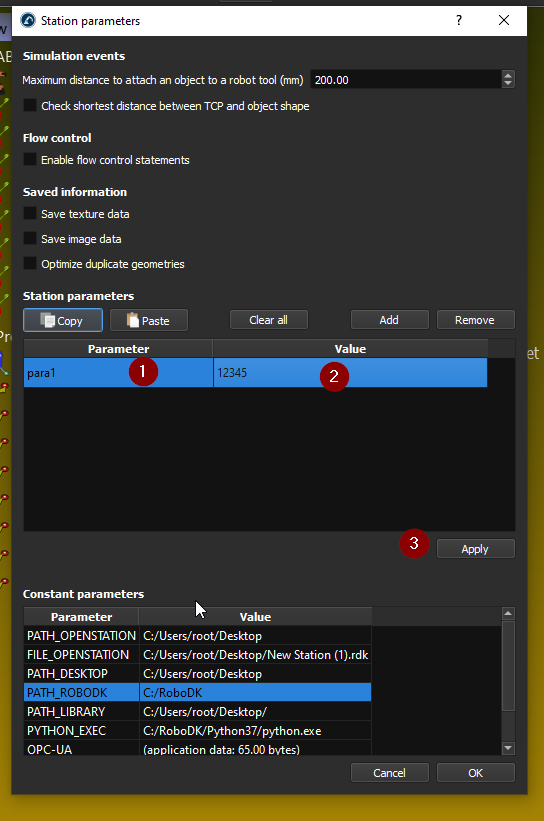
You can get your own station parameter also.
time
time is a node to allow the user to get the current time of the RoboDK Station.
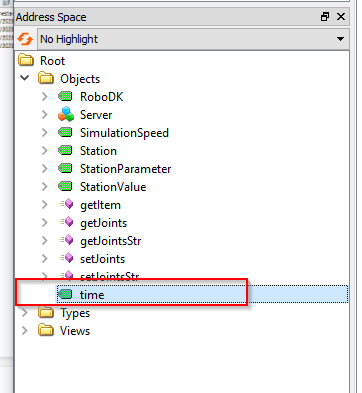
A value with DataTime format is returned.

And this Node is updated continually.

Methods
RoboDK OPC UA Server is also provided with some methods to allow the user to access the RoboDK station ‘s Data dynamically.
We can just right click the Method>Call to execute the method.
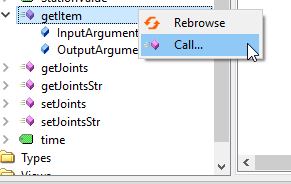
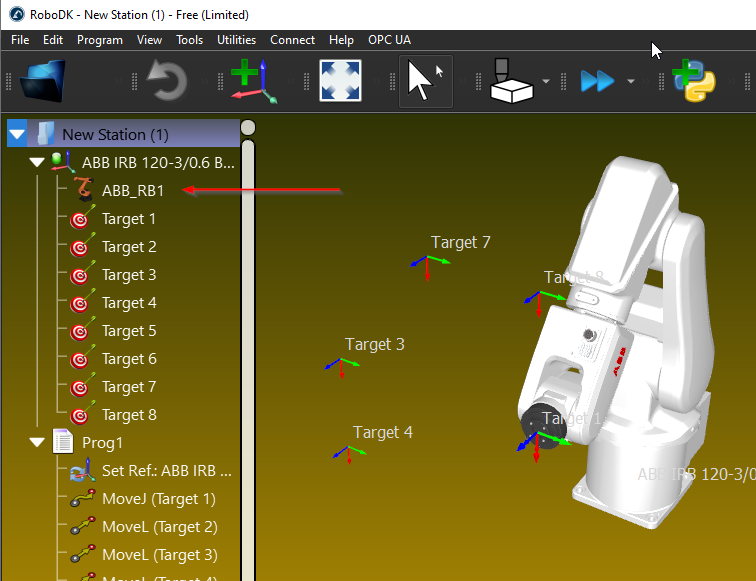
getItem
getItem is a Method that allows the user to get the pointer of your Item.
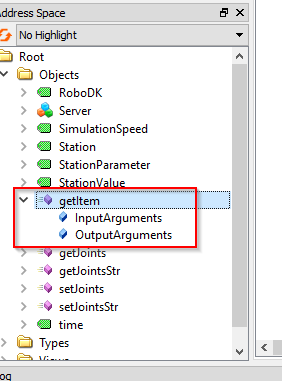
For the InputArguments, Device Name is required, you can image the Device Name is your Station Name,Robot Name..etc. And Item ID is the OutputArguments that return the Pointer of that Device.

In this Example, I received the Item ID (Pointer) of my ABB Robot that is named as “ABB_RB1”.

0 is returned if the Item Name is invalid or does not exist inside your station.

getJoints
getJonits is a method that allows the user to get the joint value of the robot from the station, based on the Item ID.
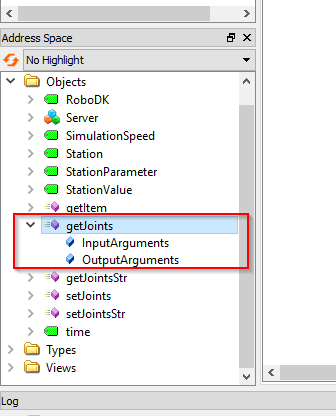
The Item ID is the pointer value of your Item, and you can get it from getItem() Method.

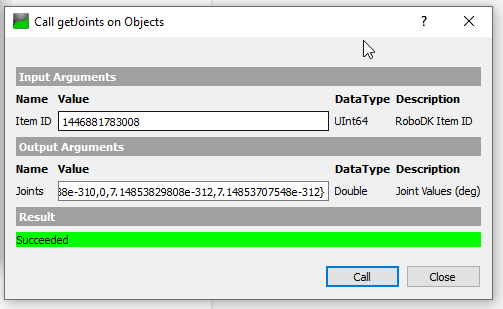
We will get the Item ID with this “ABB_RB1” Item name, and a UInt64 value is returned.
Joints value is returned while passing the Item ID in the method that we got in the previous.
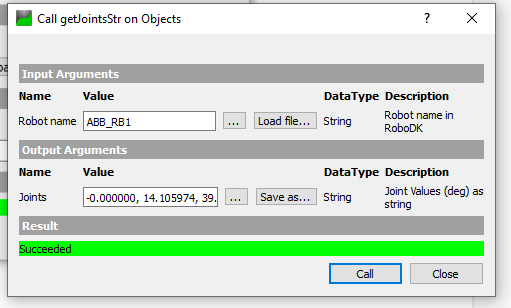
getJointsStr
getJointsStr is a method that allows the user to get the Joints value based on a String Value.
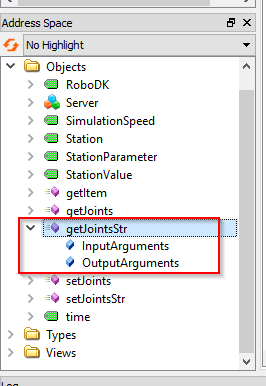
We can pass the Robot name(String) in this method.

In My Station, ABB_RB1 is my Robot name.
We can just pass “ABB_RB1” in the Robot name parameter and call the method – The joint value in String format is returned.
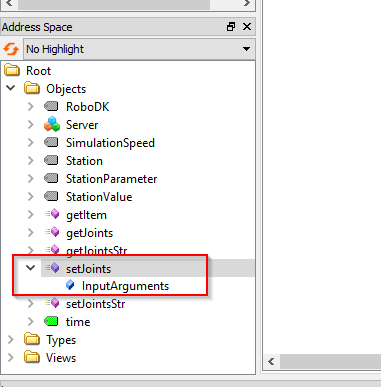
setJoints
Here is the Method to allow the user to setJoint value via the array.
setJointsStr
setJointsStr is a method that allows the user to set the Joints value of the Robot, based on a String Value.
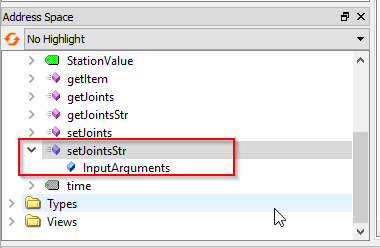
In the Robot name, ABB_RB1 is passed, and we can just pass a string with the joint value in the Joints parameter.
For example:-0.000000,0.000000,-0.000000,-0.000000,-0.0,-0.000000

Here is a gif to show you the operation of this method.

Implementation-2
Add PLC
右クリック>Add New Itemします。
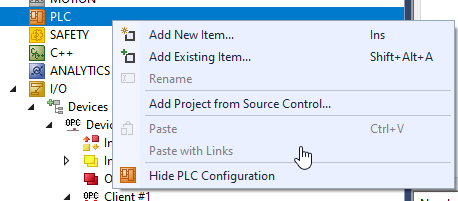
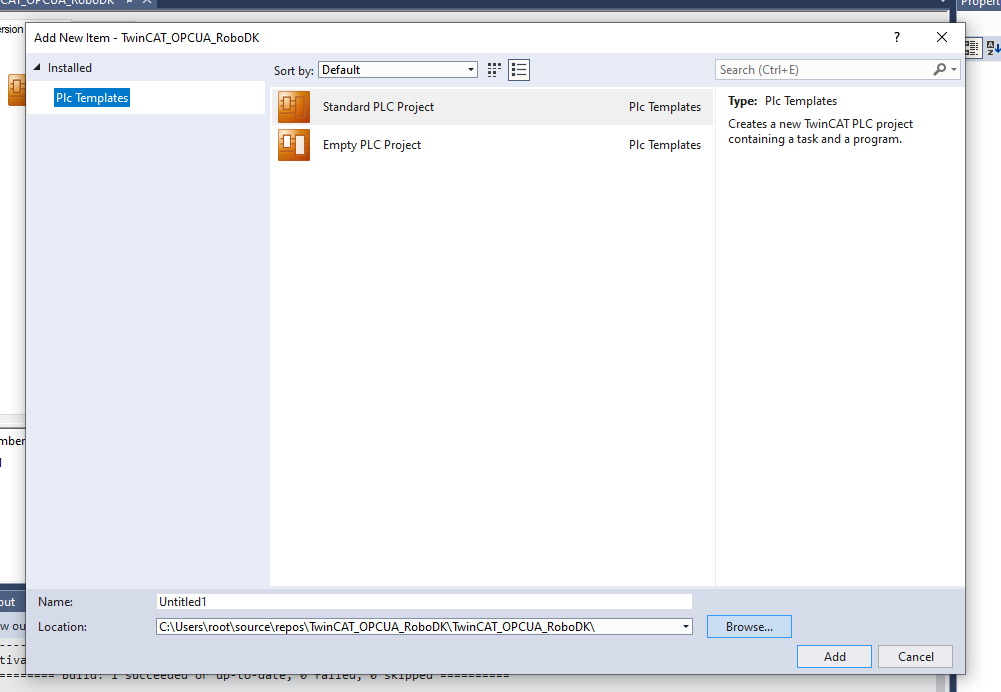
”Standard PLC Project”を選び>AddでPLC Projectを追加します。
Add Virtual OPC UA Devices
次はOPC UA Clientを追加します。Devices>右クリック>Add New Itemします。
OPC UA>Virtual OPC UA Deviceを選び>OKします。
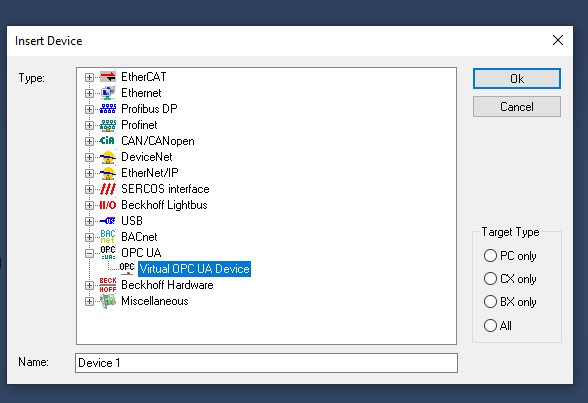
Done!OPC UA Virtualが追加されました。

Add OPC UA Client
RoboDKのOPC UA Serverにアクセスするため、OPC UA Clientを追加します。
Deviceを選択し>右クリック>Add New Itemします。
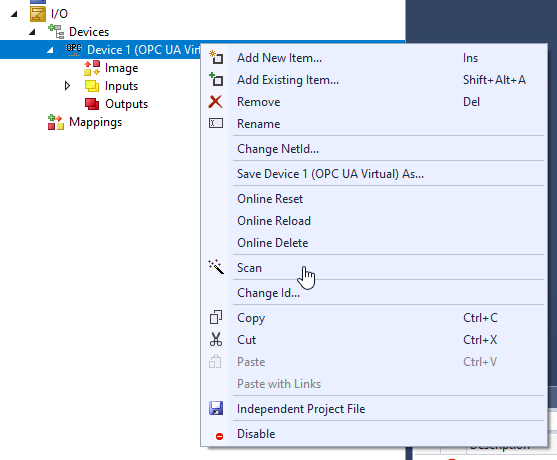
“OPC UA Client(Module)” を選び>Okします。

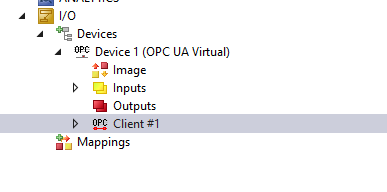
OPC UA Clientが作成されました。
Configure the Endpoint
OPC UA ClientでSettings Tabを開きます。Select Endpointをクリックし接続するOPC UA Serverの設定を行います。
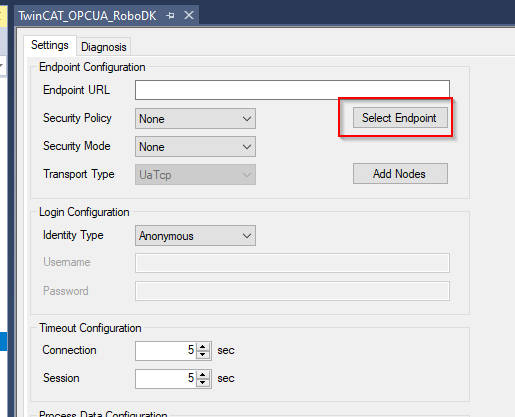
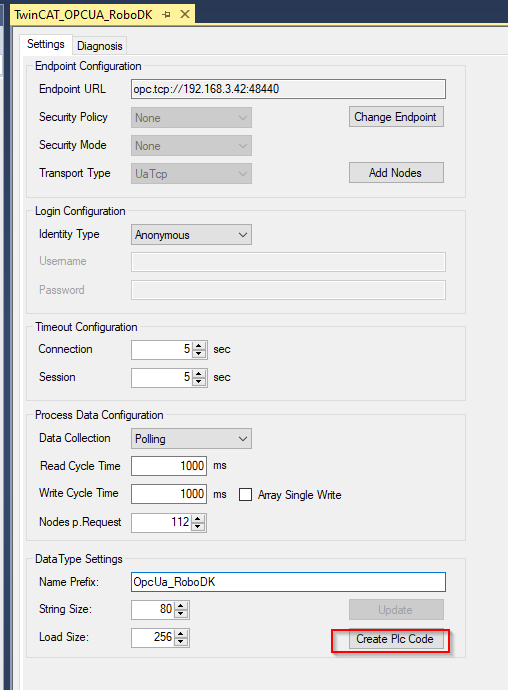
RoboDK のOPC UA Server URLを入力し、Updateします。

Add the Method
Add NodesボタンからOPC UA ServerにあるNodeを検索や追加します。
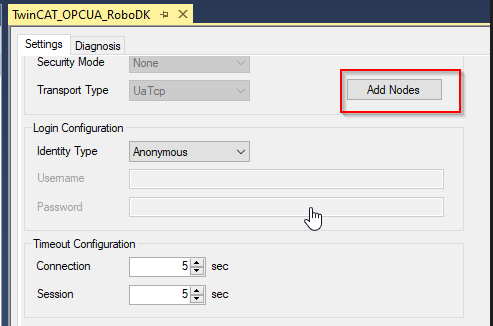
もしTwinCATとOPC UA Serverの接続が確立されておけば、該当するOPCUA Serverの中身を一覧できます。

すべてのMethodを選び>Okします。

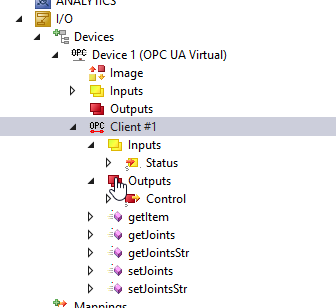
Done!MethodはConfigurationの中に追加されました。
Auto Create the Method in PLC
最初に説明しましたが、TwinCATのOPC UA プログラム自動作成機能は非常に便利です。
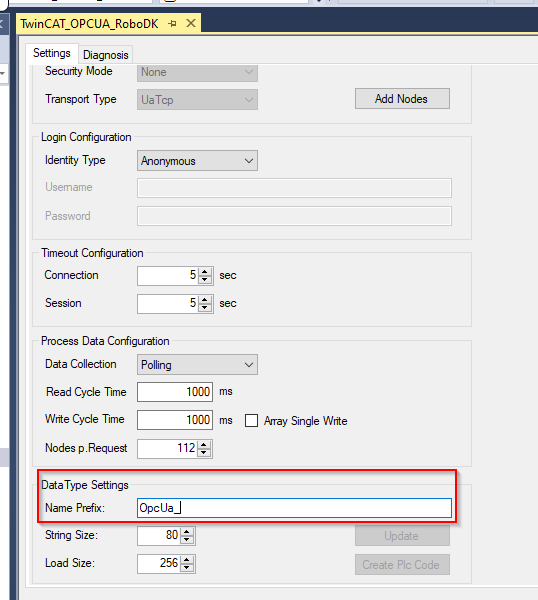
まずはPrefixを設定しましょう。それはMethodや自動作成された命名ルールになります。
今回の記事ではOpcUa_にします。
”Create Plc Code”をクリックしTwinCAT から自動PLC Codeを作成します。
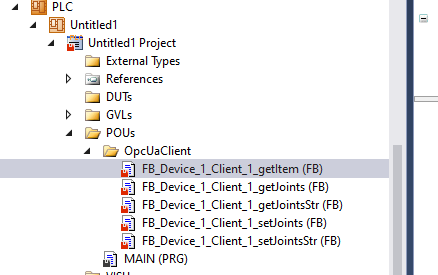
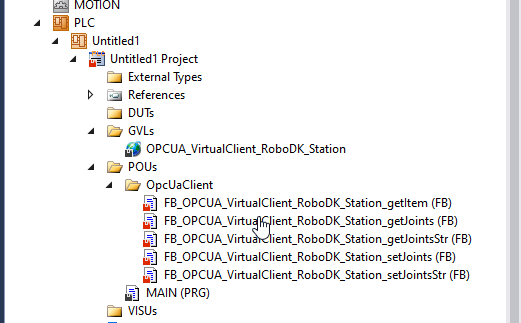
Done!OpcUaClient Folderが作成され、中にRoboDK のOPC UA MethodもIEC61131-3 Function Block として自動作成されました。
Done! OpcUaClient
Naming Rules
こちらは命名ルールです。
FB_”OPC UA Virtual Device name” + “OPC UA Client Name” +”Method Name”
Create the method again
では先の命名ルールから実際にわかりやすい名前をもう一度変更しましょう。
OPCUA_VirtualClient_RoboDK_Station
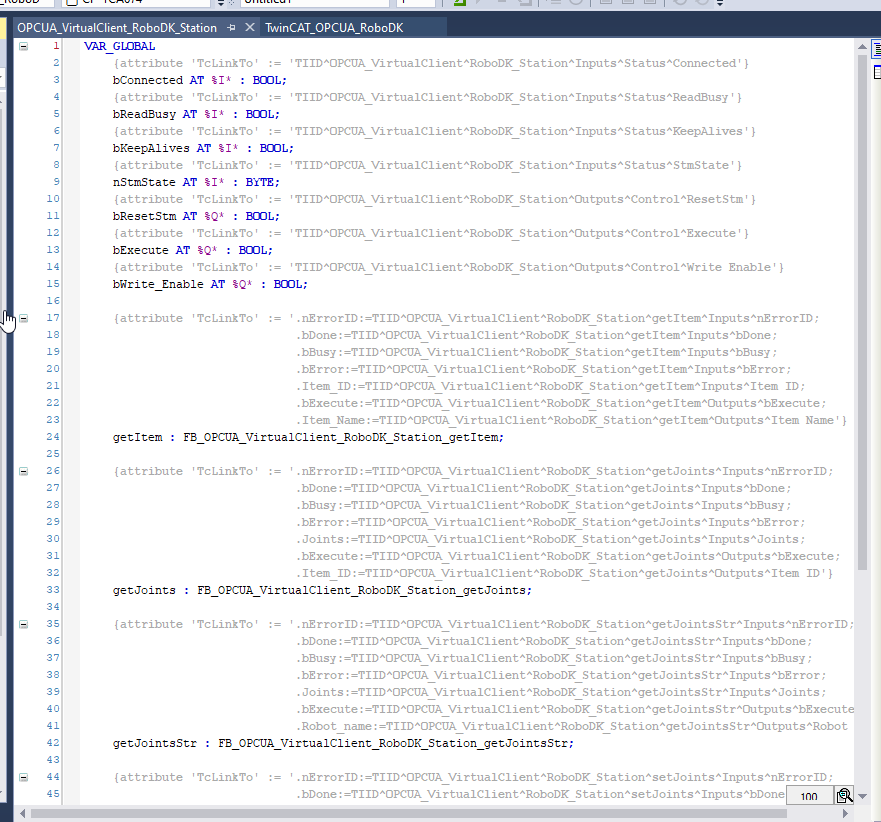
もちろん、Function BlockだけではなくGVLも作成され、中にOPC UAClientを使用するにあたって必要な変数まで定義されました。
Function Blocks
こちらは自動作成されたFunction Blockの中身になります。

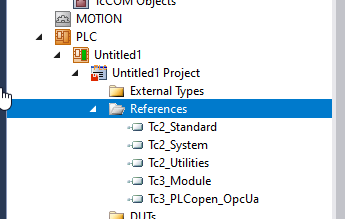
Add Library
次はTc2 Utitities Libraryをプロジェクトに追加します。
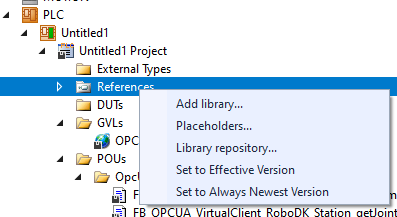
References > Add Libraryします。
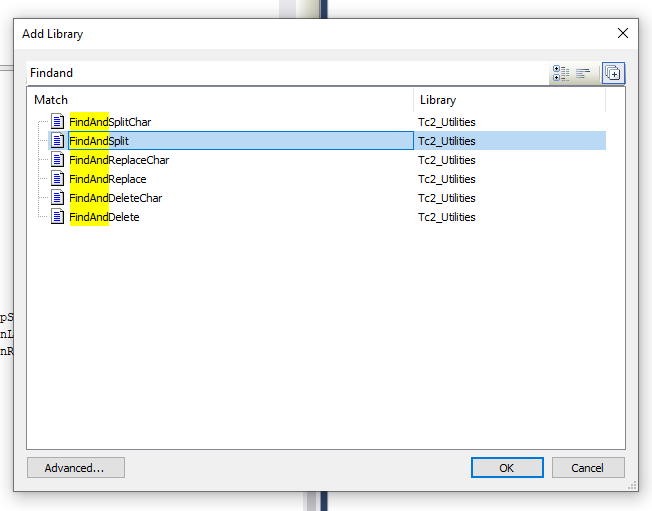
FindAndSpiltかTc2_Utititiesを検索しプロジェクトにImportしてください。そのTc2_UtititiesにあるFindAndSpilt関数を使用し実数の配列を文字列に変換し、setJointsStr()を使ってJoint ValueをRoboDKに送信します。
MAIN Program
Here is the main program to access the RoboDK OPC UA Server.
こちらはTwinCAT側でRoboDKのOPC UA ServerにアクセスやMethodを呼び出すためのプログラムです。
VAR
| PROGRAM MAIN VAR bConnected :BOOL; StationPointer :DINT; iStep :INT; bStart :BOOL;; i :INT; TON :TON; bReset :BOOL; bWrite :BOOL; TON2 :TON; bShow :BOOL:=TRUE; bVis :BOOL:=True; END_VAR VAR Robot_name :STRING(80):=’ABB_RB1′; Item_ID :ULINT; arrJoints :ARRAY[0..11]OF LREAL; strJoints :STRING(80):=”; arrJointsFromStr:ARRAY[1..11]OF LREAL; sSeparator :STRING(1) := ‘,’; arrJointsCommand:ARRAY[1..11]OF LREAL; strJointsCommand:STRING(80); END_VAR VAR CONSTANT cStepWaitCmd :INT:=0; cStepInit :INT:=5; cStepGetItem :INT:=10; cStepGetItemReset :INT:=20; cStepGetItemError :INT:=990; cStepGetJoints :INT:=30; cStepGetJointsReset :INT:=40; cStepGetJointsError :INT:=991; cStepGetJointsStr :INT:=50; cStepGetJointsStrReset :INT:=60; cStepGetJointsStrError :INT:=992; cStepSetJointStrDelay :INT:=69; cStepSetJointsStr :INT:=70; cStepSetJointsStrReset :INT:=80; cStepSetJointsStrError :INT:=993; cStepEnd :INT:=300; cStepWaitReset :INT:=999; END_VAR VAR aSplit : ARRAY[1..11] OF STRING(80); bResultSplit : BOOL; debug :BOOL; URL :STRING:=’http://192.168.3.42:8091′; END_VAR |
PRG
Here is the Step Flow:
- bStart コマンド待ち
- すべての関数や変数を初期化します。
- getItem() を使用しRoboDKのロボットObject Pointer値を取得します。
- getJoints()を使用しRoboDKのロボットJoints値を取得します。
- getJointsStr()を使用しRobotDKのロボットのJoints値(文字列)を取得します。
- bwrite is true or notbwriteがTrueしているかをCheckします。
- Trueなら、setJointsStr()を使用し新しいJoint値を書き込みます。
- Falseなら、Step3に戻ります。
- Step3に戻ります。
| bConnected:=OPCUA_VirtualClient_RoboDK_Station.bConnected; CASE iStep OF cStepWaitCmd: IF bStart THEN iStep:=cStepInit; bStart:=FALSE; END_IF cStepInit: StationPointer:=0; FOR i :=1 TO 11 DO arrJoints[i]:=0.0; arrJointsFromStr[i]:=0.0; aSplit[i]:=”; END_FOR IF NOT OPCUA_VirtualClient_RoboDK_Station.getItem.bBusy AND NOT OPCUA_VirtualClient_RoboDK_Station.getItem.bError AND NOT OPCUA_VirtualClient_RoboDK_Station.getJoints.bBusy AND NOT OPCUA_VirtualClient_RoboDK_Station.getJoints.bError AND NOT OPCUA_VirtualClient_RoboDK_Station.getJointsStr.bBusy AND NOT OPCUA_VirtualClient_RoboDK_Station.getJointsStr.bError AND NOT OPCUA_VirtualClient_RoboDK_Station.setJoints.bBusy AND NOT OPCUA_VirtualClient_RoboDK_Station.setJoints.bError AND NOT OPCUA_VirtualClient_RoboDK_Station.setJointsStr.bBusy AND NOT OPCUA_VirtualClient_RoboDK_Station.setJointsStr.bError THEN iStep:=cStepGetItem; END_IF iStep:=cStepGetItem; cStepGetItem: IF OPCUA_VirtualClient_RoboDK_Station.getItem.bDone THEN iStep:=cStepGetItemReset; Item_ID:=OPCUA_VirtualClient_RoboDK_Station.getItem.Item_ID; ELSIF OPCUA_VirtualClient_RoboDK_Station.getItem.bError THEN iStep:=cStepGetItemError; END_IF cStepGetItemReset: IF NOT OPCUA_VirtualClient_RoboDK_Station.getItem.bError AND NOT OPCUA_VirtualClient_RoboDK_Station.getItem.bBusy THEN iStep:=cStepGetJoints; END_IF cStepGetJoints: IF OPCUA_VirtualClient_RoboDK_Station.getJoints.bDone AND NOT OPCUA_VirtualClient_RoboDK_Station.getJoints.bBusy THEN iStep:=cStepGetJointsReset; ELSIF OPCUA_VirtualClient_RoboDK_Station.getJoints.bError THEN iStep:=991; END_IF cStepGetJointsReset: IF NOT OPCUA_VirtualClient_RoboDK_Station.getItem.bError AND NOT OPCUA_VirtualClient_RoboDK_Station.getItem.bBusy THEN iStep:=cStepGetJointsStr; END_IF; cStepGetJointsStr: IF OPCUA_VirtualClient_RoboDK_Station.getJointsStr.bDone AND NOT OPCUA_VirtualClient_RoboDK_Station.getJointsStr.bBusy THEN iStep:=cStepGetJointsStrReset; ELSIF OPCUA_VirtualClient_RoboDK_Station.getJointsStr.bError THEN iStep:=cStepGetJointsStrError; END_IF cStepGetJointsStrReset: IF NOT OPCUA_VirtualClient_RoboDK_Station.getJointsStr.bError AND NOT OPCUA_VirtualClient_RoboDK_Station.getJointsStr.bBusy THEN iStep:=cStepSetJointStrDelay; END_IF; cStepSetJointStrDelay: strJointsCommand:=”; strJointsCommand:=CONCAT(LREAL_TO_STRING(arrJointsCommand[1]),strJointsCommand); strJointsCommand:=CONCAT(strJointsCommand,’,’); strJointsCommand:=CONCAT(strJointsCommand,LREAL_TO_STRING(arrJointsCommand[2])); strJointsCommand:=CONCAT(strJointsCommand,’,’); strJointsCommand:=CONCAT(strJointsCommand,LREAL_TO_STRING(arrJointsCommand[3])); strJointsCommand:=CONCAT(strJointsCommand,’,’); strJointsCommand:=CONCAT(strJointsCommand,LREAL_TO_STRING(arrJointsCommand[4])); strJointsCommand:=CONCAT(strJointsCommand,’,’); strJointsCommand:=CONCAT(strJointsCommand,LREAL_TO_STRING(arrJointsCommand[5])); strJointsCommand:=CONCAT(strJointsCommand,’,’); strJointsCommand:=CONCAT(strJointsCommand,LREAL_TO_STRING(arrJointsCommand[6])); TON2(IN:=TRUE,PT:=T#0.2S); IF TON2.Q THEN TON2(IN:=FALSE); iStep:=cStepSetJointsStr; END_IF cStepSetJointsStr: IF ( OPCUA_VirtualClient_RoboDK_Station.setJointsStr.bDone AND NOT OPCUA_VirtualClient_RoboDK_Station.setJointsStr.bBusy ) OR NOT bWrite THEN iStep:=cStepSetJointsStrReset; ELSIF OPCUA_VirtualClient_RoboDK_Station.setJointsStr.bError THEN iStep:=cStepSetJointsStrError; END_IF cStepSetJointsStrReset: bWrite:=FALSE; OPCUA_VirtualClient_RoboDK_Station.setJointsStr.bExecute:=FALSE; IF NOT OPCUA_VirtualClient_RoboDK_Station.setJointsStr.bError AND NOT OPCUA_VirtualClient_RoboDK_Station.setJointsStr.bBusy THEN iStep:=cStepEnd; END_IF; cStepEnd: TON(IN:=TRUE,PT:=T#0.1S); IF TON.Q THEN TON(IN:=FALSE); IF NOT debug THEN iStep:=10; ELSE iStep:=cStepSetJointStrDelay; END_IF; END_IF cStepGetItemError: Item_ID:=0; iStep:=cStepWaitReset; cStepGetJointsError: FOR i :=0 TO 11 DO arrJoints[i]:=-99999.99; END_FOR iStep:=cStepWaitReset; cStepGetJointsStrError: strJoints:=”; iStep:=cStepWaitReset; cStepWaitReset: IF bReset THEN iStep:=cStepInit; bReset:=FALSE; END_IF; END_CASE aSplit[1] := strJoints; FOR i:=1 TO 7 DO bResultSplit := FindAndSplit( pSeparator := ADR(sSeparator) ,pSrcString := ADR(aSplit[i]) ,pLeftString := ADR(aSplit[i]) ,nLeftSize := SIZEOF(aSplit[i]) ,pRightString := ADR(aSplit[i+1]) ,nRightSize := SIZEOF(aSplit[i+1]) ,bSearchFromRight := FALSE ); IF NOT bResultSplit THEN EXIT; END_IF END_FOR FOR i :=1 TO 6 DO arrJointsFromStr[i]:=STRING_TO_LREAL(aSplit[i]); END_FOR; // OPCUA_VirtualClient_RoboDK_Station.getItem(bExecute:=iStep=cStepGetItem,Item_Name:=Robot_name); OPCUA_VirtualClient_RoboDK_Station.getJoints(bExecute:=iStep=cStepGetJoints,Item_ID:=Item_ID,Joints=>arrJoints); OPCUA_VirtualClient_RoboDK_Station.getJointsStr(bExecute:=iStep=cStepGetJointsStr,Robot_name:=Robot_name,Joints=>strJoints); IF bWrite THEN OPCUA_VirtualClient_RoboDK_Station.setJointsStr( bExecute:=TRUE ,Robot_name:=Robot_name,Joints:=strJointsCommand); END_IF; |
Visualization
次は右クリック>Add Virtualizationで画面プロジェクトを追加します。

Visual Symbols(System) を有効にします。

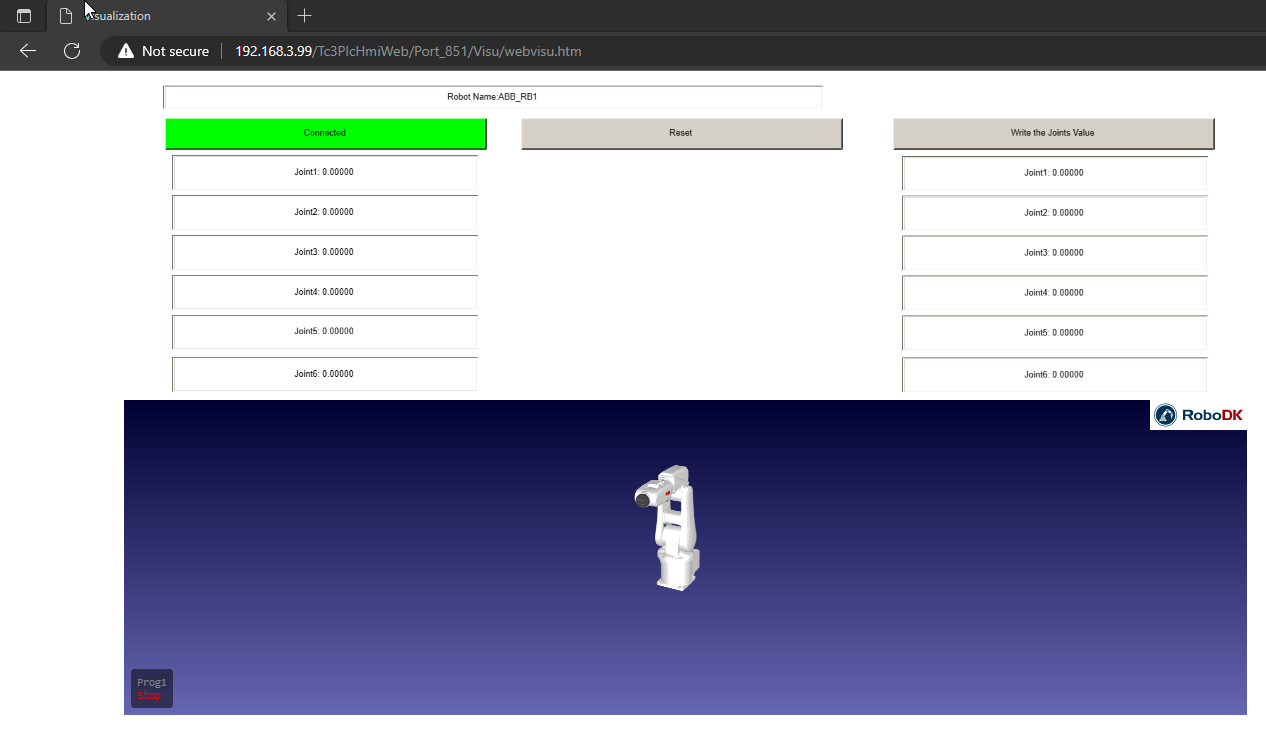
Main Screen
操作画面を作成し、エラーリセット・現在Joint値の表示があります。そして書き込みたいJoint値を入力し、”Write the Joints Value”をクリックすればRoboDKのロボットJoint値は更新されます。最後はLocal Web Server Viewも表示するようにします。

Configure the Web Display
WebvisualizationをProjectに追加します。

Install TF1810
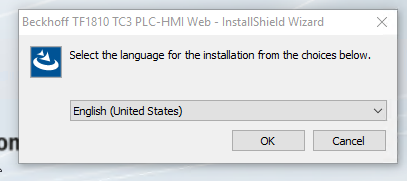
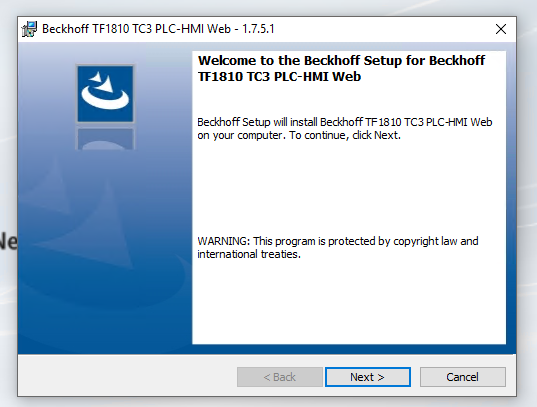
下記のLinkからTF1810をDownloadし、インストールしてください。

言語を選択し>Ok進みます。
Nextで進みます。
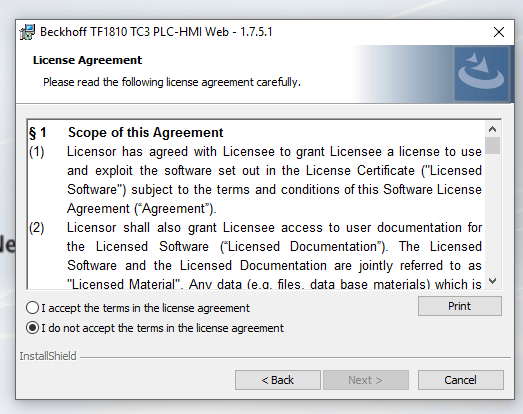
ライセンスに同意し、Next>します。
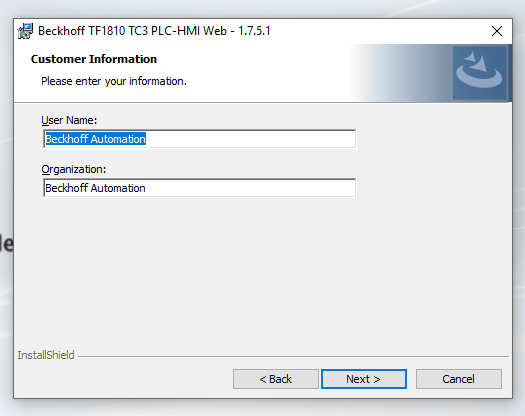
User nameなどの情報を入力し、Next>します。
インストールを開始します。

Done!
Enable the Local Web Server View
次はRoboDKのLocal Web Server Viewを有効にする必要があります。
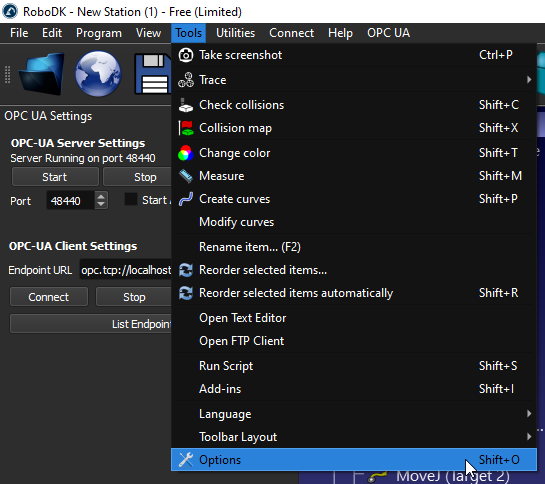
Tools>Optionsをクリックします。
Other Tabを開き、Activate Local Web Server ViewをTrueし、Port番号を入力します。
Defaultでは8091です。

Result
下記のLinkでTwinCAT WebHMIにアクセスしてください。
Your_IPC_IP_AddressはIPCのIP アドレスになります。
https://Your IPC IP Address/Tc3PlcHmiWeb/Port_851/Visu/webvisu.htm