EXOR JSmart710MのTutorial第2話です。今回JSmart710MのVNC Viewr機能を有効にします。よろしくお願いします。
電源を入れたら瞬間赤枠のところをタッチします。

EXORパネルでSYSTEM SETTINGSを選び、しばらく待ちます。
System Settingを開きます。
Systemの設定画面が表示されます。
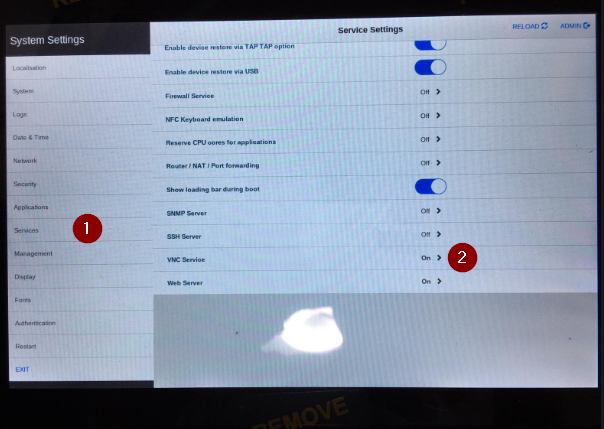
Services>VNC Servicesを開きます。
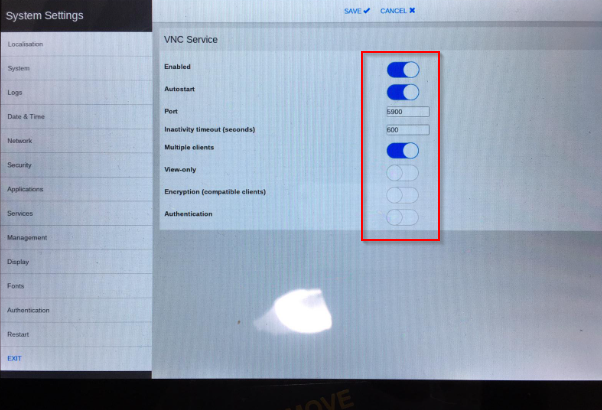
VNC ServiceをEnableし、Port番号を設定してください。認証機能が必要な場合、AuthenticationをEnableしましょう。
最後はSaveで設定を保存します。
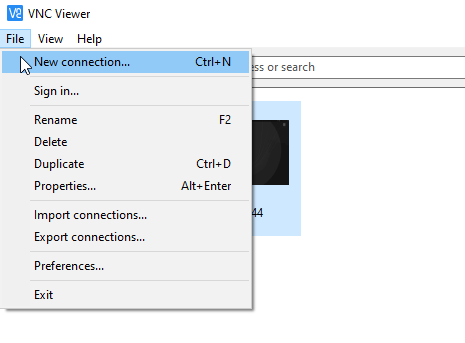
最後はVNC Viewerを起動しJSMART710Mと接続してみます。File>New Connectionします。
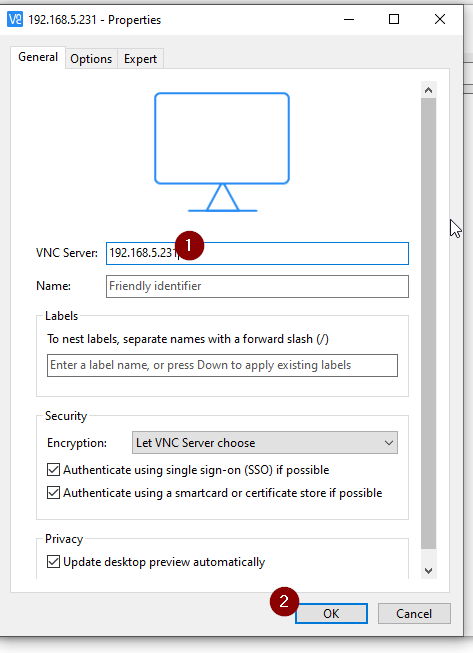
VNC ServerにJSMART710MのIPアドレスを入力しOKします。
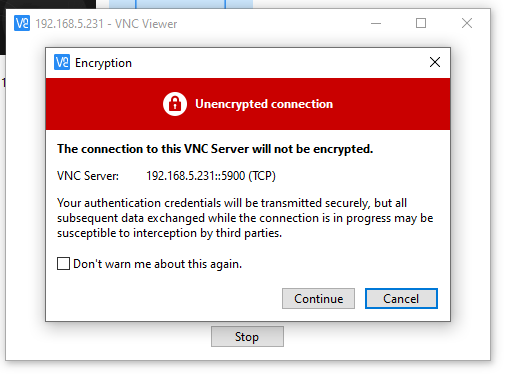
Continueで進みます。
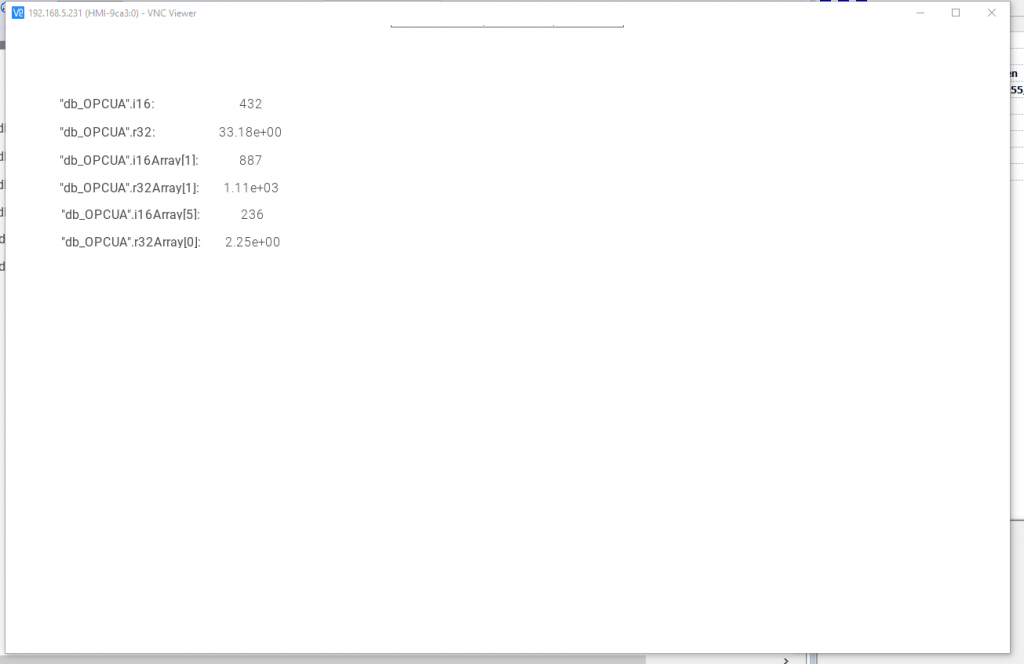
Done!