This is a new article series in which we will use the Italian company Pixsys’ web panel to perform various verifications. From Episode 3 Podman we will explain how to launch a container with OpenPLC’s Docker image and how to operate OpenPLC V3 Editor.
Let’s enjoy FA~!
Foreword
Thank you from the bottom of my heart for visiting my technical blog and YouTube channel.
We are currently running the “Takahashi Chris” radio show with Full-san (full@桜 八重 (@fulhause) / X) which I deliver every Wednesday night.
Sharing, not hoarding, technical knowledge
We publish technical information related to factory production technology and control systems for free, through blogs and videos.
With the belief that “knowledge should be accessible to everyone,” we share practical know-how and real-world troubleshooting cases from our own field experience.
The reason we keep it all free is simple: to help reduce the number of people who struggle because they simply didn’t know.
If you’ve ever thought:
- “Will this PLC and device combination actually work?”
- “I’m having trouble with EtherCAT communication—can someone test it?”
- “I want to try this remote I/O, but we don’t have the testing environment in-house…”
Feel free to reach out!If lending equipment or sharing your configuration is possible, we’re happy to verify it and share the results through articles and videos.
(We can keep company/product names anonymous if requested.)
How can you support us?
Currently, our activities are nearly all unpaid, but creating articles and videos takes time and a proper testing environment.If you’d like to support us in continuing and expanding this content, your kind help would mean a lot.
Membership (Support our radio show)
This support plan is designed to enhance radio with Mr Full.
https://note.com/fulhause/membership/join
Amazon Gift List (equipment & books for content production)
Lists equipment and books required for content creation.
https://www.amazon.co.jp/hz/wishlist/ls/H7W3RRD7C5QG?ref_=wl_share
Patreon (Support articles & video creation)
Your small monthly support will help to improve the environment for writing and verifying articles.
https://www.patreon.com/user?u=84249391
Paypal
A little help goes a long way.
https://paypal.me/soup01threes?country.x=JP&locale.x=ja_JP
Just trying to share things that could’ve helped someone—if only they’d known.
Your support helps make knowledge sharing more open and sustainable.
Thank you for being with us.
soup01threes*gmail.com
Technical knowledge shouldn’t be kept to ourselves.
Reference Link


OPENPLC?
OpenPLC is an easy-to-use software-based open source programmable logic controller. It is the first open source PLC to be fully functionally standardized in both software and hardware. the OpenPLC project was created according to the IEC 61131-3 standard, which defines the basic software architecture and programming language for PLCs.
The OpenPLC project consists of two parts: the runtime and the editor. The runtime is portable software designed to run from the smallest microcontroller (Arduino compatible) to powerful servers in the cloud. The editor is responsible for executing PLC programs created by the editor. Currently, OpenPLC Runtime is officially supported on the following platforms
- Arduino Uno / Nano / Leonardo / Micro
- Arduino Mega / Due
- Arduino Nano Every / IoT / BLE
- Arduino RB2040 Connect
- Arduino Mkr / Zero / WiFi
- Arduino Pro (Machine Control and EDGE)
- Controllino Maxi / Automation / Mega / Mini
- Productivity Open P1AM
- ESP8266 (nodemcu)
- ESP32
- Raspberry Pi 2 / 3 / 4
- PiXtend
- UniPi Industrial Platform
- Neuron PLC
- FreeWave Zumlink
- FreeWave ZumIQ
- Windows (generic target as a soft-PLC)
- Linux (generic target as a soft-PLC)
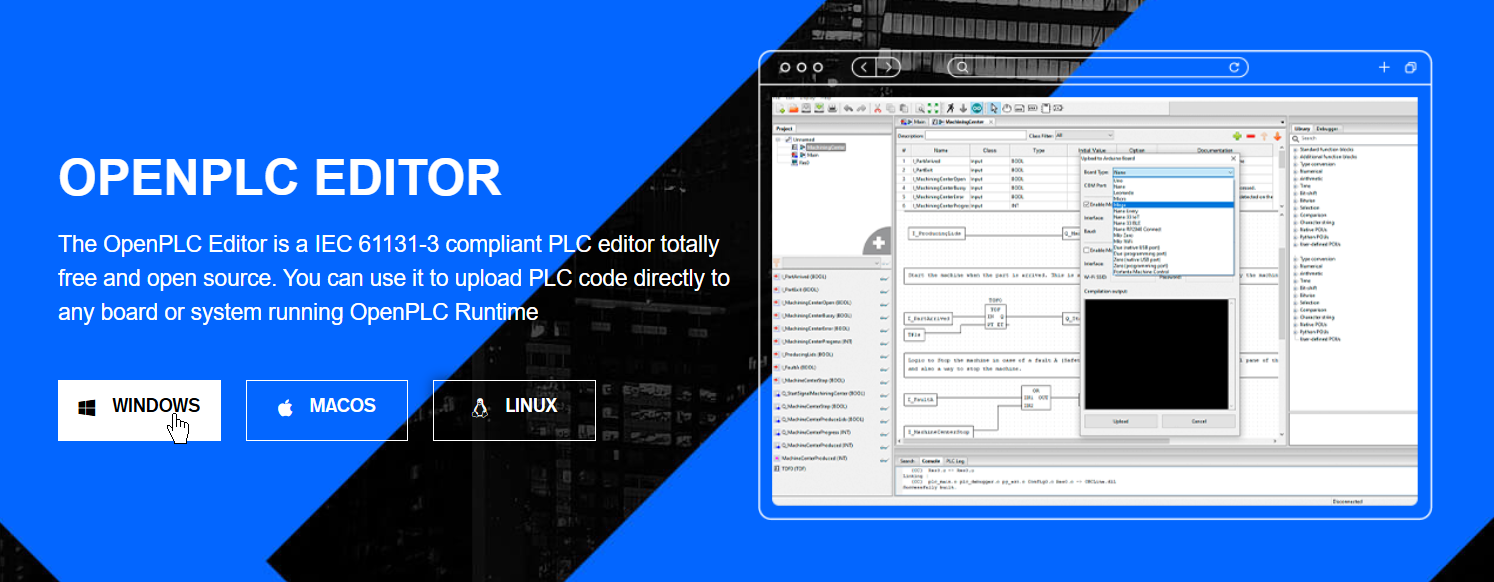
The OpenPLC Editor is software that runs on your computer and is used to create PLC programs as described above. It is very easy to use and supports all five languages defined in the IEC 61131-3 standard: Ladder Logic (LD), Function Block Diagram (FBD), Instruction List (IL), Structured Text (ST), Sequential Function Chart (SFC).
Download Tools
The OpenPLC Editor will work on any platform that supports Python. Currently, the following official installers are available
- Windows
- Linux (Debian, Ubuntu, Fedora and variants)
- macOS (currently in beta)
Download the Editor of OPENPLC from the link below.
https://autonomylogic.com/download/
Tools Installation
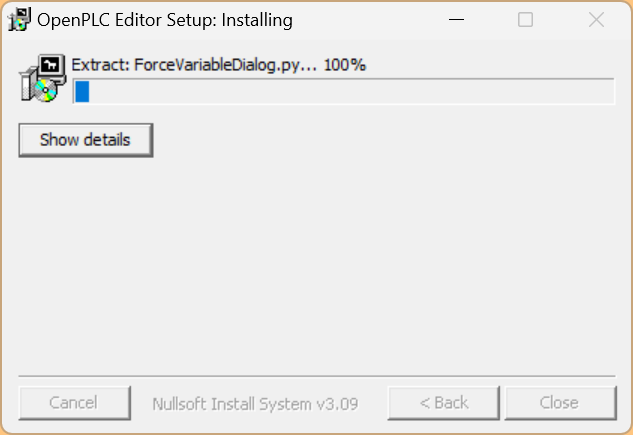
Unzip the ZIP file you just downloaded and start the installation.

Please wait a moment…
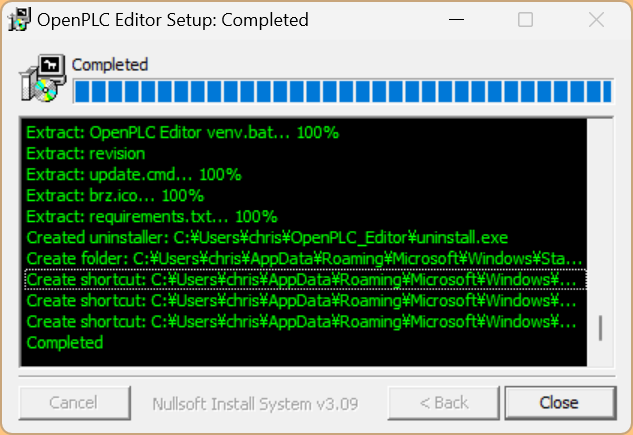
Done!Finally, click Close to close the installation screen.
Next, start the OpenPLC Editor.
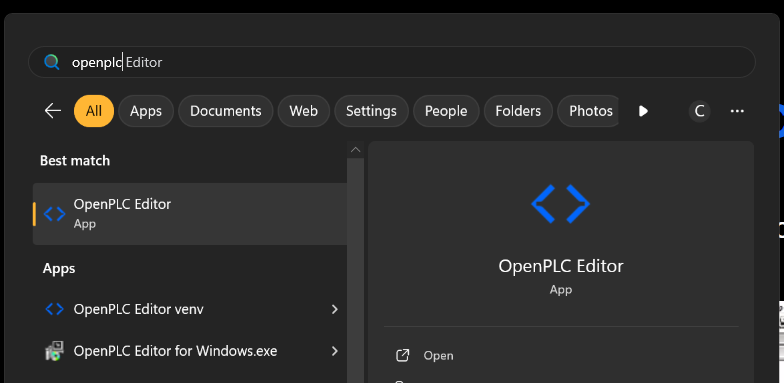
Wait for a while…

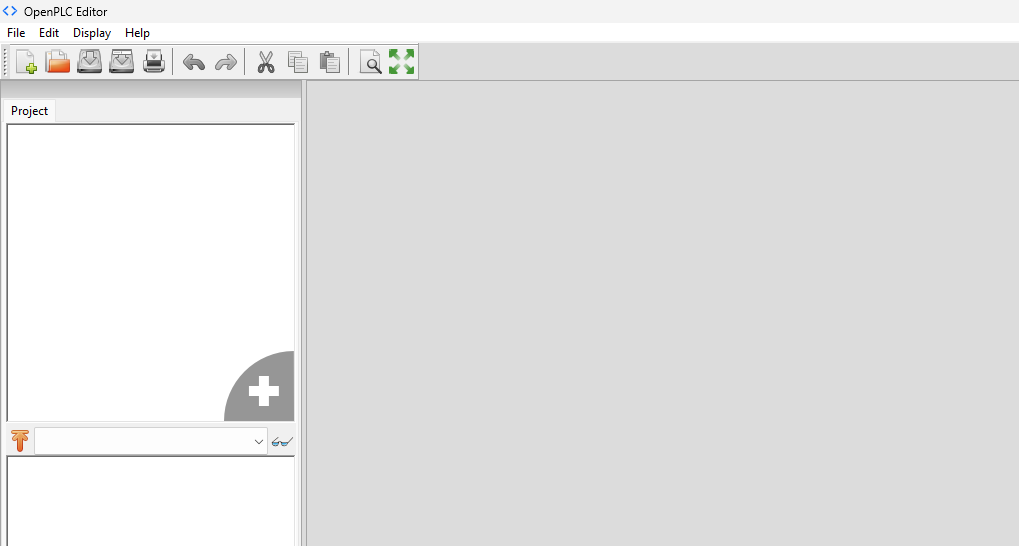
Done!OpenPLC EditorV3 is now started.
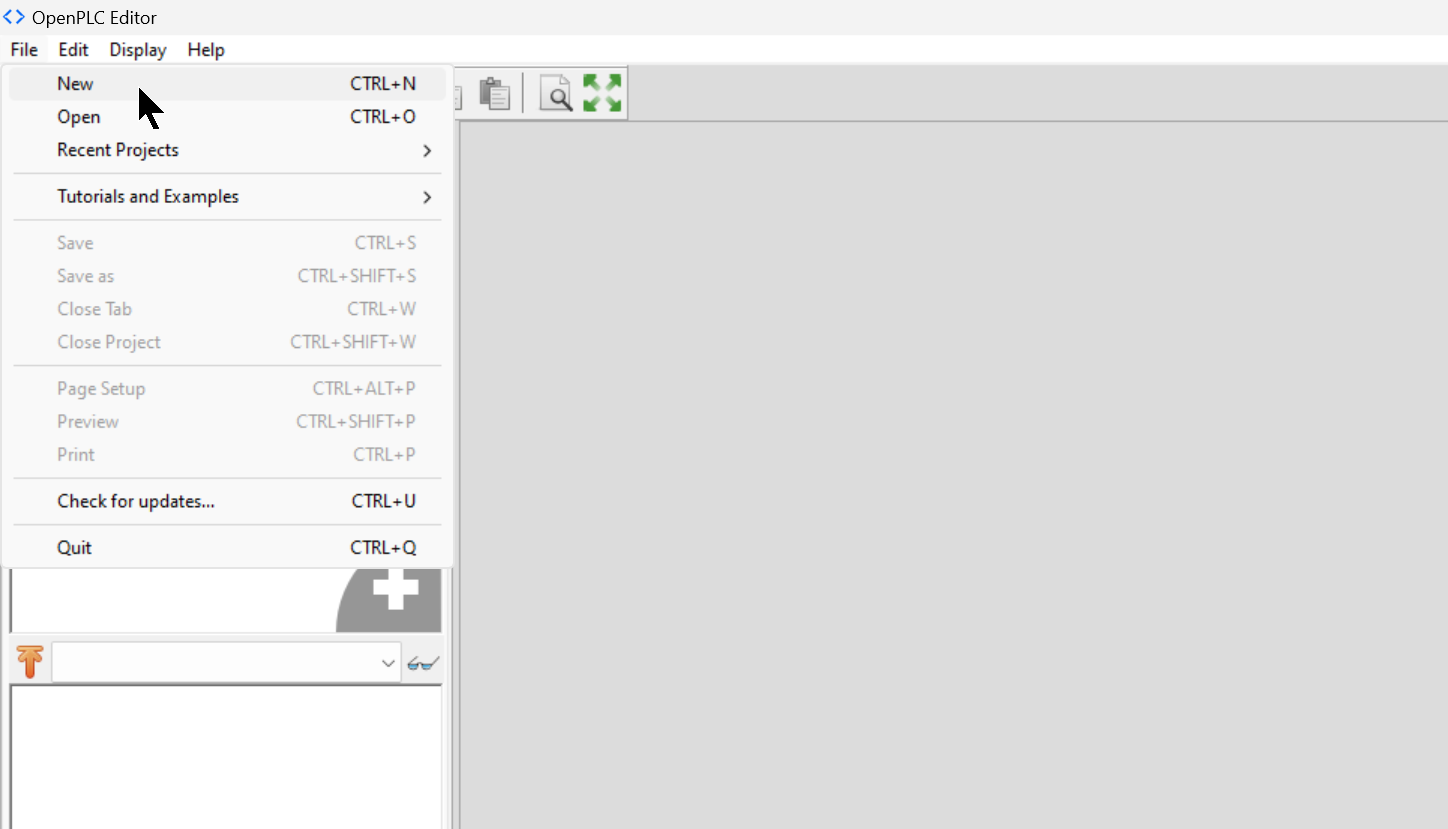
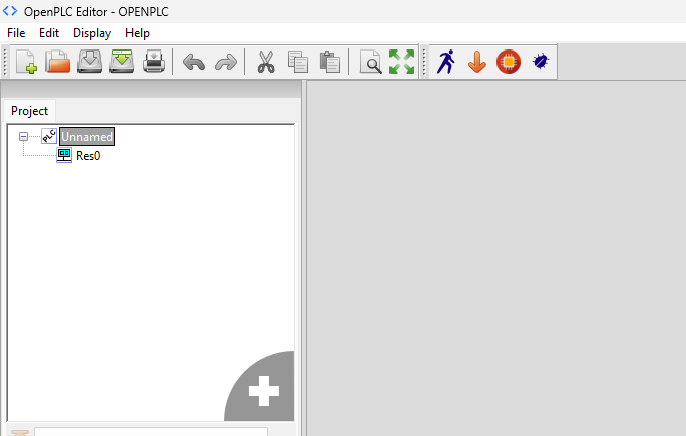
Create a new project with File→New.
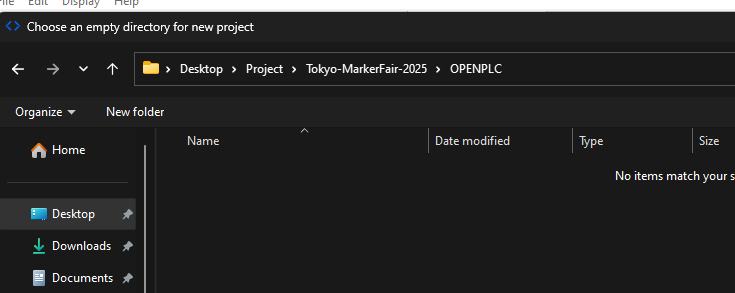
Set the File Directory for the project.
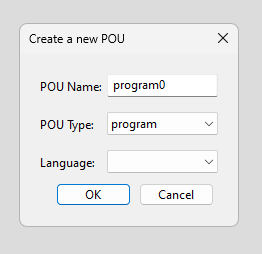
Next, the POU creation screen will appear. This time, click “Cancel” first.
Done!This is the first OpenPLC project we have been able to create.
Install the runtime in Podman
The next step is to launch the OpenPLC Runtime container in Podman.
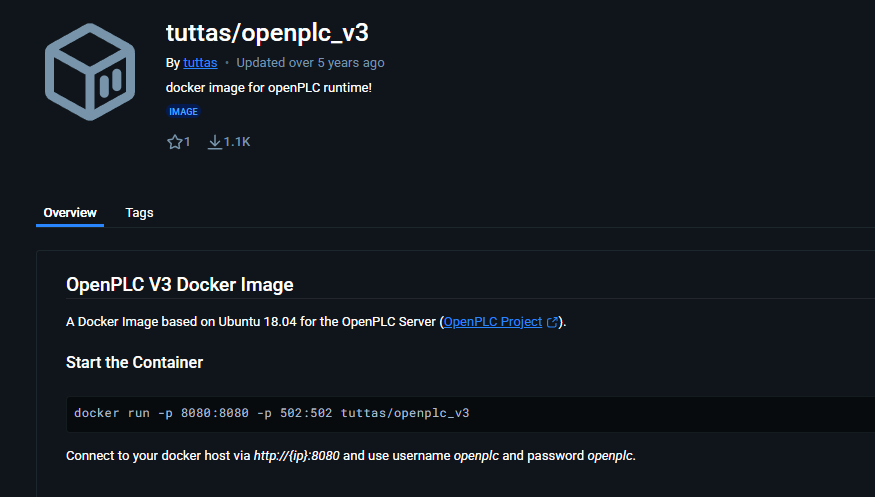
There are various OpenPLC containers on Docker hub, for example, the following:
However, when I actually launch this container on my hardware, I get this error
{“msg”:”exec container process `/root/OpenPLC_v3/start_openplc.sh`: Exec format error”,”level”:”error”} |
|---|
Exec format error is an error that occurs when the format of the file the container is trying to execute is not supported by the current environment.
Typical causes include:
- Architecture mismatch
Example: Trying to run a Docker image for x86_64 on an ARM CPU (e.g. Raspberry Pi).
- Problem with line endings in shell scripts
CRLF newlines are mixed in start_openplc.sh edited on Windows.
Now check the architecture of the Docker image with the following command.
docker inspect docker.io/tuttas/openplc_v3:latest | grep Architecture
|
|---|
Next, check the OS of your device with the following command: uname -m is aarch64 (ARM64), so the host is ARM64, while the image you are using is amd64.
user@wp615-a-p4:~$ uname -m
|
|---|
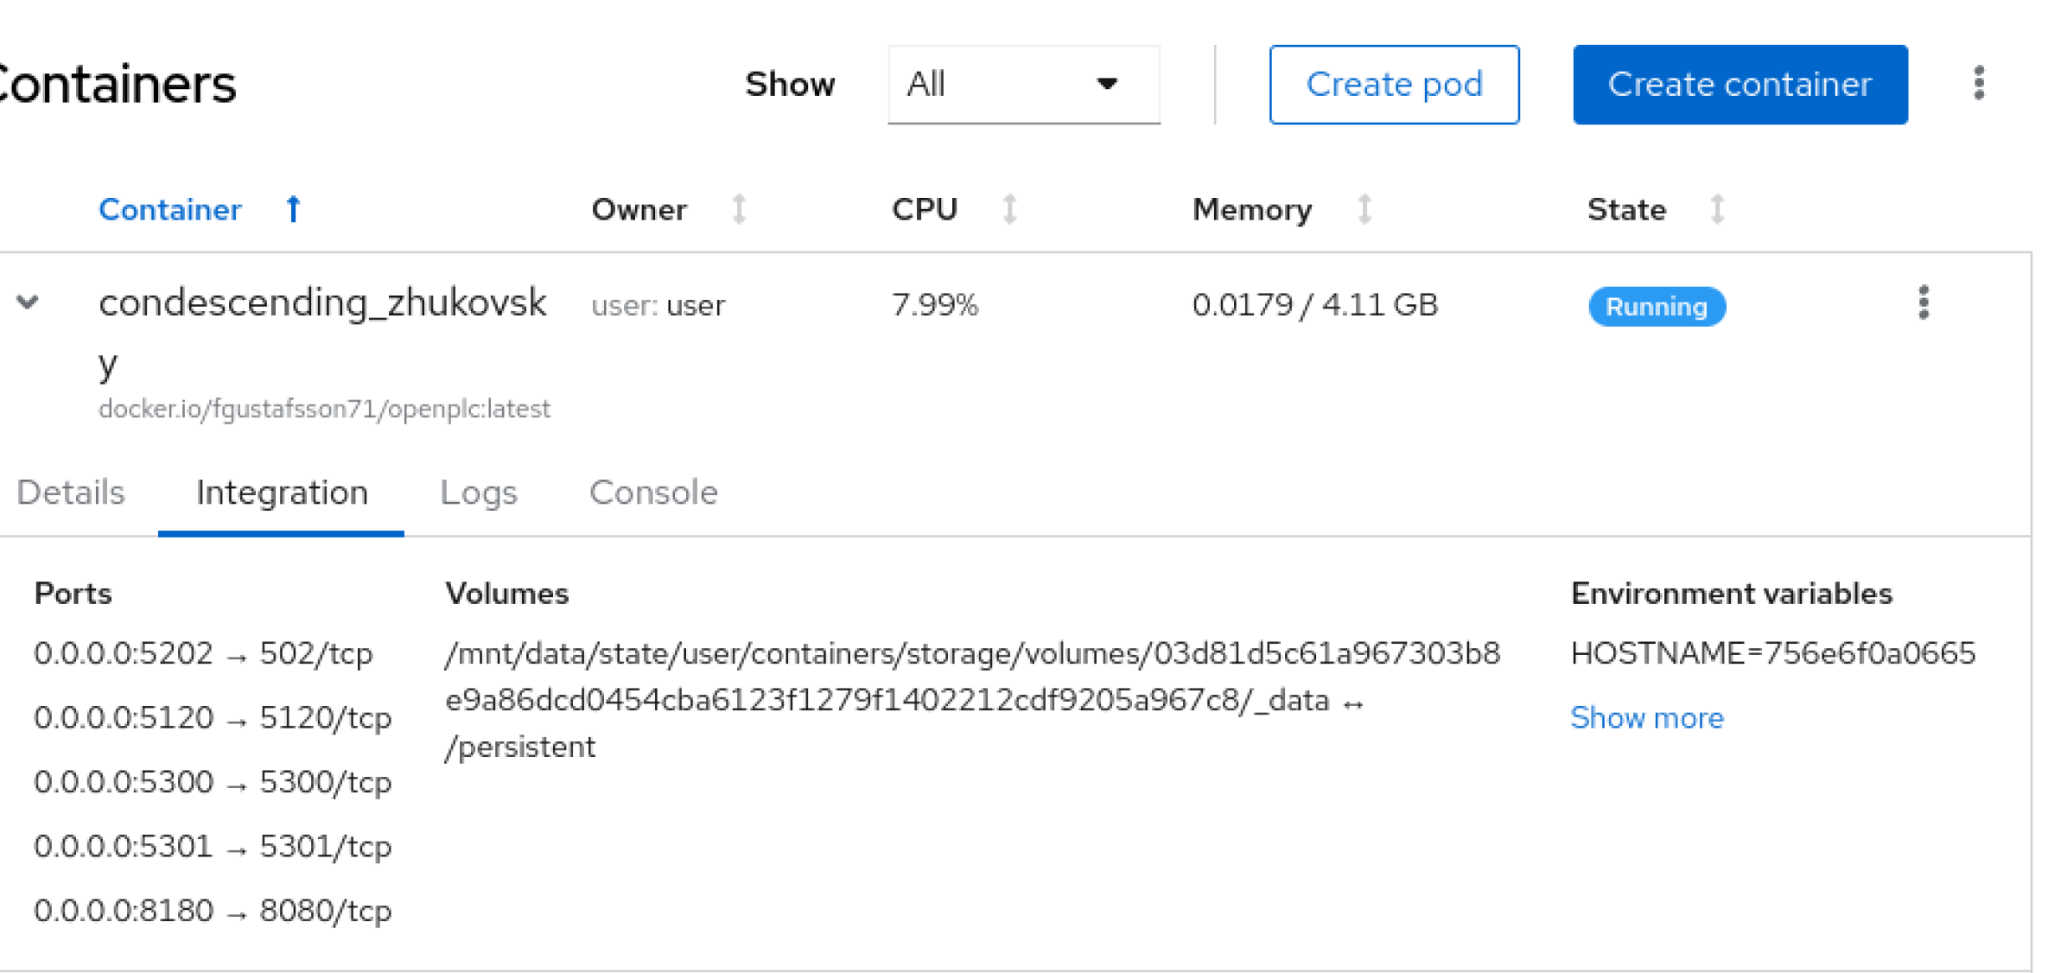
Next, let’s go to Docker iohub to find the appropriate Docker image. For example, here is one ↓.

Next, download the appropriate Docker image from WP615’s Podman screen.
Implementation
Now let’s actually create the program.
Create New Program
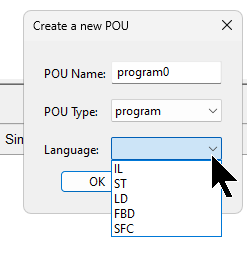
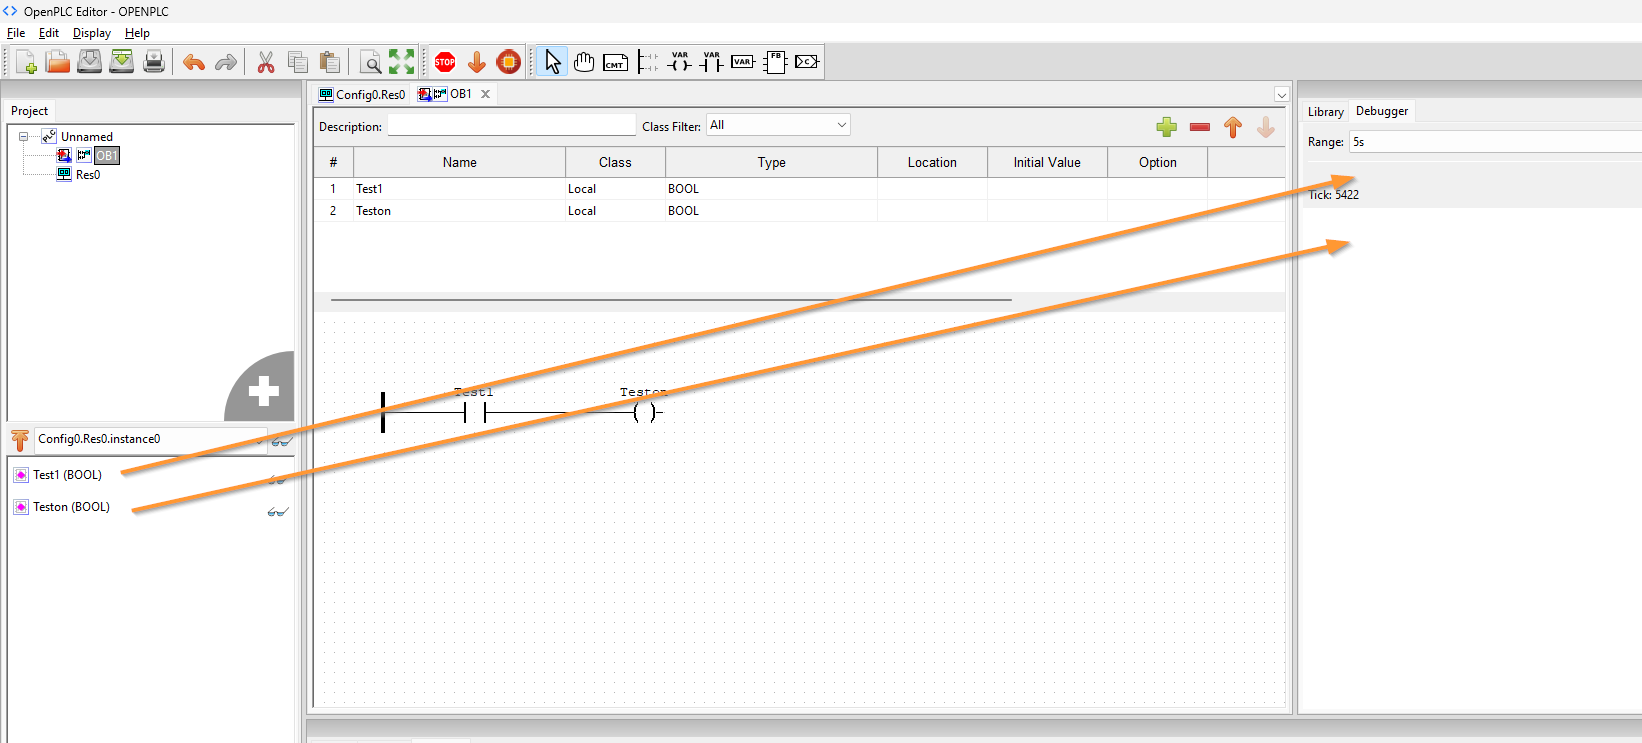
In OPENPLC V3 Editor, click the + button in the figure below → Select Program.
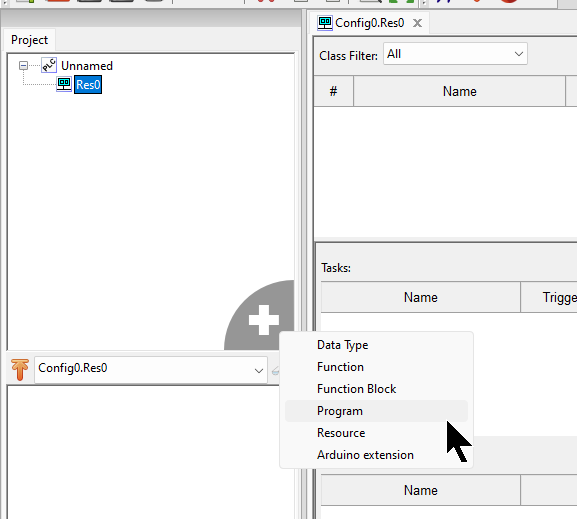
The Add POU screen will appear.
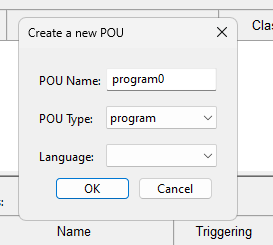
Set the POU implementation language from the Language drop-list.
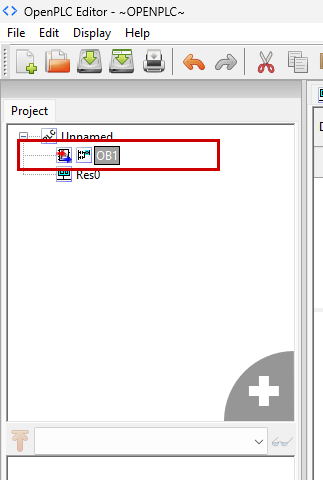
Done!New POUs have been added.
First Program
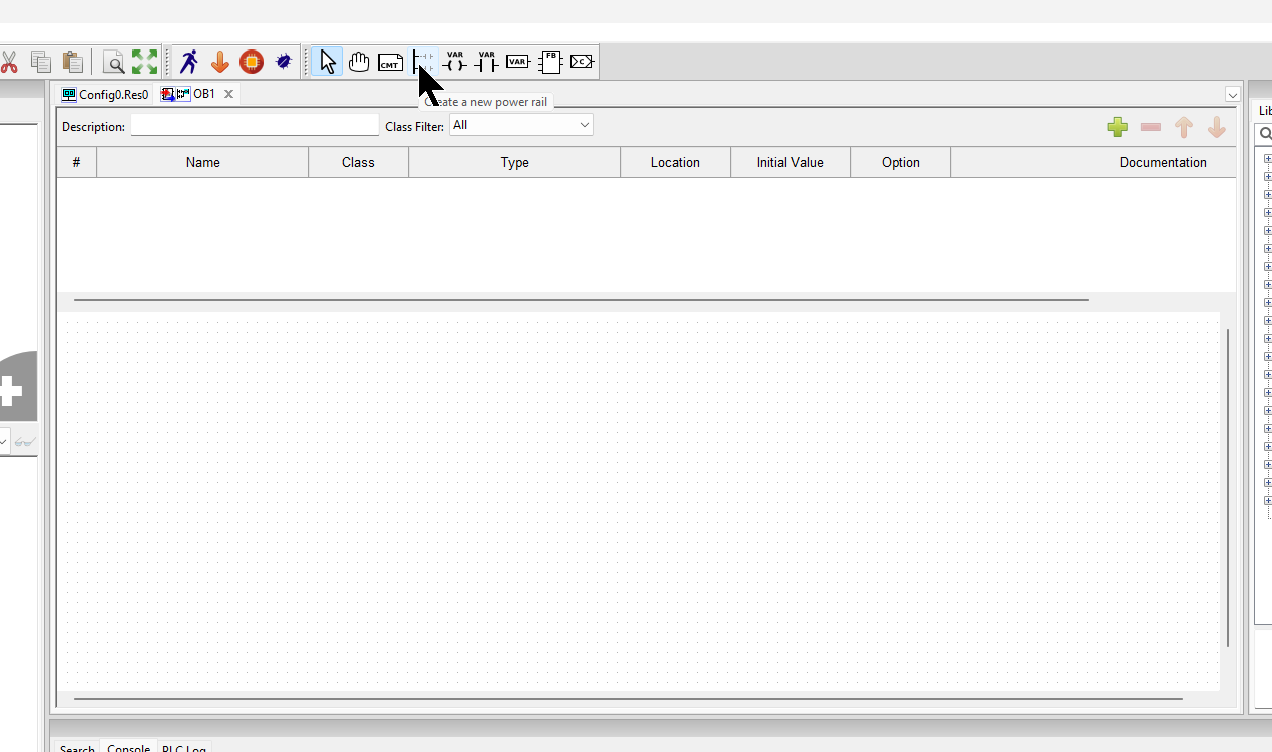
Next, let’s create a program.
Insert Power Rail
In this project we will use a ladder. Before adding the settings, add Power Rail. Click the button shown below.
Then click on the location you want to add to the program.

The Power Rail setup screen will appear. This time, leave it as it is and OK.
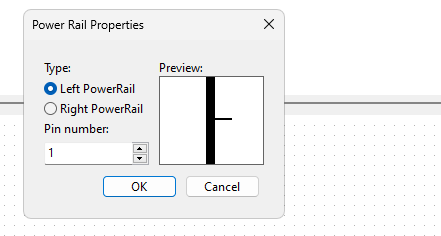
Done!Power Rail has been added.

Add NO contact
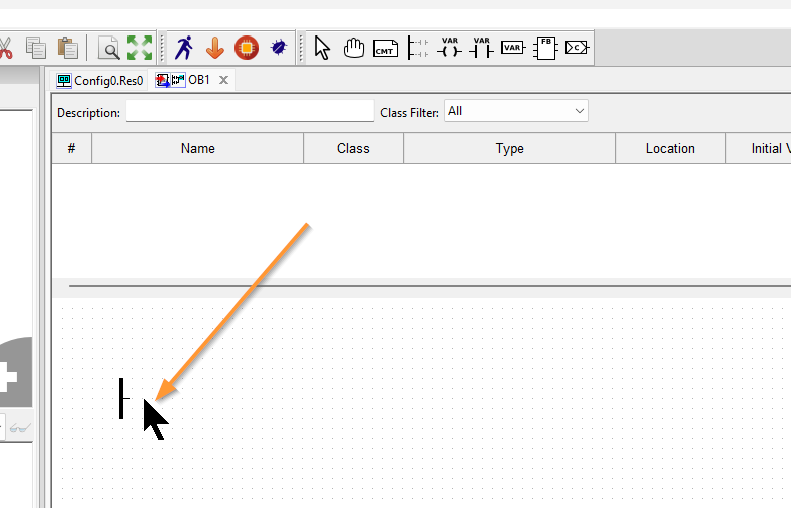
Now add contact A. Click on ICON in the figure below.
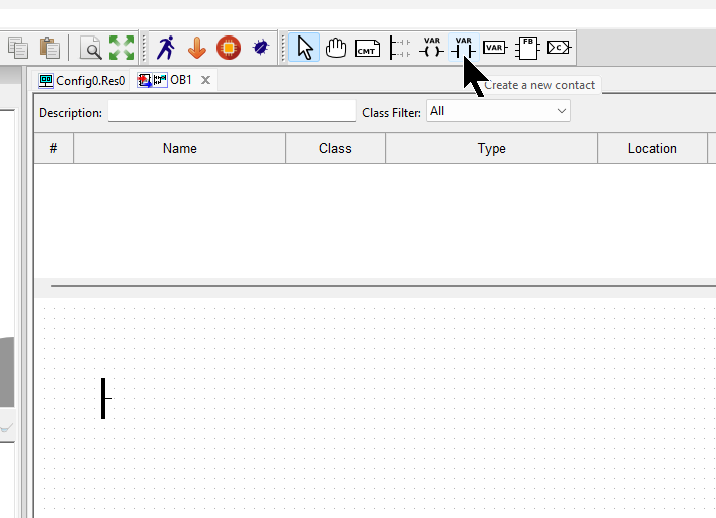
Then click on an empty program location.
The contact setting screen appears, this time set to Normal (contact A).
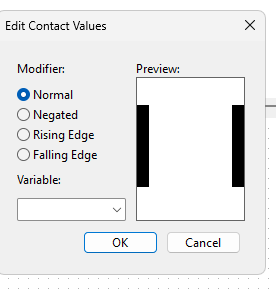
Add a variable name in the Variable column → confirm with Ok.
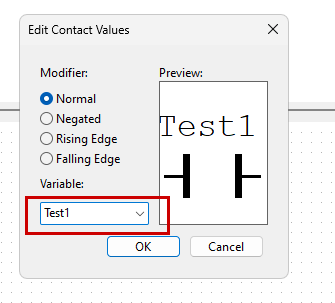
Done!New contacts have been added.
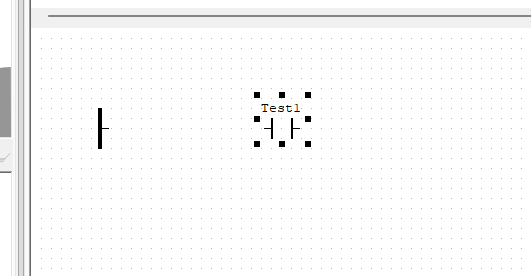
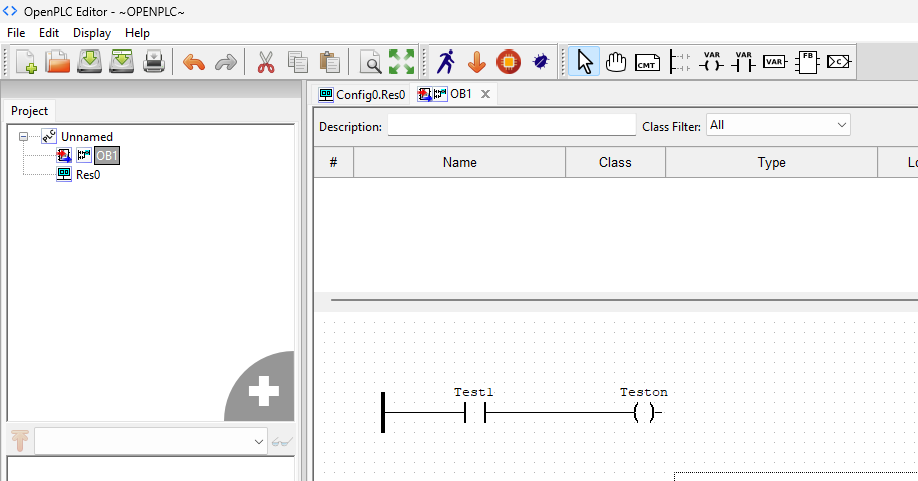
Next, connect the NO contact to the Power Rail mentioned earlier.
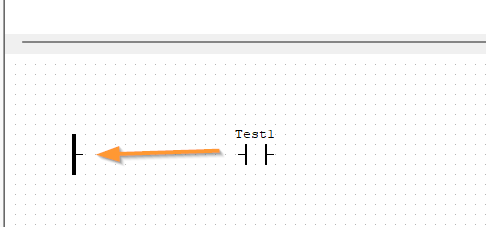
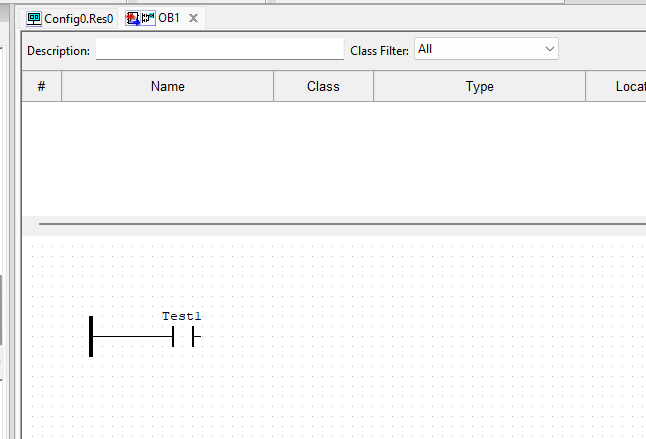
Done!
Add Coil
Finally, add coils.
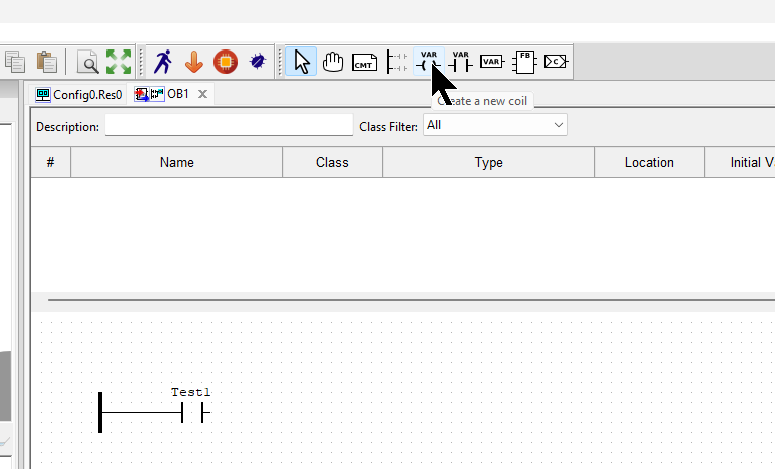
Click on Coil ICON using the same operation as before → Add it to the free space in the program. The coil setting screen will appear, and for this article, we will use the Normal coil.
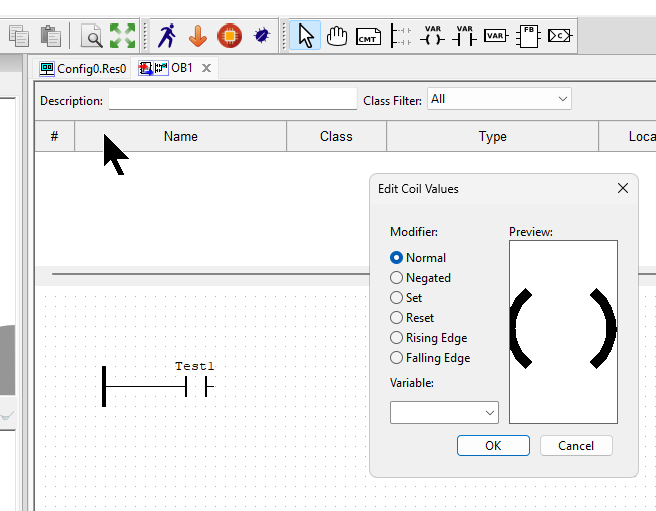
Add a variable to the Variable column and confirm with OK.
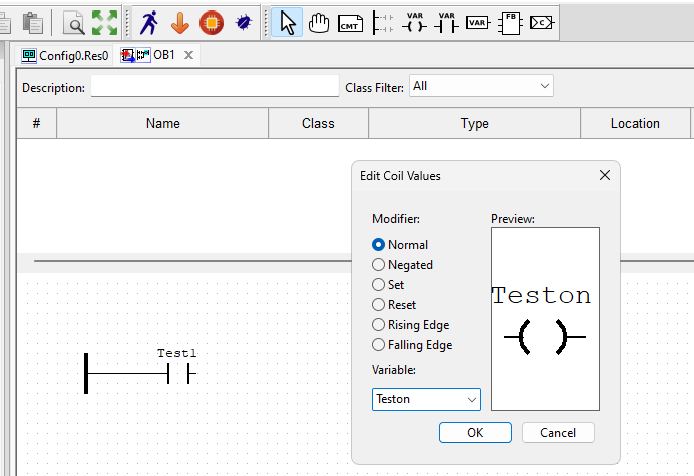
Done!Coils have been added.
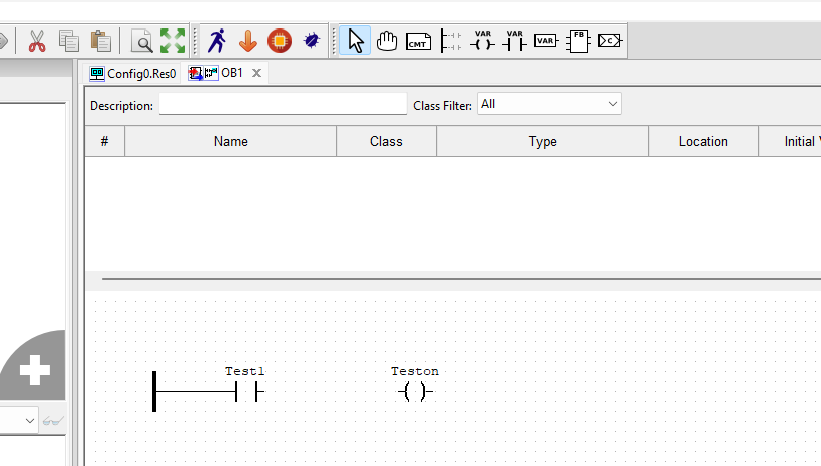
Next, let’s connect the coil to the circuit we just created.
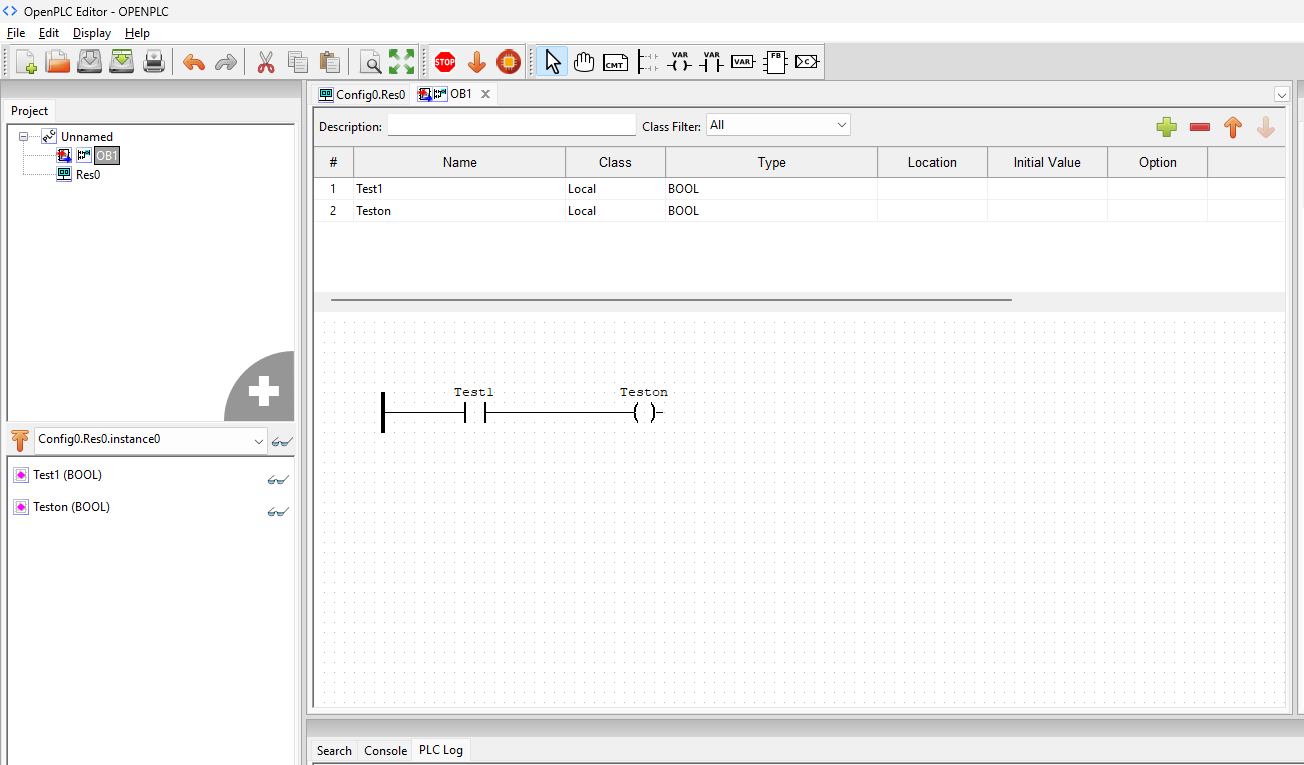
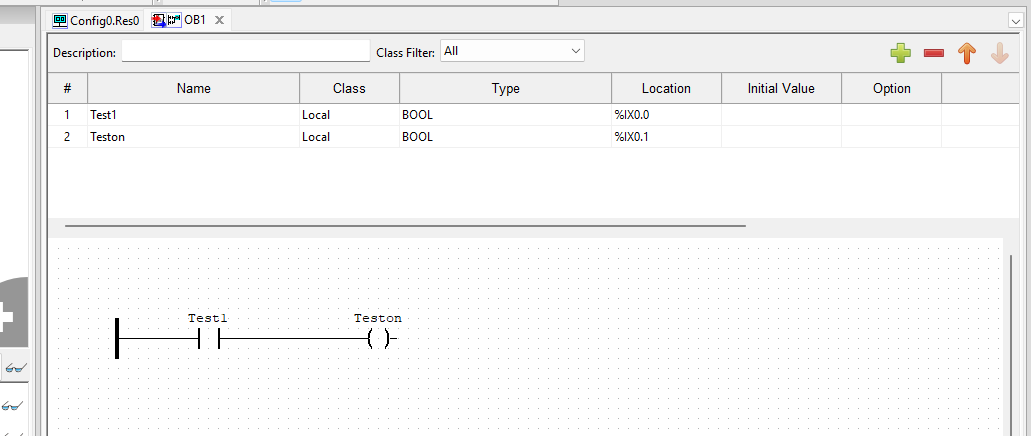
Defining Local Variables
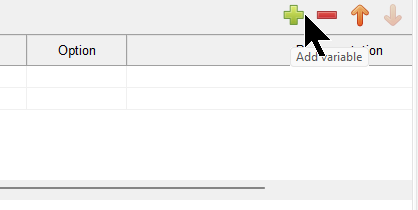
The next section explains how to declare local variables. Click on the + (Add Variable) button above the program.
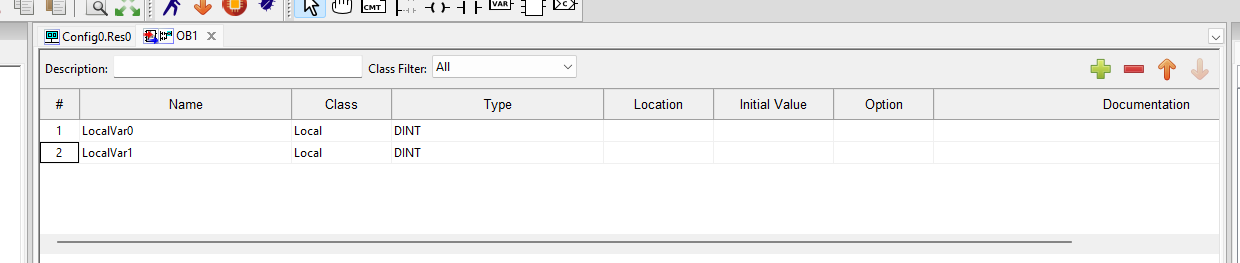
Done!Variables are added as shown in the figure below, and the variable name and data type should be done according to the application.
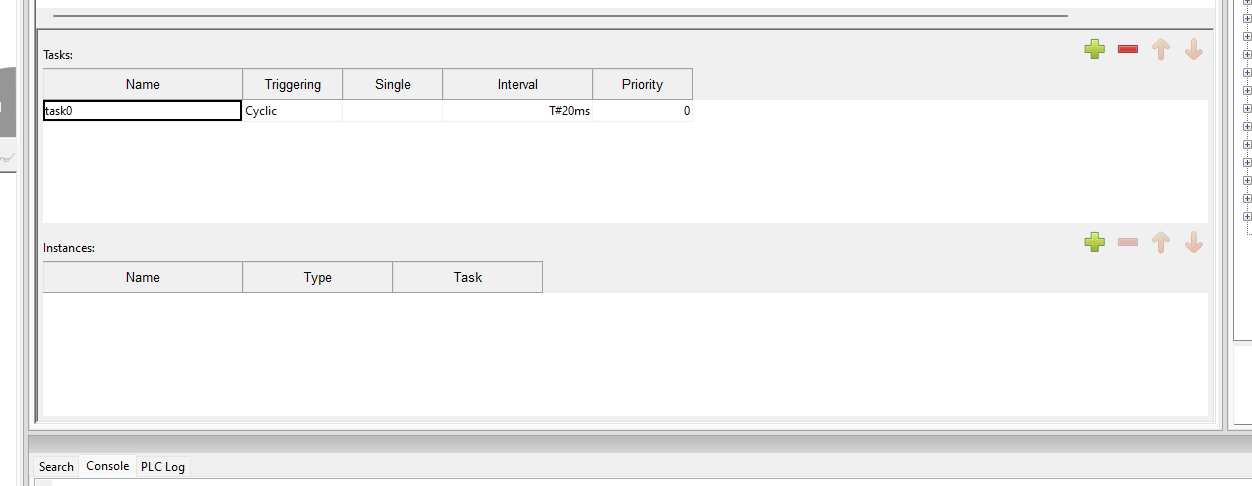
Task Assignment
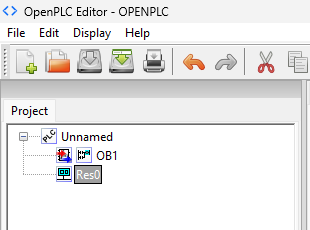
Once you have completed the creation of your program, you must now assign it to a task to execute. To do so, click on Res0.
The task setup screen will appear.

Add a new Task using the + button in the Task column.
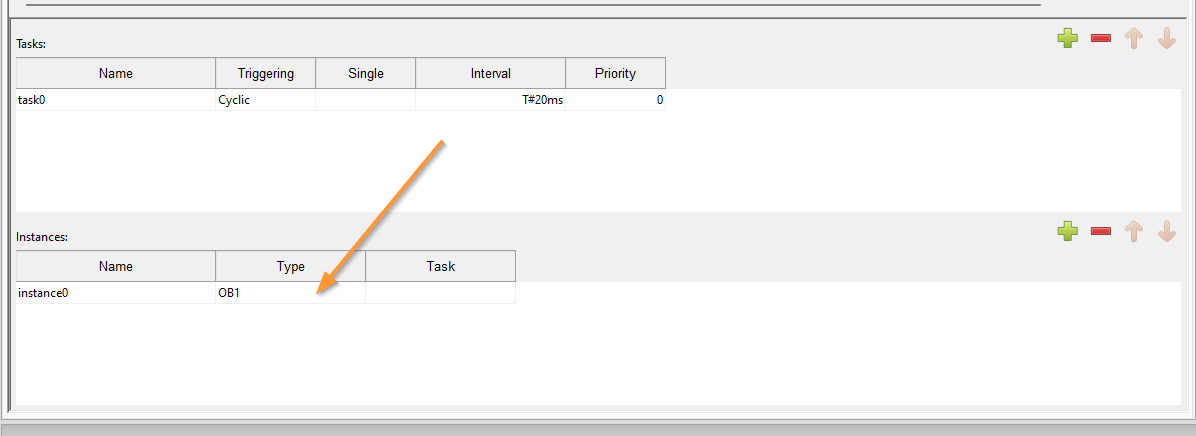
Next, add the execution cycle by clicking on the + button in the Instance column.

Then, for Type, select the program you just added (OB1 in this article).
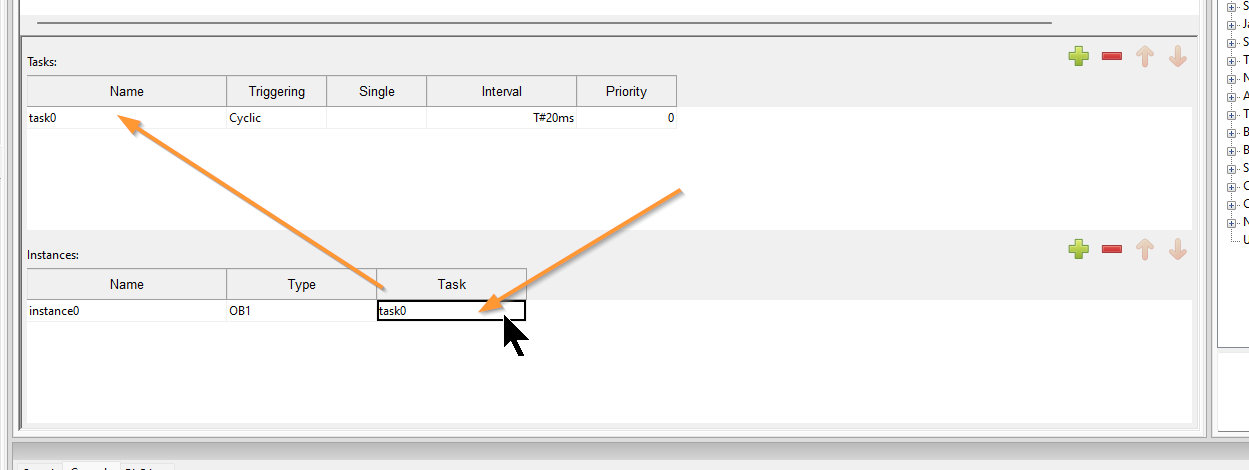
Assign the task you just added to the Task column.
Start of simulation
OPENPLC V3 Editor has a simulation function. Click the “Start Simulation” button below to start simulation.
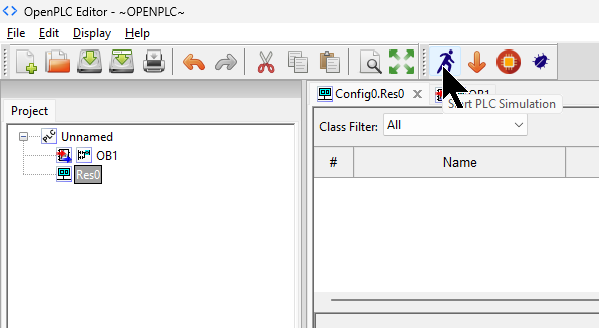
Done!The program is automatically compiled.

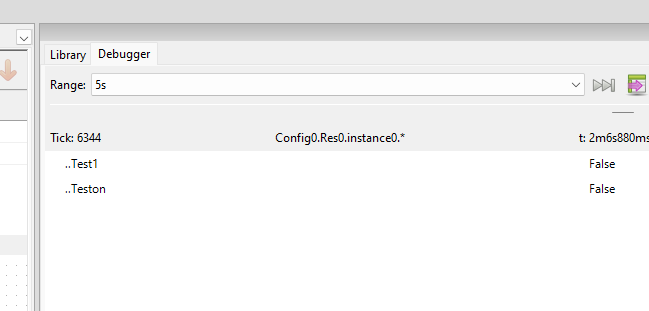
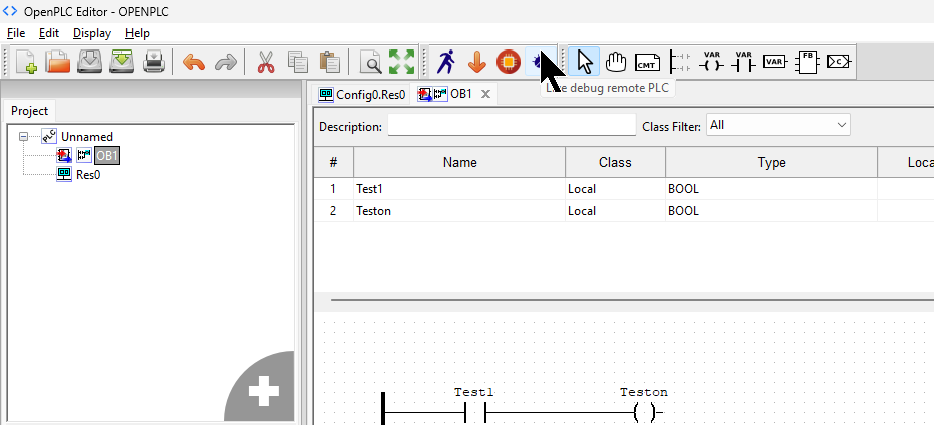
debugger
The next step is to add variables to the Debugger.
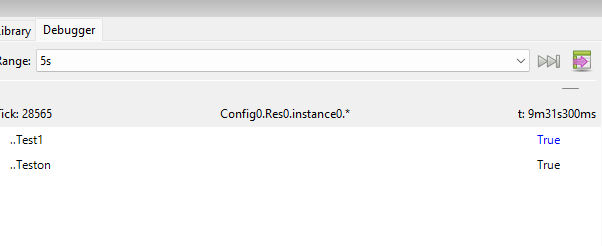
Done!The current values of those variables were also checked.
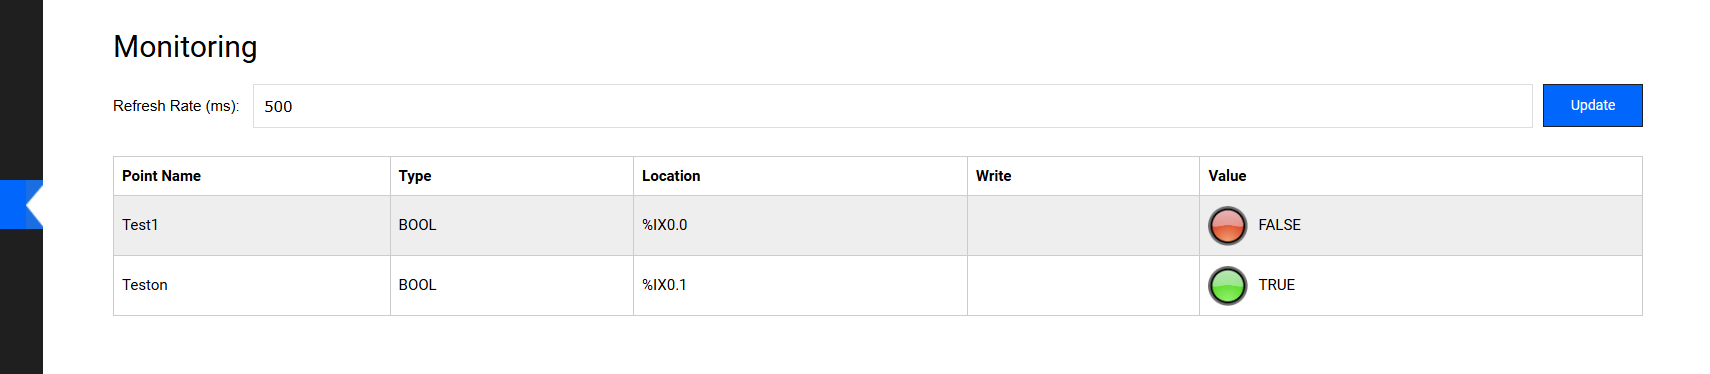
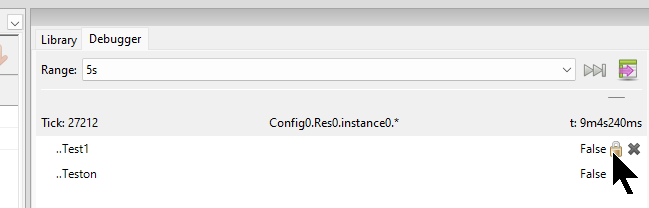
Toggle Value
To change the current value of a variable, click on the key button in the figure below.
The Change Variable Value screen is displayed.
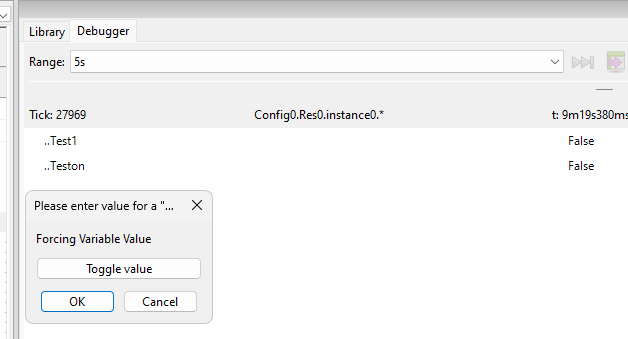
Click the Toggle value button → OK to confirm.
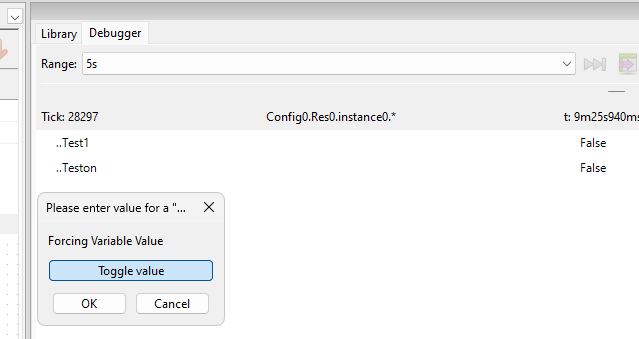
Done!The Test variable is now True.
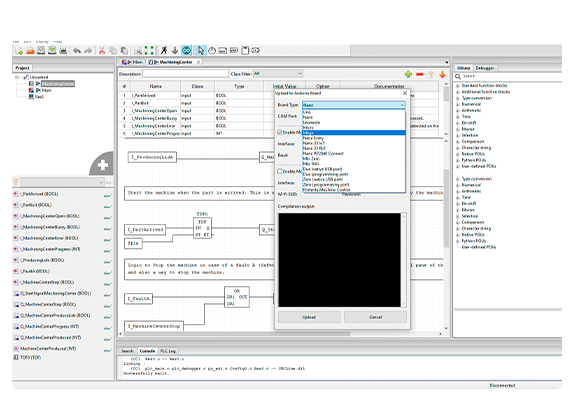
Runtime Program File Generation
Next, click the Generate Program button to generate a program file to be downloaded to Runtime.
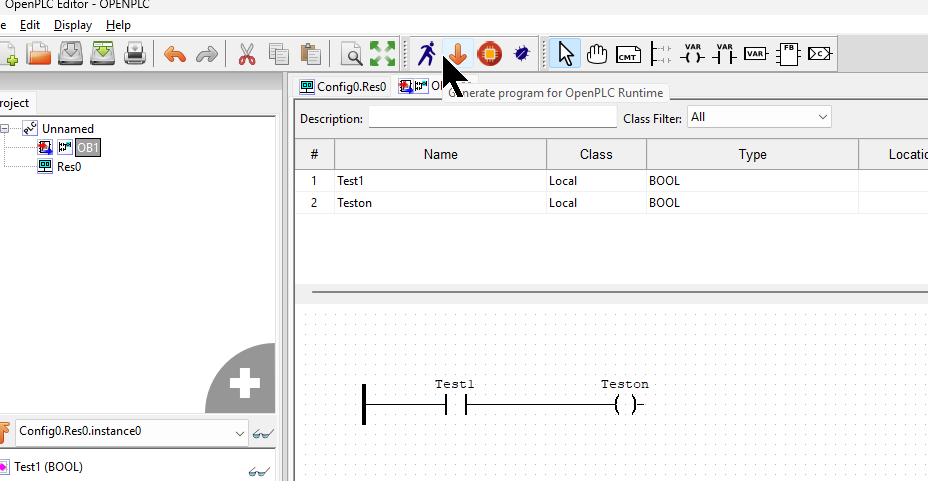
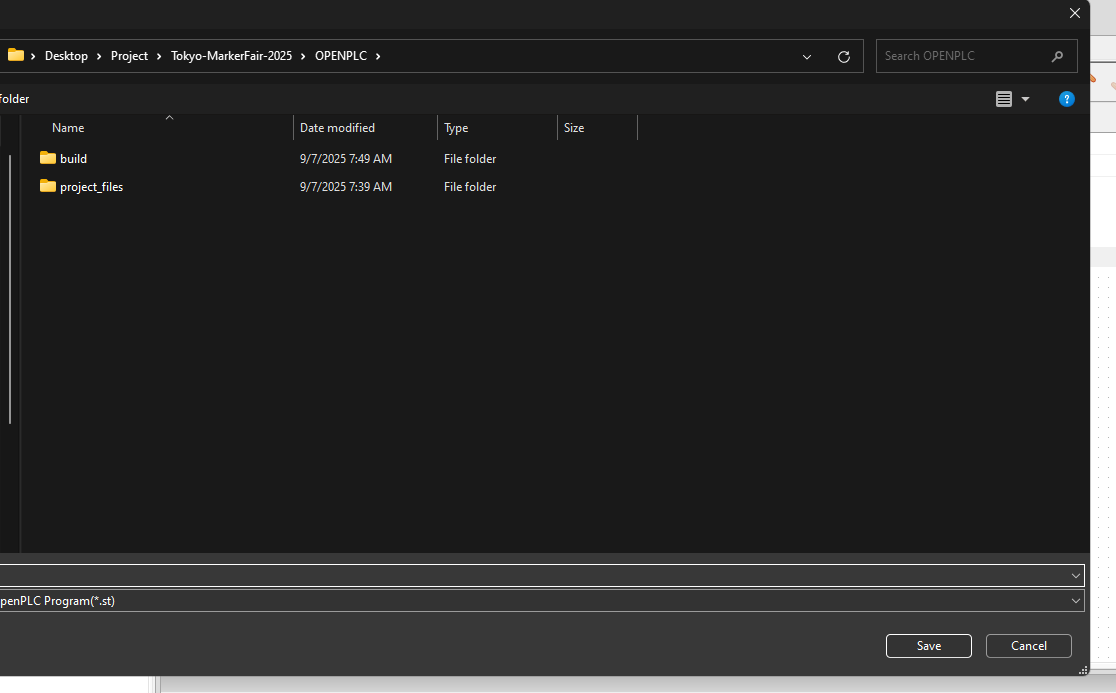
Sets the Directory where the Program is generated.
Upload the program to runtime
Next, access the Openplc Runtime web server:
http://IP Address:8180/
It is also openplc to the Default User Name and Password.
To Upload a program, click Programs→Choose.
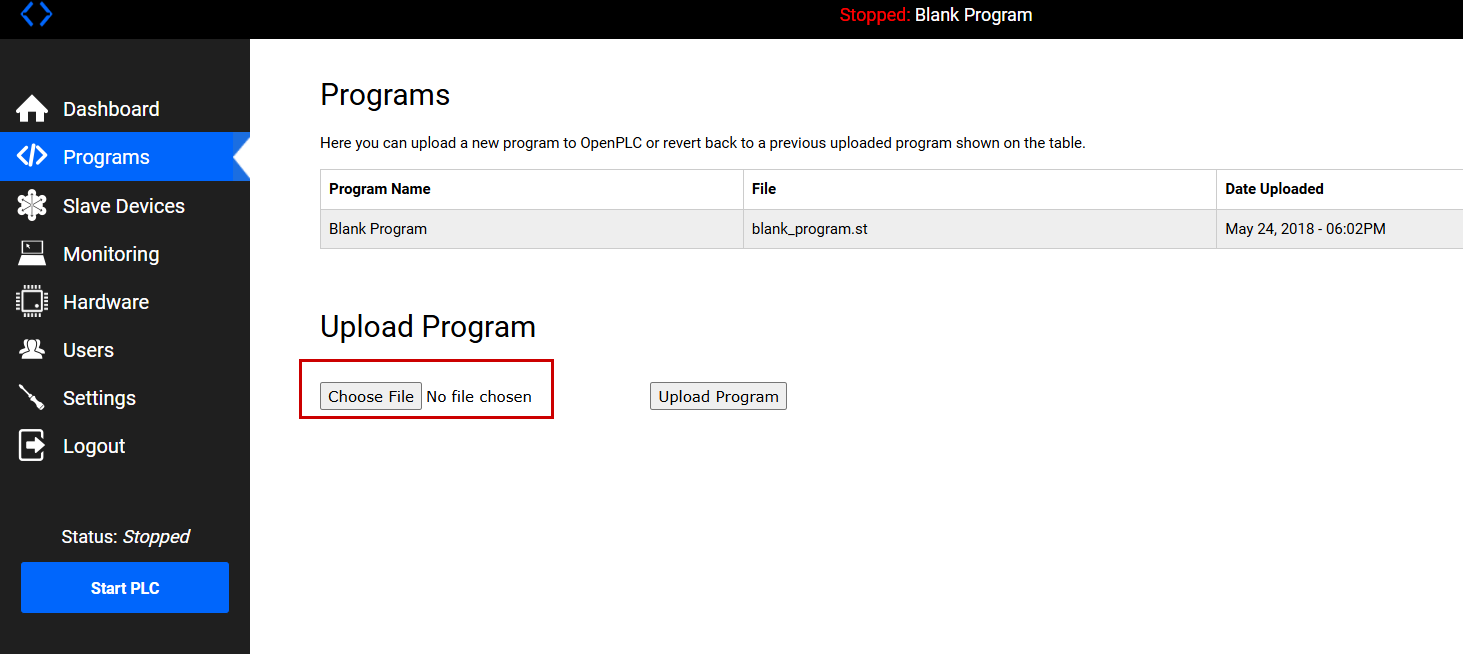
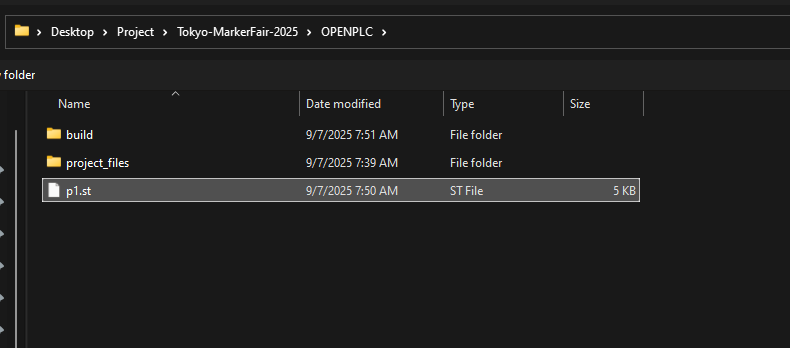
Select the program FILE that you just generated with the Openplc Editor.
Done!
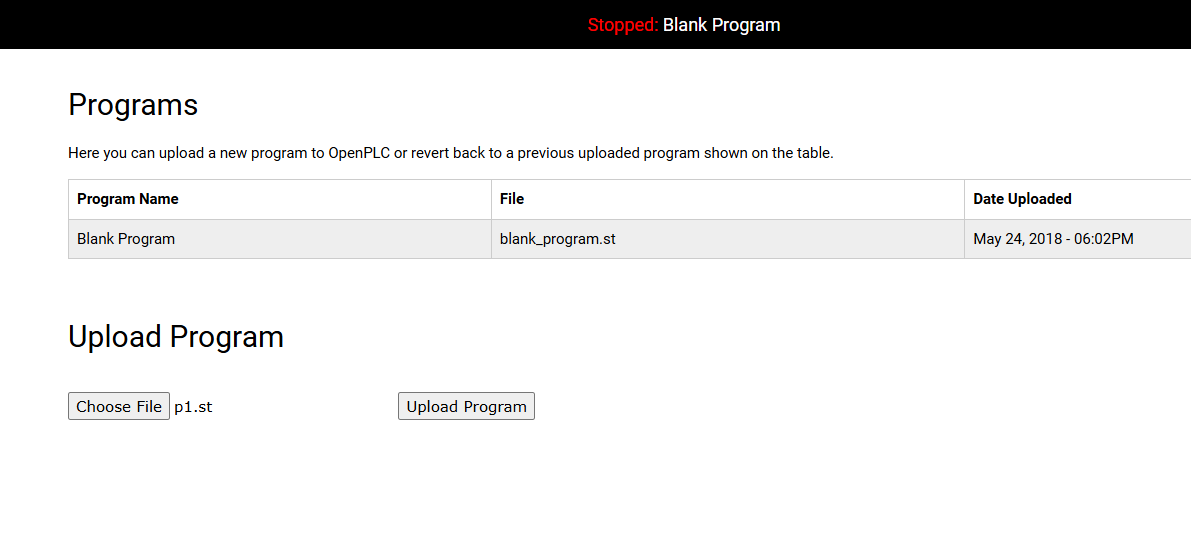
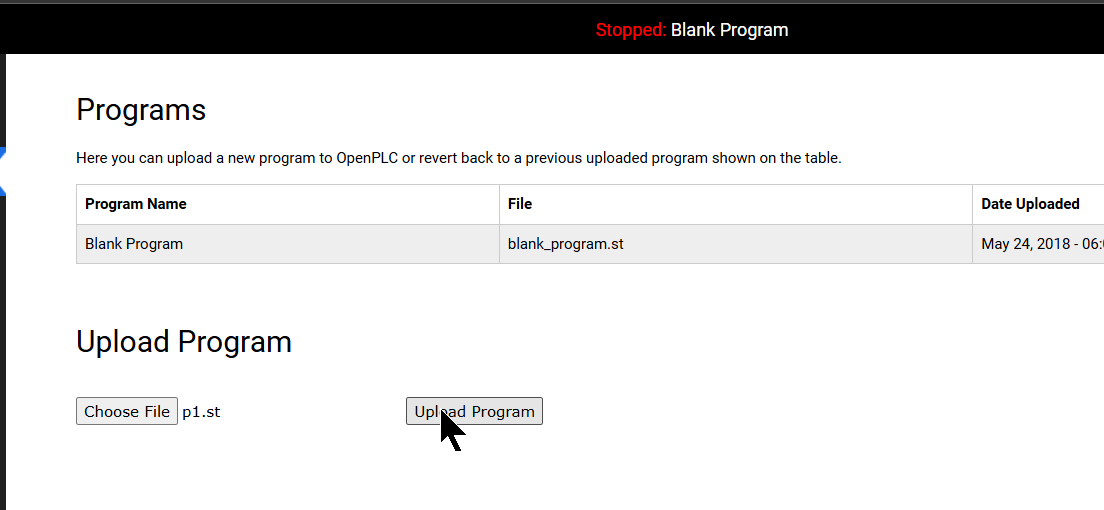
Next, click Upload Program to install the program in Runtime.
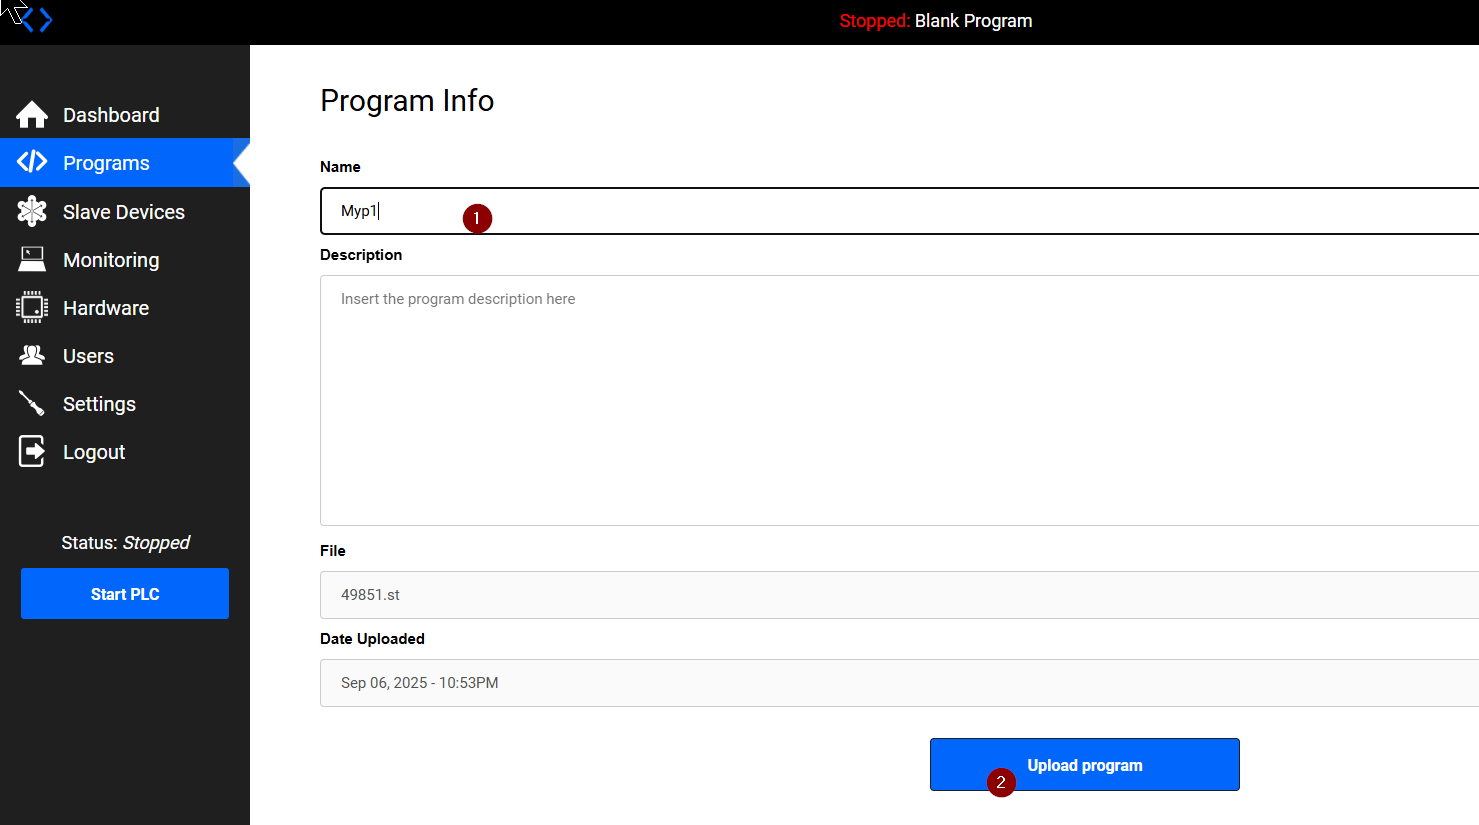
The Program Info settings screen is then displayed.
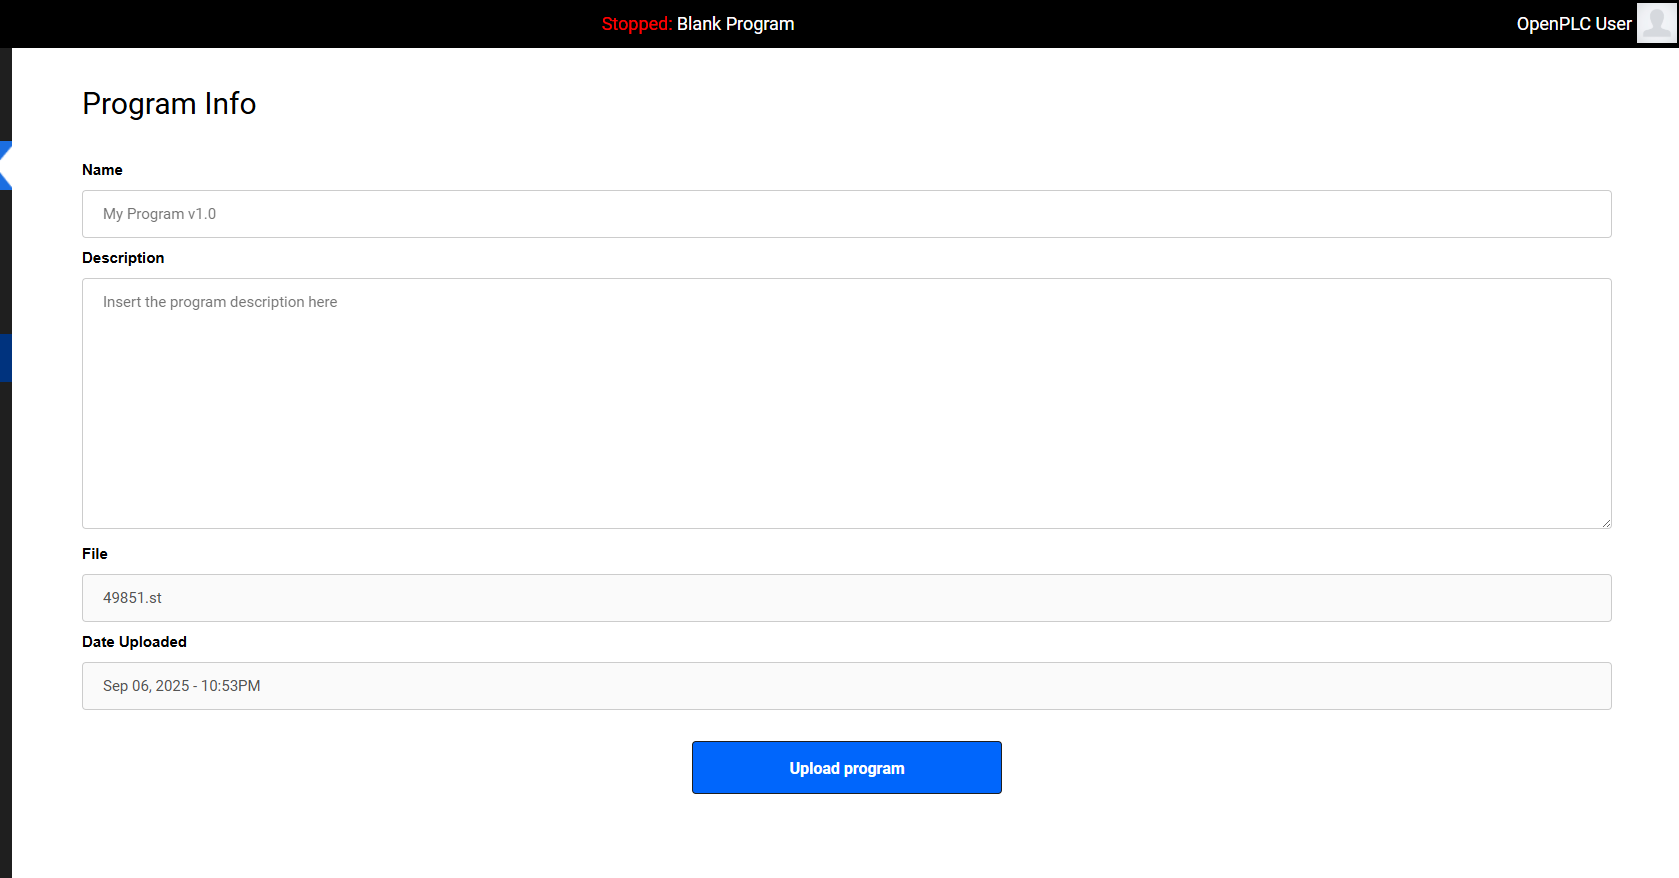
Enter a program name in the Name field and click Upload Program.
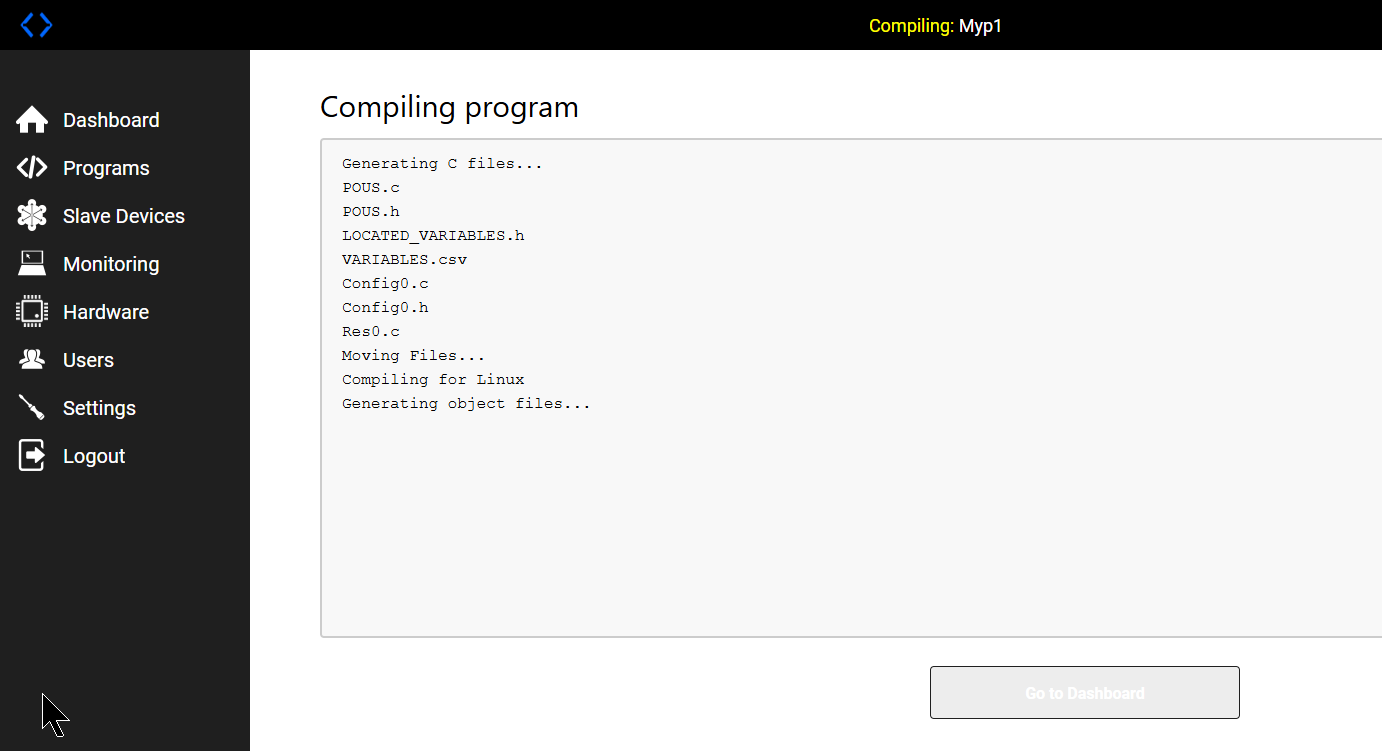
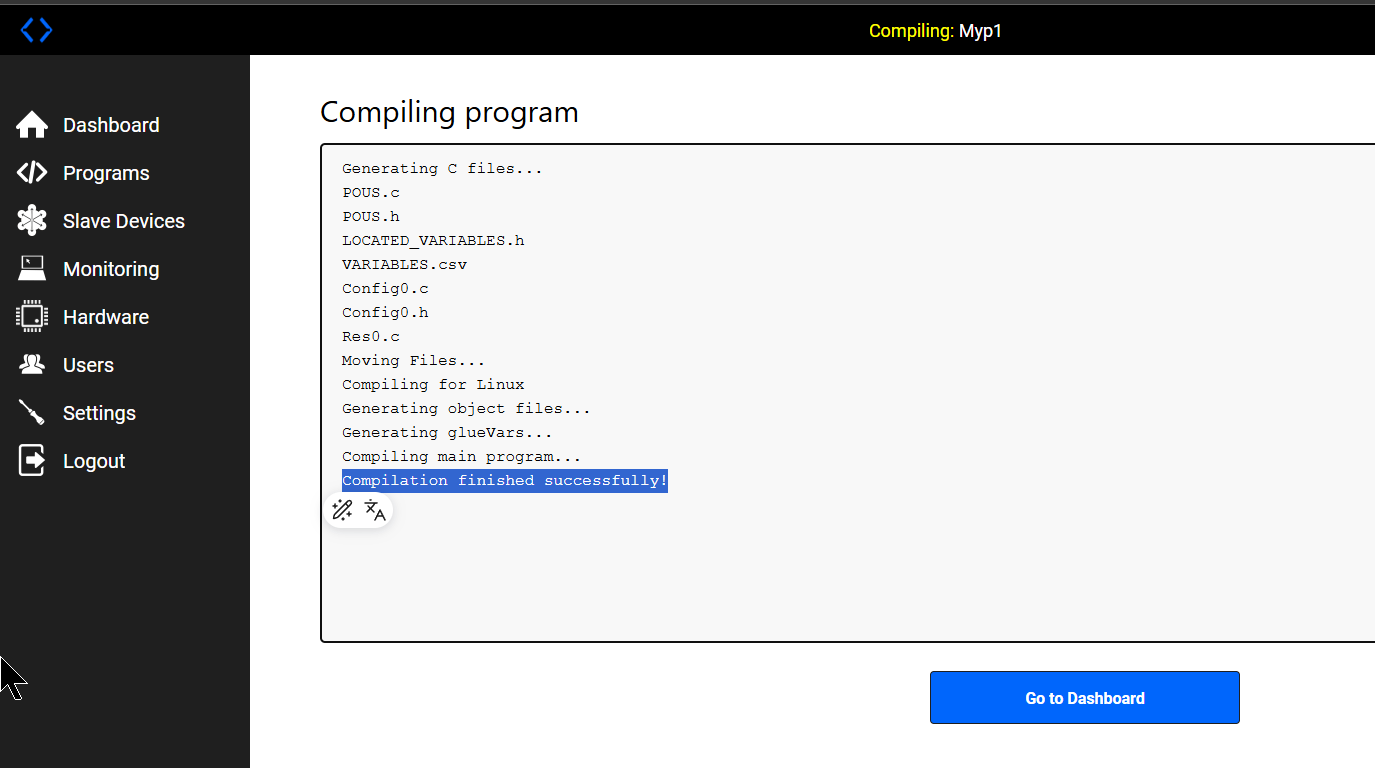
Wait for a while…
Done!Then click on the “Go to Dashboard” button.
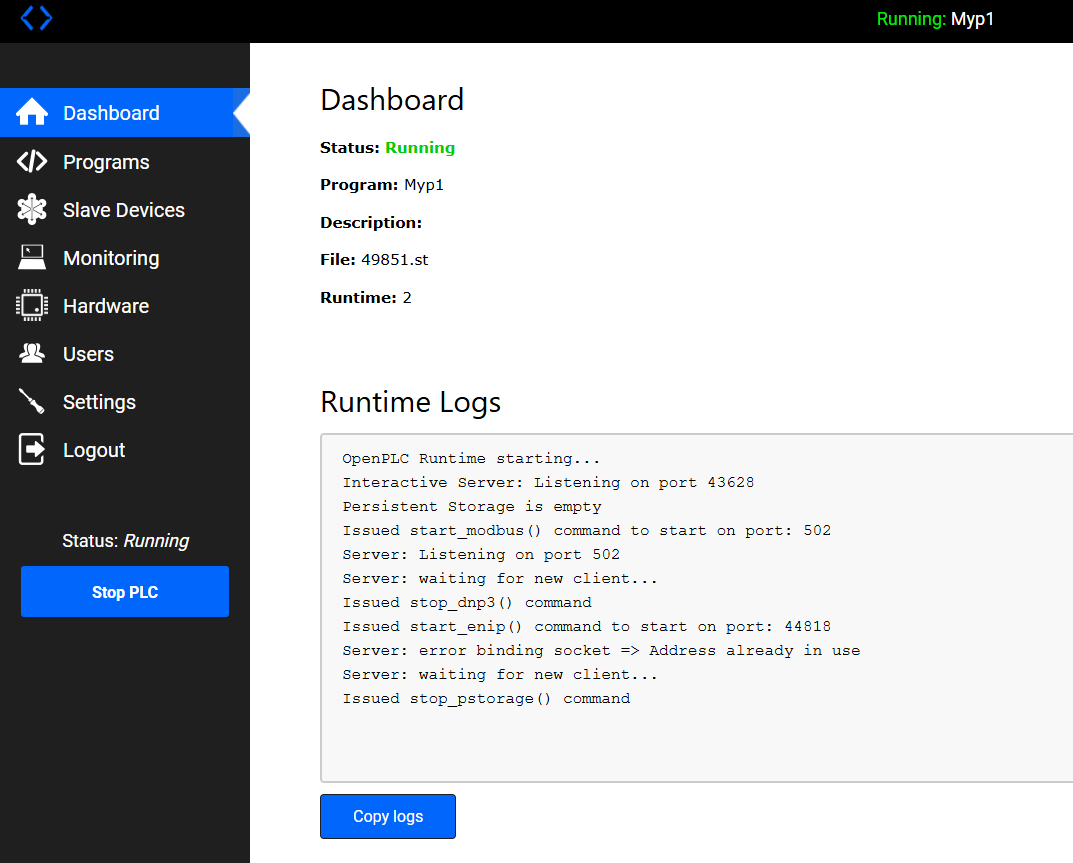
Startup of PLC
Next, click the “Start PLC” button to launch the PLC Runtime.
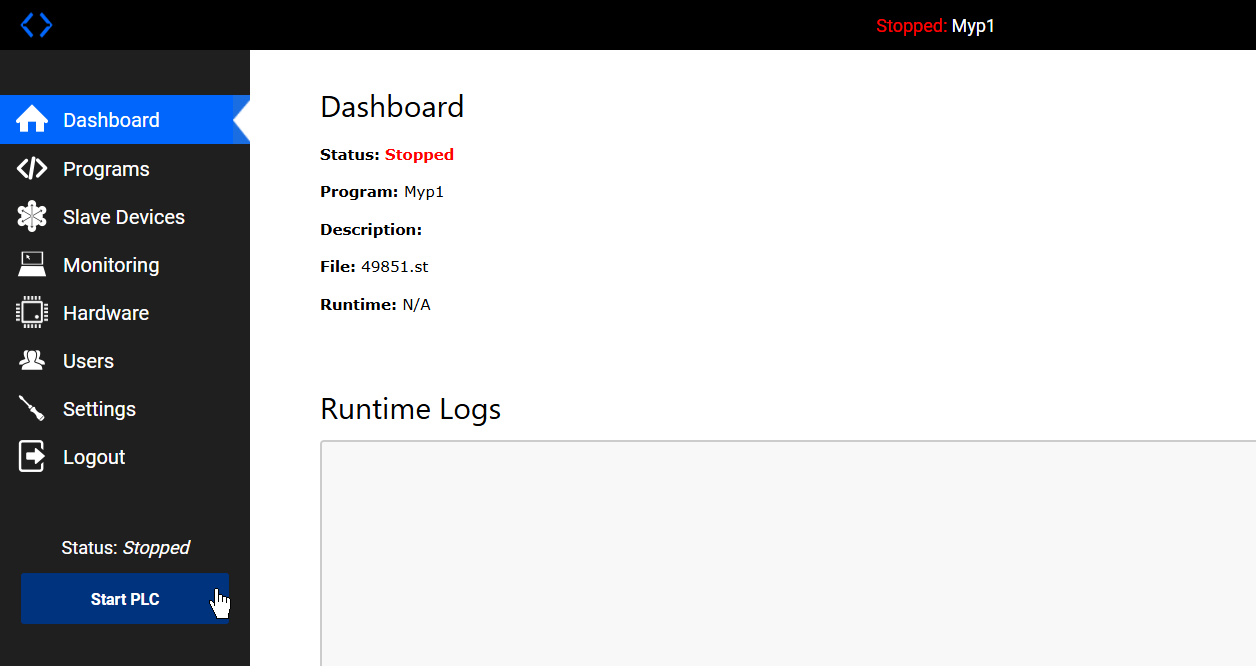
Done!!
Debugging from the Editor
Next, let’s debug the program. Click the Start Debug button shown below.
The Debugger Remote Configuration screen appears.
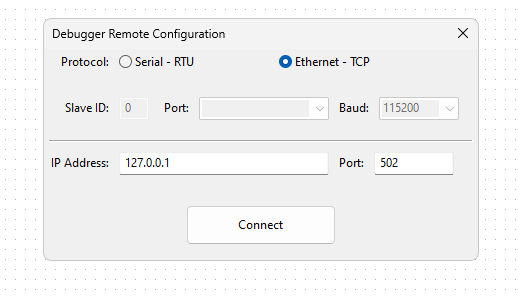
Set Ethernet-TCP, IP Address of WP615 and Port of OpenPLC Runtime, and Connect.
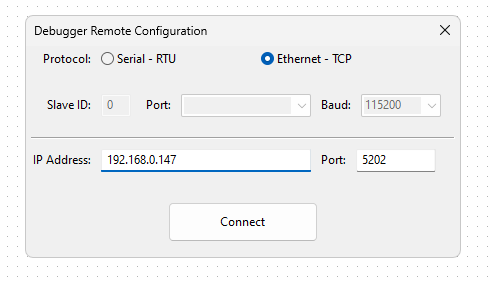
Done!
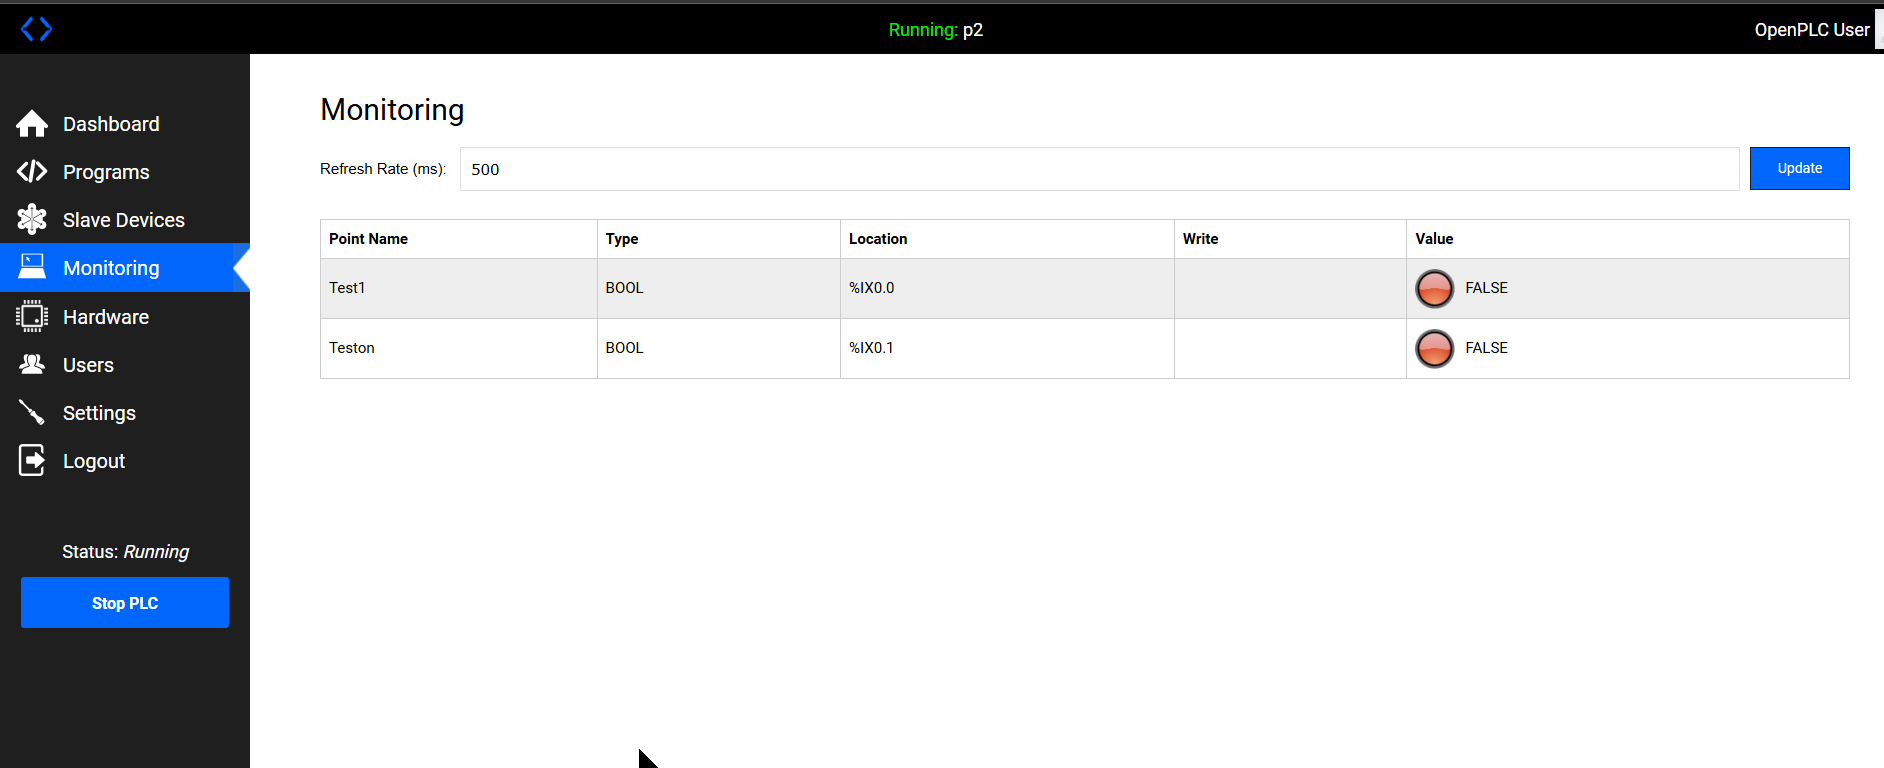
Monitor via web server
The last step is to monitor variables from the Web Server; by default, there are no variables that can be monitored on this screen.
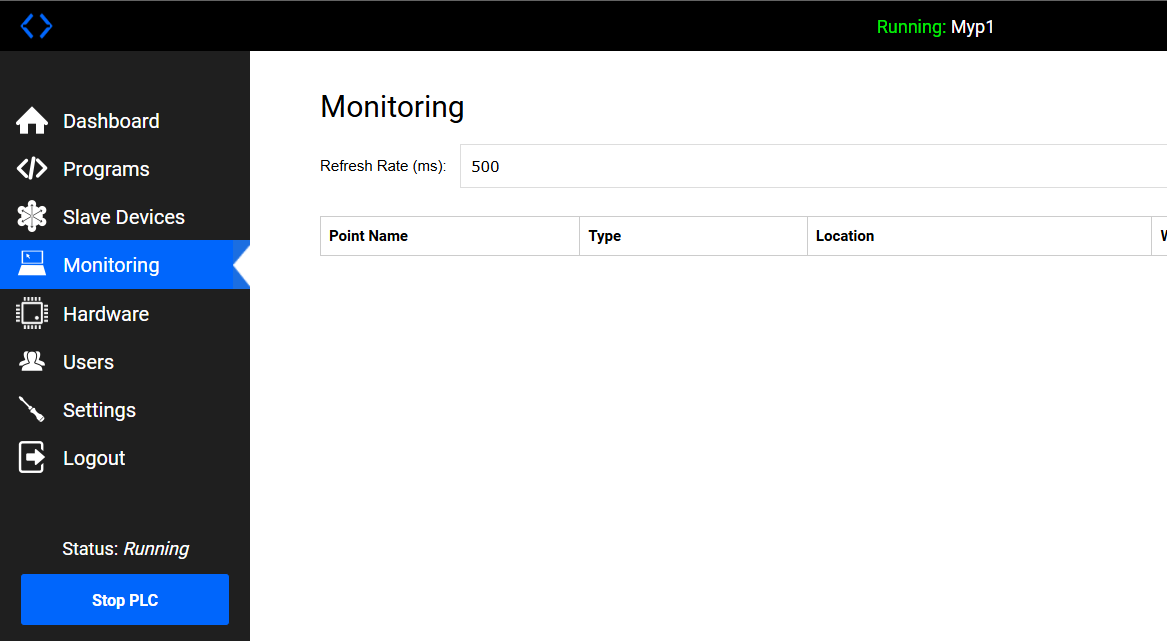
Set the address in the Location field.
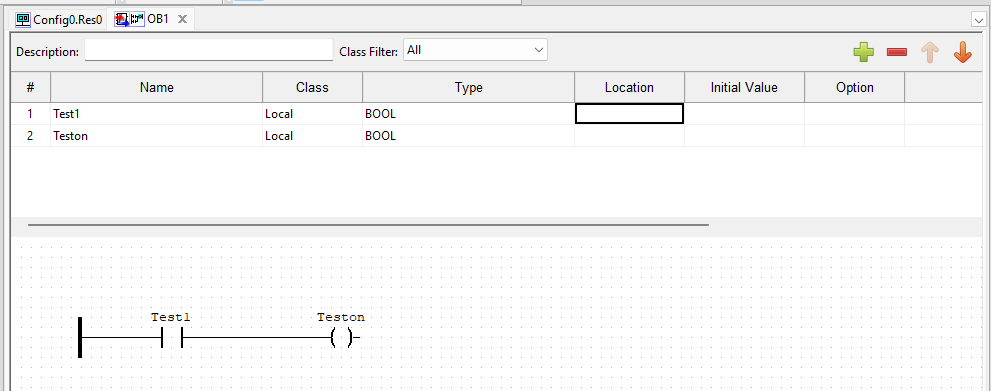
Set up %IX0.0 and %IX0.1, also generate PLC program and install it in Runtime.
Done!We were able to monitor the variables we just set in the Location setting on the Monitor screen!