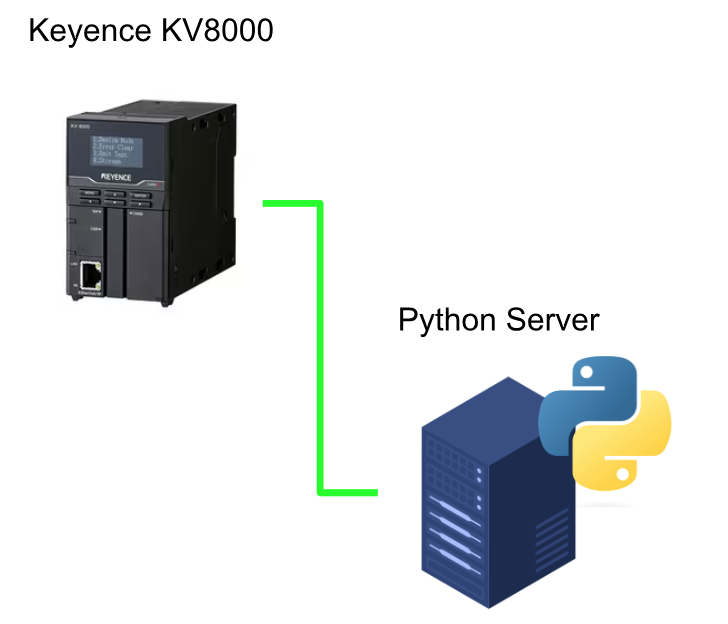
This time we will implement Socket communication, where the Client is KV8000 and we will build a sample python Server also.
Let’s start!
What is a Socket?
Simply put, a socket is a combination of an IP address and a port number: the IP address identifies the communicating terminal, and the port number identifies the service used by the terminal.
The TCP protocol is exactly that connection between IP address + port number. Data is sent and received using a path that is initially established and based on the established connection.
With the UDP protocol, the destination is specified by a combination of IP address and port number, and data is sent and received. Unlike TCP, however, no connection is initially established with the destination.

KV socket communication?
KV Socket communication is a function for sending and receiving arbitrary data to and from devices over Ethernet using the TCP/IP or UDP/IP protocols. It can communicate with a variety of supported devices as well as PCs and workstations.
In addition, data can be sent and received between the CPU Unit and the other device by using buffer memory and relays configured for socket communication and assembling grams.
TCP (non-procedural)-based communication
Because of flow control in TCP/IP-based data transmission and reception, the data length actually received by the receiver may differ from the data length sent by one transmission program. In this case, the data length to be sent must be controlled by the receiving user program.
In the case of TCP (no procedure), the data length actually received by the KV-8000/7500 is stored in the “Received Data Length (Result)” Buffer Memory.
Relays
Relay Leading Address is =n+4000+(KV Socket Number*100)
n= is the Relay Leading No. setting.
For example, let’s say I use Socket 0 and the Leading Relay No. is R3000.
The Relay Leading Address to be used in the program is:
30000+4000(0*100)=R34000.

Flow

TCP Active Open
Here is the Flow of TCP Active Open used in this article. Let’s assume that the Leading Relay is R30000 and the Socket is 0.
- Use U_SOPEN to write IP and other information.
- R34002(n+4002) is True.
- R36002(n+6002) Complete Flag answers.
- R34002(n+4002) is False.
So Connection is established, and if R36003(n+6003) is True, then it is a Connection Error and you should handle the error. If a connection error occurs, detailed error information can be obtained using the U_SSTAT function.

TCP Send
Here is the TCP Active outbound Flow used in this article. Let us assume that the Leading Relay is R30000 and the Socket is 0.
- U_SWRBUF is used to send data and other information.
- R34006(n+4006)Send request is True.
- R36006(n+6006)Complete Flag answers.
- False R34006(n+4006).
That completes the transmission. If R36007(n+6007) is True, a Connection Error has occurred and you should handle the error. If a connection error occurs, detailed error information can be obtained using the U_SSTAT function.

TCP Receive
Here is the incoming Flow for TCP Active used in this article. Let us assume that the Leading Relay is R30000 and the Socket is 0.
- Writes Server receive data and other information using SRDBUF.
- R34008(n+4008)Receive request is True.
- R36010(n+6010)Flag reply with Receive is returned.
- R36008(n+6010)Complete Flag is answered.
- R34006(n+4006)False.
That completes the transmission. If R36009(n+6009) is True, then a Connection error has occurred and the error should be handled. If a connection error occurs, detailed error information can be obtained using the U_SSTAT function.

TCP Close
Here is the Connection Close Flow of TCP Active used in this article. Here, we assume that the Leading Relay is R30000 and the Socket is 0.
- R34012(n+4012)Close request is True
- R36012(n+6012)Complete Flag being answered
- R36013(n+6013)Connection Open Flag becomes False
- R34012(n+4012) False.

Function
The following are the functions used in this article.
U_SOPEN
This function transfers the connection parameters of Connection to Buffer Memory.
Format
U_SOPEN ([EN,] Unit, Socket, Setting)
Argument
| Parameter Name | Description |
| EN | True=Execute function |
| Unit | Specify Unit number. 0=Port of KV8000 main unit |
| Socket | Specifies the KV Socket number. 0-15 can be set. |
| Setting | KV Socket Setup Data |
Settings Mapping
| Memeory | Buffer Memory | Description |
| Setting+0 | #25000+Socket番号x1500 | Local Port of KV8000 |
| Setting+1 | #25001+Socket番号x1500 | IP address of the connection destination Byte1 |
| Setting+2 | #25002+Socket番号x1500 | IP address of the connection destination Byte2 |
| Setting+3 | #25003+Socket番号x1500 | IP address of the connection destination Byte3 |
| Setting+4 | #25004+Socket番号x1500 | IP address of the connection destination Byte4 |
| Setting+5 | #25005+Socket番号x1500 | Port number that connect to |
| Setting+6 | #25006+Socket番号x1500 | TimeOut(ms) |
| Setting+7 | #25007+Socket番号x1500 | UDP Flag,1=UDP |
U_SWRBUF
This function sends the data to be sent to the appropriate Connection to Buffer Memory.
Format
U_SOPEN ([EN,] Unit, Socket, SendData)
Argument
| Parameter Name | Description |
| EN | True=Execute function |
| Unit | Specify Unit number. 0=Port of KV8000 main unit |
| Socket | Specifies the KV Socket number. 0-15 can be set. |
| SendData | Data to be sent (number of Bytes) |
Settings Mapping
| Memeory | Buffer Memory | Description |
| SendData+0 | #25009+Socket番号x1500 | Length of data to be sent (Byte) |
| SendData+1 | #25010+Socket番号x1500 | Transmission data (Byte0,1) |
| SendData+2 | #25011+Socket番号x1500 | Transmission data (Byte2,3) |
| SendData+3 | #25012+Socket番号x1500 | Transmission data (Byte4,5) |
| Etc.. | Etc.. | Etc.. |
U_SRDBUF
This function transfers the data to be received in the corresponding Connection from Buffer Memory to the program device.
Format
U_SRDBUF([EN,] Unit, Socket, Dst)
Argument
| Parameter Name | Description |
| EN | True=Execute function |
| Unit | Specify Unit number. 0=Port of KV8000 main unit |
| Socket | Specifies the KV Socket number. 0-15 can be set. |
| Dst | Destination of data to be received (Bytes) |
Settings Mapping
| Memeory | Buffer Memory | Description |
| Dst+0 | #25759+Socket Numberx1500 | Length of received data (Byte) |
| Dst+1 | #25760+Socket Numberx1500 | Received data (Byte0,1) |
| Dst+2 | #25761+Socket Numberx1500 | Received data (Byte2,3) |
| Dst+3 | #25762+Socket Numberx1500 | Received data (Byte4,5) |
| Etc.. | Etc.. | Etc.. |
U_SSTAT
Function to get the Status of the corresponding Connection.
Format
U_SOPEN ([EN,] Unit, Socket, Dst)
Argument
| Parameter Name | Description |
| EN | True=Execute function |
| Unit | Specify Unit number. 0=Port of KV8000 main unit |
| Socket | Specifies the KV Socket number. 0-15 can be set. |
| Dst | Destination of data to be received (Bytes) |
Settings Mapping
| Memeory | Buffer Memory | Description |
| Dst+0 | #25748+Socket Numberx1500 | state of connectivity |
| Dst+1 | #25749+Socket Numberx1500 | IP address(Bye1) |
| Dst+2 | #25750+Socket Numberx1500 | IP address(Bye2) |
| Dst+3 | #25751+Socket Numberx1500 | IP address(Bye3) |
| Dst+4 | #25752+Socket Numberx1500 | IP address(Bye4) |
| Dst+5 | #25753+Socket Numberx1500 | Port to connect to |
| Dst+6 | #25754+Socket Numberx1500 | Connection Open State |
| Dst+7 | #25755+Socket Numberx1500 | transmission state |
| Dst+8 | #25756+Socket Numberx1500 | Response state |
| Dst+9 | #25757+Socket Numberx1500 | Reception state |
| Dst+10 | #25758+Socket Numberx1500 | Connection Close state |
| Dst+11 | #25759+Socket Numberx1500 | Received data length |
Status
自分は基本的に0,4見ればよいだと思います。
| Code | Description |
| 0 | CLOSED,Connection is closing |
| 1 | LISTEN,Connection is available |
| 2 | SYS SENT,Active Open in operation, SYN sent |
| 3 | SYS RCVD,SYN received from Server |
| 4 | ESTABLISHED,Connection has been established. |
| 5 | CLOSE WAIT,FIN received. |
| 6 | FIN WAIT1Sent by FIN |
| 7 | FIN WAIT2,1,FIN received. |
| 8 | CLOSING,FIN is received and Connection is in Close |
| 9 | LAST AKC,FIN received and FIN also sent. |
Implmentation
Here is the implementation.
Keyence Side
Configuration
Start KV Studio and open the Unit Editor.

Socket Function
Enable the function by setting Function>Socket function to Used.

Leading relay No
Leading relay No.Default is R3000, that is, Connection control and Status data start from R3000.
IP address
IP address should also be set according to the application.

Socketx Setting
Socket0 to Socket15 can be configured.
Kv Socket is set to TCP (Non-procedure) TCP No-Procedure.
H->L sets whether Byte is Swap or not.

Program
The next step is to create the program.
DUT
DUT_U_SSTAT_TCPStatus
This structure is to clarify the Connections Status of the function U_SSTAT.
| Closed BOOL Listen BOOL SynSent BOOL SynRCVD BOOL Established BOOL CloseWait BOOL FinWait1 BOOL FinWait2 BOOL Closing BOOL LastAck BOOL |
Variable
Global
Global variable Socket0 substitutes the required Request and Response into the variable instead of the absolute address.
| gbTcp0ActiveOpenReq BOOL R34002 gbTcp0ActiveOpenComp BOOL R36002 gbTcp0ActiveOpenFail BOOL R36003 gbSocket0SendReq BOOL R34006 gbSocket0SendComp BOOL R36006 gbSocket0SendFail BOOL R36007 gbSocket0ReceveData BOOL R36010 gbSocket0ReceveInCorrect BOOL R36011 gbSocket0ReceveReq BOOL R34008 gbSockte0ReceveEnd BOOL R36008 gbSocket0CloseReq BOOL R34012 gbSocket0ReceveFail BOOL R36009 |
Local
Local variables define the devices that control the communication program, such as Unit number and Socket number.
| wUnitNo INT wstextLen UINT wSomeValue UINT wKVSocketNo INT stSocket0Status DUT_U_SSTAT_TCPStatus stext STRING[255] sSomeText STRING[10] iStep UINT iCounter UINT bStart BOOL bReset BOOL bError BOOL arrControlData ARRAY[0..7] OF UINT |
Main
Configure your Sending Data
A random integer is converted to a string and sent to the Python Server with the last part of “Hello from Keyence KV8000! This way, you can always check if the data has actually been sent.
Also, since the number of converted strings is no longer a constant due to the current value of the integer, the LEN() function is used to obtain the length of the string.
| wSomeValue:=wSomeValue+1; stext:=’Hello from Keyence KV8000!’; sSomeText:=STR(wSomeValue); stext:=CONCAT(stext,sSomeText); wstextLen:=LEN(stext); |
Move to DM
Since absolute addresses are inevitably easier to handle in Keyence functions, the SMOV function is used to send DM101 by batch transfer of the string that was just set. (DM100 is the place to store the size of the transmission.)

Get Connection Status
Obtains the status of Socket 0 in 100ms Cycle using CR2004.
| U_SSTAT( EN:=CR2004 ,Unit:=wUnitNo ,Socket:=wKVSocketNo ,Dst:=DM10 ); stSocket0Status.Closed:=DM10 =0; stSocket0Status.Listen:=DM10 =1; stSocket0Status.SynSent:=DM10 =2; stSocket0Status.SynRCVD:=DM10 =3; stSocket0Status.Established:=DM10 =4; stSocket0Status.CloseWait:=DM10 =5; stSocket0Status.FinWait1:=DM10 =6; stSocket0Status.FinWait2:=DM10=7; stSocket0Status.Closing:=DM10=8; stSocket0Status.LastAck:=DM10=9; |
Socket Communication
This is the Main section and use devices bstart to start the program.
- Step10
Set the parameters of Connection, clear the receive Buffer, and reset to the state where each function is not executed. - Step20
U_SOPEN and transfer the Connection parameter to Buffer Memory. gbTcp0ActiveOpenReq is set to True to start connection with Python Server and when gbTcp0ActiveOpenComp Flag is set to True, go to next Step. - Step30
If there is an error, go to 999. If there is no problem, go to the next step. - Step40
Reset gbTcp0ActiveOpenReq, transfer data to be sent to Buffer Memory using the U_SWRBUF function, set gbSocket0SendReq to True, and send data to Python Server. gbSocket0SendComp becomes True, it indicates that the transmission is complete, so proceed to the next Step. - Step50
If there is an error, go to 999. If there is no problem, go to the next step. - Step60
Resets the receive Buffer. - Step70
Transfer the destination of data received from the Python Server to Buffer Memory using the U_SRDBUF function. gbSocket0ReceiveReq is set to True to start receiving. gbSockte0ReceiveEnd becomes True to indicate that receiving is complete. Proceed to the next Step. - Step80
If there is an error, go to 999. If there is no problem, go to the next step. - Step90
Delay Step until the next transmission operation. - Step999
This is the Step of error handling.
| if bStart and iStep =0 then iStep:=10; bStart:=FALSE; end_if; CASE iStep of 10: //Init the data //Control Data arrControlData[0]:=9000; //local port arrControlData[1]:=192; //Server ip byte1 arrControlData[2]:=168; //Server ip byte2 arrControlData[3]:=1; //Server ip byte3 arrControlData[4]:=194; //Server ip byte4 arrControlData[5]:=5000; //Server Port arrControlData[6]:=1000; //Timeout arrControlData[7]:=0; //UDP Flag //Receive Data Buffer FMOV(0,DM1000,100); //Function Block U_SRDBUF( en:=False ,Unit:=wUnitNo ,Socket:=wKVSocketNo ,Dst:=DM1000 ); U_SWRBUF( EN:=False ,Unit:=wUnitNo ,Socket:=wKVSocketNo ,SendData:=DM100 ); U_SOPEN(EN:=False ,Unit:=wUnitNo ,Socket:=wKVSocketNo ,Setting:=arrControlData ); U_SSTAT( EN:=False ,Unit:=wUnitNo ,Socket:=wKVSocketNo ,Dst:=DM10 ); iStep:=20; 20://TCP Open Req gbTcp0ActiveOpenReq:=True; U_SOPEN( EN:=True ,Unit:=wUnitNo ,Socket:=wKVSocketNo ,Setting:=arrControlData ); if gbTcp0ActiveOpenComp then iStep:=30; end_if; 30://Check TCP Open Status if gbTcp0ActiveOpenFail then iStep:=999; ELSE iStep:=40; end_if; 40://TCP Send Data gbTcp0ActiveOpenReq:=False; DM100:=wstextLen; U_SWRBUF(EN:=True ,Unit:=wUnitNo ,Socket:=wKVSocketNo ,SendData:=DM100 ); gbSocket0SendReq:=True; if gbSocket0SendComp then iStep:=50; U_SWRBUF(EN:=False ,Unit:=wUnitNo ,Socket:=wKVSocketNo ,SendData:=DM100 ); gbSocket0SendReq:=False; end_if; 50://Check TCP Send Status if gbSocket0SendFail then iStep:=999; else iStep:=60; gbSocket0SendReq:=False; end_if; 60: //Rset the Receive Buffer FMOV(0,DM1000,100); iStep:=70; 70://TCP Receive Data U_SRDBUF( en:=true ,Unit:=wUnitNo ,Socket:=wKVSocketNo ,Dst:=DM1000 ); gbSocket0ReceveReq:=True; if gbSockte0ReceveEnd or not stSocket0Status.Established then U_SRDBUF( en:=False ,Unit:=wUnitNo ,Socket:=wKVSocketNo ,Dst:=DM1000 ); gbSocket0ReceveReq:=false; iStep:=80; end_if; 80://Check Receive Status if gbSocket0ReceveInCorrect or gbSocket0ReceveFail then iStep:=999; else iStep:=90; iCounter:=0; end_if; 90://10ms Pulse,Step Back Delay if CR2004 then iCounter:=iCounter+1; end_if; if iCounter>=600 THEN iStep:=40; iCounter:=0; end_if; 999://Error,Wait Reset bError:=True; bReset:=True;//Auto Reset U_SRDBUF( en:=False ,Unit:=wUnitNo ,Socket:=wKVSocketNo ,Dst:=DM1000 ); U_SWRBUF( EN:=False ,Unit:=wUnitNo ,Socket:=wKVSocketNo ,SendData:=DM100 ); U_SOPEN(EN:=FALSE ,Unit:=wUnitNo ,Socket:=wKVSocketNo ,Setting:=arrControlData ); if CR2004 and bReset then iCounter:=iCounter+1; end_if; gbSocket0CloseReq:=True; gbSocket0ReceveReq:=False; gbTcp0ActiveOpenReq:=False; gbSocket0SendReq:=False; if iCounter>=600 then gbSocket0CloseReq:=False; iStep:=10; bError:=False; bReset:=False; iCounter:=0; end_if; END_CASE; |
Python Side
This is the Python side implementation.
| import socket HOST = ‘192.168.1.194’ PORT = 12344 with socket.socket(socket.AF_INET, socket.SOCK_STREAM) as s: s.bind((HOST, PORT)) s.listen() conn, addr = s.accept() with conn: print(f’Connected by {addr}’) while True: data = conn.recv(1024) if not data: break print(‘data from client:’.encode()+data) conn.sendall(data+’,Data back from Server’.encode()) |
Implementation-2
The following is a brief overview of how to implement common GET requests that use the REST API.
Keyence Side
Just force the first place where you set up the string to write all the necessary contents for a GET request.
| stext:=’GET /mydata HTTP/1.1$R$LHost: $R$LUSER-Agent: Keyence$R$LAccept: text/html$R$LAccept-Encoding: identity$R$LAccept-Charset: utf-8$R$L$R$L’; wstextLen:=LEN(stext); |
Python Side
| from flask import Flask app=Flask(__name__) @app.route(‘/’) def hello_world(): return “hello” @app.route(‘/mydata’) def get_data(): return “data-1-2-3-4”,200 if __name__==’__main__’: app.run(host=”192.168.1.194″) |
Result


Download Source Project
Download the Sample Project from Github.
https://github.com/soup01Threes/Keyence/blob/main/SocketTest_Get_Finally.7z