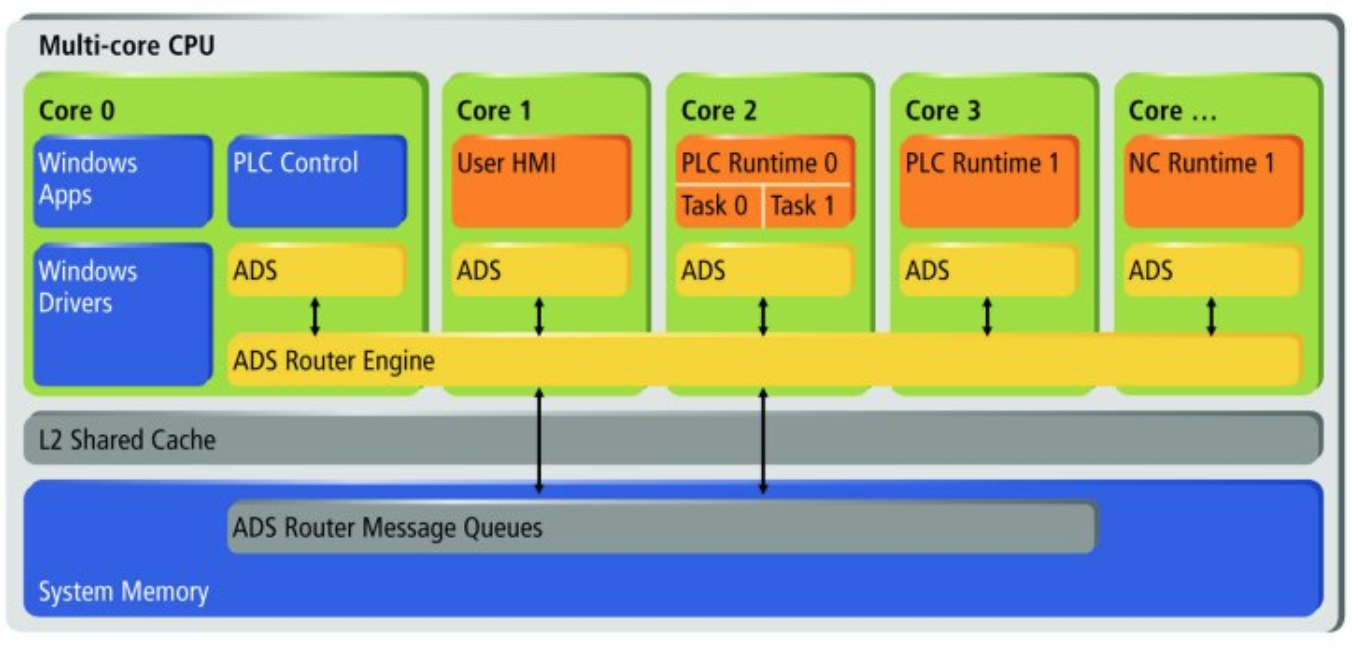
ADSはなに?
ADS=Automation Device Specificationのことで、独立したでデバイスやField-bus Interfaceを定義し、アクセスの方法を管理します。そのADS Interfaceは他のADSデバイスとCommunicationすることも可能です。
TwinCATシステムでは各モジュール(TwnCAT PLC・HMIなど)を独自のデバイスとして扱うことできます。Taskことにソフトウェアモジュールがあり、それはServerかClientですね。
Servers
システム内でServersはデバイスのような働き(実物のハードウェアみたいに)、なのでSoftware上でそのような仮想デバイスとIntefaceで通信することが可能ですね。
Clients
プログラム内でServersにリクエストをするのはClientsになります。
それらのObject間でADS Interface経由し”Message router”使用して通信します。それらのMessageはTCP/IP 接続で管理されます。その”Message router”はすべてのTwinCAT デイバスにも存在しており、Server・Client間でコマンドやデータやStatusをやり取りすることが実現します。
ADS device identification
すべてのADSデバイスにも自分独自の2つidentifiersがあります。
- PortNr
- NetId
AMS-Ports
PortはClient アプリケーションが初めてADS デバイスをアクセスするときに振り分けられた数字です。ADSデバイスは自分の番号などすでに決めています。
例えば初めてアプリケーションLoginするよく見えるのMessage:
Port851=TC3 PLC Runtime System 1です。
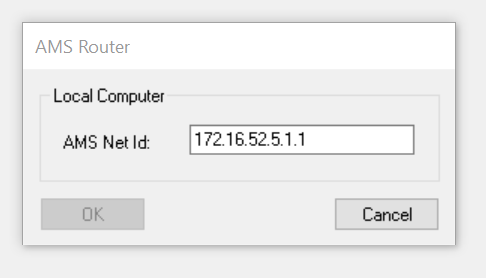
AMS NetId
ネットワーク上のTwinCATデバイスはAMS NetIDに認識されます。そのAMS NetIdは8個のBytes数字に構成されています。最初の4つの数字は自由選択でき、最後の2つ(.1.1)の場合が多くはSubnet Maskとして使用しています。AMS NetIdは必ずかぶらないように注意してください。
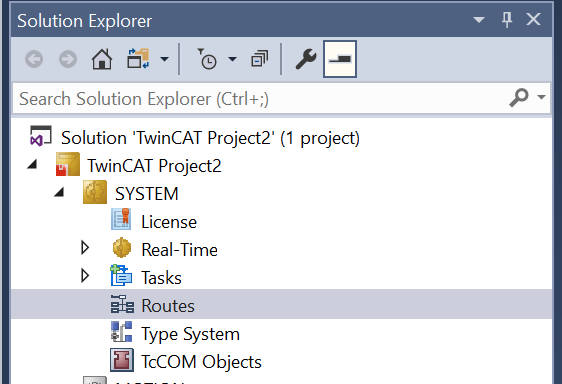
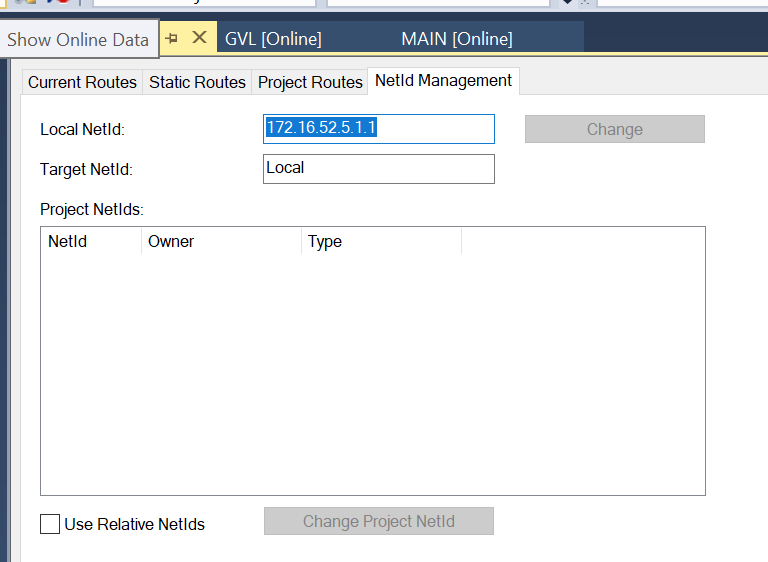
NetIdの確認方法1
TwinCAT XAEを起動し、SYSTEM>Routesをクリックします。
NetId ManagementのところにLocal NetIdがあります。
NetIdの確認方法2
Task BAR>Router>Change AMS NetIdします。
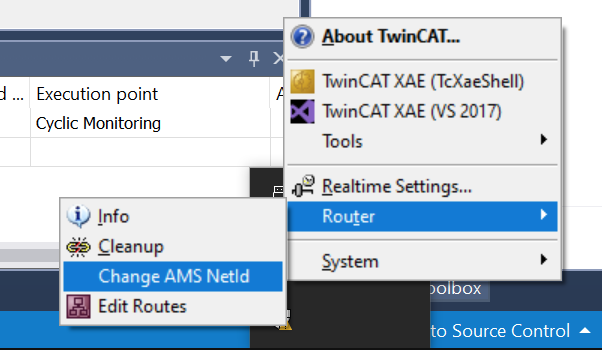
同じくAMS Net Idが表示されます。
インストール
今回インストールに関しては2つに分けれています。Anacondaをインストールする部分とpyadsをインストールするところです。別にAnacondaではなく普通のTerminalでPythonをプログラムしたり、VSCodeでやったり、Jupyter notebookでやったりでも構いません。自分にとってAnacondaは便利なのだけです。
Anaconda
まず下記のLinkをアクセスします、ExeをDownloadします。
https://www.anaconda.com/products/individual
Next>します。
ライセンス同意します。

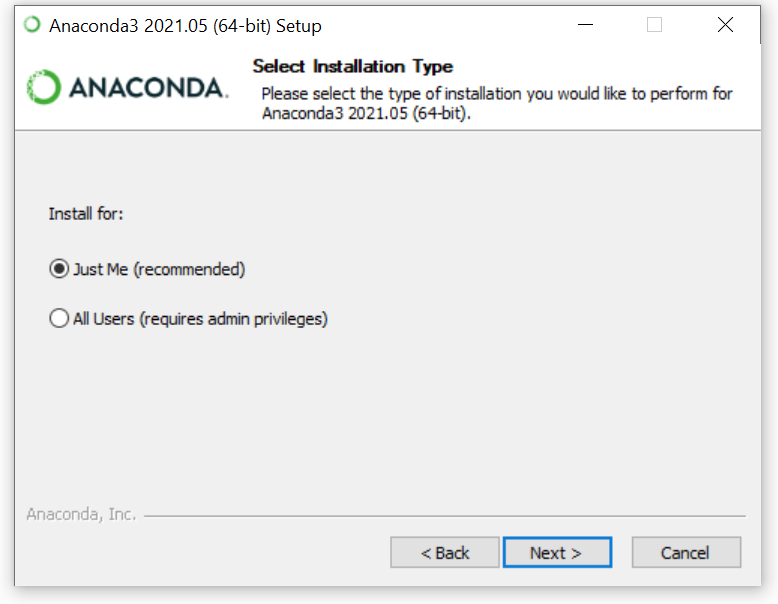
Just Meを選択し、Nextします。
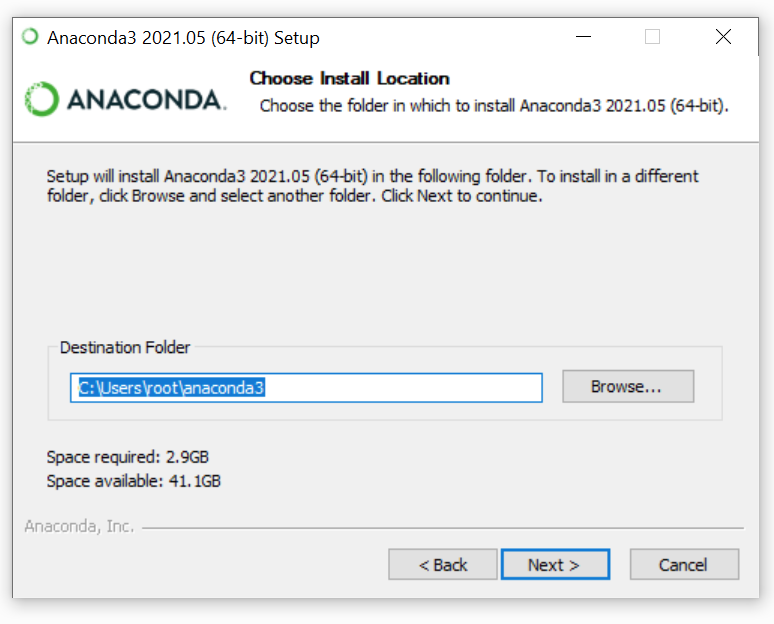
Install Locationを選択し、Next>します。
Checkを外して、Installします。

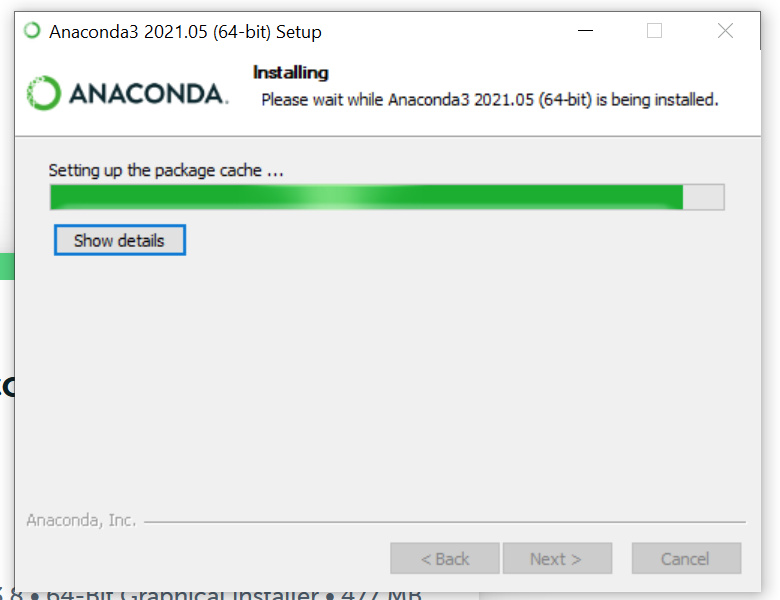
しばらく待ちます…
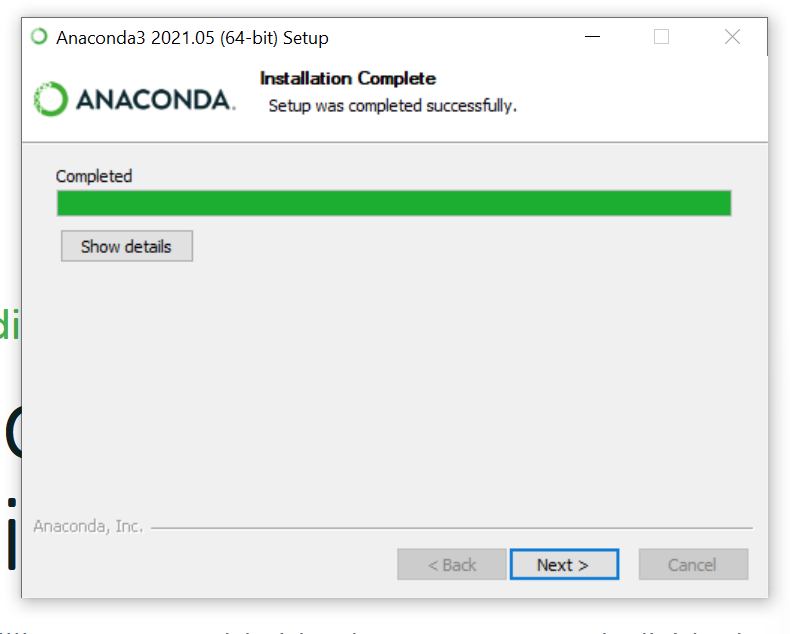
終わったらNext>で進みます。
Next>します。
FinishでOK!

環境テスト
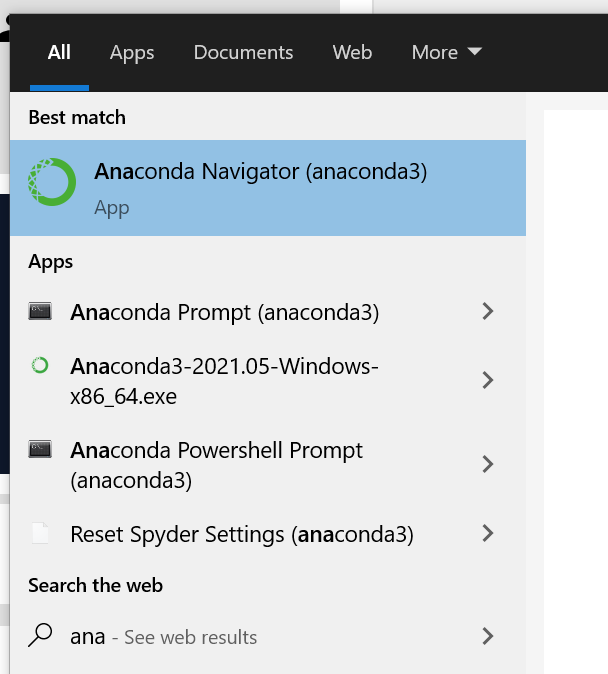
Anaconda Navigatorを起動します。
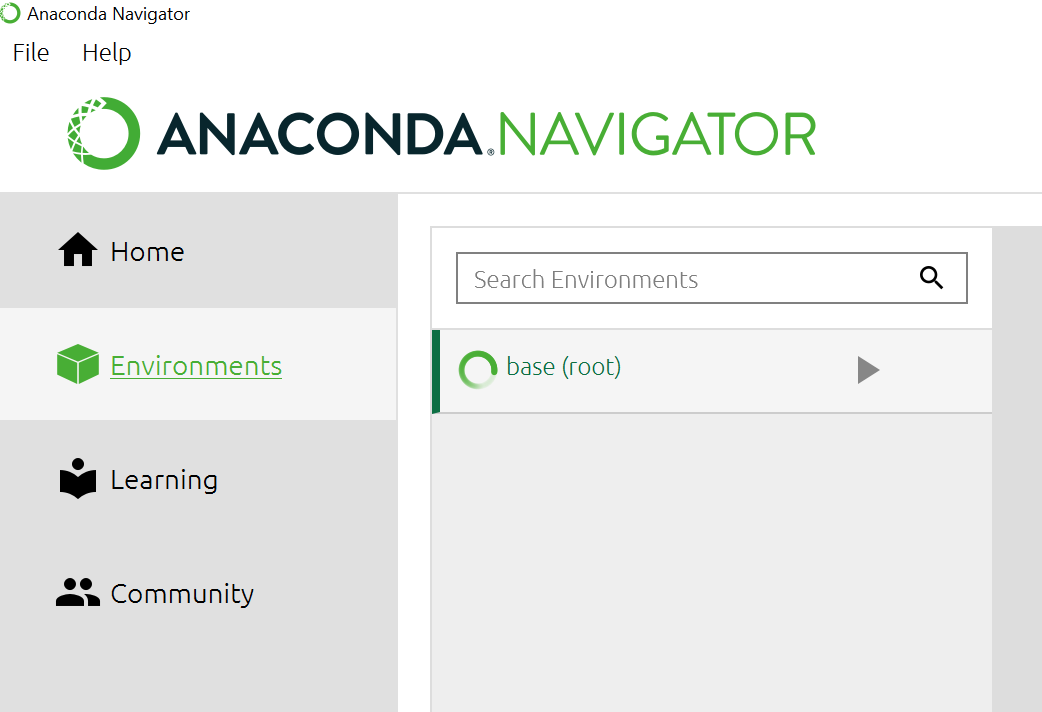
最初はBaseの環境しかありません。
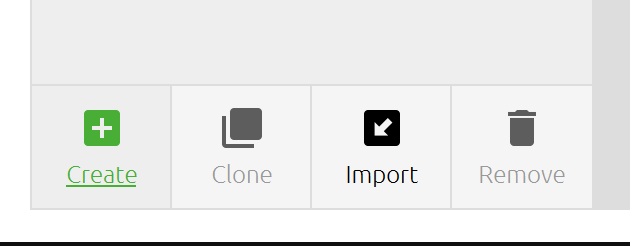
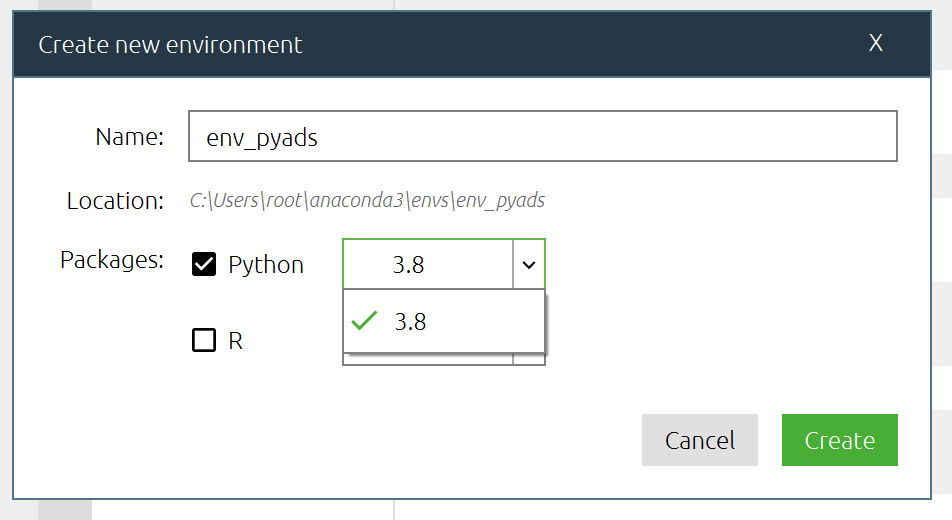
右下でCreateをクリックし、新しい仮想環境を作成します。
仮想環境の名前やPythonのバージョン設定し、Createします。
もちろんTerminalからにも色々な操作できます。
Anaconda Promptを起動します。

以下のコマンドどんな環境存在しているかを一覧できます。
| conda info -e |

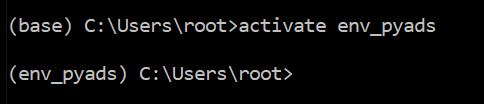
そして以下のコマンドで仮想環境を起動します。
| activate env_pyads |
pyads
次はpyadsのインストールですね。
公式LINK:
https://pyads.readthedocs.io/en/latest/index.html
このpyadsはPython上でTwinCAT デバイスと通信することが可能です。そのpyadsはWindows上ではTcAdsDll.dll を使用し、Linuxならadslib.soを使用しています。Linuxの場合はpyads パッケージ含まれています。
以下のコマンドでInstallします。
| pip install pyads |

環境テスト
パッケージをちゃんインストールできるのかをCheckします。
| import pyads |

プログラム
パッケージ内の関数たくさんあり全部説明が無理ありますので、使えそうなものを一部拾って説明します。主にDevicesの接続・読み書き・あと変数が変化あったときのお知らせですね。
Connect
最初はTwinCAT PLCと接続し現在のSystem状態を取ってみましょう。
Code
| import pyads from ctypes import sizeof ads_net_id=’172.16.52.5.1.1′ plc=pyads.Connection(ads_net_id,pyads.PORT_TC3PLC1) print(‘Connecting to TwinCAT PLC..’) plc.open() print(‘Current connection status:’,plc.is_open) print(‘Current Status:’,plc.read_state()) print(‘Closing the Connections..’) plc.close() print(‘Current Status:’,plc.is_open) |
Result
| Connecting to TwinCAT PLC.. Current connection status: True Current Status: (5, 0) Closing the Connections.. Current Status: False |
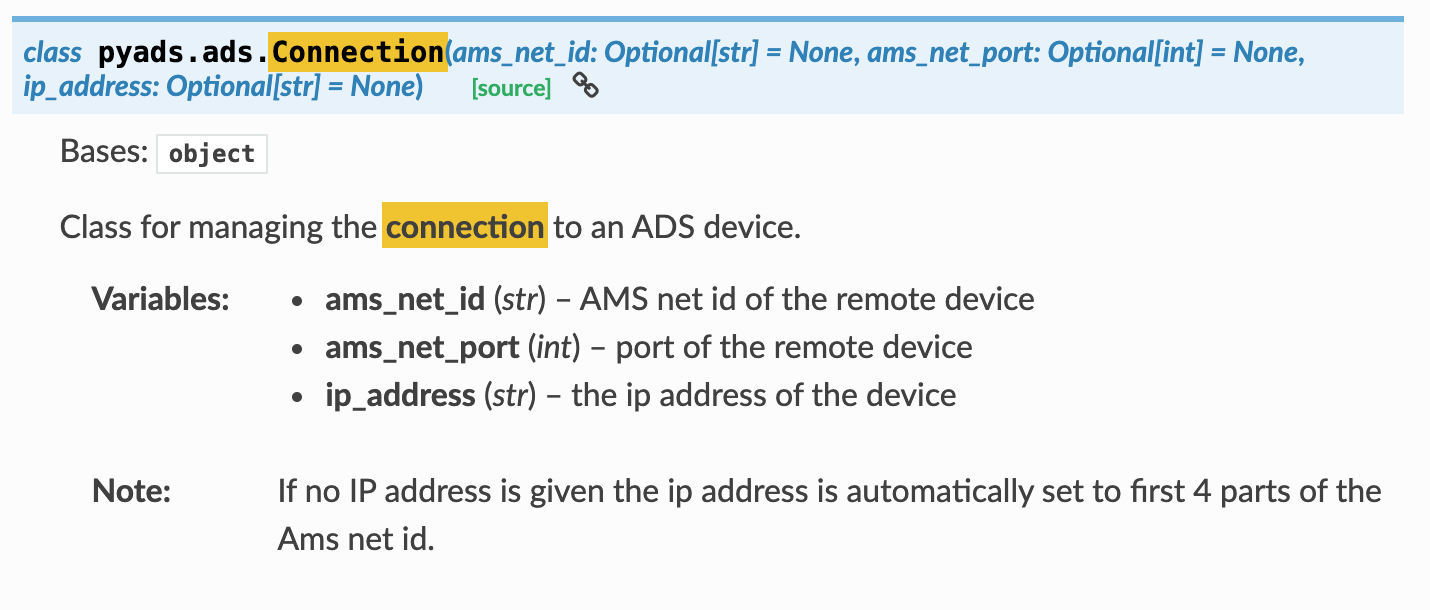
pyads.Connection
pyads.Connectionでは必要なパラメタはNetIDとPortです。確認する方法も先程で説明しました。それでConnectionを作ります。
plc.open()
TwinCAT message routerと接続しますね。

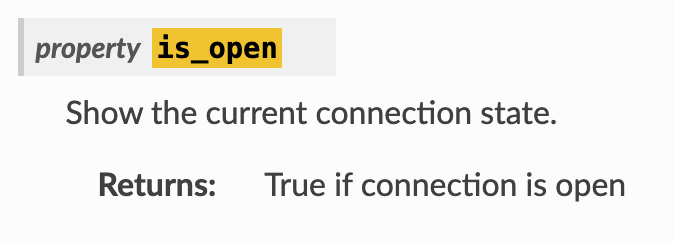
plc.is_open
True=いまConnectionがOKです。
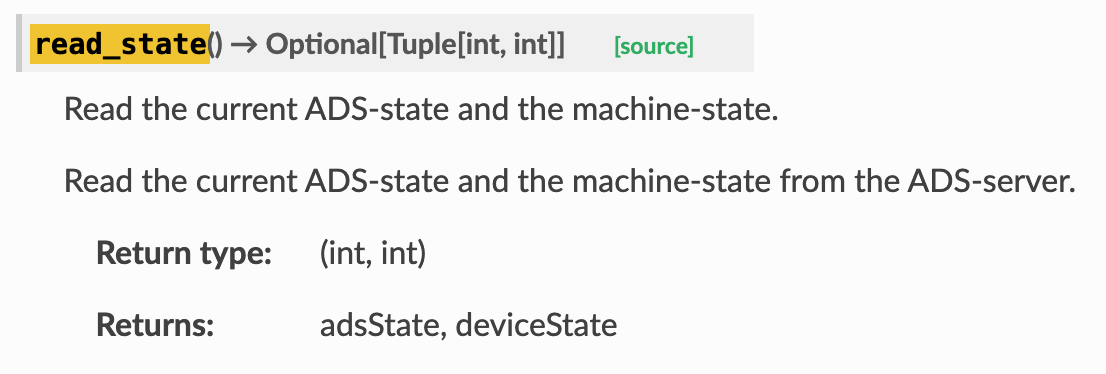
plc.read_state()
現在のADS デバイス状態を読み出します。
戻り値は(int,int)で(adsState,deviceState)ですね。
先のExampleだとCurrent Status: (5, 0)はadsState=5,deviceState=0になります。
こちらはADS Return Code=0、つまりERR_NOERRORです。
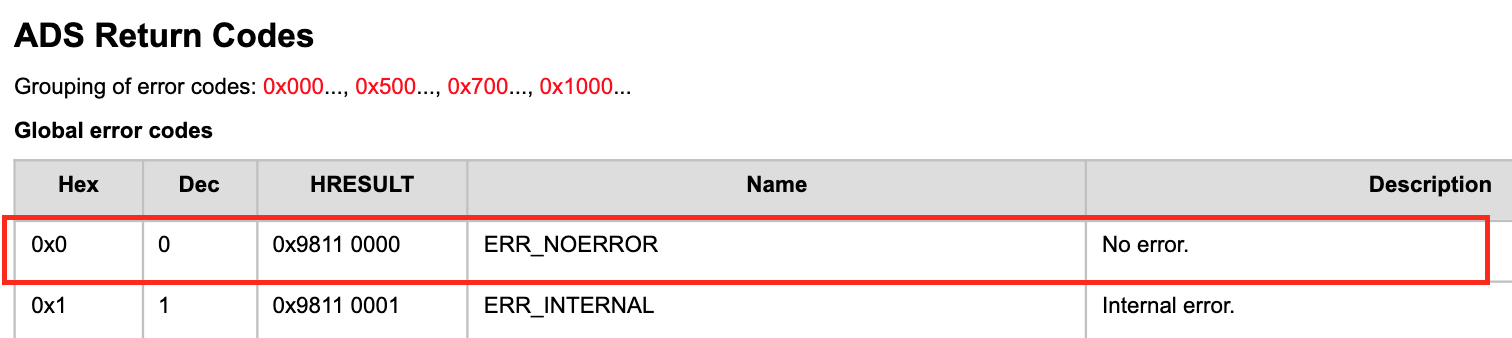
adsState=5、つまりいまRUNしてる状態ですね。

Read Devices
Code
次はTwinCAT PLCの変数を読み込んでみましょう。
| import pyads from ctypes import sizeof ads_net_id=’172.16.52.5.1.1′ plc=pyads.Connection(ads_net_id,pyads.PORT_TC3PLC1) print(‘Connecting to TwinCAT PLC..’) plc.open() print(‘Current connection status:’,plc.is_open) print(‘Current Status:’,plc.read_state()) print(‘Reading Devices..’) var=plc.read_by_name(data_name=’GVL.i32′,plc_datatype=pyads.PLCTYPE_DINT) print(‘GVL.i32 is’,var) print(‘Closing the Connections..’) plc.close() print(‘Current Status:’,plc.is_open) |
Result
| Connecting to TwinCAT PLC.. Current connection status: True Current Status: (5, 0) Reading Devices.. GVL.i32 is 319 Closing the Connections.. Current Status: False |
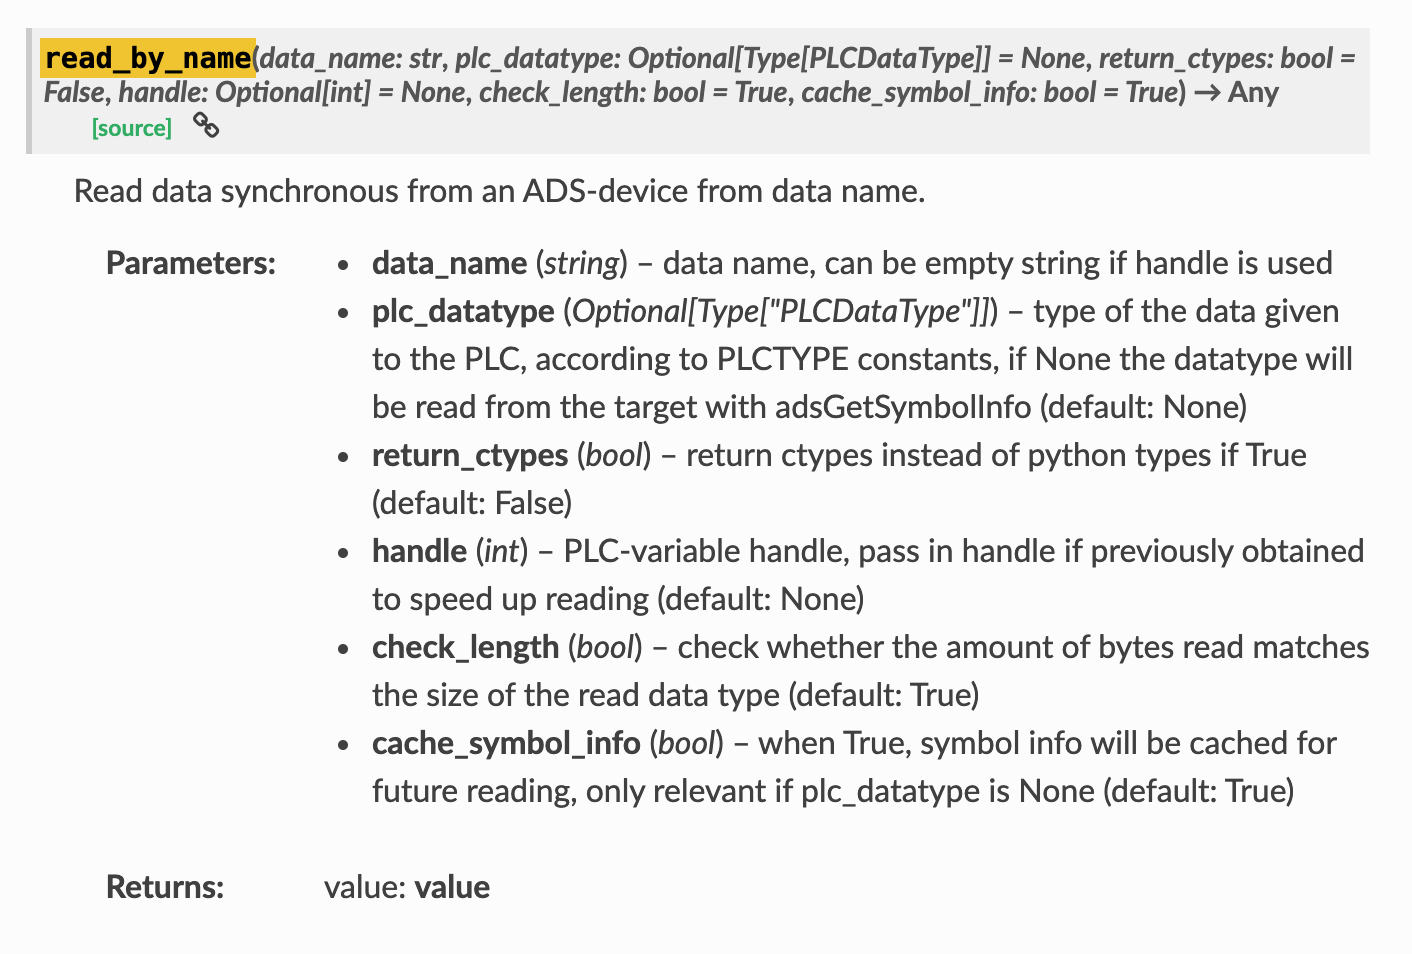
read_by_name
その関数を使って変数値を読み込みます。
基本はdata_nameだけでOKです。data_nameは変数名のことですね
plc_datatypeは戻り値のデータタイプをCheckするかどうかですね。Noneならなにもしません。
Read Devices As List
次はまとめて変数を読み込む方法を紹介します。
code
| import pyads from ctypes import sizeof ads_net_id=’172.16.52.5.1.1′ plc=pyads.Connection(ads_net_id,pyads.PORT_TC3PLC1) print(‘Connecting to TwinCAT PLC..’) plc.open() print(‘Current connection status:’,plc.is_open) print(‘Current Status:’,plc.read_state()) print(‘Reading Devices List..’) varList=[‘GVL.i32′,’GVL.var1′,’GVL.var2′,’GVL.var3’] vardata=plc.read_list_by_name(varList) for k,v in vardata.items(): print(k,’:’,v) print(‘Closing the Connections..’) plc.close() print(‘Current Status:’,plc.is_open) |
Result
| Connecting to TwinCAT PLC.. Current connection status: True Current Status: (5, 0) Reading Devices List.. GVL.i32 : 319 GVL.var1 : 1 GVL.var2 : 2 GVL.var3 : 3 Closing the Connections.. Current Status: False |
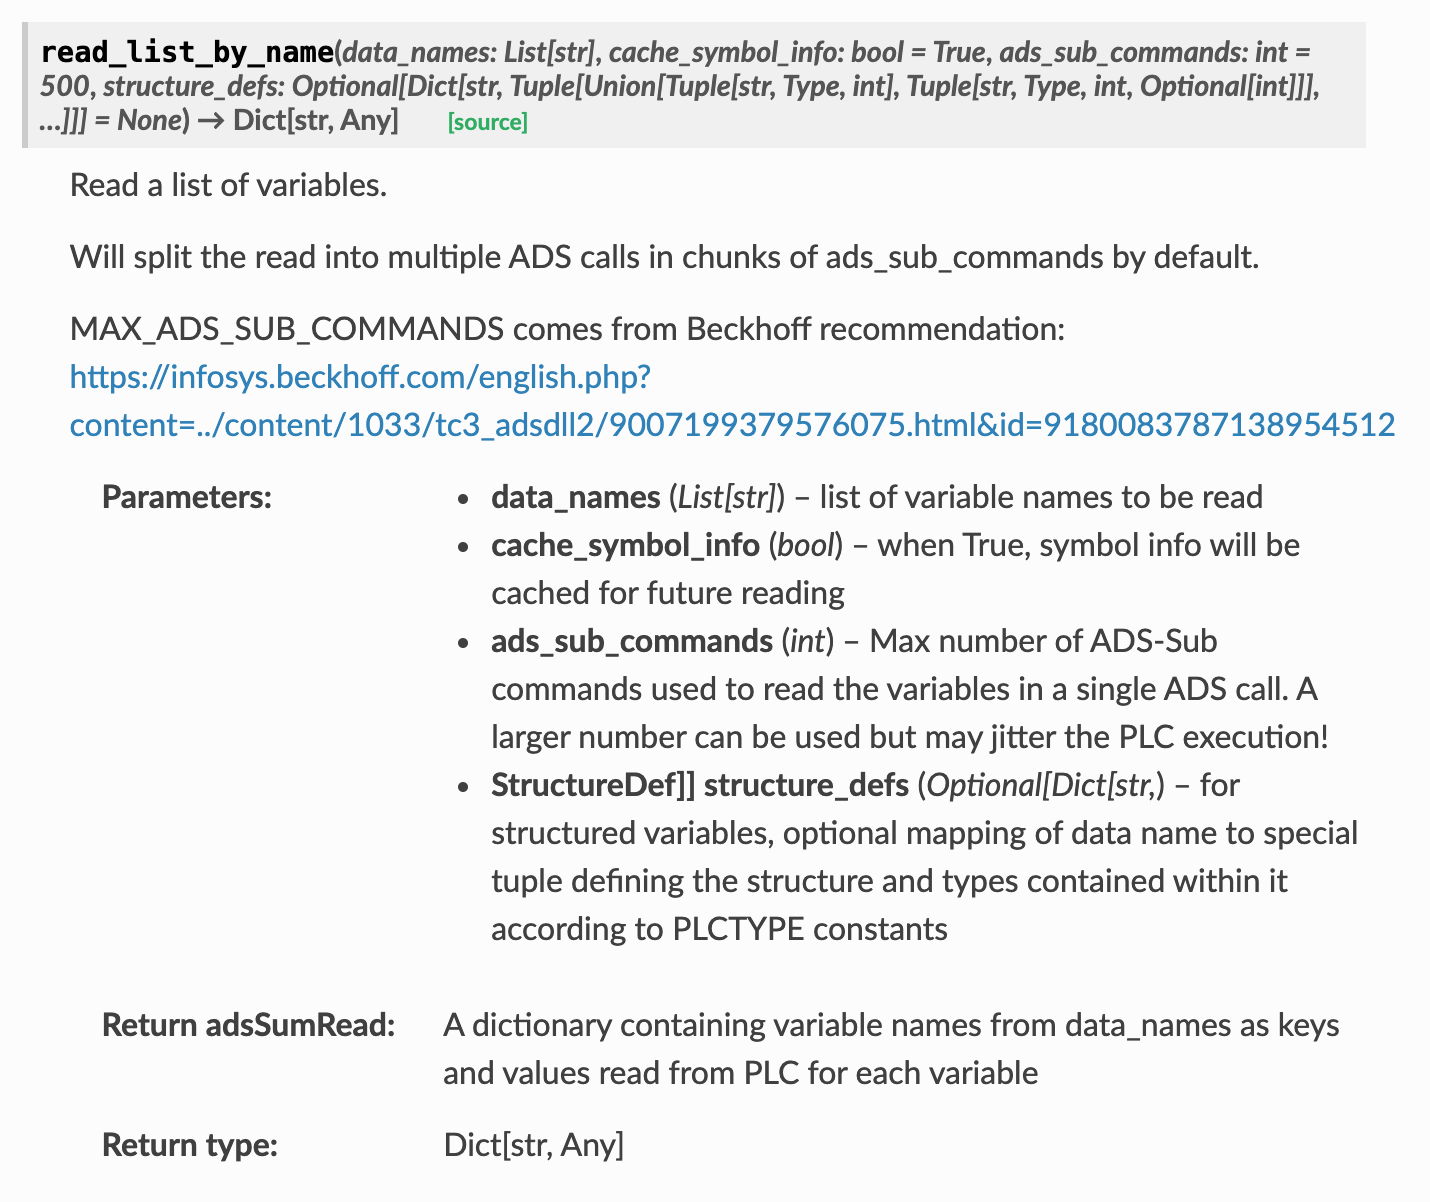
read_list_by_name
やってることはread_by_nameとあまりわかりませんが、data_namesは文字列の配列に変わってたことですね。
そのListに読み込みたい変数を入れます。
このように:
| varList=[‘GVL.i32′,’GVL.var1′,’GVL.var2′,’GVL.var3’] |
そして戻り値は辞書になります。
Write Devices
変数を書き込むにも読み込むとあまり変わりません。
Code
| import pyads from ctypes import sizeof ads_net_id=’172.16.52.5.1.1′ plc=pyads.Connection(ads_net_id,pyads.PORT_TC3PLC1) print(‘Connecting to TwinCAT PLC..’) plc.open() print(‘Current connection status:’,plc.is_open) print(‘Current Status:’,plc.read_state()) plc.write_by_name(data_name=’GVL.i32′,value=100,plc_datatype=pyads.PLCTYPE_DINT) print(‘Reading Devices List..’) varList=[‘GVL.i32′,’GVL.var1′,’GVL.var2′,’GVL.var3’] vardata=plc.read_list_by_name(varList) for k,v in vardata.items(): print(k,’:’,v) print(‘Closing the Connections..’) plc.close() print(‘Current Status:’,plc.is_open) |
Result
| Connecting to TwinCAT PLC.. Current connection status: True Current Status: (5, 0) Reading Devices List.. GVL.i32 : 100 GVL.var1 : 1 GVL.var2 : 2 GVL.var3 : 3 Closing the Connections.. Current Status: False |
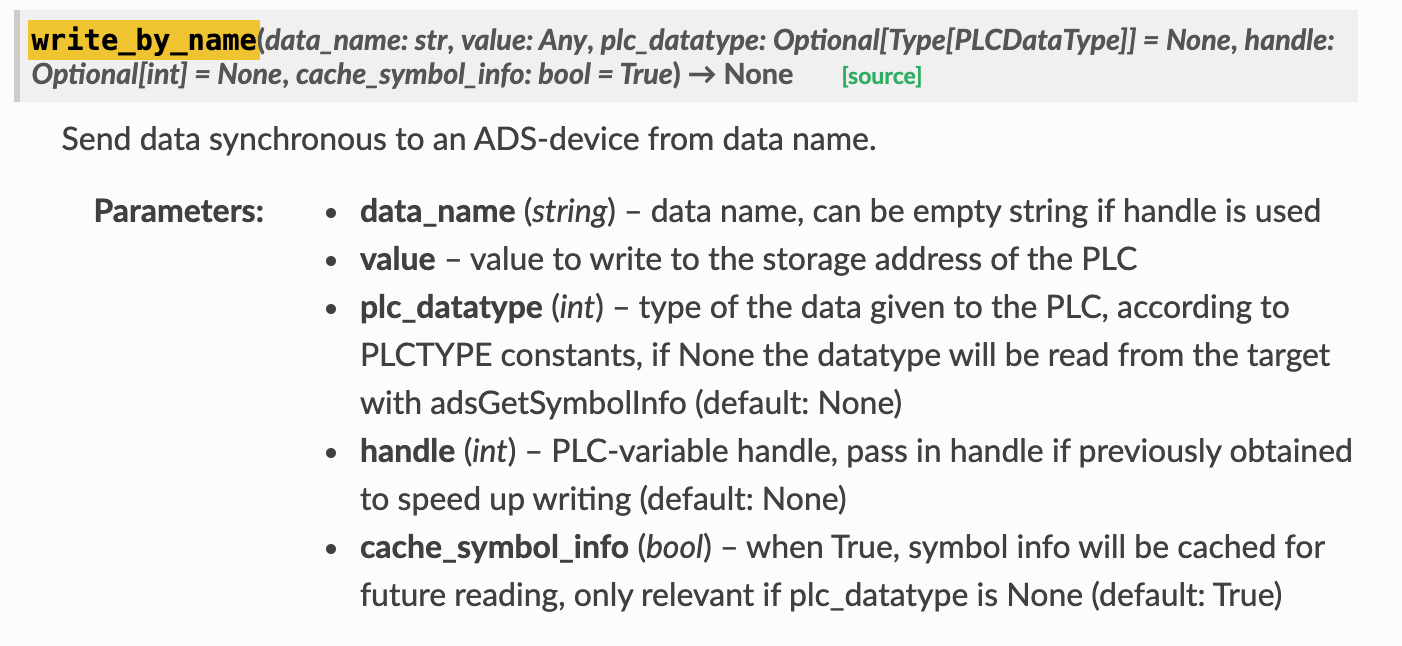
write_by_name
value値は書き込みたい値になりますね。
Write Devices as list
次はまとめて変数を書き込みましょう。
Code
| import pyads from ctypes import sizeof ads_net_id=’172.16.52.5.1.1′ plc=pyads.Connection(ads_net_id,pyads.PORT_TC3PLC1) print(‘Connecting to TwinCAT PLC..’) plc.open() print(‘Current connection status:’,plc.is_open) print(‘Current Status:’,plc.read_state()) varList=[‘GVL.i32′,’GVL.var1′,’GVL.var2′,’GVL.var3’] varWriteList={ ‘GVL.i32’:20 ,’GVL.var1′:99 ,’GVL.var2′:32 ,’GVL.var3′:88 } plc.write_list_by_name(data_names_and_values=varWriteList) print(‘Reading Devices List..’) varList=[‘GVL.i32′,’GVL.var1′,’GVL.var2′,’GVL.var3’] vardata=plc.read_list_by_name(varList) for k,v in vardata.items(): print(k,’:’,v) print(‘Closing the Connections..’) plc.close() print(‘Current Status:’,plc.is_open) |
Result
| Connecting to TwinCAT PLC.. Current connection status: True Current Status: (5, 0) Reading Devices List.. GVL.i32 : 20 GVL.var1 : 99 GVL.var2 : 32 GVL.var3 : 88 Closing the Connections.. Current Status: False |
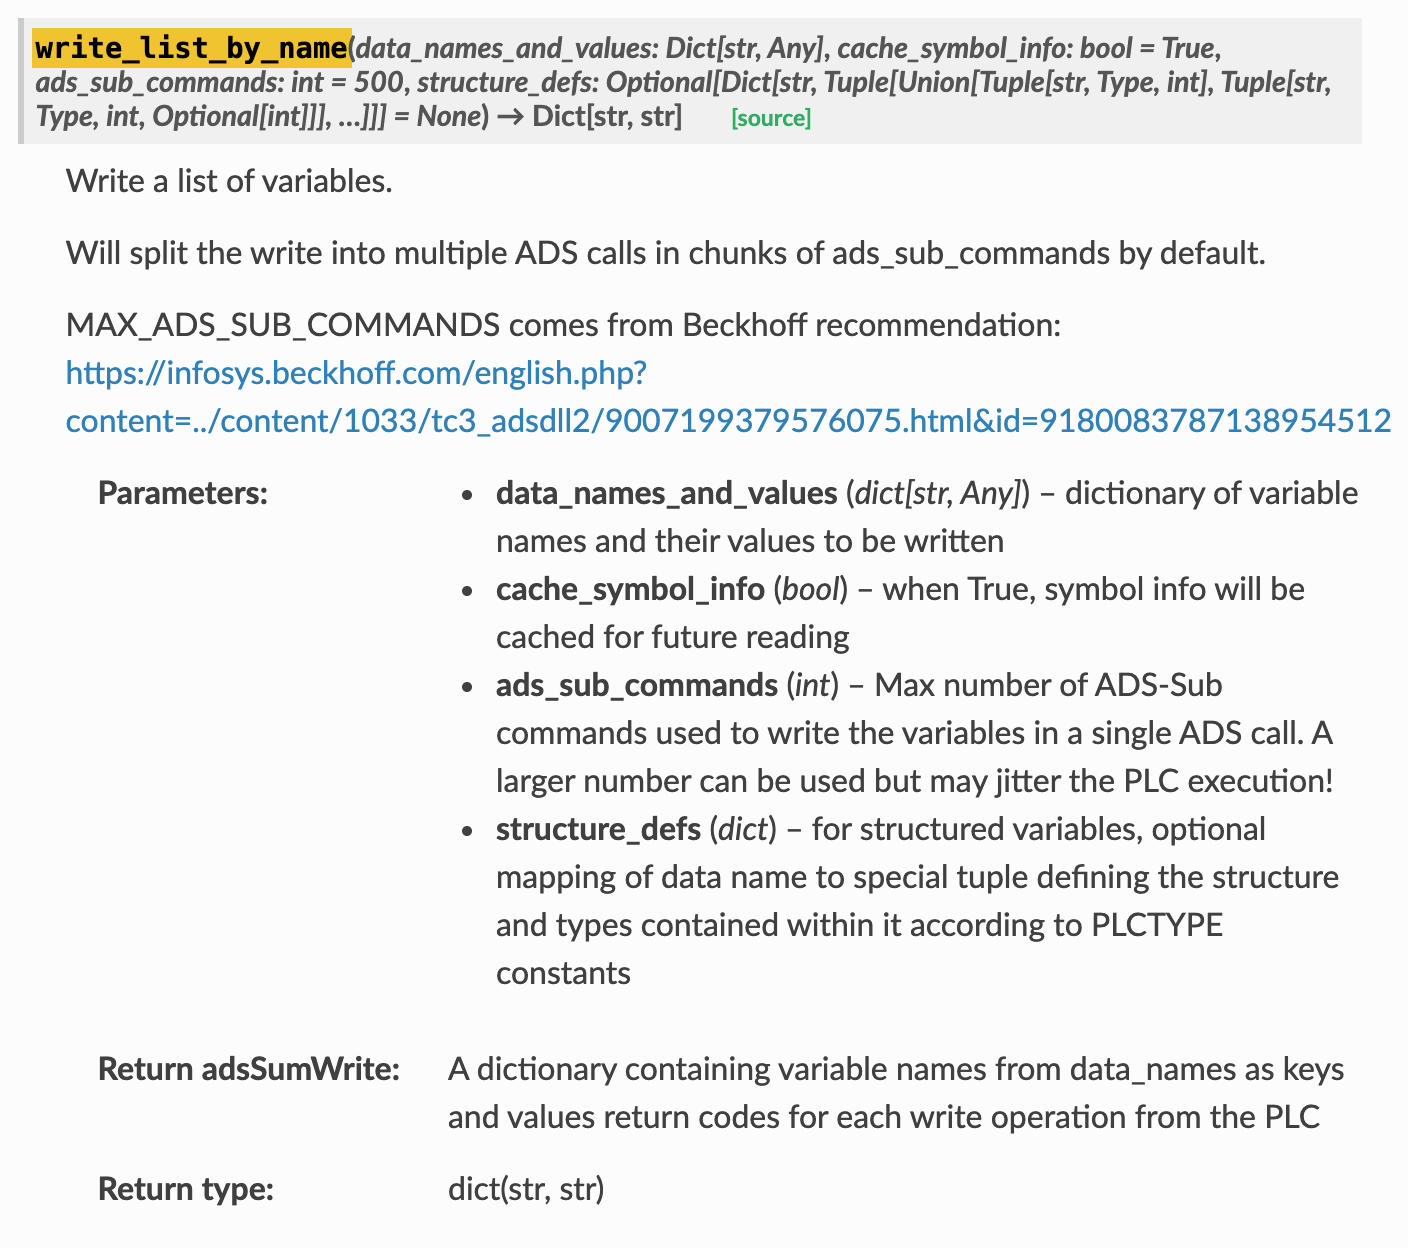
write_list_by_name
data_names_and_valuesは辞書タイプだけは注意しましょう。
Noifications
最後はnotificationsです。ADSはnotificationsをSupportします。つまりCallback関数を渡すことができ、変数値は変化してるときに実行することが可能になります。
code
| import pyads from ctypes import sizeof ads_net_id=’172.16.52.5.1.1′ plc=pyads.Connection(ads_net_id,pyads.PORT_TC3PLC1) print(‘Connecting to TwinCAT PLC..’) plc.open() print(‘Current connection status:’,plc.is_open) print(‘Current Status:’,plc.read_state()) @plc.notification(pyads.PLCTYPE_DINT) def callback(handle, name, timestamp, value): print(handle, name, timestamp, value) attr = pyads.NotificationAttrib(sizeof(pyads.PLCTYPE_DINT)) handles = plc.add_device_notification(‘GVL.i32’, attr, callback) #do some things plc.del_device_notification(*handles) plc.close() |
Result
| Connecting to TwinCAT PLC.. Current connection status: True Current Status: (5, 0) handle: 26 name: GVL.i32 timestamp: 2021-10-02 00:41:39.946000 value: 555 |
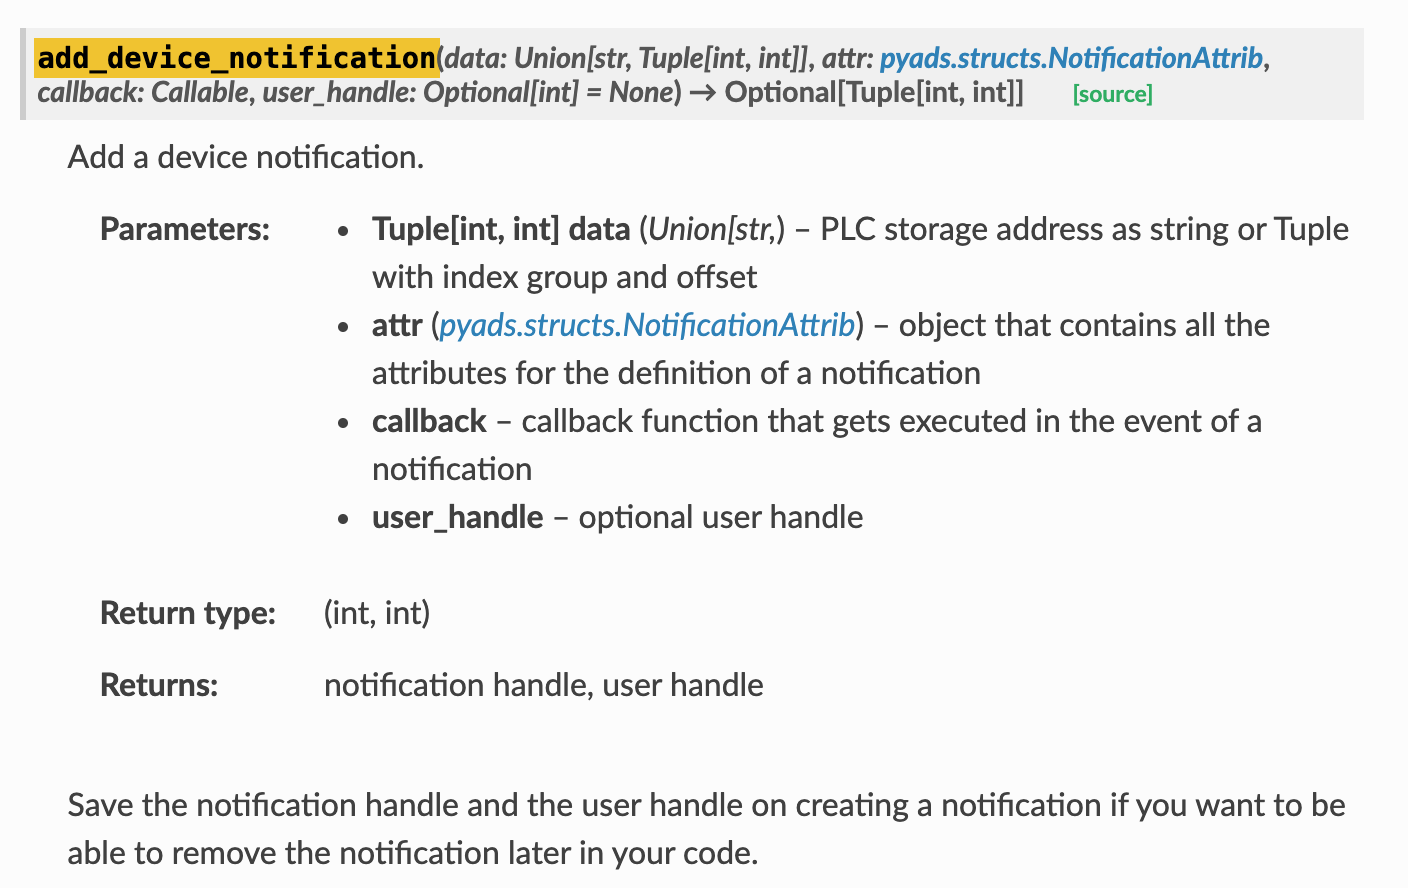
add_device_notification
Device notificationを追加します。必要なのは変数名・NotificationAttrib・CallBack関数です。
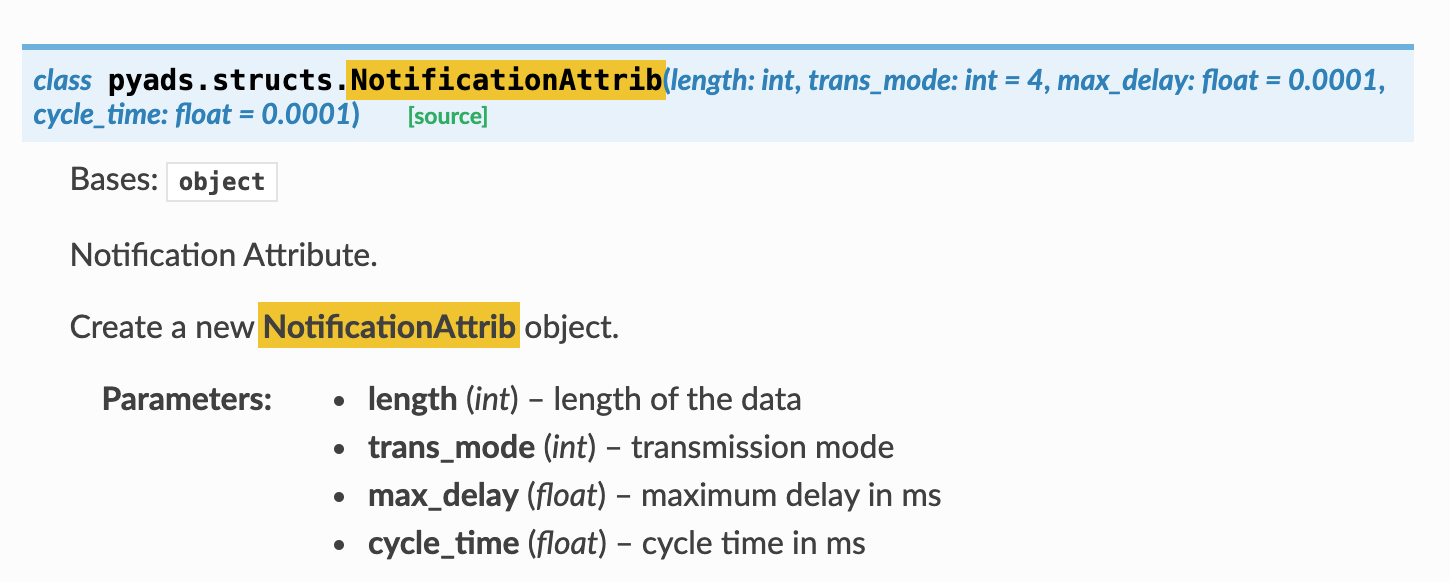
NotificationAttrib
このNotificationの設定ですね。
Lengthさえ入れればOKです。
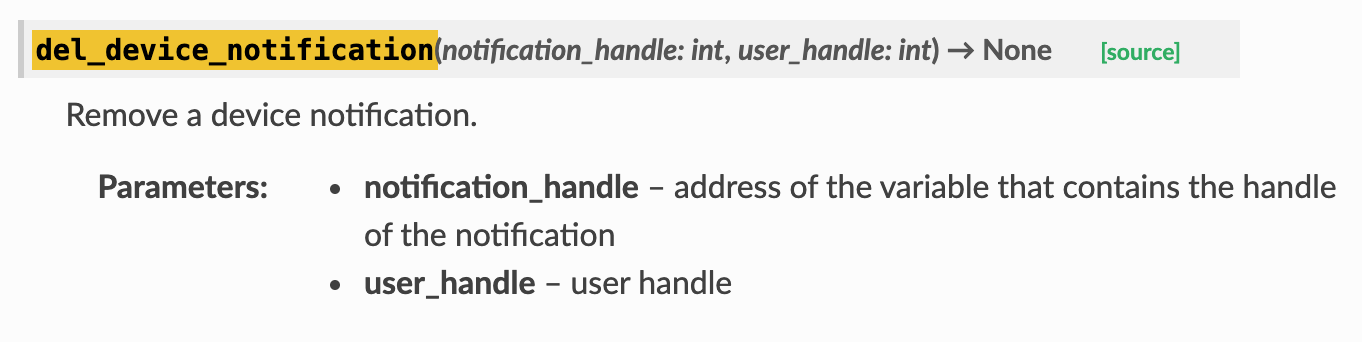
del_device_notification
最後はNotification使わなくなったら削除する関数です。
はーい、お疲れ様です。
もしなにか質問あれば、メール・コメント・Twitterなどでもどうぞ!
Twitterのご相談:@3threes2
メールのご相談:soup01threes*gmail.com (*を@に)
コメント
ADS通信の説明ありがとうございます。
質問ですが
ADS通信でSlaveのState Machine(例: OP->Init)変更方法ありますか。
お世話になります。
BeckhoffのTwinCATライブラリにはTc2_EtherCATがあり、中にFB_EcReqSlaveStateのFBを使用すればEtherCAT Slaveの状態を変更できます。
(もちろんSlaveが100%受け付けるかは別です。)