In this series of Tutorials I will show you how to use PLCNEXT with SPLCs, which can be used in combination with the AXCF 2152 and AXCF 3152 to create safety applications.
Below is an example configuration for use with this series.
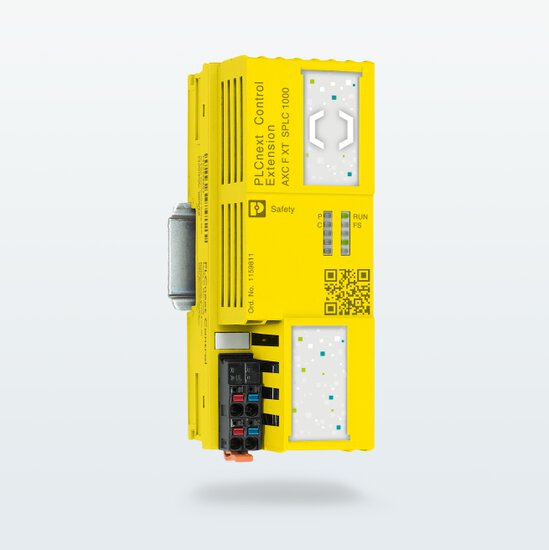
The AXCF 3152 has the SPLC1000 on the left and the Smart Elements Base unit and Safety input/output modules installed on the right.
Let’s Start!

SPLC?
The SPLC 1000 is a safety-related controller, an extension module called PLCnext Control Extension, which can be placed on the left side of AXC F 2152 or AXC F 3152. SPLC 1000 supports the PROFIsafe protocol. As F-Host, the SPLC 1000 communicates directly with the F-Device in the Axioline F-Station module connected to the right side of the PLCnext Control device. The safety-related I/O levels in the Ethernet network are connected to the SPLC 1000 via PROFIsafe/PROFINET via the PLCnext Control device used.
Programming
PLCnext Engineer can be used to configure and program the SPLC 1000, and PLCnext Engineer is connected to the SPLC 1000 via the PLCnext Control device being used.
Web-based management
The SPLC 1000 itself does not have an integrated web-based management interface, but SPLC information can be retrieved via the AXC F X152 Web Server.

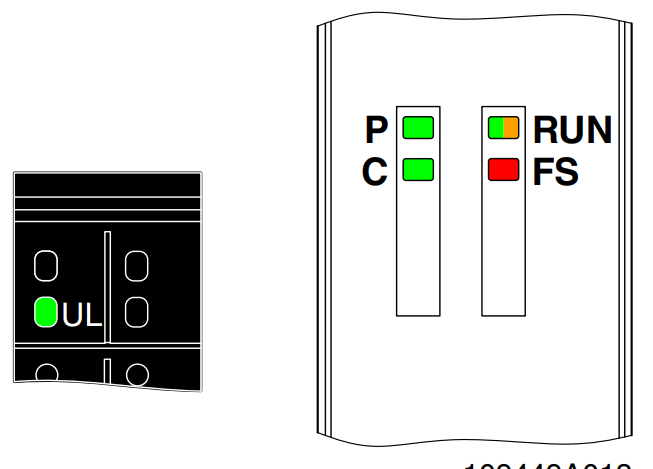
LED
SPLC diagnostic and status information is displayed directly on LEDs on the SPLC 1000.
- FS: Fault State: Safety state of SPLC 1000.
- RUN: Operating state of SPLC 1000.
- P: State of safety-related communication between the SPLC 1000 (F-Device) and the upper-level safety-related controller (F-Host).
- C: State of safety-related communication between SPLC 1000 (F-Host) and the configured lower F-Device.
Internal Block
This is the basic internal circuit of the SPLC1000.
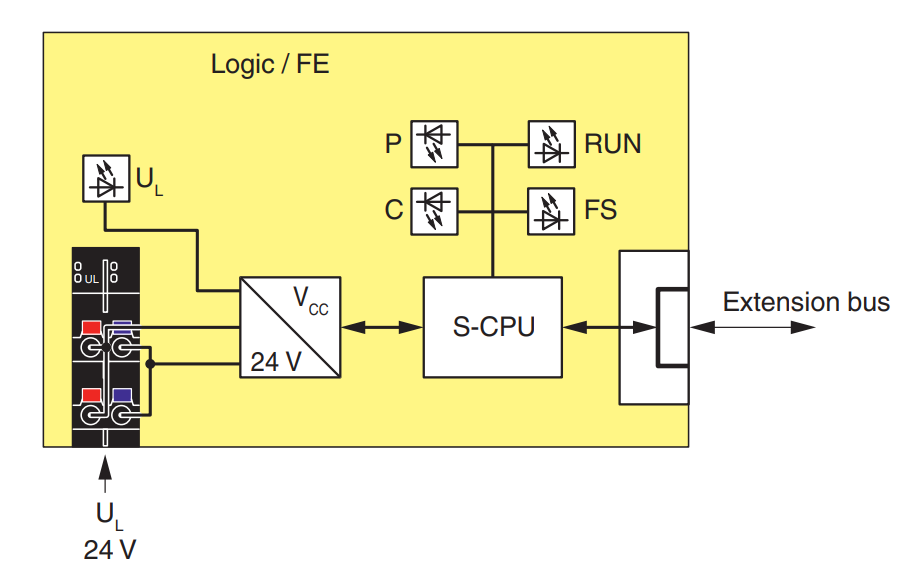
Power Supply
The power supply voltage for the PLCnext Control device used with the SPLC 1000 must be supplied via a shared 24VDC power supply unit.
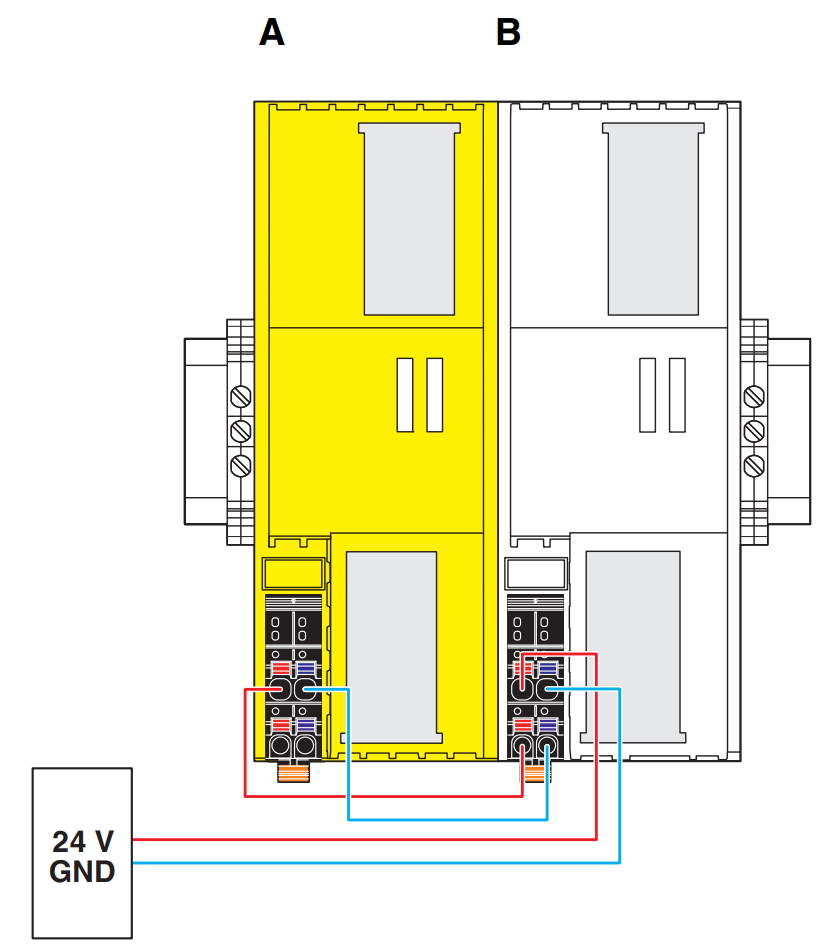
Terminal
a1,a2=24DC positive and b1,b2=GND.

License
A license is required to create a Safety program with PLCNEXT Engineering.

Let’s Check the license in the USB from the PC on which PLCNEXT Engineering is installed.
http://localhost:22352/container.html
The CodeMeter WebAdmin web is now displayed.

When you open the USB Tab of PHOENIX CONTACT, you can see all the licenses in the USB.

Active
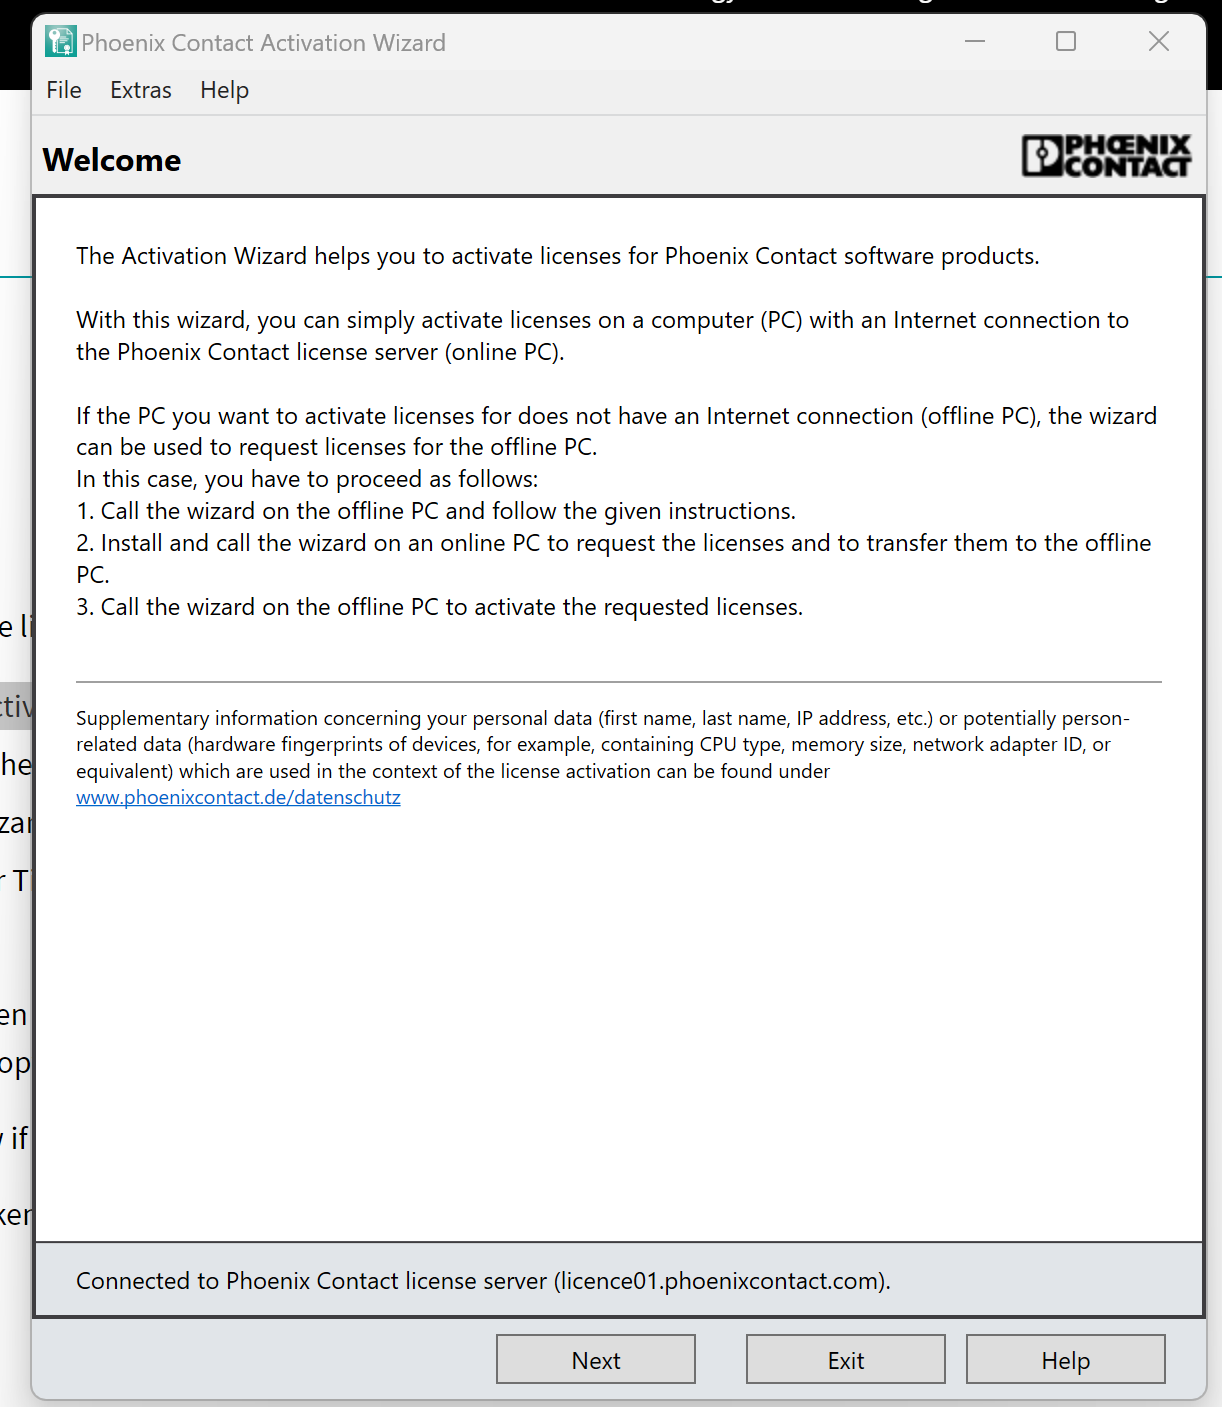
Start the Activation Wizard.

Next.
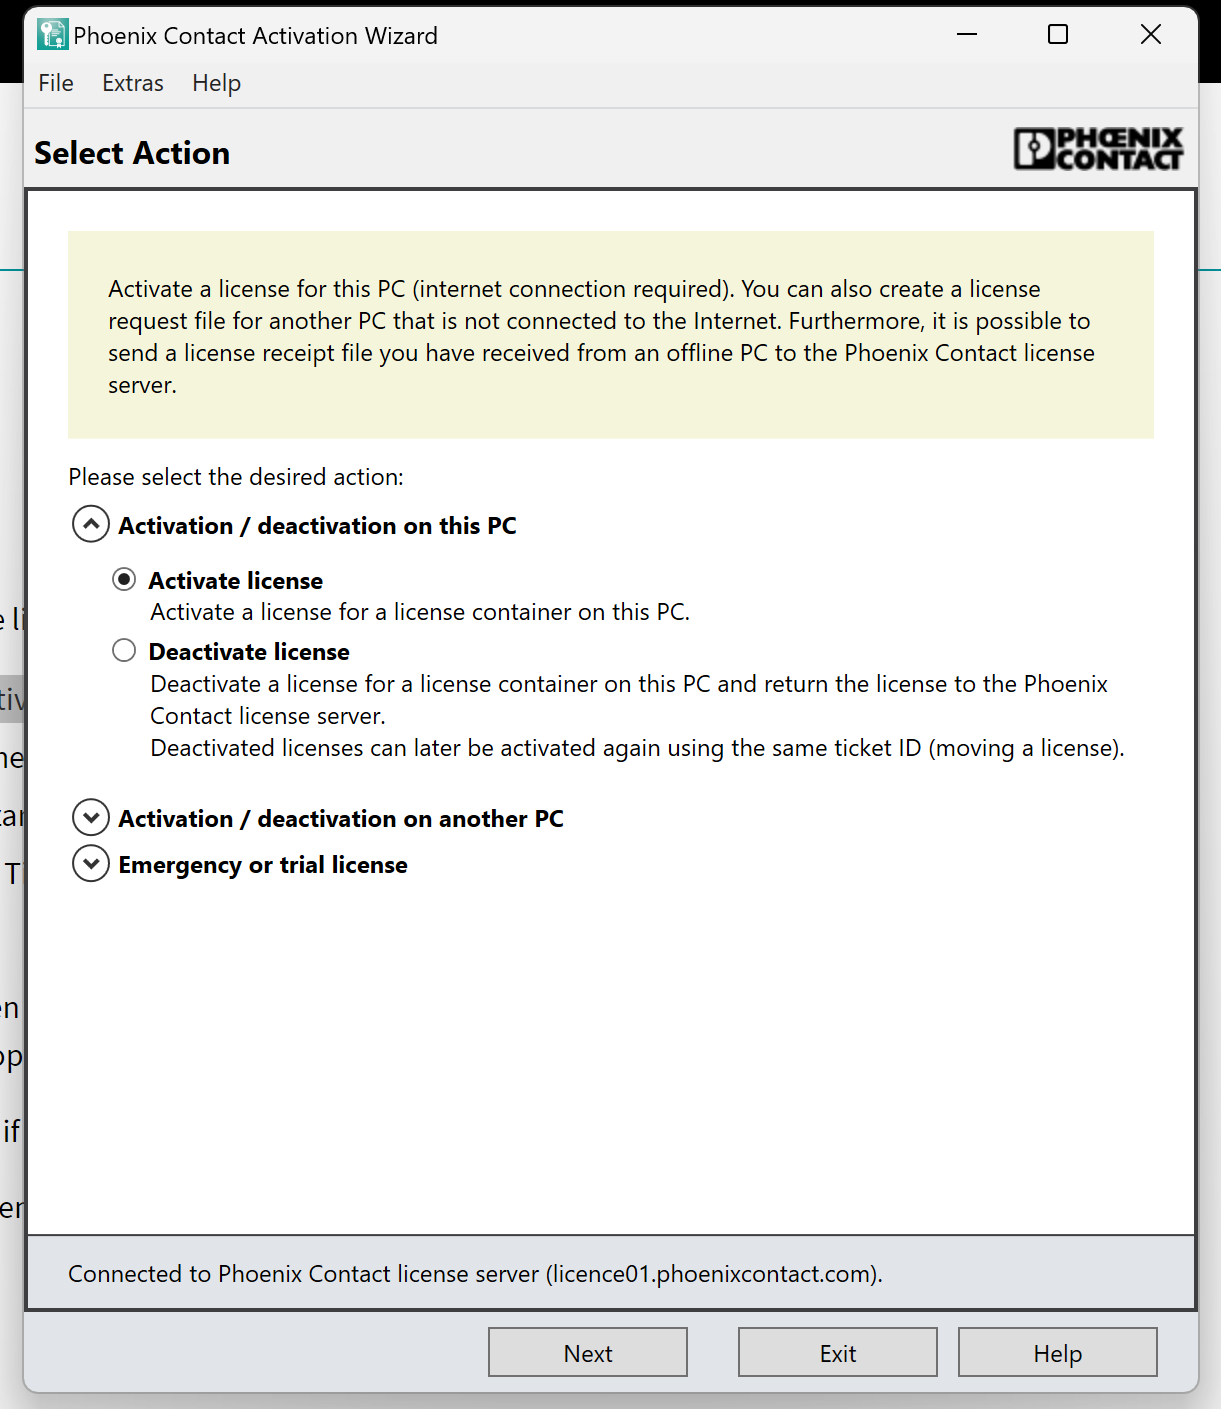
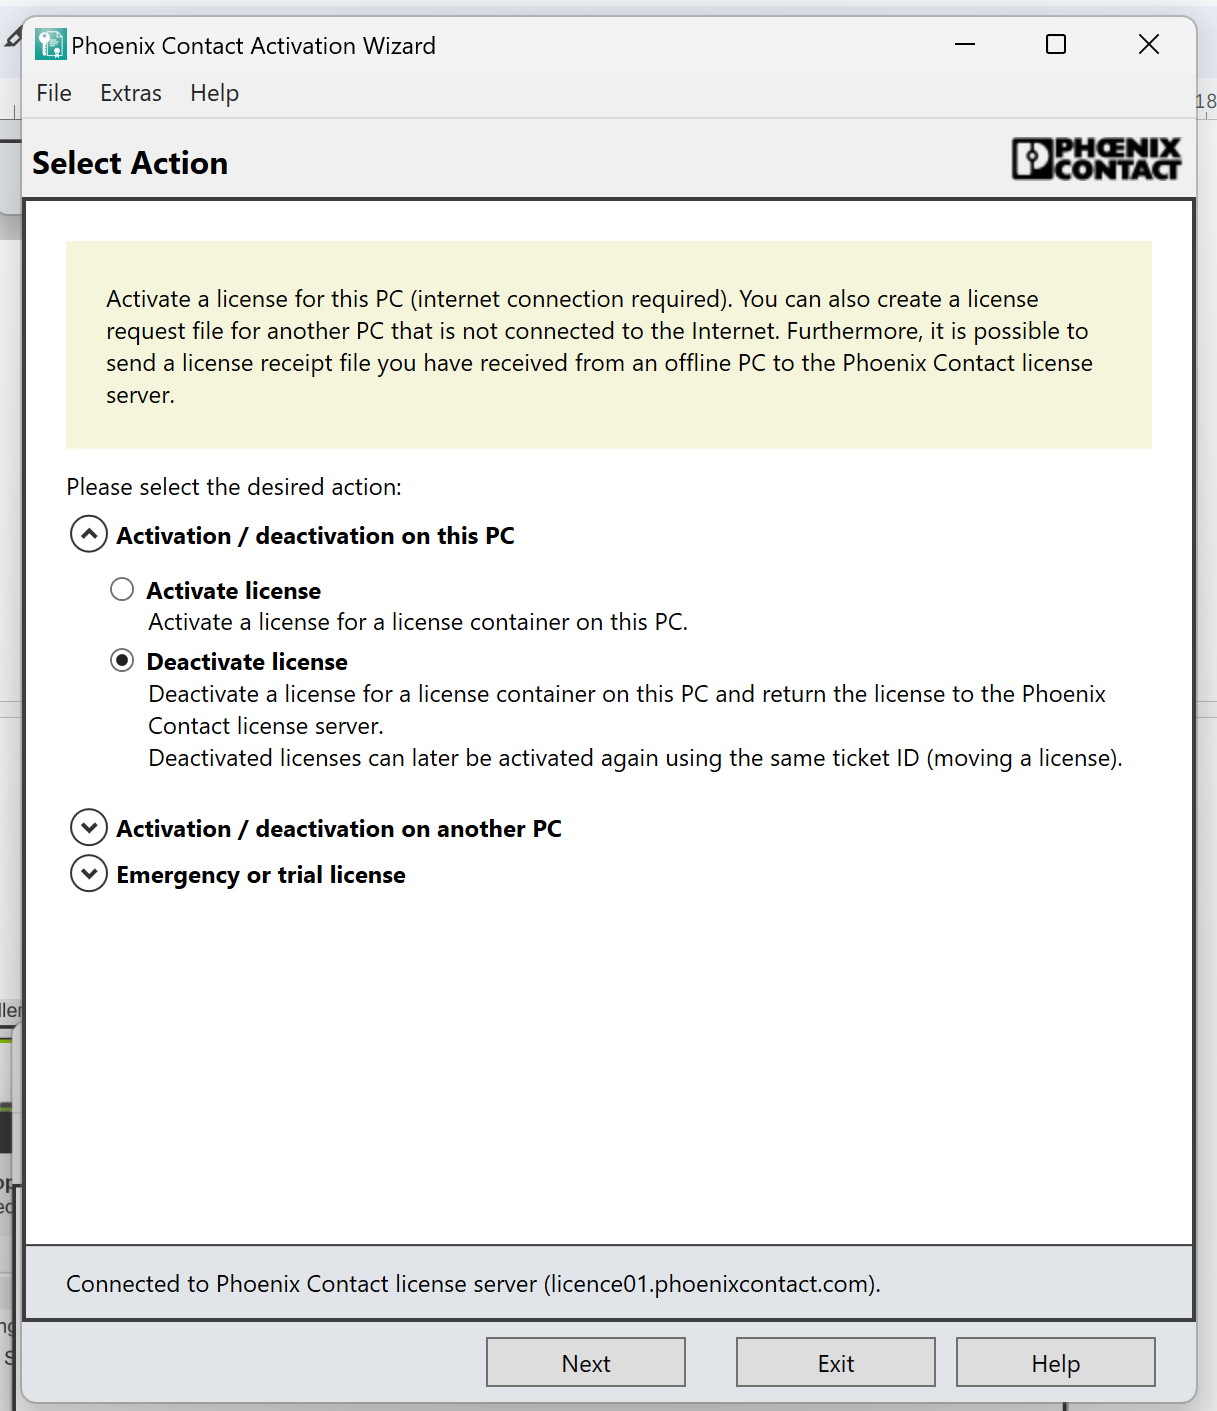
Select Activation /Deactivation on this PC>Activate License>Next to proceed.
Enter the Ticket ID.
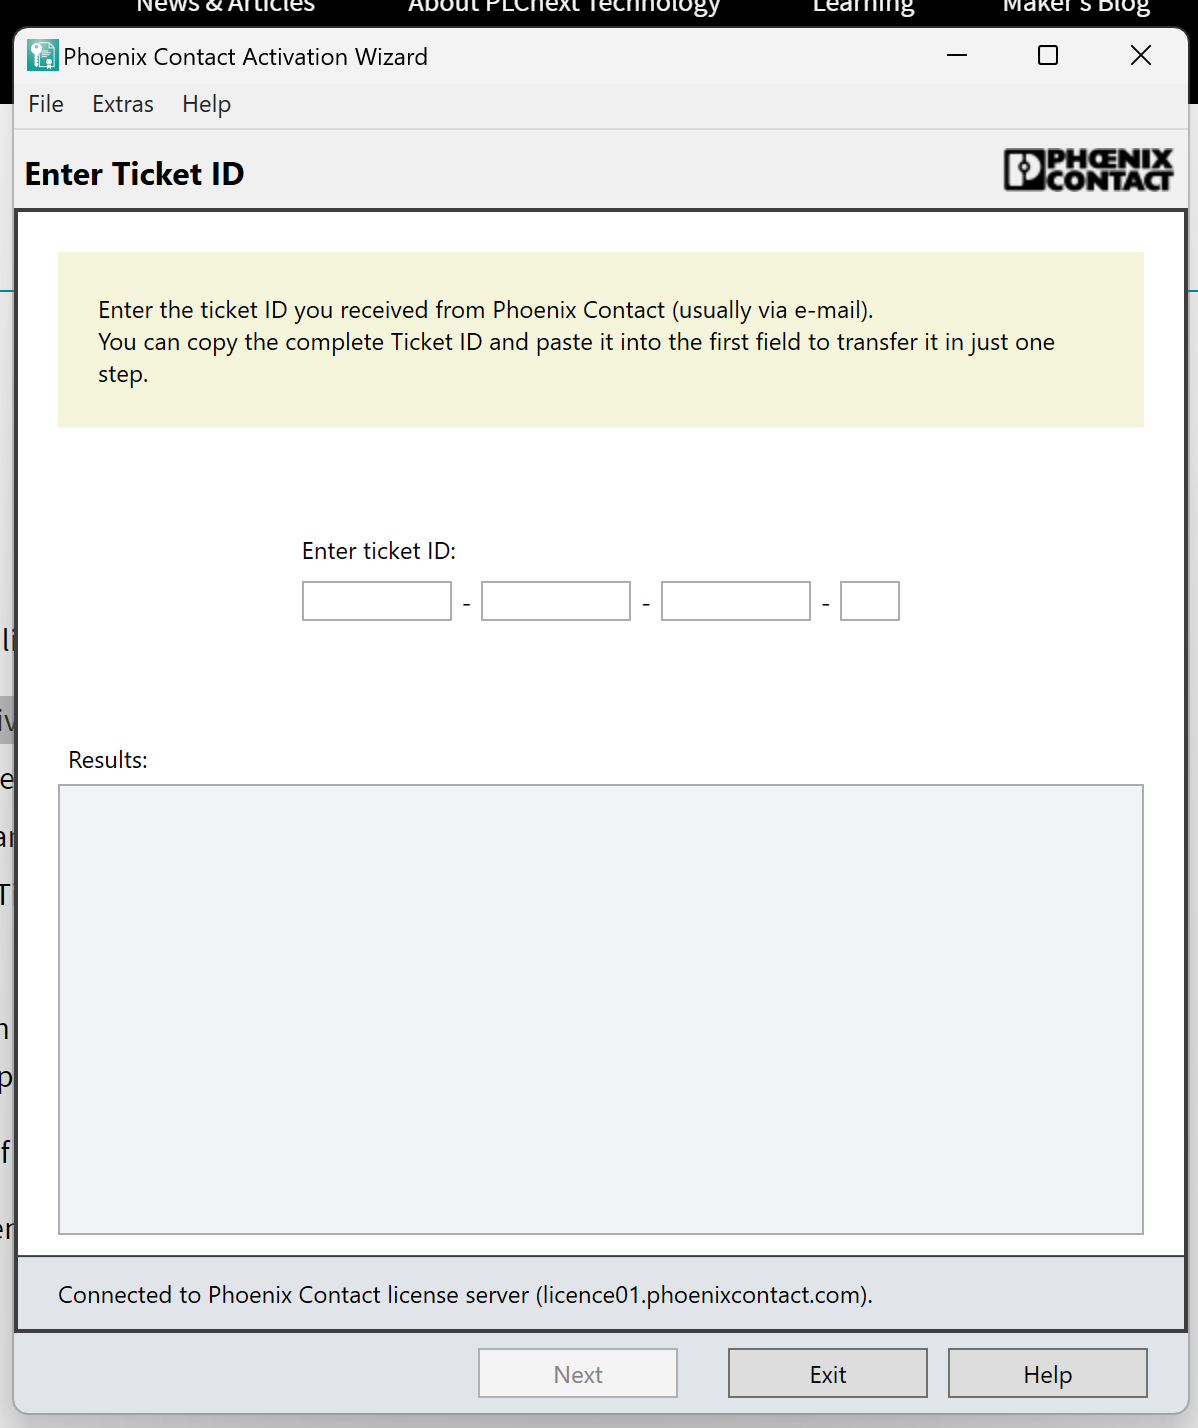
You will probably receive a paper like this when you purchase a license from PHOENIX CONTACT.

However, in the Results, the message “The Actual status of license allows only deactivation” is shown. In other words, you can only deactivate the license.

Deactive it
If so, try to deactivate the license once, choose Activation/deactivation on this PC>Deactivate license and press Next to proceed.
Select and deactivate all licenses.

Done!

Active again
Activate the license one more time with the same operation.

Done!

Online
Let’s see if the SPLC1000 can be connected to my PC.
This is my PLCNEXT Engineering Version.

Create a new project at File>New Project.

Double-click on Project.

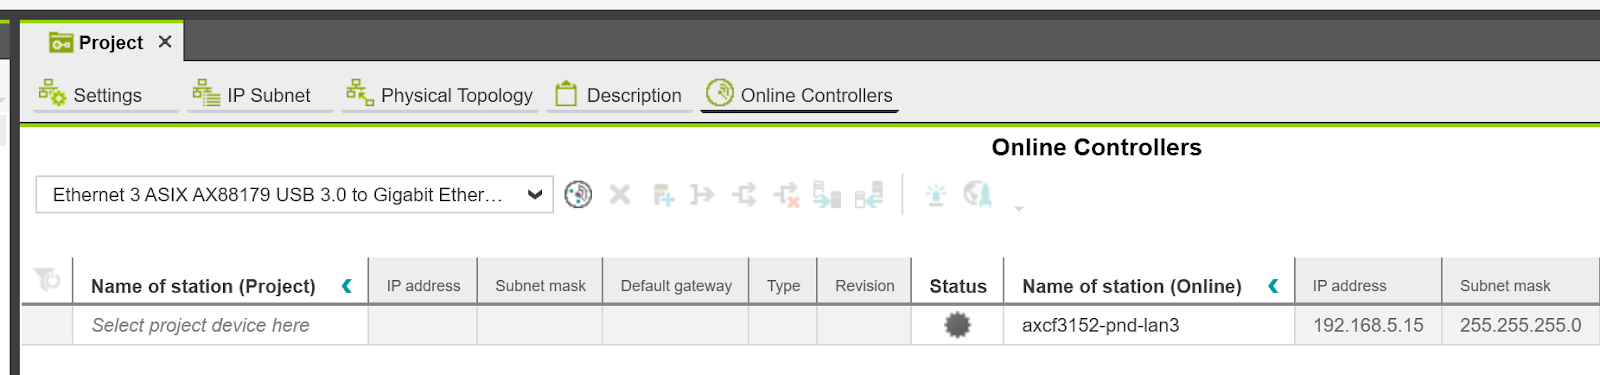
Open the Online Controller’s Tab.

Set the Network Adapter connected to the CPU from the Drop-List.

Click the adjacent symbol and search for CPUs.

Done!3152 is found.
Right click on 3152>Add To project to add the project to the Local PC.

The CPU selection screen changes.

Multiple CPU types can be selected from the drop-list.
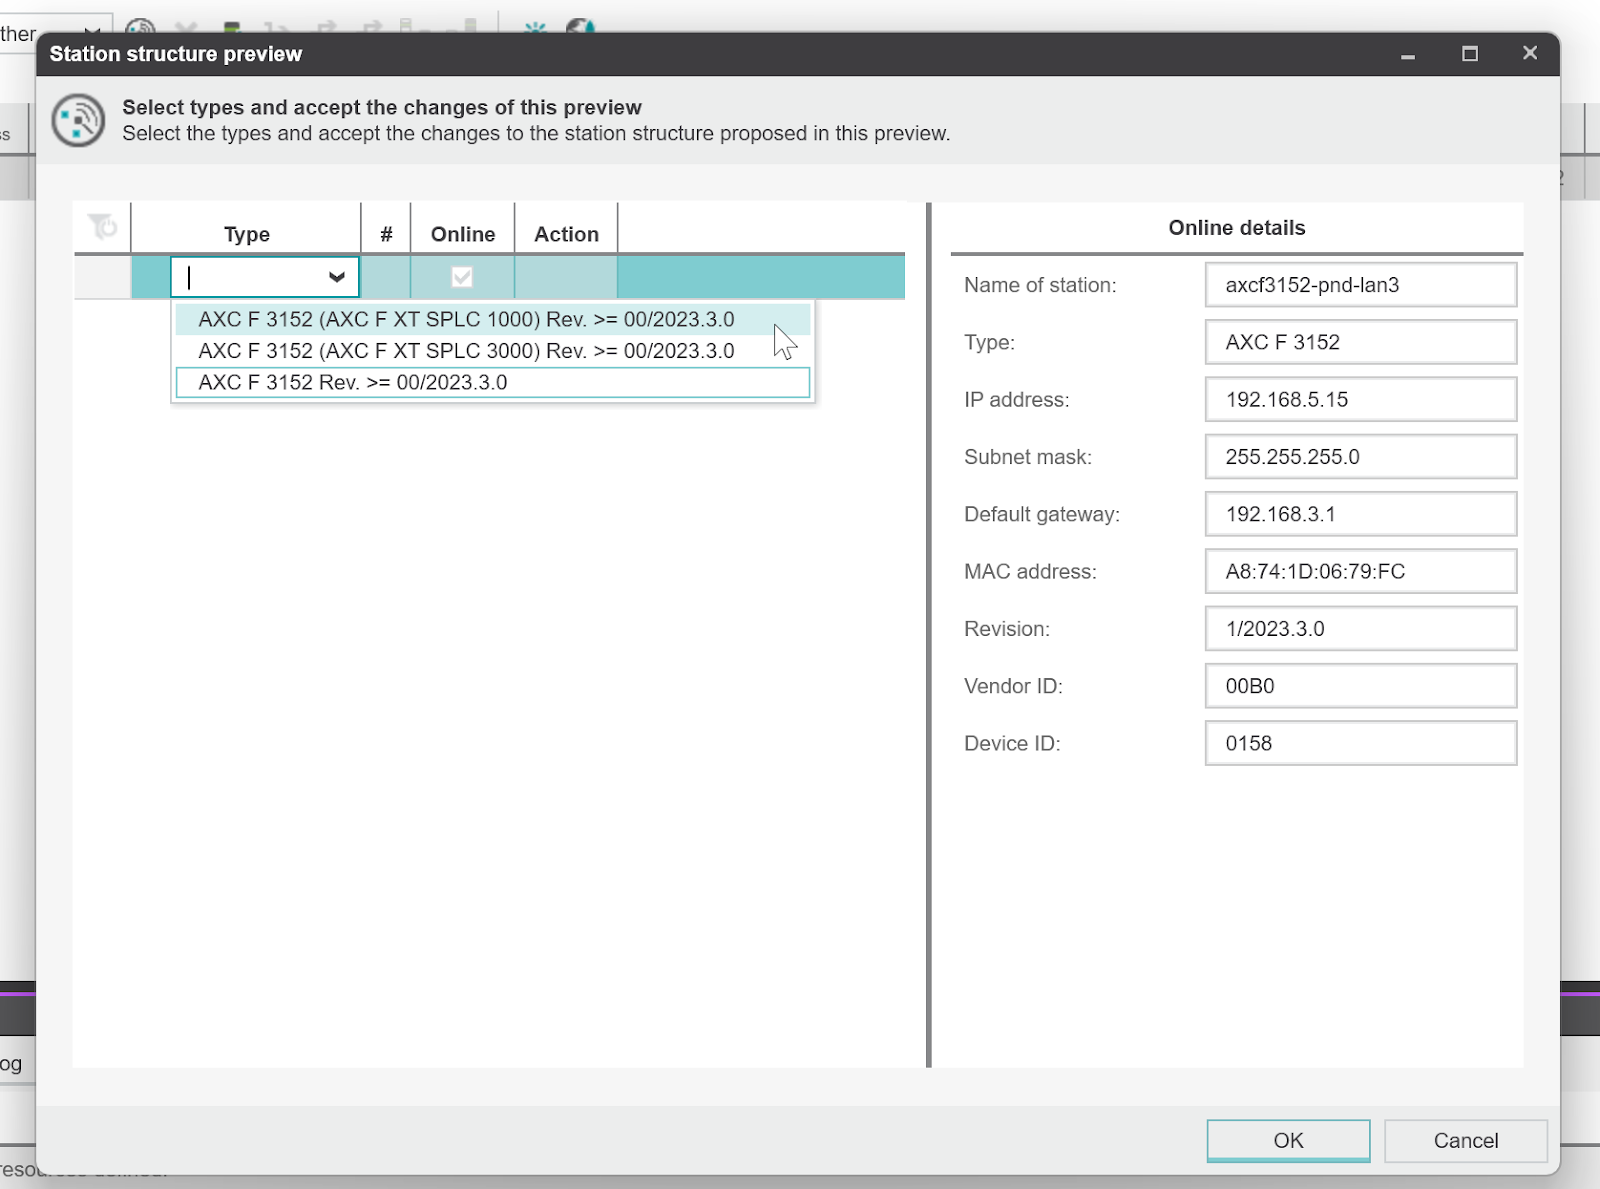
There is a Drop-List in the Type Field , select AXC F 3152 (AXC F XT SPLC1000) >Ok.

If you are logging in for the first time, you will need to set a Safety Password.
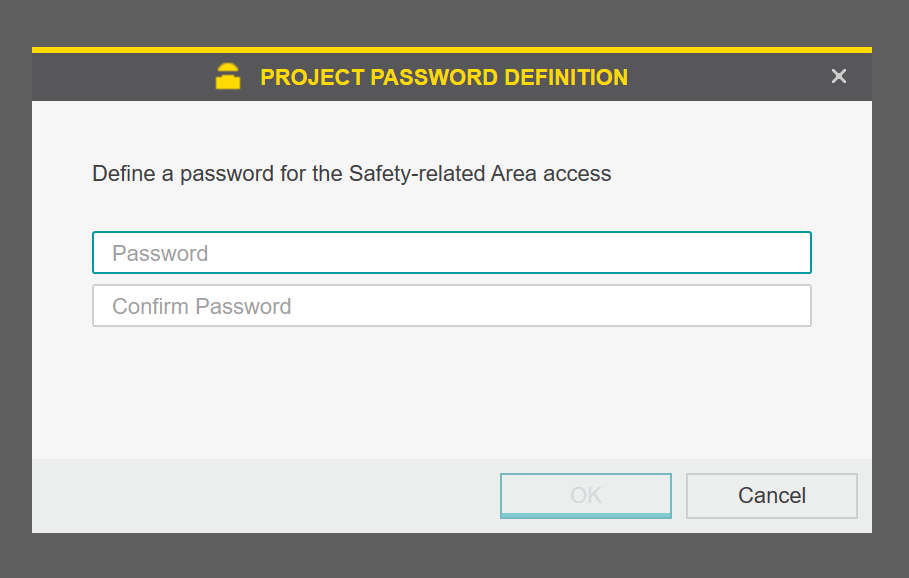
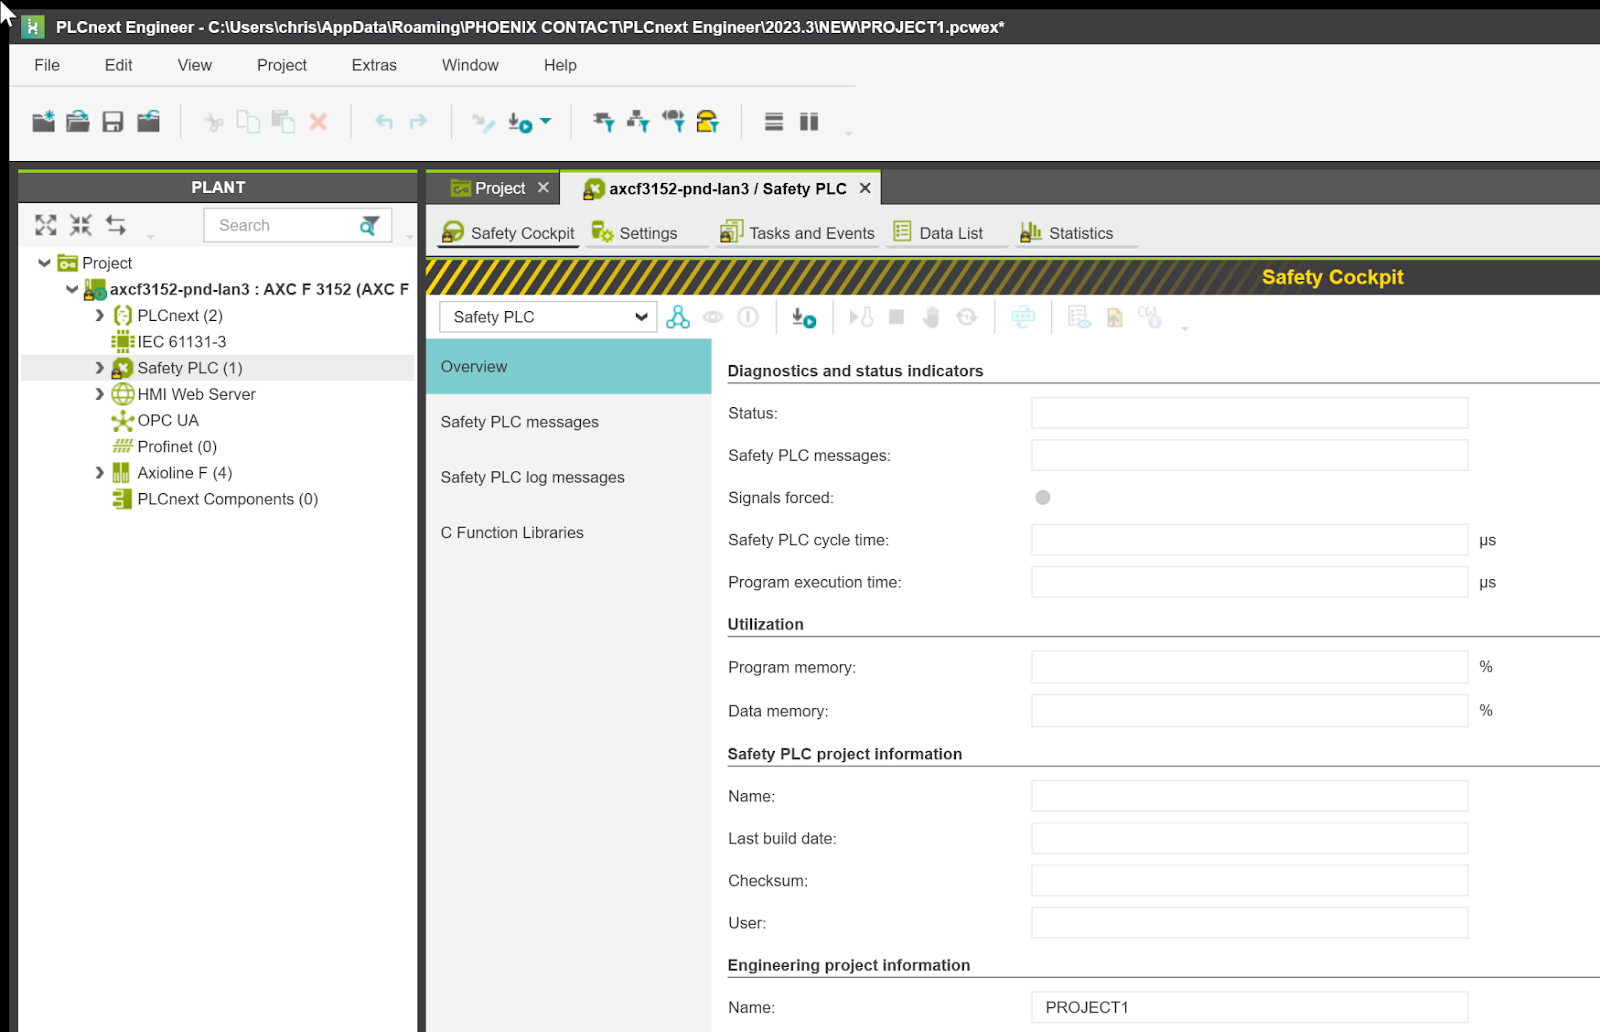
Done!Safety PLC is shown.
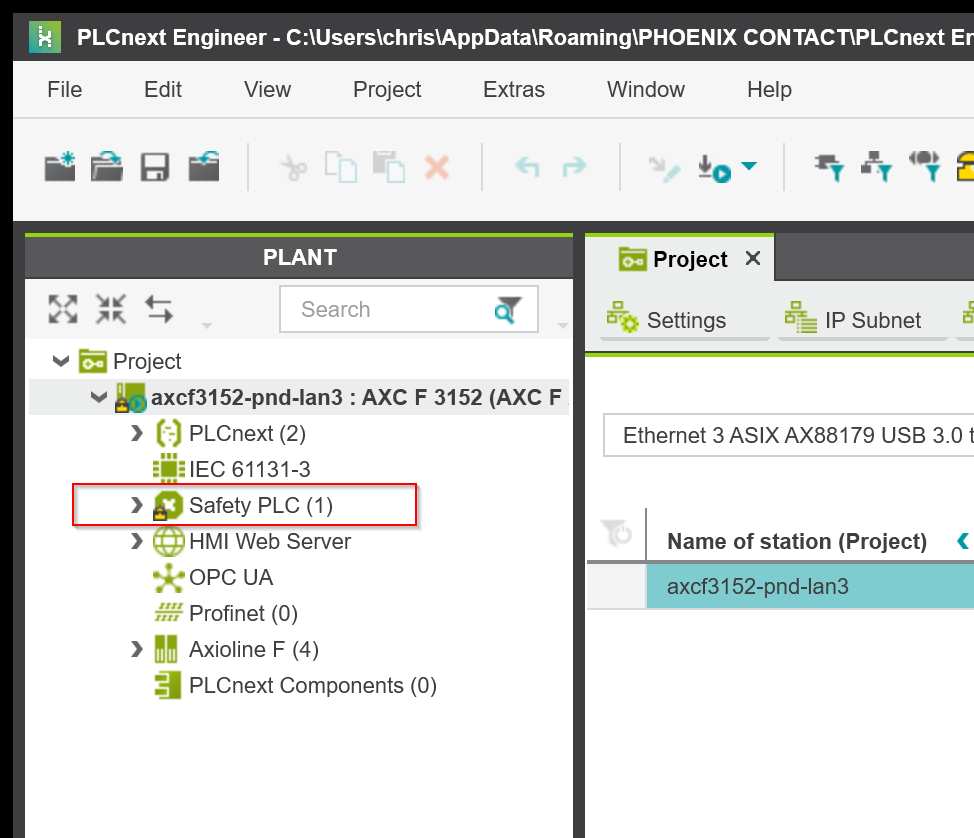
Double-clicking the Safety PLC opens the Safety Cockpit, where you can perform safety function-related settings and other functions.