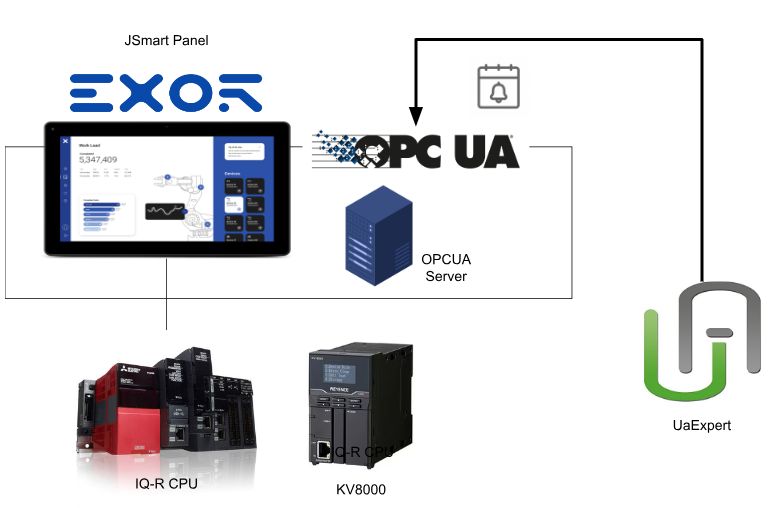
This is now the 9th episode of the EXOR Panel Tutorial. Last time we introduced the OPC UA functionality, and we will introduce the functionality, overview, and simple Node of Alarm and Event instead of OPC UA DA (Data Access) in this tutorial.
Let’s get started!
Reference Link
OPC UA Alarm
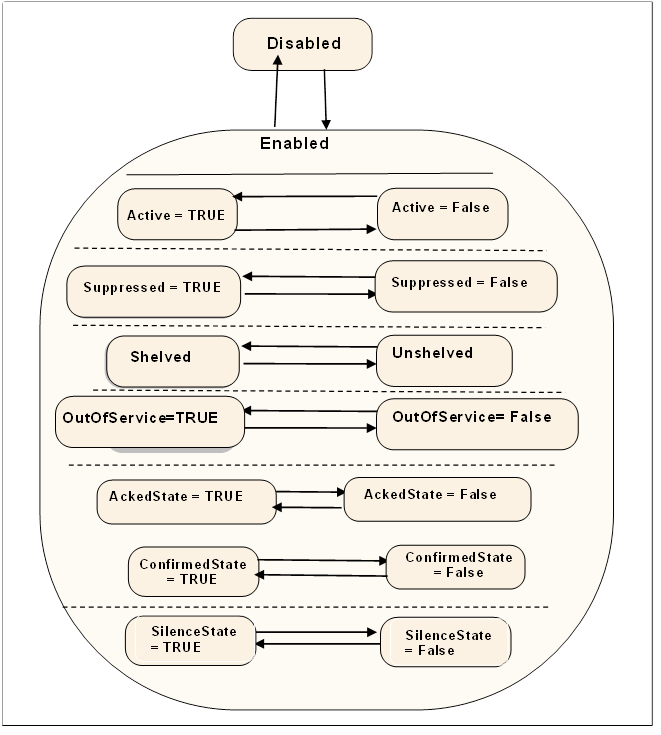
OPC UA alarms are a specialization of Acknowledgeable Conditions, which adds the concepts of Active, Shelving, and Suppressed states to Conditions. The state model is shown in the figure below.
The Active state, Alarm, indicates that the condition represented by Condition is currently present. If the Alarm is in the Inactive state, it represents a situation that has returned to a normal state.
Some alarm subtypes introduce a substate of Active state. For example, an alarm representing temperature may provide a high level state as well as a critical high state.
Also. Out of Service, Suppression state differs from Disabled state in that the alarm is still fully functional and can be included in subscription notifications to clients.
Typically, if no action related to an alarm is taken for a period of time, the process will exceed a certain threshold at which point consequences will begin to occur The OPC UA alarm model describes these states, delays, and actions.
Implementation
Now let’s actually use the OPC UA Alarm function from the EXOR panel.
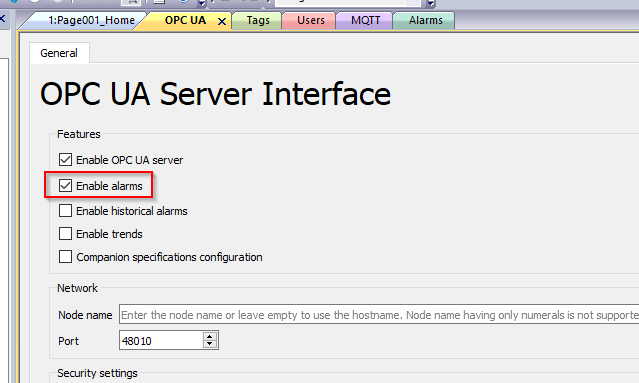
Enable alarm
Check the Enable alarms checkbox in the OPC UA Server Interface section.
The creation of Alarms was explained in the previous Tutorial, so we will skip it this time.

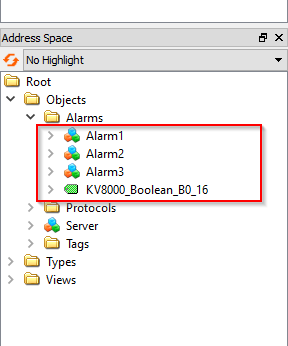
And when I accessed the OPC UA Server of EXOR from UaExpert, I found a Folder of Alarms and there were Objects like Alarm1, Alarm2, Alarm3. Those objects are OPC UA Alarms.
Severity
Severity is inherited from the Basic Event Model defined in OPC10000-5. It indicates the urgency of Severity, especially in relation to Alarms in ProcessConditionClassType, or also referred to as “priority”.
Event ID /Ack
Now let’s actually set B2=True on the Keyence KV8000. Alarm B2 is an alarm that requires an Acknowledge operation.
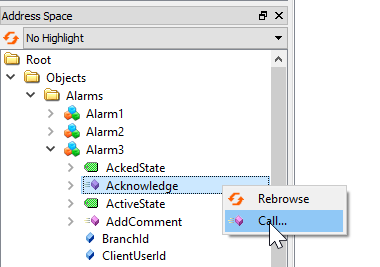
Now let’s try to acknowledge Keyence Alarm B2 from the OPC UA server by clicking Alarm3>Acknowledge>Call.
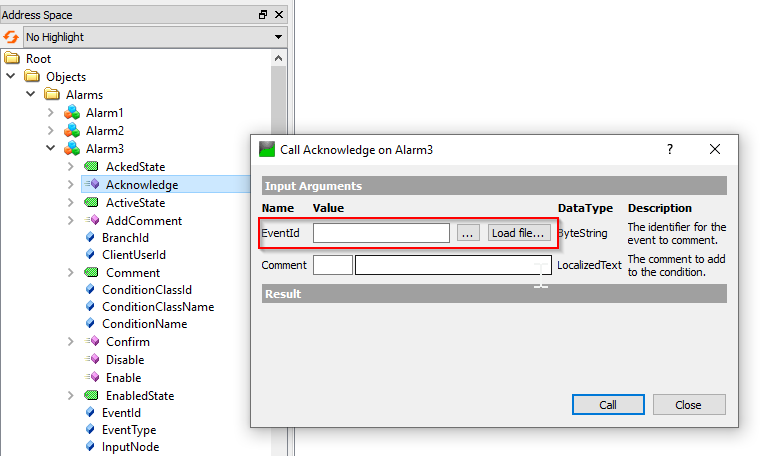
Acknowledge is actually an OPC UA Method that takes an EventId as an Input parameter. The flow is as follows: Acknowledge the corresponding alarm according to the EventId.
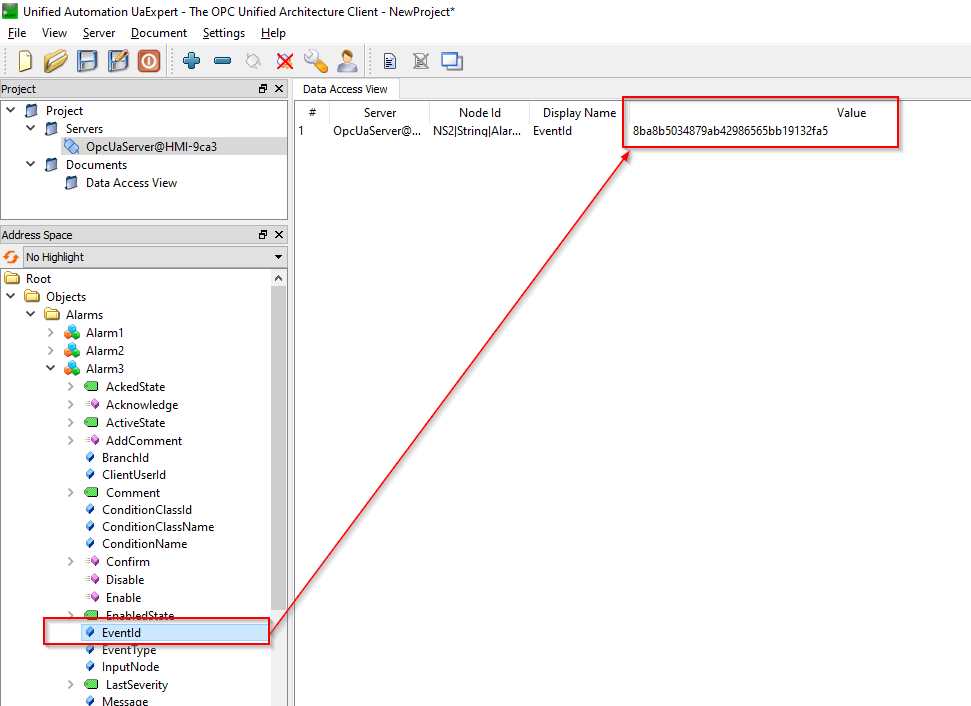
If you open the Node under Alarms>Alarm3>EventId, you will find the value displayed in HEX Format. It is EventId.
Return to the Method of Acknowledge and click the … button next to the Field of EventId.

The Edit Value screen is displayed. Paste the EventId value as it is and click the Write button.

Finally, press the Call button to execute the Method.
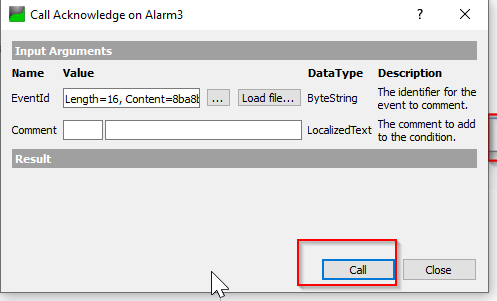
Done!If the Result displays a green Field with Succeeded, the Method was executed successfully.

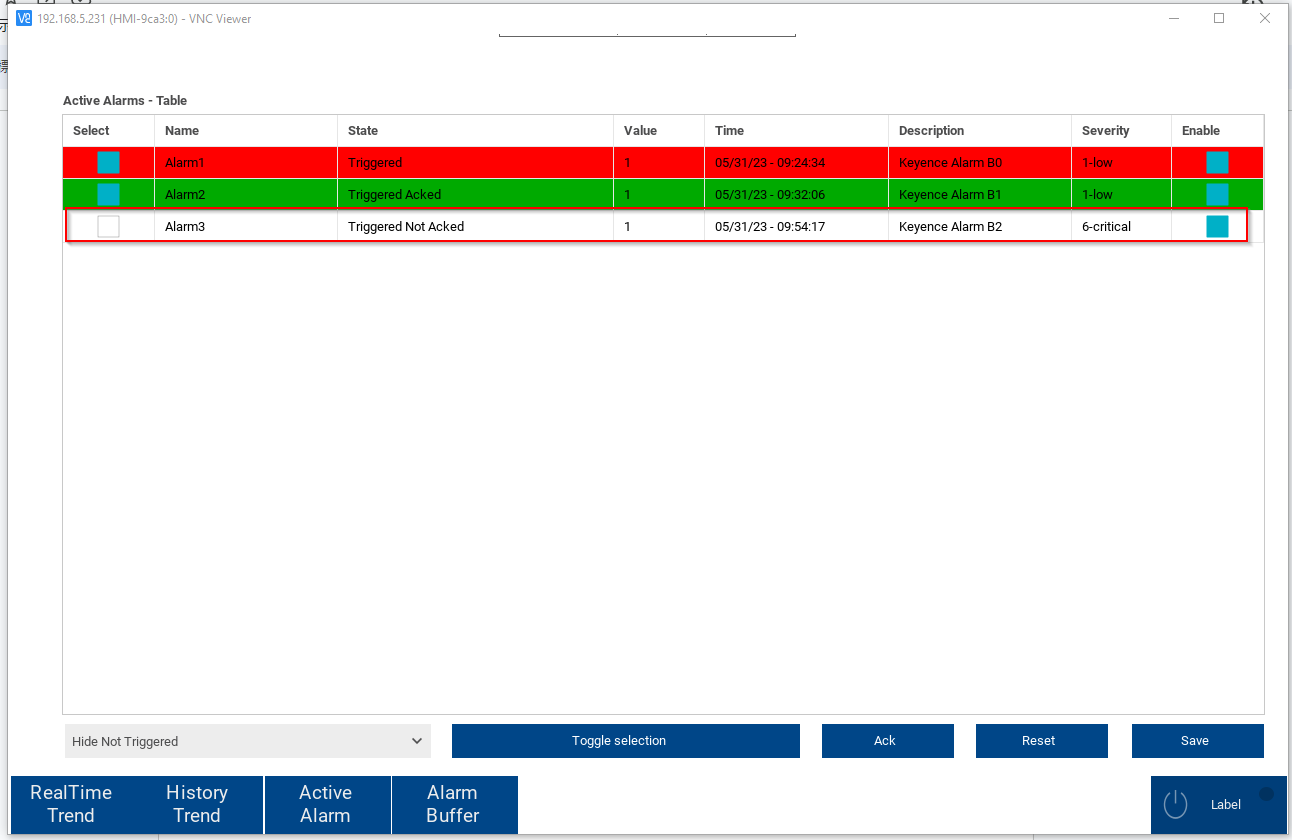
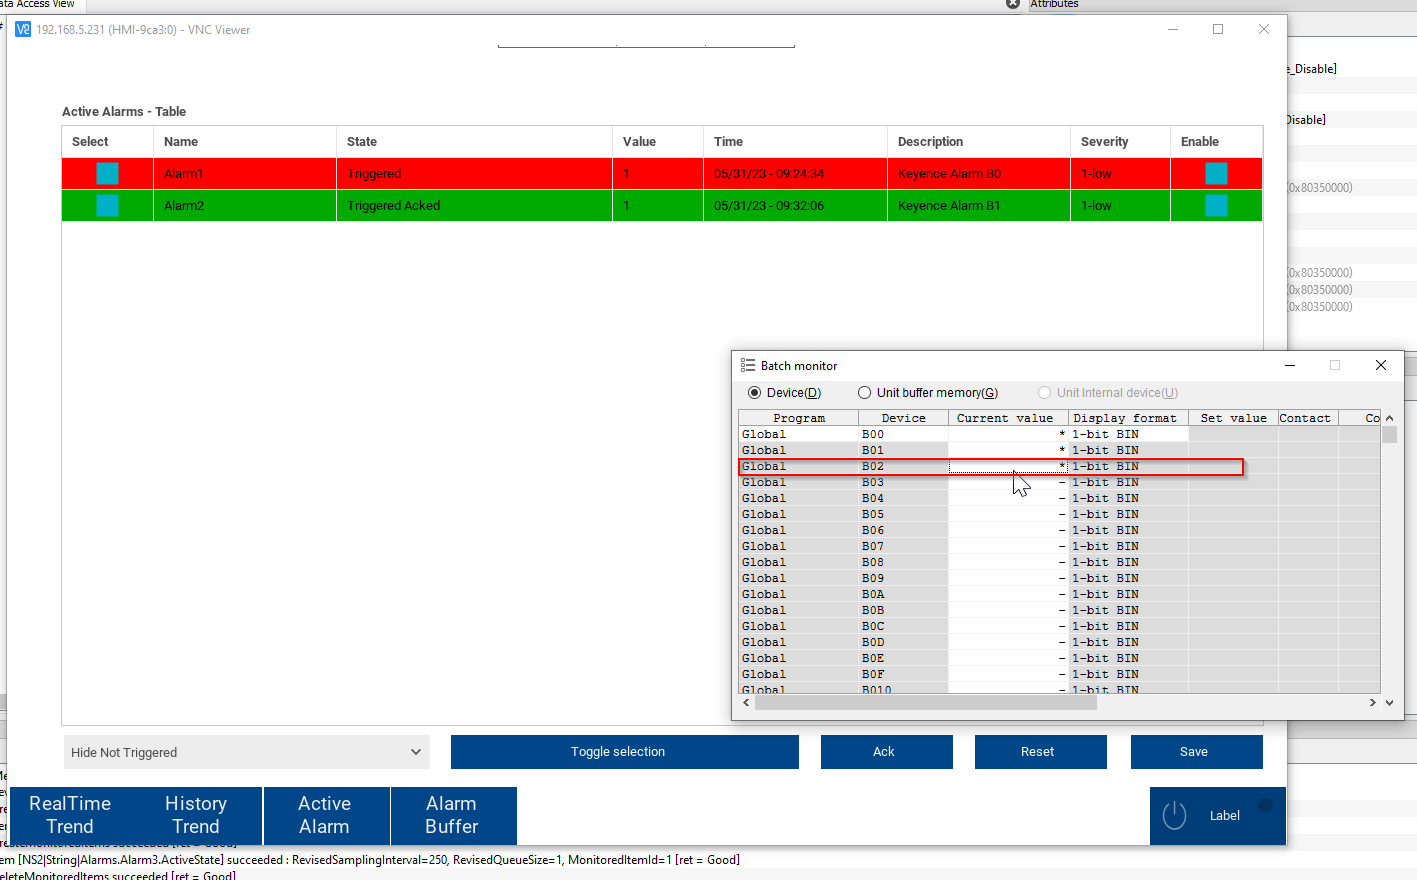
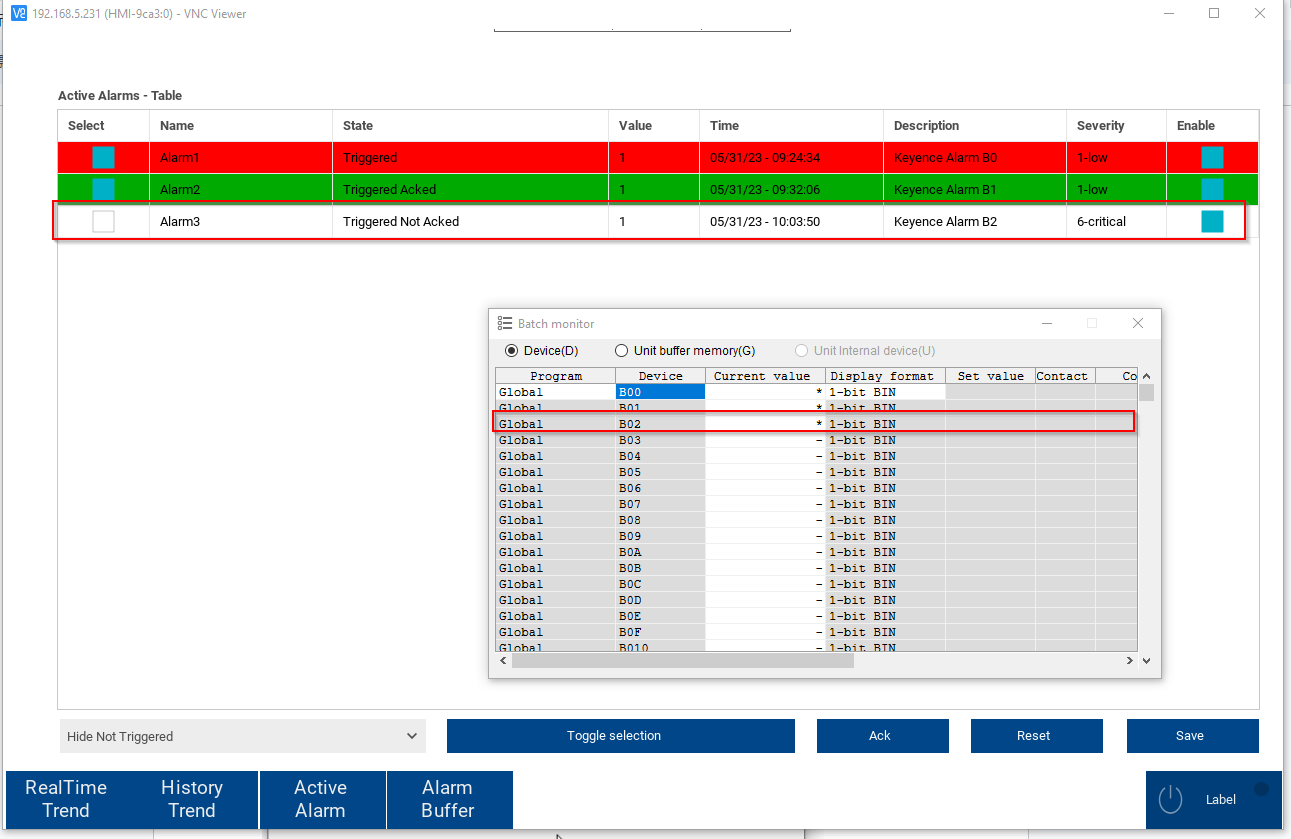
Checking the alarm screen of the EXOR panel, the State of Keyence Alarm B2 changes to “Trigger Acked”, which means that the alarm has been acknowledged.

Disable
The Disable method is used to change the Condition instance to the Disabled state. Normally, the NodeId of the object instance is passed to the Call Service as the ObjectId, but some Servers do not expose Condition instances in the AddressSpace. Therefore, all servers must allow clients to call the Disable method with ConditionId as ObjectId. (Actually, it is better to think of this as disabling the alarm.)

Call Alarms>Alarms3>Disable>right click.

Disable is also one of the Methods; simply calling it will disable the corresponding alarm.
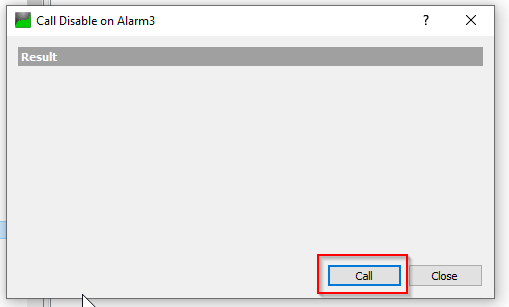
Done!Method was successfully executed.
If device B02=True, which now Keyence Alarm B2 is in true, the alarm will not be Triggered.
Enable
The Enable method is used to set the Condition instance to the enabled state. Normally, the NodeId of the object instance is passed to the Call Service as the ObjectId, but some Servers do not expose Condition instances in the AddressSpace. Therefore, all servers must allow clients to call the Enable method with the ConditionId as ObjectId. (Actually, it is better to think of this alarm as Enable.)
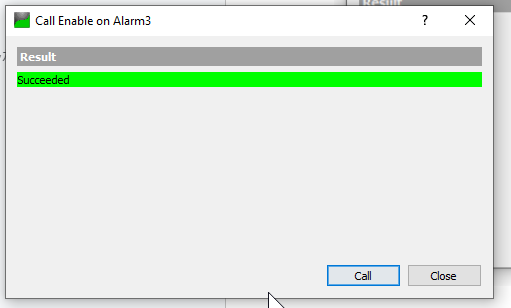
The method to Enable is the same as for Disabled: Alarms>Alarms3>Enable>Call.

The method to Enable is the same as for Disbale: Alarms>Alarms3>Enable>Call.

Done!
If you check from the EXOR alarm screen, Alarm is now Triggered when device B2=True, which will trigger Keyence Alarm B2.
Active Status
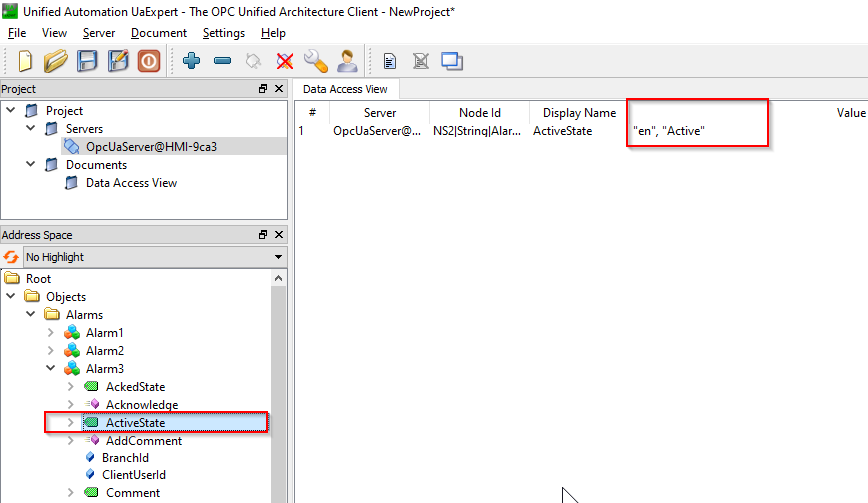
In this Node, you can check the status of the corresponding alarm as a string. For example, if you want to check the status of Alarm3, open Alarms>Alarms3>ActiveState.It is currently in Active state.
Checking the EXOR alarm screen, Alarm3 is now “Trigger Not Acked”, which means it is active.

When the alarm is cleared, the ActiveState changes to Inactive.

ACK Status
Acknowledgment approval usually comes from two directions
- From the client
- From the server’s internal logic
For example, the Acknowledgement of a Condition associated with an alarm may be the result of this Condition being Acknowledged, or it may be set up to Acknowledge automatically.
Two Acknowledge state models are supported in this standard, and Ack’s capabilities can be extended to support more complex acknowledgement situations.
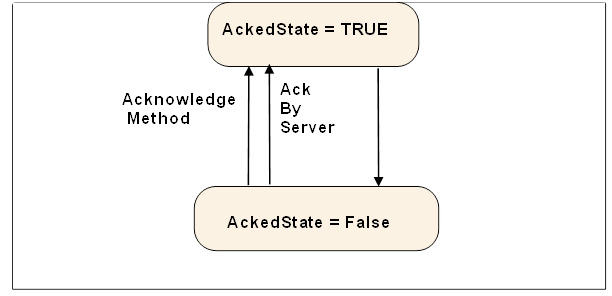
The basic Acknowledge state model is shown in the figure below.
This model defines the AckedState. The specific type of state change depends on the Server implementation. For example, in a typical alarm model, changes are limited to transitions to or within the Active state.
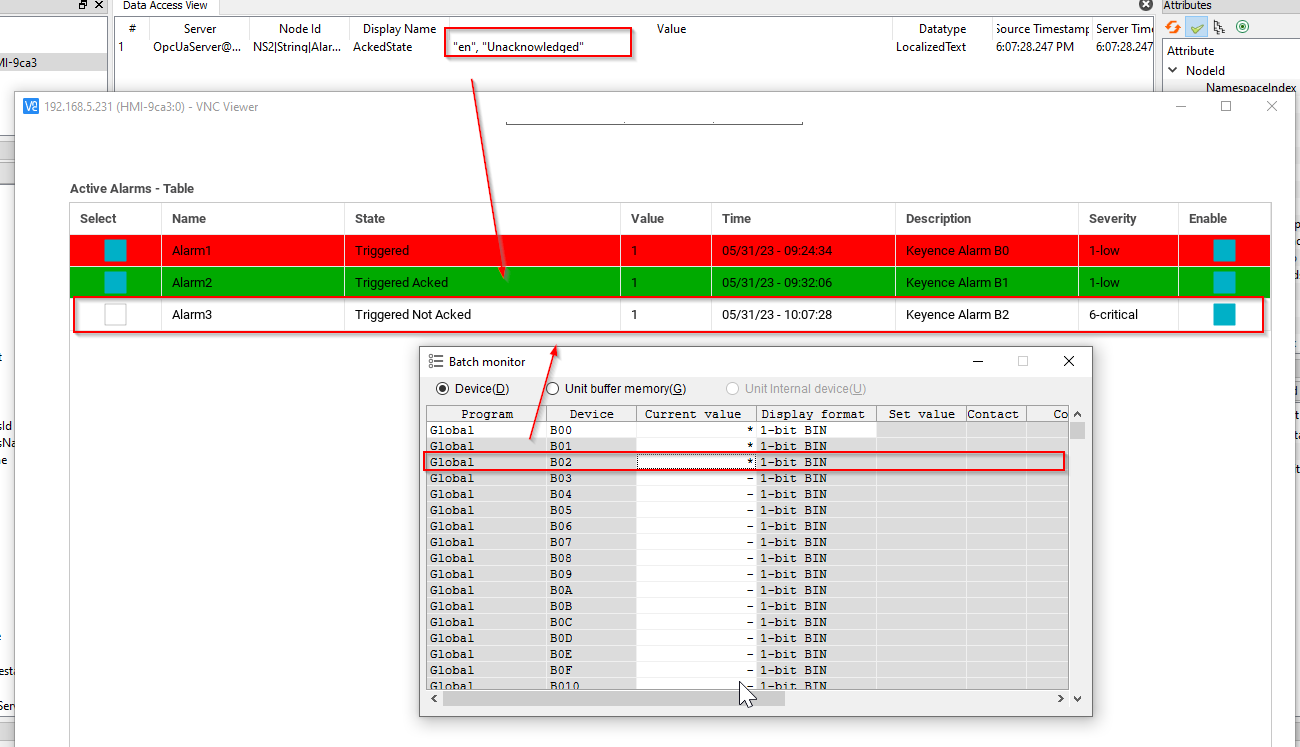
To check the Acknowledge state of an alarm, go to Alarms>AlarmX>AckedState to see the Acknowledge state of the alarm as a string.
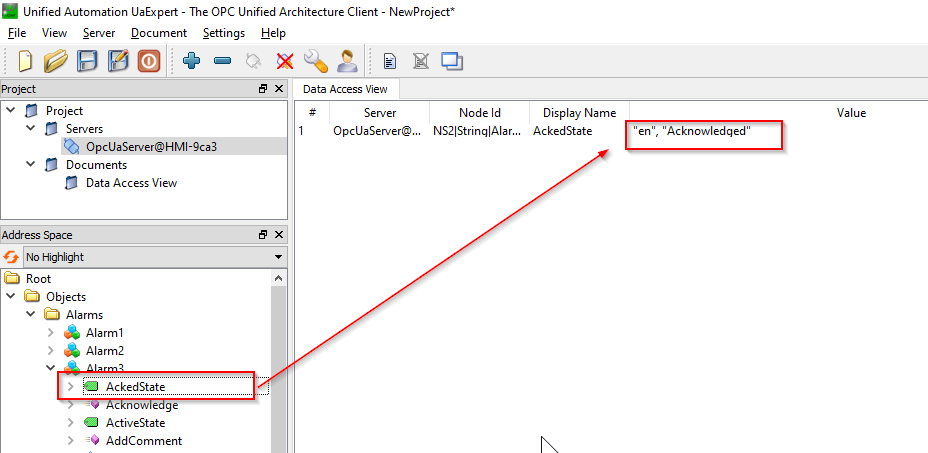
The State of Alarm 3 is now displayed as “Trigger Not Acked” and the AckedState value is “Unacknowledged”. In other words, it indicates that it has not been Acked.
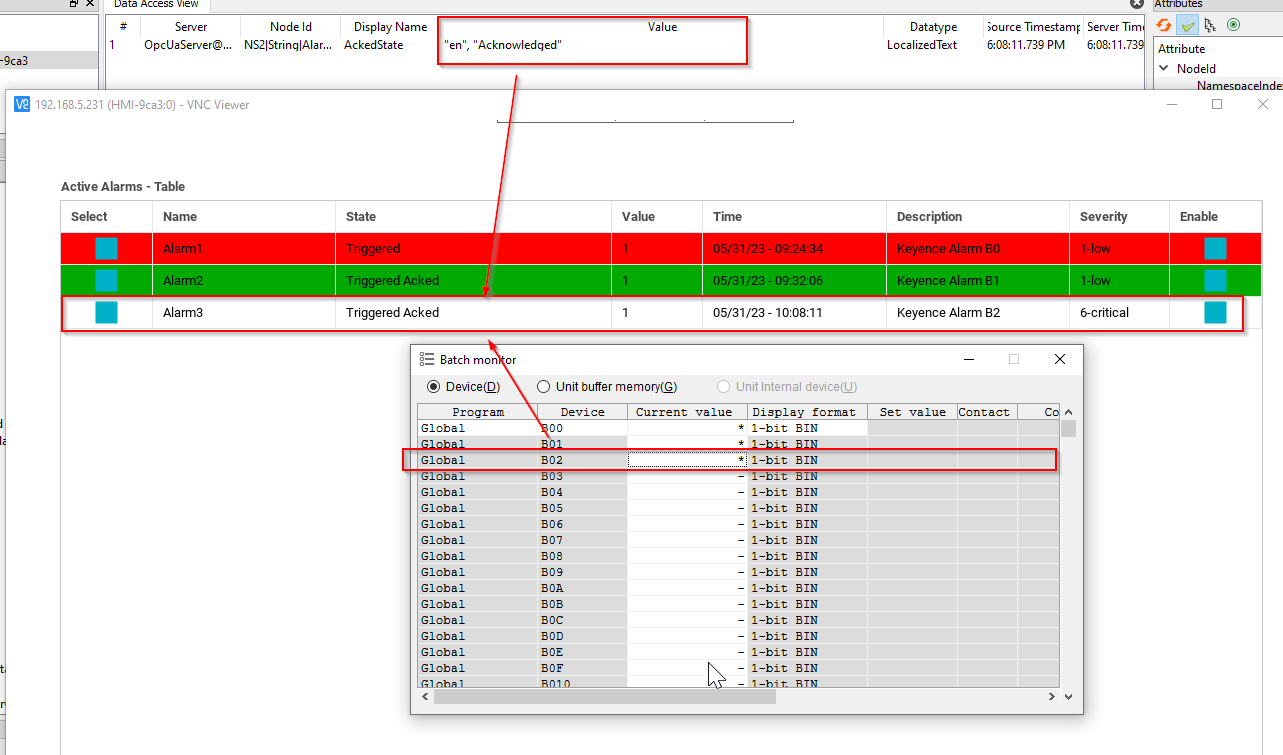
After Acking Alarm3, State=”Trigger Acked” and AckedState changes to “Acknowledge”.
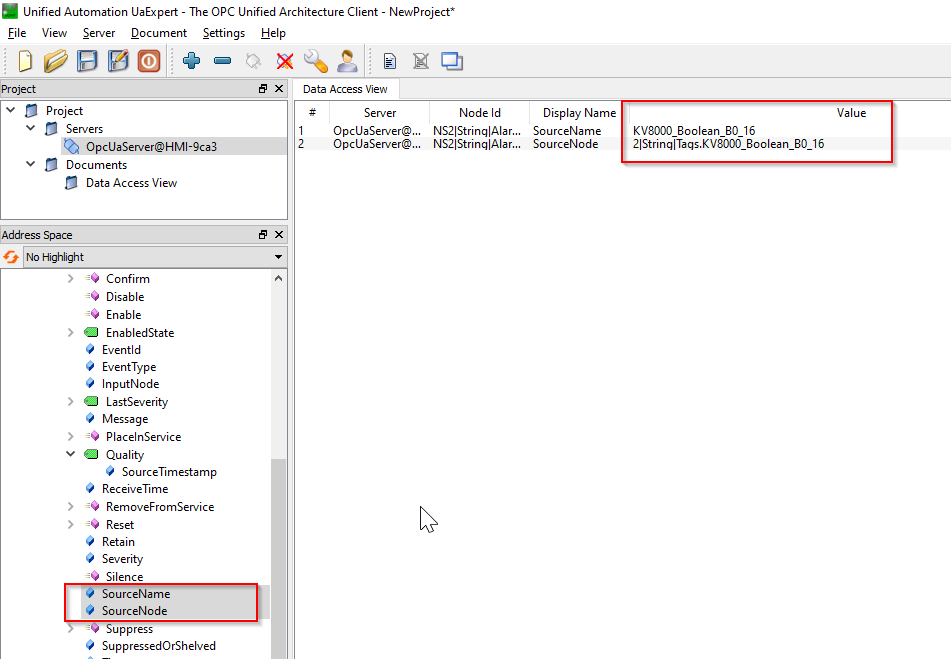
SourceName/SourceNode
SourceName is a string that displays the name of the Trigger device for the corresponding alarm.SourceNode is a string that displays the Node of the Trigger device for the corresponding alarm.
Message
Message contains the message of the corresponding alarm.
