この記事はSiemens社のStarterソフトウェアを使ってプログラムなしのDrive試運転方を説明します。
Starterとは?
StarterはコンミッションツールとしてS120,G120などSiemens社製のDriveと通信、パラメータ設定、情報診断様々な機能はもつのツールです。もちろん無料です。
Download:
Delivery release for SINAMICS MICROMASTER STARTER V5.3 HF1 and additive SSPs
Installするとき引っかかりそうなエラーと解決方法:
STARTER: Installation of the STARTER software
ここで、Offlineプロジェクト作成の方法と実機から吸い出しの2つの方法も説明します。
(私は吸い出しのほうがおすすめですが。)
Offlineプロジェクト作成
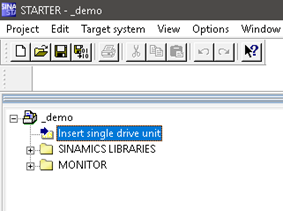
Insert single drive unitを押します。
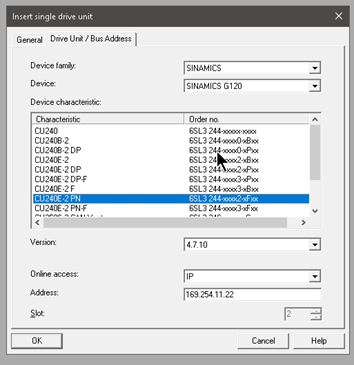
次はDevice familyを選びます。今回はSinamicsで、DeviceがとりあえずCU240E-2 PNにします。Versionは必ず実機と合わせてください。バージョン確認はDrivesを電源落としてその中にあるCF Cardを取って確認できます。IPはTIAのプロジェクトに合わせてください。
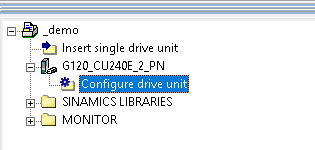
Configure drive unitを押します。
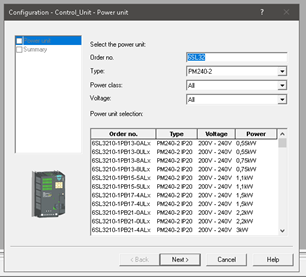
型式は実機に合わせ、Nextを押します。
“Then start commissioning wizard”のCheckboxを入れて“Finish”をクリックします。
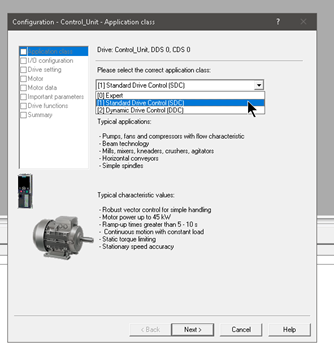
Application Classを選びます。
0=Expert、つまりUserさんが自分でカスタマイズします。
1=Stand Drive Control、例えばPump、Fan簡単なアプリケーション。
2=Dynamic Drive Control、例えばEncoder付きのコンベヤー、Lifter、そのような少し精度必要なアプリケーション。
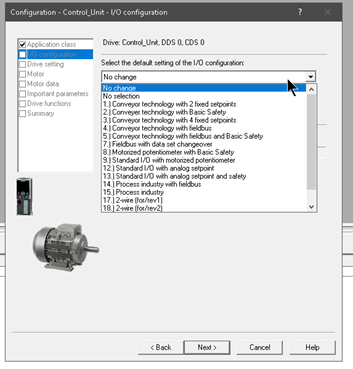
I/O Configurationはハード配線どうする?ってこと。ここはNo changeします。
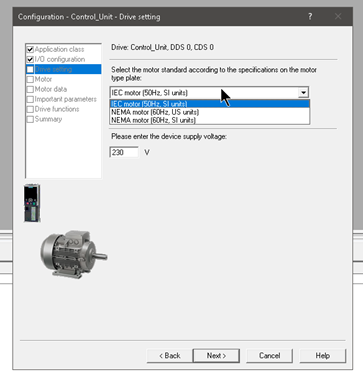
Drive SettingはMotorタイプを選択し、電圧供給を入れます。

MotorでInduction motorとか同期Motorとか選択できます。
そしてMotorの上についてName Plateにのってるデータを手打ちにします。
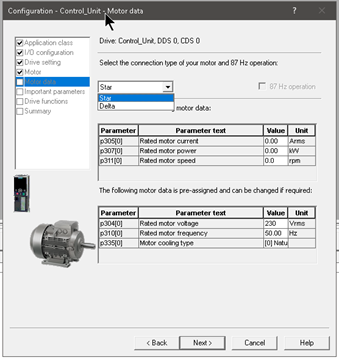

Motorの定格電流、結線などを入れます。
Important parametersで電流リミット、Ramp-up時間などを設定します。
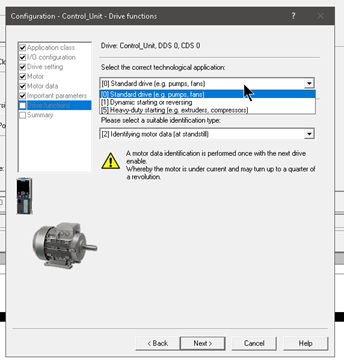
Drive Functionがまたどんなアプリケーションを選択します。標準Driveか、重いもの搬送するのDriveとかなどを設定できます。Suitable identification typeはハードウェアの設定終わり、パラメータなどダウンロードしたあとの初めて通信はどうやって最適のパラメータを探すの設定するのです。
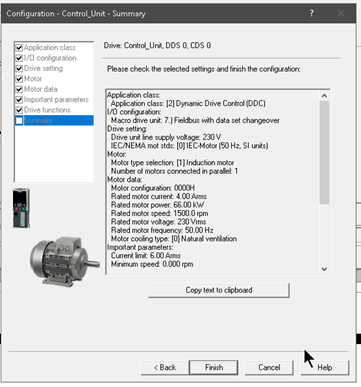
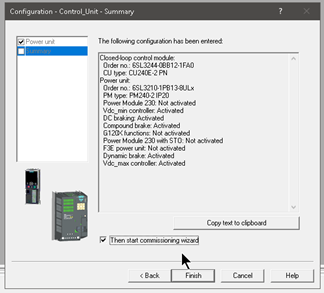
全部確認した上にFinishをクリックします。
実機から吸い出し
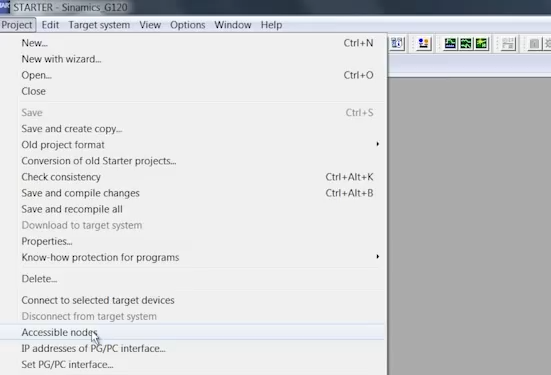
Project>Accessible nodesをクリックします。
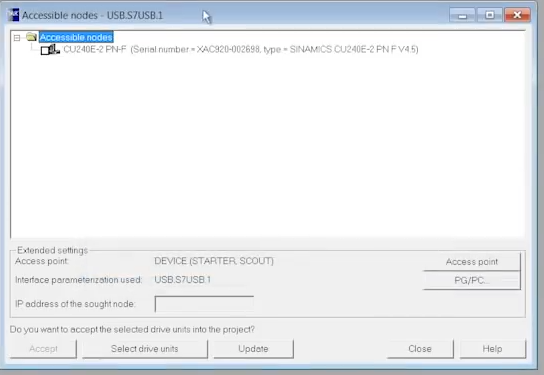
Starterが自動的接続してるDriveを探し表示させます。
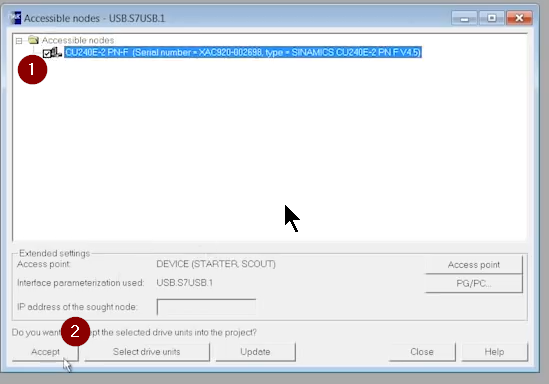
1.見つかったDriveに左が小さいなCheckboxがあり、Check入れます。
2.Accept押します。
そうするとProjectが自動的Starterに引っ貼ってくれます。
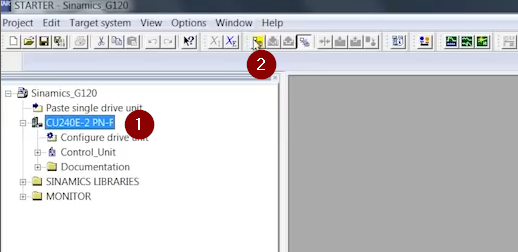
次は吸い出したDriveを選んで、2のOnlineボダンを押します。
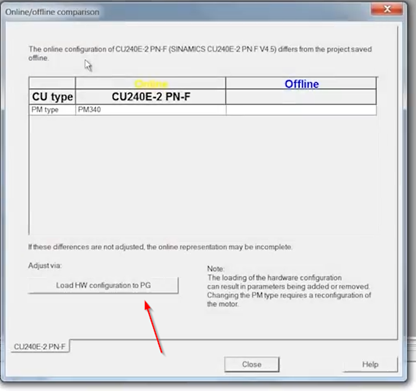
つながってるのであればOnlineとOfflineのCUが違いますよ~と言われています。
“Load HW configuration to PG”をクリックします。
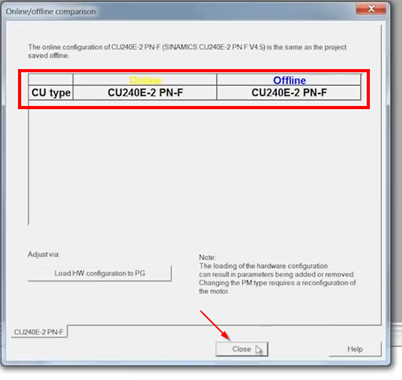
それでOnlineとOfflineのCU Typeが一致することになります。
Closeをクリックします。
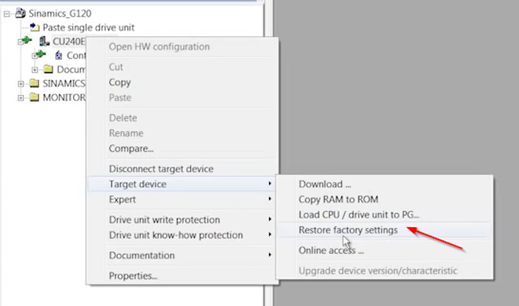
Driveのところに右クリックし、Target device>Restore factory settingsをクリックします。それで出荷設定に戻ります。
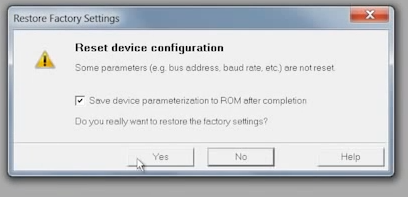
確認Popupが出てきます。
ここでちょっと注意するのは“Save device parameterization to ROM after completion”というCheckboxです。SiemensのDriveはRAMメモリとROMメモリがありまして、もちろんみんなさんも知ってると思いますが、RAMメモリがアクセス早いが電源消えたらなくなる。ROMが保持できますがアクセスのは遅い。
例えば、試して設定をいじりたいときはRAMだけに書き込んで、あれ~やっちゃったになったら電源入れ直しすれば元に戻れます。
逆に、うん、このパラメータも完璧だ!だと思ったらROMにも書き込まないと電源入れ直してしまうと消えてしまう。
ここでとりあえずCheckbox入れて、“Yes”を押します。
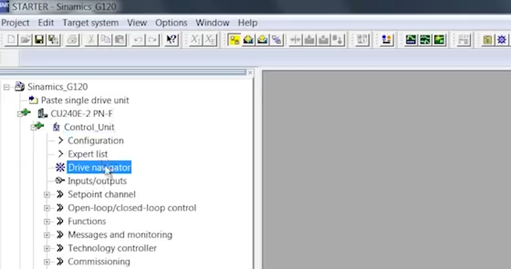
Factory Reset終わったらDrive navigatorをクリックします。
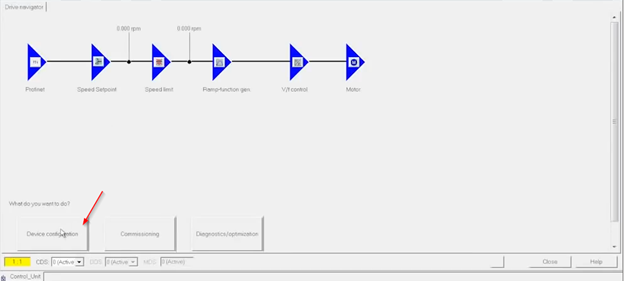
右側の画面はこのように出てきます。Drive configurationをクリックします。
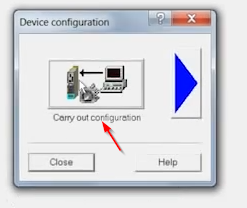
小さいなPopupが出てきます。Carry out configurationをクリックします。
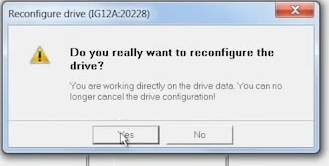
また小さいなPopupが出てきます。もちろんYesです。
そして先と同じようが構成設定画面が出てきます。Motorなどの実機に合わせように設定してください。

次は試運転に行きます。
Commissioning をクリックします。

画面の下このような出てきます。
“Assume control priority!”を押してDriveの操作権を取ります。
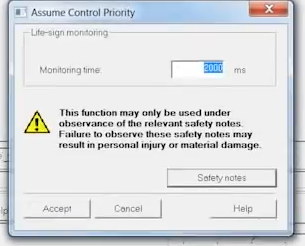
Assume Control priorityという小さいなPopupがまた出てきます。
Monitoring timeは現在SpeedなどをDriveから取るときの更新時間。
そしてそれらの操作は安全注意が必要です…など。
Acceptを押します。
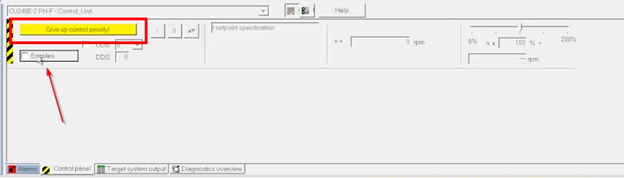
先のボタンが黄色になり、文字も“Give up control priority!”に変わります。
そしてEnablesのCheckboxをいれることで操作始まります。
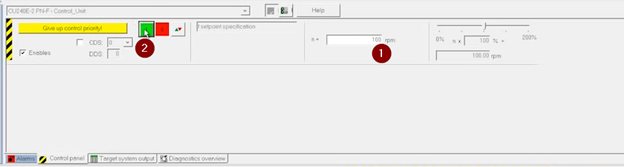
Enableすると、n=rpmが入力できるようになってる。ここで仮に100 rpm入れて2の緑のボタンを押して回り始まります。
OKなら1をDriveオフし、n=rpmを0にし、最後は“Give up control priority!”のボタンをクリックし操作権を放棄します。
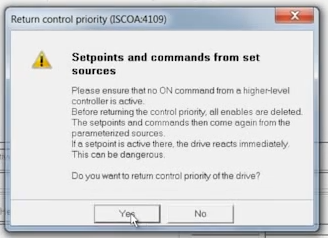
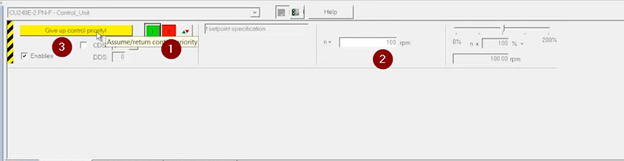
Return Control priorityというPopupが出てきます。
先の“Give up control priority!”ボタン押すことによって操作権を放棄ってことは操作権をPLCなどの上位のControllerに戻すことになります。
もしそのときControllerはONの指令が入るとすぐDriveが動作することになります。
危険があります。本当によろしいですか?っと。
確認したらYesを押します。
お疲れ様ーです。