In 2026, AUTONDMY’s OPENPLC V4 underwent a major update, with both the Editor and Runtime officially releasing V4! This series will conduct various tests using OPENPLC V4 in practice. Episode 2 introduces operations such as adding IEC timers and counters, and using the Debug Tab.
Additionally, the Open PLC Runtime will be installed within the Docker container of Advantech’s AMAX-7580 100D5A.
Let’s enjoy the FA!

Foreword
Thank you from the bottom of my heart for visiting my technical blog and YouTube channel.
We are currently running the “Takahashi Chris” radio show with Full-san (full@桜 八重 (@fulhause) / X) which I deliver every Wednesday night.
Sharing, not hoarding, technical knowledge
We publish technical information related to factory production technology and control systems for free, through blogs and videos.
With the belief that “knowledge should be accessible to everyone,” we share practical know-how and real-world troubleshooting cases from our own field experience.
The reason we keep it all free is simple: to help reduce the number of people who struggle because they simply didn’t know.
If you’ve ever thought:
- “Will this PLC and device combination actually work?”
- “I’m having trouble with EtherCAT communication—can someone test it?”
- “I want to try this remote I/O, but we don’t have the testing environment in-house…”
Feel free to reach out!If lending equipment or sharing your configuration is possible, we’re happy to verify it and share the results through articles and videos.
(We can keep company/product names anonymous if requested.)
How can you support us?
Currently, our activities are nearly all unpaid, but creating articles and videos takes time and a proper testing environment.If you’d like to support us in continuing and expanding this content, your kind help would mean a lot.
Membership (Support our radio show)
This support plan is designed to enhance radio with Mr Full.
https://note.com/fulhause/membership/join
Amazon Gift List (equipment & books for content production)
Lists equipment and books required for content creation.
https://www.amazon.co.jp/hz/wishlist/ls/H7W3RRD7C5QG?ref_=wl_share
Patreon (Support articles & video creation)
Your small monthly support will help to improve the environment for writing and verifying articles.
https://www.patreon.com/user?u=84249391
Paypal
A little help goes a long way.
https://paypal.me/soup01threes?country.x=JP&locale.x=ja_JP
Just trying to share things that could’ve helped someone—if only they’d known.
Your support helps make knowledge sharing more open and sustainable.
Thank you for being with us.
soup01threes*gmail.com
Technical knowledge shouldn’t be kept to ourselves.
Reference Link
http://soup01.com/en/category/openplc_en/
Implementation
Let’s get started on creating the programme.
Add IEC Timer
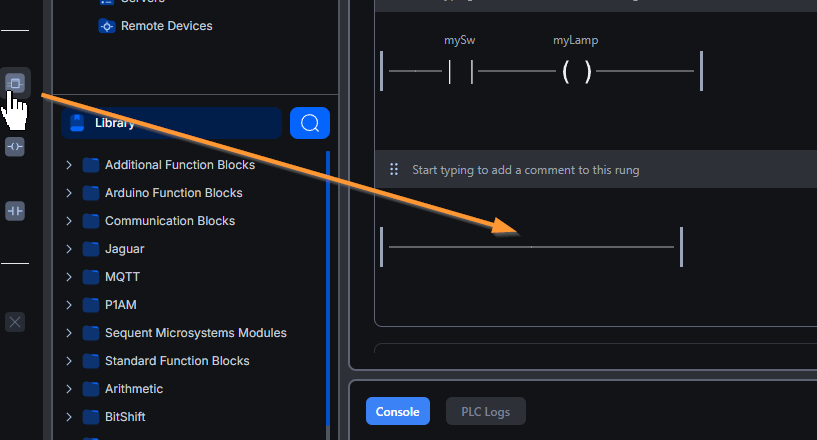
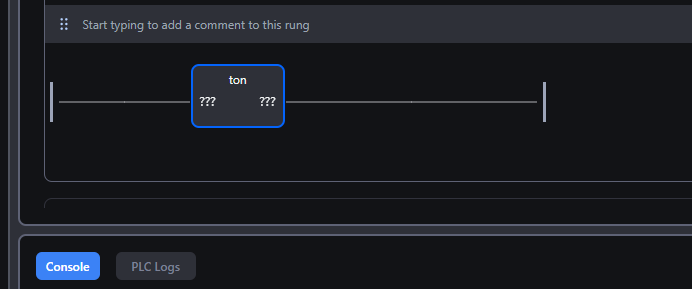
This time, we’ll use an IEC timer. Let’s add the block shown below to the rung.
Done!A new block has been added.
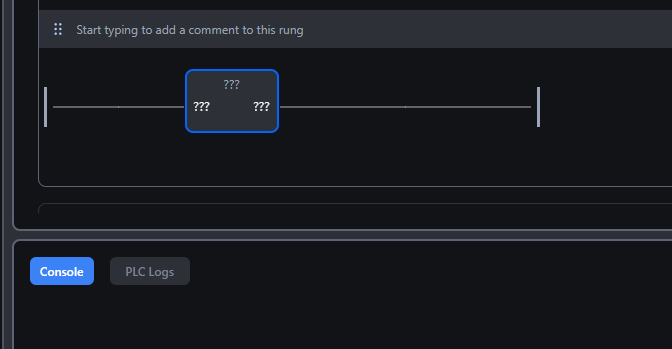
Double-click the Block you just added and select the FB/FC you want to call.
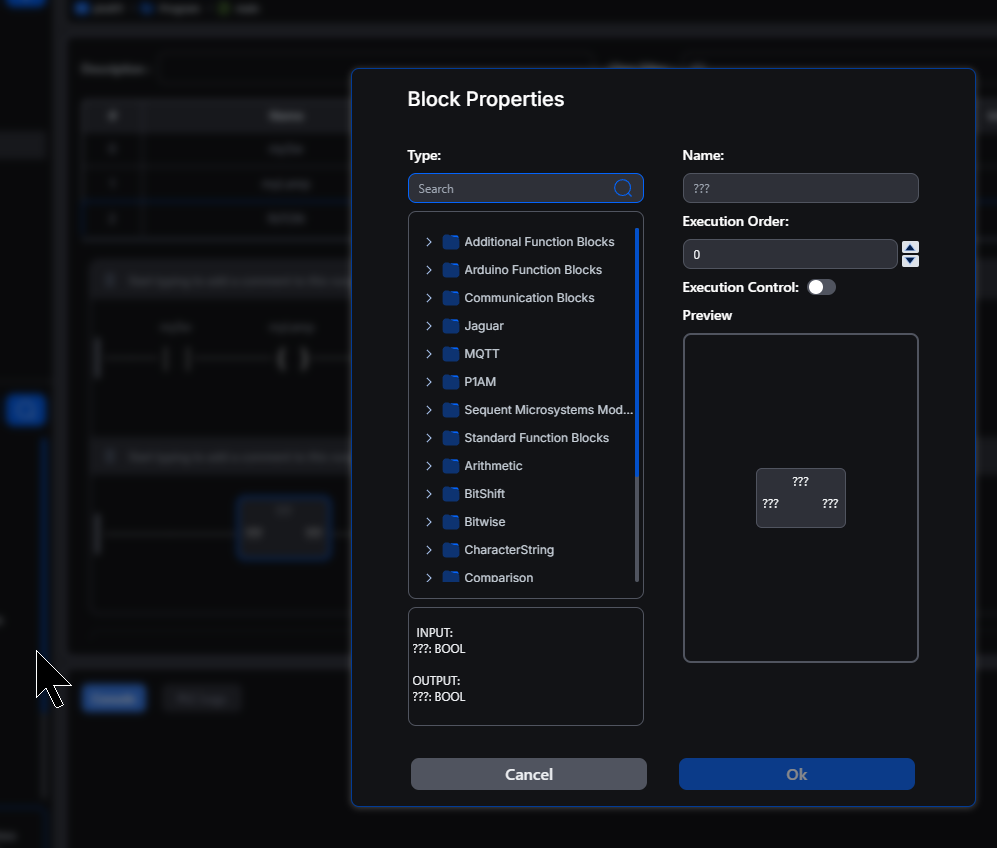
Or, enter TON directly into the Block.
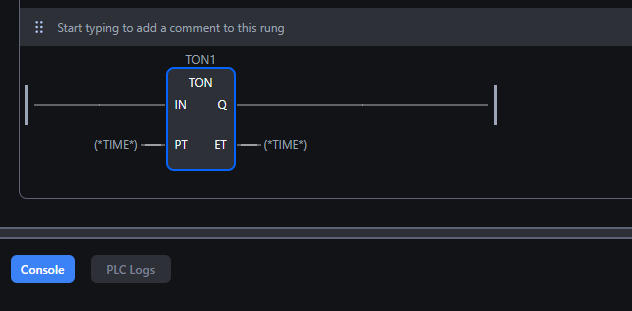
This time, we will add a TON (IEC delay ON timer).
Done!An IEC timer has been added.
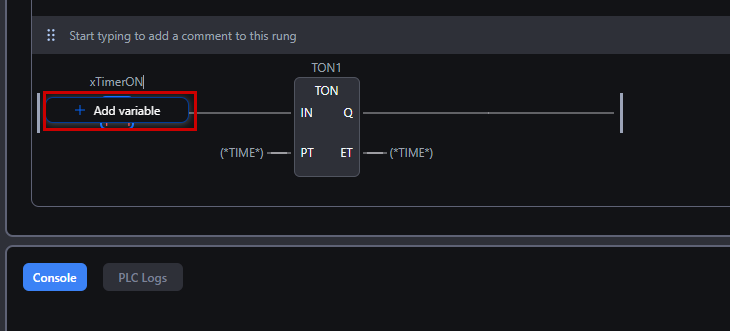
The OPENPLC V4 Editor also supports automatic variable declaration. Click Add Variables when entering variables.
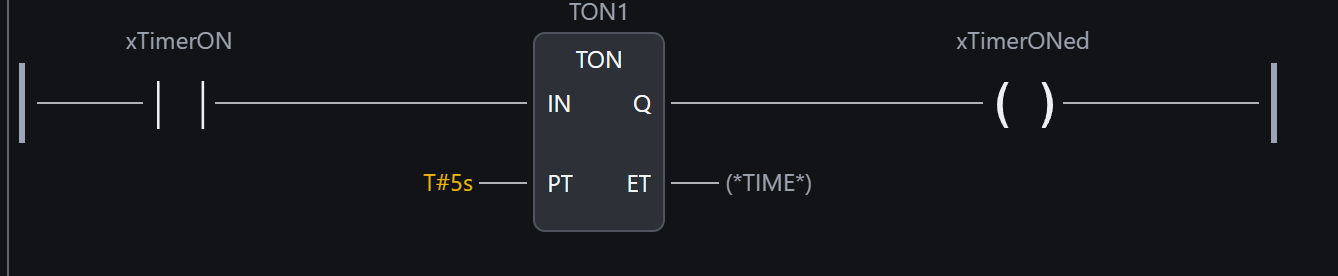
Assign the input and output parameters of the Block as shown in the figure below.
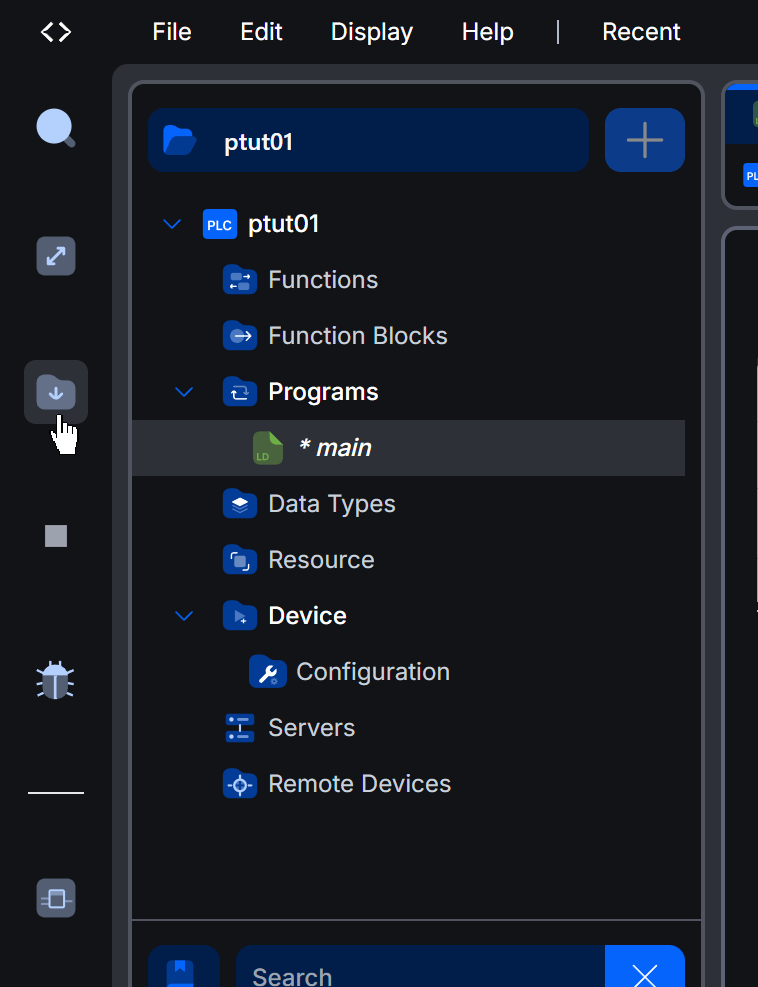
Download
Download the project to Runtime.
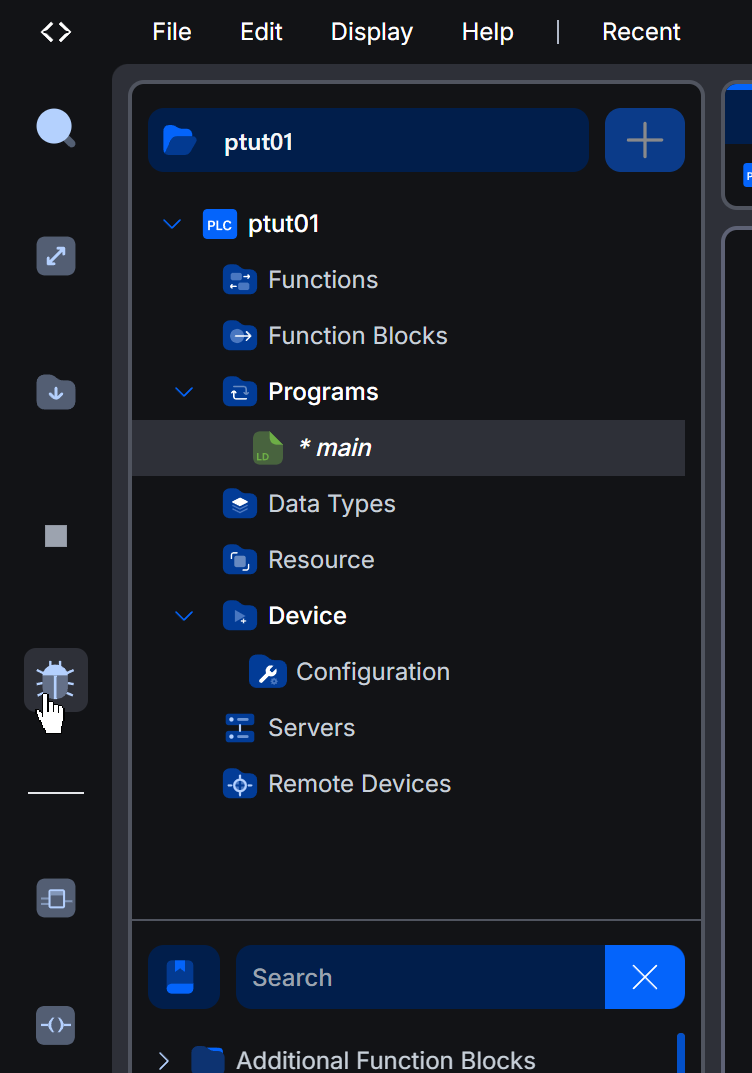
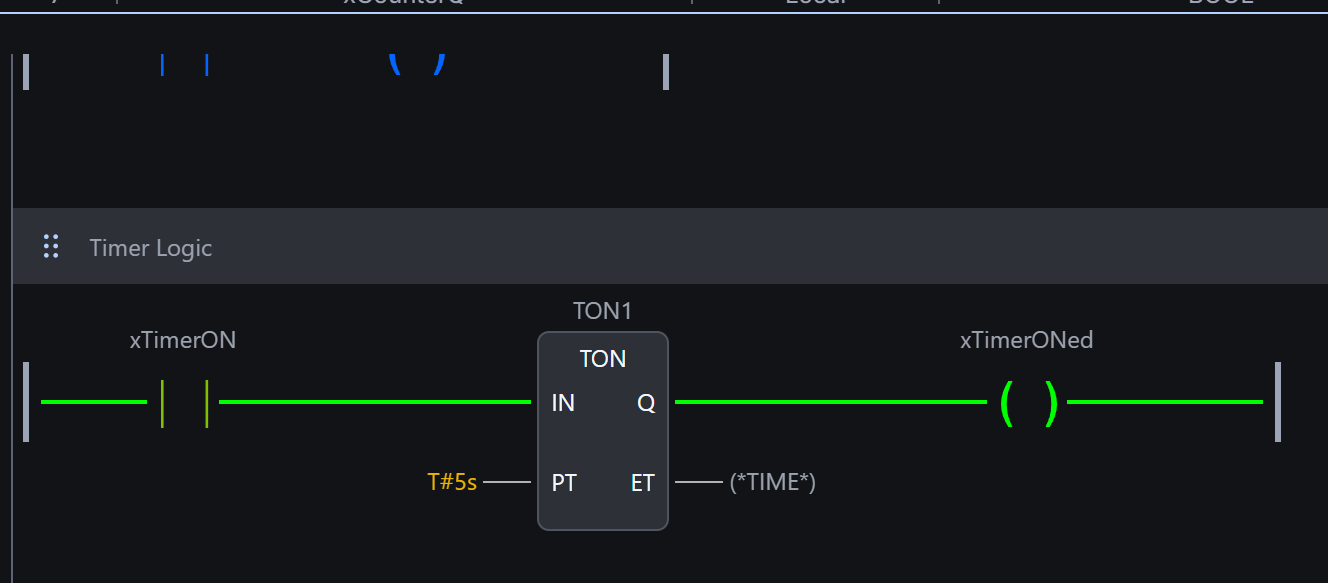
Start debugging
Next, we will start Program monitoring.
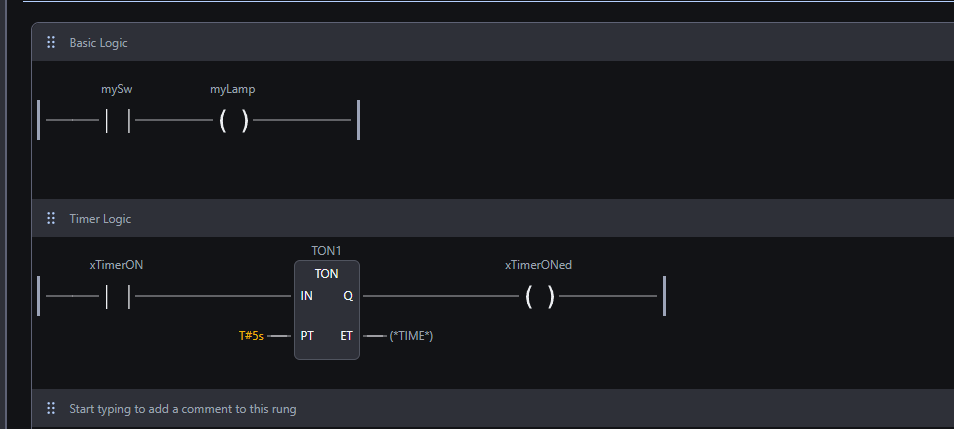
Done!The IEC timer also worked properly.
Add Comment
The ladder editor in OPENPLC V4 allows comments to be added separately for each rung.
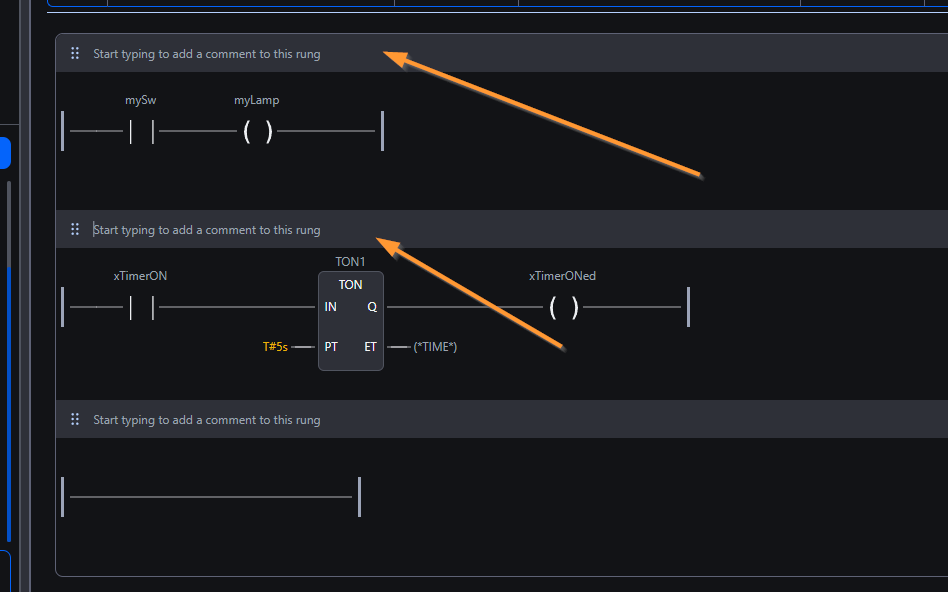
Create rung comments according to the program’s purpose, as shown in the figure below.
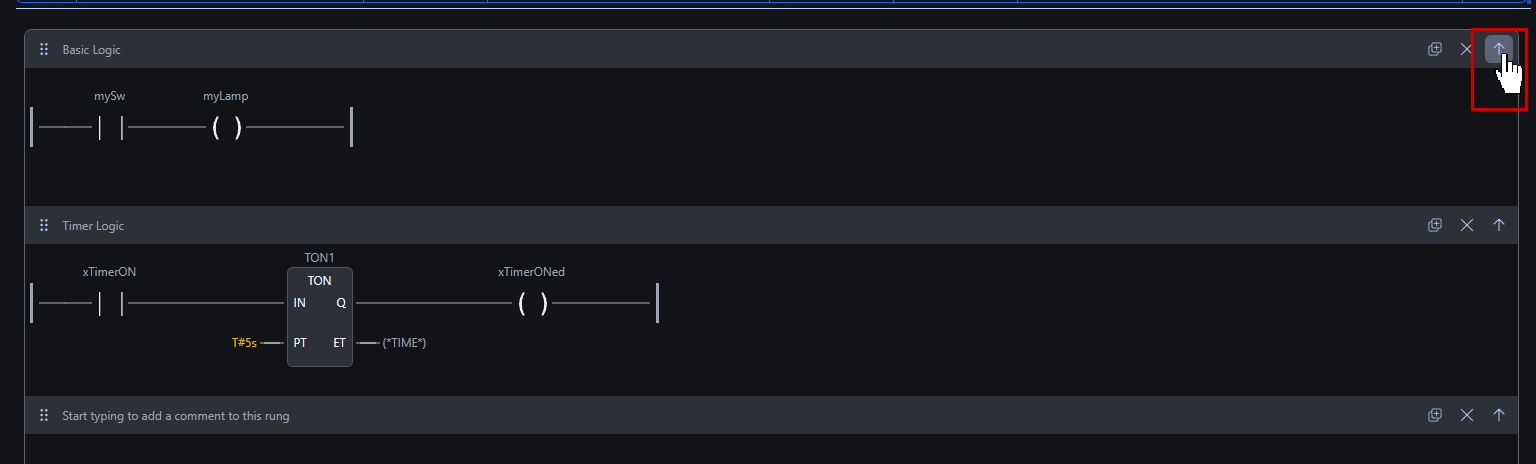
Show/Hide the Rung
When the program becomes lengthy, you can temporarily close and hide unnecessary circuits. To do so, click the arrow button in the red box shown below.
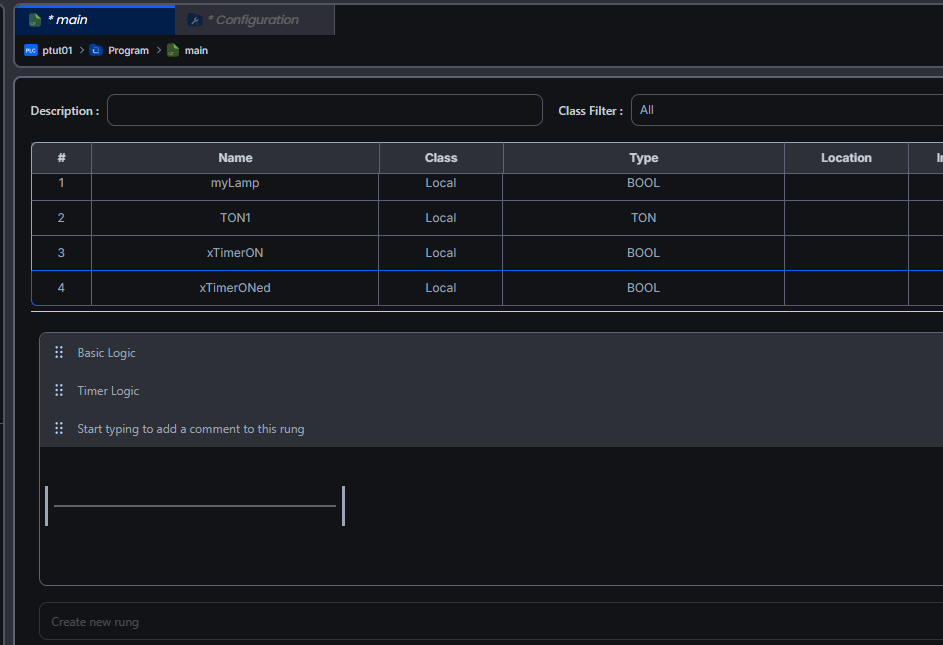
Done!The ladder Rung has been closed.
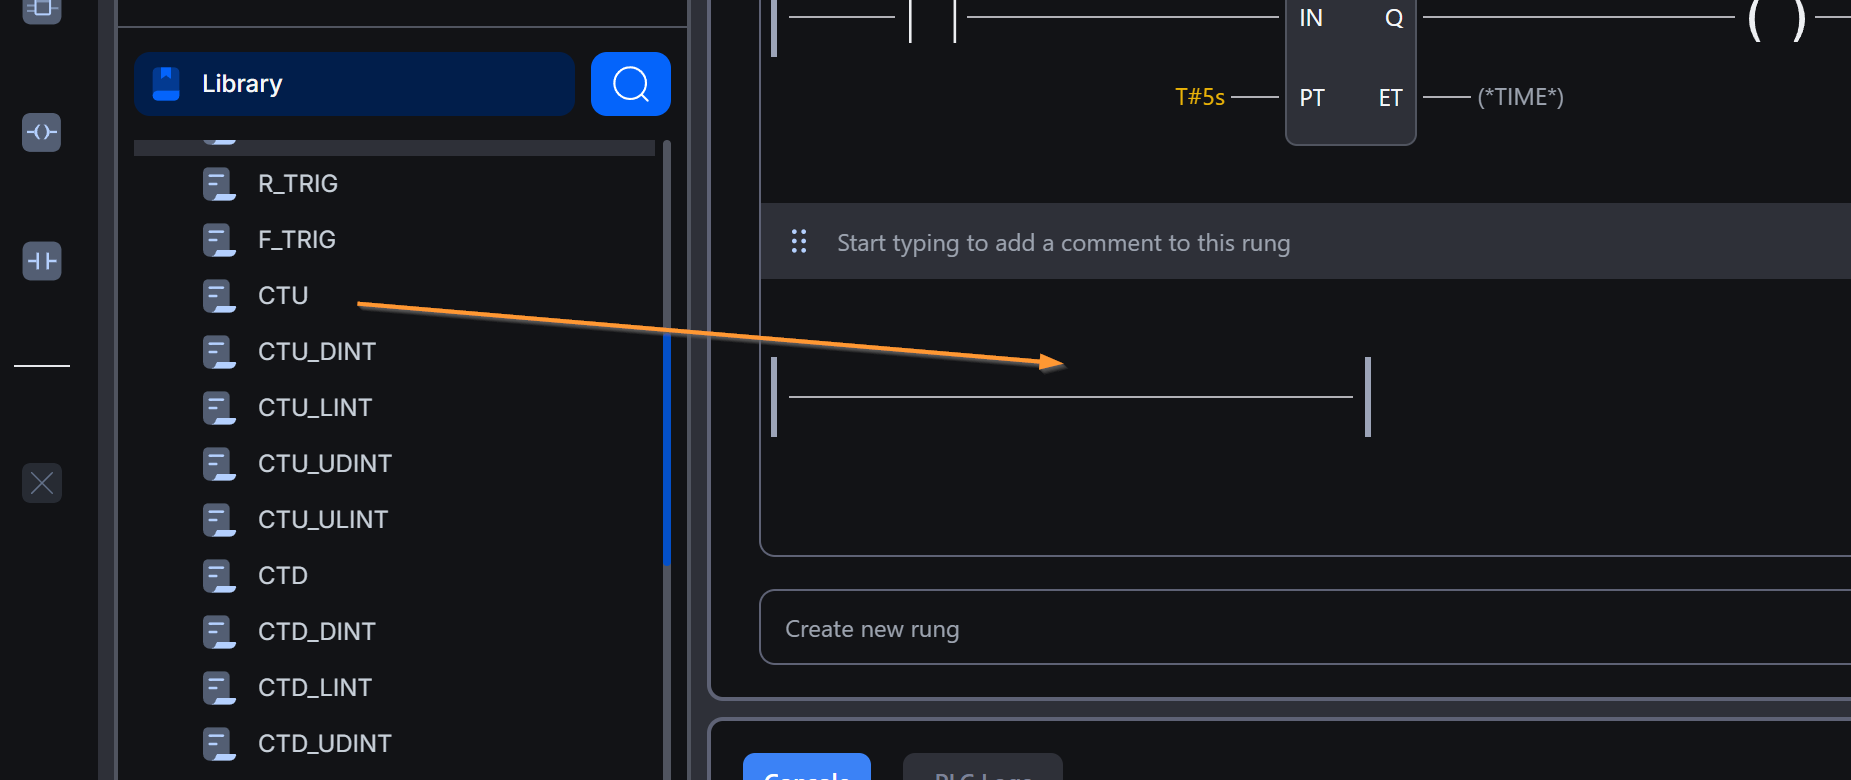
Add CTU FB
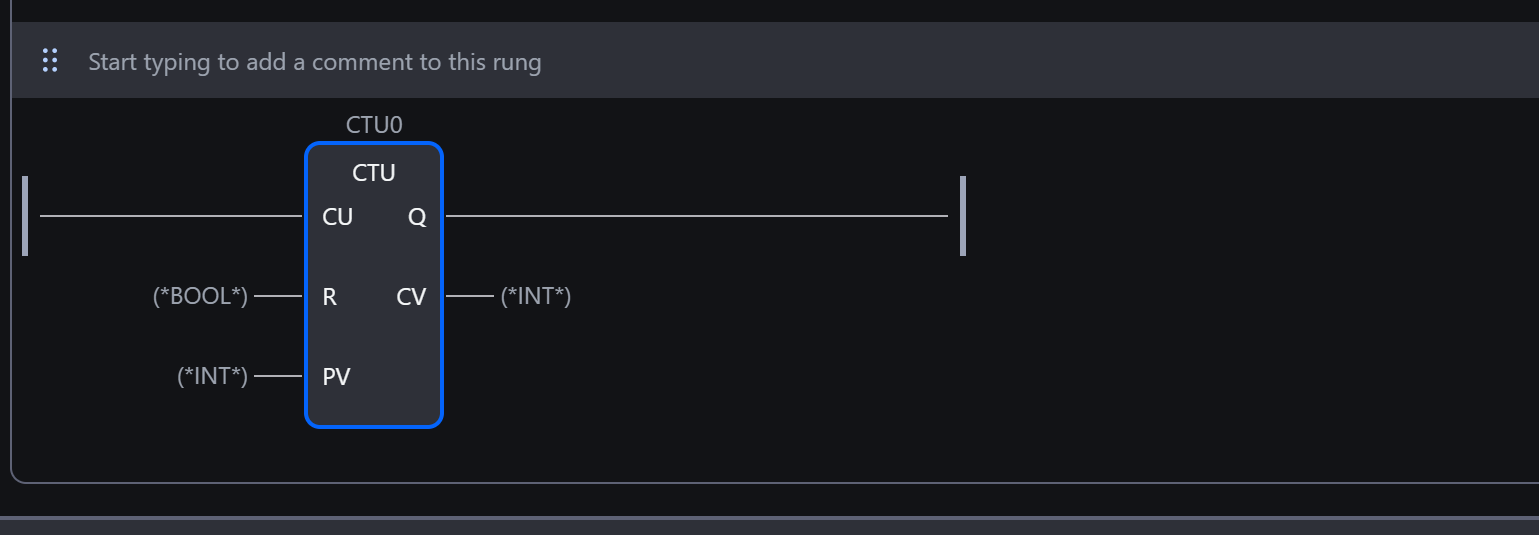
Now let’s add an IEC Counter. From the Library on the left, add the CTU block to the new rung.
Done!It is also automatically declared in the instances required for CTU FB.
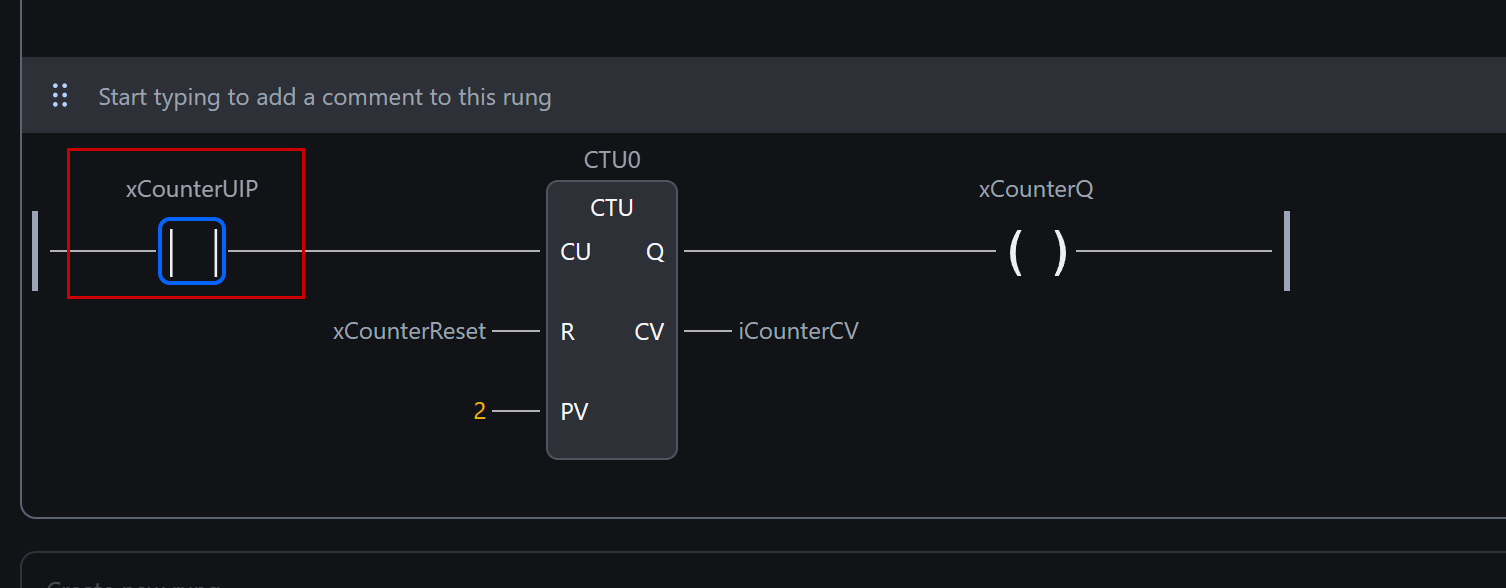
Next, assign the input and output parameters required for the CTU BLOCK. Also, change the xCoutnerUP A contact connected to the CU input from start detection to detection. Double-click this contact.
The contact type settings screen appears. Set the Rising Edge and confirm.
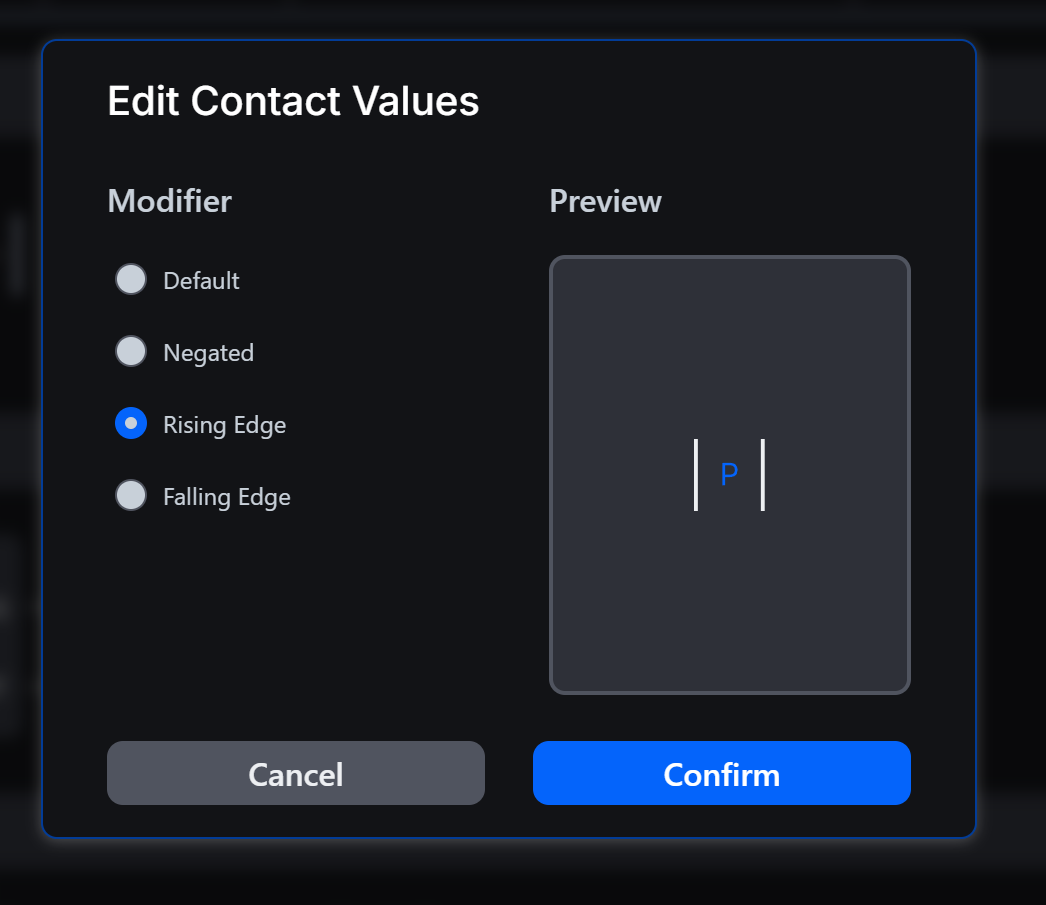
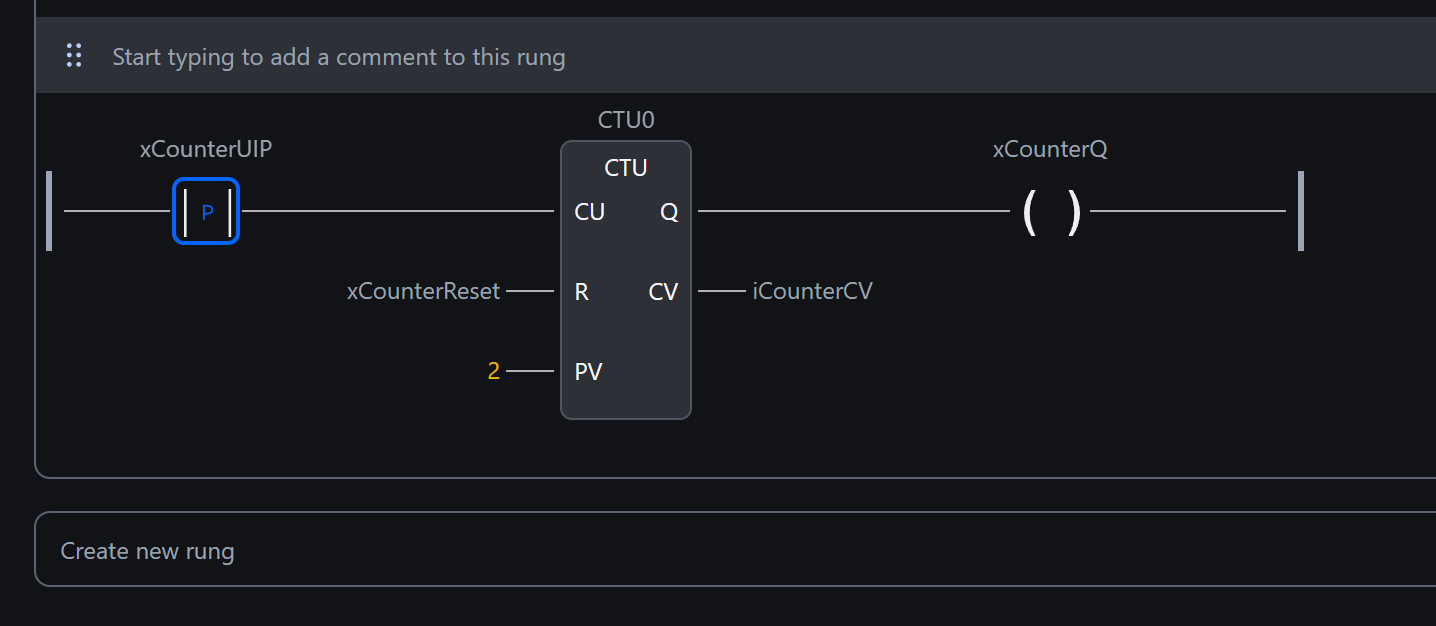
Done!
Next, add the reset coil.
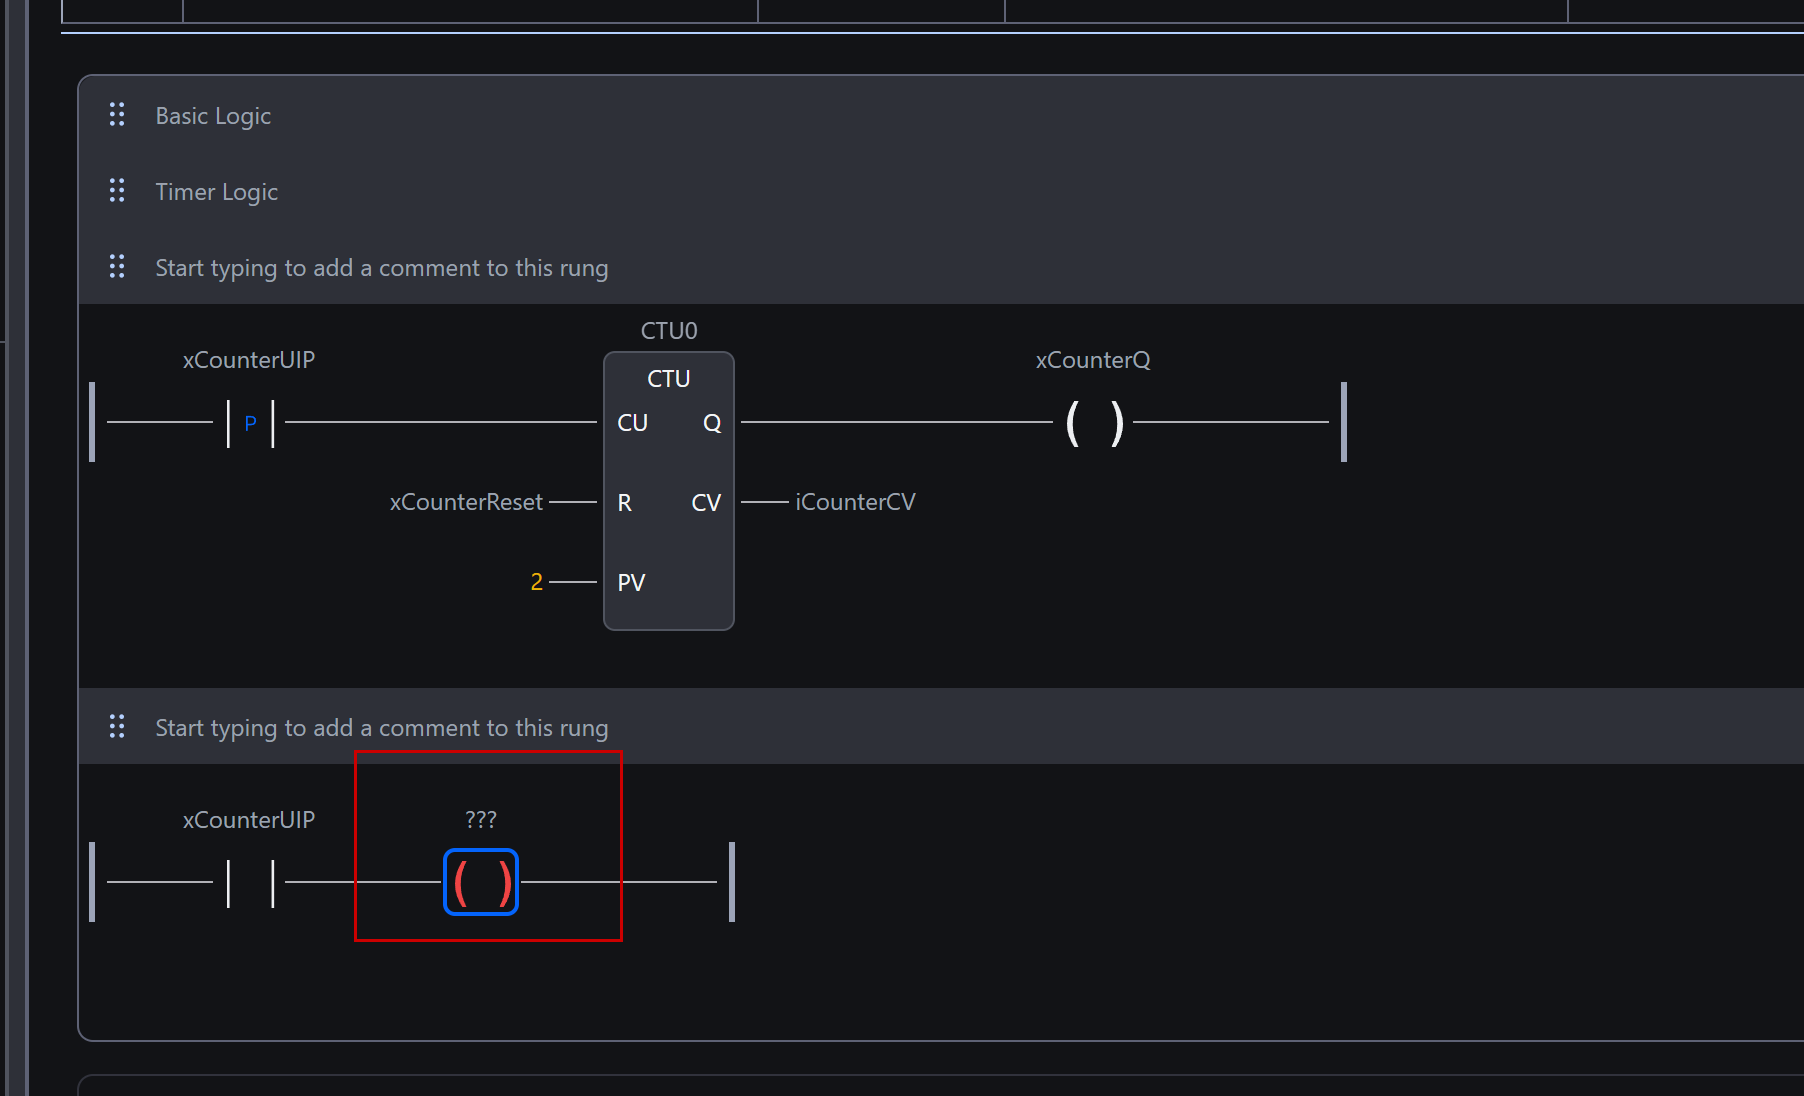
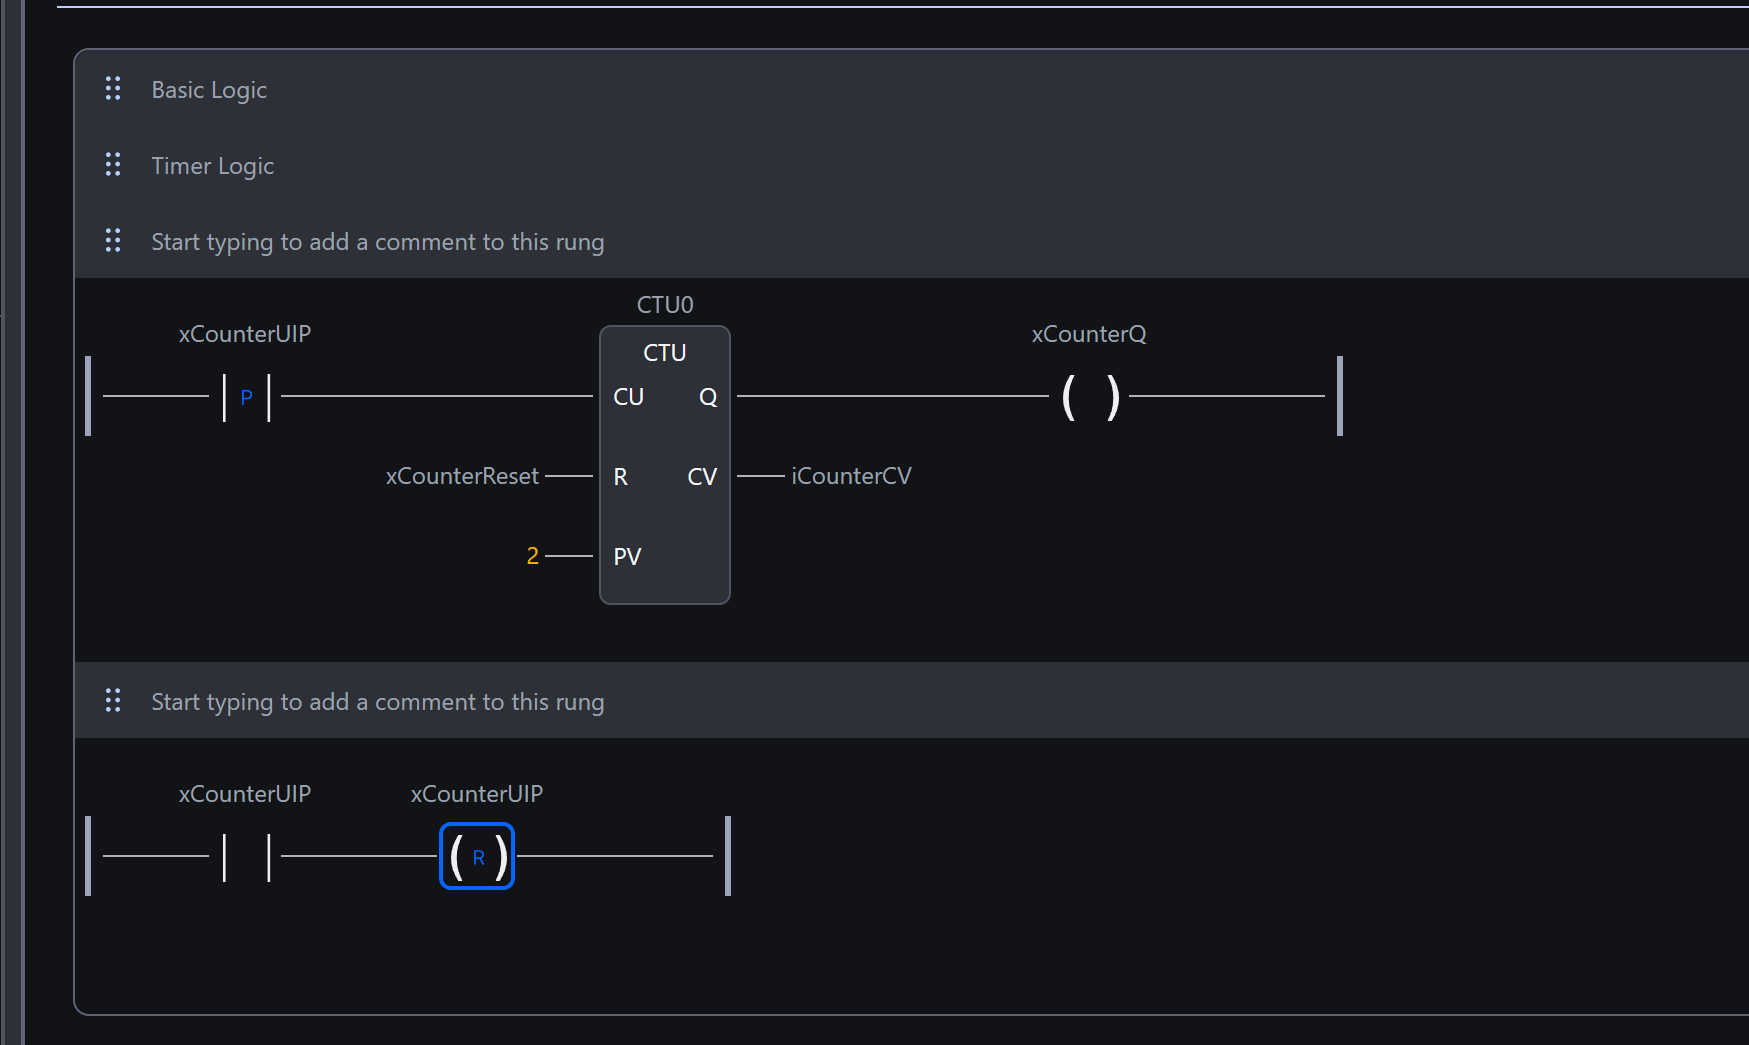
Double-click the coil you just added, select “Reset,” and confirm.
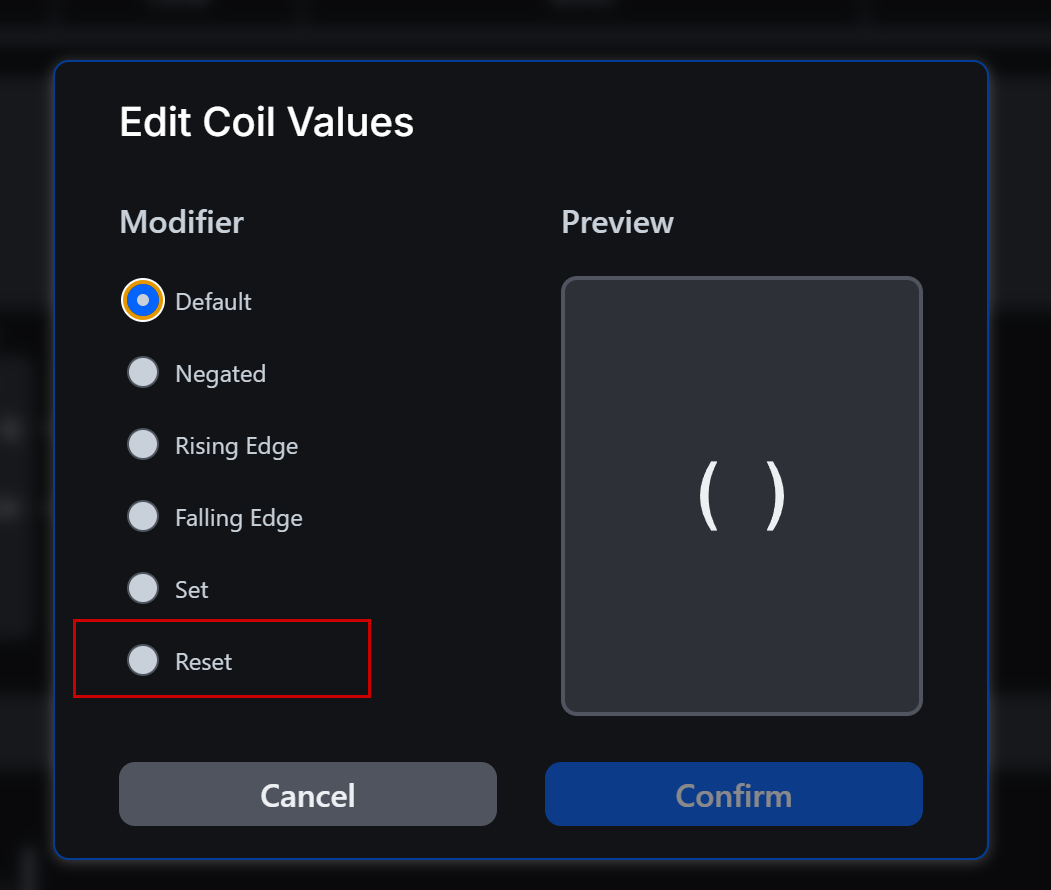
Done!
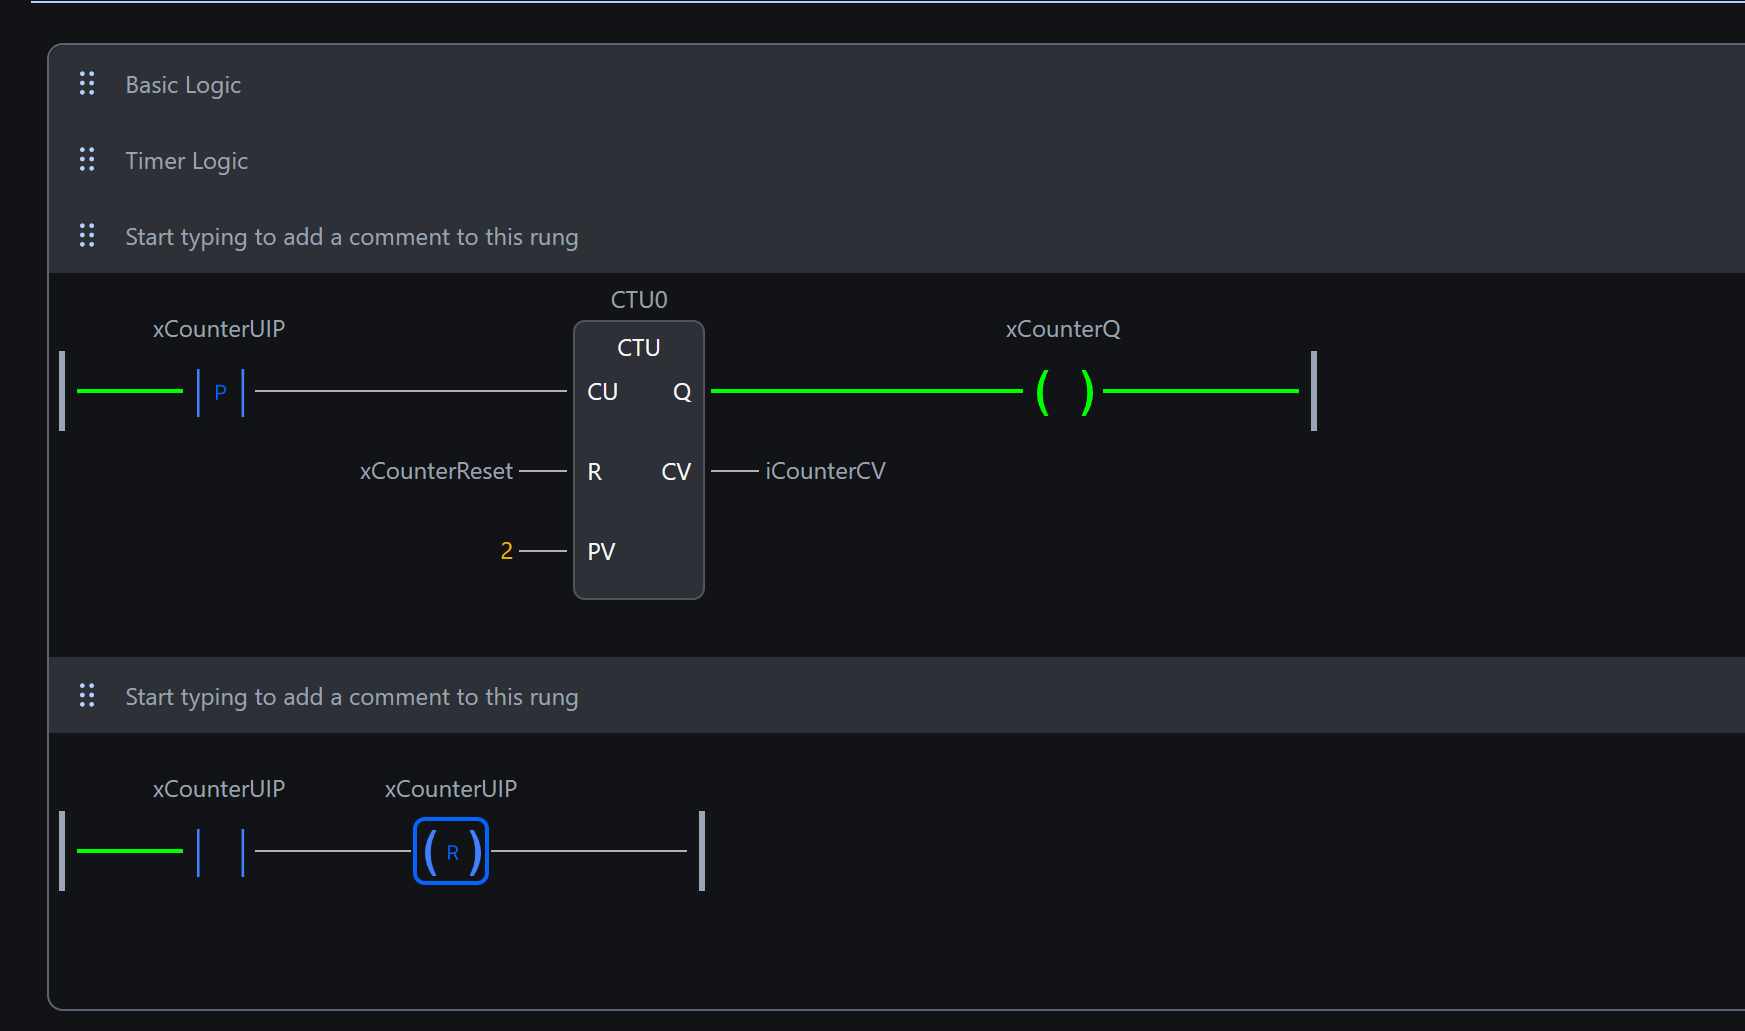
Result
Finally, let’s verify the program’s operation.
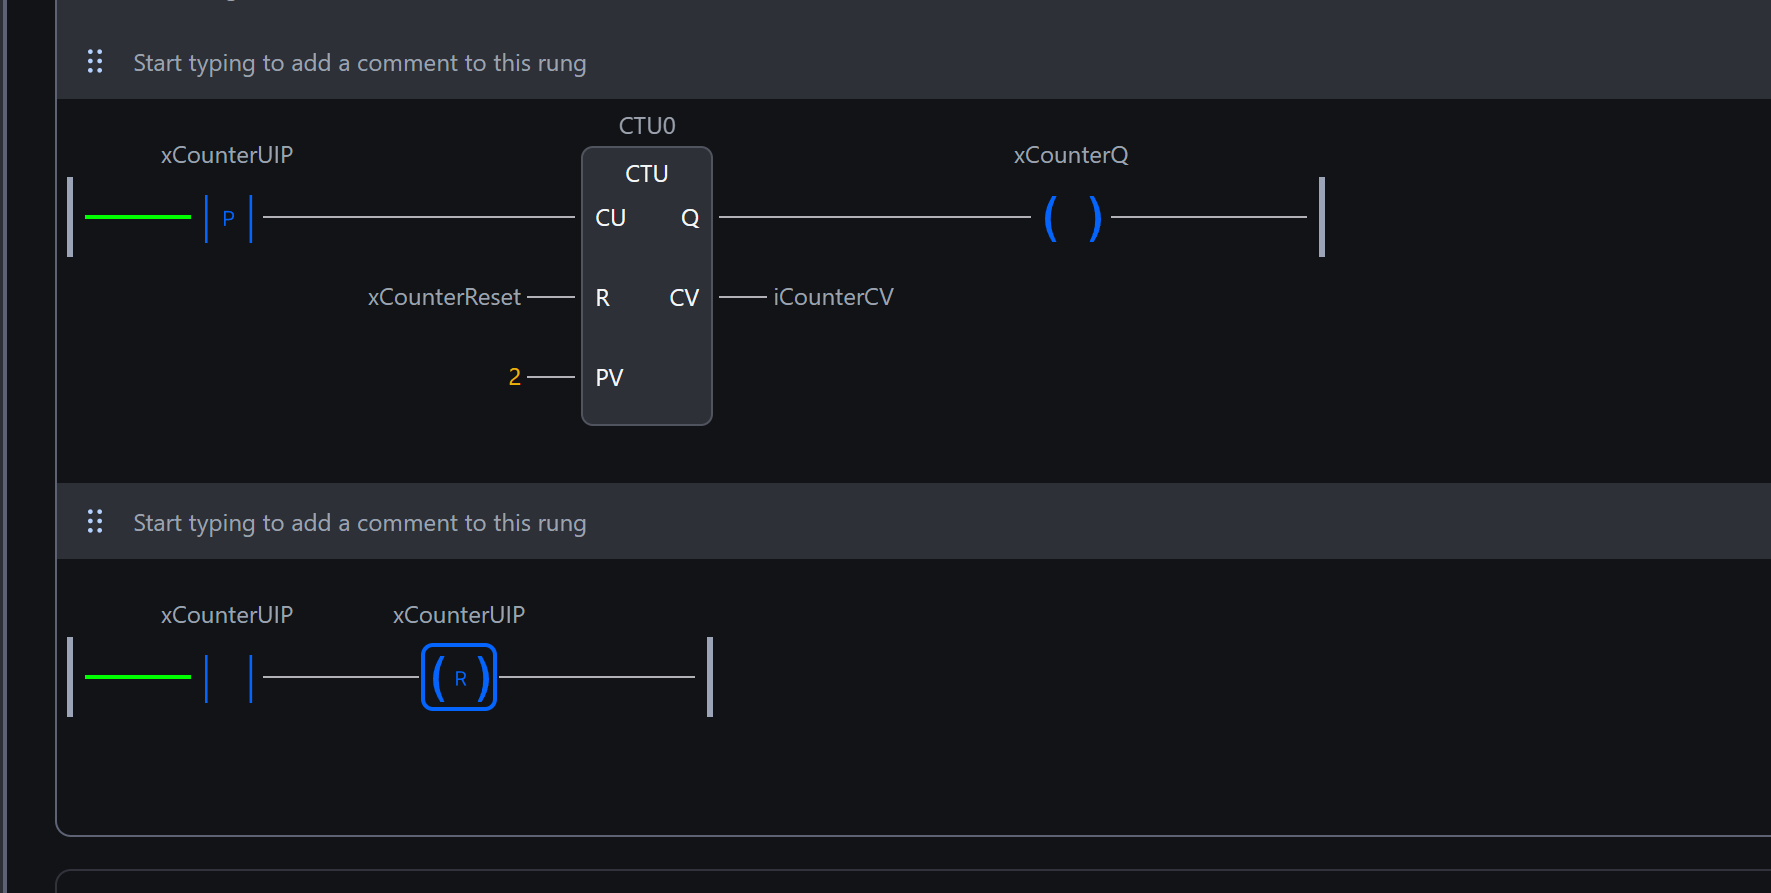
Then, when xCounterUP is launched twice, xCounterQ becomes TRUE.
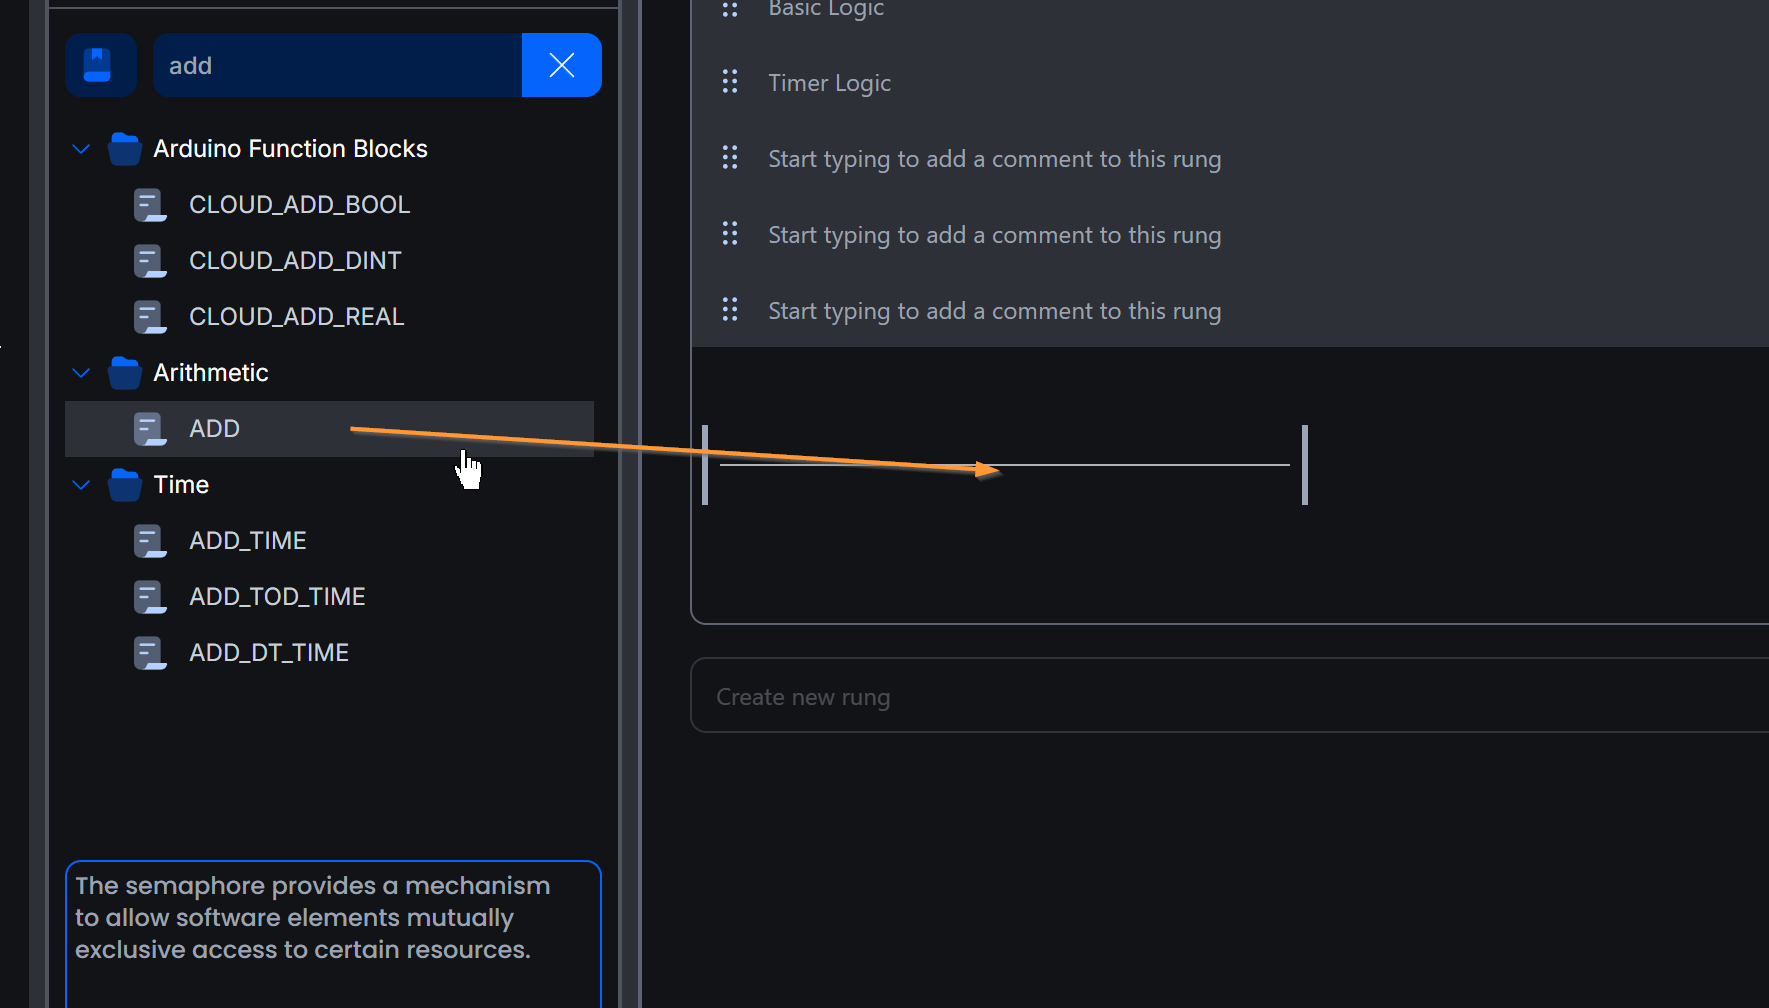
Insert Add Block
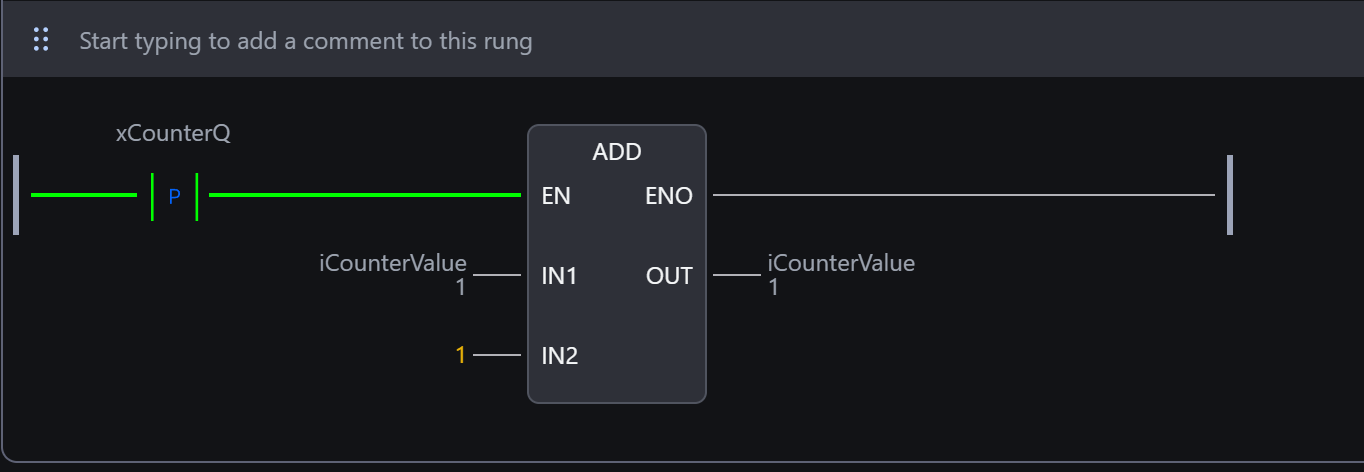
Finally, let’s add the calculation function ADD block.
Each time xCounterQ becomes TRUE, increment iCounterValue1 by 1.
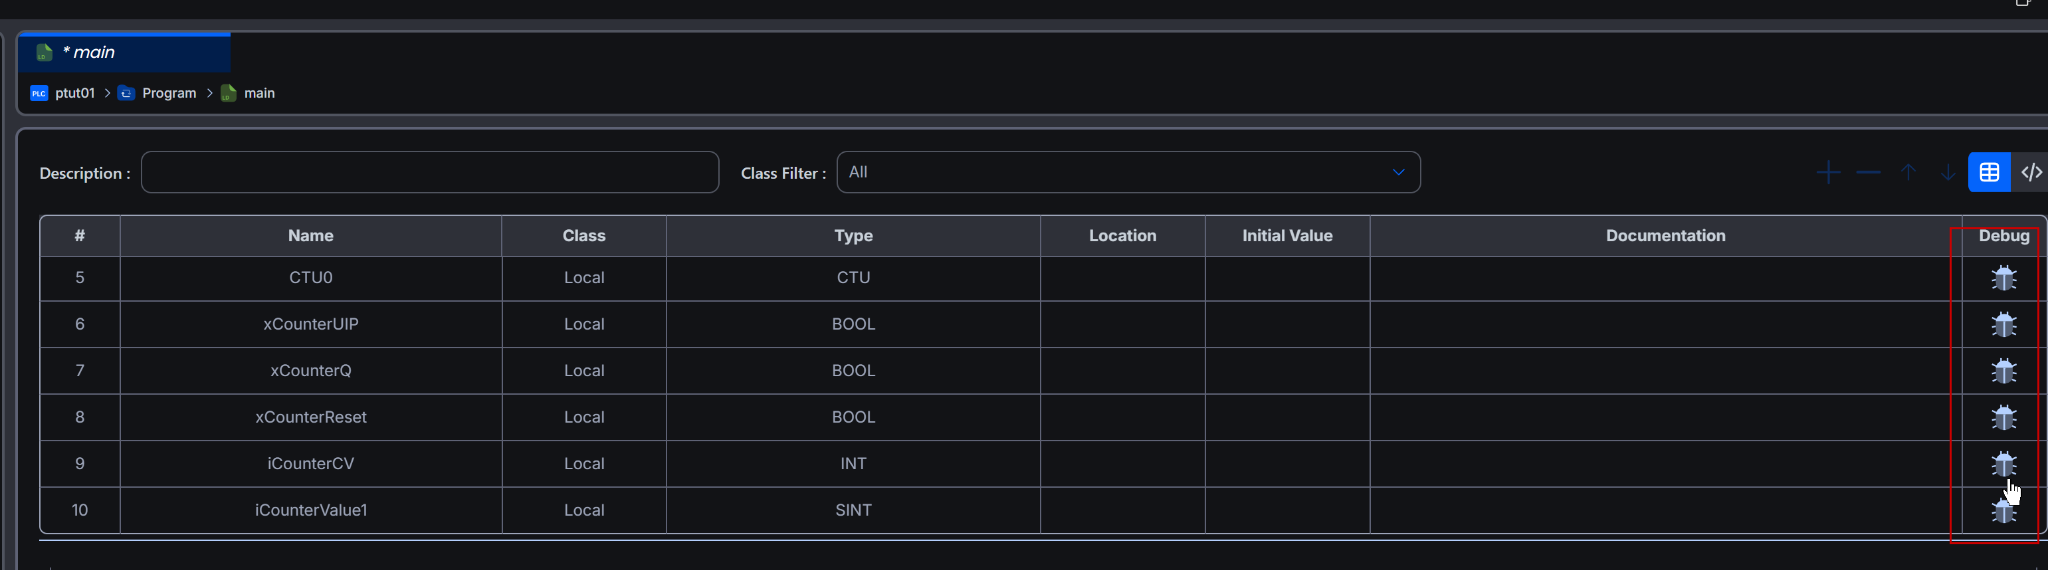
Current Value Monitoring
In ladder diagrams, you can check Boolean variables directly as True/False, but you can also monitor other variables. In the variable declaration section, there is a Debug button. Click the variable you want to monitor.
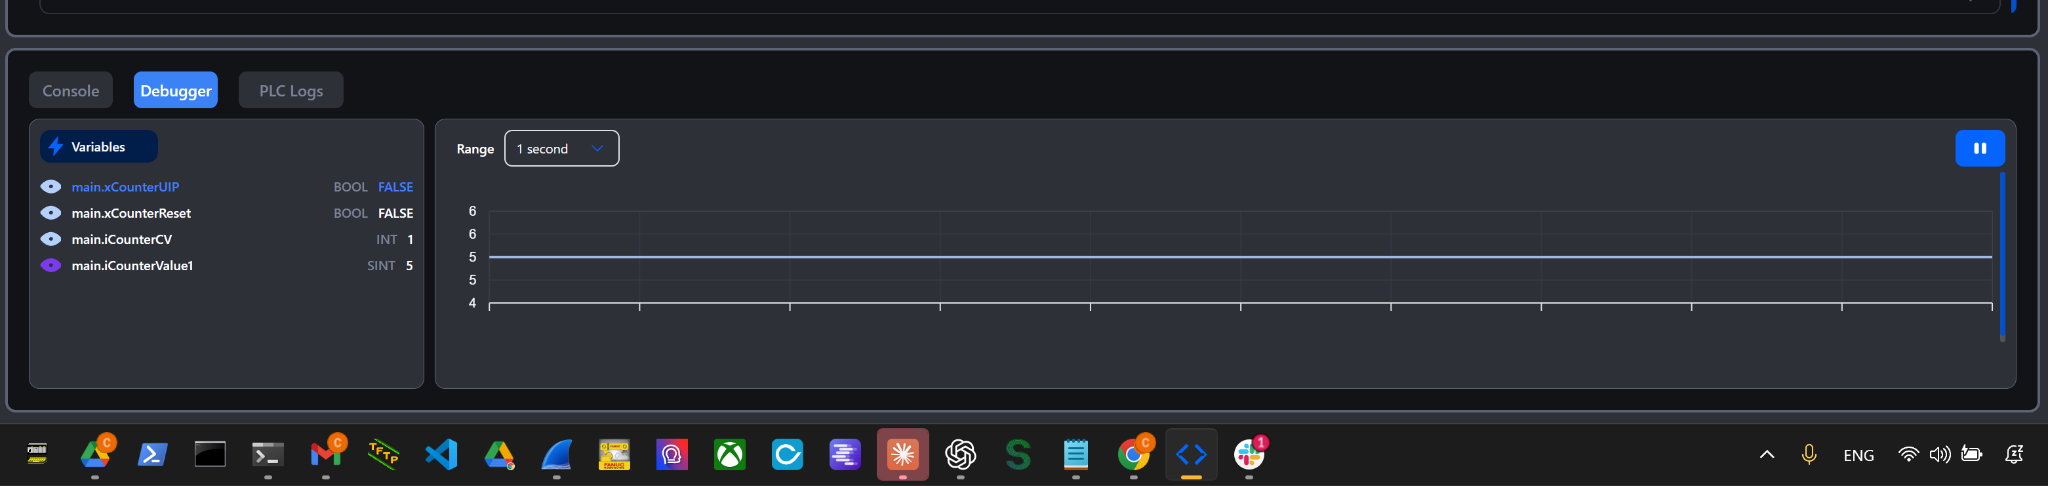
Then click the Debugger tab at the bottom of the Editor.
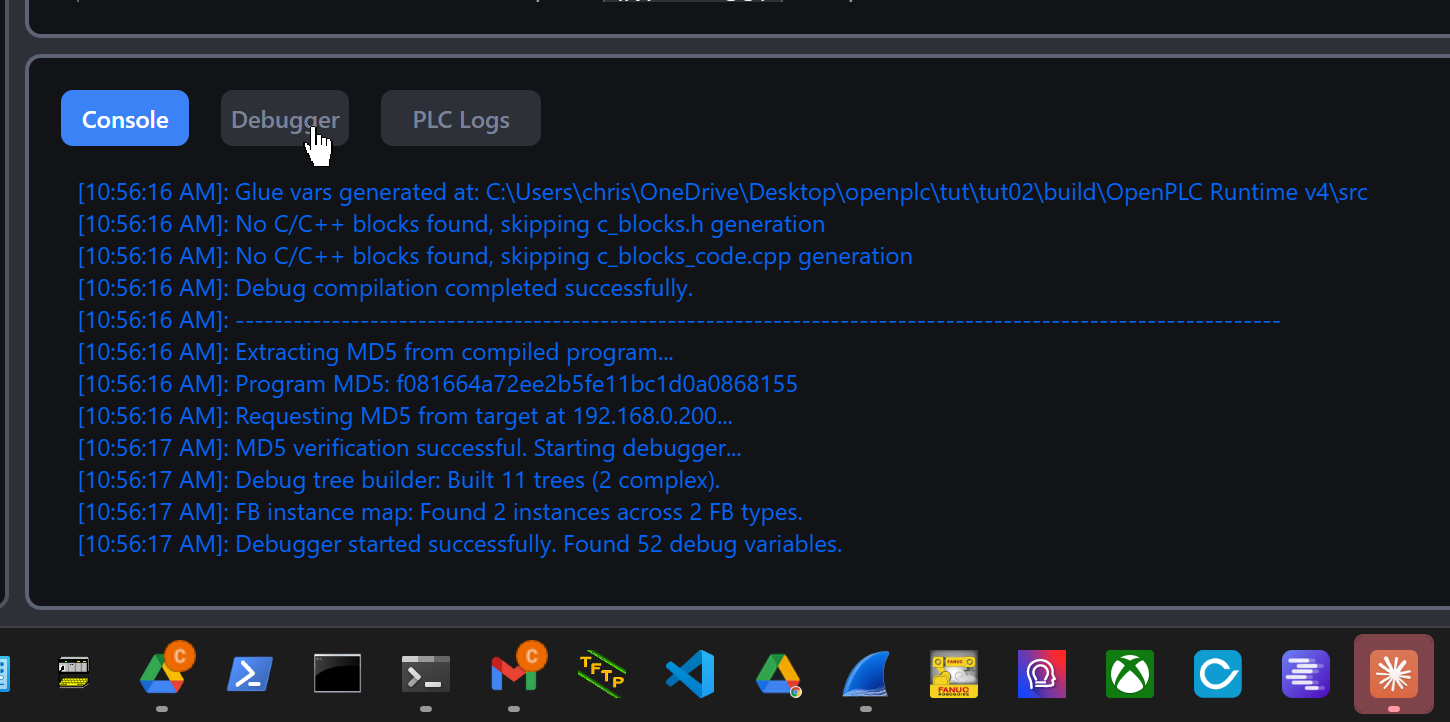
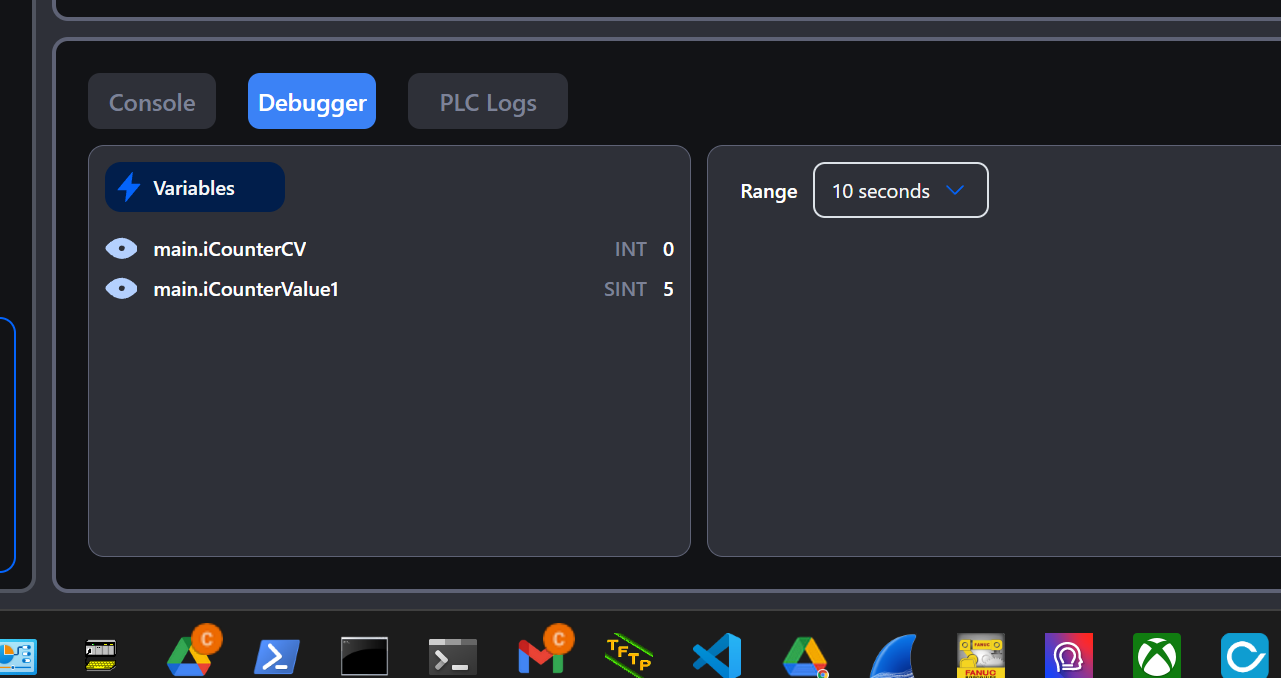
You can now monitor the variables you just registered.
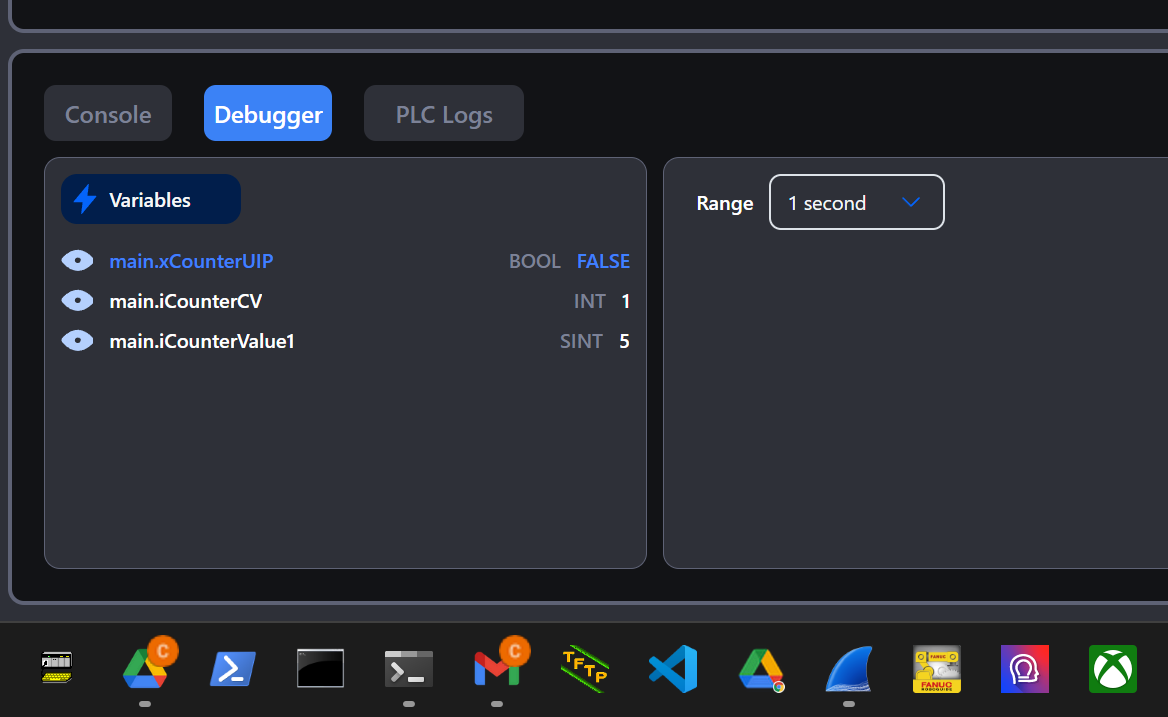
Additionally, you can modify the current values of variables from the Debug Tab.
Finally, click the button with the icon next to the variable.
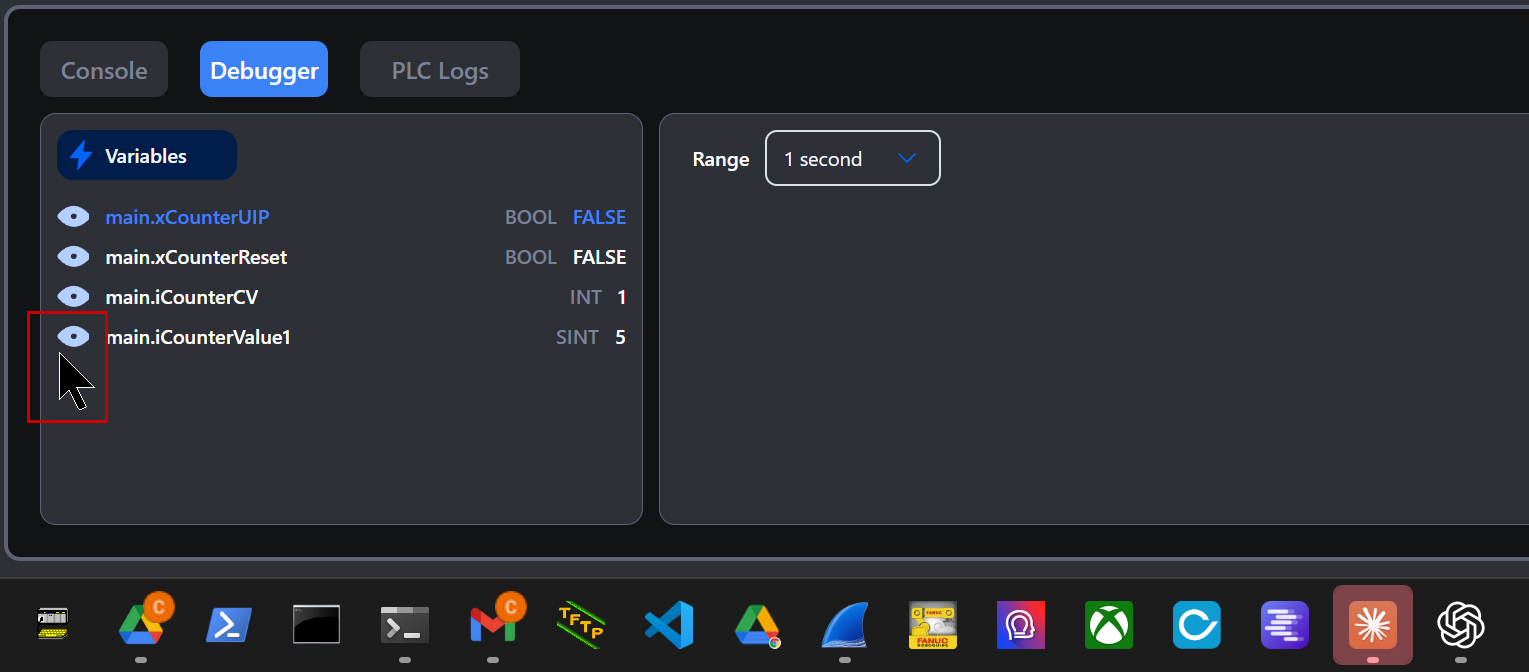
Real-time trades for the relevant variables will be displayed.