In this Tutorial I will explain how to configure a Profinet Device in the Raspberry pi4 where Codesys runtime is installed .
Export the GSDML
If we need to configure the Profinet network, a GSD file is necessary. You can image it as a XML Files.
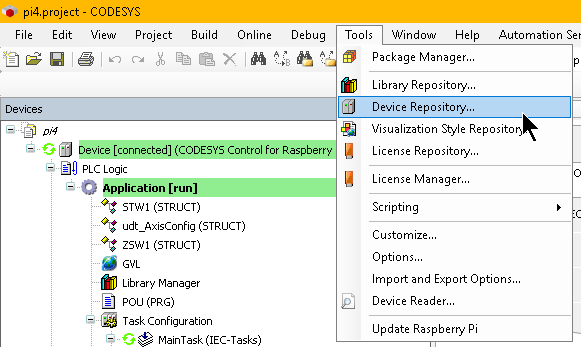
Go to Tools>Devices Repository.
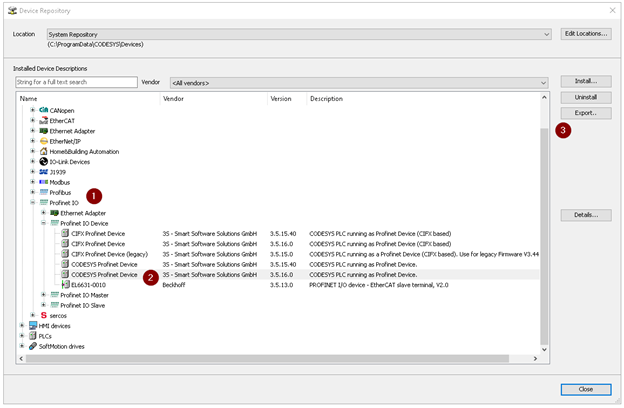
If we need to configure the Profinet network, a GSD file is necessary. You can image it as a XML Files.Go to Profinet IO>Profinet IO Devices>Codesys Profinet Device and click the Export button to output your GSD Files.
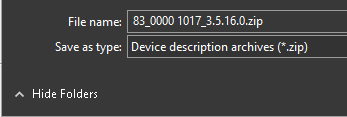
zip files are exported.
After unzipping, we can see 2 xml files.

Configuration
This time Siemens TIA Engineering tools is using it to configurare the profinet.
GSD Install
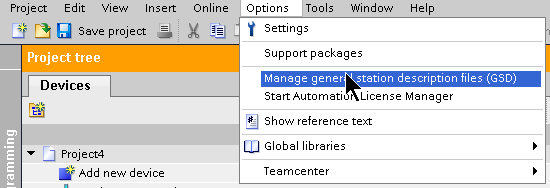
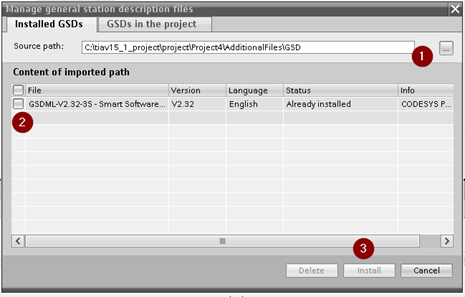
Go to Options>Manage general station description (GDS).
Choose the XML file that we unzipped, and check the GSD files inside, press install.
Network Configuration
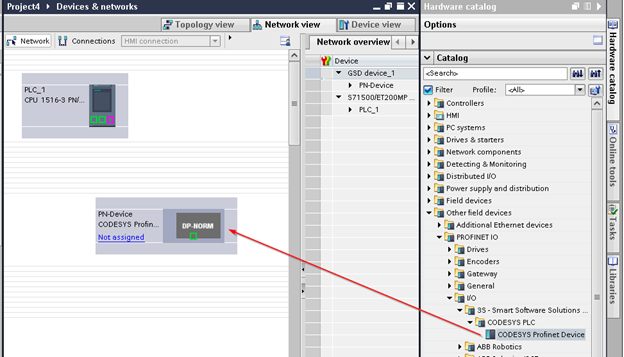
On the right side, choose Field devices>PROFINET IO>I/O>SS-Smart Softwarexxxx>CODESYS>CODESYS Profinetxxx and Drop it into the network view.
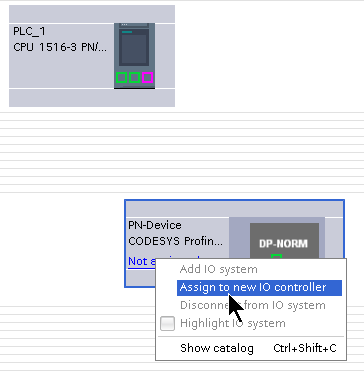
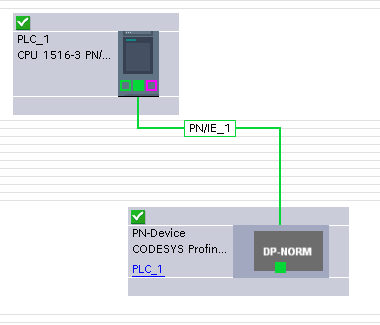
Right Click the device that we inserted , and choose Assign to new IO controller.
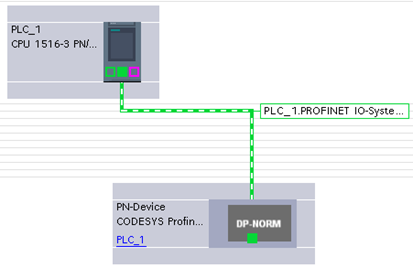
Profinet is configured in the TIA Project.
Device setting
Although we inserted the device inside our profinet network, some configuration setting is necessary.
Insert Submodules
In the TIA Project Click the Profinet device that we inserted before , and switch to device view.
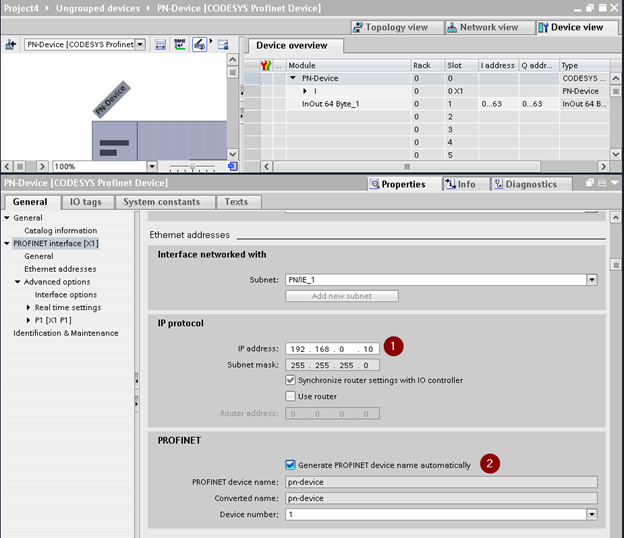
IP and Device Name setup
Device name and IP are necessary for Profinet.While the Controller is changed from Stop to Run, the Profinet Controller will assign the IP address for all Profinet devices, base on their device name.
ModulesUpdate Cycle
The Engineering Tools of Siemens will auto calculate the update cycle time and we do not need to care too much.

Codesys Project Setup
Now it is the time to set up the Codesys Side.
Profinet Devices setup
Go to Ethernet(Ethernet)>Add Device..
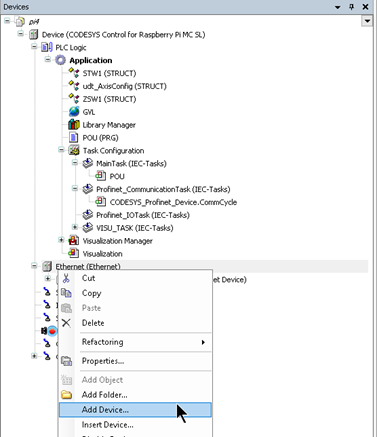
Select Profinet IO>Profinet IO Devices>CODESYS Profinet Device.

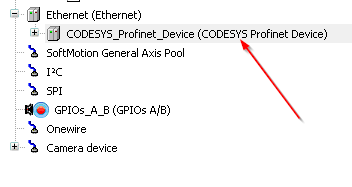
A Profinet device is inserted in our project.
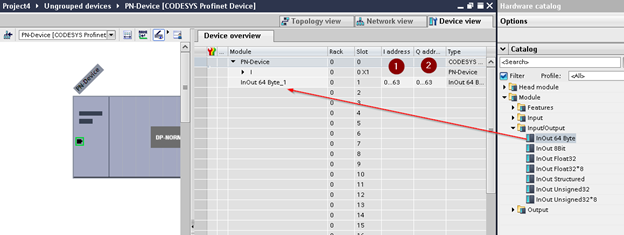
Now we need to set up the Data Exchange Area.
Go to CODESYS_Profinet_Device>Add Device.

Let’s choose Input/Output> In/Out 64 Bytes and press Add Devices to insert it.We need to use the same setting on both Controller and Device side.
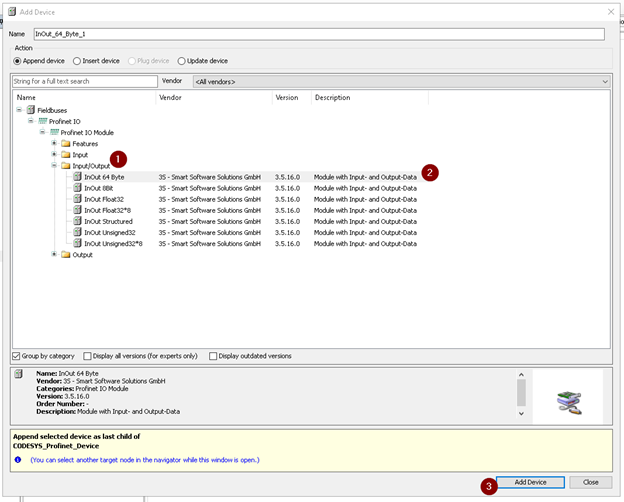
64 Bytes In/Out is inserted.

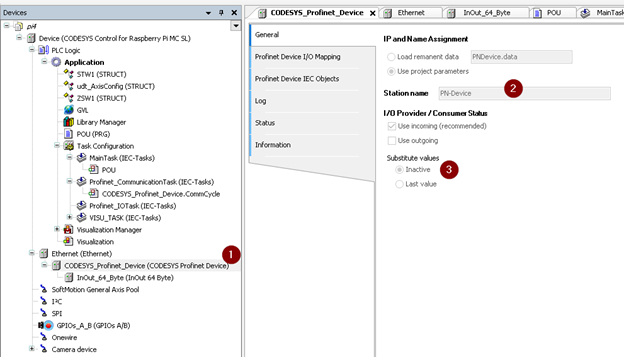
Device Setting
In Profinet , Device name is necessary.Please make sure to set it and assign it from the Engineering tools.
Symbol
Finally I would like to configure the Symbol of these 64 bytes in/out.It is not a must step but variables with good names are better for everyone.
GVL
Let’s define a 64 bytes size array.

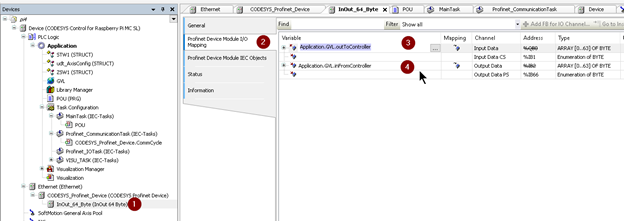
Assgin
configure the Symbol of these 64 bytes in/out.It is not a must step but variables with good names are Let’s assign these variables from the Symbol to your profinet IO.fGo to the InOut_64_bytes>Profinet Device Module I/O Mapping> and click the … button to assign it.
Please be careful, Q is the output area and I is the input area.All these input/output are in the Controller view – it means that the “input” are the inputs to Controller and “Output” are the output from Controller to your PI Devices.
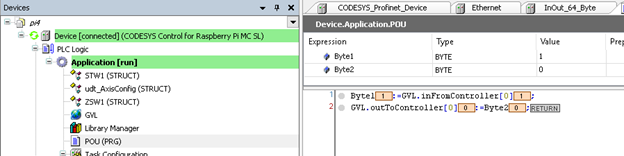
Program
are the inputs to Controller and “Output” are the output from Controller to your PI DeviceNo just in Codesys but also Beckhoff, all the variables if you do not use inside your program,the values will not update.Please make some simple program.
PI4 Setup
You can get more information from this link: https://help.codesys.com/webapp/_pnio_runtime_configuration_device;product=core_ProfinetIO_Configuration_Editor;version=3.5.16.0
/etc/CODESYSControl_User.cfg
insert the following code.
[SysEthernet]
QDISC_BYPASS=1
Linux.ProtocolFilter=3
[SysSocket]
Adapter.0.Name=”eth0″
Adapter.0.EnableSetIpAndMask=1
/etc/dhcpcd.conf
interface eth0 static ip_address=0.0.0.0
Install the Vlan
sudo apt-get install vlan # Install VLAN package
sudo modprobe 8021q # Load 8021q kernel module
Start UP
Open the TIA and press the ? button.

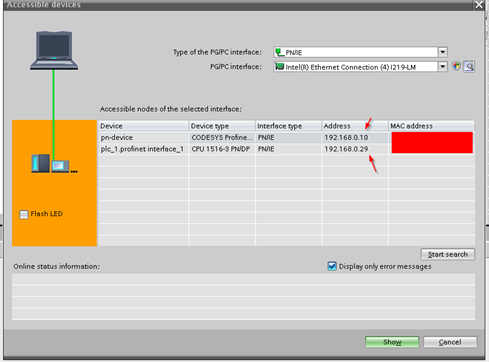
Choose the network interface that you are connecting to and start serah..
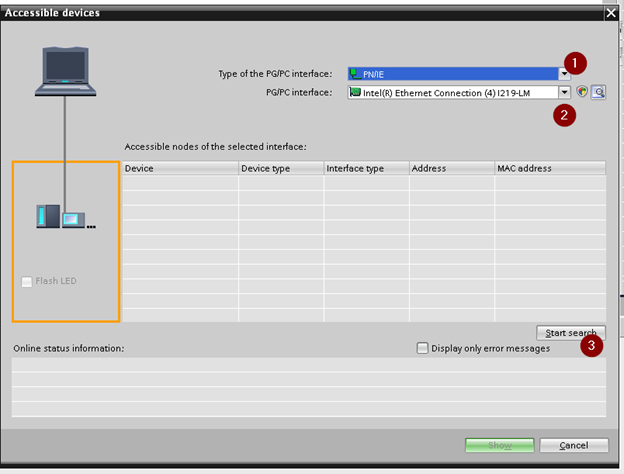
you can see which devices are visible in your network.
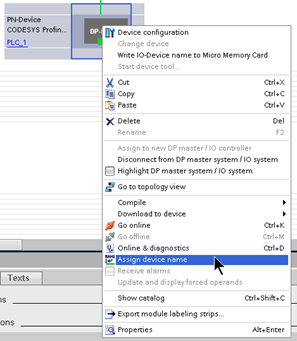
Right Click the Devices and press Assign device name.
Choose the interface that you are connected into network, press update list.
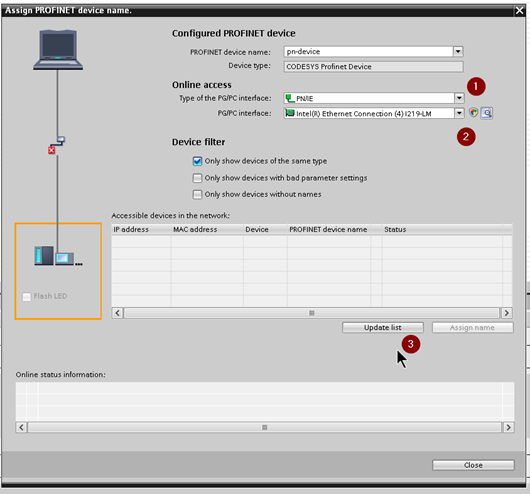
Choose your raspberry devices and press the assign name.
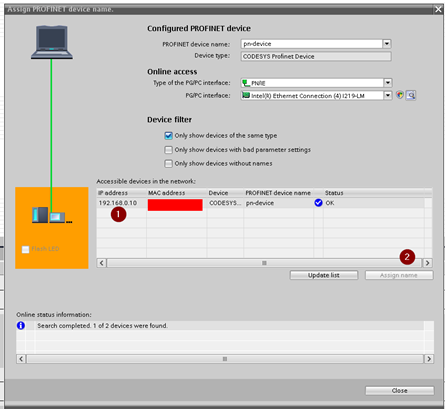
The profinet connection is established.
Notes
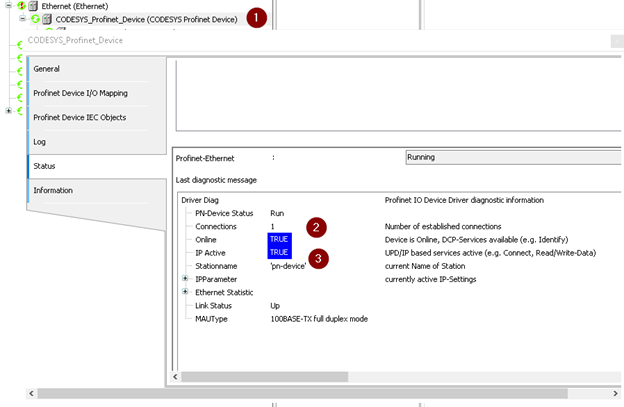
If you login to the Codesys runtime, a green icon is shown while the device is connected to the controller.An also the statues are shown Online and IP active as TRUE.
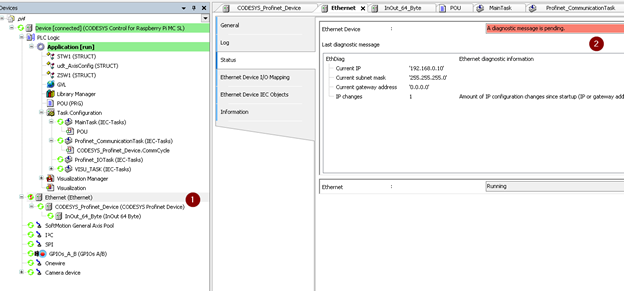
And also in the Ethernet Tab, you can view the alarm message and current status.
 Result
Send

Receive
コメント
Codesys#Using PI4 as a Profinet Device
My setting Raspberry pi 4
Codesys V3.5 SP20 64bit
Name: CODESYS Control for Raspberry Pi 64 SL
Vendor: CODESYS
Categories: SoftMotion PLCs
Version: 4.12.0.0
Order Number: 2302000009
Description: An IEC 61131-3-compliant SoftPLC for Raspberry Pi. CODESYS Control based on CODESYS SDK 3.5.20.10, Release
I exported GDSL and added to TIA port successfuly.
but if i go online with the S7 2111C Plc i get error.all instruction base on yours.
only i could not instal the Vlan.
is ther any chance i buy the raspberry pi image(configured as profinet PLC)?