This is the Servo Drive Tutorial for Festo’s CMMT-ST Series, and the first episode will take you through the setup, tool installation, and commissioning of the CMMT-AS Drive.
Let’s get started!
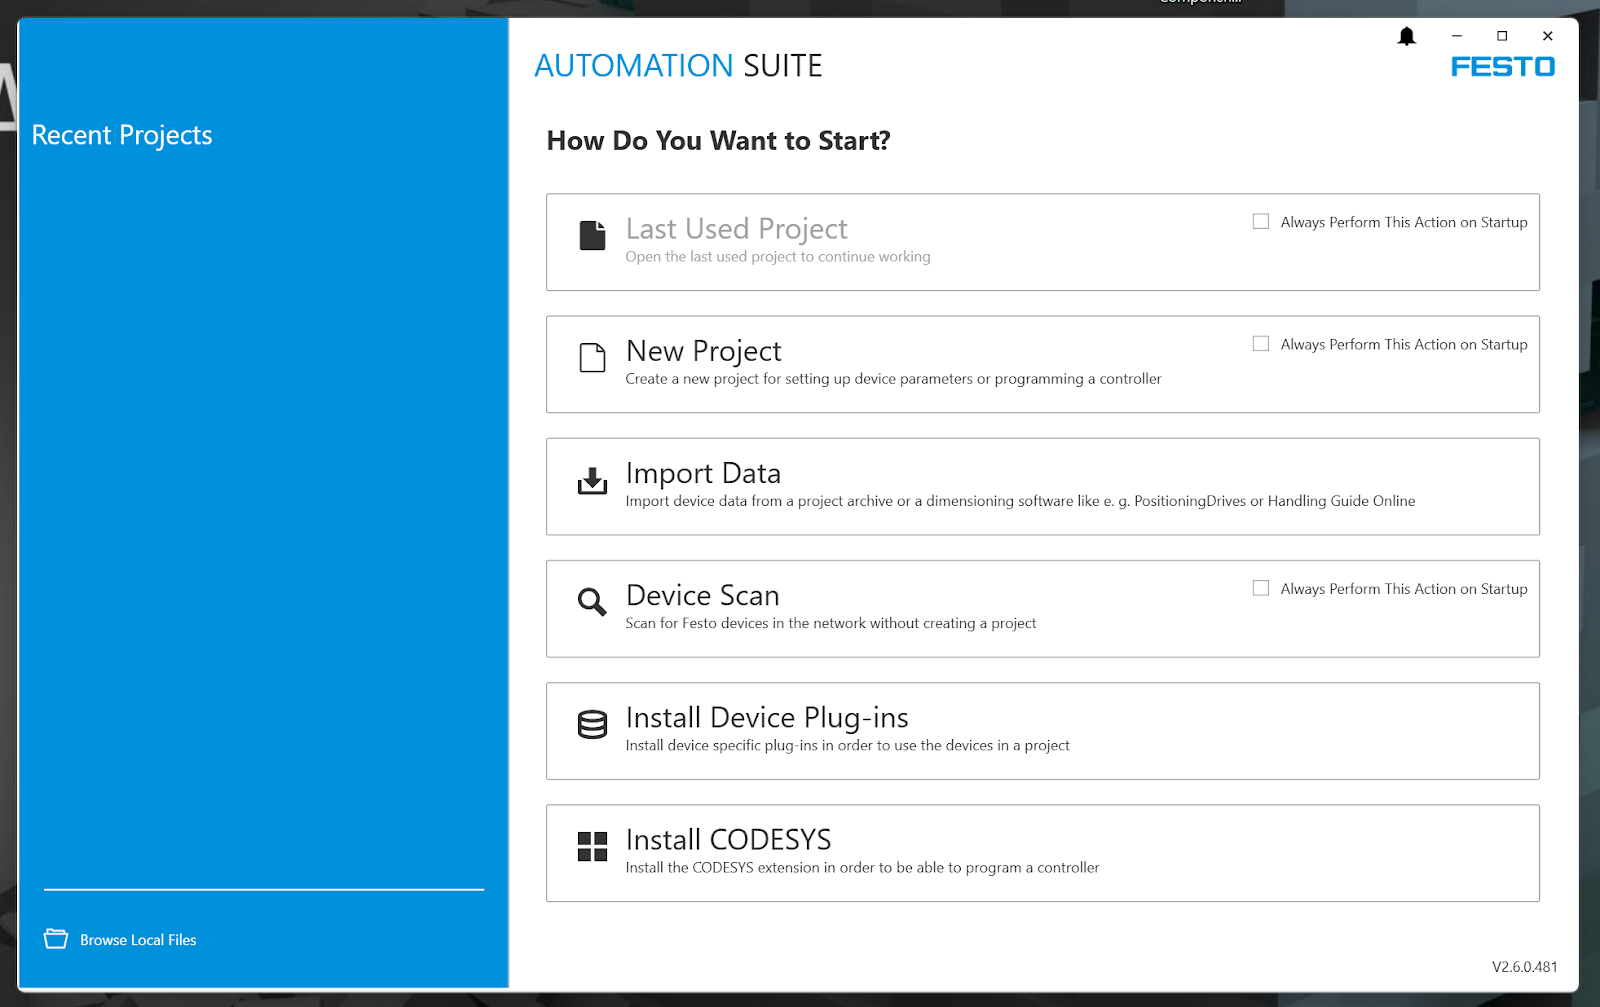
Festo Automation Suite Setup Software?
Festo Automation Suite software (free of charge) makes it easy to set up drive packages, from machine systems to controllers, with just one application.
Reference Link
Festo also has CPX Series products and offers a comprehensive Fieldbus Solution for EIP/Profinet/Ethercat. Please refer to the following link if you like.
I have written my own Step by Step guideline connecting Festo CPX modules with Beckhoff TwinCAT, Keyence, and IQR.
Video
Here is an instructional video that I made to test run the CMMT-ST Servo Drive using the Festo Automation suite.
Festo.CMMT-ST Sero Drive Tutorial_Part1_Commissioning with Automation suite_EN
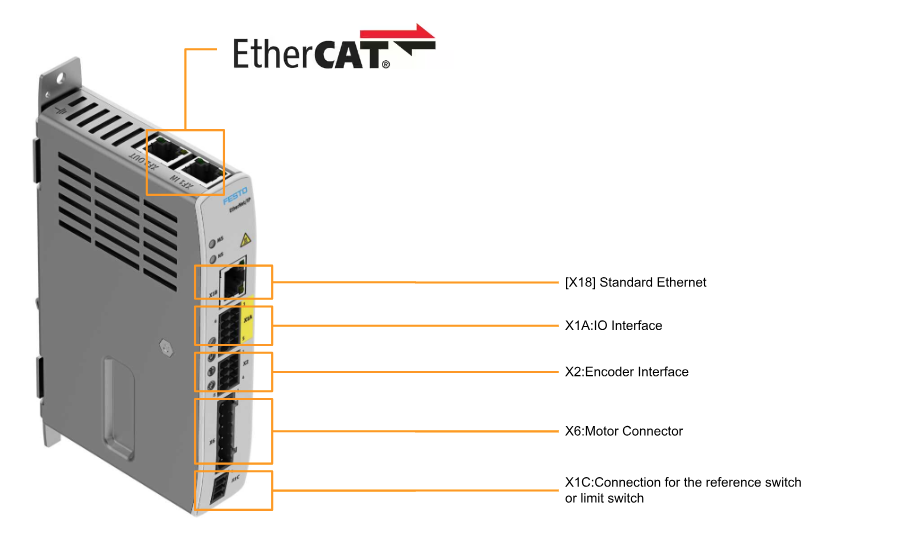
Basic Layout
This is Layout of CMMT-ST Servo.
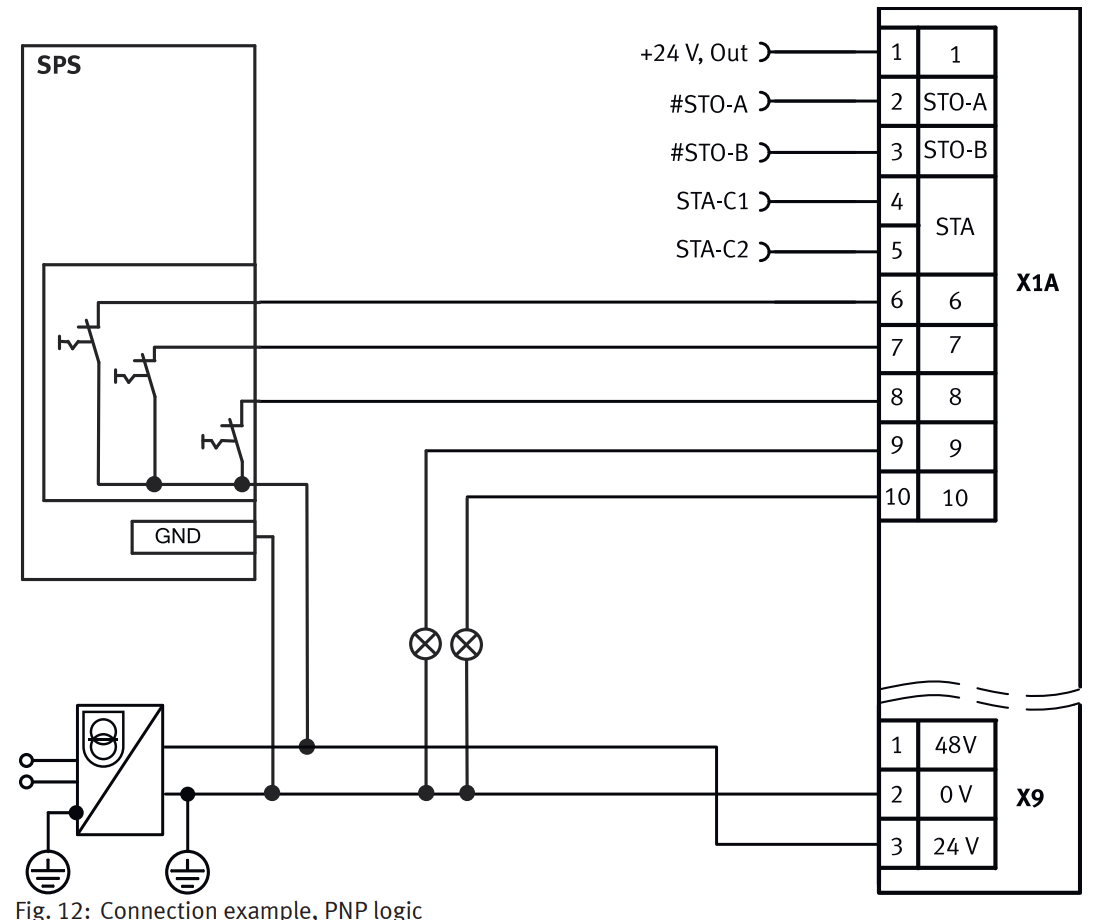
X1A Wiring Example
Wiring example of X1A input terminal block.
Download
Download Festo Automation Suite from the link below.

Installation
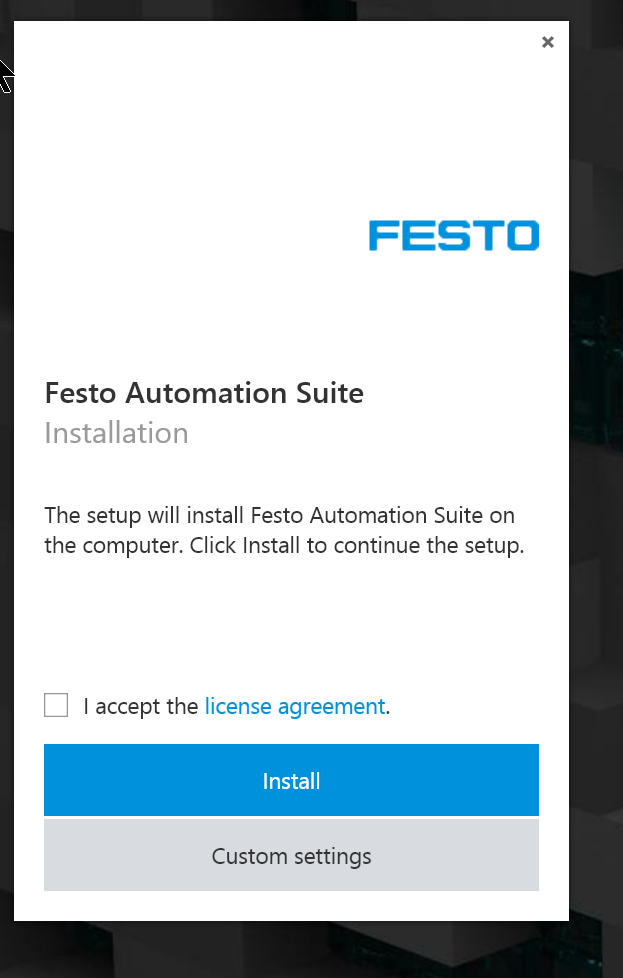
Start the EXE File and install Automation Suite.
Accept the license and begin installation.
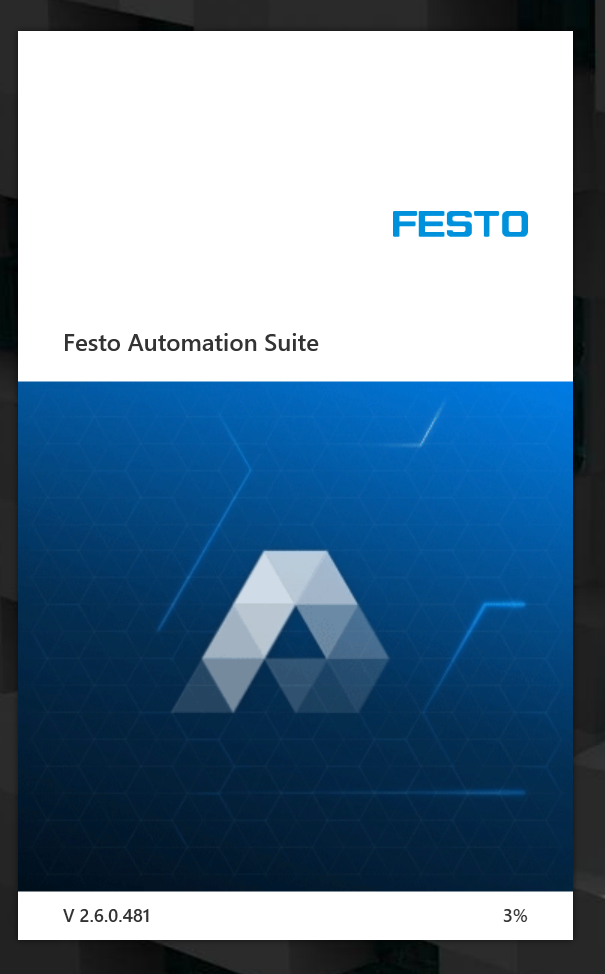
just a second..

Done!
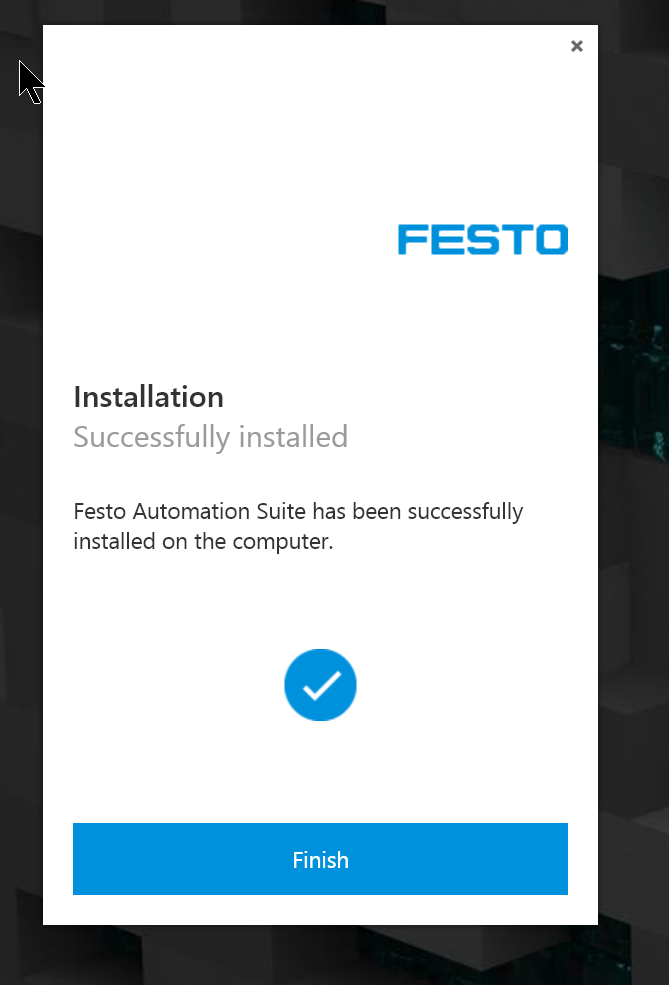
The software will automatically initialize the software.
Done!Shortcut for Festo Automation Suite was also created on the Desktop.
Install Plug-in
The CMMT-AS Plugin is integrated into the Festo Automation Suite and allows parameterization, commissioning, diagnostics and manual control of Servo Drives of the CMMT-AS series from the Festo Automation Suite. IP Base to communicate with the CMMT-AS Servo Drive, and the ports used are 7507, and 7508.
Now let’s install the plug-in to use CMMT-AS Servo Drive with Automation Suite.
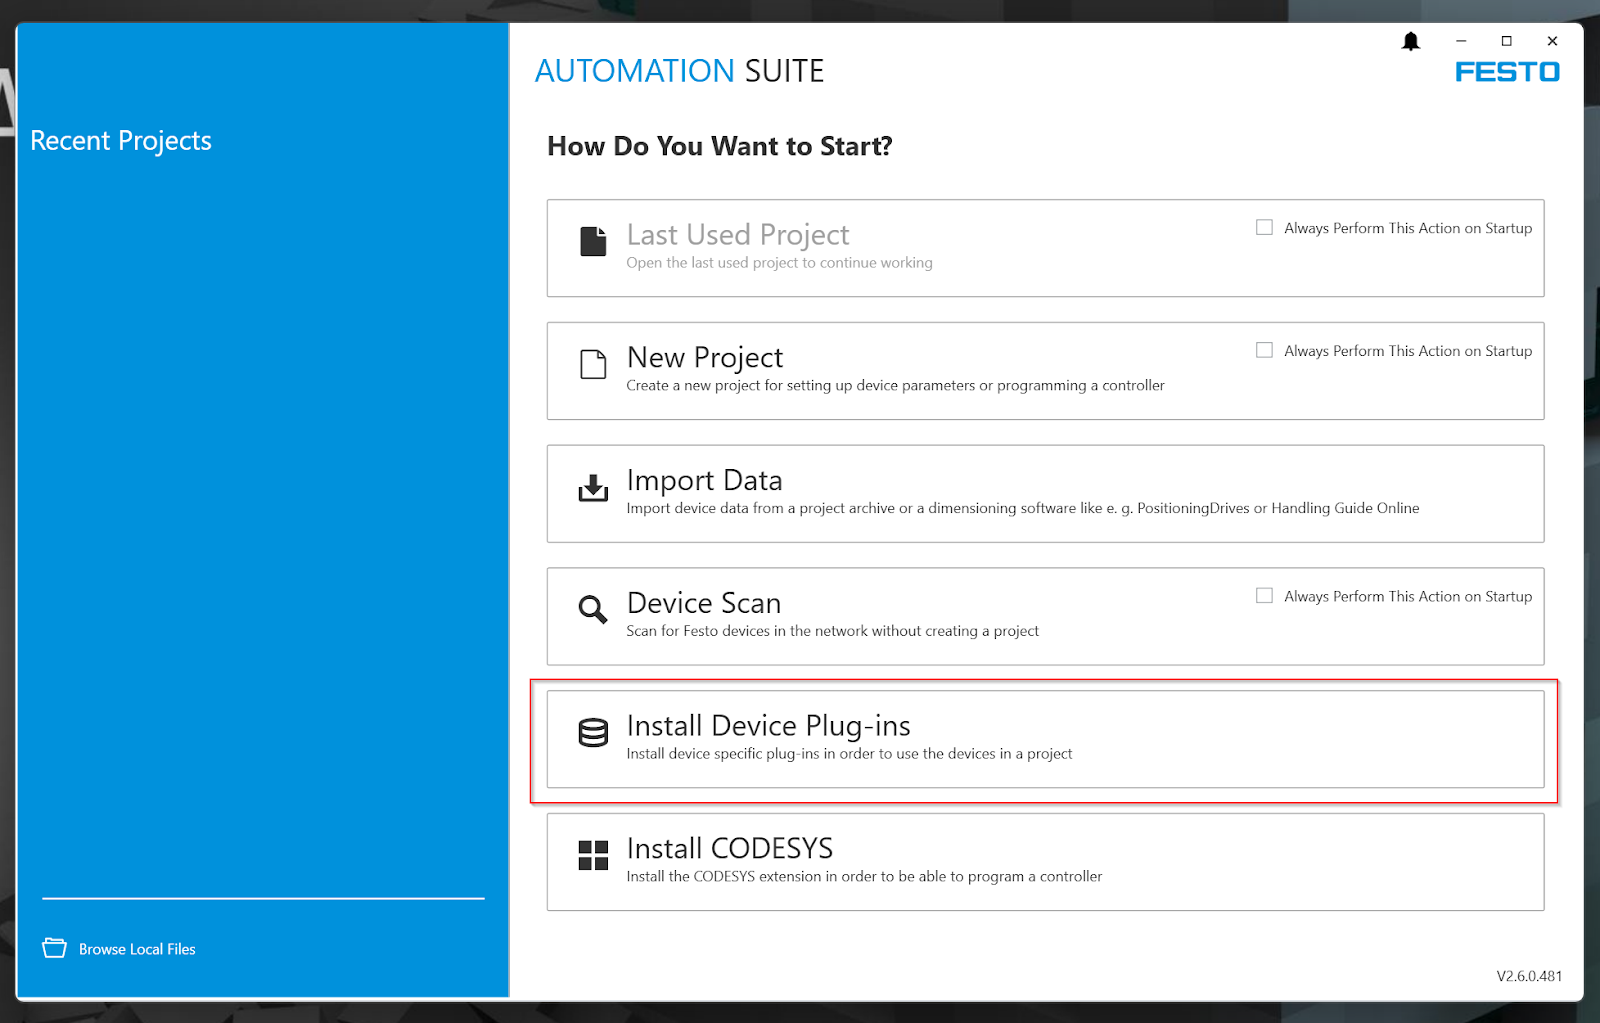
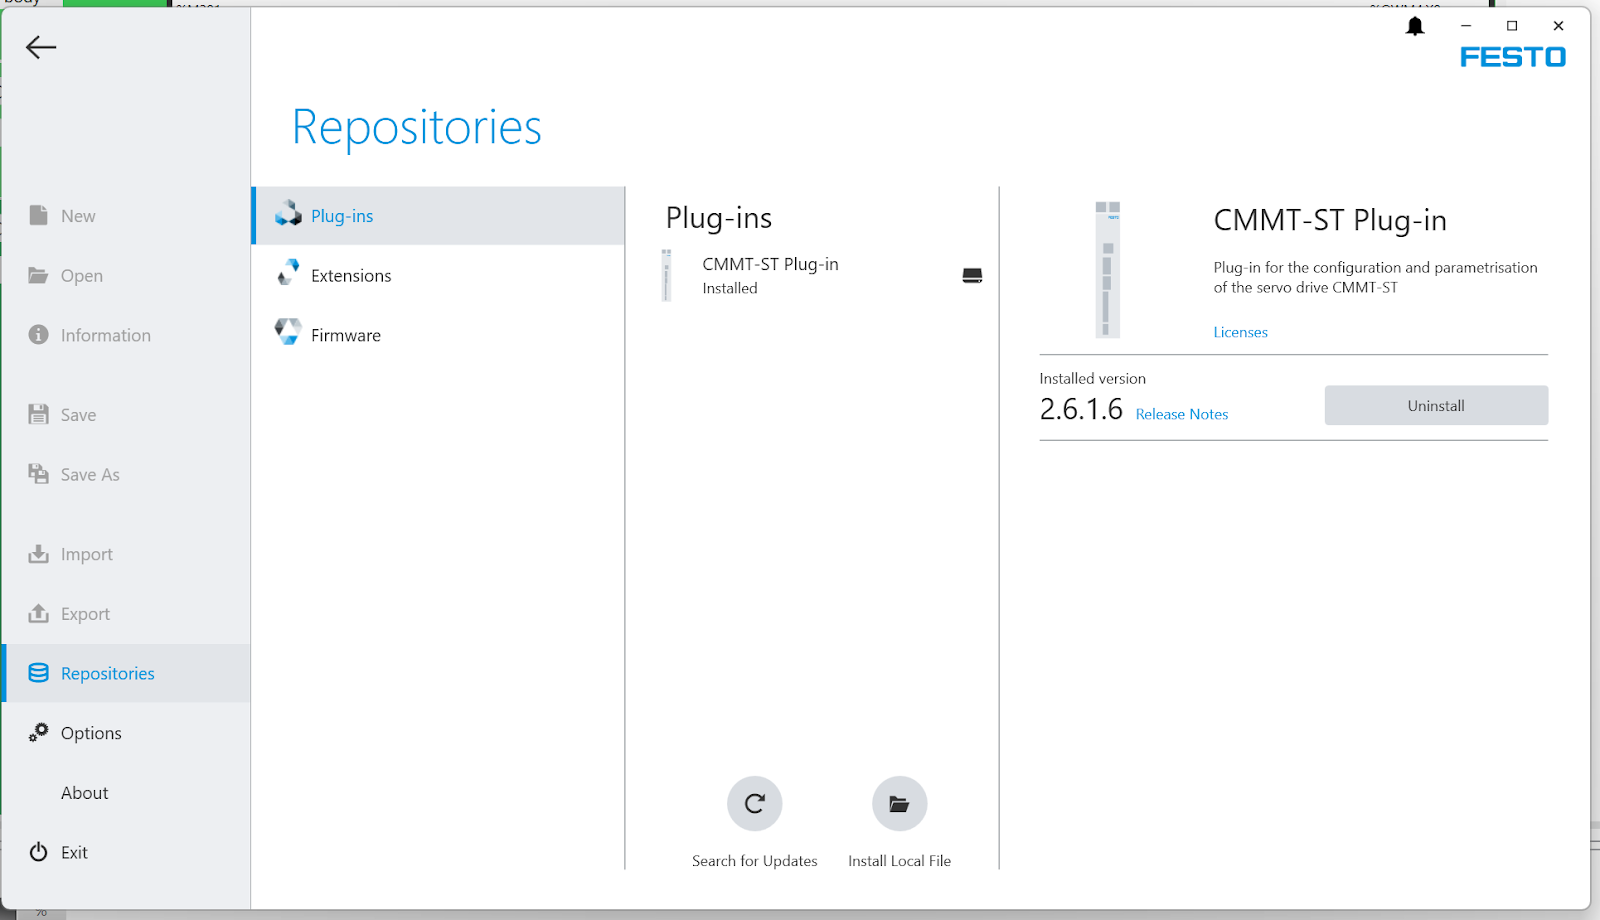
The Repositories screen appears.

Select Plug-in>CMMT-AS Plug-in.

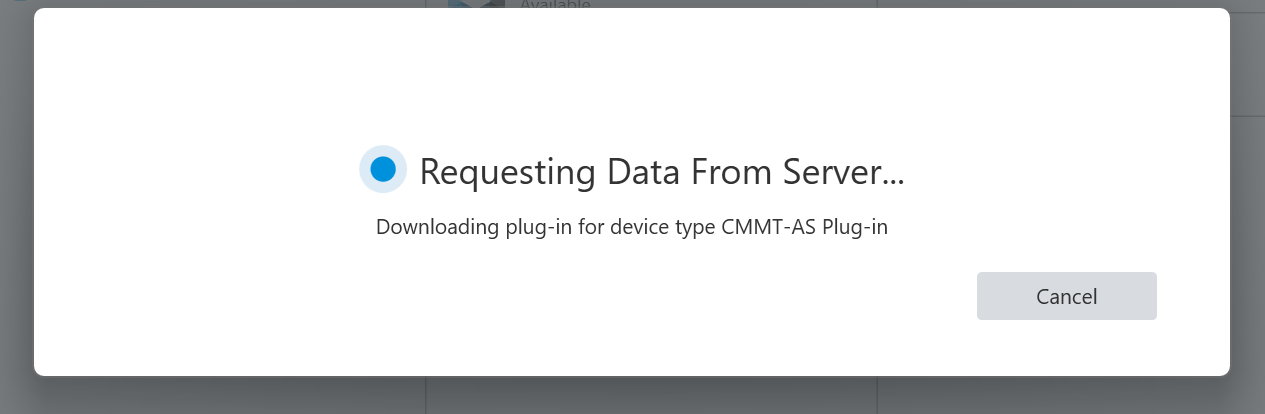
Click the Install button to install the CMMT-AS Plug-in.

Just a second..
Done!
Start Commissioning!
Now let’s actually try the CMMT-AS Servo Drive from Festo Automation Suite.
New Project
Create a new project by click the New Project.

Done!
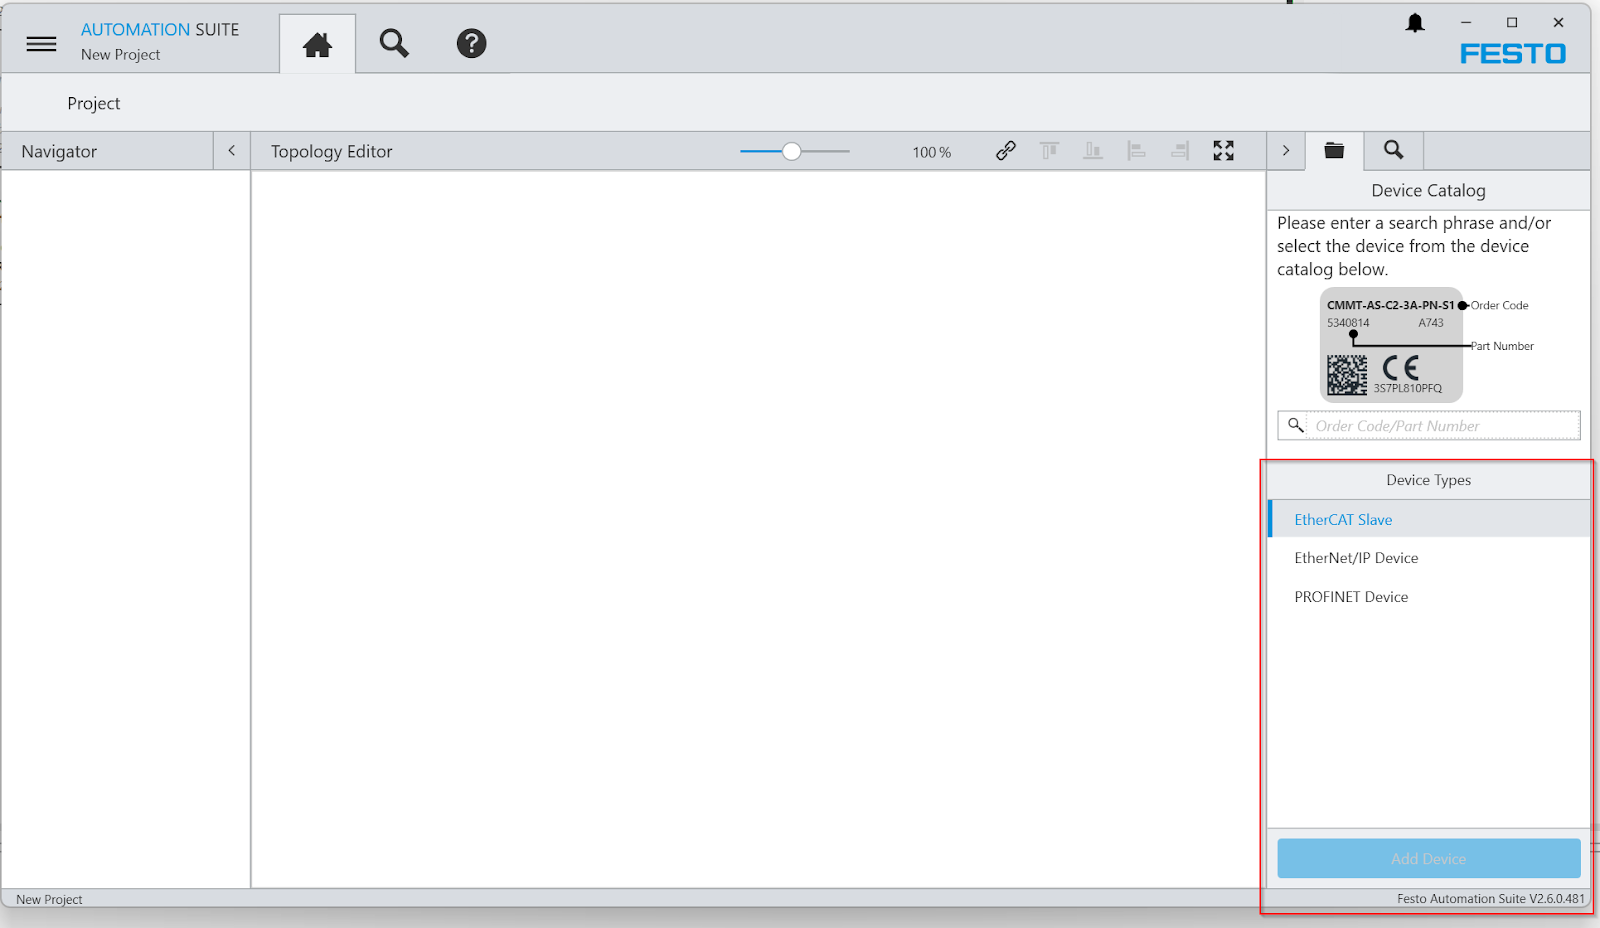
Add Drive
To add a CMMT-AS Drive to your project, select Device Catalog>and select>Add Device to add the CMMT-AS Drive to your project.
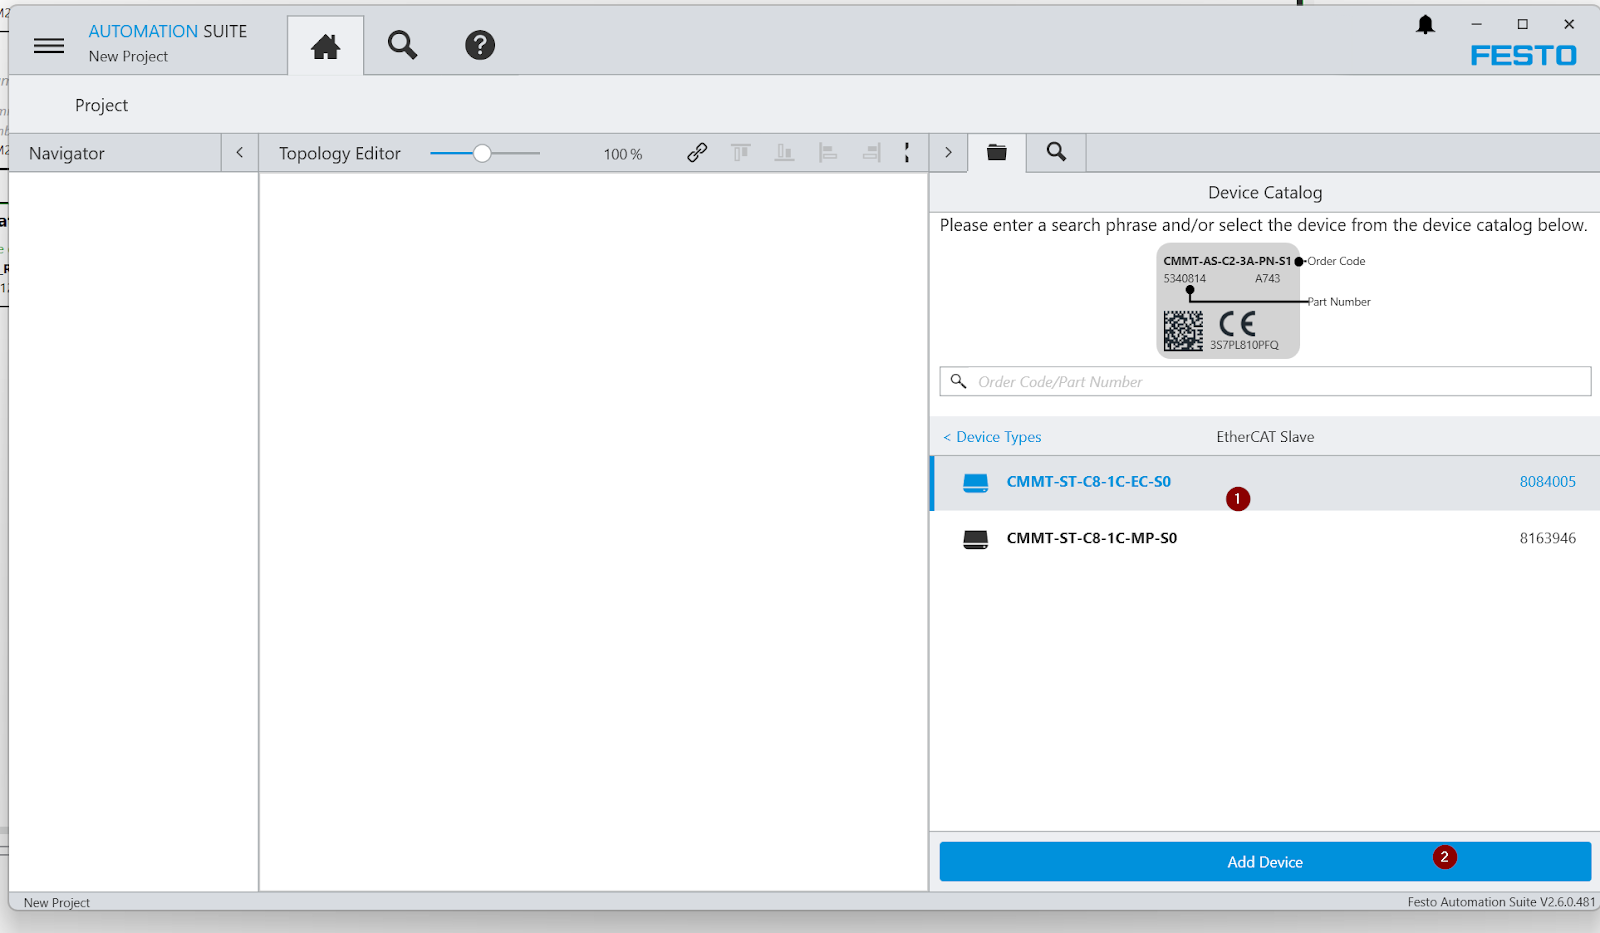
just a second..
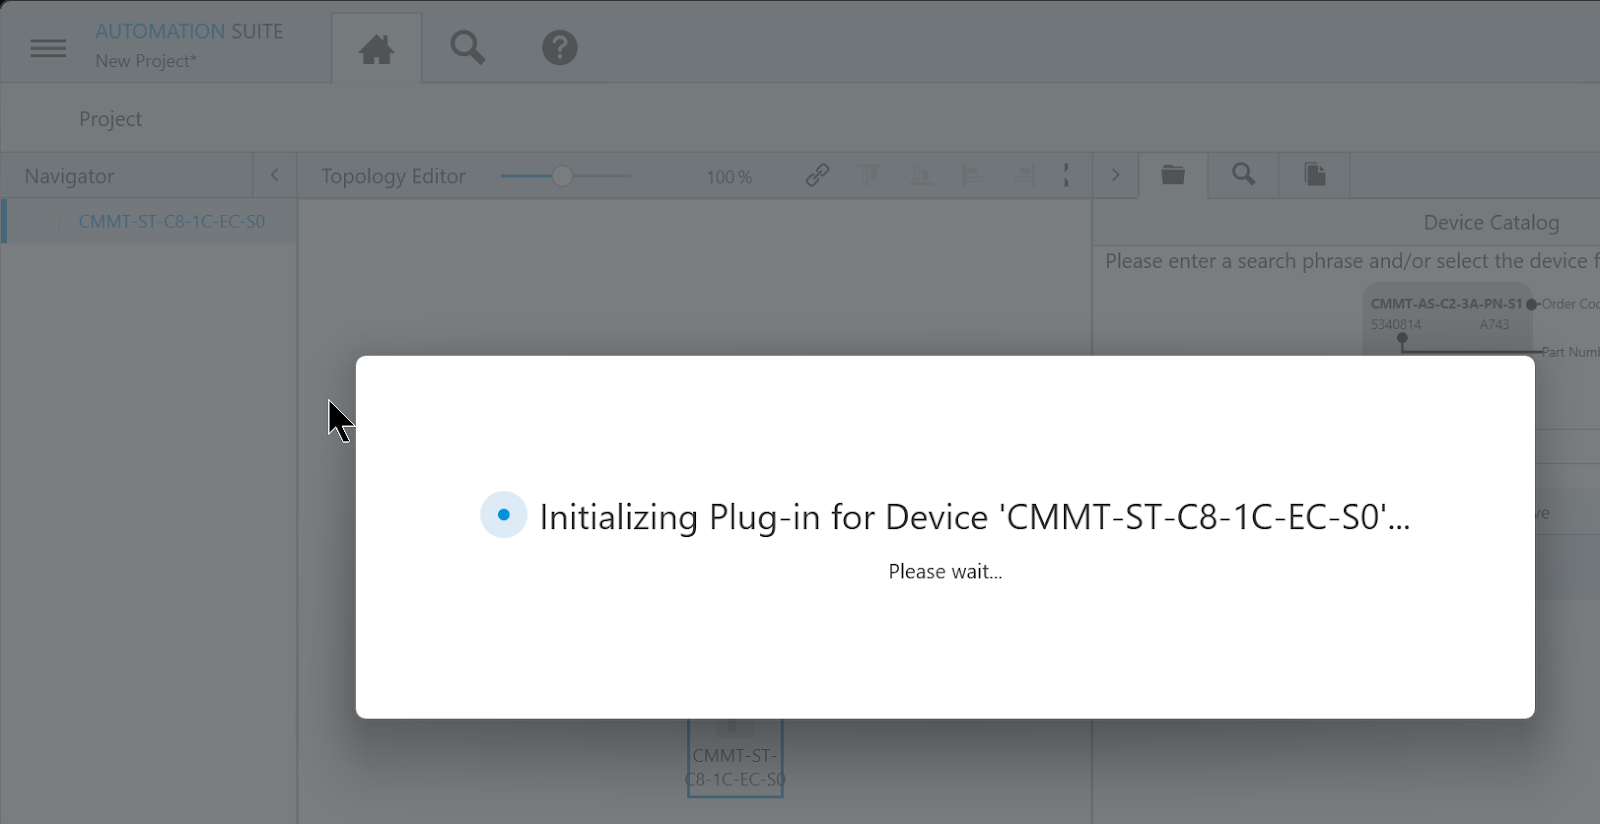
Done!CMMT-ST-CB-1C-EC-S0 has been added to the project.
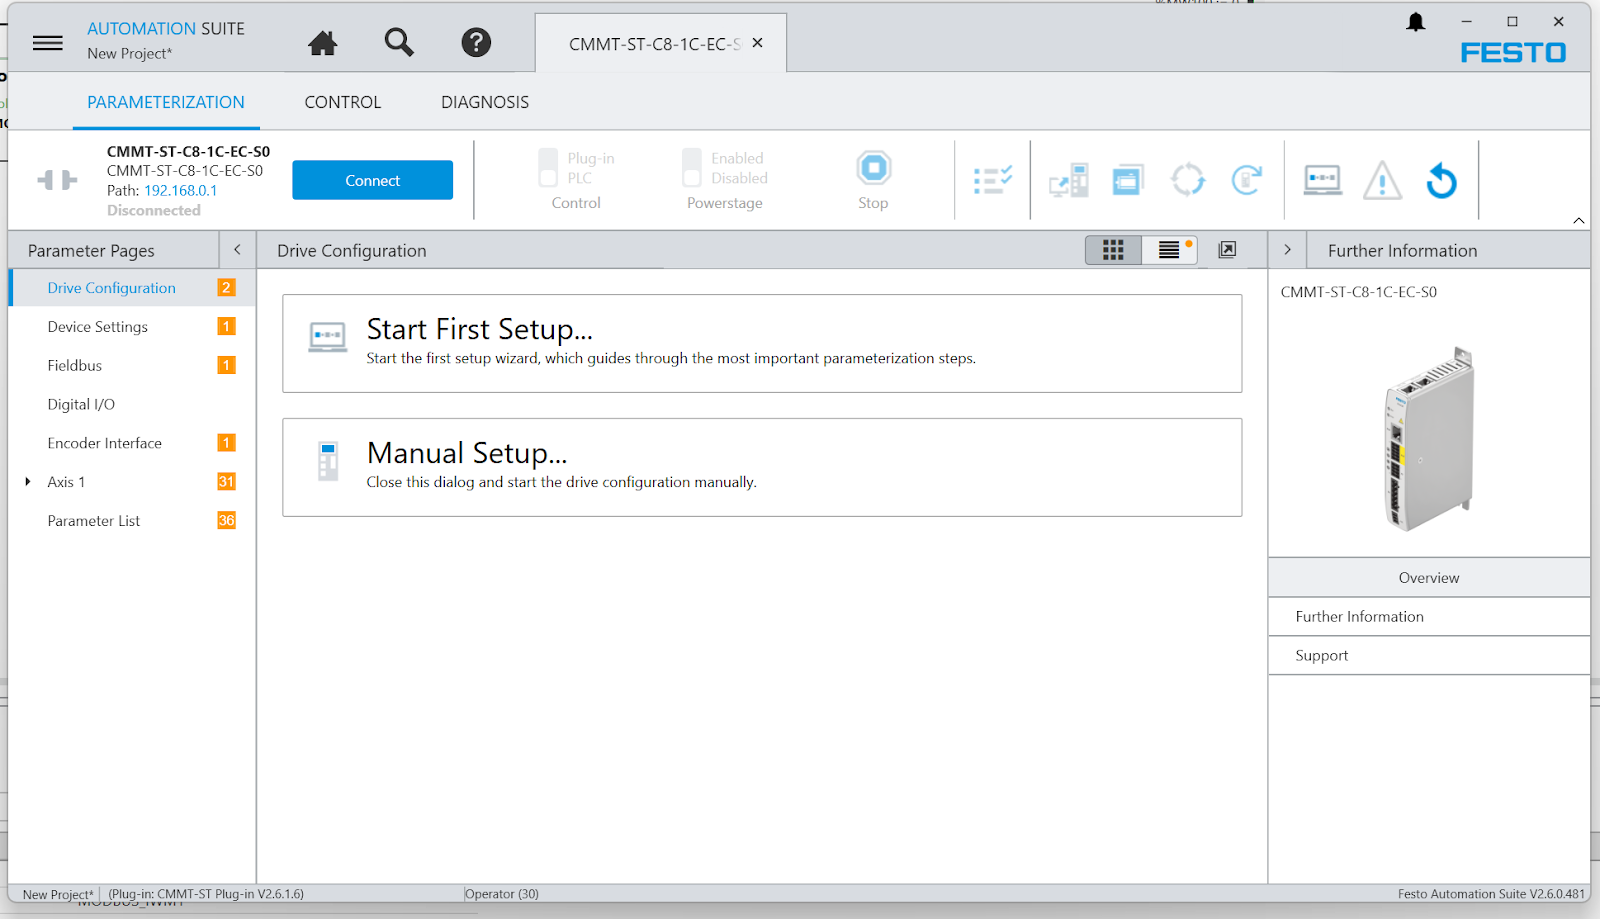
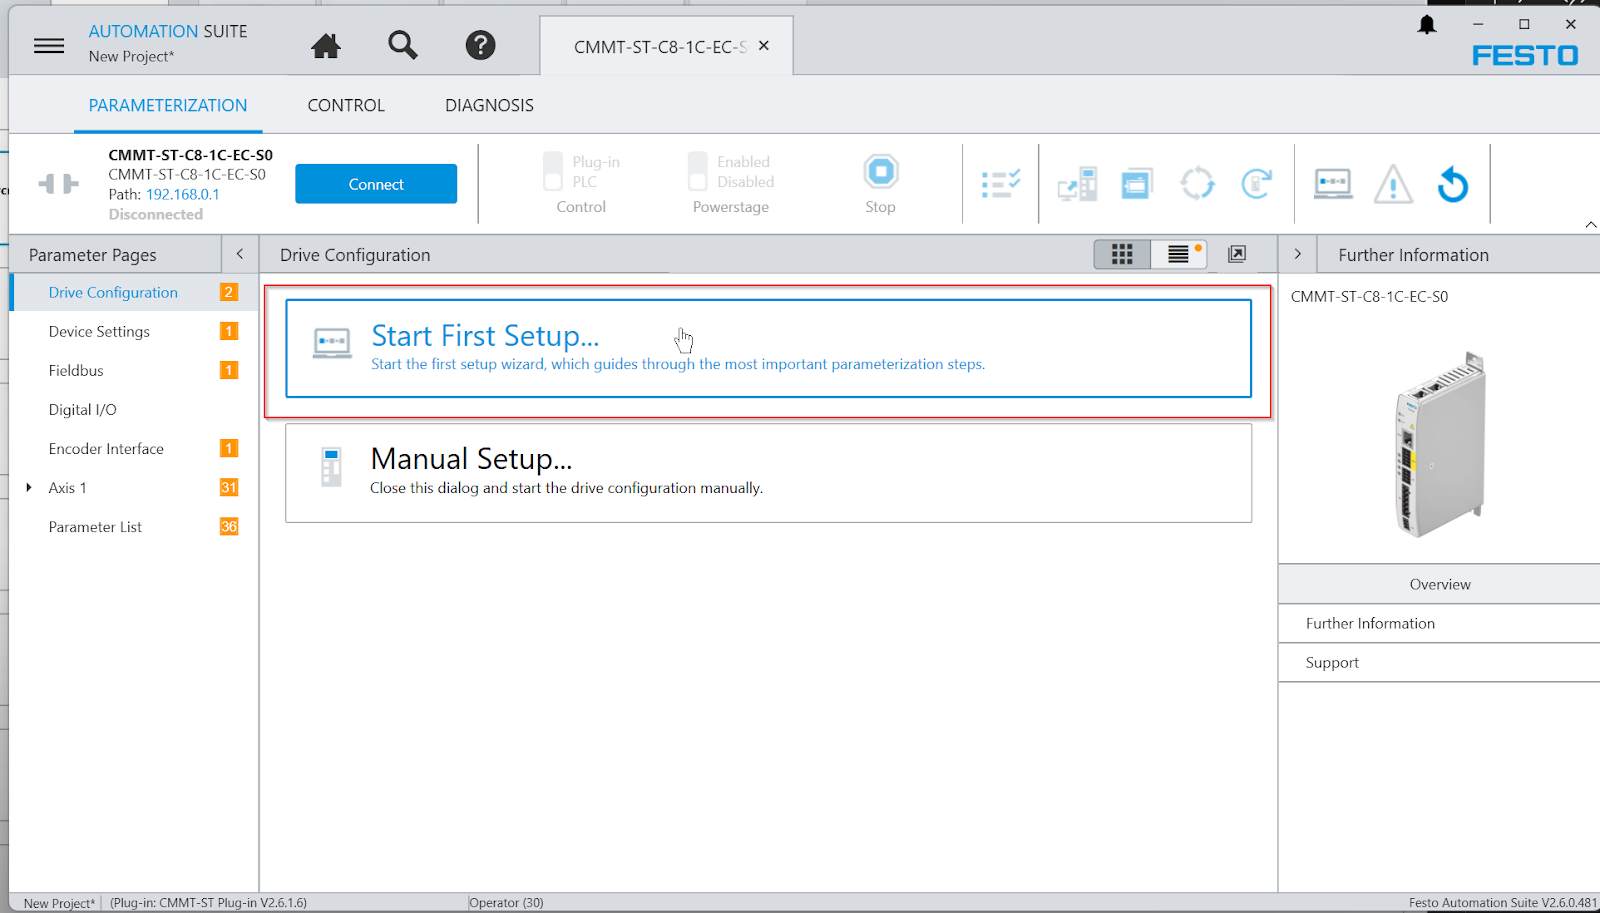
Start First Setup
Start First Setup performs the initial setup of Servo Drive. This function also sets up application data, hardware switches, homing, software exit position, etc.
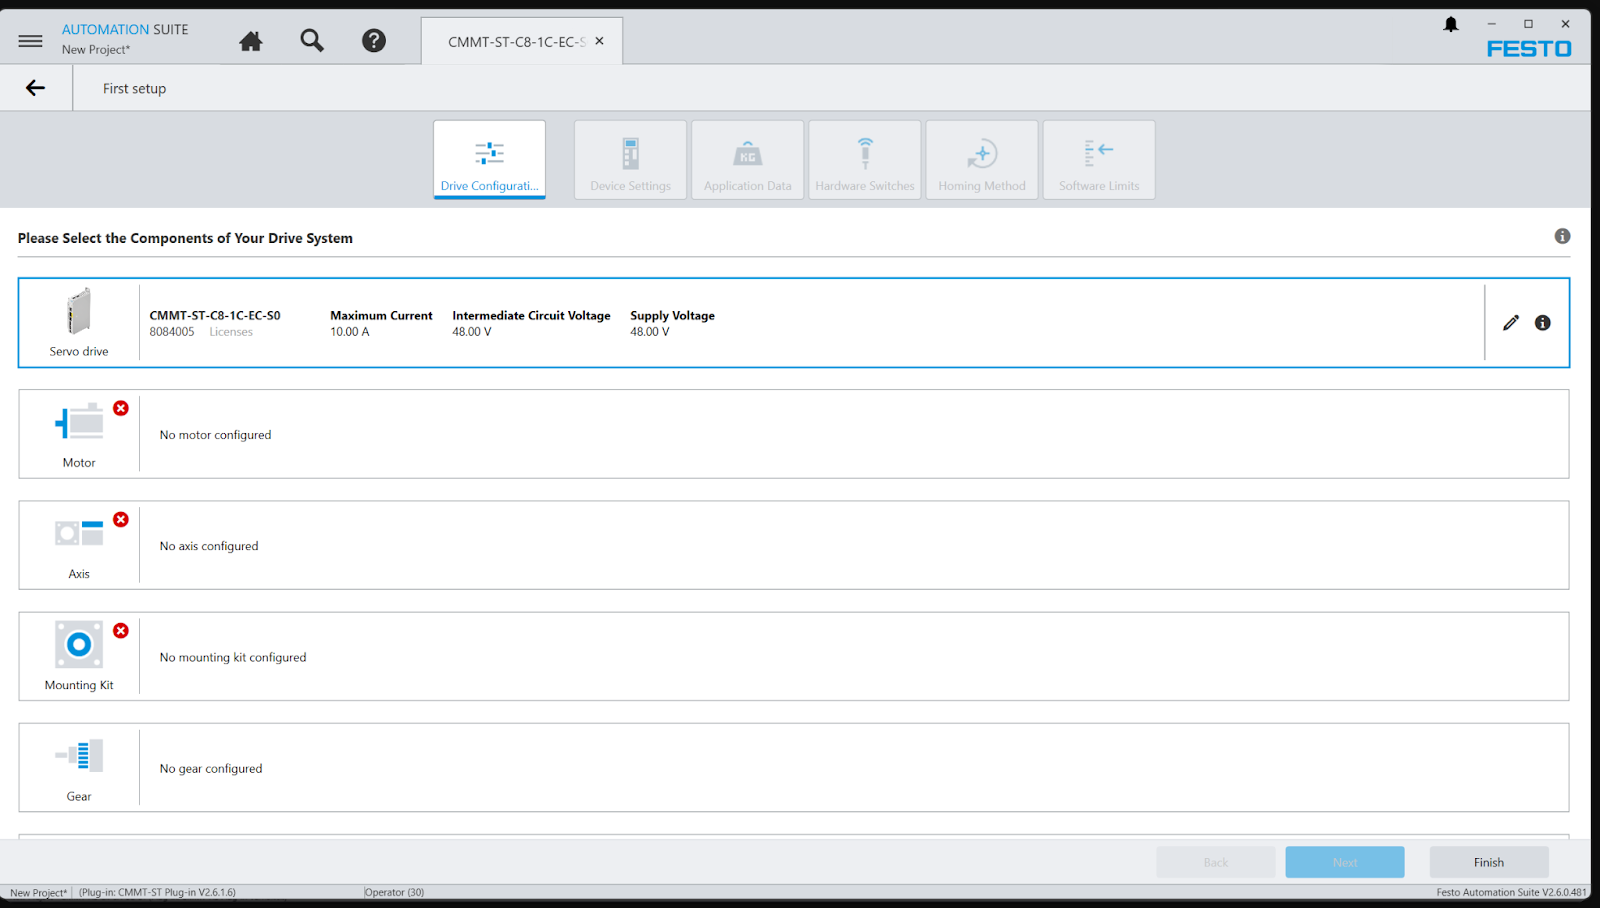
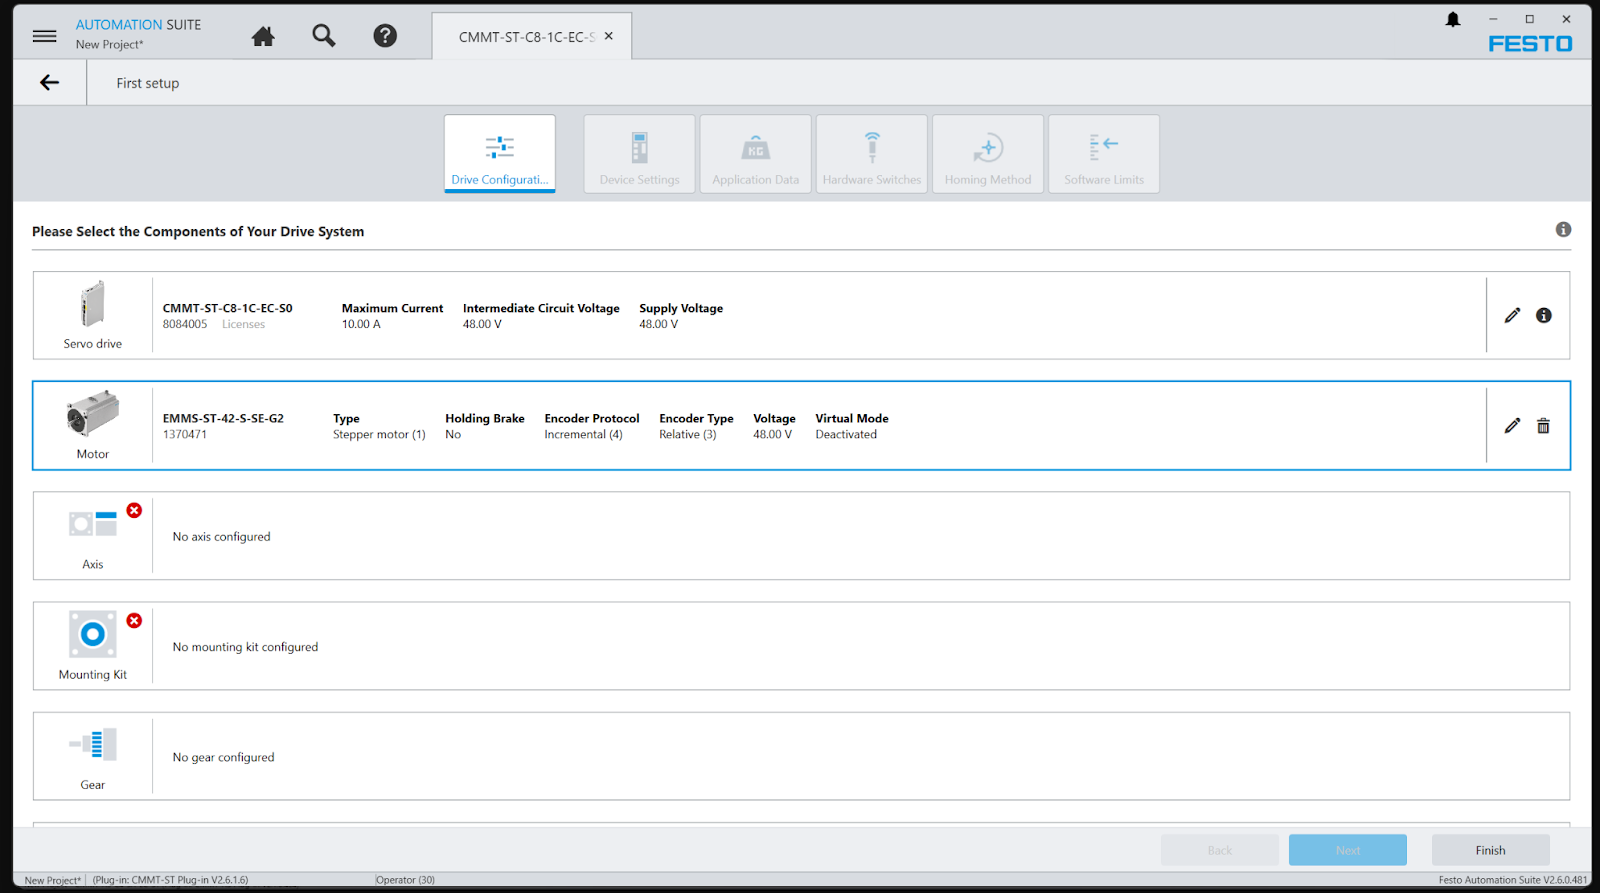
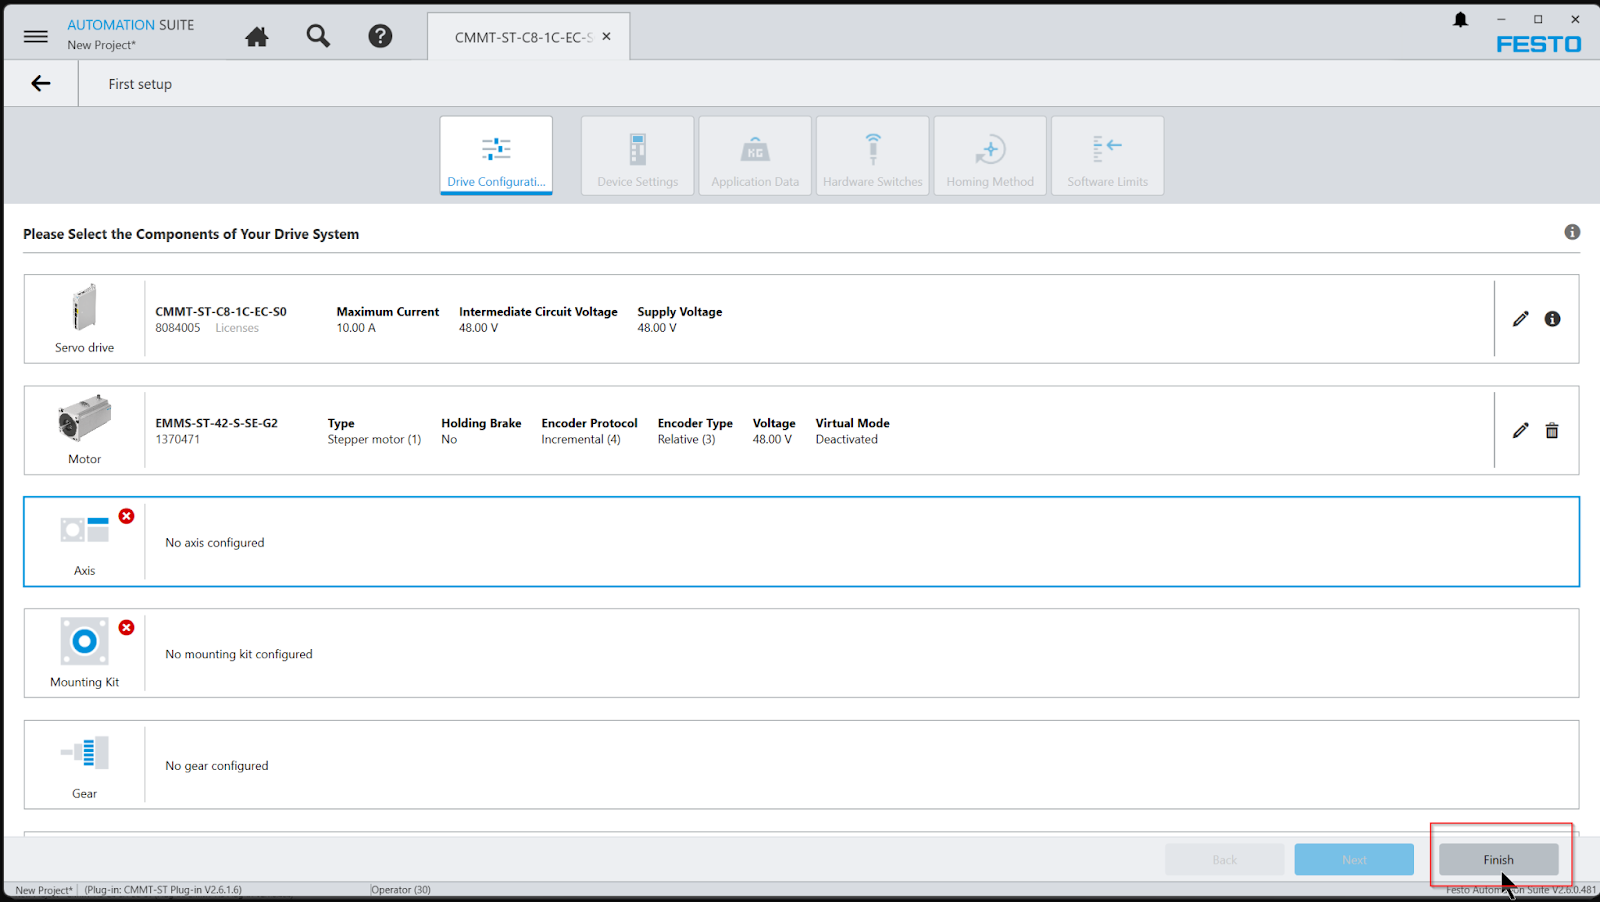
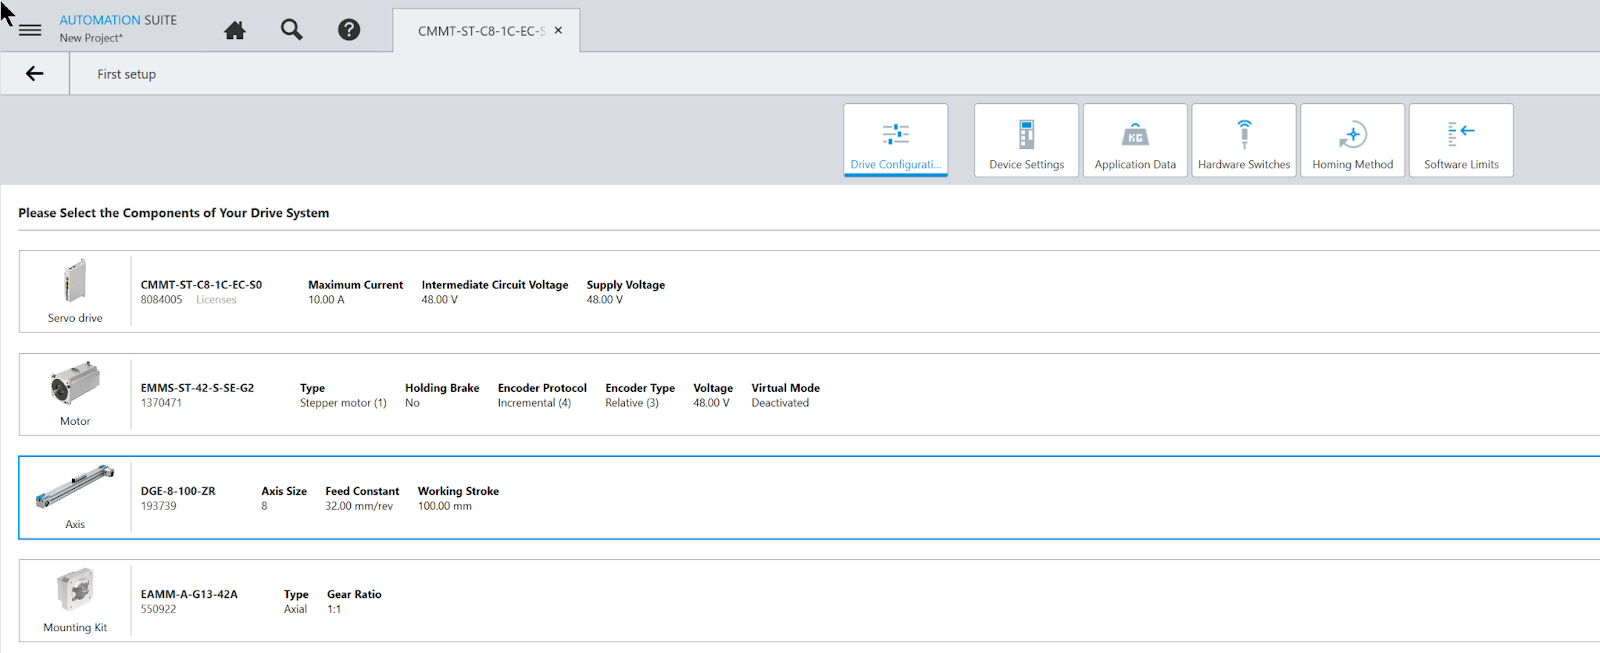
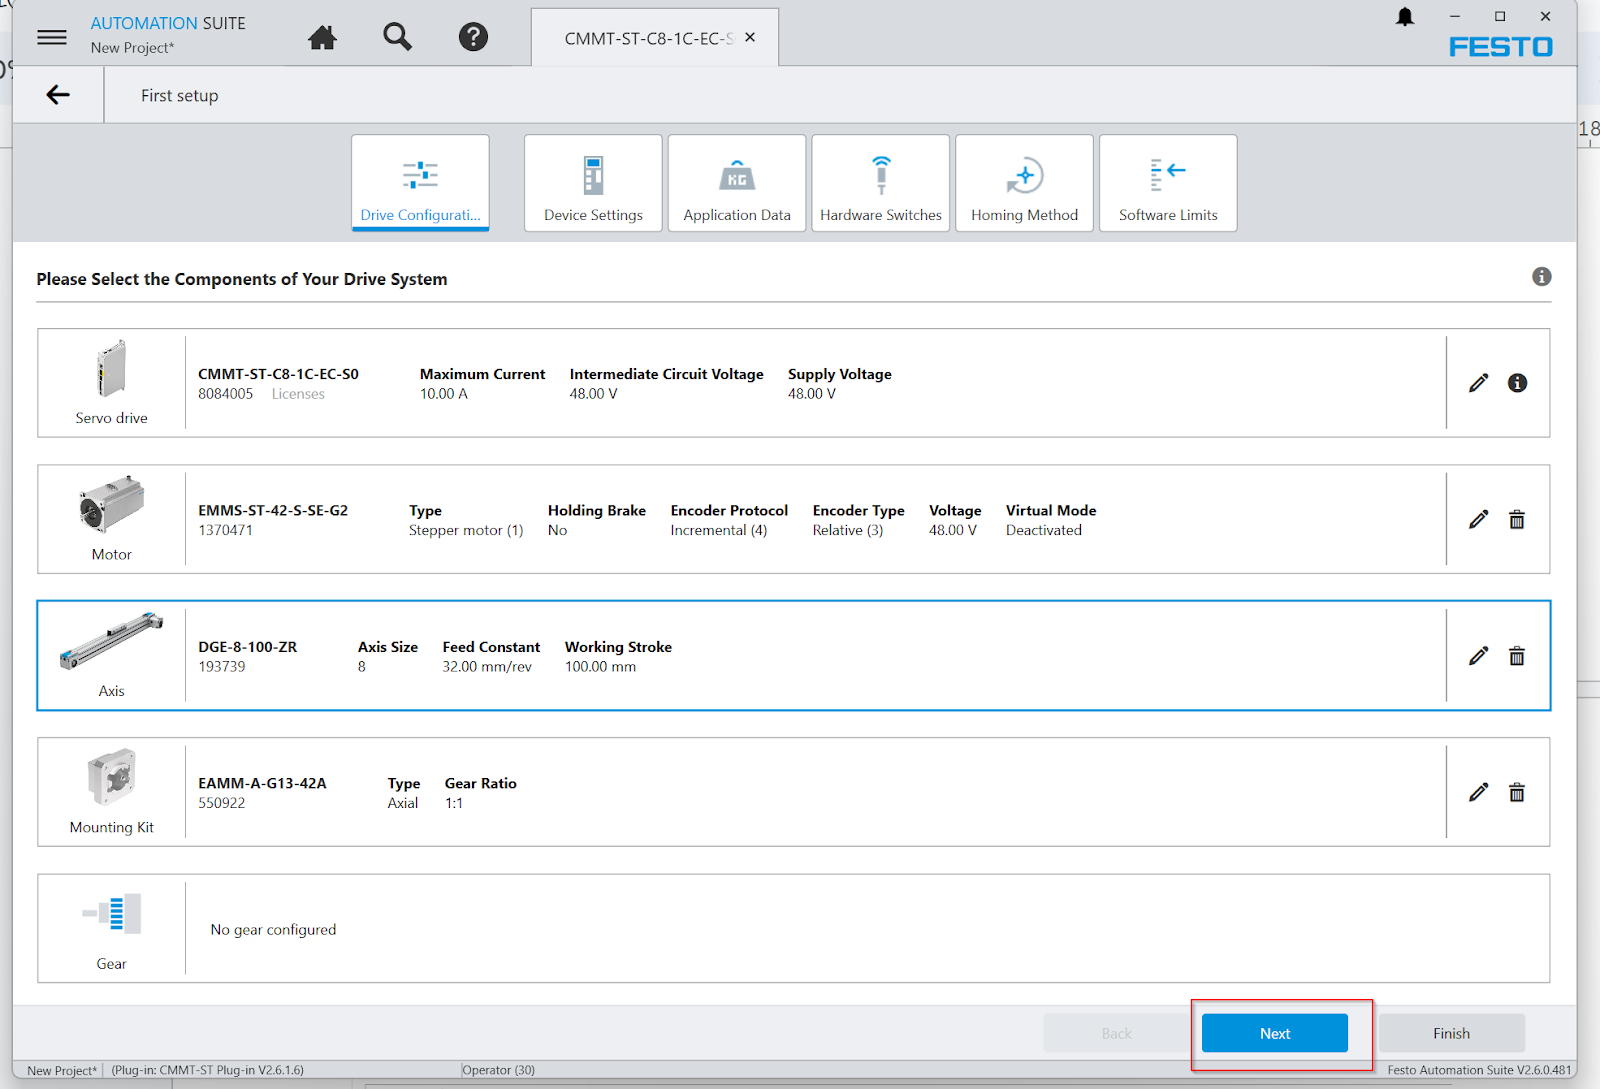
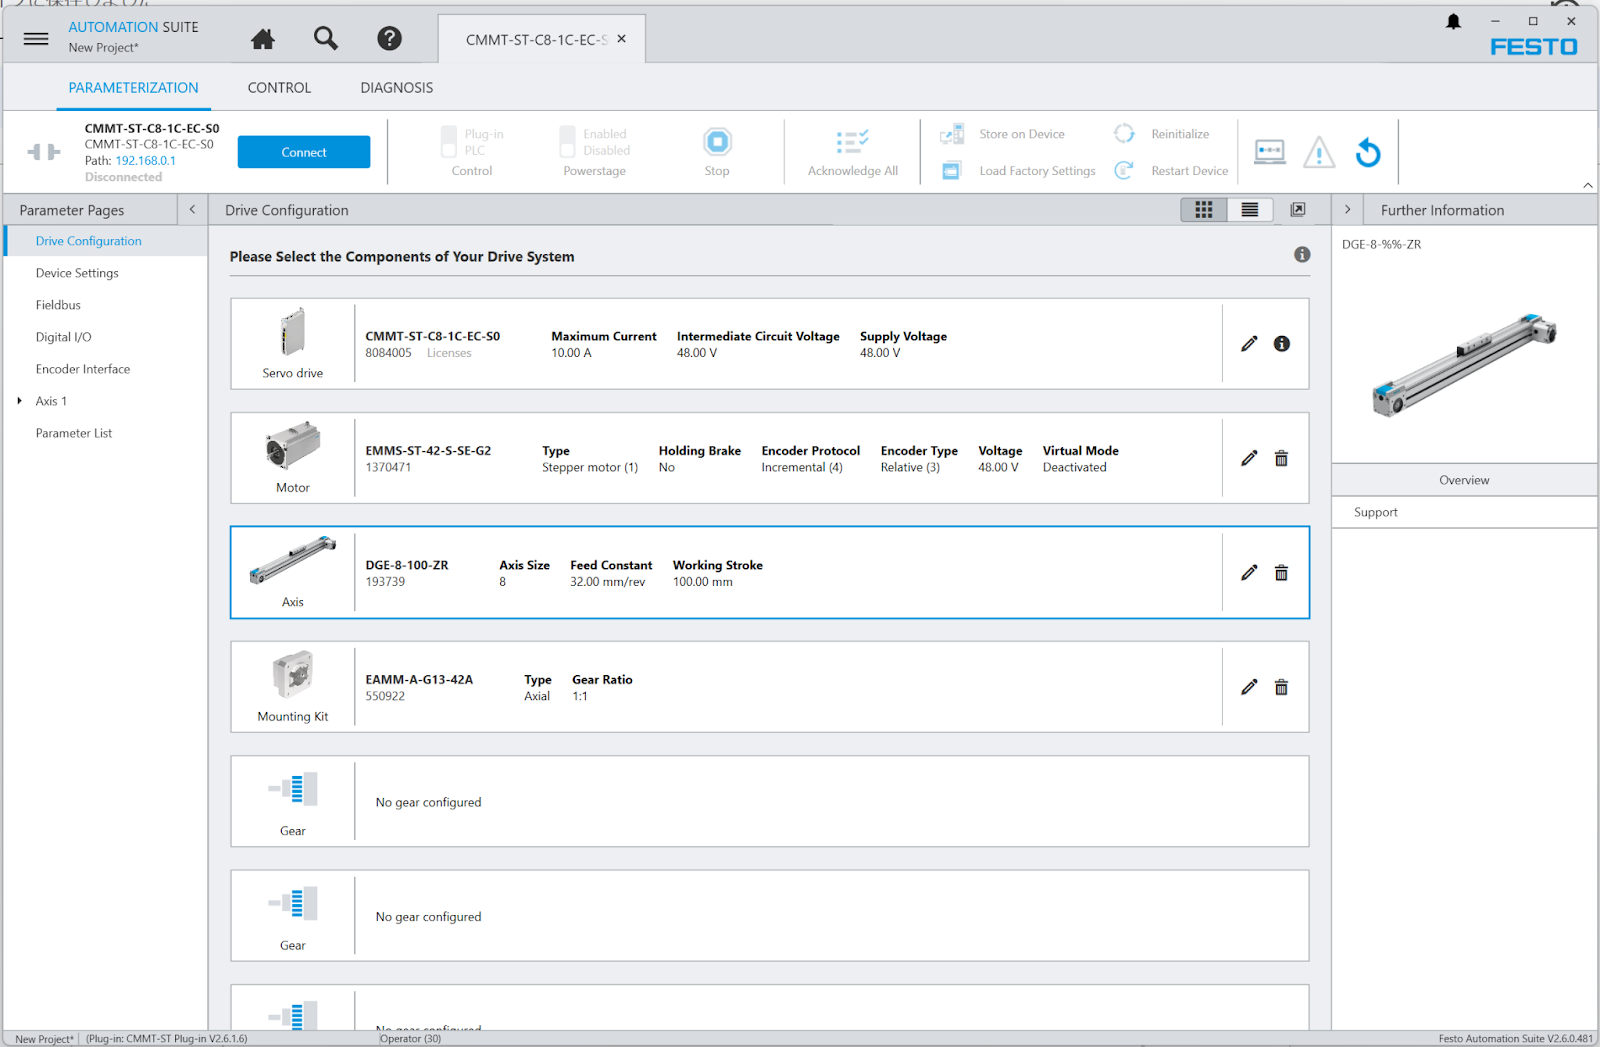
Drive Configuration
The Drive Configuration screen appears, from which you can configure the Servo Drive and the connected Motor, Axis, Gear, and other settings.
Motor
Now we will configure the Motor settings.
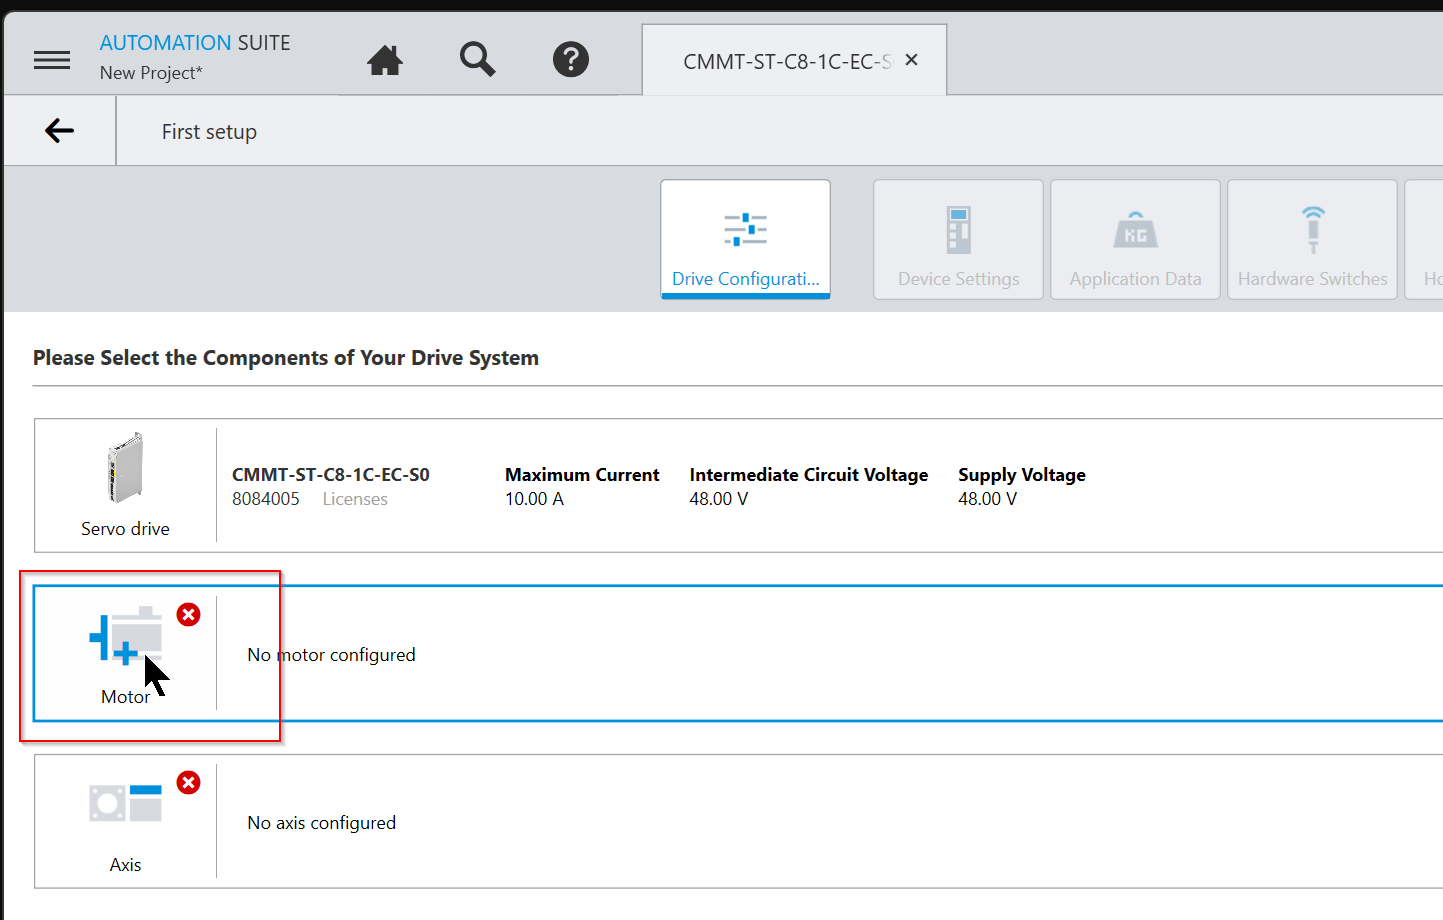
Select Motor’s Popup will appear.

Enter the model number on the Motor’s installed nameplate.

Done!
Axis
The next step is to set the Axis connected to the Motor.
The Select Axis popup is displayed.
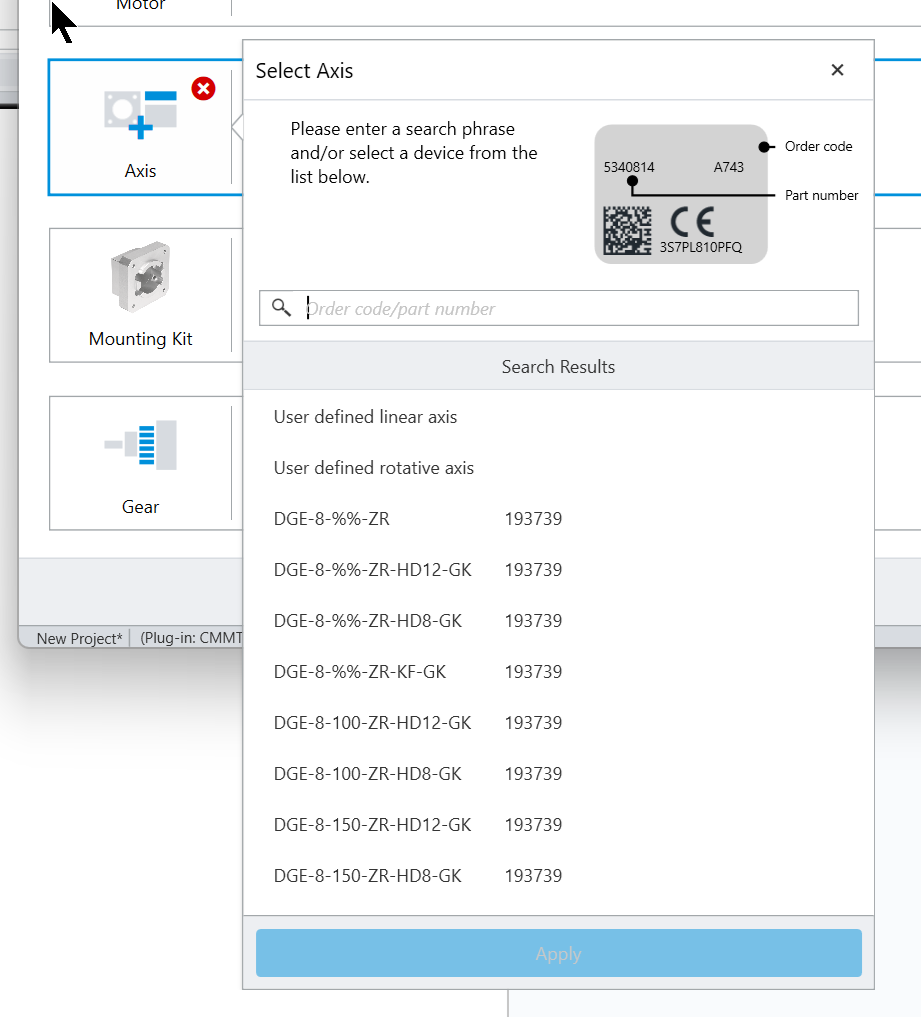
In this case, Motor and Axis are not connected, so you can set them up as you see fit.
Done!
Finally, press the Next button to proceed.
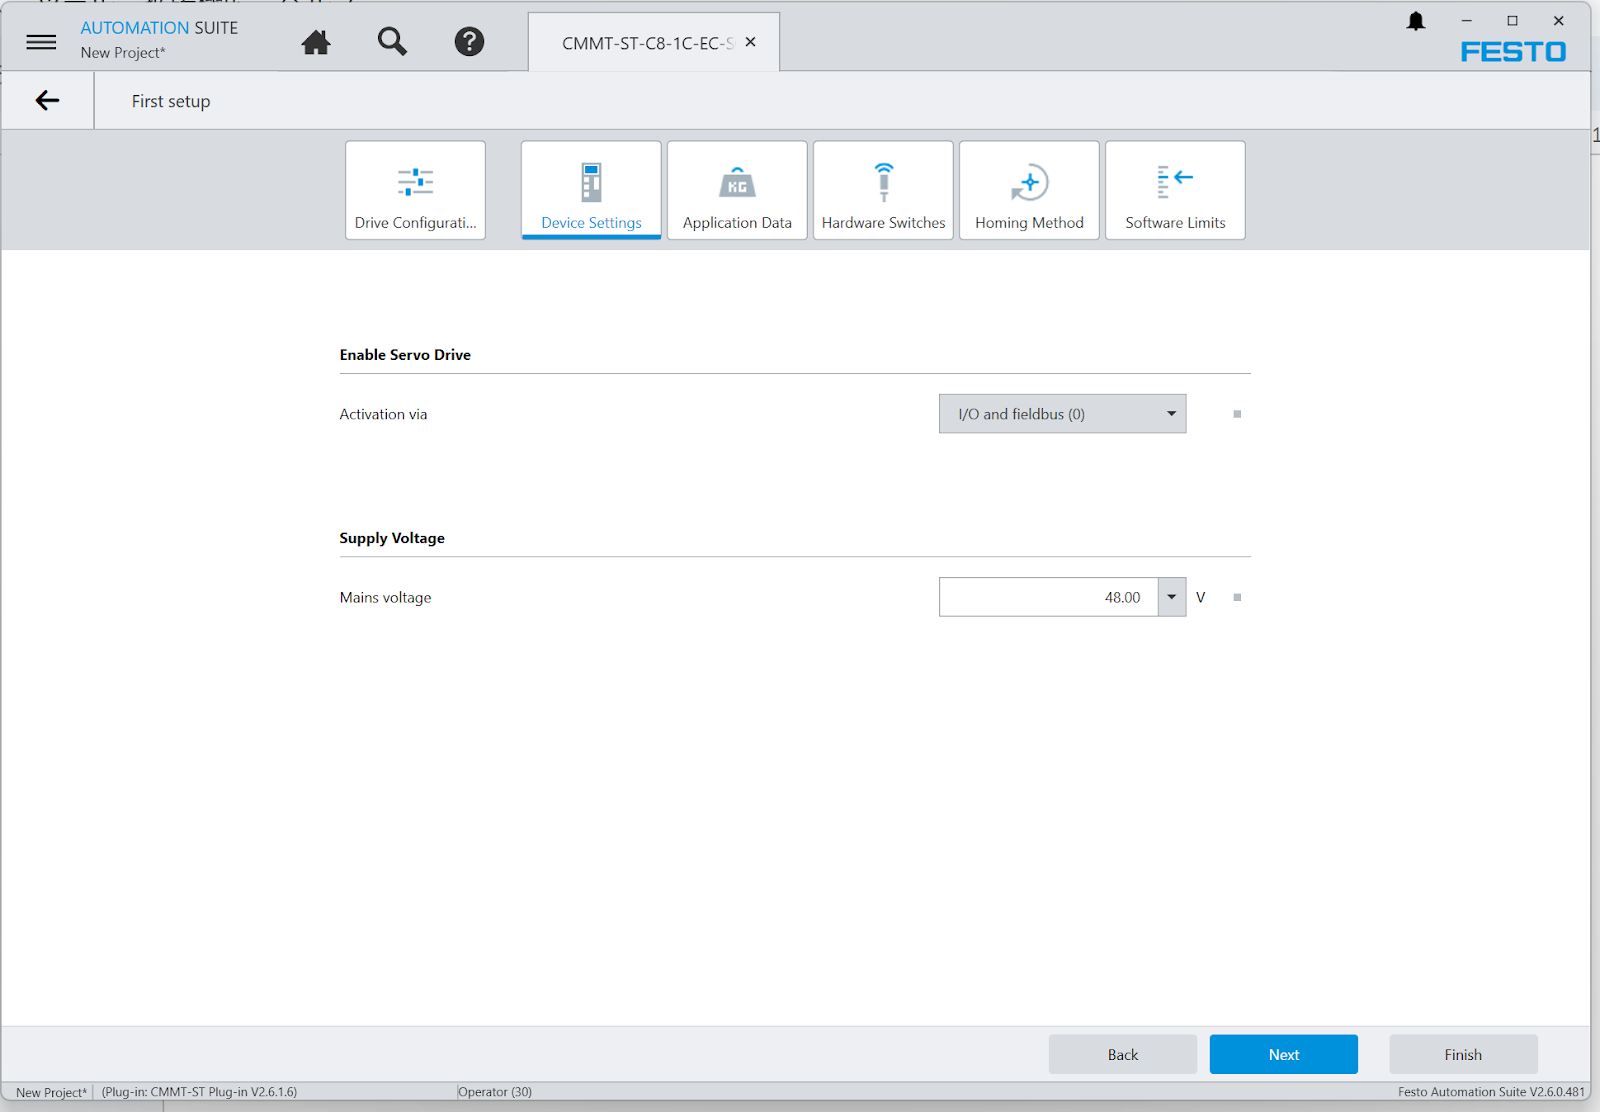
Device Settings
Now we can define the main power supply voltage supplied to the servo drive controller from the Device Settings screen. Note that this setting is only used for limit calculations by the plug-in and does not actually affect the operation of the servo drive controller.
Application Data
In the Application Data screen, you can set the cable length, Axis weight, and other data for the actual application. The most used setting is probably the Rotation Poiarity, which can be changed if the encoder value and motor rotation direction are opposite.

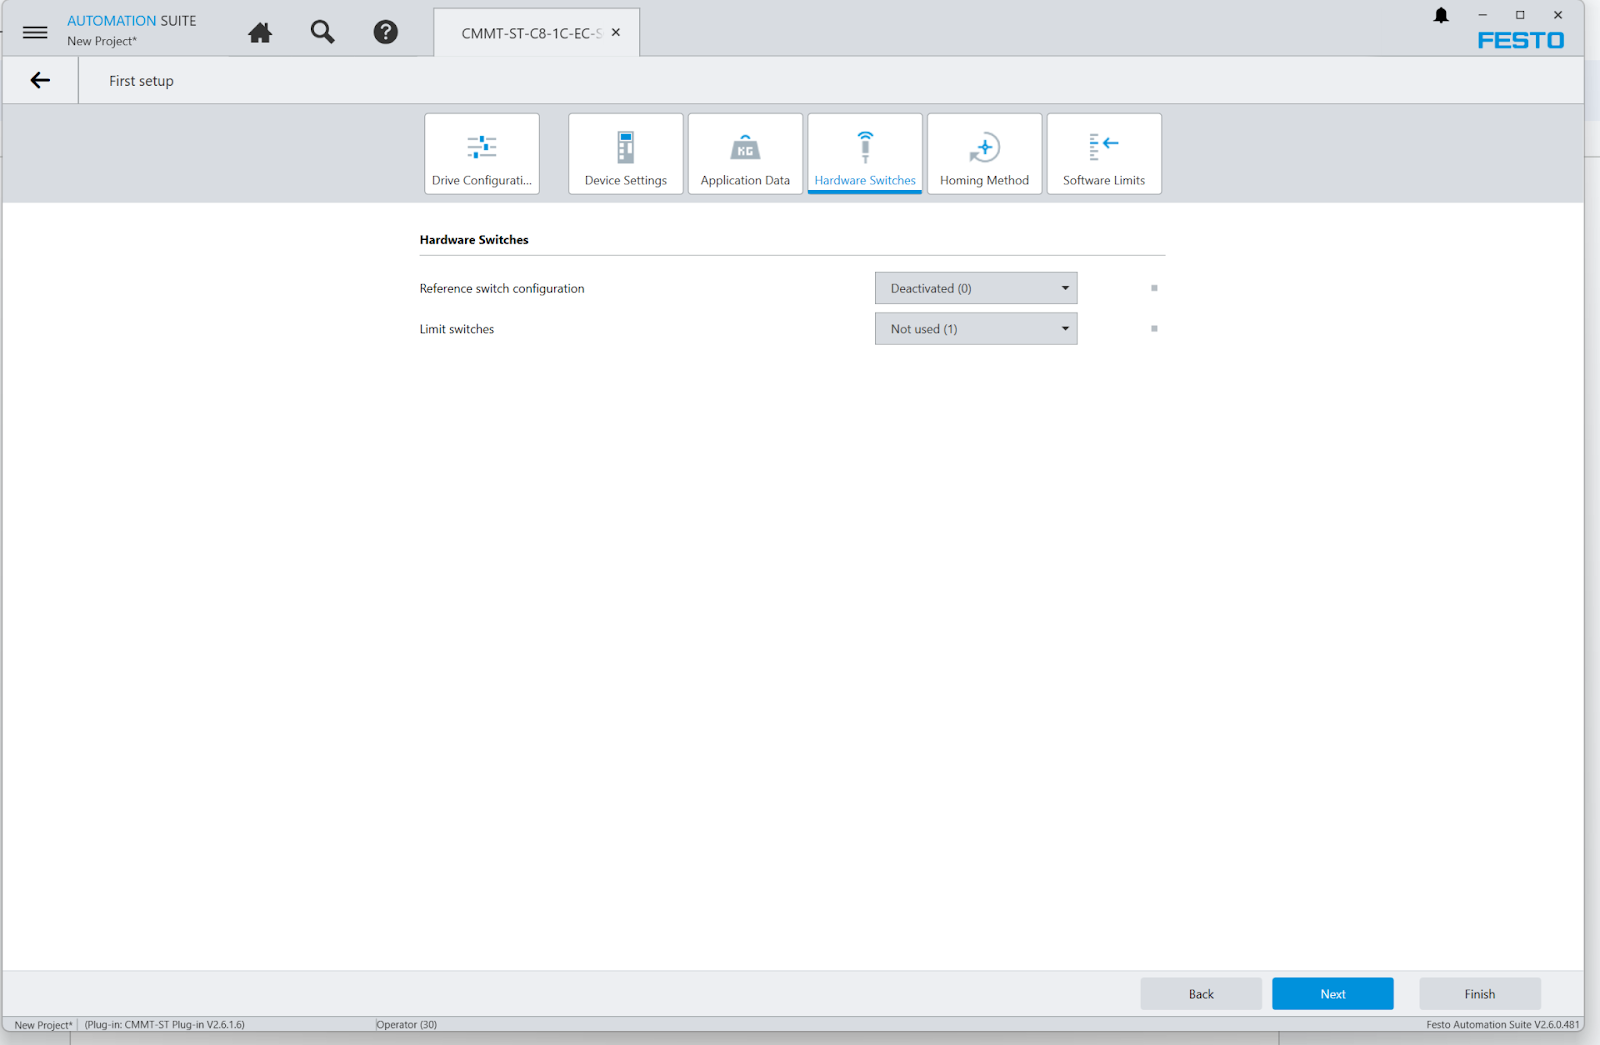
Hardware Switches
Hardware limit switches and reference switches can be set in this parameter group to select their application and switch type (N/C contact or N/O contact). Those switches are automatically assigned to the following digital inputs
- Reference switch
- X1C.2
- Positive/negative hardware limit switch
- X1C.6
- X1C.7
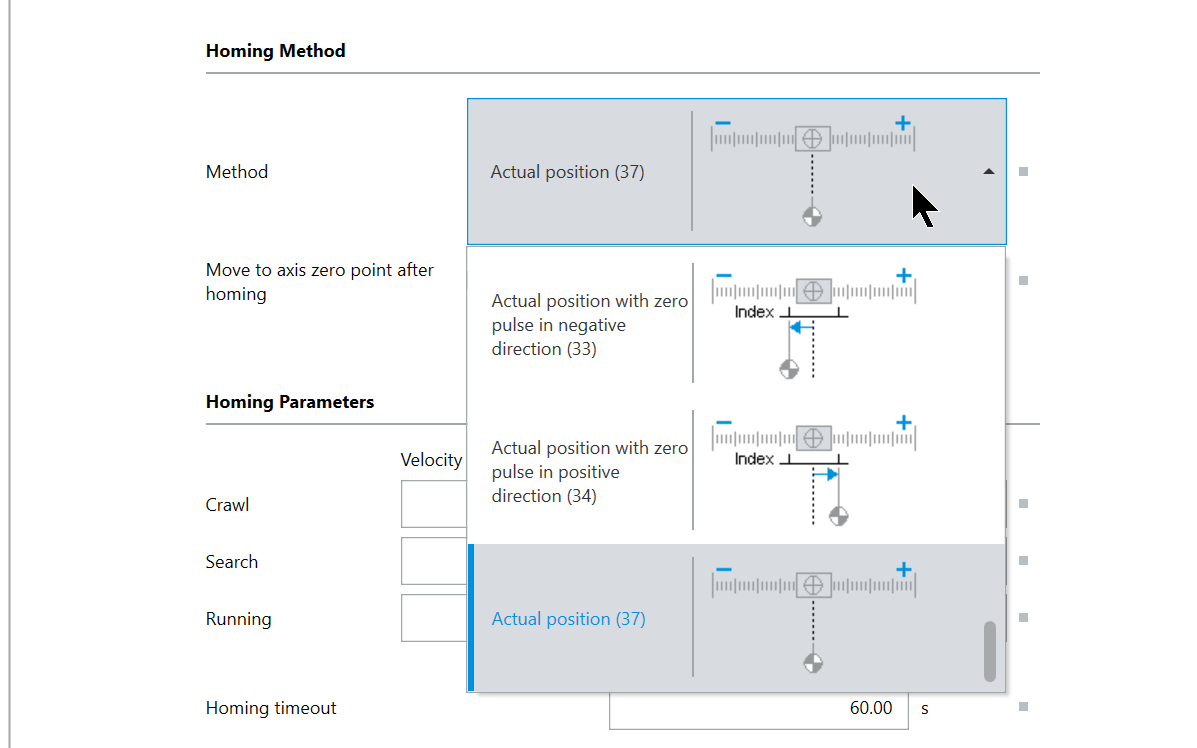
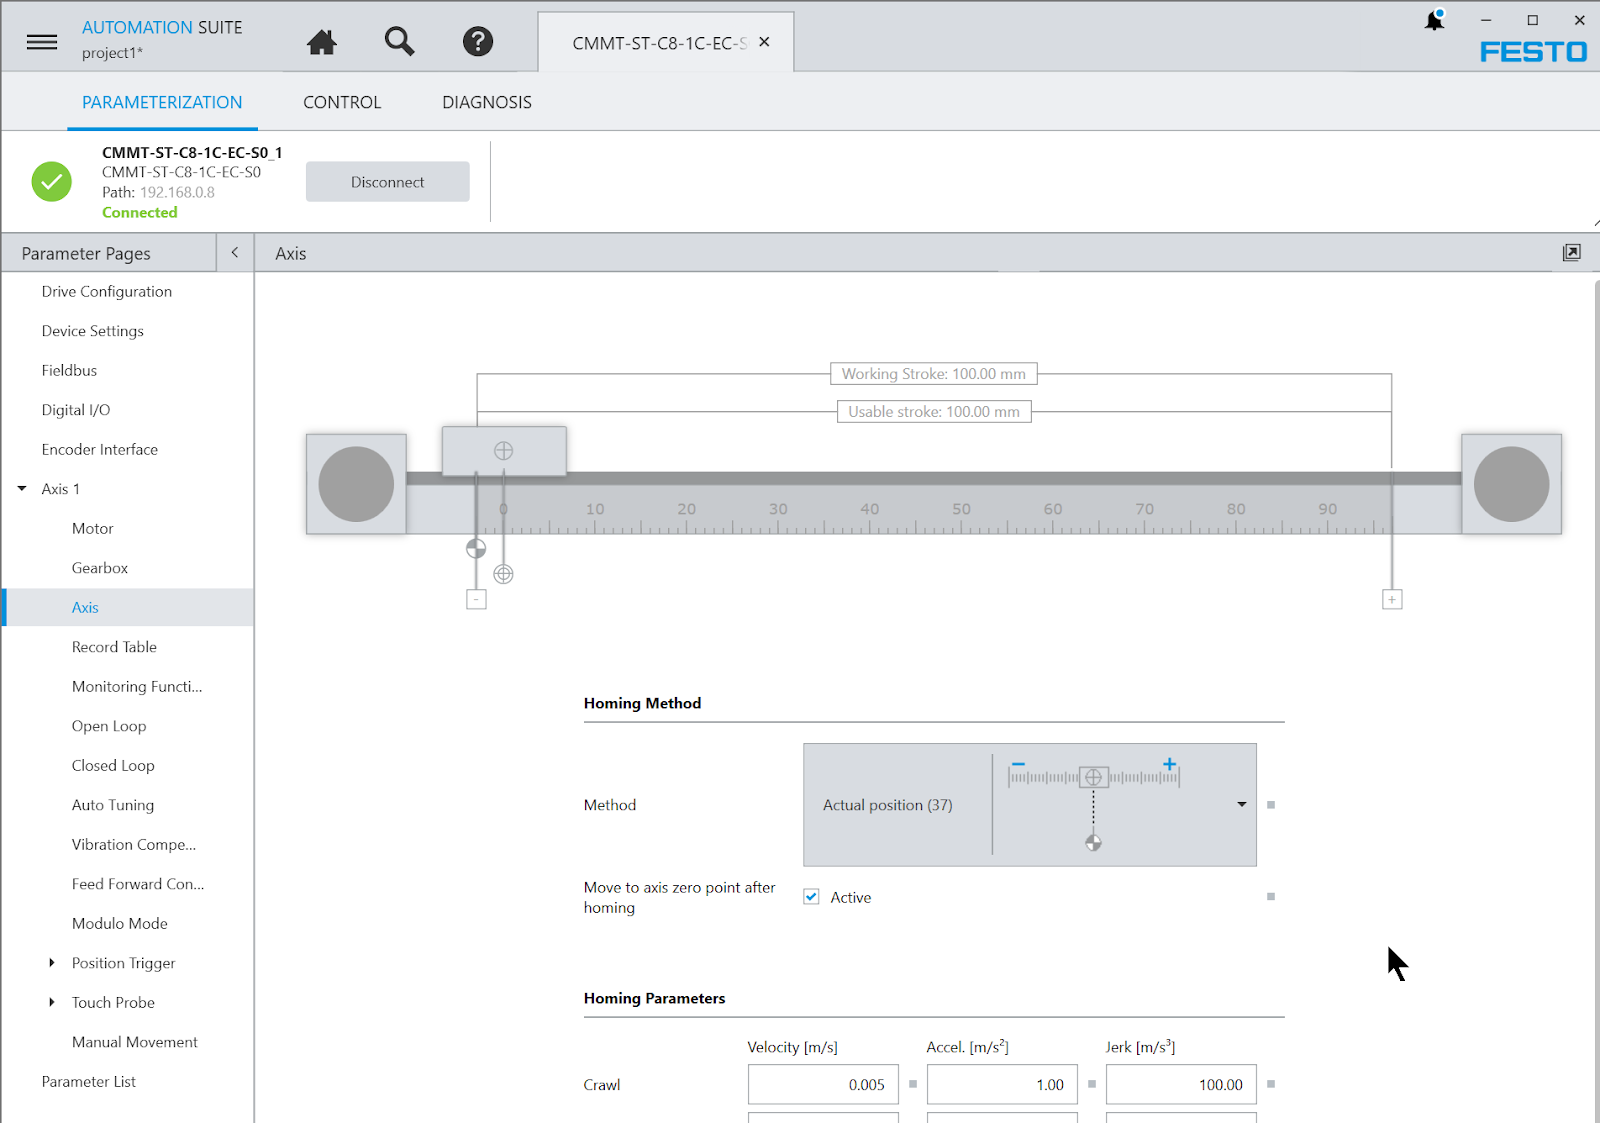
Homing Method
The following settings related to homing can be set from its ‘Homing Method’.

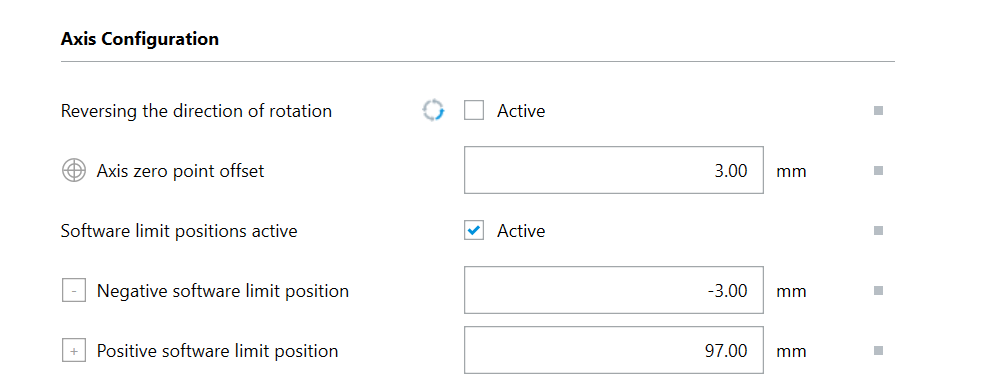
Software Limit
Servo Motor’s Software Limit can be set from this screen.
- Axis zero point offset
- Software limit positions active
- Negative software limit position
- Positive software limit position

Done!
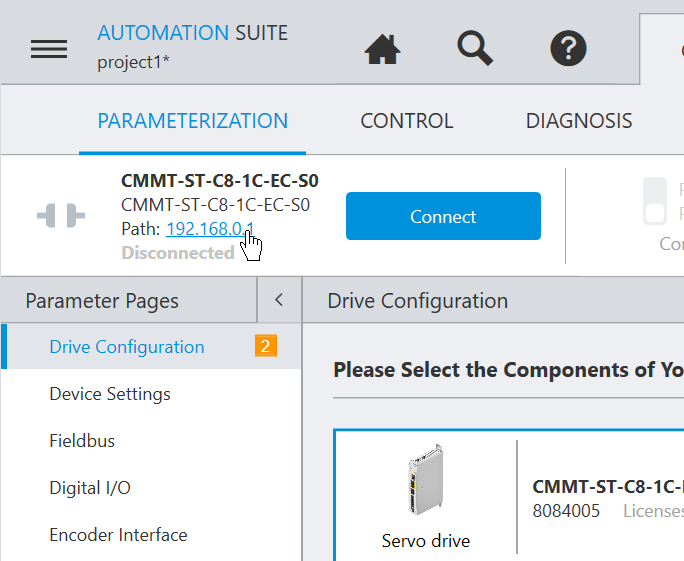
Search the Drive
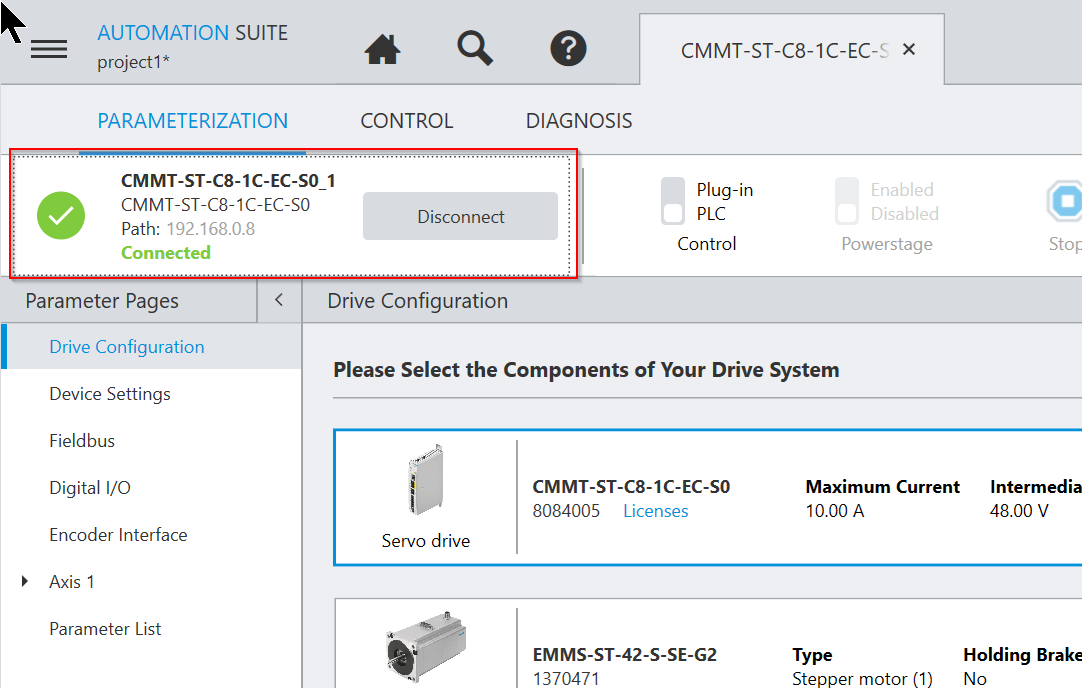
Once the initial setup is complete, connect to Servo Drive using the Connect button.
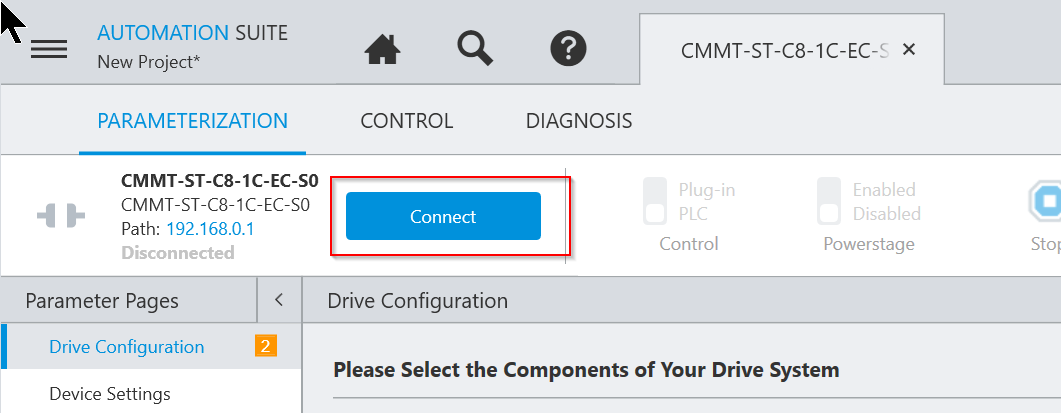
Default is 192.168.0.1, but in some cases the IP of the Drive may have already been changed, in which case click on the IP address of the Path.
The Festo Automation suite searches the network for Festo devices.
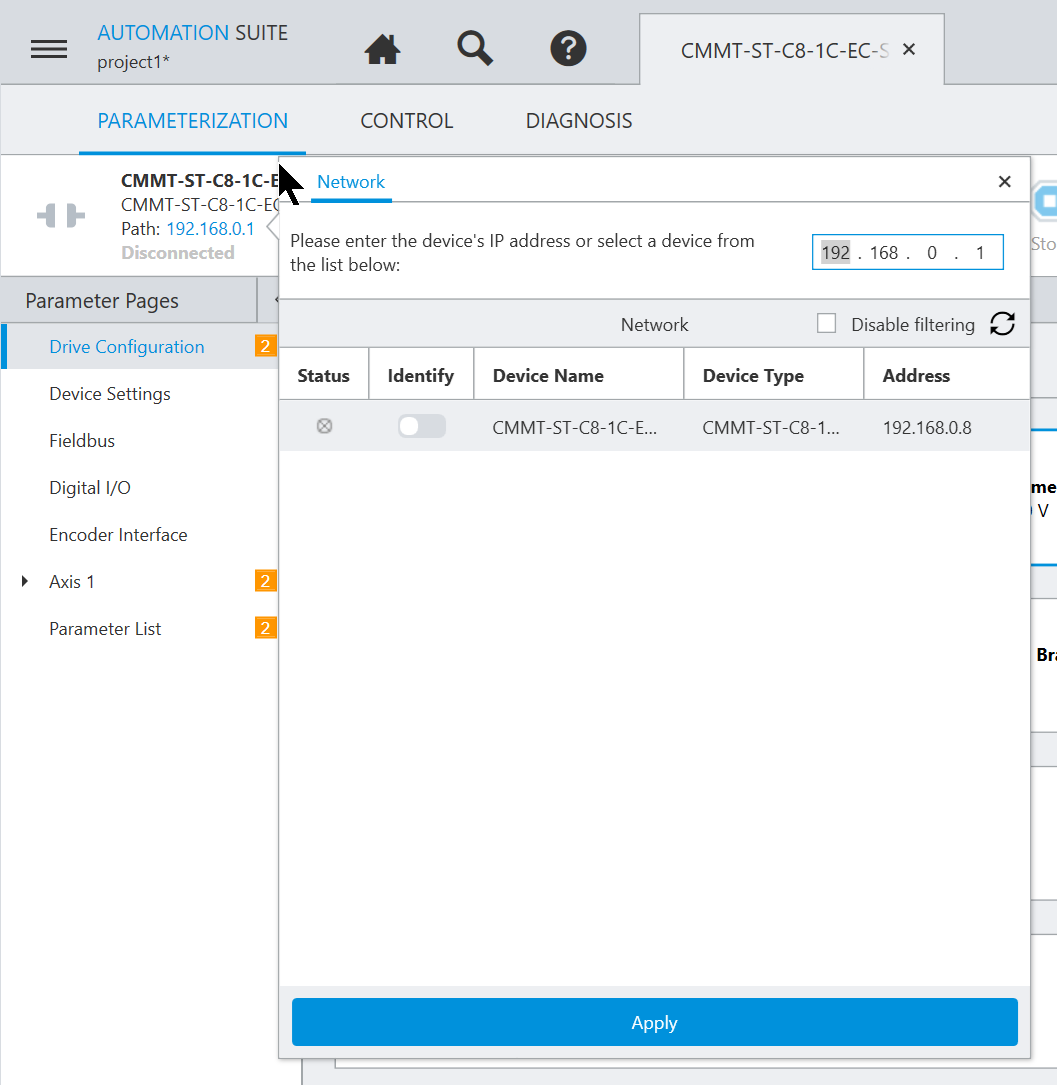
I can see that the IP address of the CMMT-ST Drive that is now connected to the PC is 192.168.0.8.

Select the Sero Drive you wish to connect and Apply.
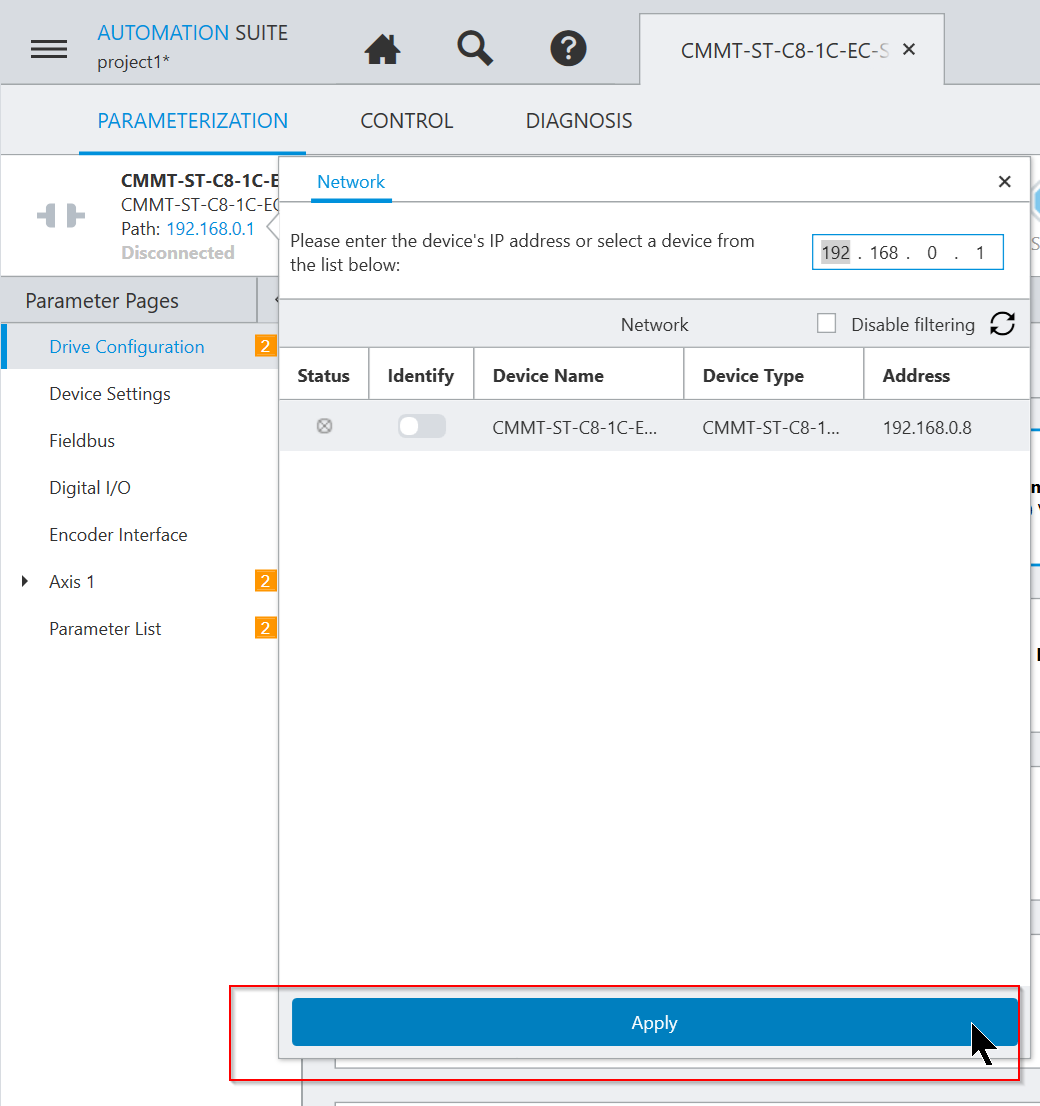
Connect to Drive
The IP address of the Path will change to 192.168.0.8. Connect to the Drive with Connect.

If the project is not set up for completion, it is possible to upload the parameters directly from the Drive and proceed with Read from the device.

Done!If the message “Connected” appears and the green Check Icon is displayed, the PC and Servo Drive are successfully connected.
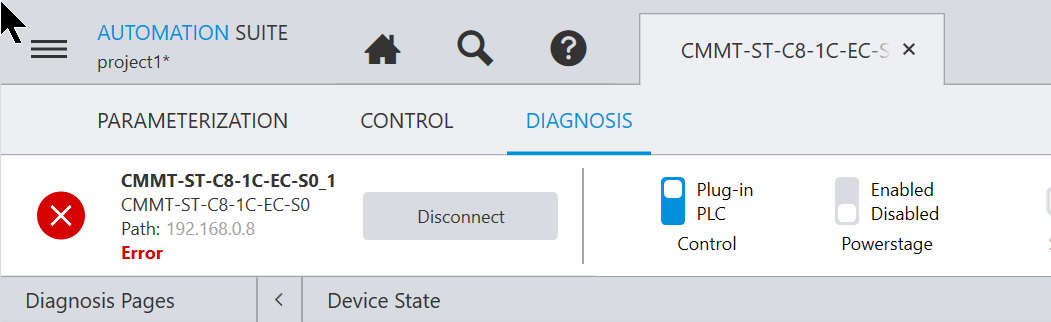
If Error..
In some cases Servo Drive will have errors.

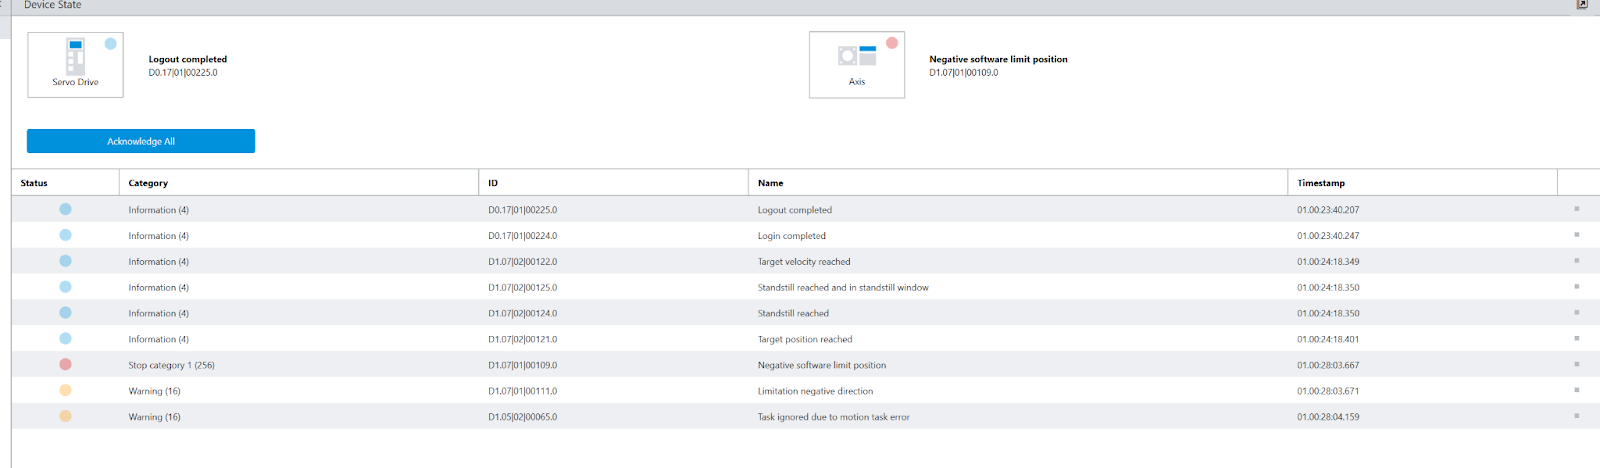
For more information about Servo Drive, open the DIAGNOSIS Tab and a list of diagnostic information is available.
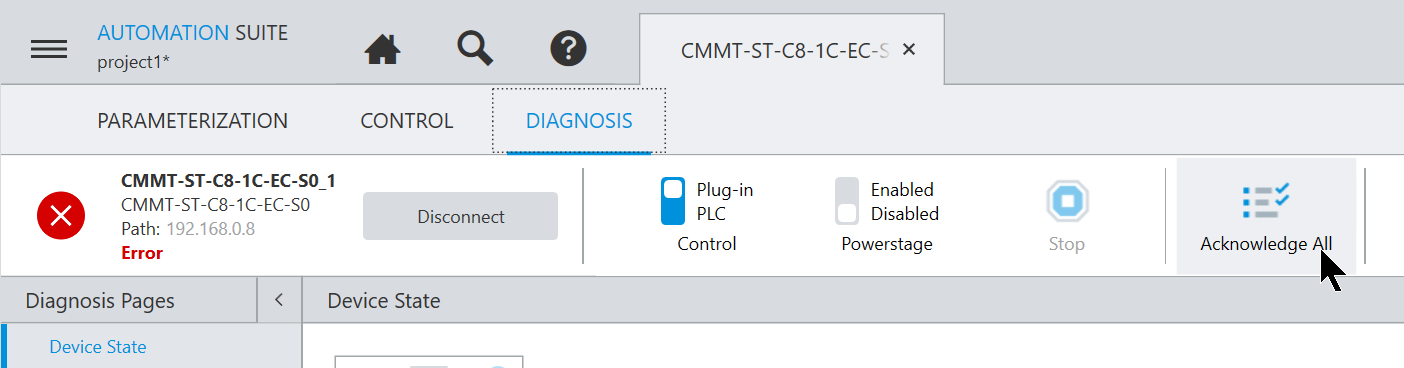
Acknowledge
If you want to reset Servo Drive errors from Festo Automation Suite, just click the Acknowledge All button.
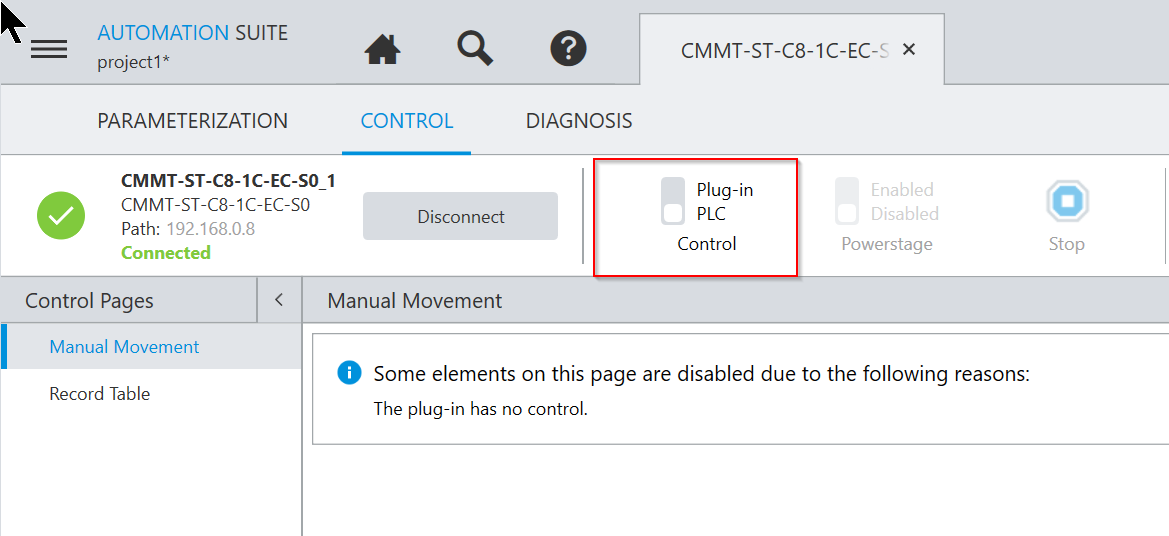
Plug-in PLC Control
Since simultaneous control by multiple connections can lead to uncontrolled operation of the drive, device control is an exclusive access right, limiting the drive to only one connection.
The CMMT-AS Plug-in can remove master control from a higher-level controller (e.g., PLC) under the following conditions
- Automation Suite CMMT-AS Plugin connected to Servo Drive
- Other devices (other plug-ins) do not have Master Control
It is important to note that the Plug-in will return control of the Servo to the PLC if the Servo Drive connection is interrupted.
Now, click on Plug-in PLC Control to obtain Servo control rights from the actual Automation Suite.
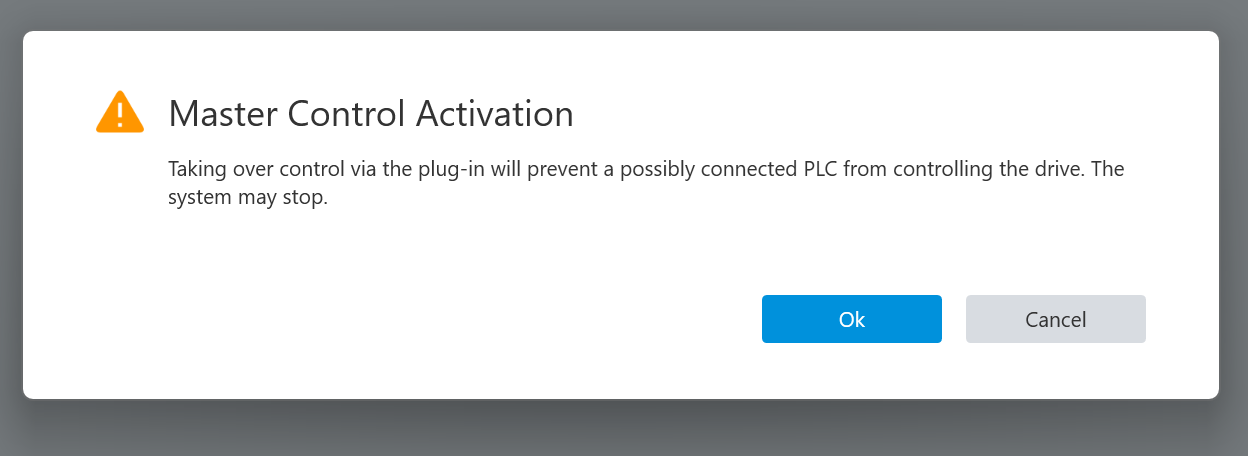
A “Does the plug-in take control of Servo Drive? popup will be displayed, and proceed with “Ok”.
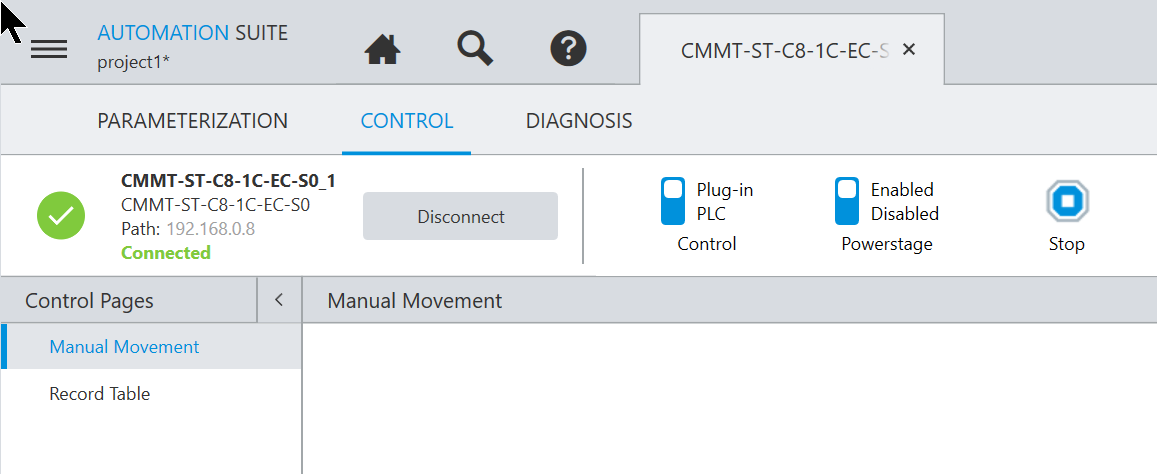
Done!Now the Slide button is in the Plug-In and Automation Suite has taken control of Servo Drive.

Enable the Drive
Now that Automation Suite has taken control authority, the next step is to Servo-ON the Drive with the Enable/Disabled button.

Done!Servo-ON.
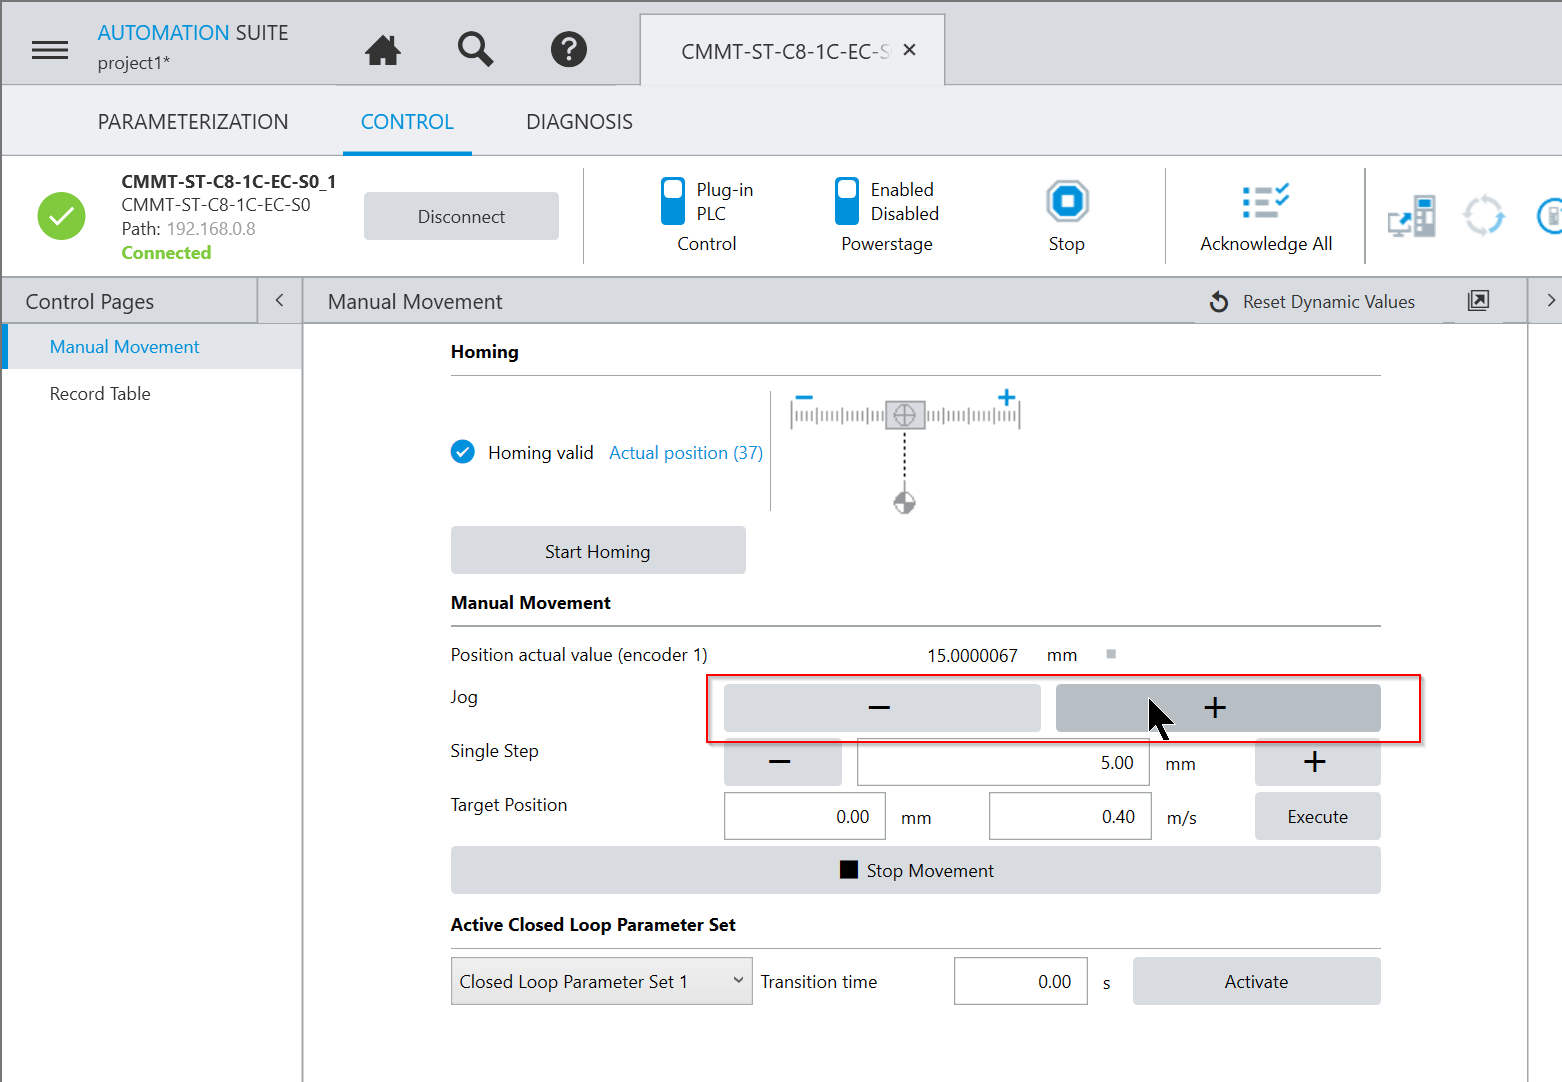
Control Panel
Open the Tab of CONTROL to see the Control Panel that controls Servo Drive from the Automation Suite.

Jog operation
Clicking the +/- button on Jog allows Servo’s Jog operation.
This is how it is operated.
Festo.CMMT-ST Servo Drive Jog Operation
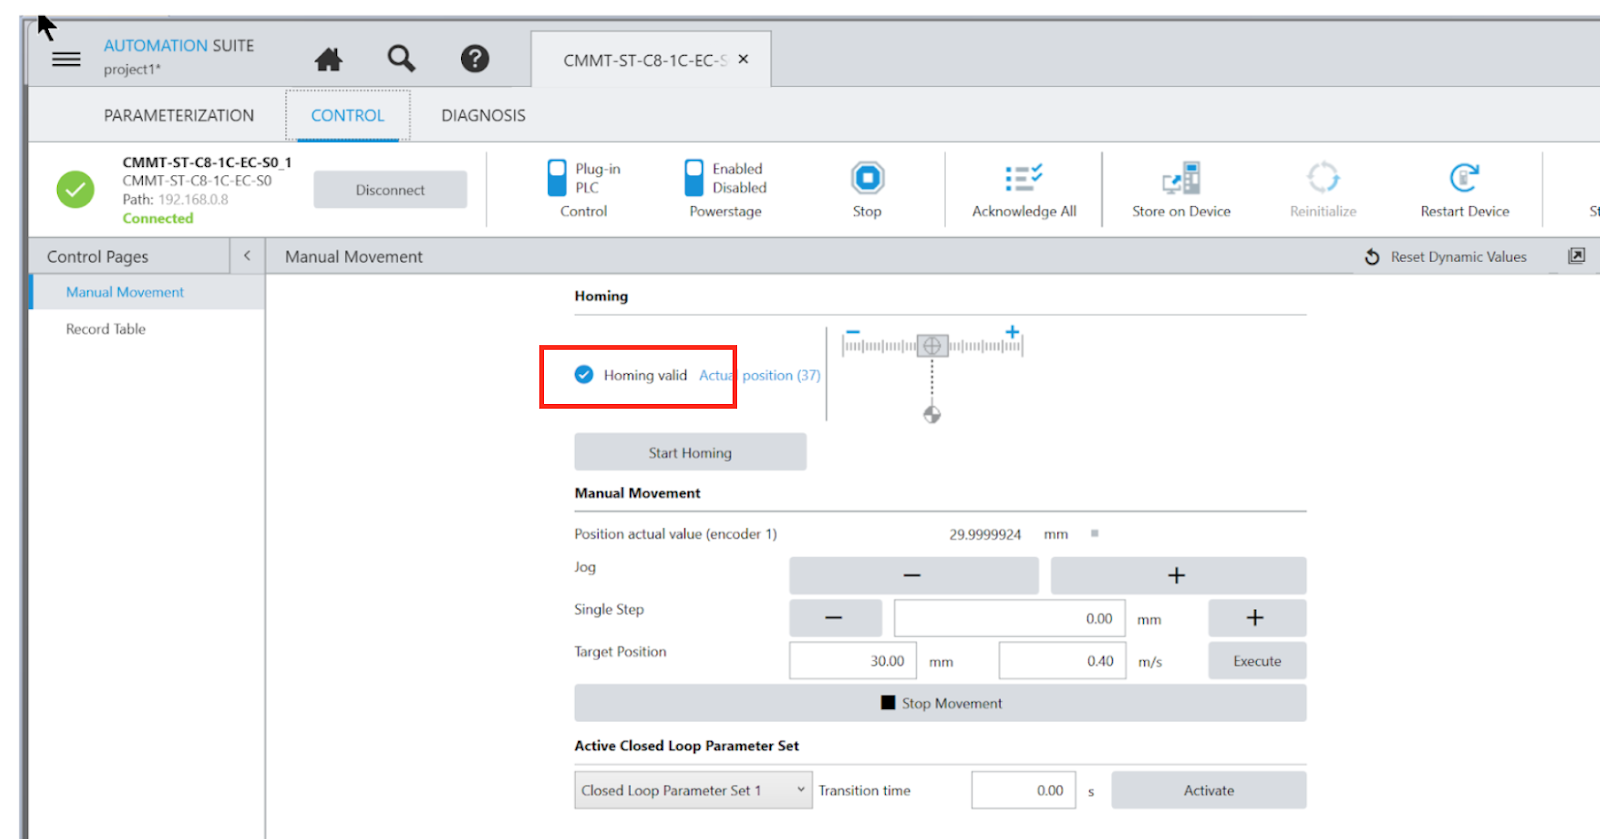
Homing
Click the Start Homing button to start the Servo Drive homing.

When homing is complete, a “Homing Valid” message is displayed.
Step Run
Enter the distance to be traveled in Single Step and click the +/- button to make Servo travel the set distance from the current distance.

This is how it is operated.
Festo.CMMT-ST Servo Drive Single Step Operation
Absolute Positioning
If you want to execute absolute positioning from the Control Panel, enter the destination and speed in Taget Postion and execute with Execute.

This is how it is operated.
Festo.CMMT-ST Servo Drive Absolute Positioning Operation
Stop the Movement
If you want Servo Drive to stop in the middle of a movement, click on Stop Movement.

Configure the Drive
To set the parameters of the Drive, you can click directly on the Area of the Actual Position.

Drive’s parameter screen is displayed with Graph.
Software limit
The Softrware Limit in Axis Configuration, which is often set, can also be changed here.
Homing Method
Alternatively, the homing method can be changed here.