FX5-ENET/IP is a module that is supplied from Mitsubishi for the Ethernet./IP Solutions with FX5 CPUs.In this tutorial I will go through the programming and setup parts.

Manual And Information
Please download the manual from here:
Reference Link!
The Function Blocks and Configuration Tools are same as IQ-R Modules, I will not explain too much in here and please reference
Flow
- Turn on the Un\G37.0.(The start signal of Ethernet/IP Communication request)
- Conneciton Open
- Module reply if Normal
- Transfer the data from user program
- Exchange the data depends on RPI
- Send/Receive data

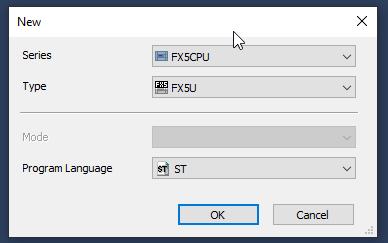
New Project
Project>New to create a new project.

Select FX5CPU as your series, Type is FX5U.
Connection Setup
Now we need to establish the connection between GXWorks3 and CPU.
Click the Connection Destination tab.

Click the Connection.

We will use an Ethernet cable directly connect to the FXCPU.
Direct Coupled Setting>Ethernet>Your Network CARD and press the Communication Test button to test the communication.

Good and the Connection is OK.

Insert FX5-ENET/IP
Now we can insert the FX5-ENET/IP module into out project.
Please click the Module Configuration.

Choose FX5-ENET/IP module in the Element Selection Tab and insert it.
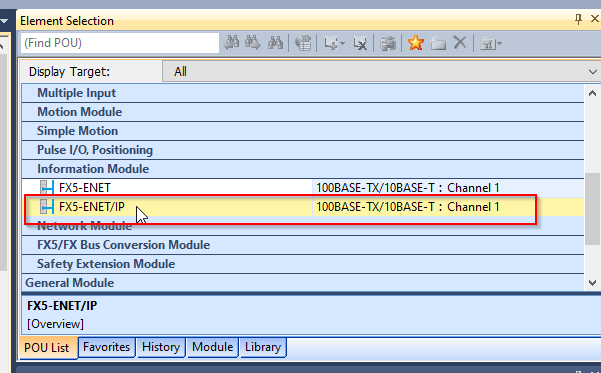
Done.

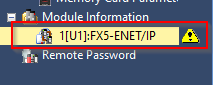
Parameter Setup
The next step – we need to configure the module parameter.
Go to Module Information>FX5-ENET/IP.
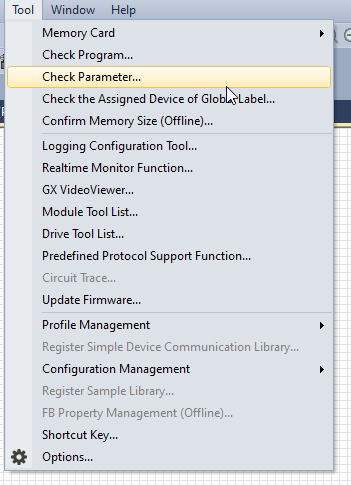
Go to the Basic setup>Own Node Settings>IP and configure your IP address.

Go to Tools>Check Parameters to Check the parameters are valid or not.
Download
Before downloading the project inside the CPU, Let’s Rebuild all the sources first.

Then Write to PLC.

Choose all options and Execute it.

Would you want to Remote Stop?
Yes.
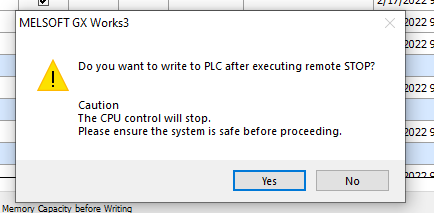
Would you want to overwrite it?Yes.

Please wait a mins..

Reset your CPU to finish the operation.

Library Operation
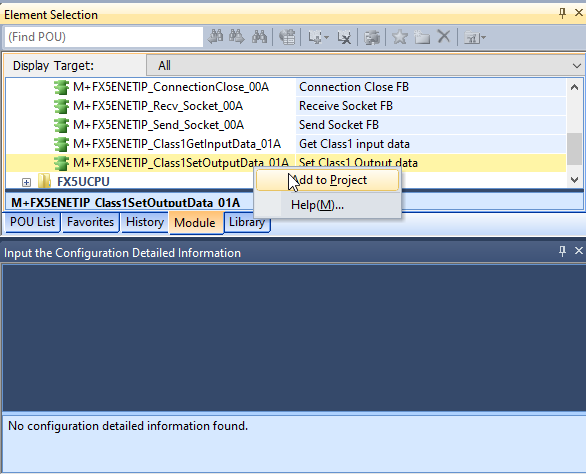
Now we can insert the FXEIP communication library.
Go to Project>Library Operation>Register to Library List>User Library.

Open the Module Tab.

Insert the Module Label of the EIP Module.

And Also the Function Block.

we will write the data to the adapter also, Function Block of SetoutputData_01A is necessary.
EIP Configuration Tools
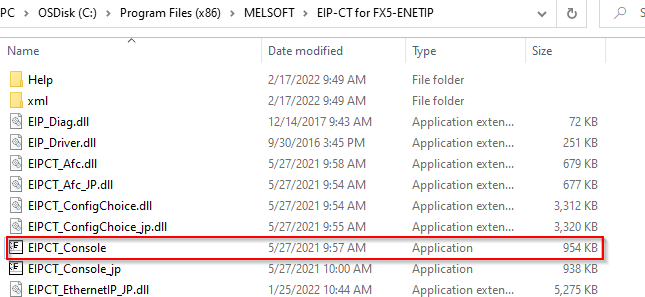
Please download the EIP Configuration Tools from here:

You will find a new directory named EIP-CT for FX5-ENTIP.

Please Run the EIPCT_Console as Admin.
The operation is the same as EIP Configuration Tools of IQ-R CPU, I will not explain the operation here.

This connection No. is used as the Function Block parameters.

Program
VAR
| VAR counteri :Word [Signed] fbwriteCmd1 :M+FX5ENETIP_Class1SetOutputData_01A; fbConnection4:M+FX5ENETIP_Class1GetInputData_01A; fbConnection5:M+FX5ENETIP_Class1GetInputData_01A; fbConnection6:M+FX5ENETIP_Class1GetInputData_01A; END_VAR |
Code
| //init //Emable the connection IF NOT M0 THEN U1\G37.0:=TRUE; END_IF; //please check the value from Un\G5198 //Connection1 //2bytes Data U1\G60000:=16#F00F; //Connection2 //4bytes Data U1\G60750:=16#A00A; U1\G60751:=16#B00B; D200:=16#BCDD; fbwriteCmd1( i_bEN:= TRUE ,i_stModule:= FX5ENETIP_1 ,i_uConnectionNo:= 1 ,i_uOutputData:= D200 ,o_bENO=> M9 , o_bOK=>M10 ,o_bErr=> M11 ,o_uErrId=> D222 ,o_uStatusId=> D224 ); //Connection3 //1444bytes Data Z0:=0; FOR counteri :=0 TO 749 DO Z0:=counteri; U1\G61500Z0:=counteri+1; END_FOR; // D40.3:=TRUE; D50.3:=TRUE; D60.3:=TRUE; fbConnection4( i_bEN:=D40.3 ,i_stModule:=FX5ENETIP_1 ,i_uConnectionNo:=4 ,o_bENO=>D40.0 ,o_bOK=>D40.1 ,o_bErr=>D40.2 ,o_uErrid=>D42 ,o_uStatusId=>D44 ,o_uInputData=>D4000 ); fbConnection5( i_bEN:=D50.3 ,i_stModule:=FX5ENETIP_1 ,i_uConnectionNo:=5 ,o_bENO=>D50.0 ,o_bOK=>D50.1 ,o_bErr=>D50.2 ,o_uErrid=>D52 ,o_uStatusId=>D54 ,o_uInputData=>D5000 ); fbConnection6( i_bEN:=D60.3 ,i_stModule:=FX5ENETIP_1 ,i_uConnectionNo:=6 ,o_bENO=>D60.0 ,o_bOK=>D60.1 ,o_bErr=>D60.2 ,o_uErrid=>D62 ,o_uStatusId=>D64 ,o_uInputData=>D6000 ); ; |
Useful Buffer Memory
Here are some useful Buffer Memory Memory Offset.
All Memory offset is Calculated from G5198.

The output data size of each connection.
(Count by word)

各connectionのアドレスoffset。
The memory offset of each connection
