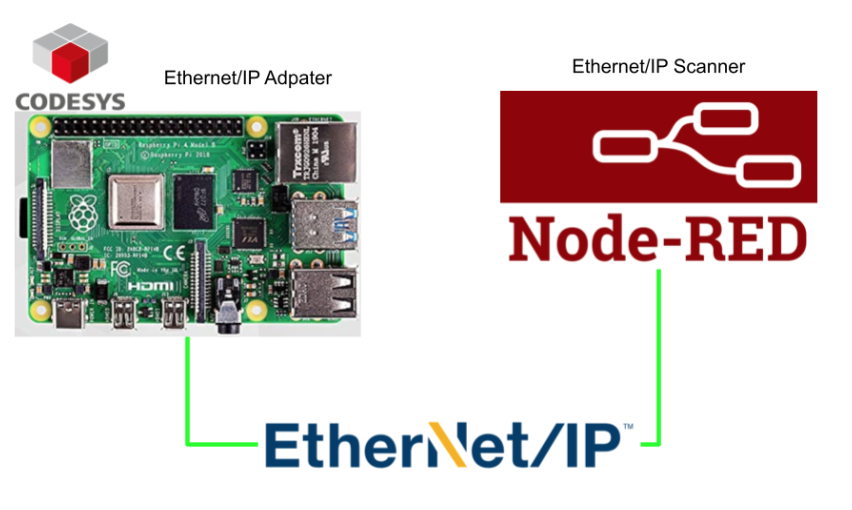
In this article, an Ethernet/IP Adapter is set up on Codesys installed on a Raspberry PI4, and an Ethernet/IP Scanner is set up in Node-Red to communicate.
(From a X(Twitter) request).
Node-Red is running as an Ethernet/IP Scanner.
https://serafintech.com/GettingStarted
Let’s start!
Install node
Install node-red-contrib-eip-io using the following command.
npm install @serafintech/node-red-contrib-eip-io
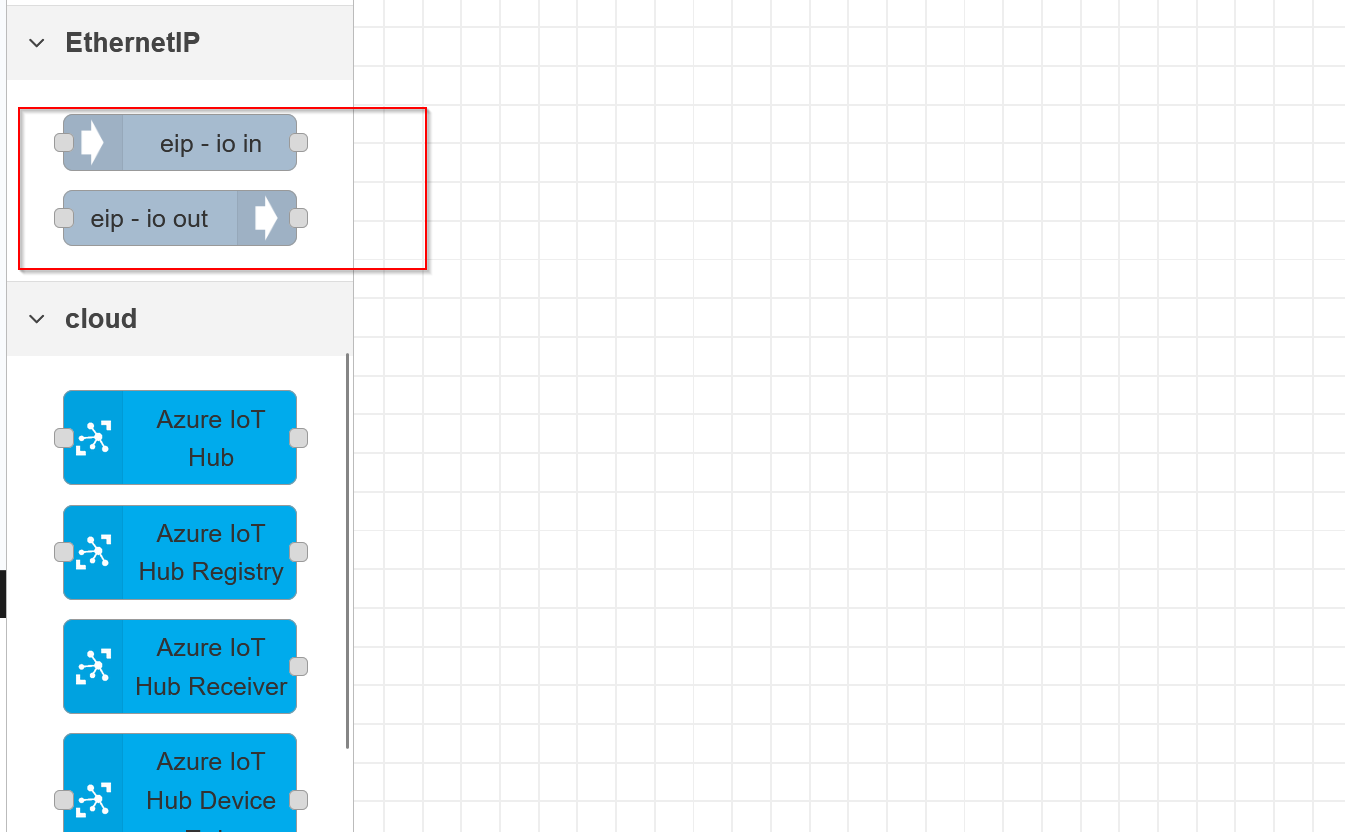
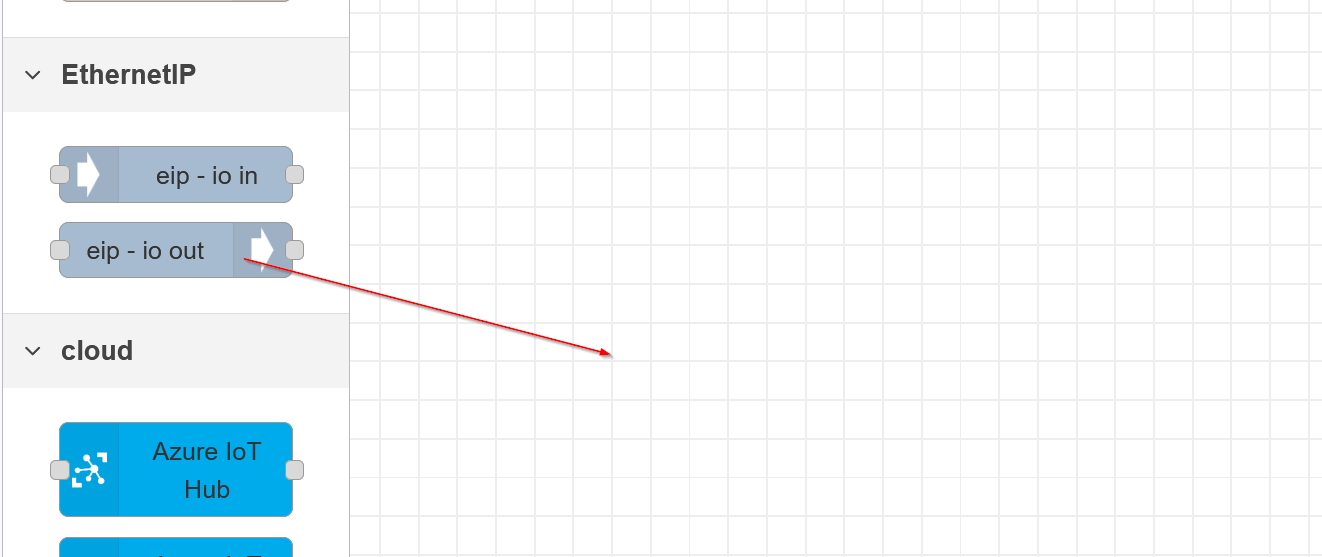
Nodes have been added to two eip-io in /eip-io out in Node-Red.
Implementation
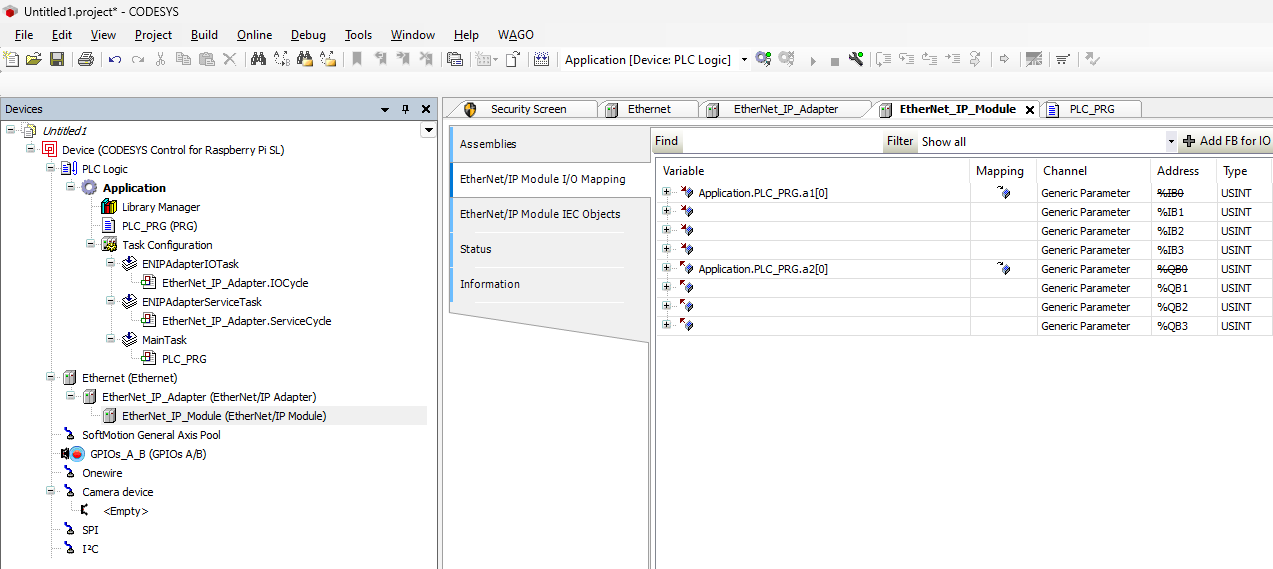
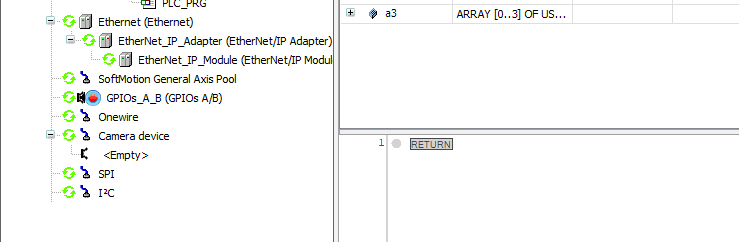
Codesys Side
On the Codesys side, only 4 Bytes input/output was built this time, but it should be configured according to the application.
Reference Link
https://serafintech.com/GettingStarted
NodeRed Side
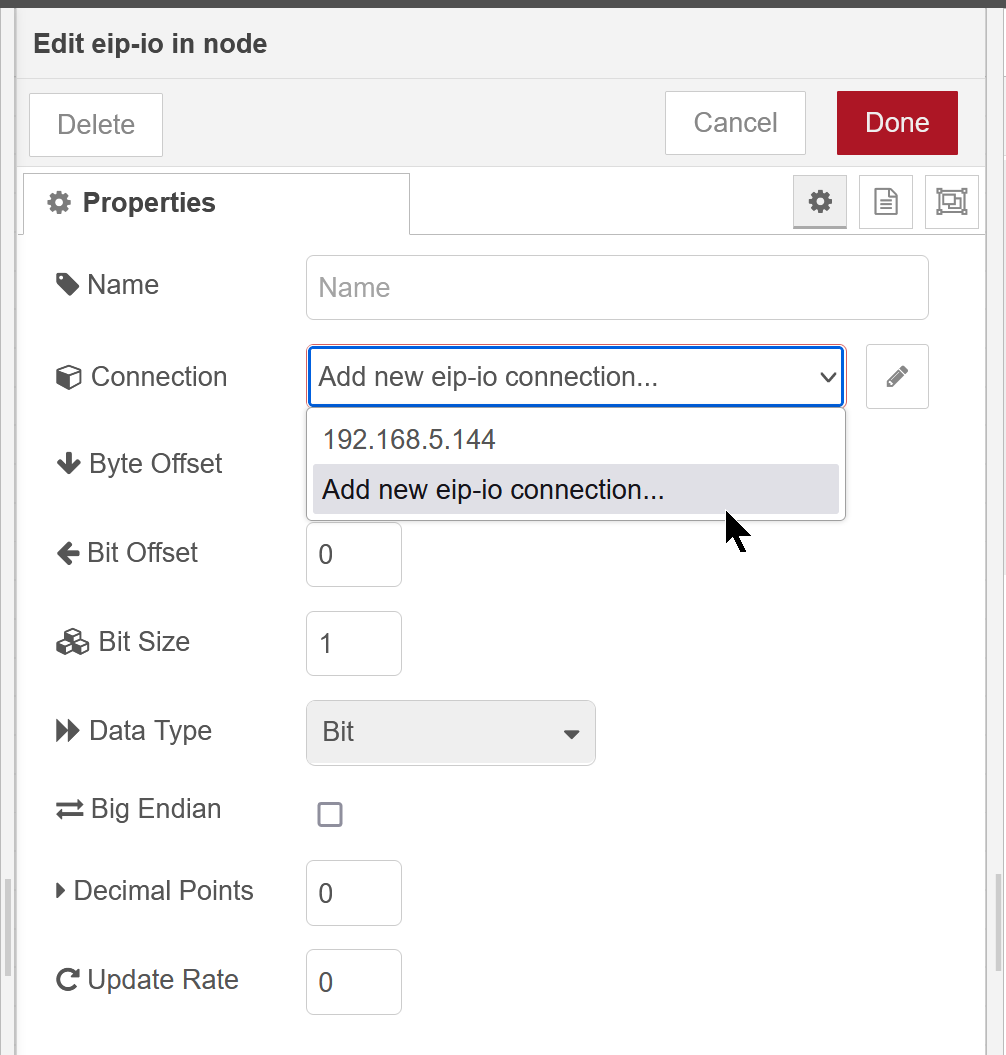
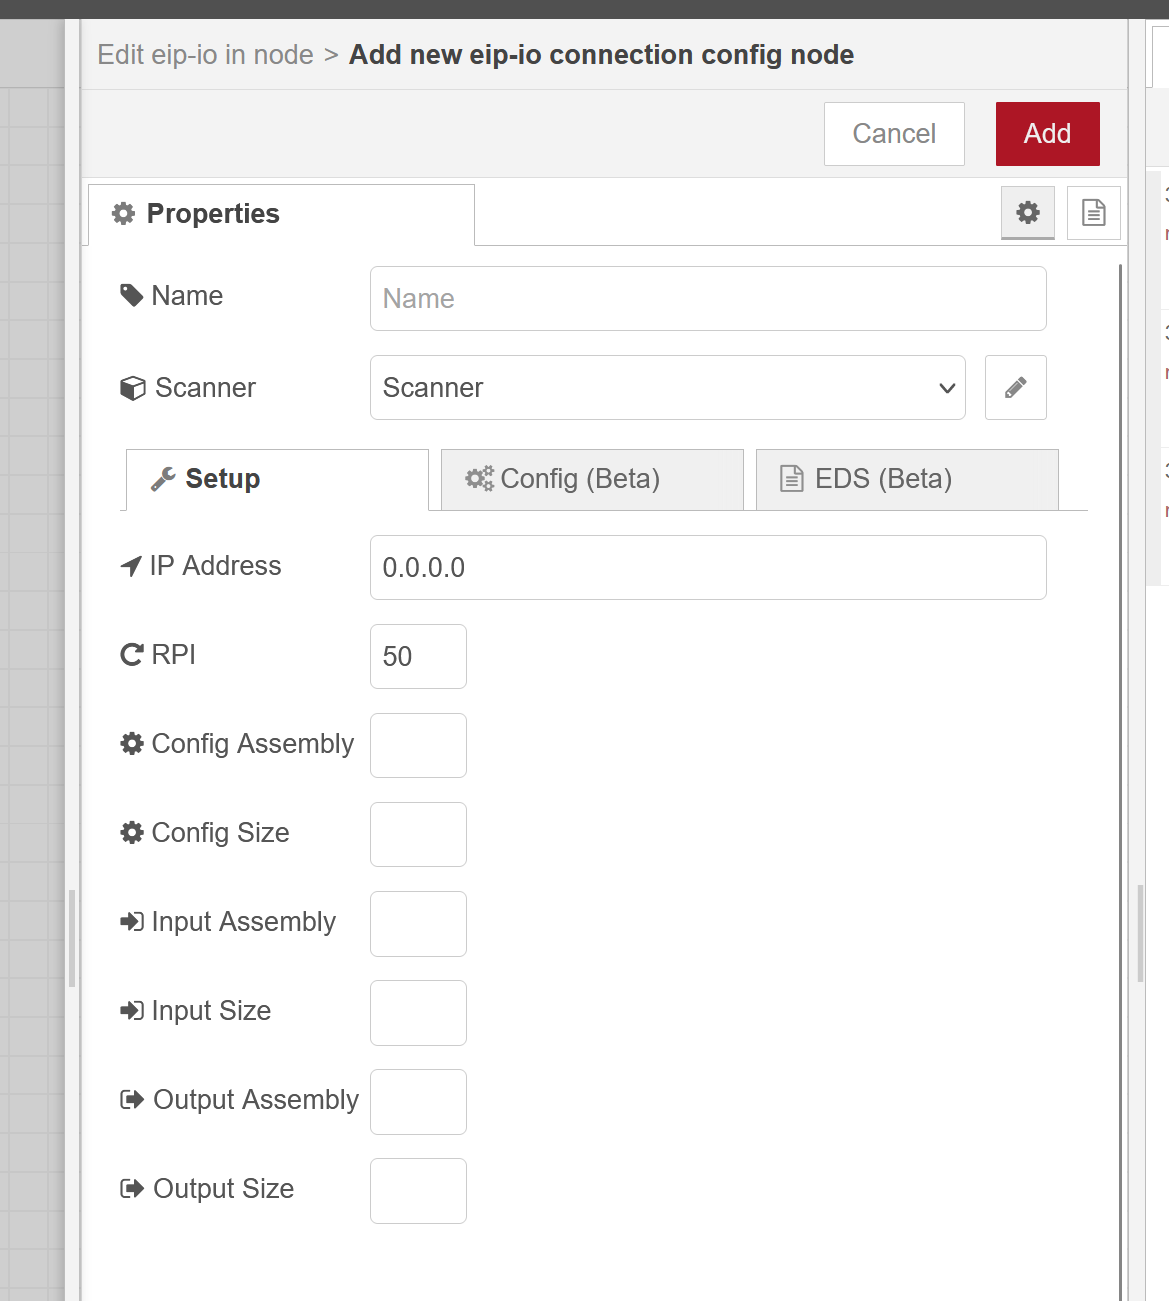
Add eip – io in Node and configure the connection settings regarding the Codesys Ethernet/IP Adapter.

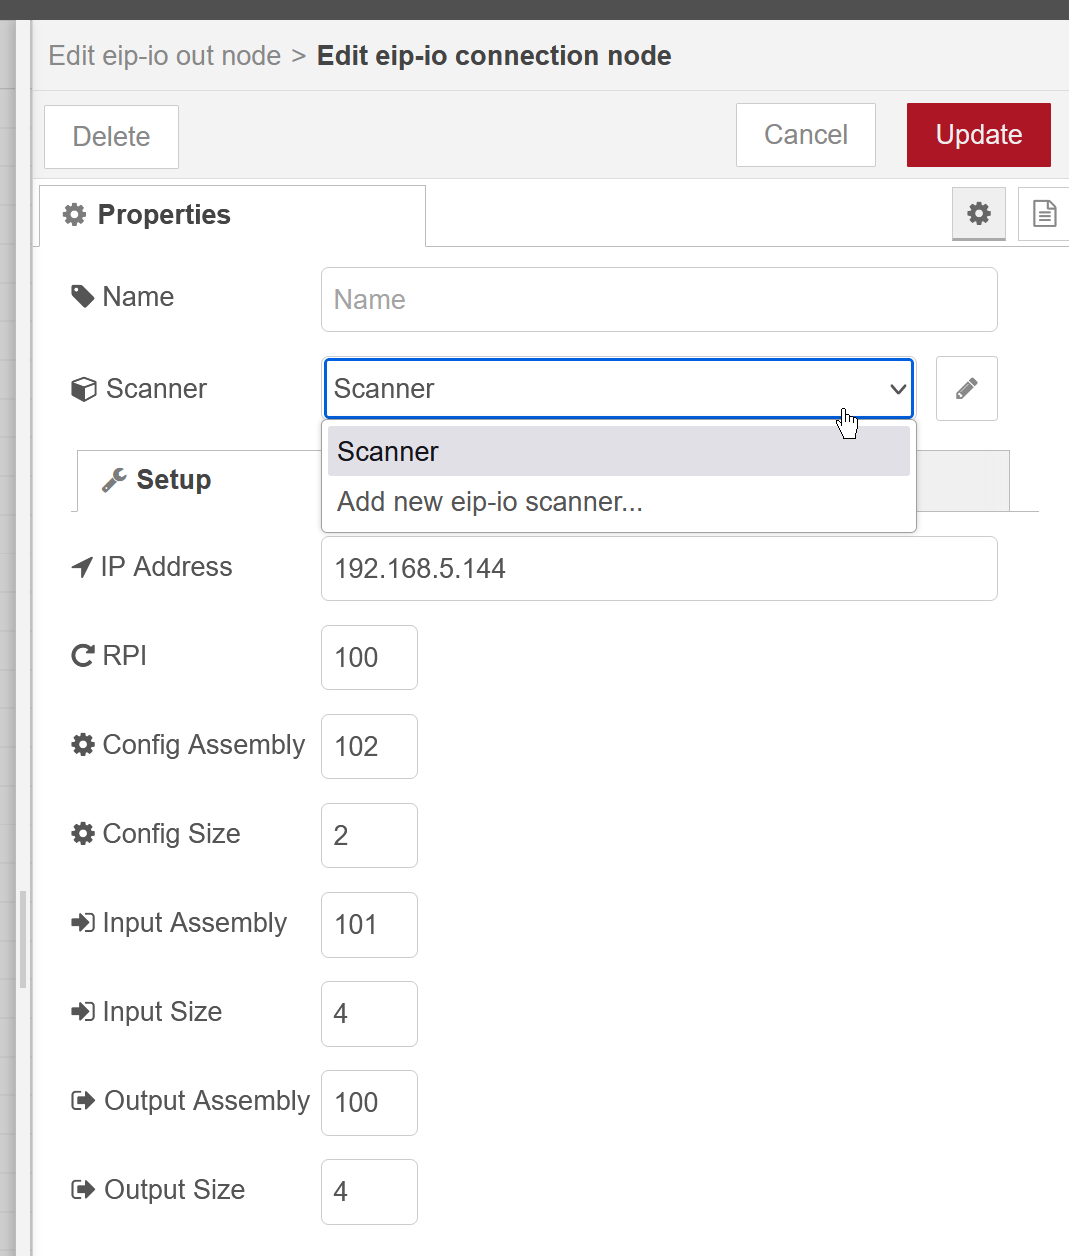
Add a new Connection with Connection>Add new eip-io connection.
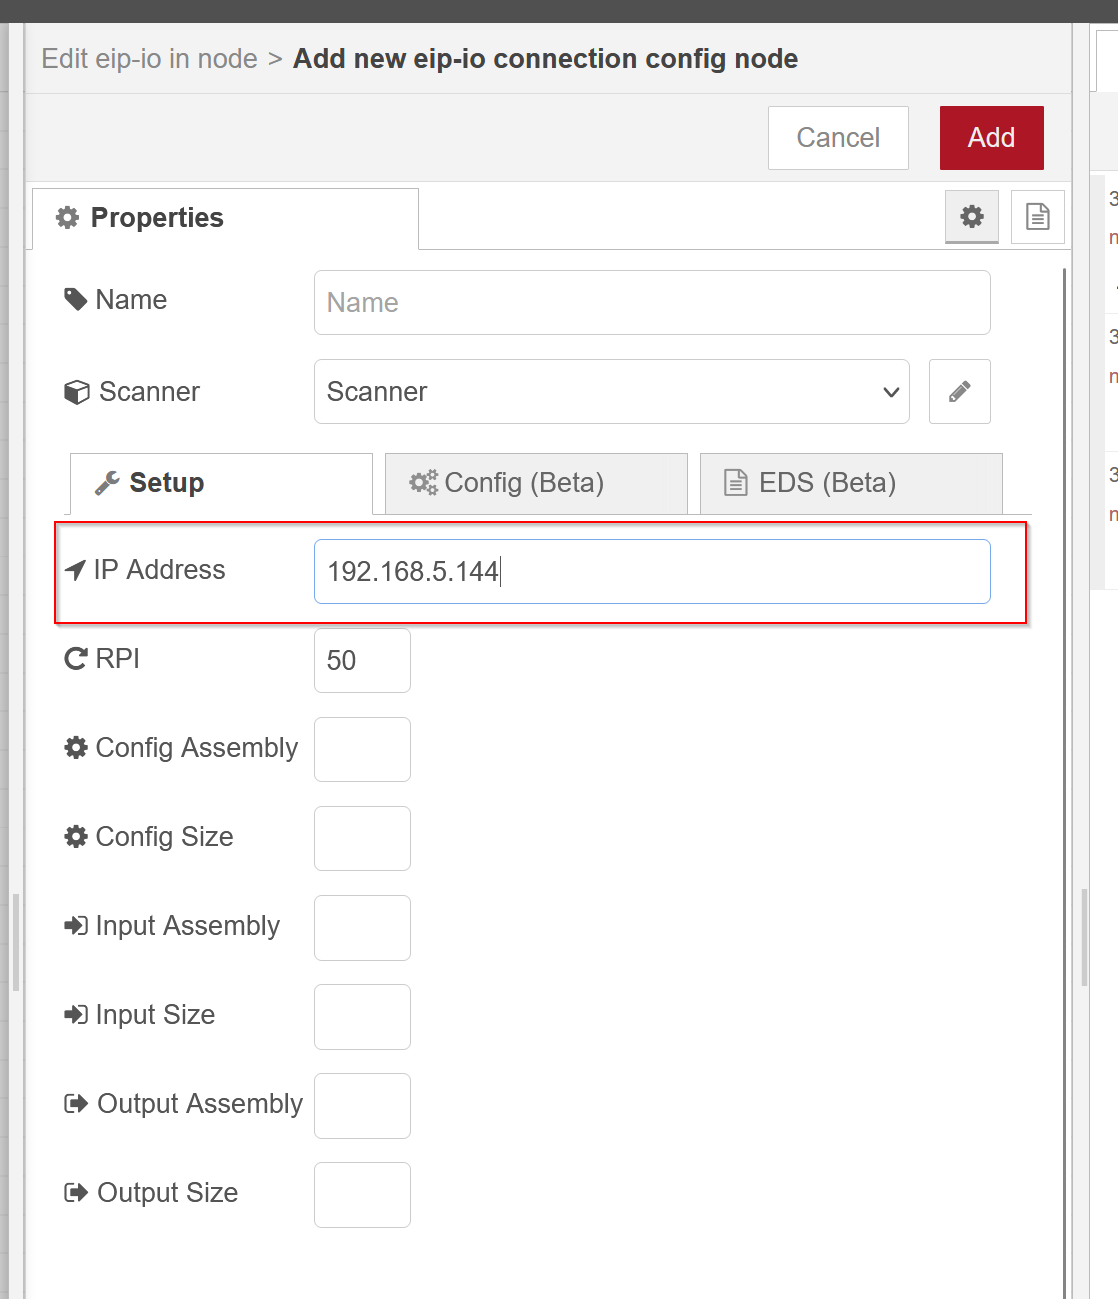
This is the Adapter connection settings screen.
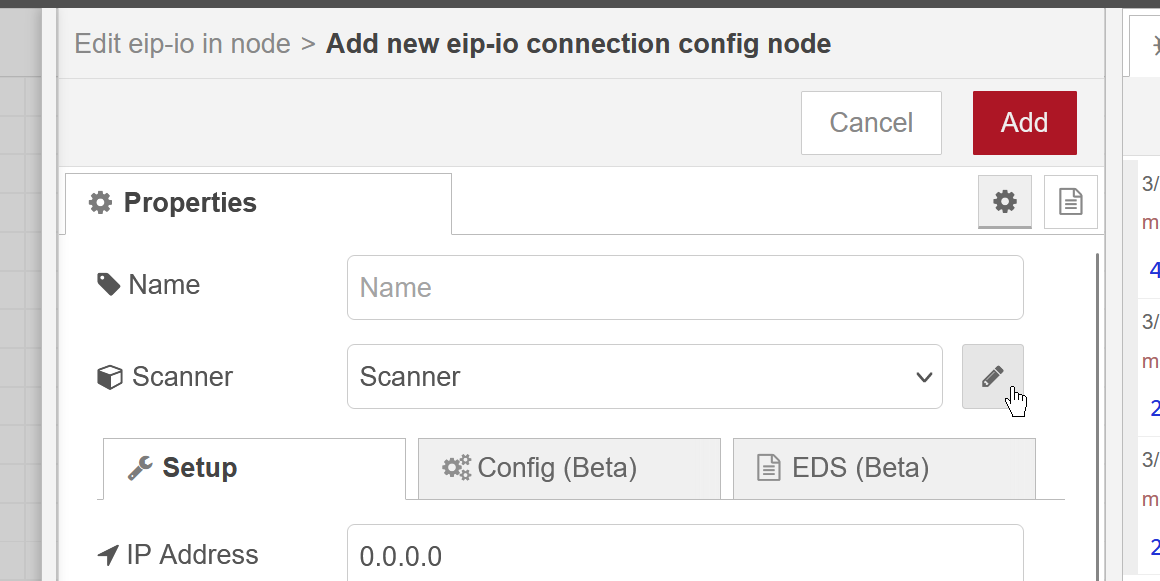
Click on the pencil icon.
Set a new Connection name in Name.
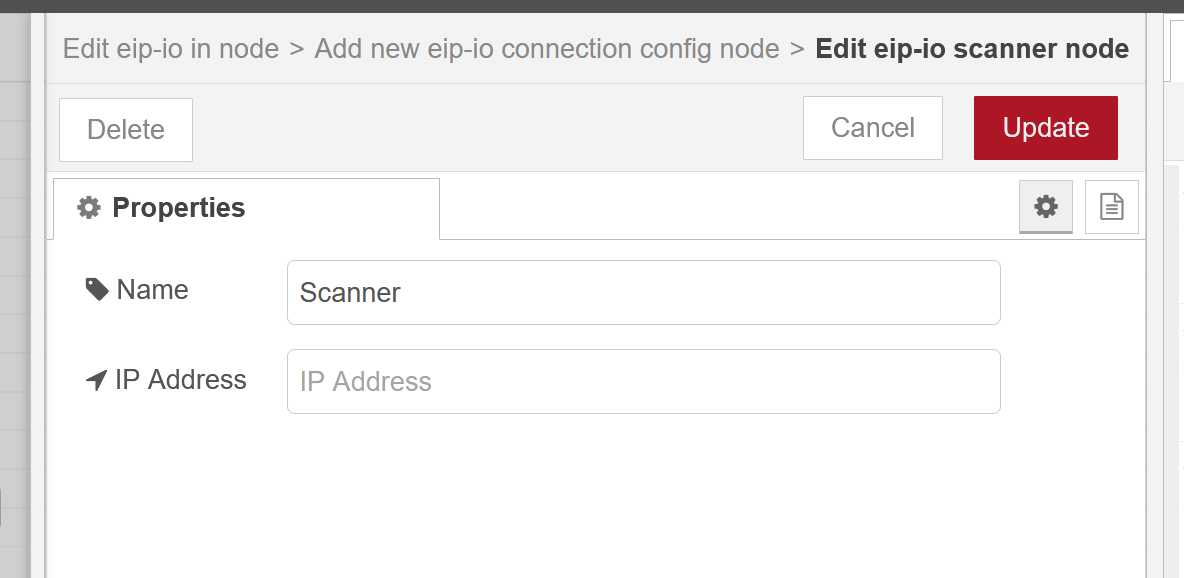
IP Address
Return to the Properties screen.
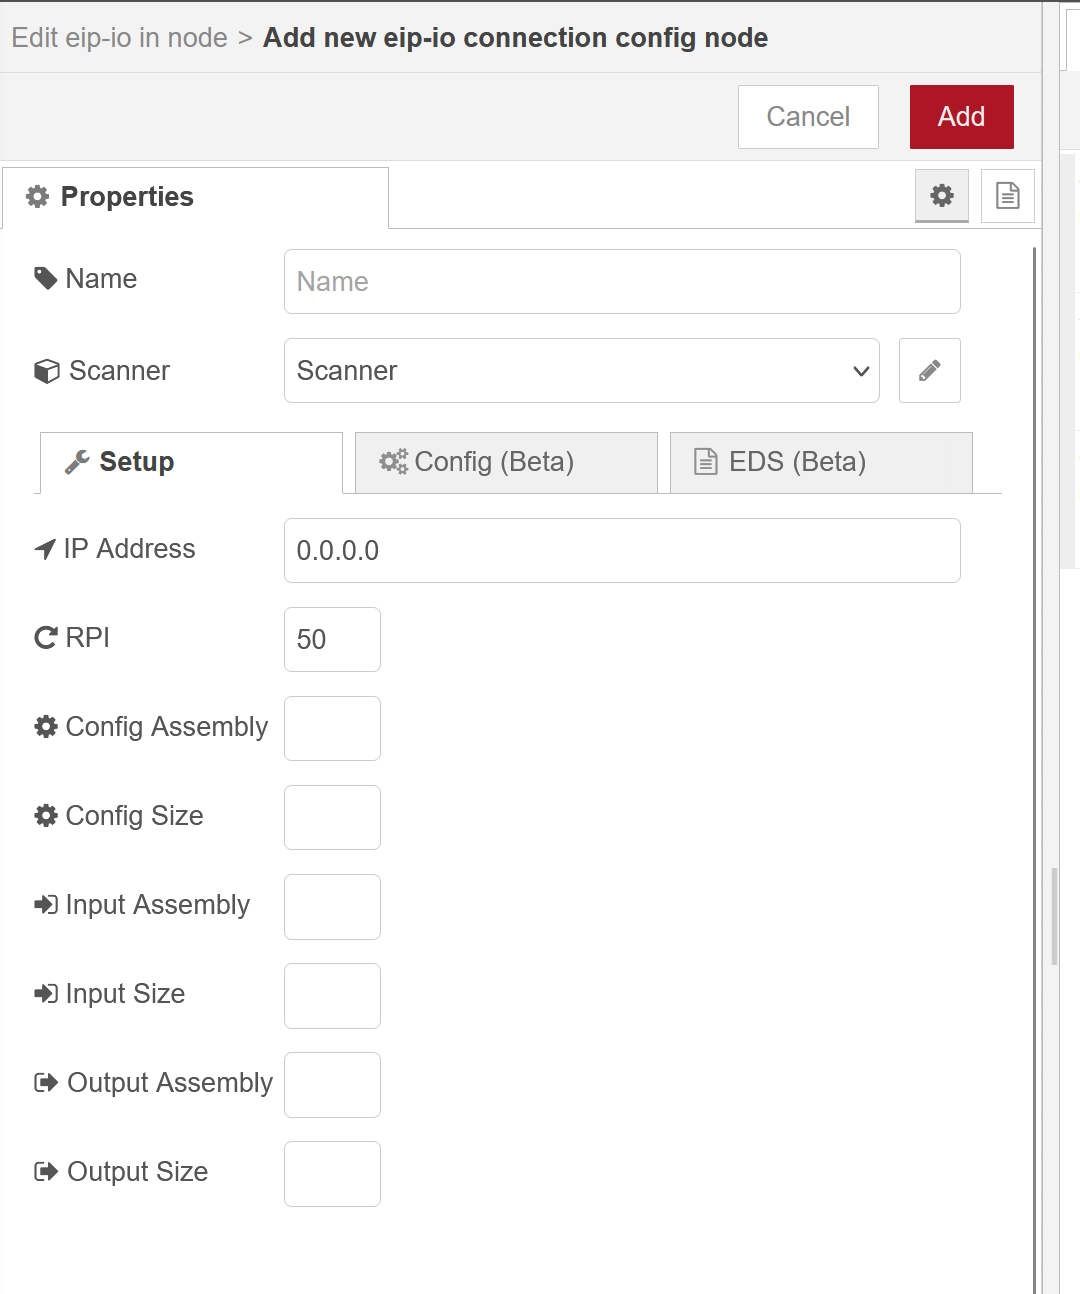
Set IP to match the Ethernet/IP Adapter.
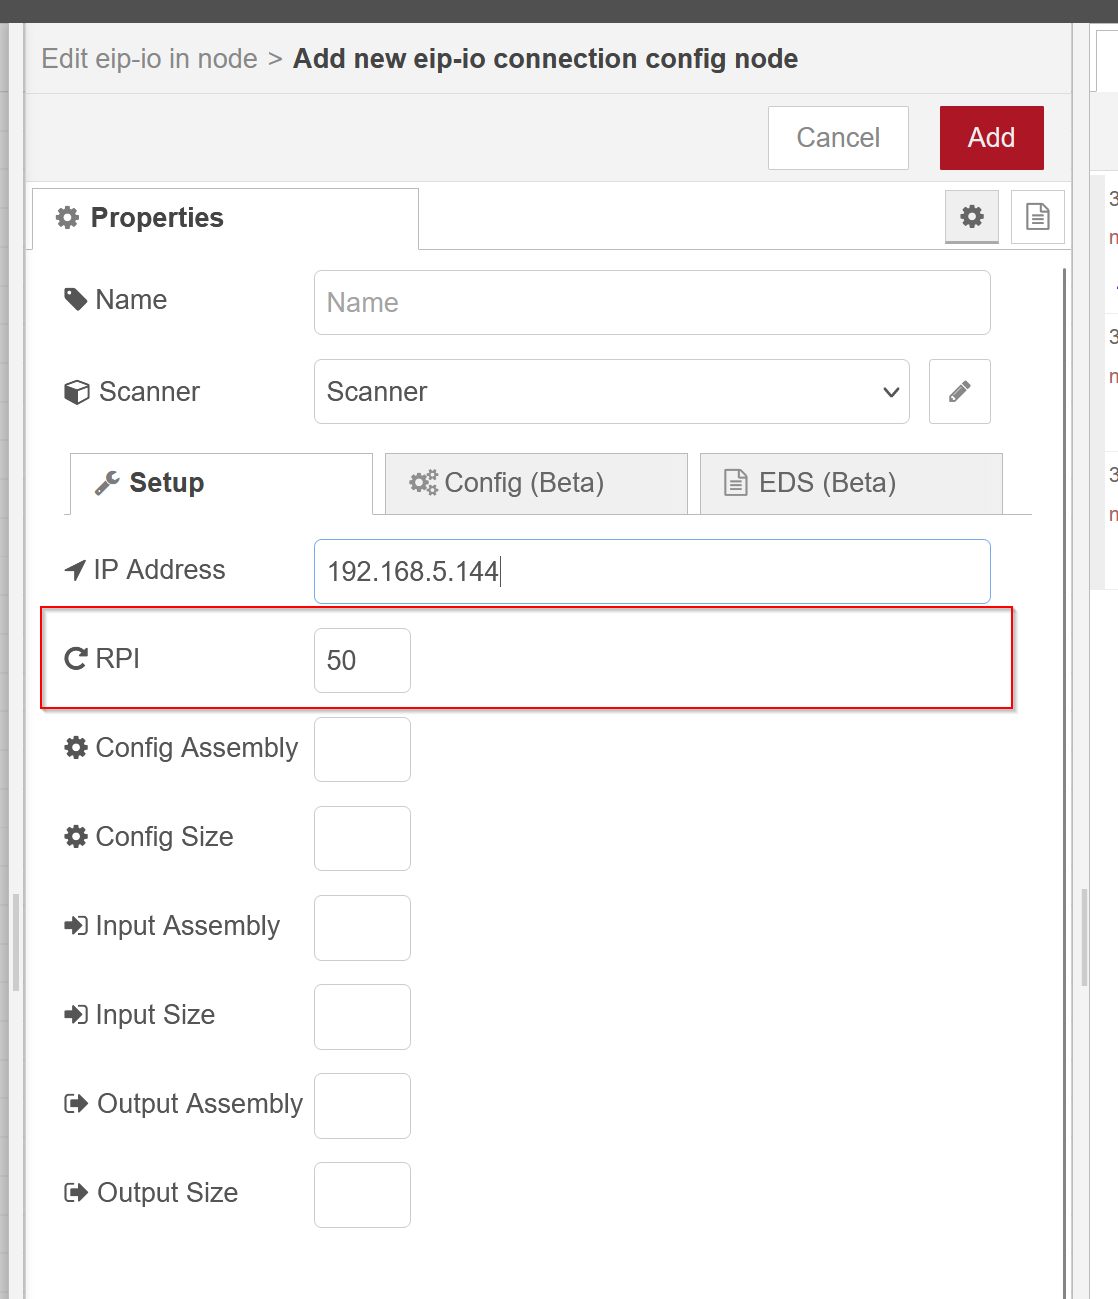
RPI
The RPI update cycle should be set according to the application and network load.
Assembly Settings
The next step is to configure the Assembly settings. This is the final configuration and will now be explained one by one.
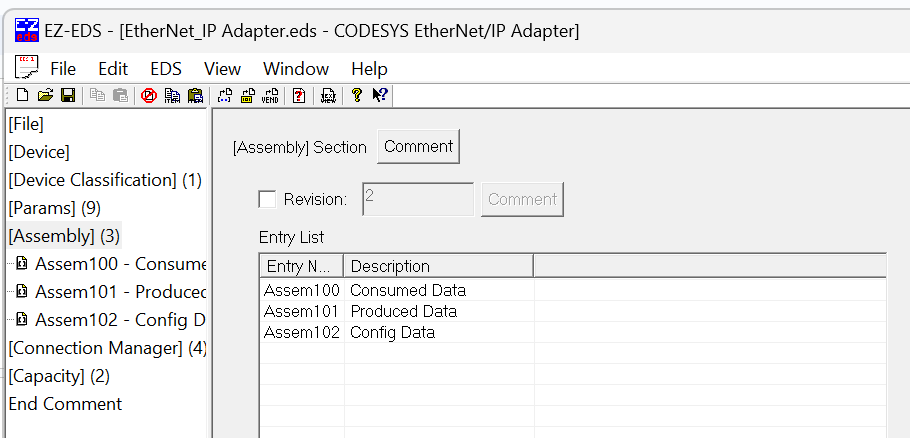
Use the EZ-EDS tool to analyse your EDS File.
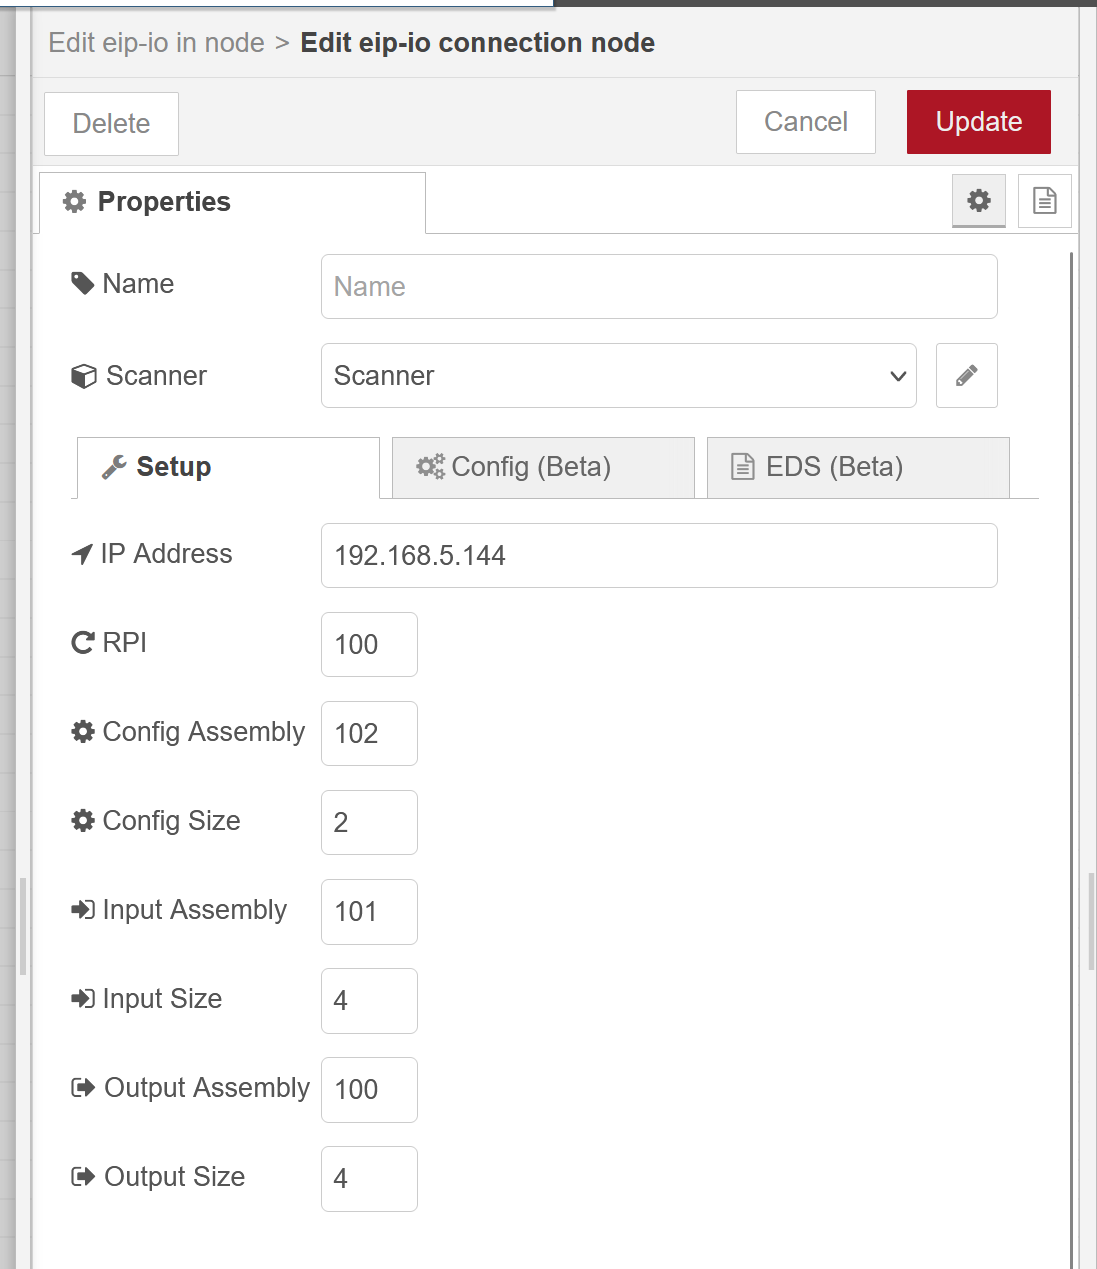
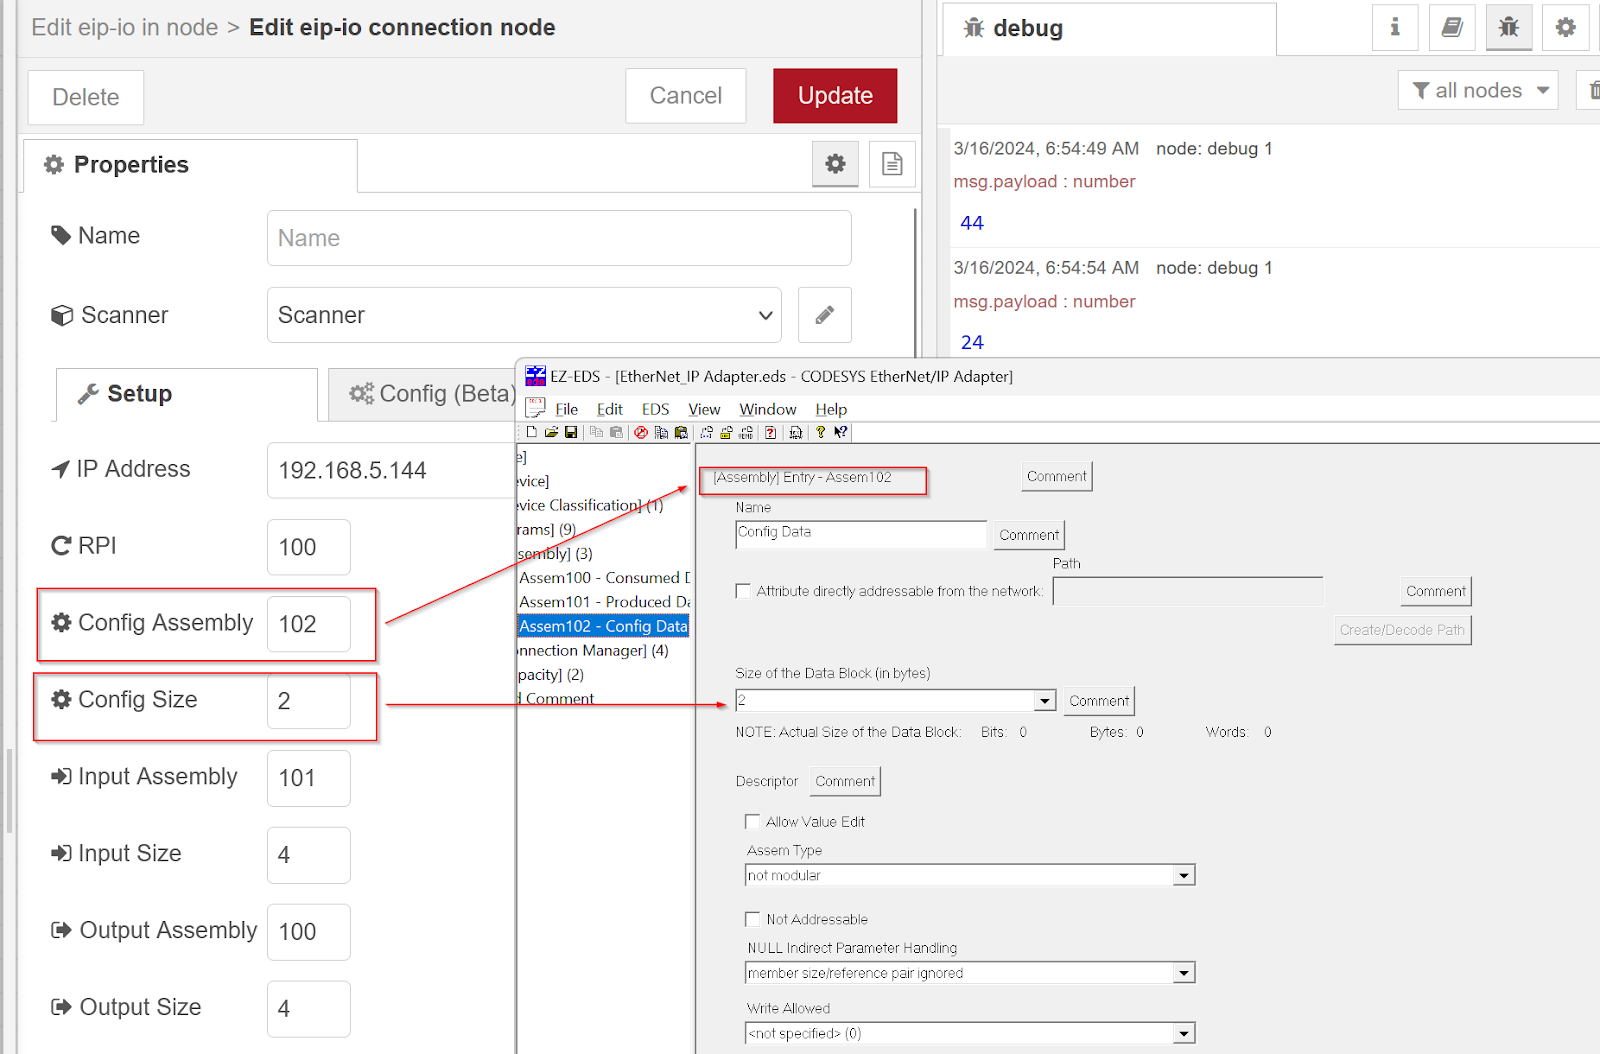
Config Assembly/Size
Set Config Assembly and Config Size to Assembly=102 and Config Size=2 for Codesys.
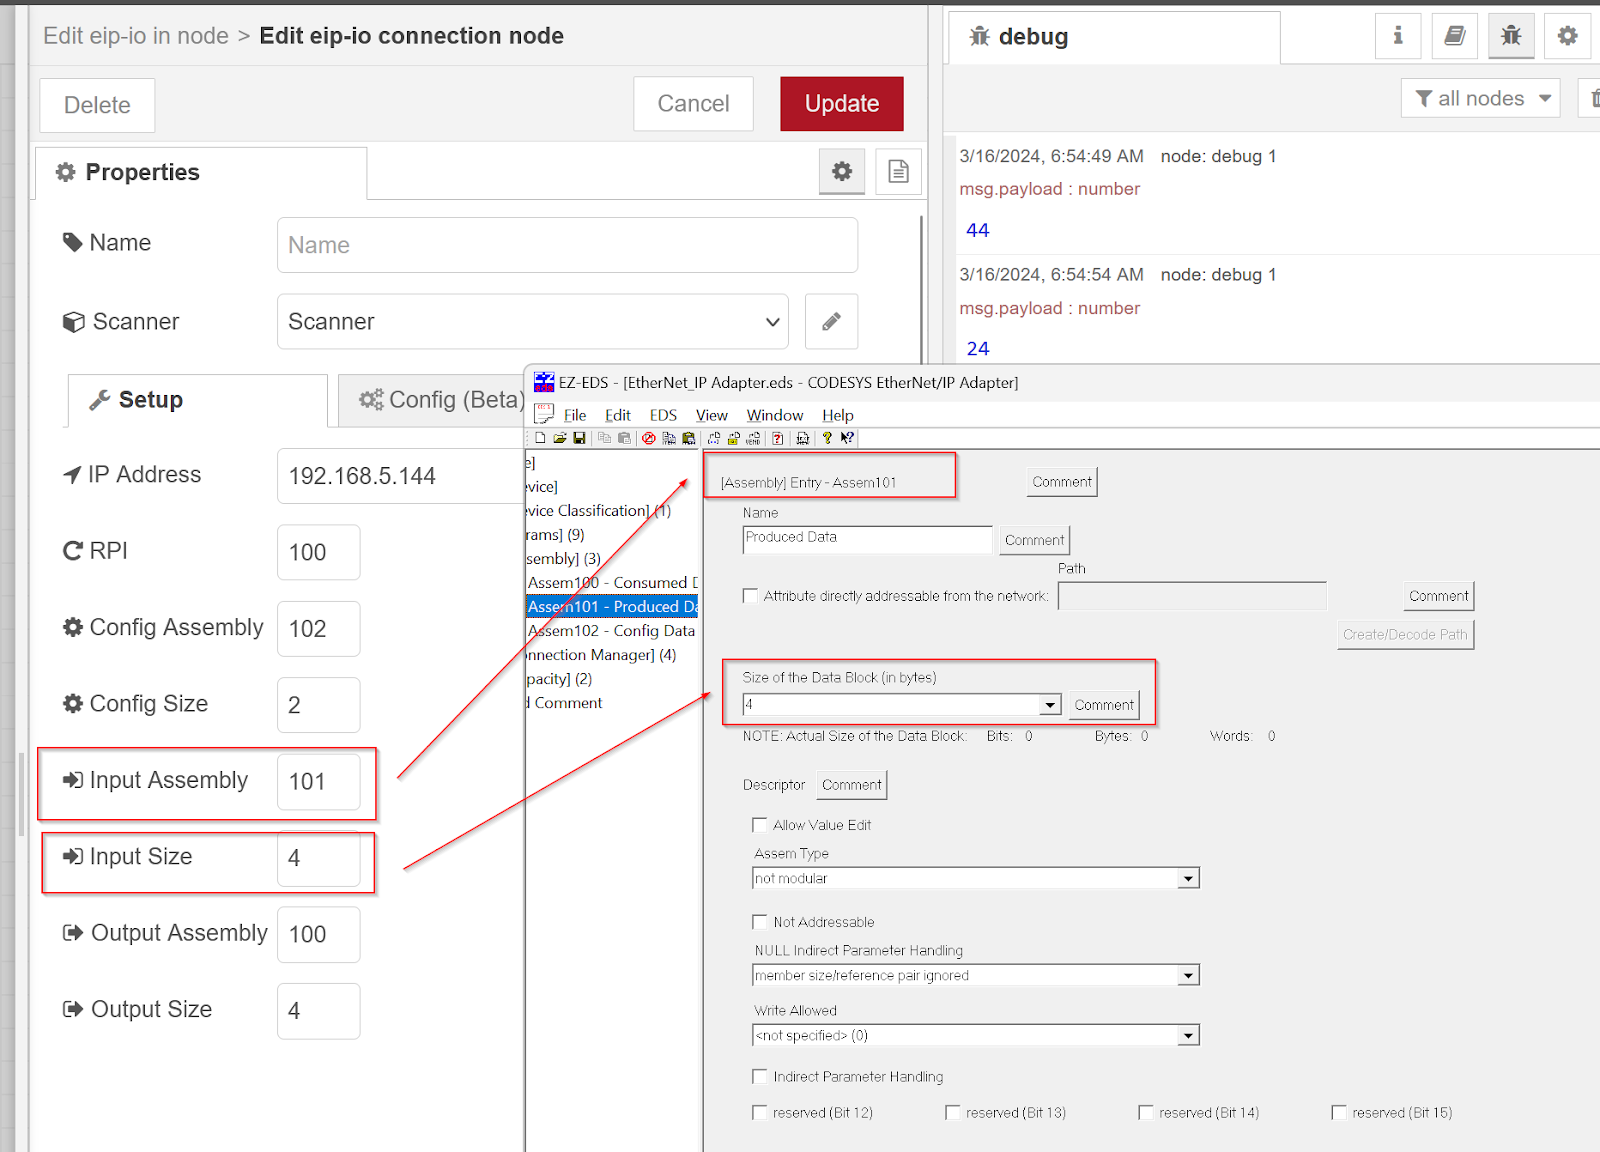
Input Assembly/Size
Set Input Assembly and Input Size to Assembly=101 and Input Size=4 (this time) for Codesys.
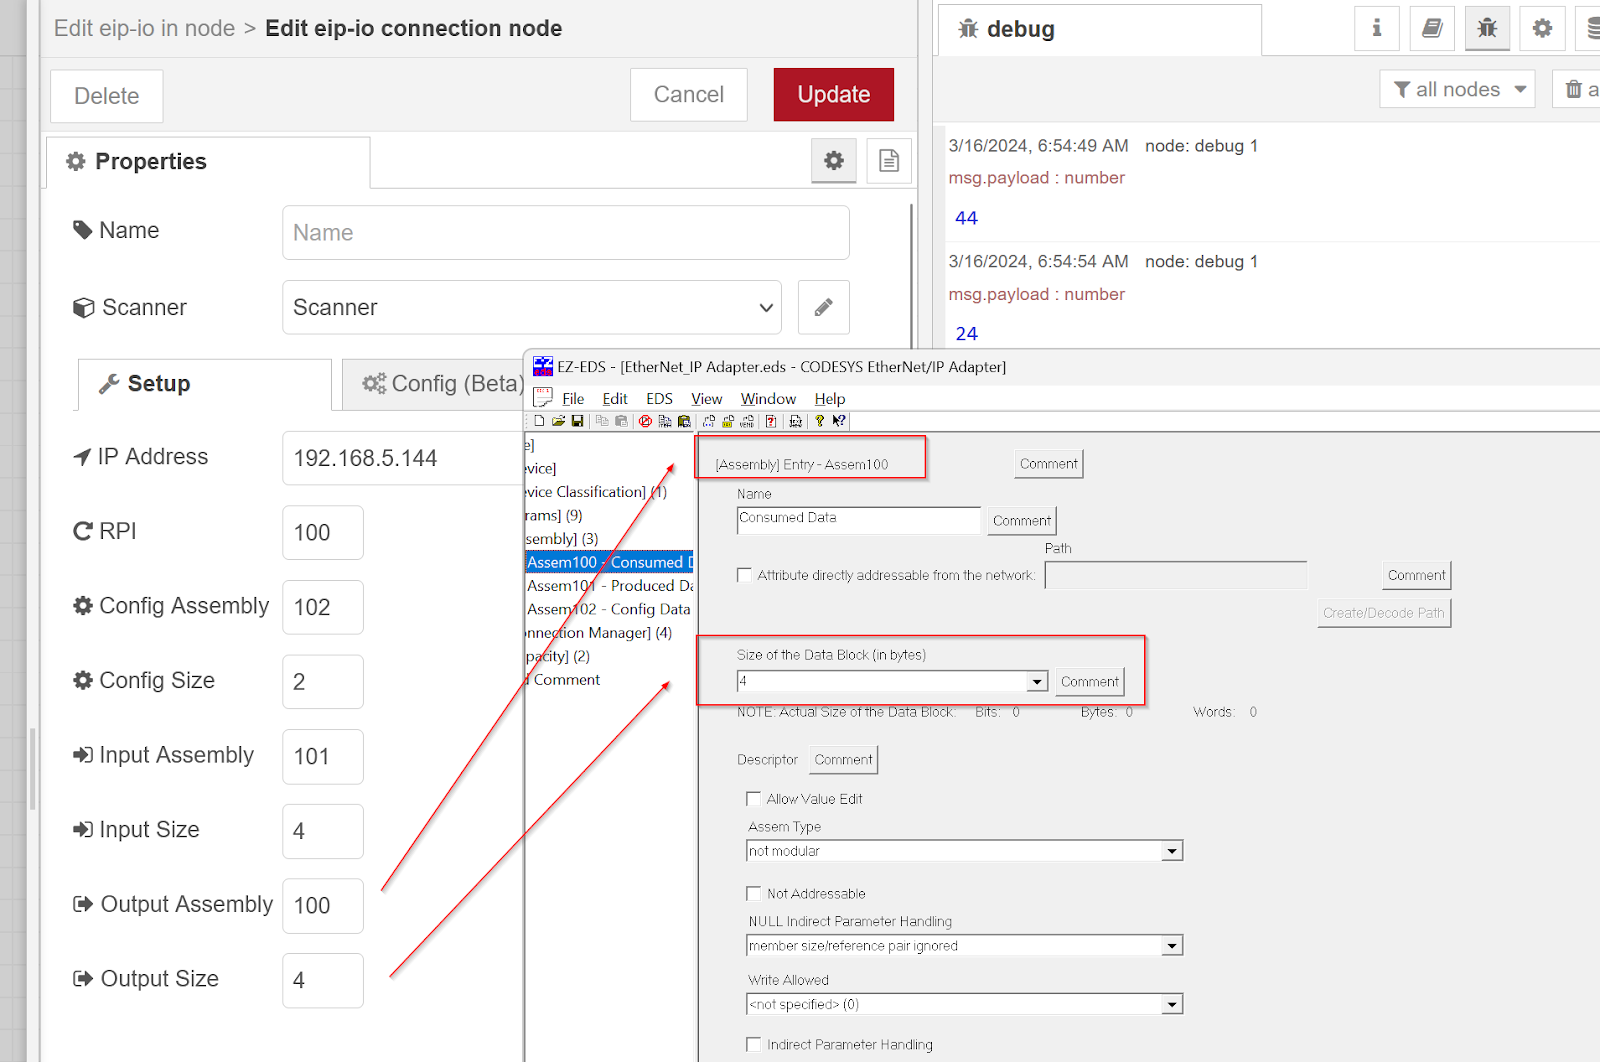
Output Assembly/Size
Set Output Assembly and Output Szie to Assembly=100 and Output Size=4 (this time) for Codesys.
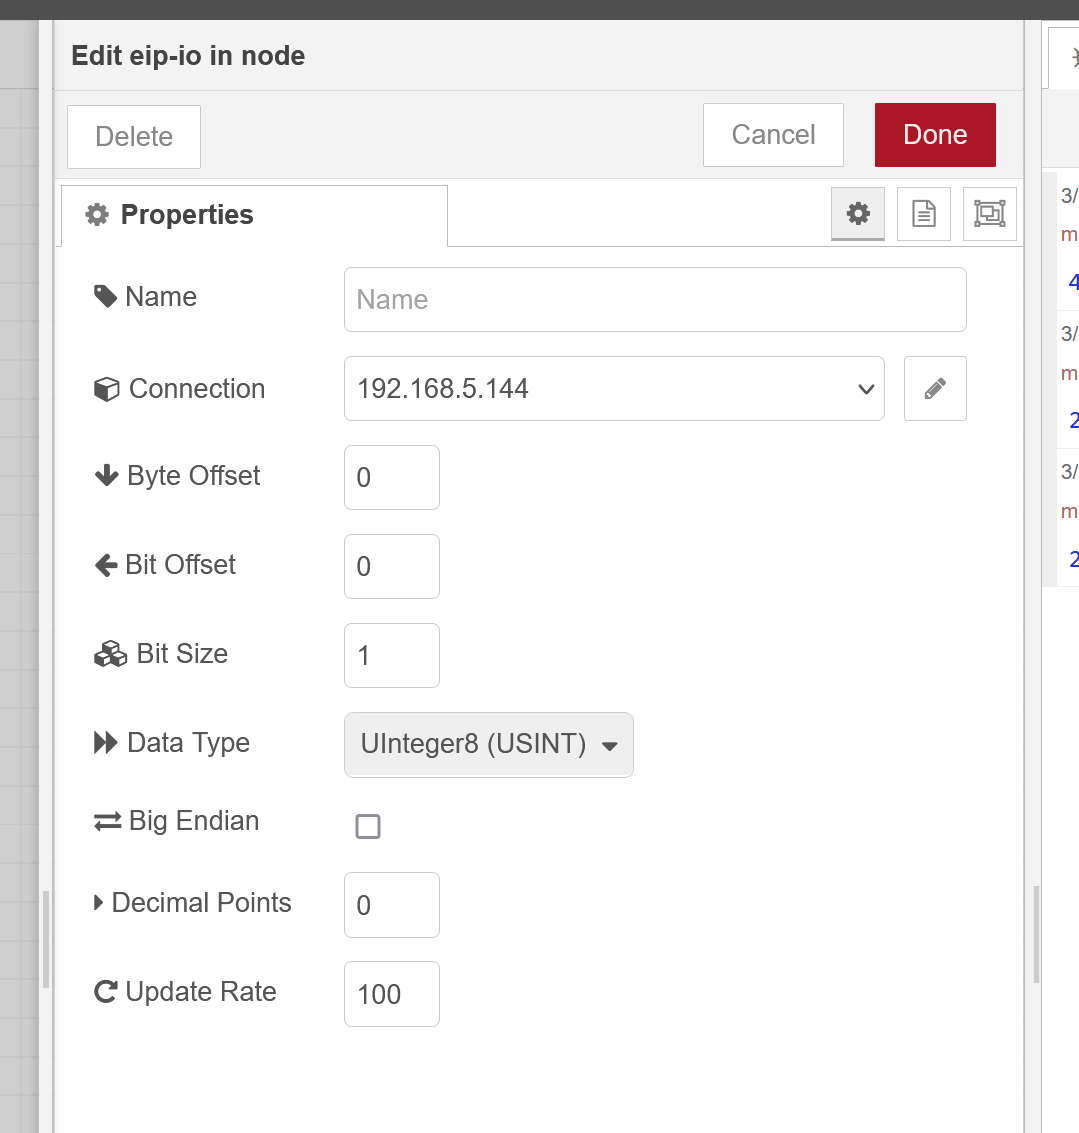
Input Node
After completing the basic connection settings, set the input data you want to retrieve in the Implicit Message. With the following settings, the 0th Byte is taken out as a USINT type in 4 Bytes.
Output Node
Set the output data you want to pass to Codesys via Implicit Message. The following configuration will pass the data received via USINT type and Payload for the 0 Byte in 4 Bytes.

Of course, in the Scanner settings section, select the Adapter you have just set up.
Change Output Value
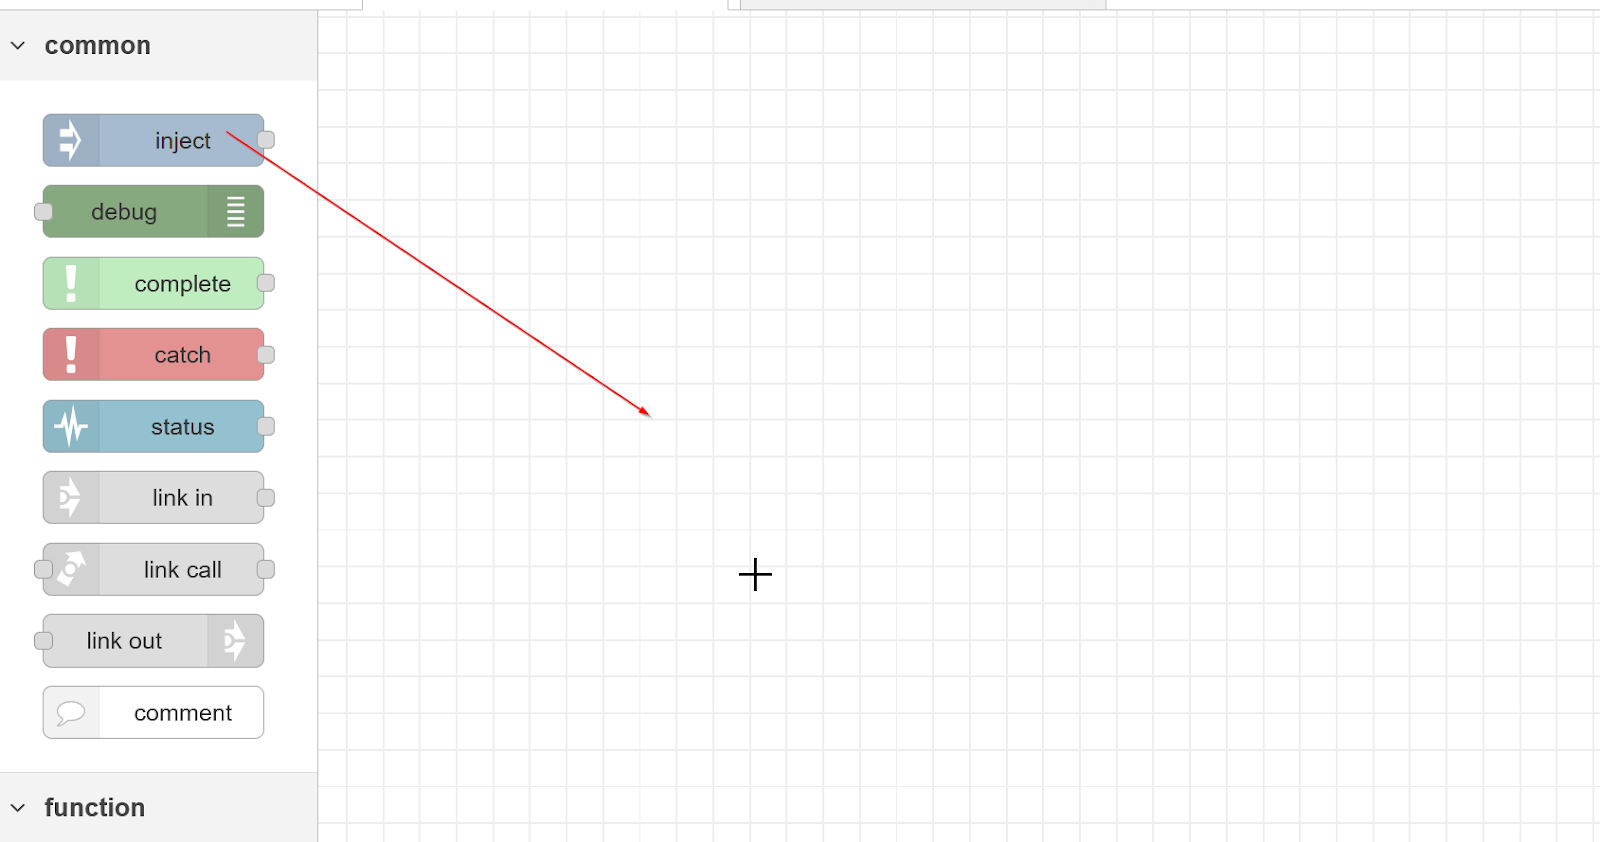
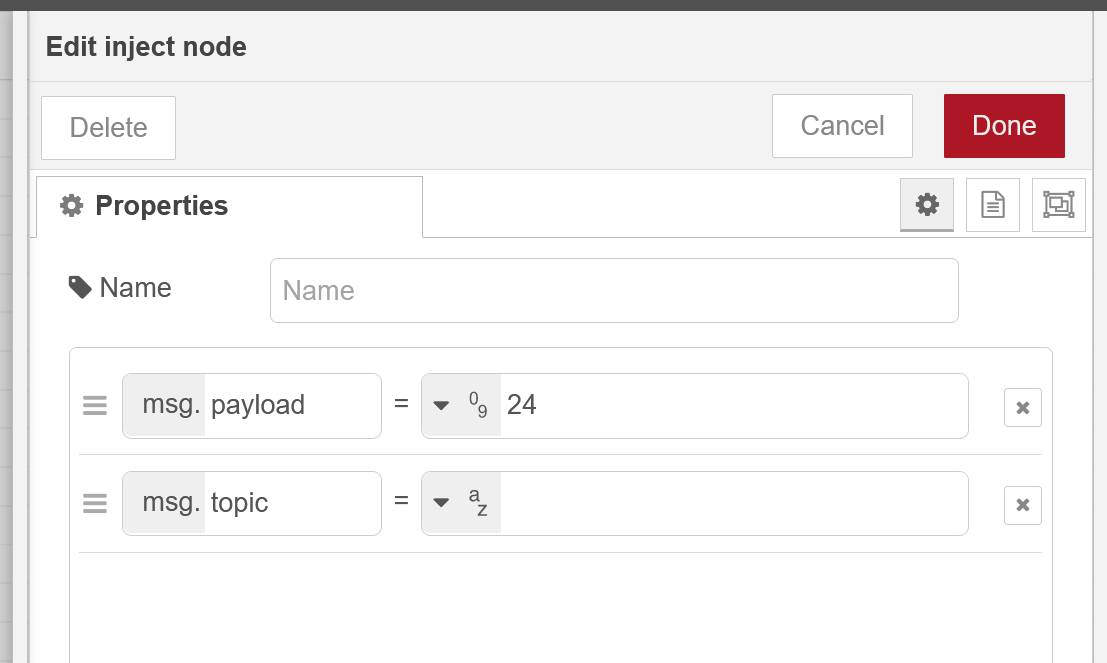
The last step is to put an Inject Node in order to output data to Codesys.
Set msg.payllaod to the number you want to write to Codesys.
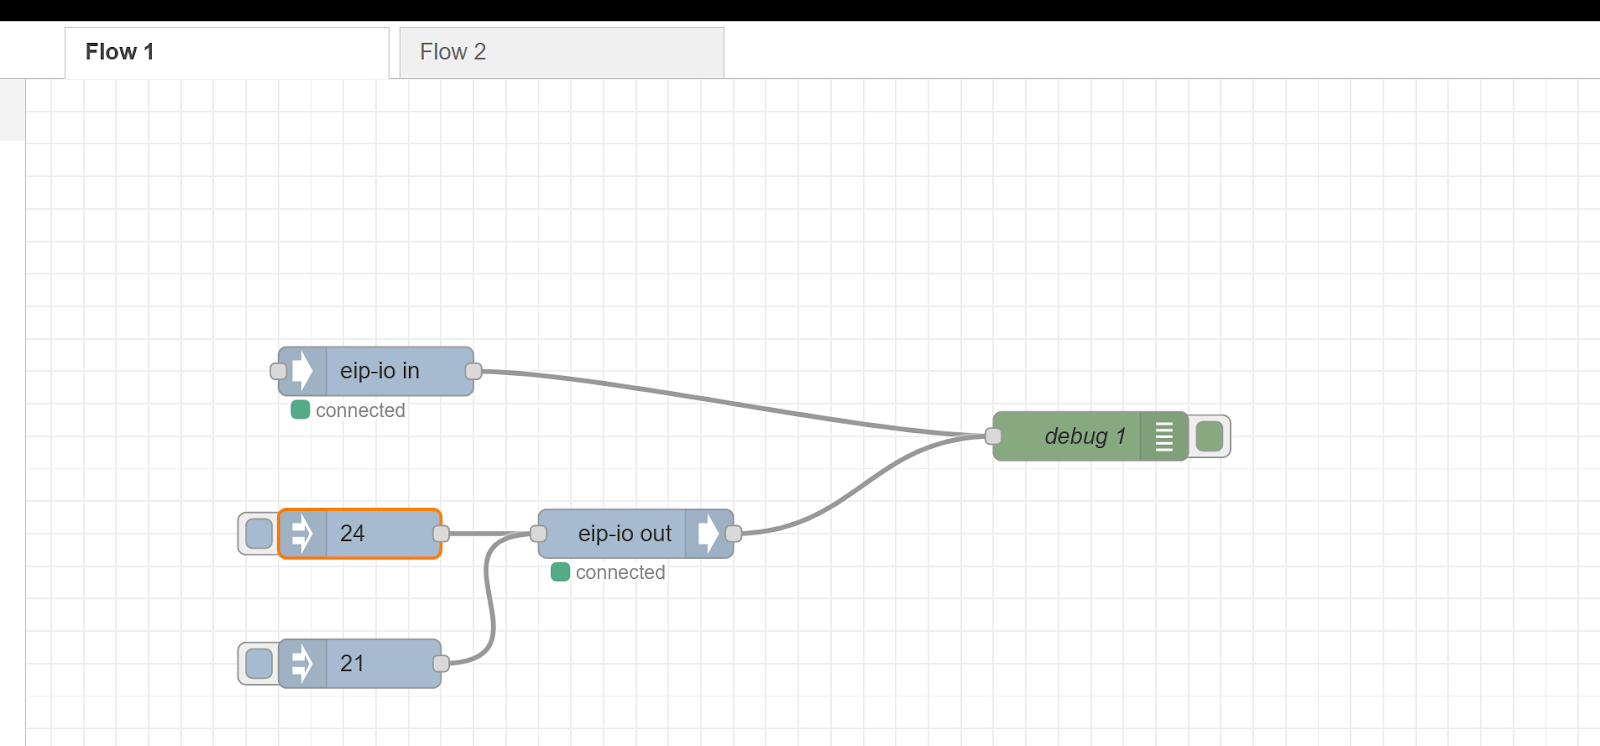
Flow
This is the final Flow.
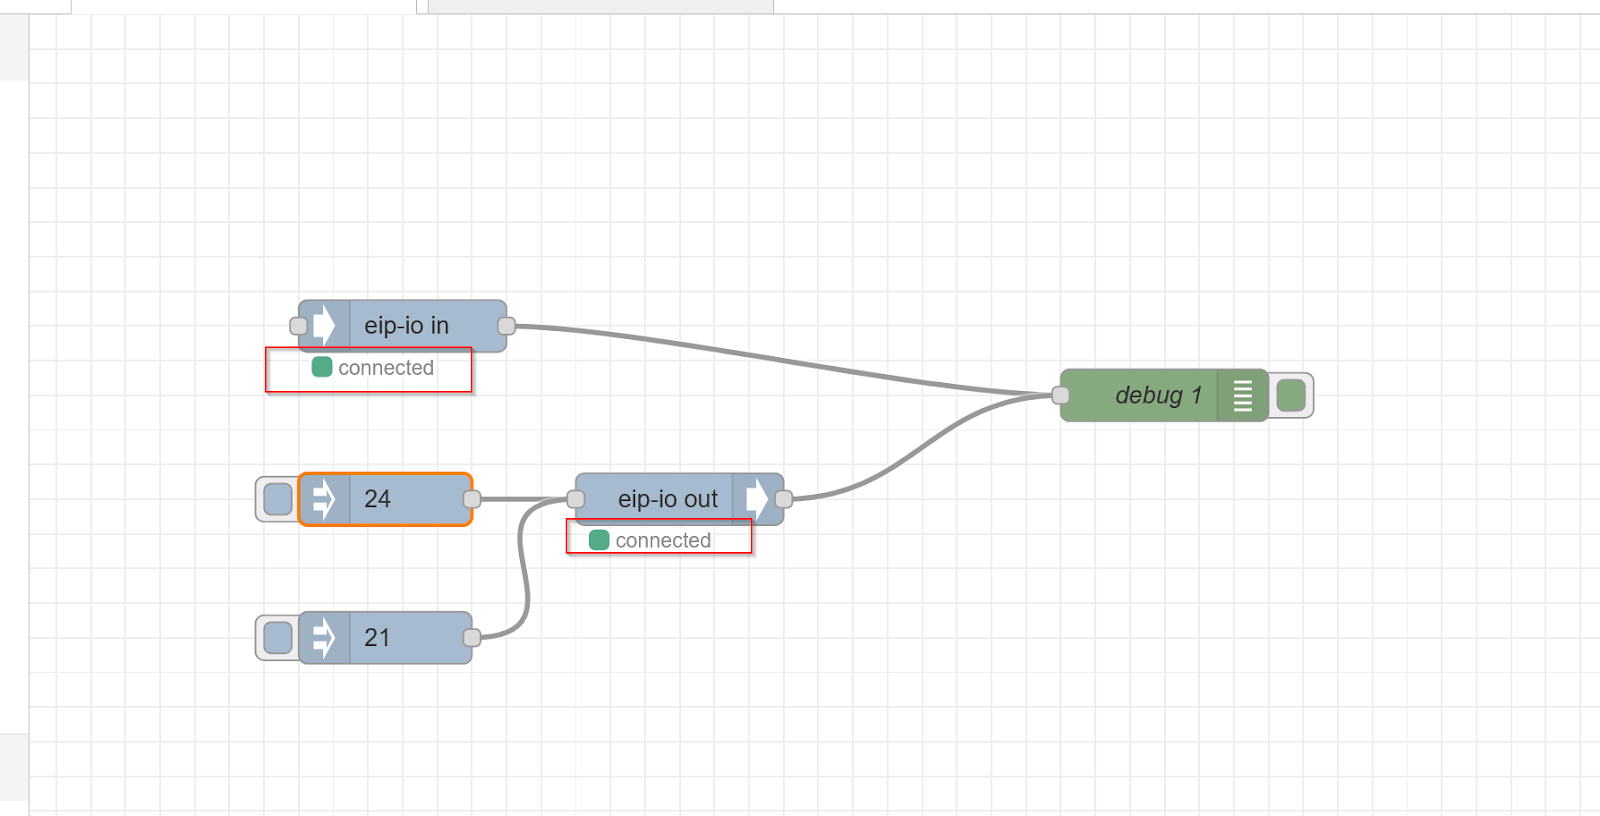
Result
Done!On the Codesys side, it is now connected to Node-red.
A green “Connected” text is also displayed in Flow.
You can check the operation in the video below.