Here is my new Tutorial to show you how to play with a JSmart710M panel with HMI and Codesys – A Smart HMI that powered by EXOR.
In Part1, I will explain the first setup while you receive this panel for the first time.
Let’s start!

JSmart710M
Here is the JSmart710M that I will use in this tutorial series. This Panel is an HMI powered by a 64-bit quad core CPU with a multi touch display, with 10/100 Ethernet port single cable for power and Ethernet.
A high-light point is ,this panel is fully enclosed with IP67 protection and can install in any location of your Factory.(for Example theme parks, electric car installations, etc.)
And Also you can activate the Codesys V3 in your JSmart Panel to extend your application to any fields.
Please find more information from this link:
https://www.exorint.com/en/product/jsmart710m
Power Supply
Ratings
Power supply IEEE 802.3af PoE
Power Consumption 14W max.
JSPOU0P1
Here is the PoE Power Supply that was used in this tutorial.
- PoE Standard IEEE 802.3af/at
- Output Power 36W max
- DC Output Voltage +54 Vdc
- Data rates 10/100
- Interface
- Ethernet IN port 10/100
- Ethernet OUT port 10/100 PoE
- Ethernet IN port 10/100
- Power Supply +24 Vdc (18-32 Vdc)
- Current Consumption 2.0 A at 24 Vdc (max.)

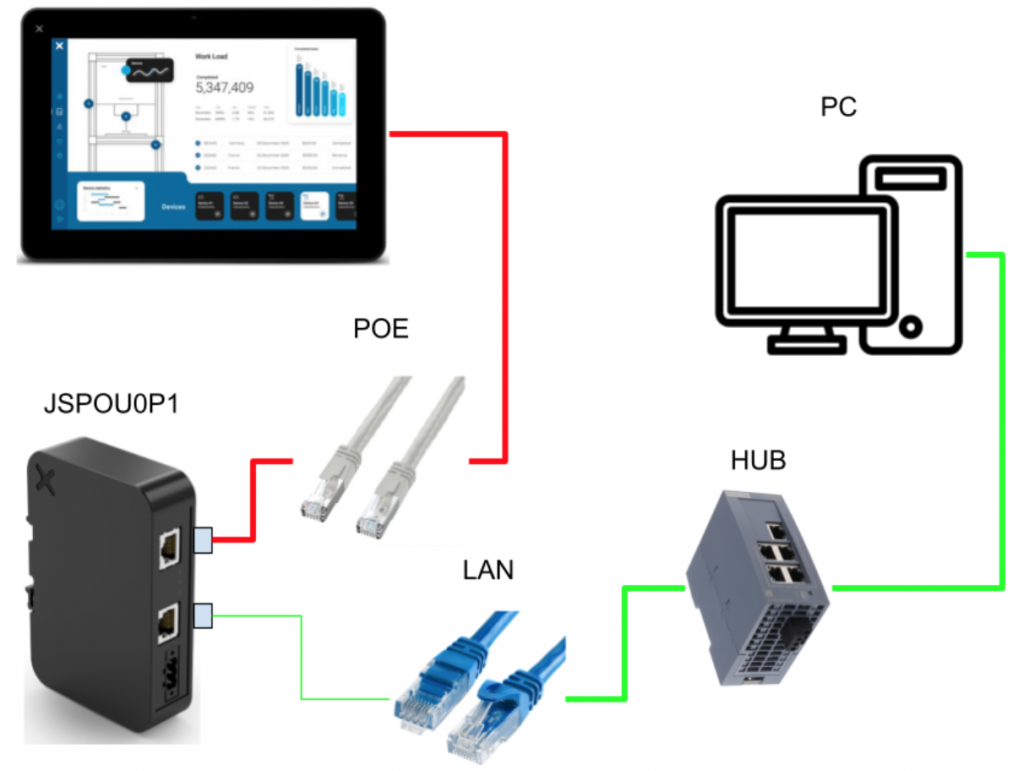
Wiring
Here is the Wiring.
Power ON!
Let’s Power ON! If this is your first time to power on the EXOR panel, there are some basic setup that you need to configure, and “Empty boost Sequence” is shown.

Basic Setup
In this Getting Started tutorial, I will show you how to setup the user password and IP address that prepares for the runtime installation.
setup user password
Press the “System Settings” button.

Because it is my first time to power on this smart panel, you need to set up the user password.
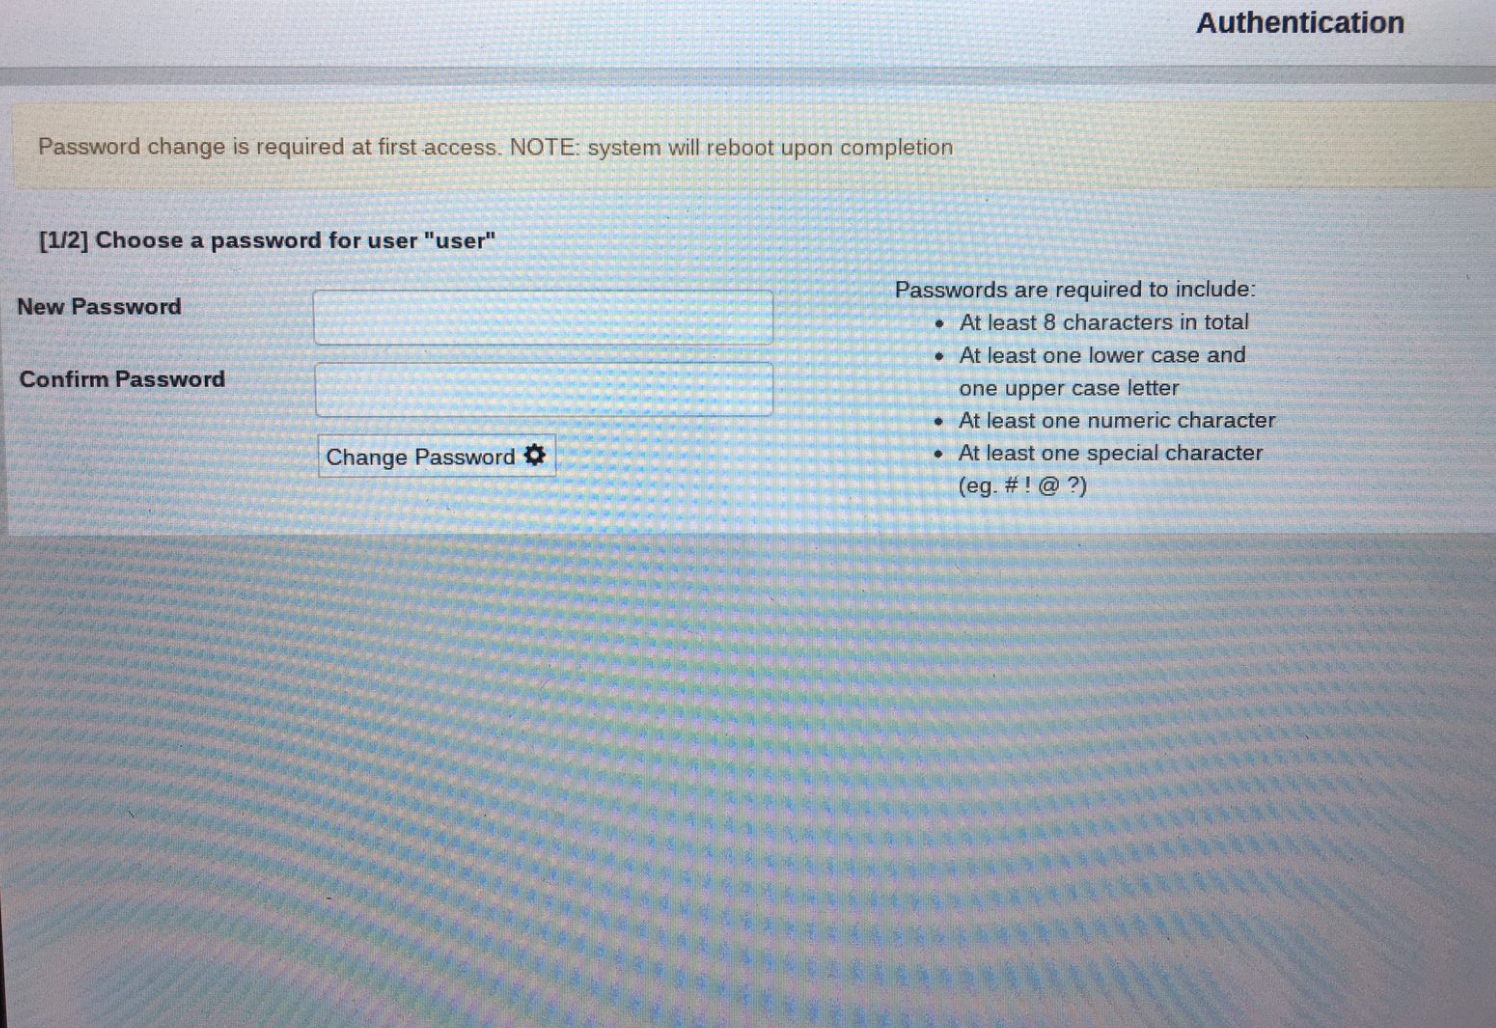
Done!Password for user is configured.

And then you need to configure the admin password also.

IP Address
Restart your panel, and press the system settings button again.
Now you can configure all system settings of your panel.In this case , I will show you how to change the IP address of your panel. please click on the Network Field.

Open the Network interface field, you can see the current setting of your ethernet interface.

Static ip is used in my tutorial and please disable the DHCP setting.

Now you can Enter the IP address and press save to apply your setting.

Done!

Press EXIT to finish the setting.

Software Download
Please access this link to request the software Download Link.
https://www.exorint.com/en/software/jmobile

Enter your personal information and press “SUBMIT”.

You should receive an email with a Download Link.

Click “JMobile Suite 4.5”.

Download the Software.

ZIP file is downloaded and please unzip it.

Installation
Double Click the “JMSuite-vXXXX.exe” to start the installation.

Select your installation Language>OK.

Accept the License and Next>.

Press Next> to continue.

Choose Full Installation as your install option and Next>.

Next>.

Create the desktop shortcut and Next>.

Install!

Please wait a second..

Done!

JMoblie Software is started..!

You can use this software in the Trial version within 30 days.

Allow the access from JMobile Studio.

Great!JMobile Studio is started.

Register
you can register the software if you get the License key by Help>Register.

Please enter your personal Information and Activation Key.

New Project
Now we can create a new project by File>New.

Enter your Project Name and Press Next.

Select the direction of your panel and Next>.

Select Unified and Finish.

Please wait a second.

Done!New Project is created.

Download to Target
Now we can download the project to the Panel.Go to Run>Download to Target.

Please wait a second..

The Download to Target is shown.

You can check the connection between your PC and Panel with ping command.

Then you can select the Panel from Drop-down list.

Because this is my first time to use this panel, you need to install the Runtime.

Enter the admin password.

Please wait a second..

Hello World!
Finally I will create a Hello world project.Go to view>Toolbars and Docking Windows>Widget Gallery to activate the Widget Gallery.

The Widget Gallery is shown on the Right hand Side.

Let’s drop a Label to the blank screen.

Double Click the Label item and Configure your Text.

Done! and please download to the panel again.

Result
Great!Here is your Hello world project !
