This is the third episode of the Opto22 series. Last Time, we introduced how to access IO via Modbus TCP with the OPTO22 EPIC Controller, and next time, we will introduce how to use the OPTO22 with MQTT Protocol.
Let’s get started!
Reference Link


MQTT?
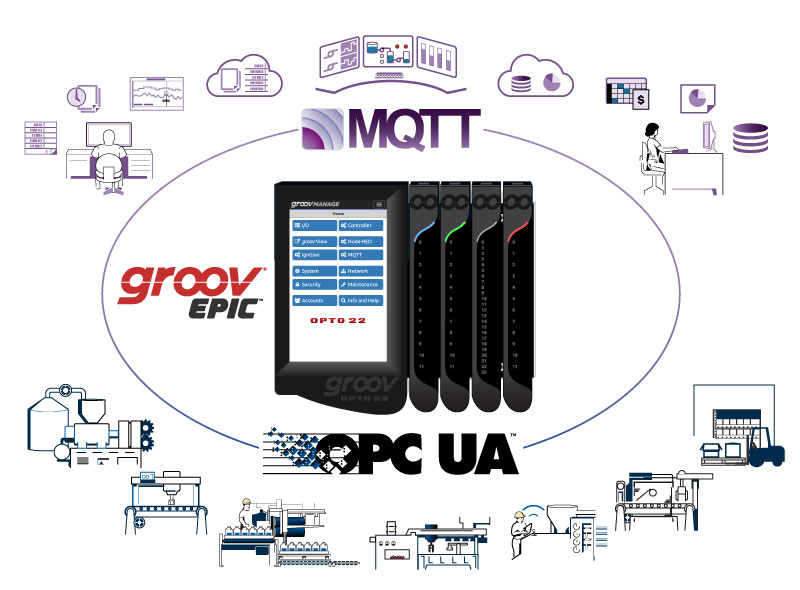
groov EPIC and groov RIO include MQTT communication can improve communication efficiency and reduce dependency on IT. mqtt is a pub-sub (publish-subscribe) protocol suitable for many IIoT applications because of its architecture.
In the pub-sub architecture, a central server, called the broker, handles all data; MQTT clients can publish data to the broker or subscribe (or both) to retrieve data. Clients that publish data send data only when it has changed. Clients that subscribe to data automatically receive it from the broker only when the data has changed.
In contrast, the request-response (or polling-response) architecture requires a direct connection between the client and server. Since the client is unaware of data changes, it must request data at regular intervals.

MQTT pub-sub has these main advantages over request-response for IIoT applications
- Network traffic is reduced overall. This is because data is published and sent only when changes are made, not at regular intervals.
- Because the broker is the central source of data, the server does not need to be overloaded with multiple clients. It can also publish or subscribe to data over unstable connections or low-bandwidth remote devices.
For groov EPIC and groov RIO, MQTT can be used from groov Manage or via Ignition/Ignition Edge (available in GRV-EPIC-PR1, GRV-EPIC-PR2, and GRV-R7-MM2001-10).
Exmaple
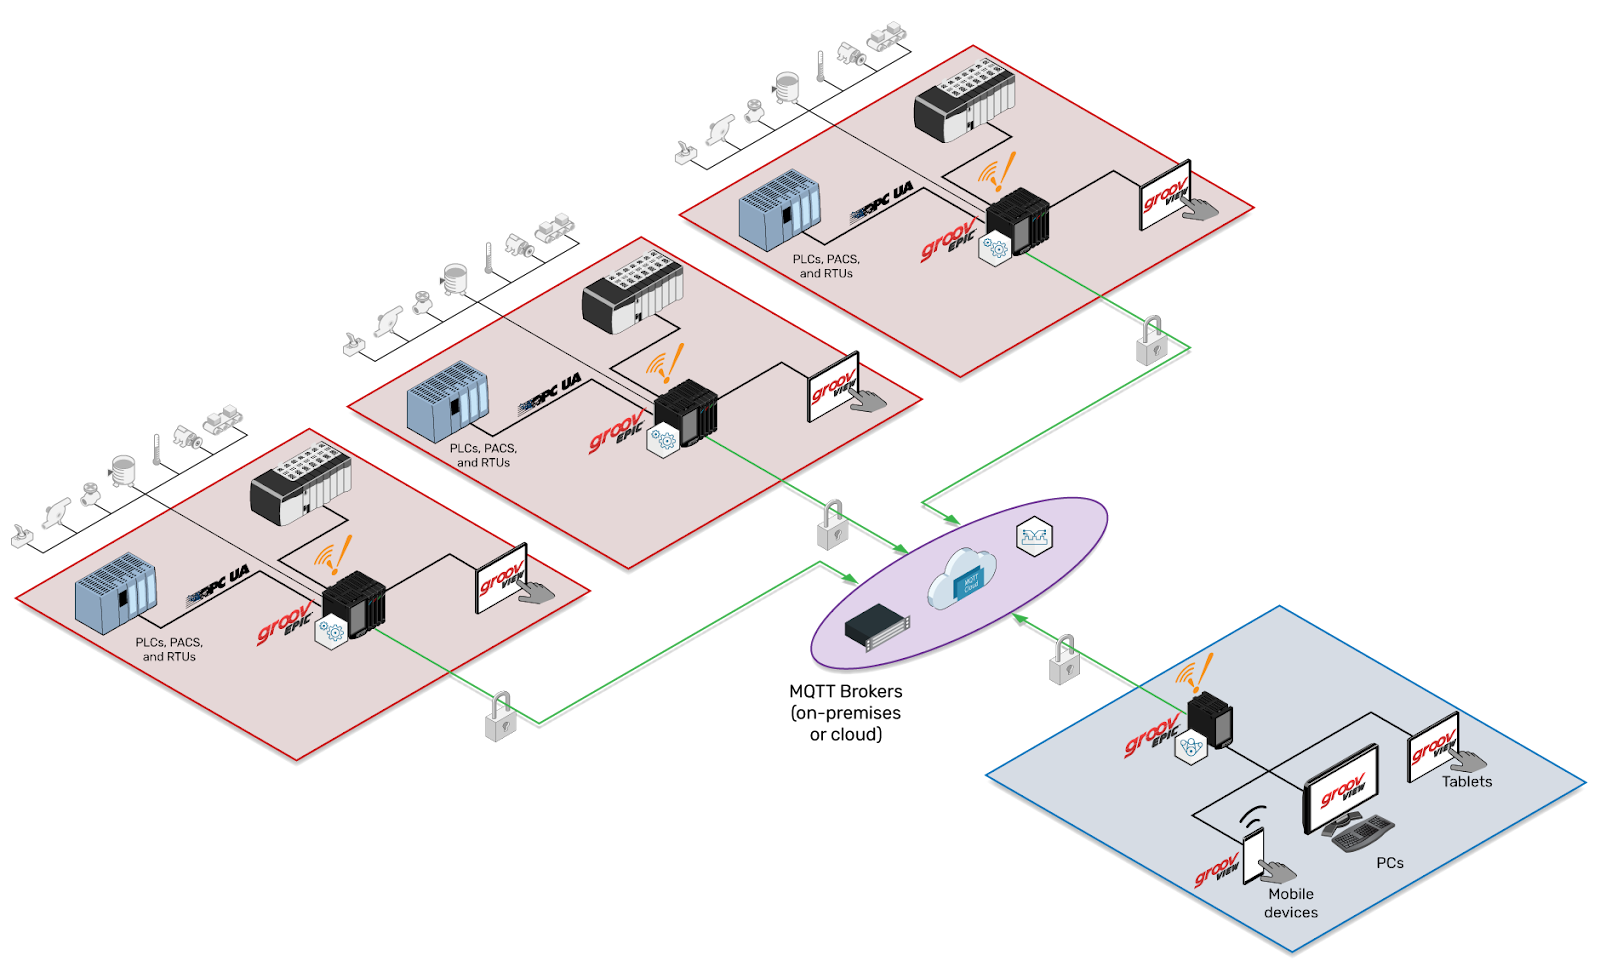
MQTT transmission using string payloads or Sparkplug-B payloads provided via groov EPIC and groov RIO offers advantages in on-premise and remote data communication.
In the figure, a groov EPIC system in an industrial area connects to sensors and actuators via its own I/O and other PACs, PLCs, and RTUs, and publishes and subscribes data through an MQTT broker.
At the main site, Ignition Edge and groov EPIC also publish and subscribe data via brokers, providing database connectivity and system visualization.
MQTT Advantages
- Designed for industrial systems
- Communication originating from devices
- Centralized security control at the broker
- Data reported by exception only upon change
- Lightweight data communication
- Fewer communication links
- Significantly less traffic on the network
- Ideal for intermittent connections
- Broker can be on-site or off-site
- No need to open VPN or firewall ports
- Less reliance on IT department
Getting Started with MQTT in groov Products!
Opto22’s groov EPIC® edge programmable industrial controller and groov RIO® edge I/O provide many ways to use MQTT data communication via groov Manage, Node-RED, or Inductive Automation®’s Ignition Edge.
Implemenation
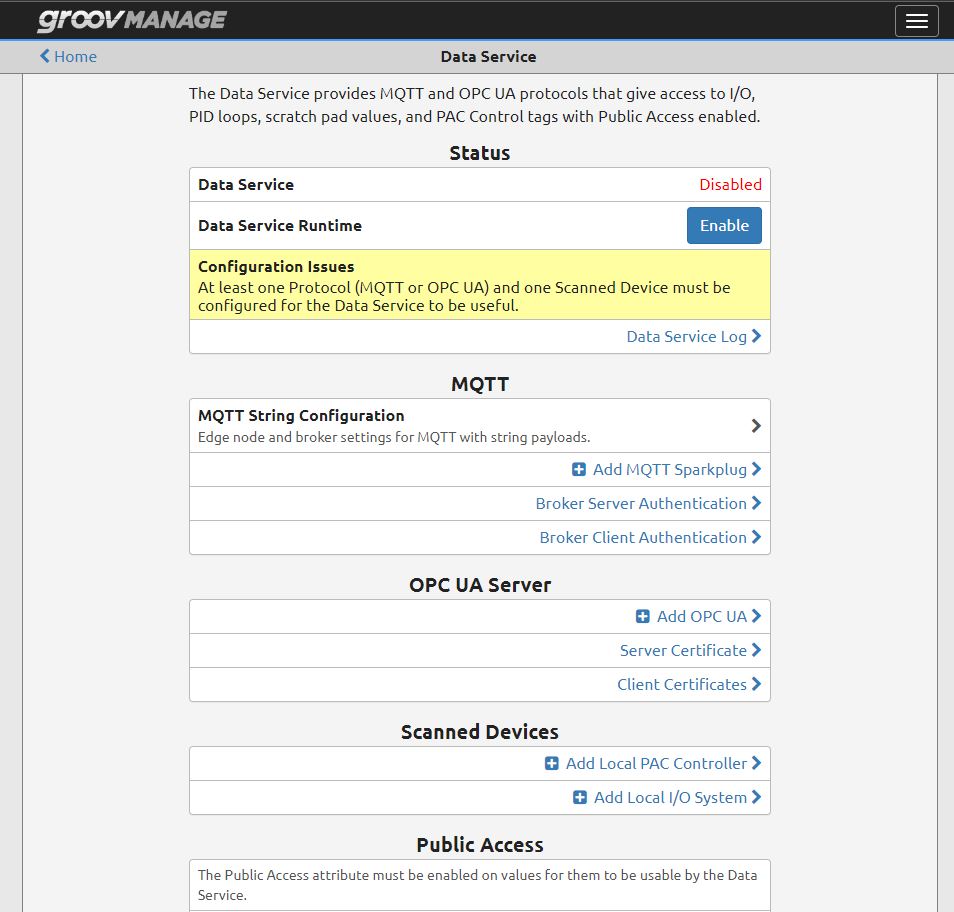
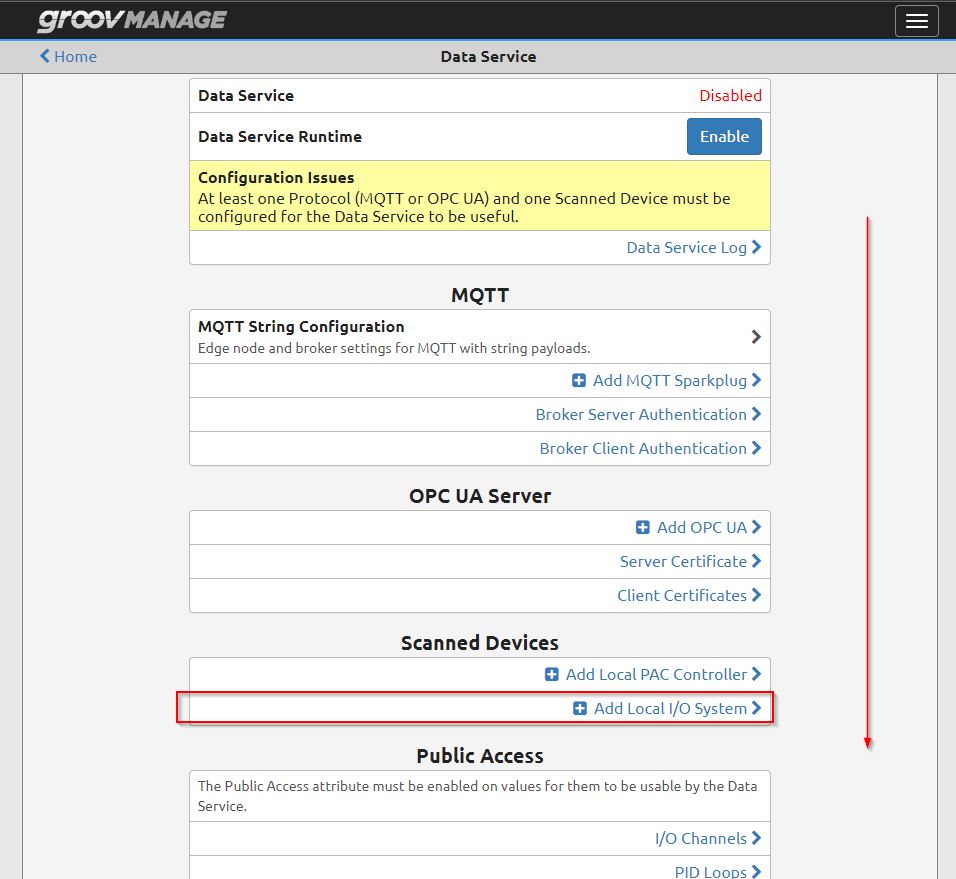
Open the groovMANAGE screen and click on >Data Service.
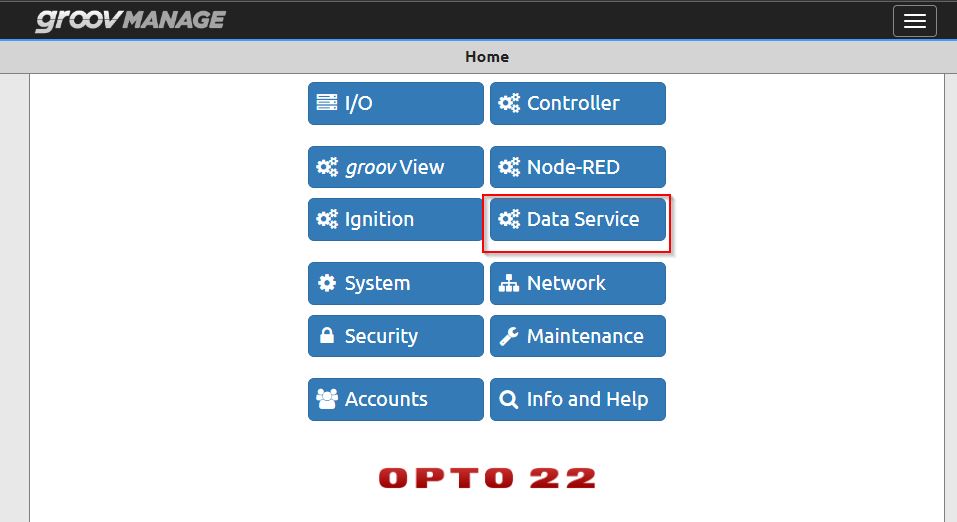
The Data Services configuration screen appears, which includes not only MQTT but also OPC UA Server settings, which we will discuss in a future article.
MQTT Configuration
To change the MQTT Broker connection settings, open MQTT>MQTT String Configuration.
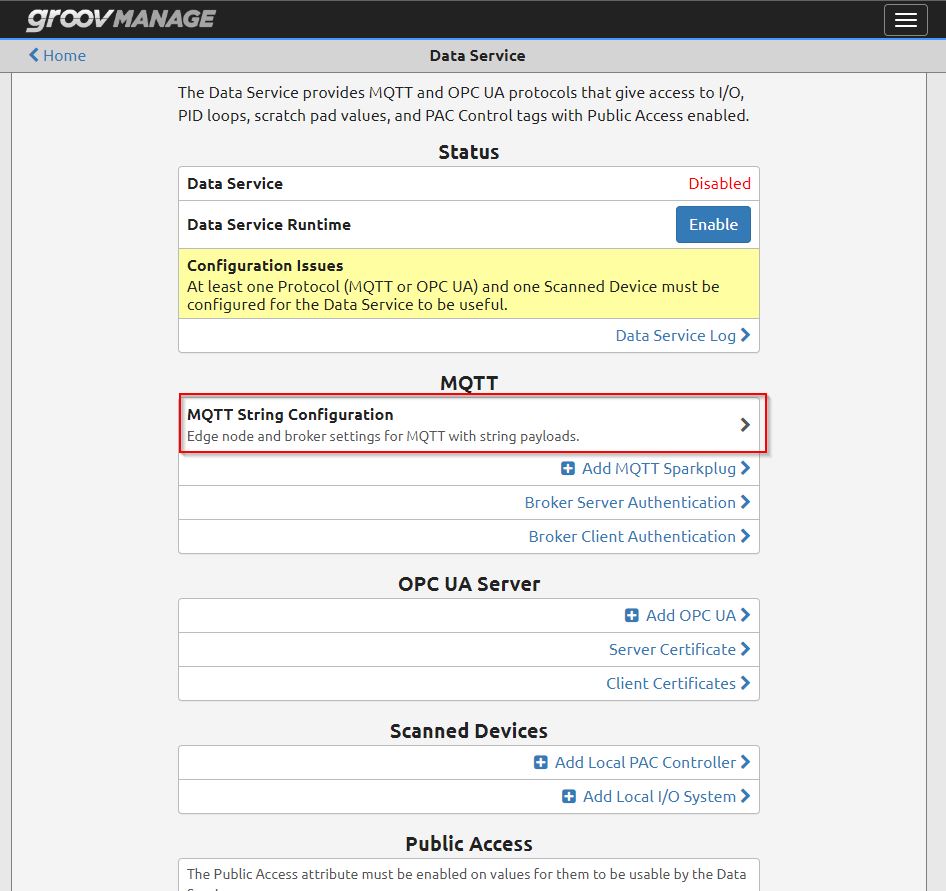
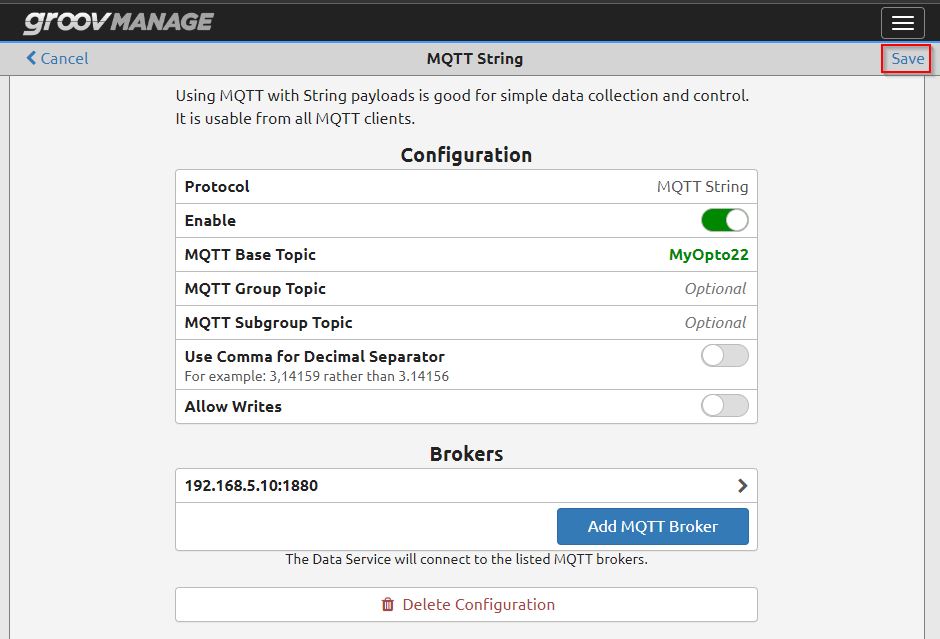
The MQTT String configuration screen appears.

Enable
First, enable the MQTT functionality with the Slide Button under Configuration>Enable.

Group Topic
The MQTT Base Topic is set to MyOpto22, but if you want to further isolate the data in more detail, set the MQTT Group Topic/MQTT Subgroup Topic.
(This setting is Optional and can be set to Empty, but the current setting will send a Topic like MyOptio22/XXX/XXX to the Broker.)
This is the configuration Format for Topic.
<Base Topic>/<Group Topic>/<Subgroup Topic>/<Device Topic>/<Tag
<Base Topic>/<Group Topic>/<Subgroup Topic>/<Device Topic>/#

Topic paths and wildcards
Before we move on to the next Session, let’s first talk about Topic and other topics.
When you publish the data you want to publish, you can include wildcards in the MQTT topic path to form the data your subscribers will receive. Wildcards work the same way for both strings and Sparkplug. Available wildcards are,
- Multi-level number sign (#)
- Single-level plus sign (+)
The two are
there is the following topic paths and data for each level available from the publisher:
- opto22/manufacturing/line1
- opto22/manufacturing/line2
- opto22/shipping/line1
- opto22/shipping/line2
Here is how subscribers can get the data they need
- The subscriber uses that exact topic path to subscribe to data on the topic opto22/manufacturing/line2.
- Use the multi-level wildcard # to subscribe to any level of data within a topic. For example, the path opto22/manufacturing/# subscribes to opto22/manufacturing, opto22/manufacturing/line1, and opto22/manufacturing/line2.
- You can use the single-level wildcard + to subscribe to a single topic level of data. For example, the path opto22/+ subscribes to opto22/manufacturing and opto22/shipping, but not to opto22/, opto22/manufacturing/line1, opto22/shipping/line1, etc. This wildcard can also be used in the middle of a topic path. For example, opto22/+/line1 subscribes to opto22/manufacturing/line1 and opto22/shipping/line1.
Add MQTT Broker
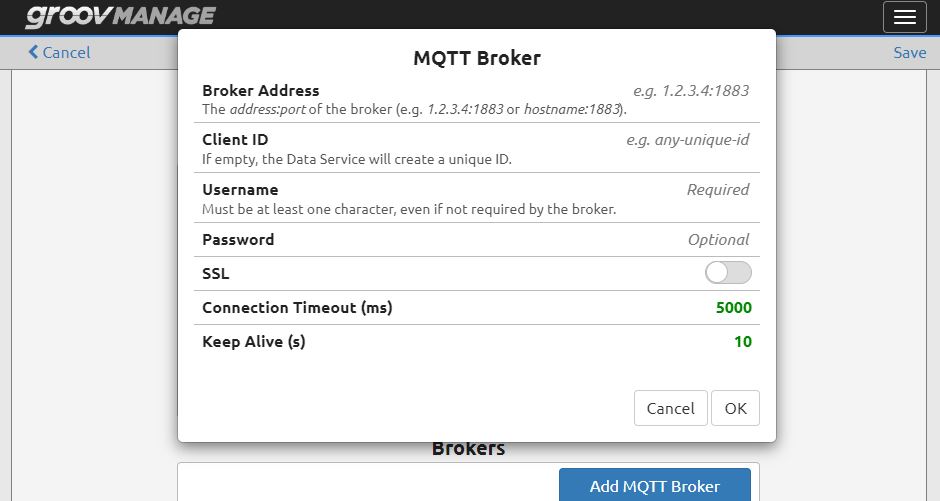
Next, add the MQTT Broker that will connect to Opto22: click on Brokers>Add MQTT Broker.

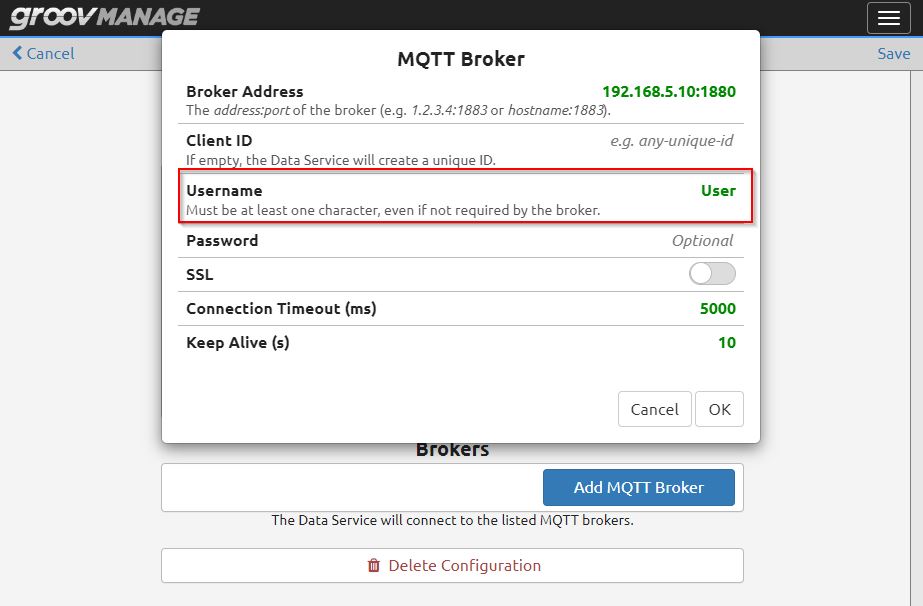
The MQTT Broker connection settings screen appears.
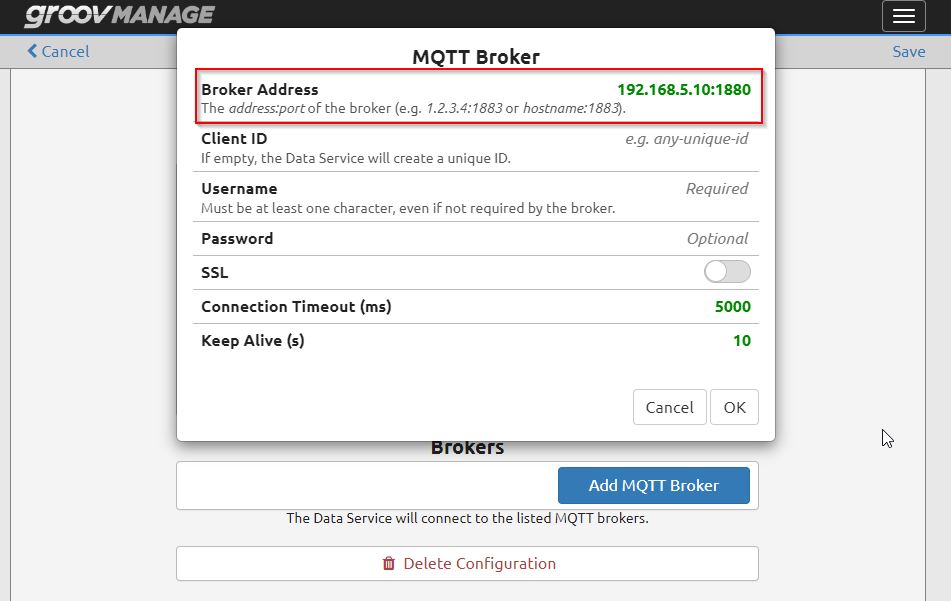
Broker Address
Enter the IP address:Port number of the MQTT Broker in the Broker Address field.
User name
It may be possible to connect without User name or Password, but Opto22 requires DefaultUsername to be set, so if the Broker you are connecting to has no Username/Password, please enter an appropriate string.
Done!Brokers has been added.

Save
Save your settings using the Save button in the upper right corner.
Scanned Devices
After completing the MQTT-related settings, the next step is to configure Scanned Devices, which is used to publish the modules installed on the Groov CPU and PAC Controller devices via MQTT/OPC UA.
In the Tutorial, we have not done anything related to PAC Controller yet, so we would like to start with the IO modules installed in the groov CPU.
Let’s click Scanned Devices>Add Local I/O System.
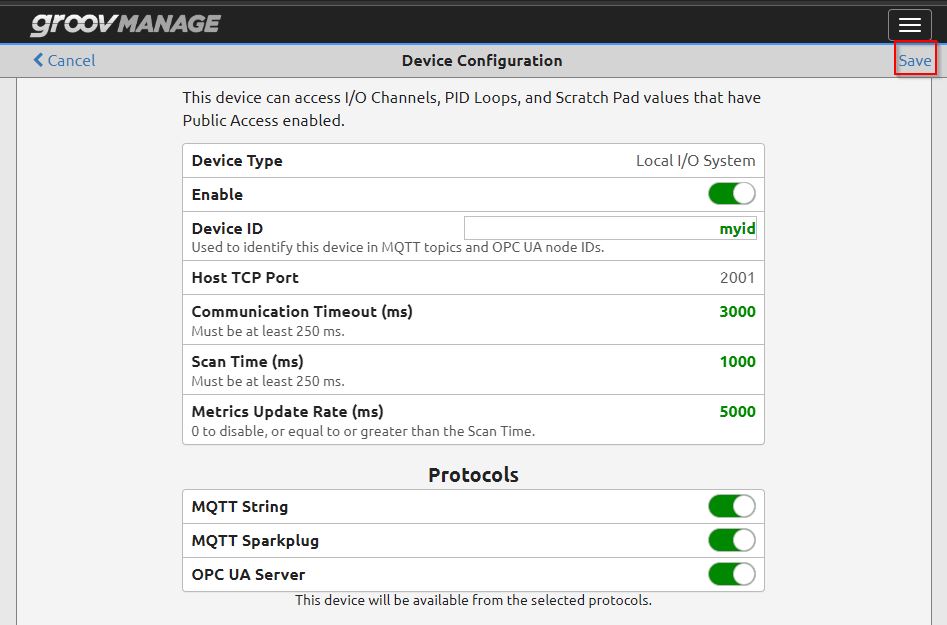
The Device Configuration screen appears.
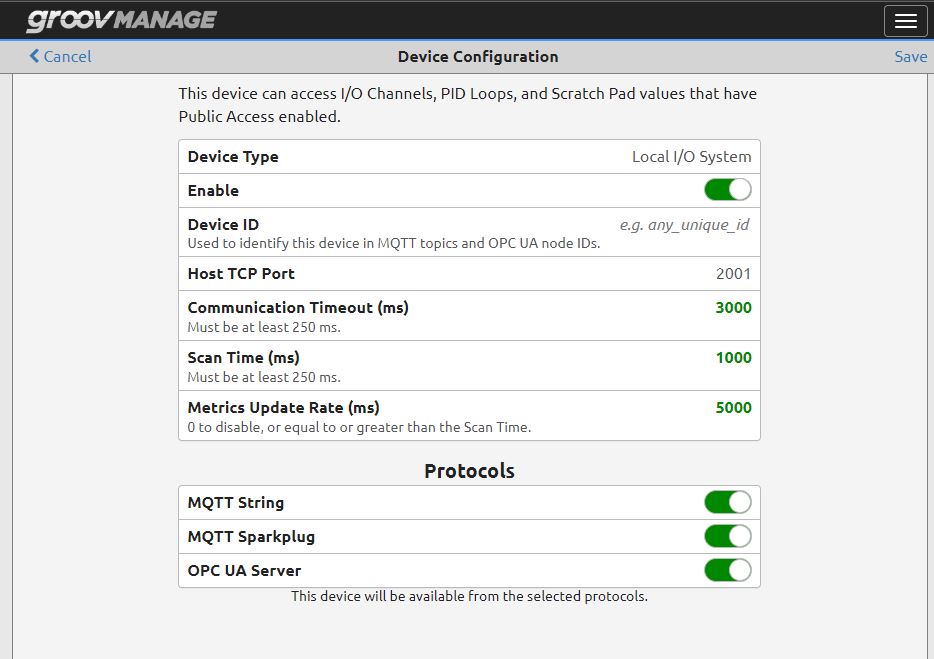
DeviceID
A DeviceID must be set and that ID will be the Node ID for MQTT and OPC UA.

Save
Finally, use the Save Button to save your settings.
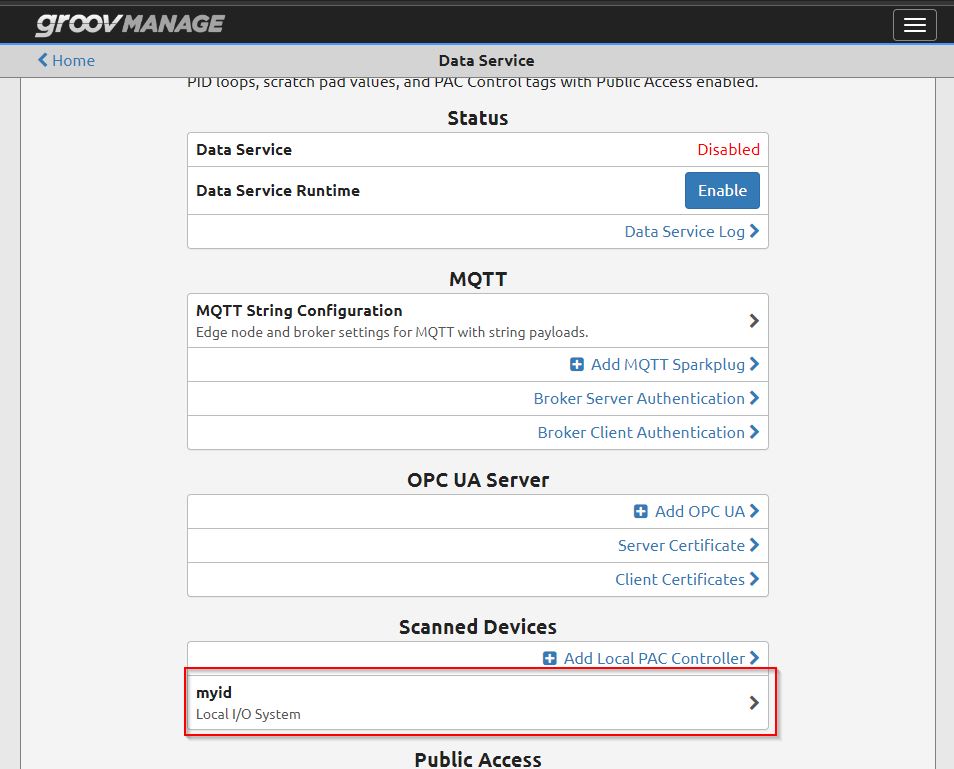
myid has been added to Scanned Devices.
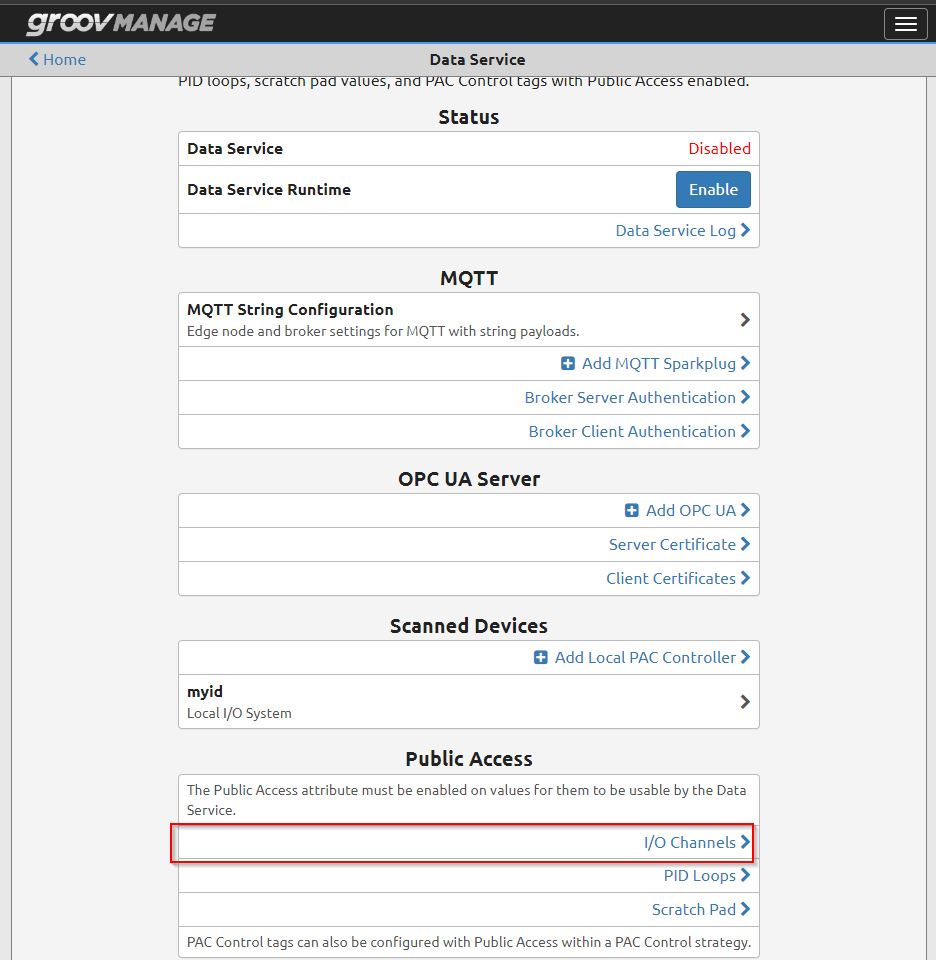
Configure
I/O Channel
The next step is to configure the Local I/O System settings for myid.
From the groovMANAGE screen, you can now list the modules installed on the groovCPU by clicking on the “DI ” button next to Slot0. (DI = digital input, DO = digital output, AI = analog input)

You can check the status of each channel of the digital input module, and you can also set the name of the corresponding Channel individually. As an example, let’s click to set DI0, (Channel0)
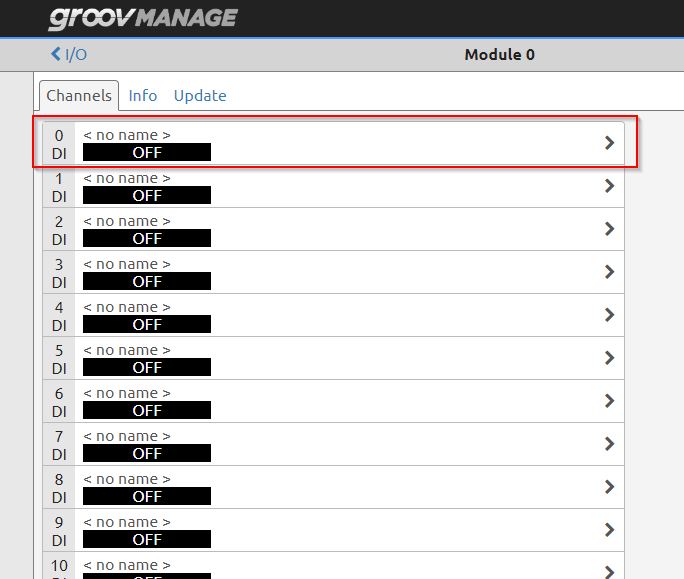
You can check the current detailed status of the corresponding channel and proceed with Configure.

The Channel 0 setting screen appears.

Name
The Name Field is the name of the channel.
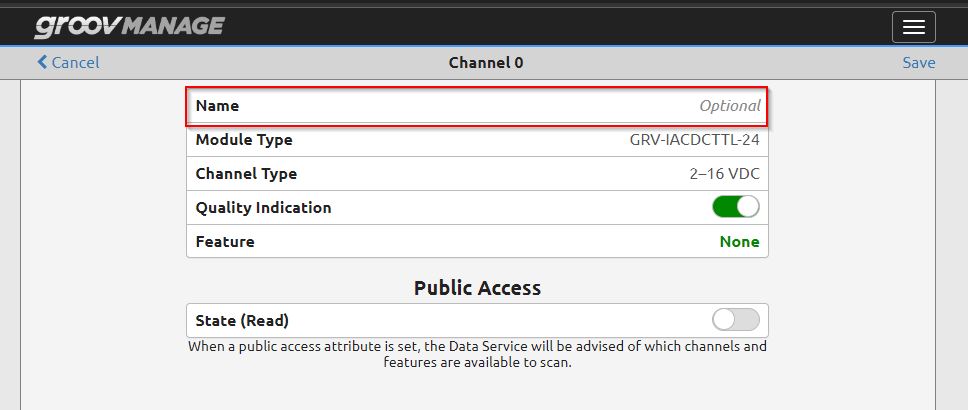
State
Public Access>State(Read) allows you to set whether the state of Channel 0 can be published via MQTT/OPC UA.

If you turn on the Slide button for State (Read), detailed information on Channel 0, such as Counter, can also be disclosed depending on the settings. In this Tutorial, only State is available.

Save
Save the settings using the Save button in the upper right corner.
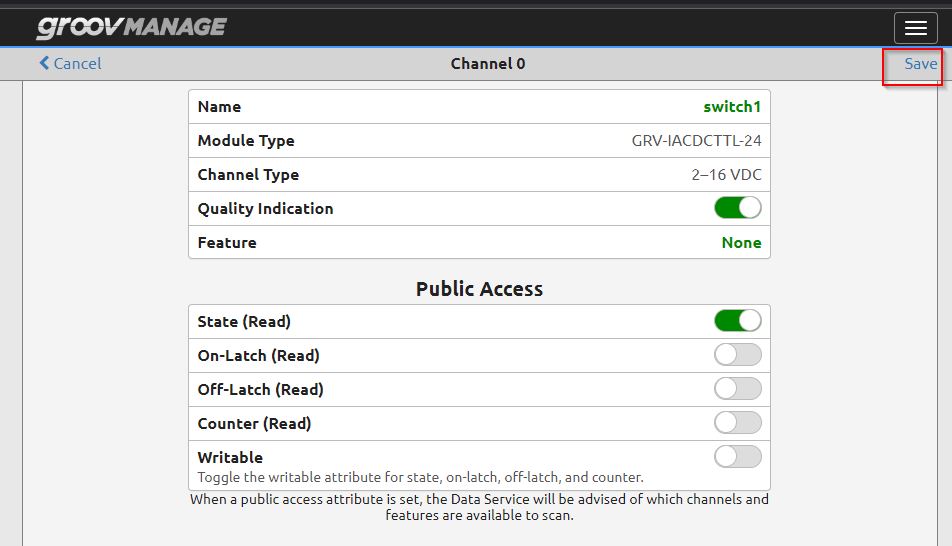
Done!Now DI0 is renamed switch1.

Info
In fact, on the Module screen, you can also check the channel wiring diagram from the Tab in Info.

Enable
Let’s return to the Data Services configuration screen and click the Data Service Runtime>Enable button to enable Data Service.

Please wait a moment…
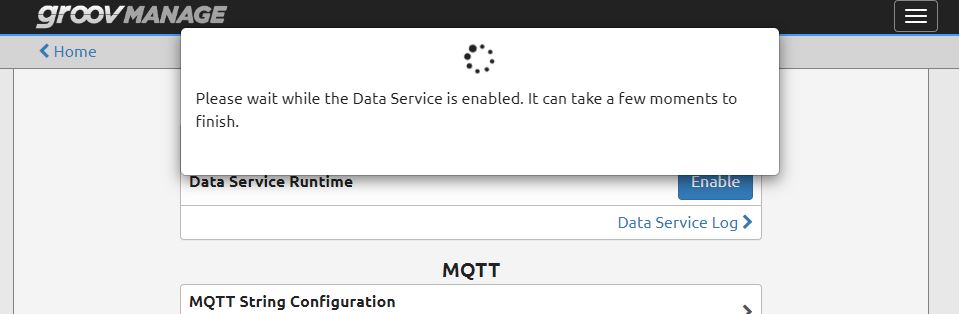
Done!The status of the Data Service has now changed to Running.
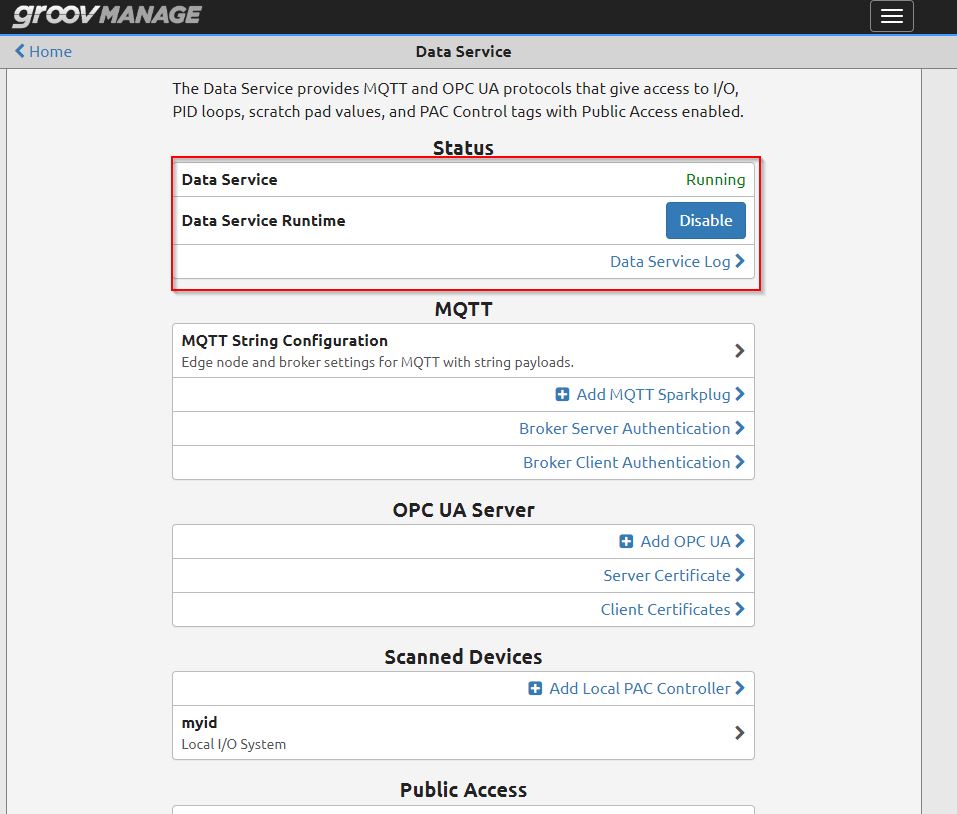
View the Log
If you are unable to Enable or want to check the status of your Broker connection, click on Data Service Log.

Done!your controller is connected to the MQTT Broker.

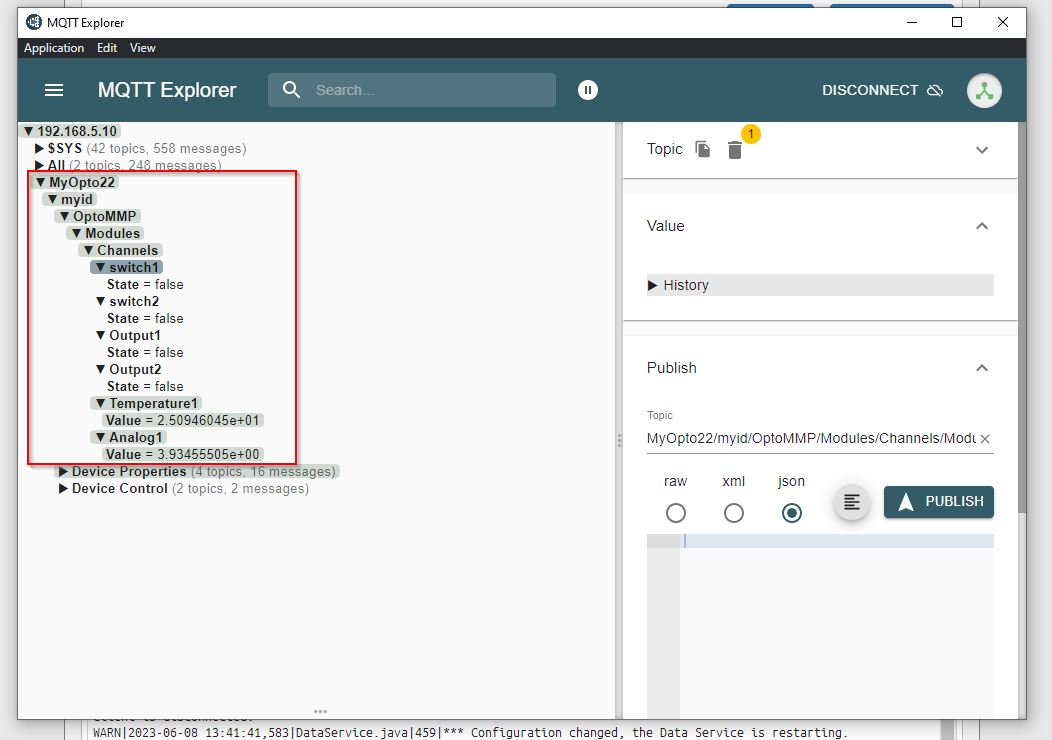
Result
Finally, if we connect Broker with MQTT Explorer, we can see that we can receive MQTT Messages from Opto22.