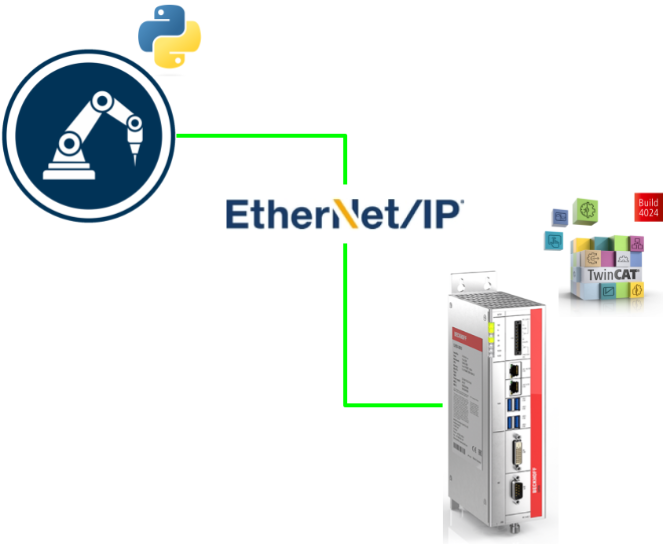
In this article, an Etherent/IP network is built with RoboDK and Beckhoff TwinCAT.
The Scanner side is RoboDK and the TwinCAT is the Adapter.Note that what is shown in this article is a demonstration, so you will have to evaluate for yourself whether it is suitable for your real application.
Let’s start!
RoboDK Side
Configure the Station and Program
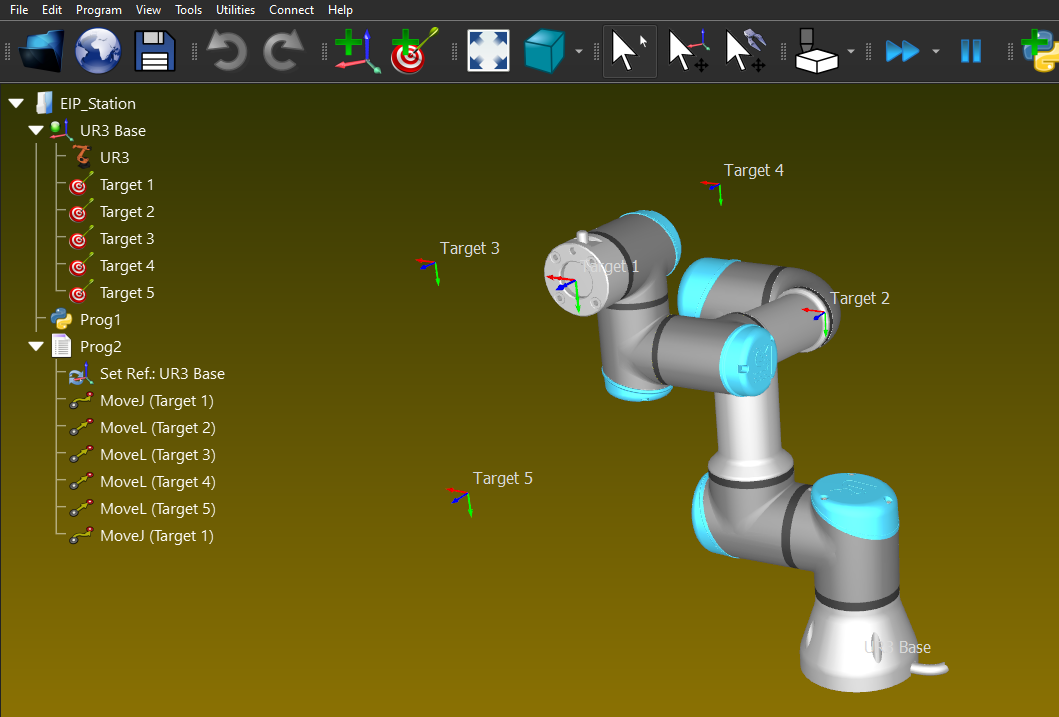
Launch the RoboDK Software and Create your Station.
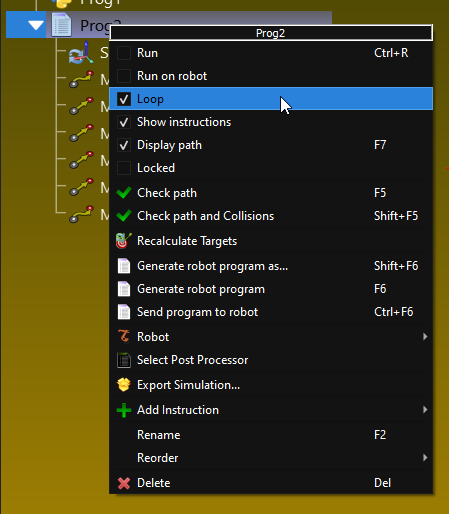
Configure it as Loop
After you teach some points and Add it into the program, let’s run the program in the infinite loop, by Right clicking the program>Loop.
Test it First
Here is the Station that I created.

Python Script
RoboDK allows the user to create their own python script in the station and run it based on their applications – but also provides a very good API.
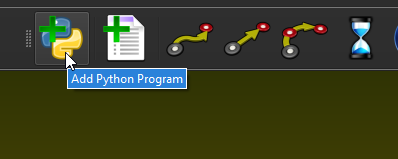
Add a new Python Program
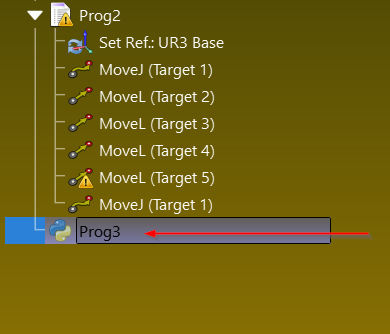
Press the Python icon in RoboDK Software to Add a new Python program.
You can see a Python script is inserted in the end of your station.
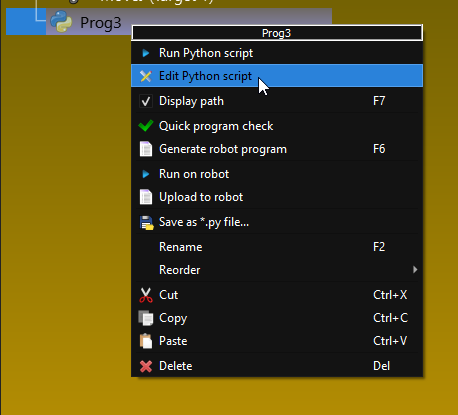
Just Right click the Python Script> choose “Edit Python Script” to edit your own program.
If the python script is generated from RoboDK software, it is created with a template with the necessary library.

Just Click the Run>Run Module to execute your Python script.

Done!
EIP Module
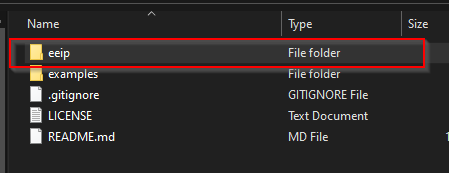
Here is the Library that we are using in this tutorial.

You can download the eeip library from this Github link.
https://github.com/rossmann-engineering/eeip.py


eeip is the library that using in this tutorial.
Program it!
Here is the python script.
| # Type help(“robodk.robolink”) or help(“robodk.robomath”) for more information # Press F5 to run the script # Documentation: https://robodk.com/doc/en/RoboDK-API.html # Reference: https://robodk.com/doc/en/PythonAPI/robodk.html # Note: It is not required to keep a copy of this file, your Python script is saved with your RDK project # You can also use the new version of the API: import sys sys.path.append(r”C:\Users\root\Desktop\eeip.py-master\eeip.py-master”) from eeip import * from robodk import robolink # RoboDK API from robodk import robomath # Robot toolbox RDK = robolink.Robolink() # Forward and backwards compatible use of the RoboDK API: # Remove these 2 lines to follow python programming guidelines from robodk import * # RoboDK API from robolink import * # Robot toolbox # Link to RoboDK # RDK = Robolink() import struct # Notify user: print(‘To edit this program:\nright click on the Python program, then, select “Edit Python script”‘) print(‘Creating EEIP..’) eeipclient=EEIPClient() print(‘Register session…’) eeipclient.register_session(‘192.168.3.240’) #Parameters from Originator -> Target eeipclient.o_t_instance_id = 0x82 eeipclient.o_t_length = 44 eeipclient.o_t_requested_packet_rate = 100000 #Packet rate 100ms (default 500ms) eeipclient.o_t_realtime_format = RealTimeFormat.HEADER32BIT eeipclient.o_t_owner_redundant = False eeipclient.o_t_variable_length = False eeipclient.o_t_connection_type = ConnectionType.POINT_TO_POINT #Parameters from Target -> Originator eeipclient.t_o_instance_id = 0x81 eeipclient.t_o_length = 44 eeipclient.t_o_requested_packet_rate = 100000 #Packet rate 100ms (default 500ms) eeipclient.t_o_realtime_format = RealTimeFormat.MODELESS eeipclient.t_o_owner_redundant = False eeipclient.t_o_variable_length = False eeipclient.t_o_connection_type = ConnectionType.POINT_TO_POINT eeipclient.configuration_assembly_instance_id=0x80 eeipclient.forward_open() item = RDK.Item(‘UR3’) Joints = bytearray(struct.pack(“f”, value)) try: while 1: # Program example: if item.Valid(): print(‘Item selected: ‘ + item.Name()) print(‘Item posistion: ‘ + repr(item.Pose())) print(‘Items in the station:’) print(‘State of the first Input byte: {0}’.format(eeipclient.t_o_iodata)) joints=item.Joints().list() count=4 for joint in joints: print(count) barray=bytearray(struct.pack(“f”, joint)) eeipclient.o_t_iodata[count]=barray[0] eeipclient.o_t_iodata[count+1]=barray[1] eeipclient.o_t_iodata[count+2]=barray[2] eeipclient.o_t_iodata[count+3]=barray[3] count+=4 print(‘State of the second output byte: {0}’.format(eeipclient.o_t_iodata)) print(type(eeipclient.o_t_iodata)) time.sleep(0.1) except KeyboardInterrupt: print(“Keyboard interrupt exception caught”) print(‘forword close..’) eeipclient.forward_close() eeipclient.unregister_session() |
Explanation
import the python sys packages and append an absolute path of your library directory.
In my case, it is C:\Users\root\Desktop\eeip.py-master\eeip.py-master.
| import sys sys.path.append(r”C:\Users\root\Desktop\eeip.py-master\eeip.py-master”) from eeip import * |
192.168.3.240 is the ip address of your Ethernet/IP Adapter.
| eeipclient.register_session(‘192.168.3.240’) |
Here is the program to configure the connection path from Originator to Target.
I will draw a draft in the explanation of Beckhoff TwinCAT3 side to show you how to match these parameters.
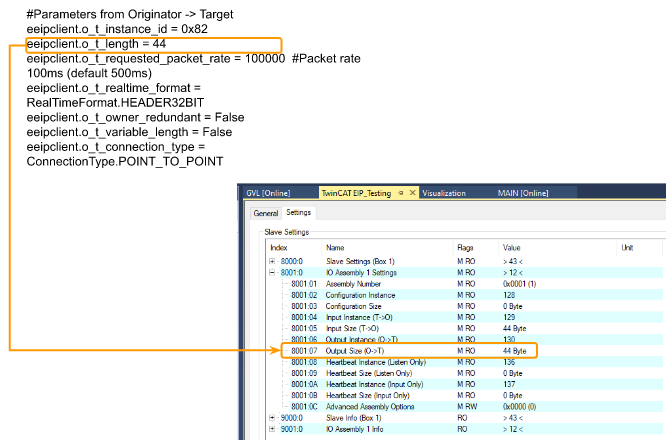
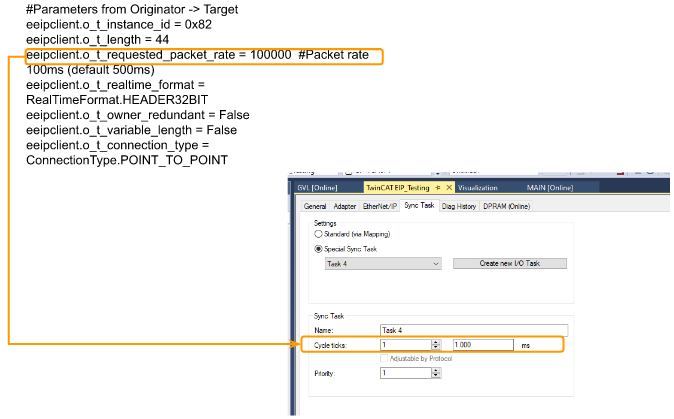
| #Parameters from Originator -> Target eeipclient.o_t_instance_id = 0x82 eeipclient.o_t_length = 44 eeipclient.o_t_requested_packet_rate = 100000 #Packet rate 100ms (default 500ms) eeipclient.o_t_realtime_format = RealTimeFormat.HEADER32BIT eeipclient.o_t_owner_redundant = False eeipclient.o_t_variable_length = False eeipclient.o_t_connection_type = ConnectionType.POINT_TO_POINT |
Here is the program to configure the connection path from Target to Originator.
I will draw a draft in the explanation of Beckhoff TwinCAT3 side to show you how to match these parameters.
| #Parameters from Target -> Originator eeipclient.t_o_instance_id = 0x81 eeipclient.t_o_length = 44 eeipclient.t_o_requested_packet_rate = 100000 #Packet rate 100ms (default 500ms) eeipclient.t_o_realtime_format = RealTimeFormat.MODELESS eeipclient.t_o_owner_redundant = False eeipclient.t_o_variable_length = False eeipclient.t_o_connection_type = ConnectionType.POINT_TO_POINT |
Here is the program to configure the configuration instance id.
I will draw a draft in the explanation of Beckhoff TwinCAT3 side to show you how to match these parameters.
| eeipclient.configuration_assembly_instance_id=0x80 |
We can send the forward_open request to the Ethernet/IP Adapter(Beckhoff TwinCAT3 in this tutorial) to establish the connection.
| eeipclient.forward_open() |
RoboDK provides a very good Python API for the user, it can allow us to access the RoboDK data in an easy way – Here is the part of the script to get the 6 joints values of our UR robot via API.
| joints=item.Joints().list() count=4 for joint in joints: print(count) barray=bytearray(struct.pack(“f”, joint)) eeipclient.o_t_iodata[count]=barray[0] eeipclient.o_t_iodata[count+1]=barray[1] eeipclient.o_t_iodata[count+2]=barray[2] eeipclient.o_t_iodata[count+3]=barray[3] count+=4 print(‘State of the second output byte: {0}’.format(eeipclient.o_t_iodata)) print(type(eeipclient.o_t_iodata)) time.sleep(0.1) |
Don’t forget to write the Exception, we need to make sure the forward_close request and unregister request are sent to the adapter, while exception is happening.
| except KeyboardInterrupt: print(“Keyboard interrupt exception caught”) |
The script to send the forward_close request() and unregister_session().
| eeipclient.forward_close() eeipclient.unregister_session() |
TwinCAT Side
Now we can configure the TwinCAT Side.
Add Ethernet/IP Adapter
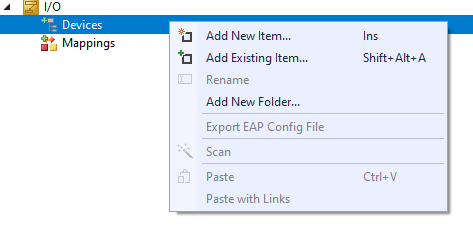
Go to I/O>Devices>Add New Item to add a new Device.
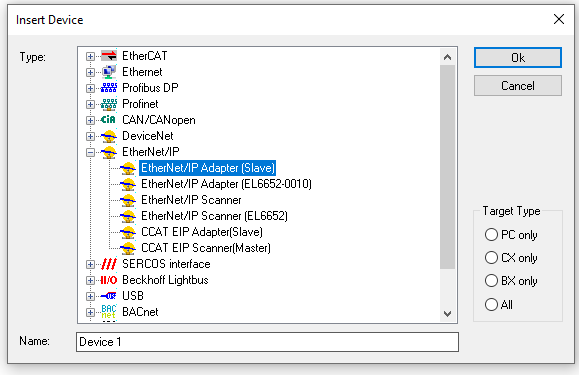
Select EtherNet/IP>EtherNet/IP Adapter[Slave]>Ok.
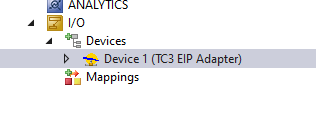
A TC3 EIP Adapter is created in your project.
Configure the Adapter
Open your Ethernet/IP Adapter>Go to Adapter Tab and Press the “search” button to find out the usable Network Adapter in your IPC.
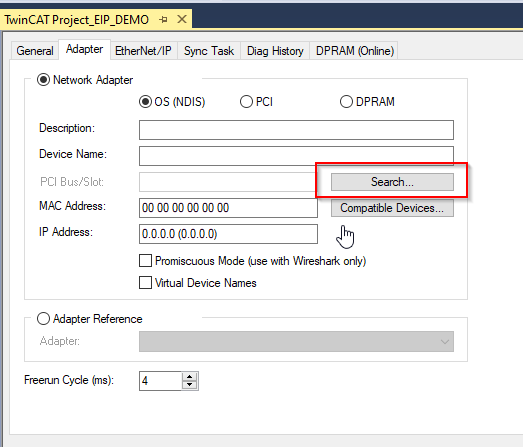
A list is shown and select your Network Adapter.

Configure the Task
Open the Sync Task tab>Select Special Sync Task>Create new I/O Task.

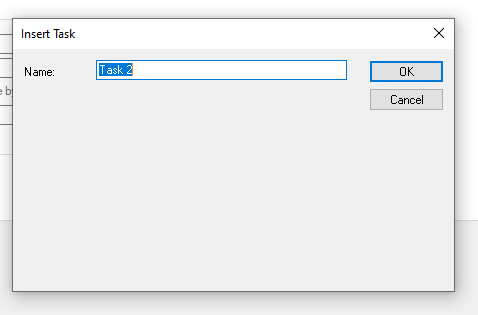
Enter your new task’s name.
IP Address
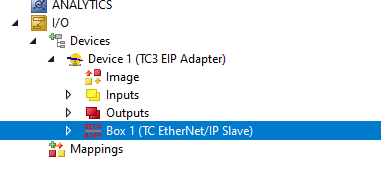
Expand your Ethernet/IP Adapter Devices>open the Box1(TC EtherNet/IP Slave)
Go to the Settings Tab, and Configure the IP address setting from 8000:21 to 8000:23.
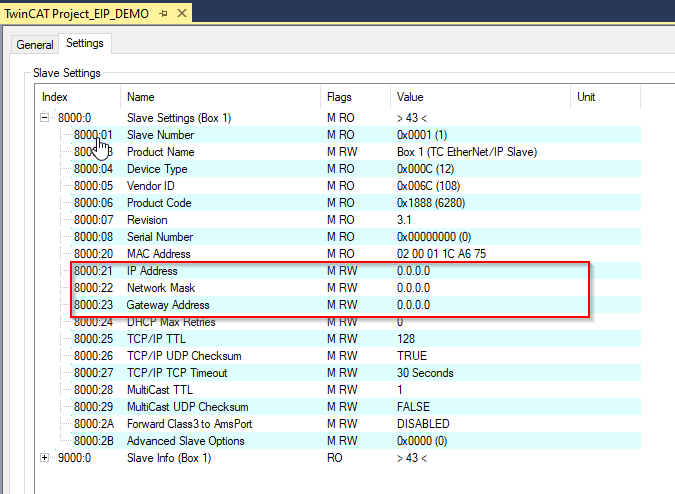
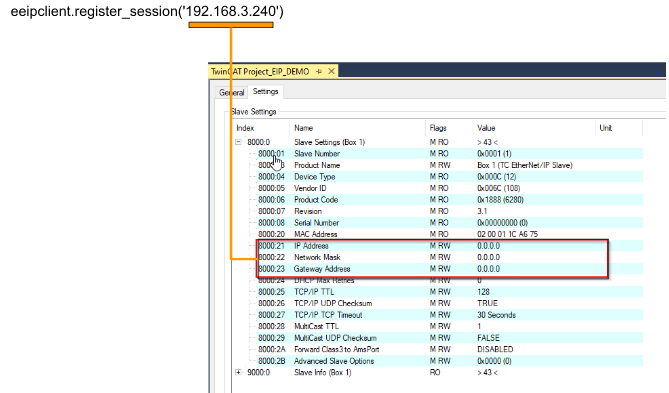
As we mentioned in the RoboDK Side before, the ip address parameter should be matched with the eeipclinet.register_session(‘’) method.
So,IP Address=192.168.3.240,Network Mask=255.255.255.0 are configured.

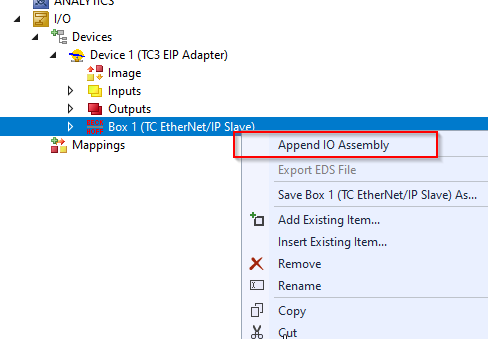
Append IO Assembly
Right Click the Box1 and Select “Append IO Assembly”
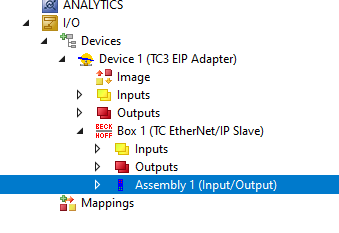
A New Assembly is created in your Ethernet/IP Adapter.
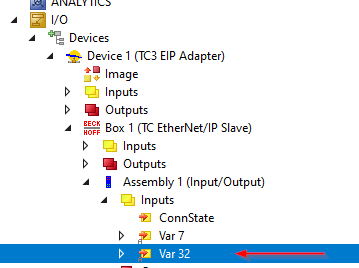
Inputs Data
Now we can Add some Input data.Right Click the Inputs>Add New Item.

Select BYTE as the Data Type, and then Press the “Create Array Type” to create an array type variable.
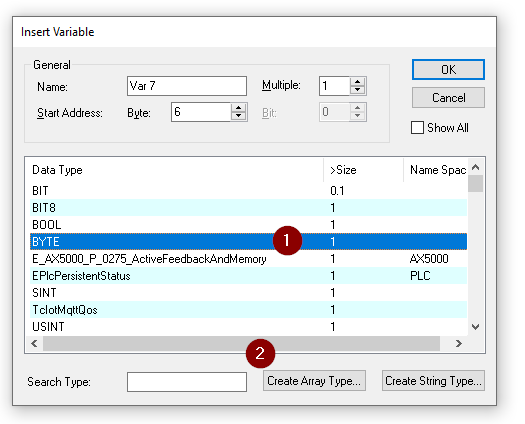
Select “0” to define a 1D array, and enter the Data length from 0..23.
Because we will get the Actual joint position via RoboDK API and each joint position is 32 bit value – 6×4=24 bytes.

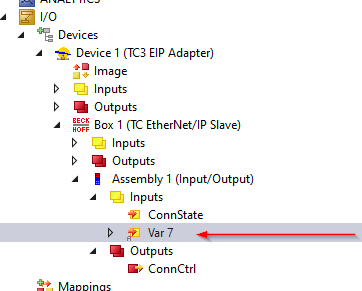
Input Data for our Robot’s joint value is defined.
Just do the same operation to add another new Variable.

Select Byte as the Data type and then press the “Create Array Type” button.
Select “0” to define a 1D array, and enter the Data length from 0..15.
Because the total input data size=40 bytes in this tutorial, in the previous step 24 bytes data is defined. In here we will define a 16 bytes array because 40-24=16.

Done!
Outputs Data
Just Do the same operation with the output data by Right click the Outputs Field>Add New item.

Choose BYTE as the Data type and create Array Type.
define a 20 bytes array.

Just do it one more time to fill the 40 byte data size.

Match the Setting between TwinCAT and RoboDK
Now we can match the setting between our python script and TwinCAT Configuration.
Click on your Ethernet/IP Box>Go to Settings Tab.

Parameters from Originator -> Target
o_t_Instance_id
For the Output instance,the Instance number in the TwinCAT side is 130 = 0x82 in Hex.

o_t_length
There is a 4 bytes header in Real-time format, So the t_length=44.(Although the total size of user data size is 40 bytes)
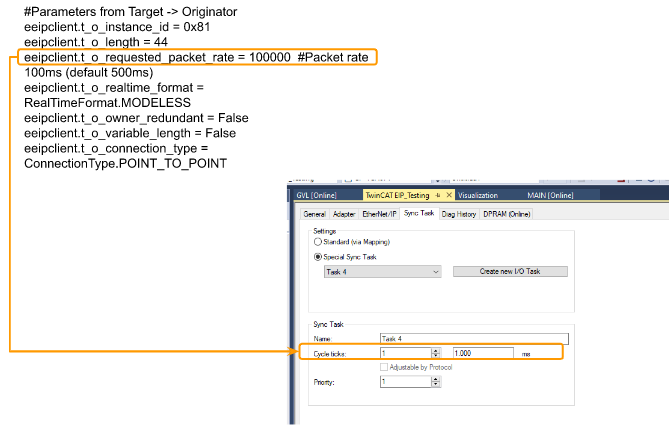
o_t_requested_packet_rate
Please make sure the RPI is larger than the cycle time of the Sync Task in TwinCAT.
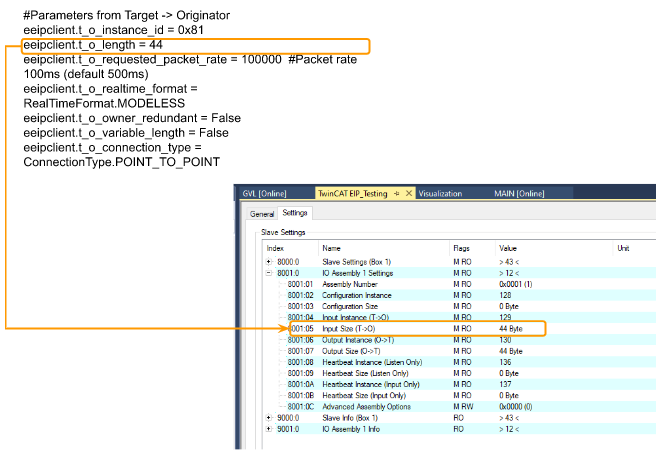
Parameters from Target -> Originator
t_o_Instance_id
For the Input instance ,the Instance number in the TwinCAT side is 129 = 0x81 in Hex.
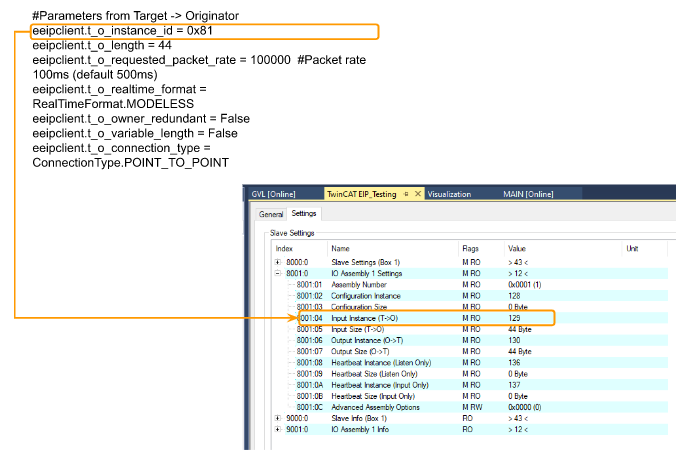
t_o_length
There is a 4 bytes header in Modeless,So the t_length=44.(Although the total size of user data size is 40 bytes)
t_o_requested_packet_rate
Please make sure the RPI is larger than the cycle time of the Sync Task in TwinCAT.
Add PLC
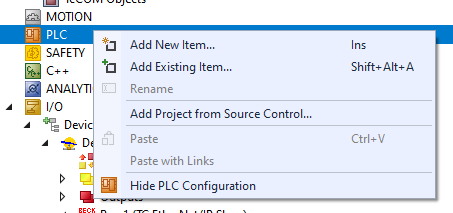
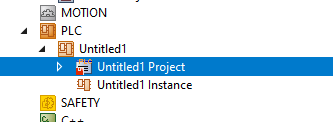
Finally we just need to add a new PLC in our TwinCAT project.
Right click the PLC>Add New Item.
Select Standard PLC Project as your project template.
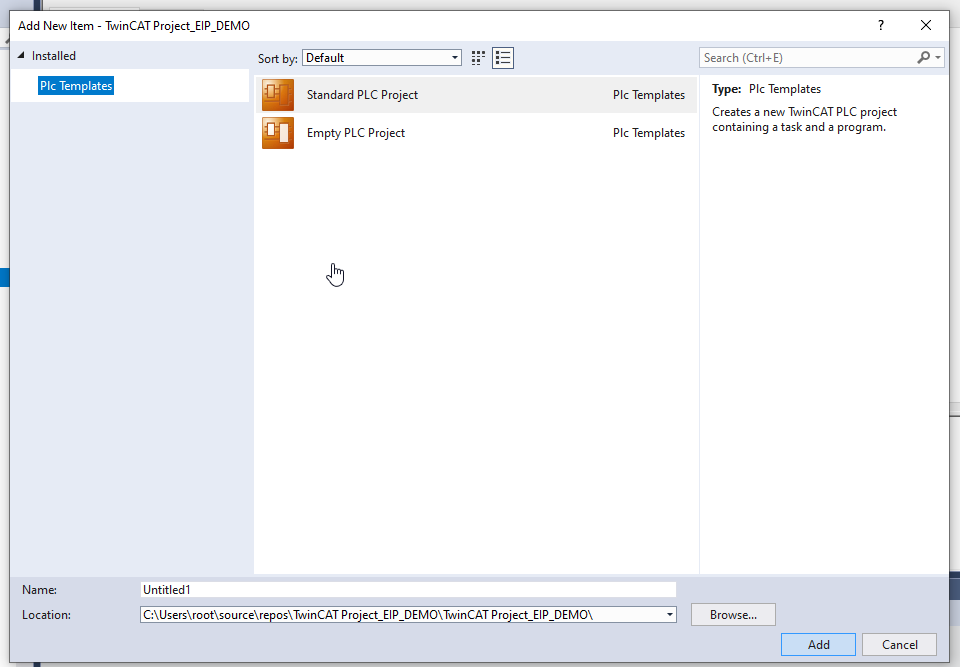
Done!
GVL
Create a Global Variable List and define the process input/output data.
| {attribute ‘qualified_only’} VAR_GLOBAL Inputs AT %I* :ARRAY[0..23]OF BYTE; Outputs AT %Q*:ARRAY[0..19]OF BYTE; END_VAR |
MAIN Program
MEMMOVE function is used to block move the data that is received from RoboDK to a 32 bit real array.
And I will just write some random numbers back to TwinCAT side.
| PROGRAM MAIN VAR i:INT; r32:ARRAY[0..5] OF real; END_VAR FOR i :=0 TO 19 DO GVL.Outputs[i]:=INT_TO_BYTE(i+10); END_FOR MEMMOVE( destAddr:=ADR(r32[0]) ,srcAddr:=ADR(GVL.Inputs[0]) ,n:=24) |
;
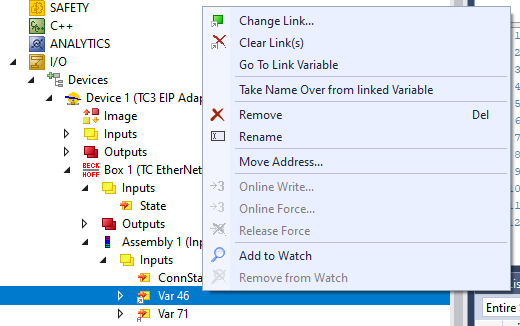
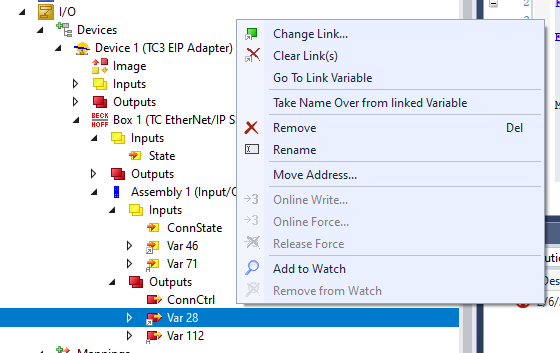
Mapping
Do not forget to map your variables between Process IO and User Program.
Inputs
Outputs
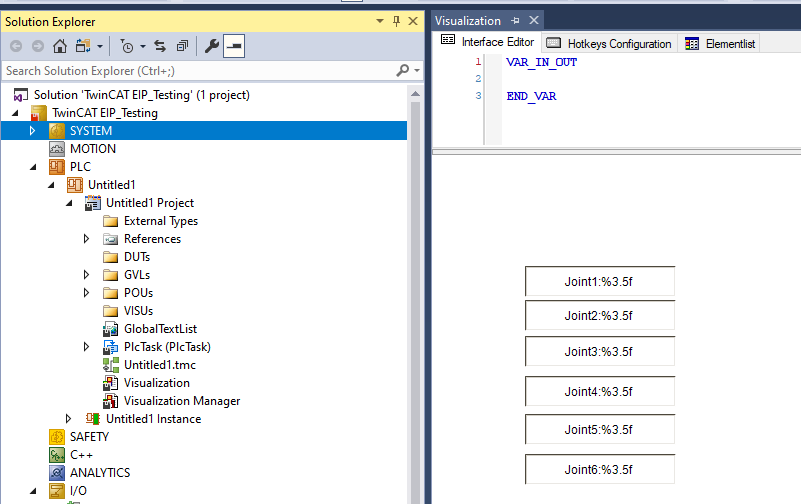
Visualization
we can create a Visualization for displaying the joint’s value of our UR Robot.
Result
DevState=0, It means that no Error in our Ethernet/IP Adapter.
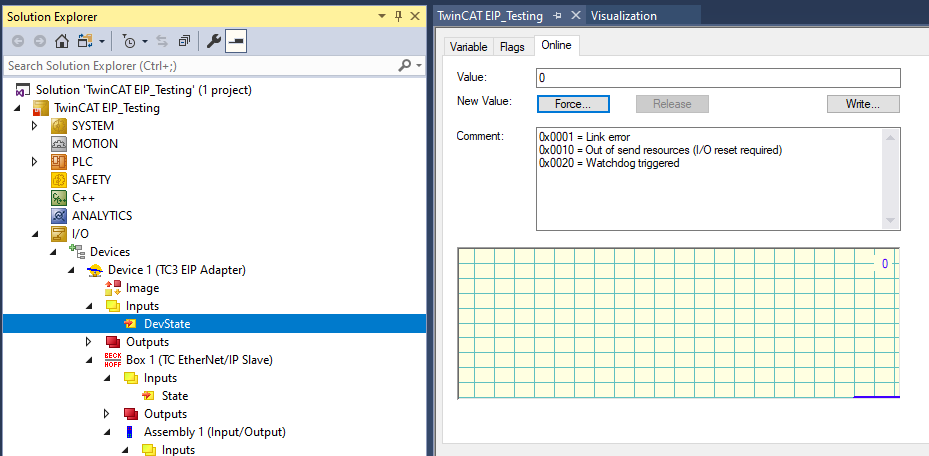
State=0,It means that No Error in our Ethernet/IP slave.

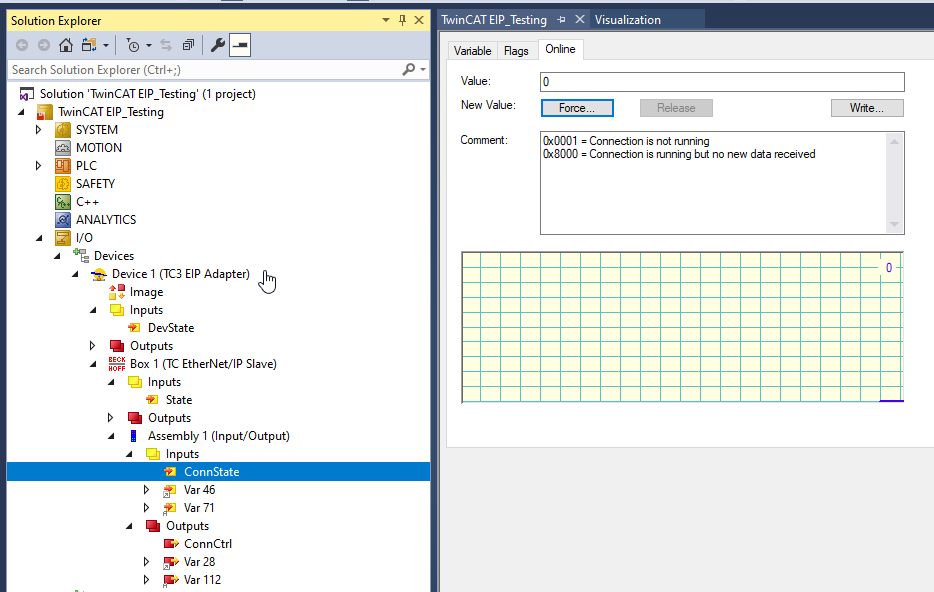
ConnState=0, It means that Connections between Scanner and Adapter are established.
192.168.3.42 is my PC with RoboDK installed inside, A Forward Open request is sent to the Ethernet/IP Adapter, Success response is returned.

Point to Point Data data exchange packages can be found from wireshark.

And You can check the operation from this link: