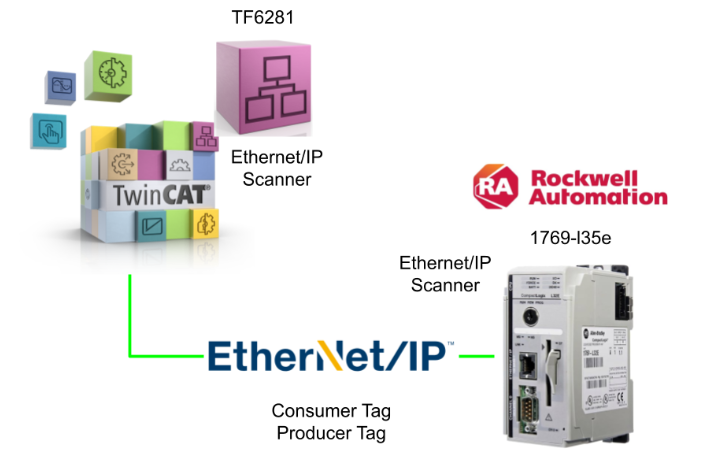
This article describes the construction of Tag communication between a Beckhoff TwinCAT3 TF6281 Ethernet/IP Scanner and a Rockwell PLC Ethernet/IP Scanner from scratch.
The Rockwell side uses older PLCs, but the same philosophy applies to the new devices.
Let’s enjoy FA!
Implementation
Beckhoff Side
First, build from the Beckhoff side.
Configure Etherent/IP Network
We will establish an Ethernet/IP network on the TwinCAT3 side.
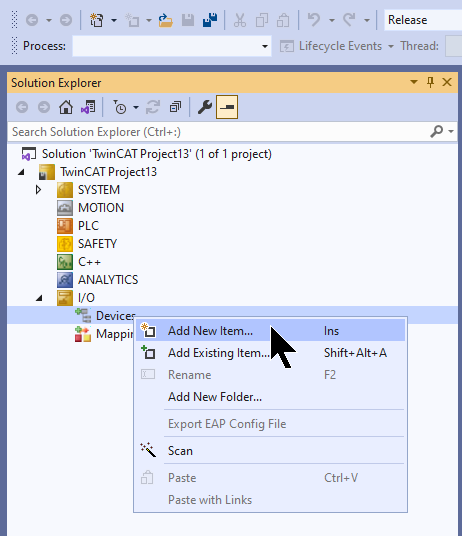
Add Ethernet/IP Scanner
To add an Ethernet/IP Scanner, go to I/O>Devices>Add New Item.
Select Ethernet/IP>Ethernet/IP Scanner>OK.
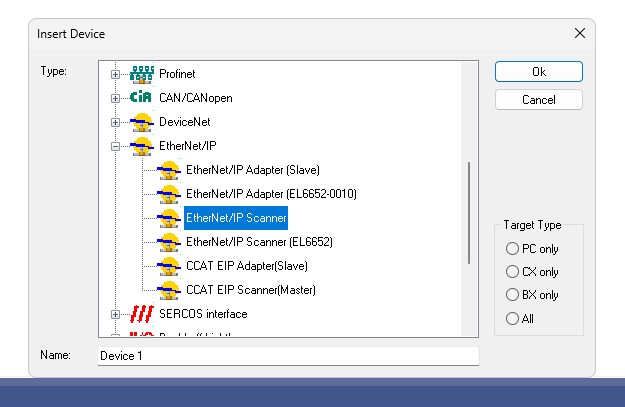
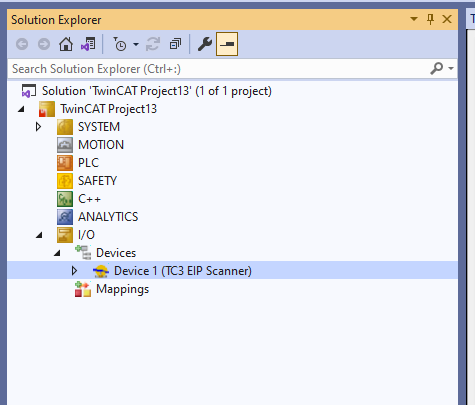
Done!Ethernet/IP Scanner has been added.
Configure Ethernet Adapter
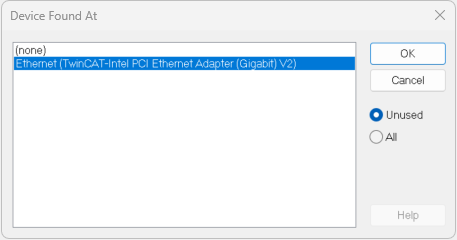
Open the Adapter tab, click on the Serach button and search for an Ethernet Adapter that can be used with the PC currently running TwinCAT Runtime.
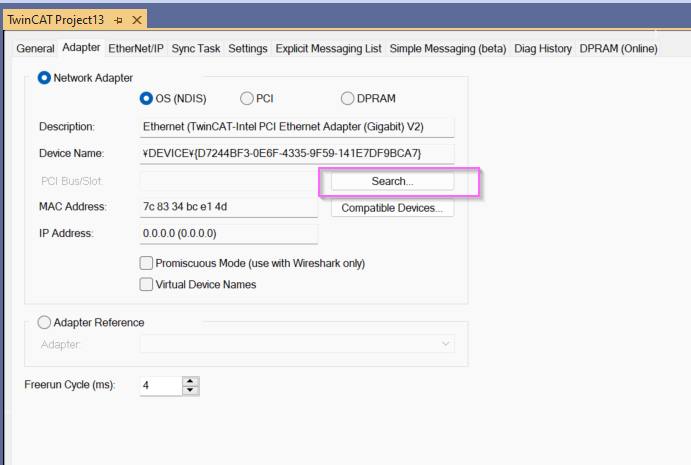
Set the appropriate Interface and proceed with OK.
Configure Task
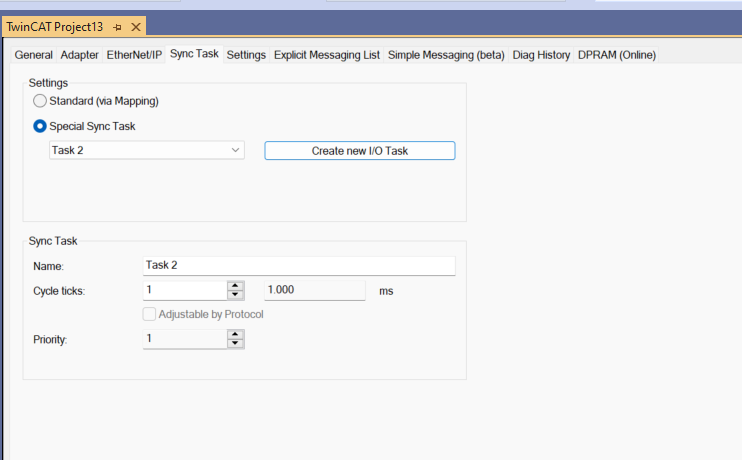
Next, to set up the Ethernet/IP Sync Task, click on Tab Open in Sync Task>Special Sync Task>Create New IO Task.
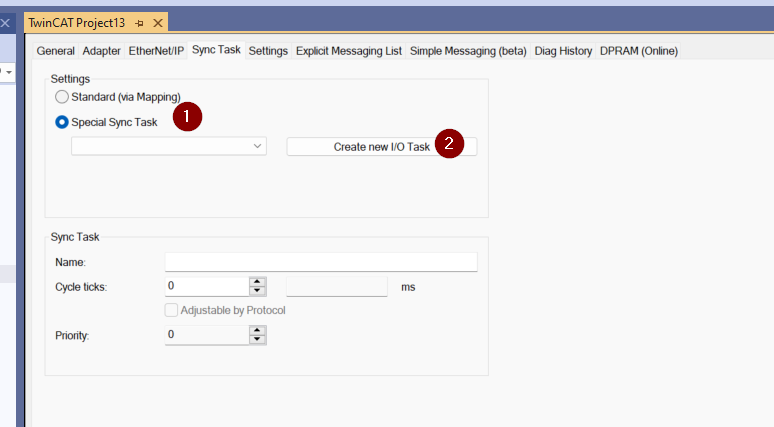
Enter the Task name.
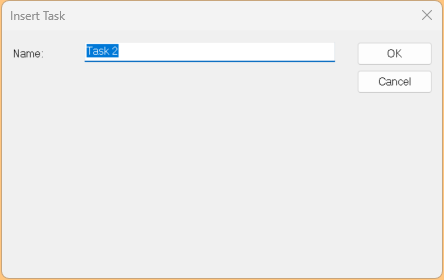
Done!
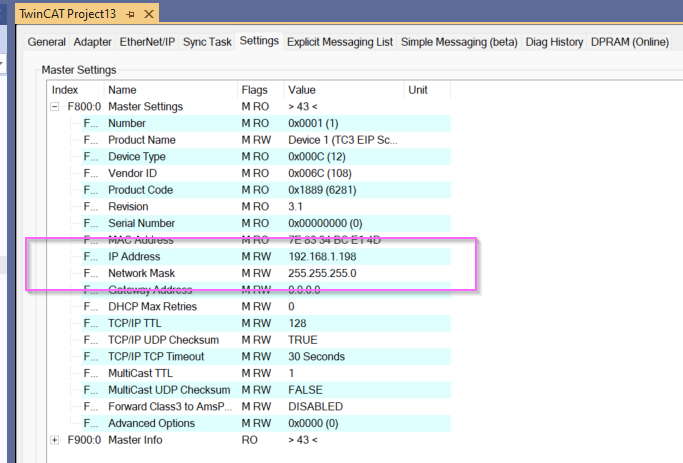
Configure IP Address
Set the TwinCAT’s Ethernet/IP Scanner IP address; set Settings>IP Address and Network Mask to match your application.
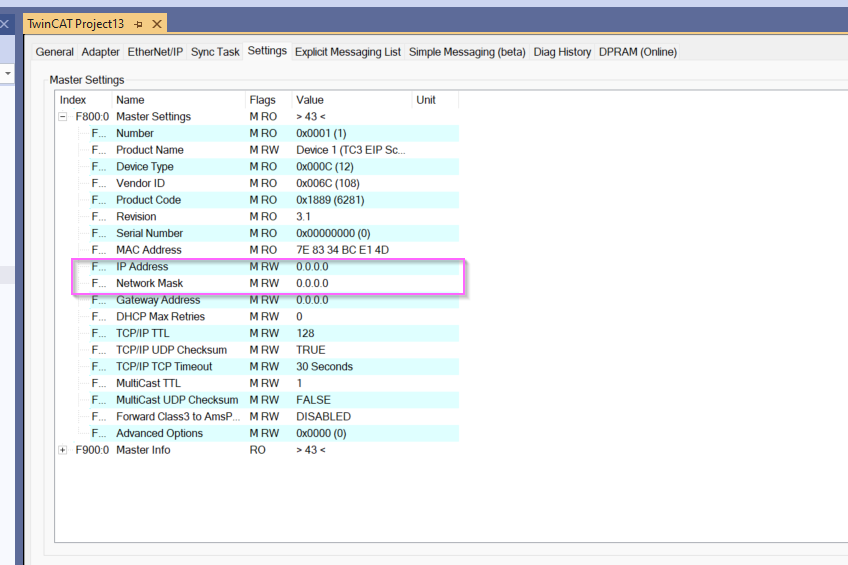
Done!
Add Producer Object List
In order for Scanners to communicate with each other, a Producer Tag and Consumer Tag must be defined. Right-click on the Scanner>Add New Item.
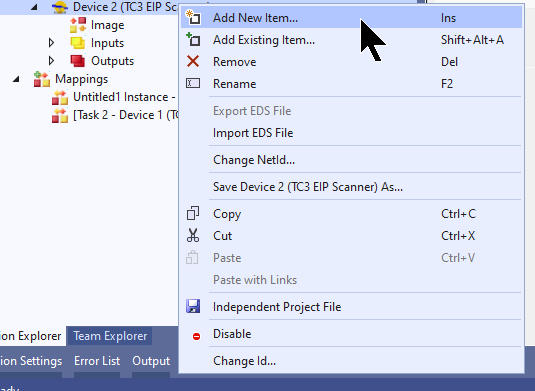
Select Miscellaneous>Producer Object List>OK to proceed.
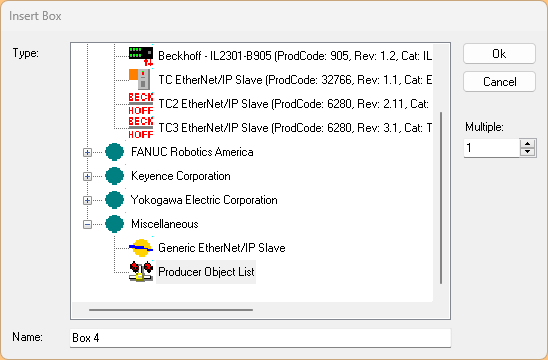
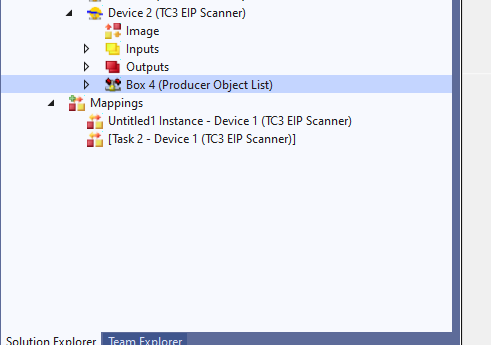
Done!A Producer Object List has been added.
Append Producer Connection
To add a Producer Tag to the Ethernet/IP Scanner on the TwinCAT side, right click>Append Producer Connection.
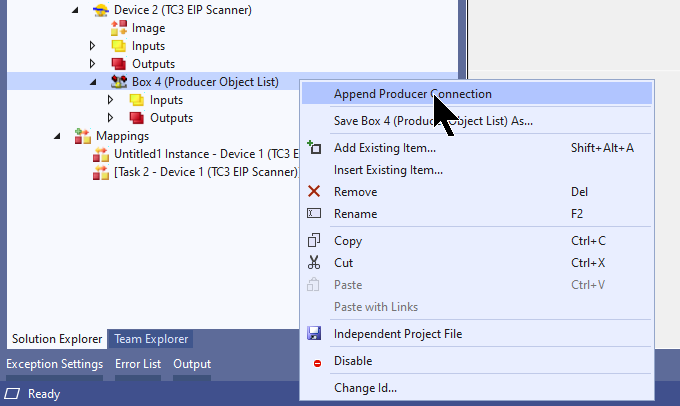
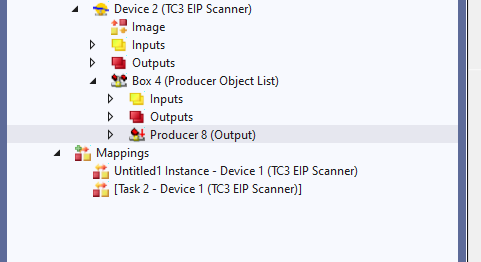
Done!Producer Tag has been added.
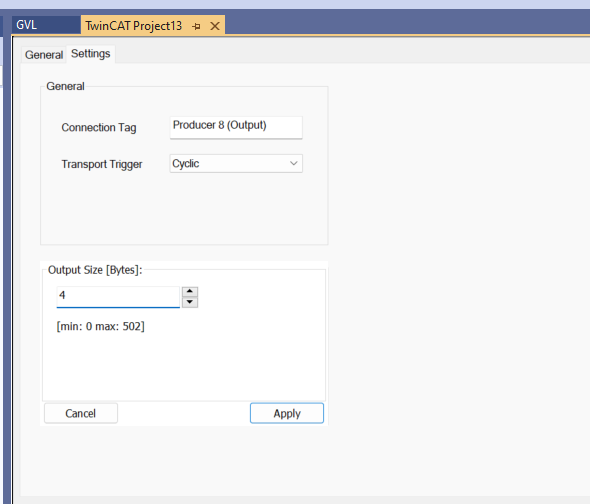
Open the Setting Tab and set the Producer Tag.
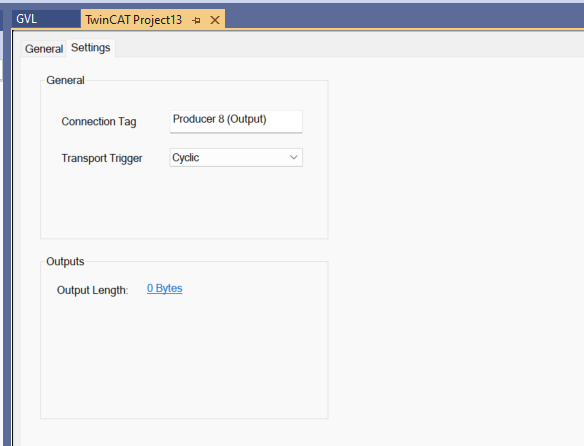
Output Size
Click “0 Bytes” to set the Producer Tag size (Byte).
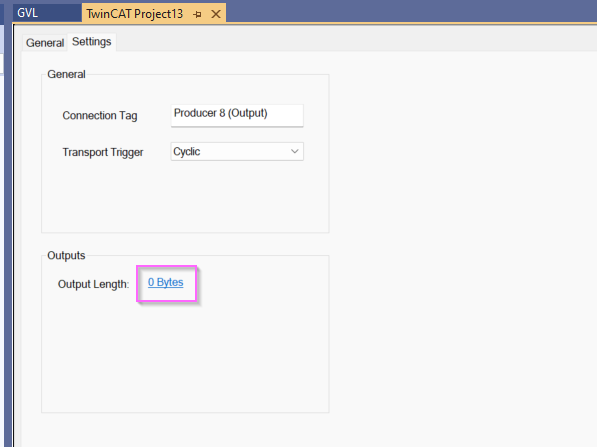
This time, we will construct a 4 Byte Producer Tag.
Done!
Connection Tag
Set the Producer Tag name in the Connection Tag field. The Tag name must be set later according to Rockwell.
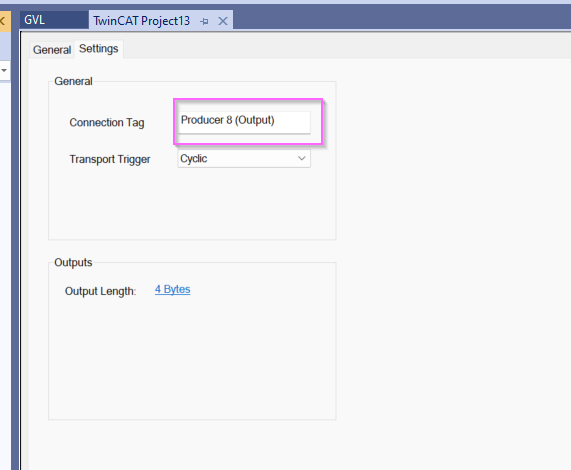
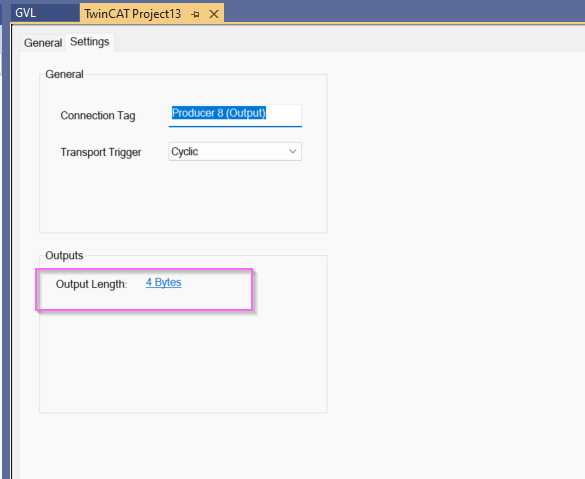
Result
Done!Producer Tag has been set up.
Add Generic EtherNet/IP Slave
Now, to connect to the Producer Tag (Consumer Tag from the TwinCAT3 perspective) on the Rockwell PLC side, go to Ethernet/IP Scanner>Right click>Add New Item.
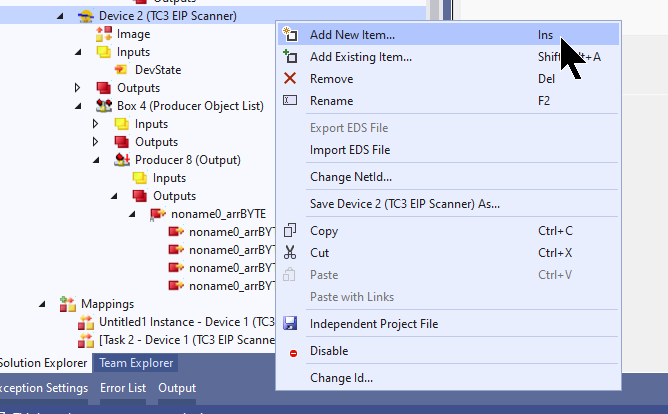
Select Miscellaneous>Generic Ethernet/IP Slave and proceed with Ok.
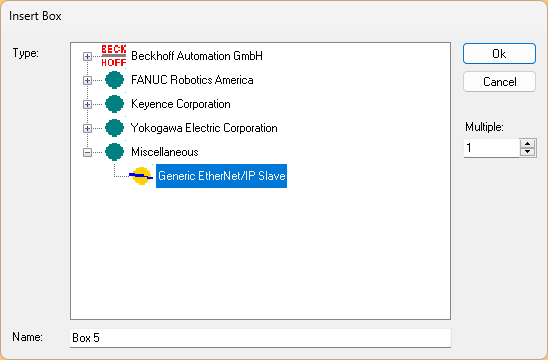
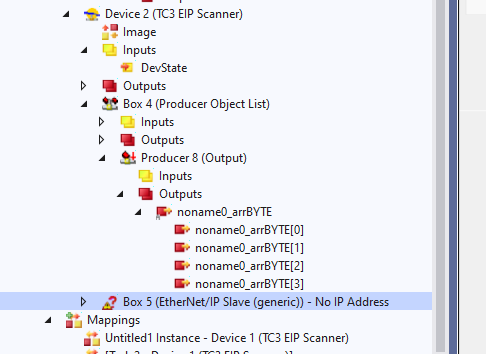
Generic Ethernet/IP Slave has been added.
IP Address
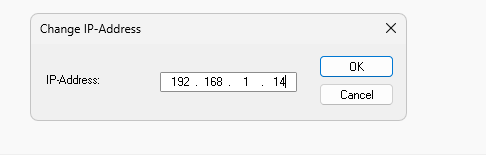
To set the IP address of the Generic Ethernet/IP Slave, right-click>Change IP Address.
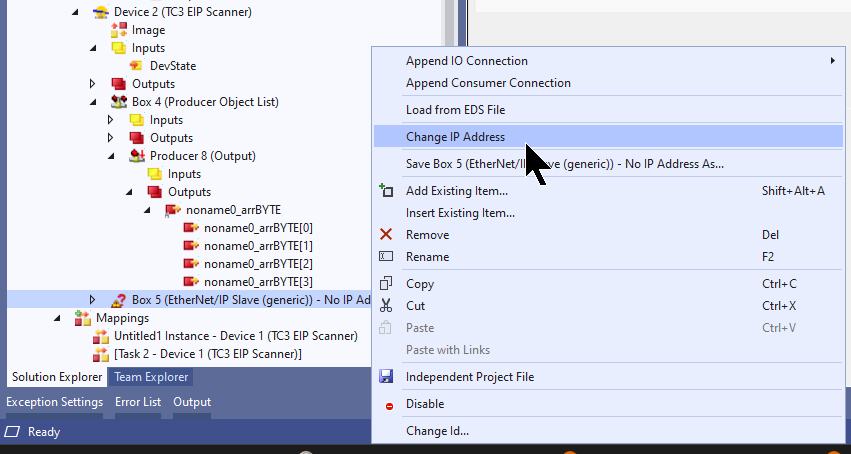
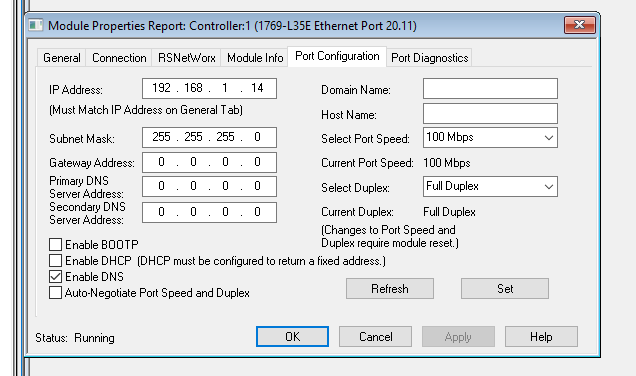
Set to the IP address of the Rockwell PLC.
On the Rockwell side, the IP address can be viewed from the Port Configuration Tab.
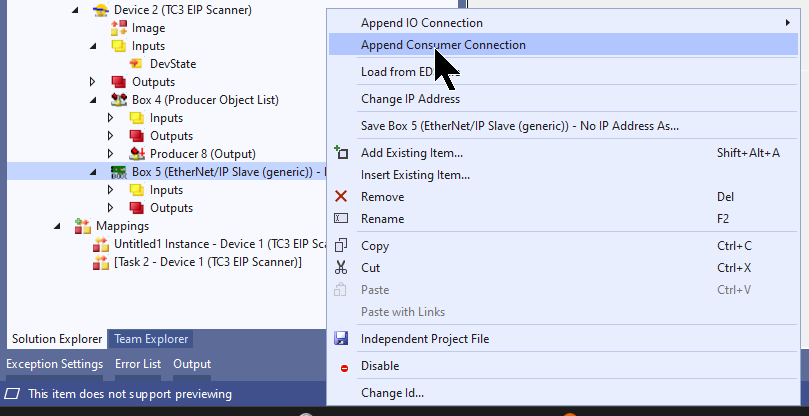
Append Consumer Connection
Click Append Consumer Connection to add a Consumer Tag to the Generic Ethernet/IP Slave (Rockwell’s PLC in this article).
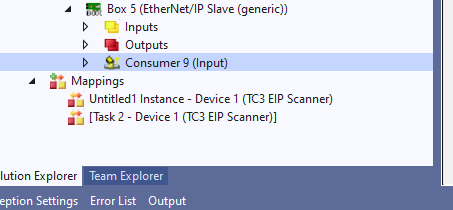
Cousumer Tag has been added.
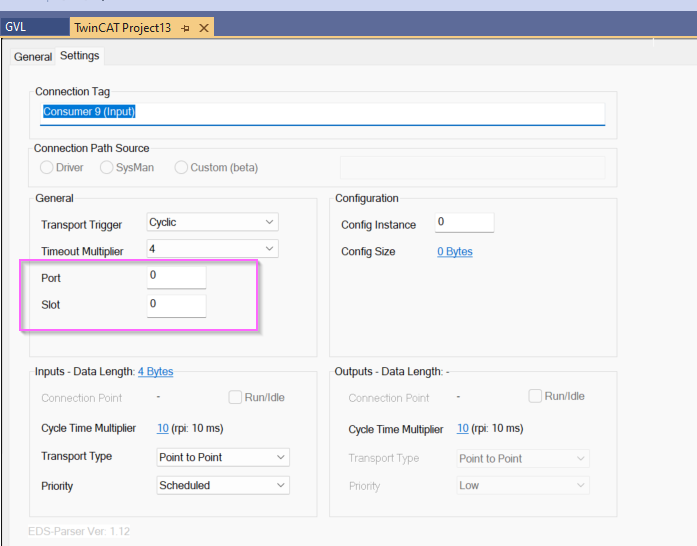
This is the Consumer Tag setting screen.
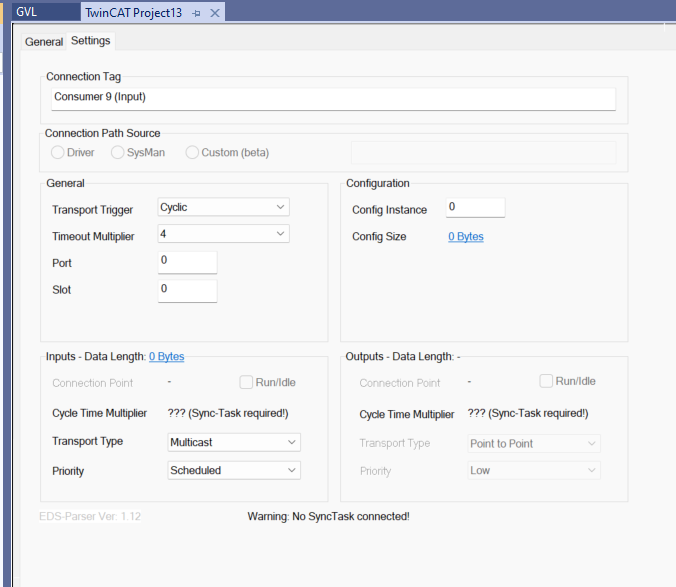
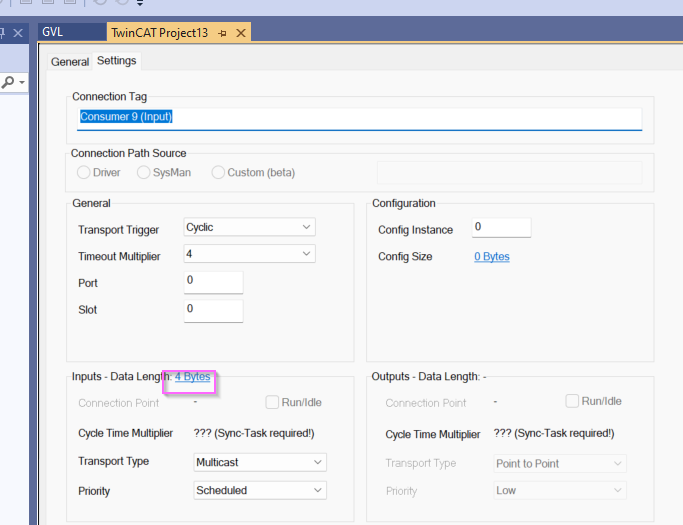
Input Data Size
Sets the input data size for the Consumer Tag.
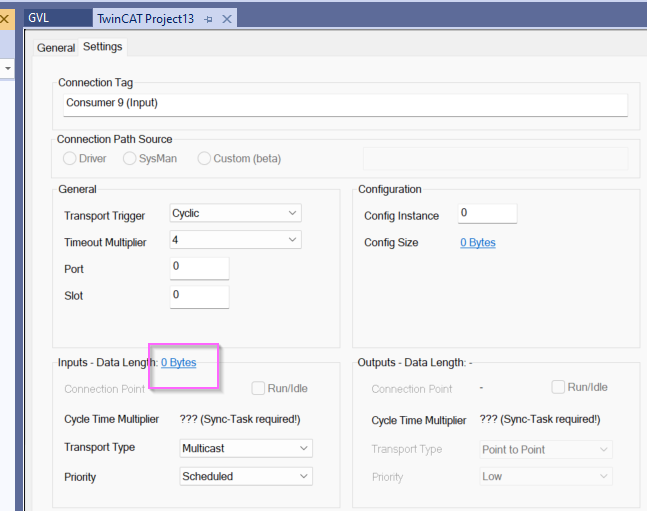
This data size should be set according to the Producer Tag set on the Rockwell side.
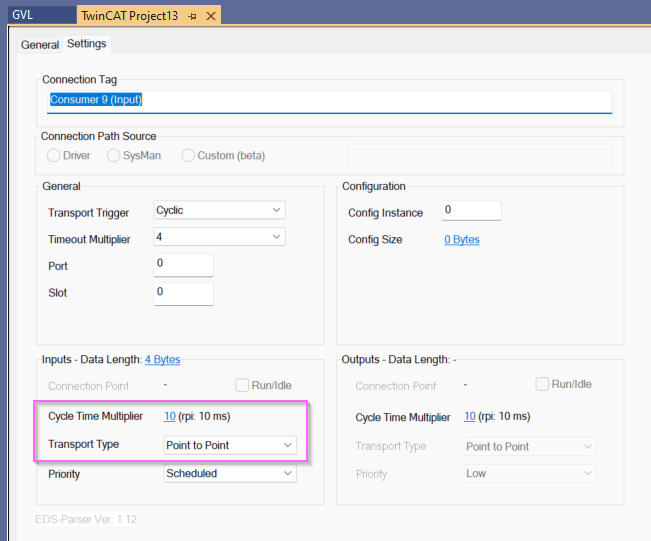
Transport Type/Cycle Time Multiplier
RPI and connection settings should be configured according to the application.
Port/Slot
Set Port=1. This parameter is usually 1, but be sure to check the setting on the Rockwell side.
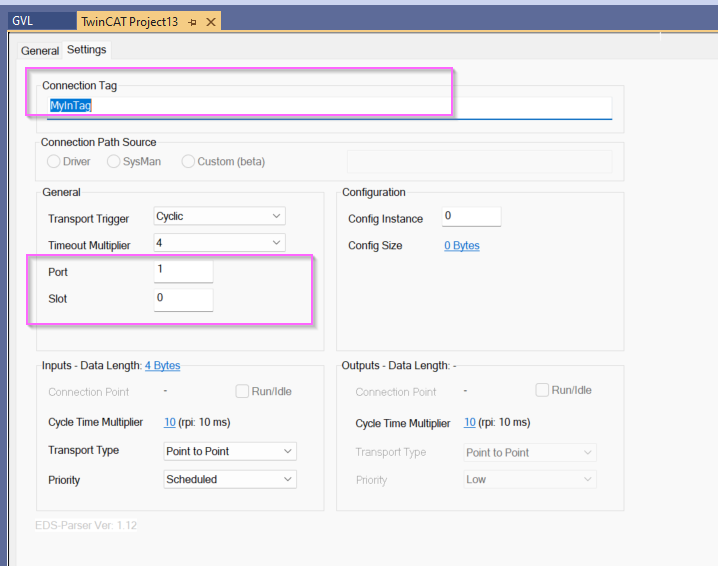
Connection Tag
Next, the Connection Tag should be set to match the Rockwell PLC’s Producer Tag name.
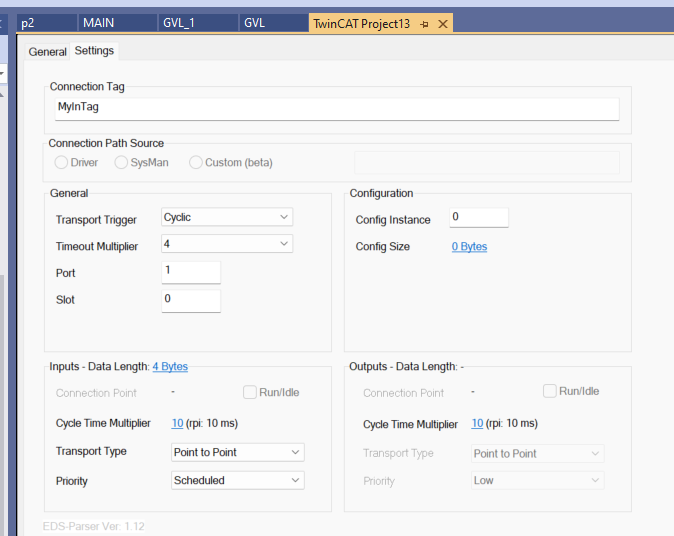
Result
Done!Now you are ready to set up.
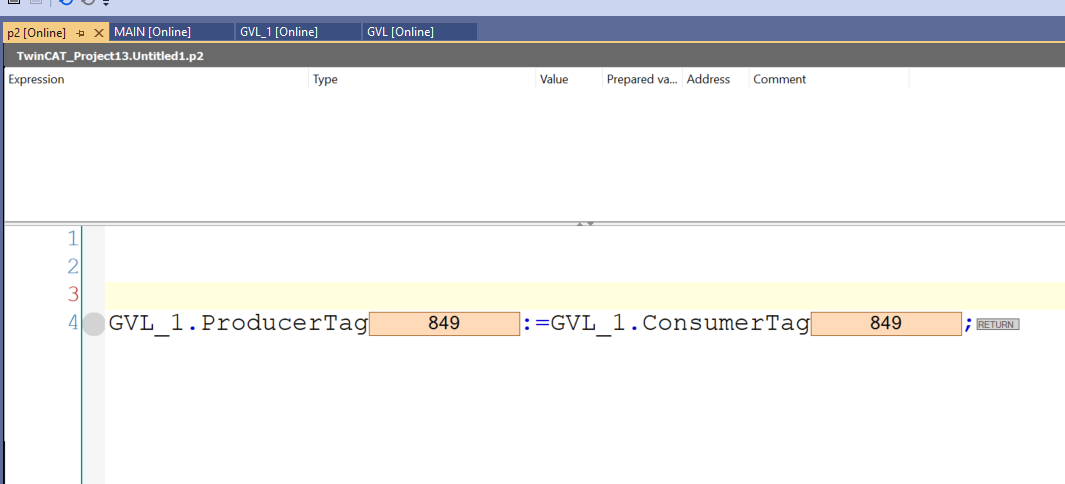
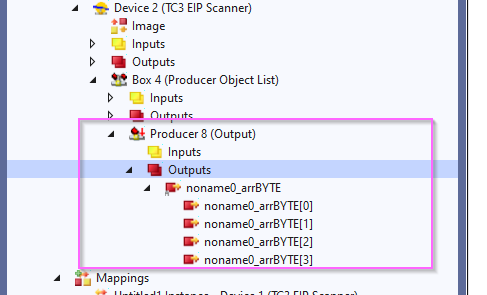
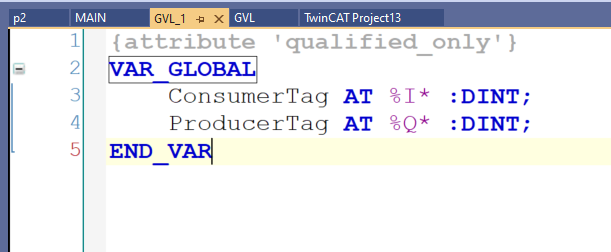
GVL
Add Global Variables List.
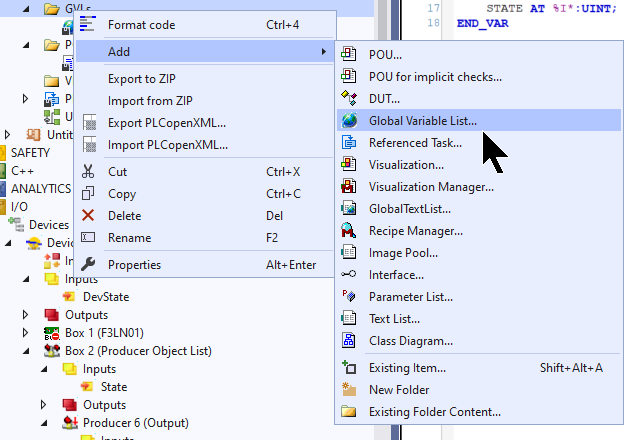
Define Process input/output data as shown in the figure below.
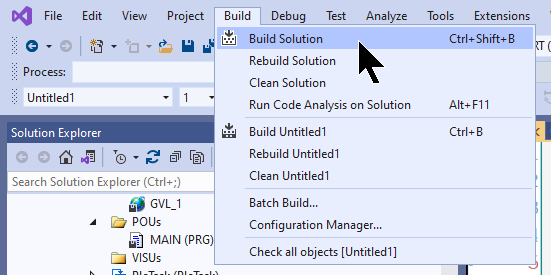
Build
Compile the project under Build>Build Solution.
Mapping-OutputData
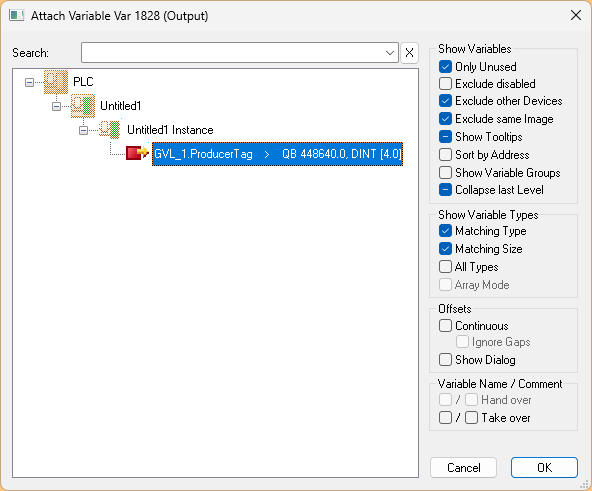
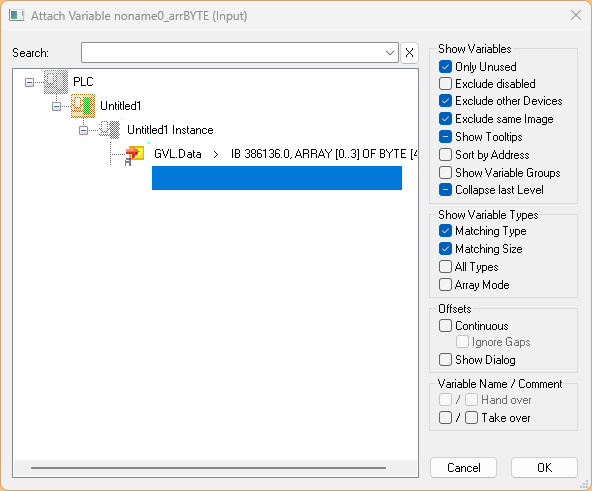
To link the Producer Tag to a variable in the program, click Producer Tag>Right Click>Change Link.
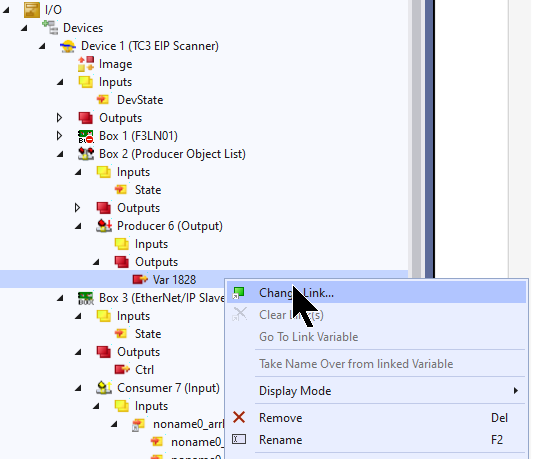
Let’s Link this to the variable we defined earlier.
Mapping-InputData
To link a Cosumer Tag to a variable in the program, click Cosumer Tag>Right Click>Change Link.
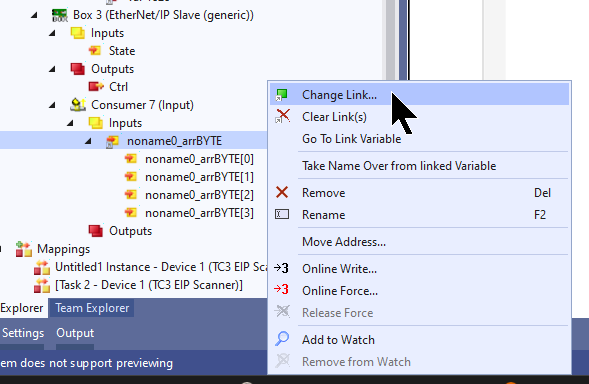
Let’s Link this to the variable we defined earlier.
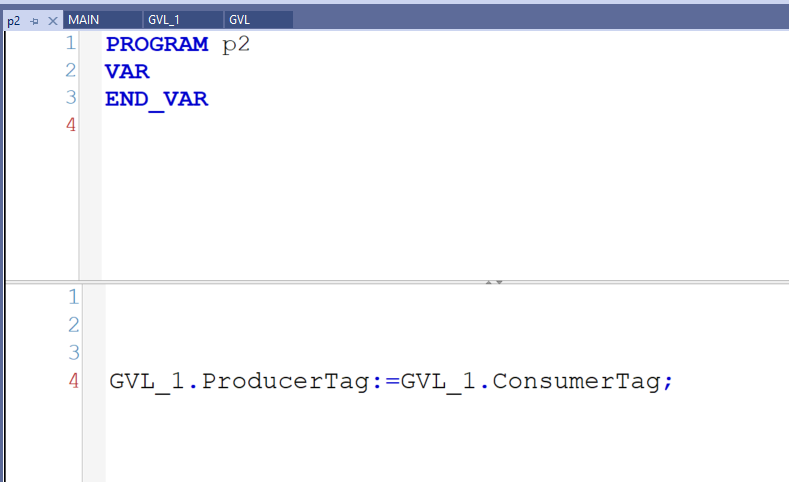
PROGRAM
The last step is to Create a simple communication confirmation program.
Activate Configuration
Download the hardware configuration into the TwinCAT runtime in Configuration.
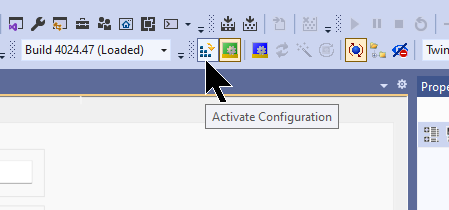
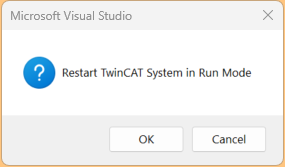
OK to proceed.

Switch TwinCAT Runtime to Run Mode.
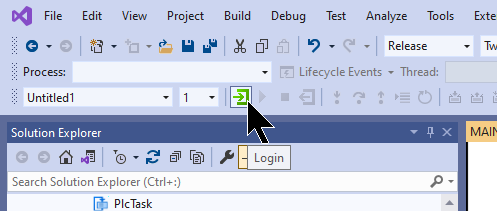
Login
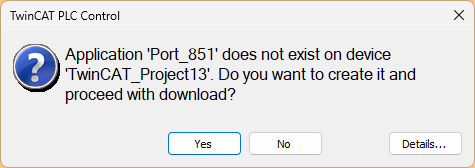
Download the program with Login.
Proceed with Yes.
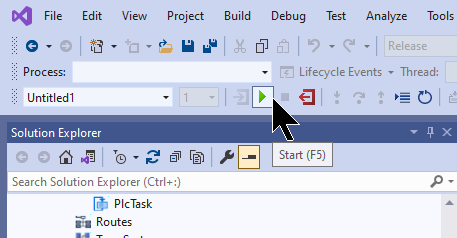
Start
Finally, start TwinCAT Runtime with the Start button.
Rockwell Side
To enable PLC – PLC communication using Consume Tag and Produce Tag, an EtherNet/IP controller must be installed on the Rockwell side. However, it is not possible to use the Beckhoff Controller directly with the Rockwell Controller, so you need to create a Rockwell controller with the configuration tool.
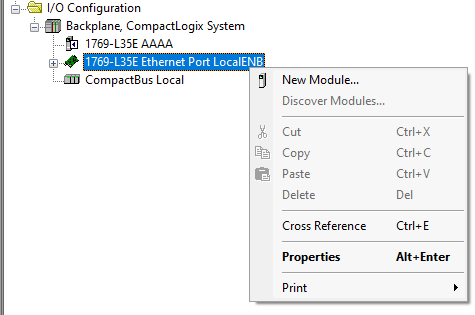
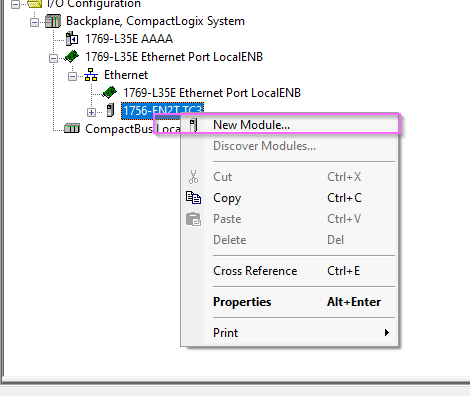
Add New Module
Add a temporary Rockwell Controller to create a TwinCAT3 connection in Hardware Configuration: LocalENB>Right click>New Module.
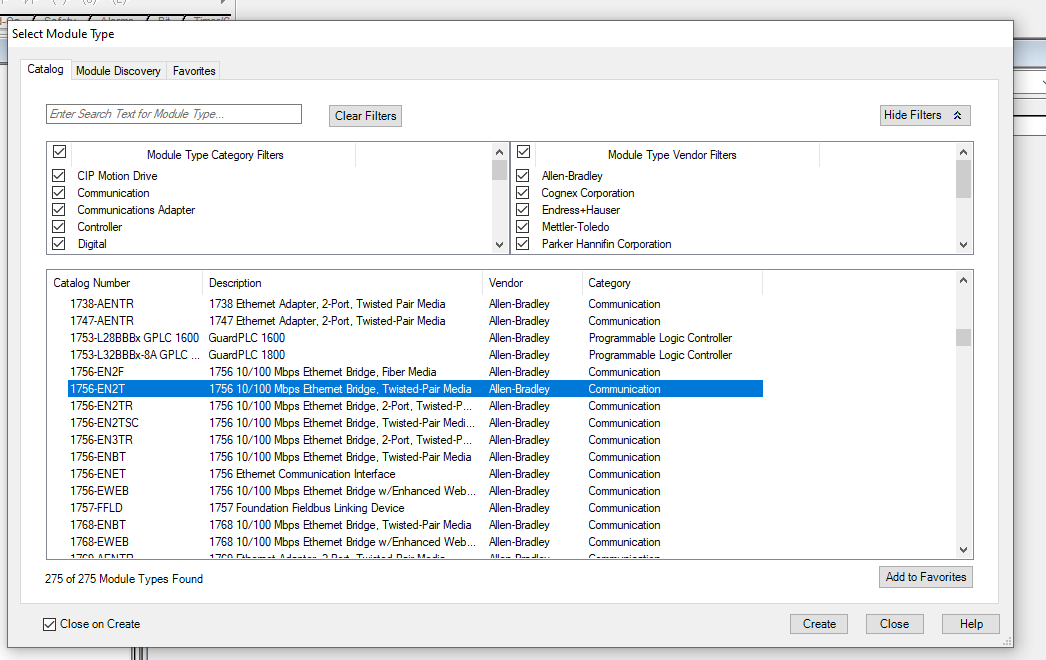
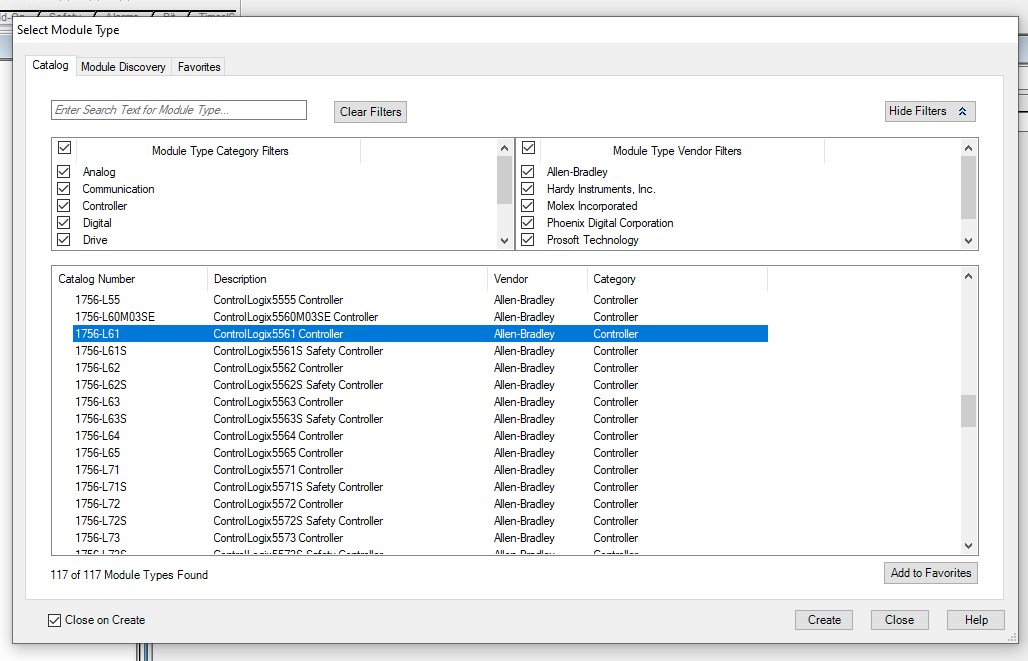
Add a Rockwell CPU. The model can be anything, so we will install a 1756-EN2T for this article.
Done!
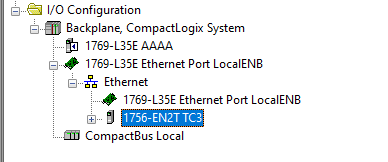
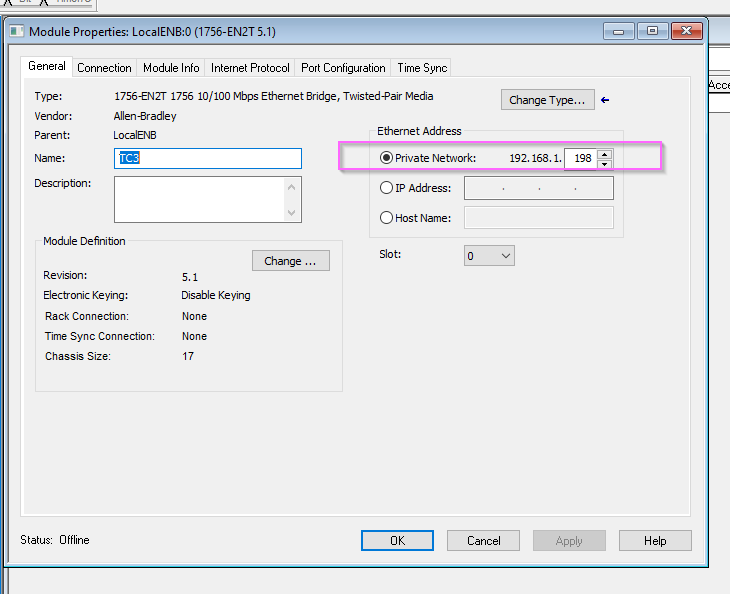
CPU Name
Set the CPU name to TC3 (TwinCAT3) so that the CPU you just added can be easily recognized.
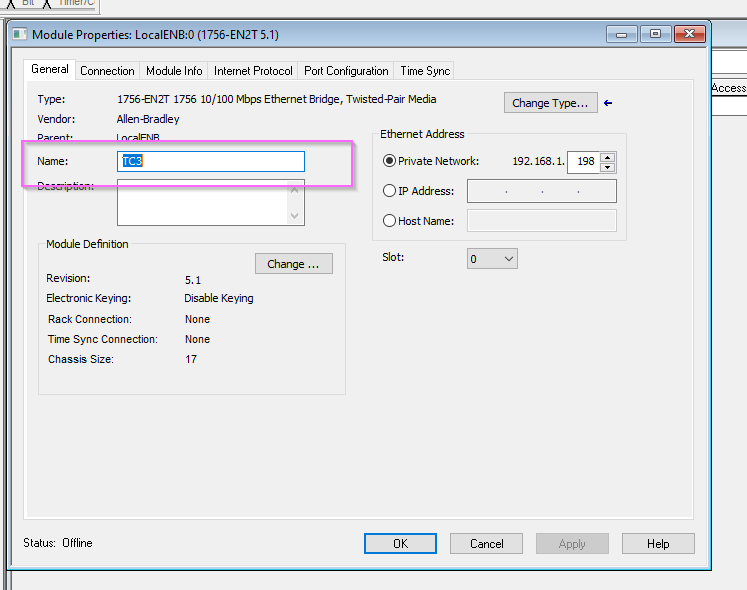
IP Address
Set the IP address to match the TwinCAT3 side.
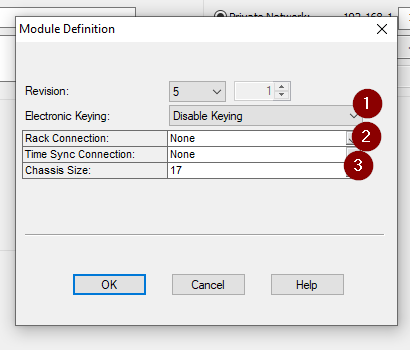
Module Definition
Next, click on Change to configure the Module.

Since this article will only present the TwinCAT Ethernet/IP Scanner as a “Rockell” PLC, let’s disable Electronic Keying and set Rack Connection and Time Sysnc Connection to None.
Add New Local PLC
Add a new module by right-clicking “Rockwell PLC” you just added and selecting “New Module.
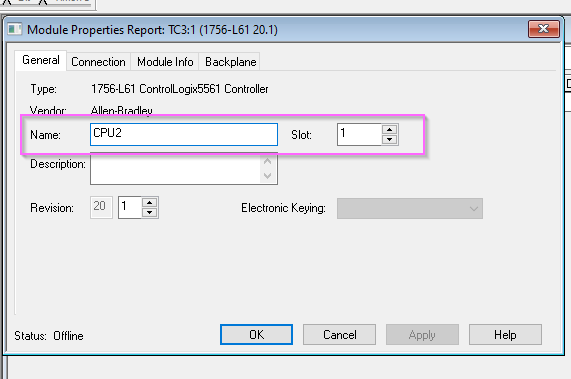
For this article, we will set it to “1756-L61”.
CPU Name/Slot
Set Module name and Slot to 1.
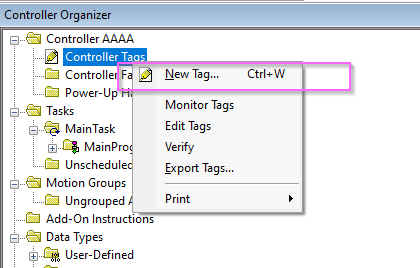
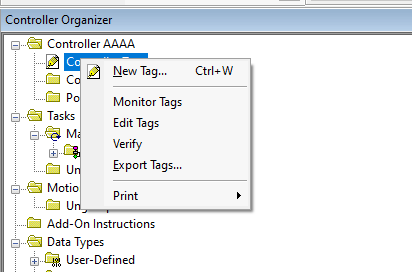
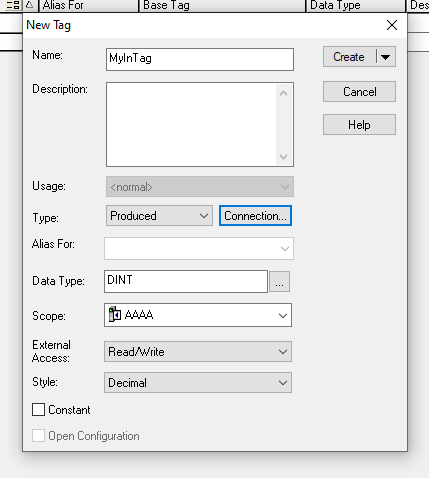
Configure Tag
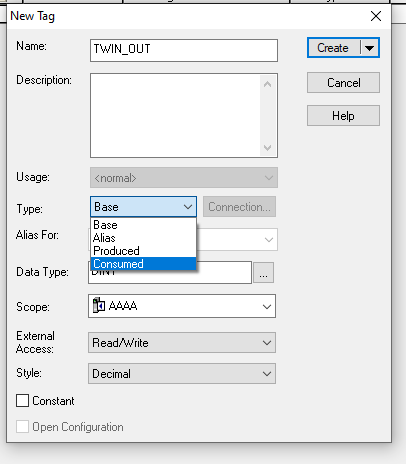
Once you have completed building the TwinCAT PLC connection, the next step is to add a Controller Tag. Go to Controller>Controller Tags>New Tag.
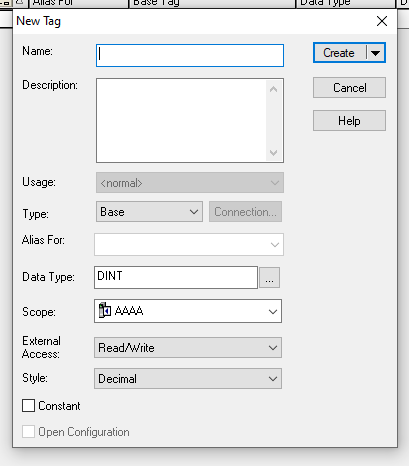
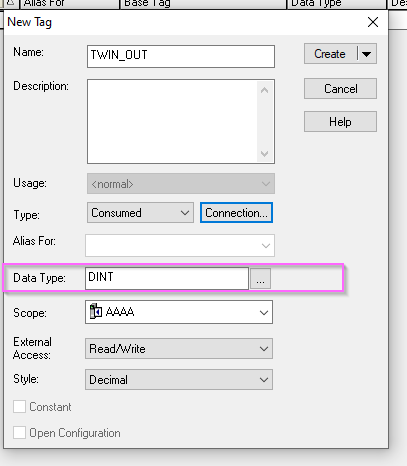
This is the screen for adding a Tag.
Consume Tag
This operation adds a “Consumer Tag,” which is the input data on the Rockwell side and the output data on the TwinCAT side.
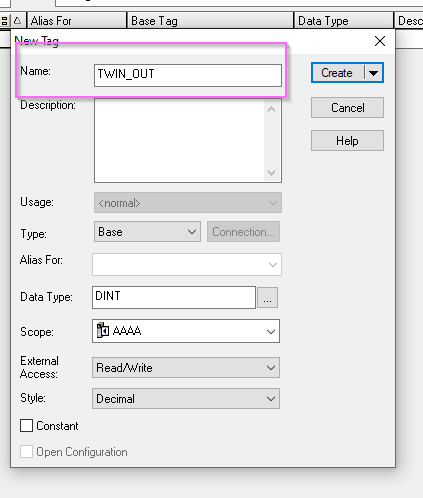
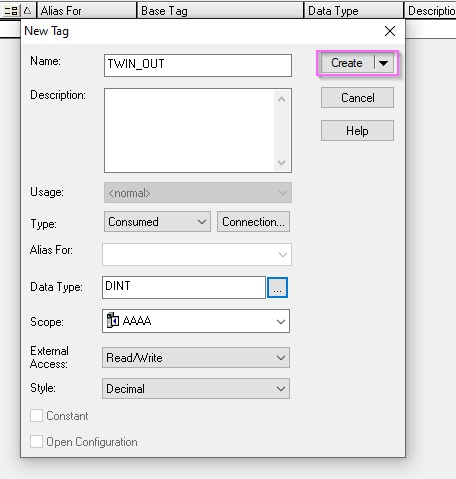
Name
The Name field defines the Tag name. The Name must match the Producer Tag defined on the TwinCAT side. In this article, TWIN_OUT is used.
Type
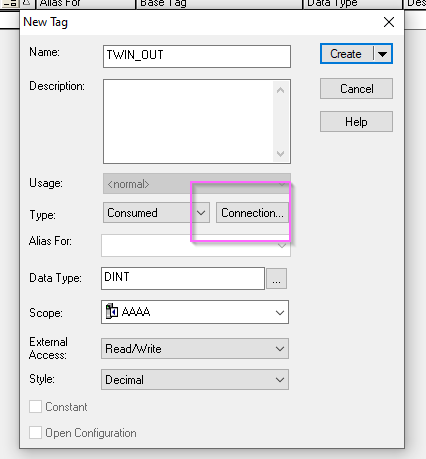
The Type Field is the data type of the variable. Let’s set it as Consumed here.
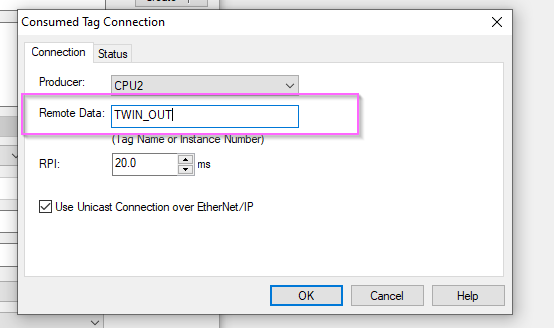
Connection
The next step is to set the Connection. In other words, this Consumer Tag is set to the Connection from which it is to be sent.
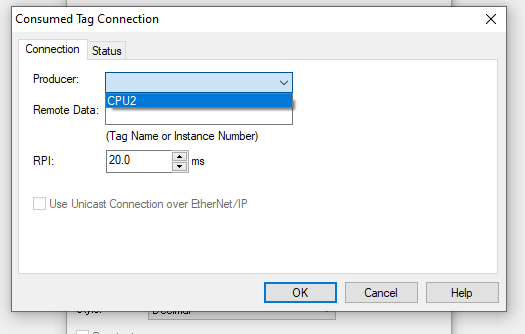
This is the Consumer Tag connection setup screen.
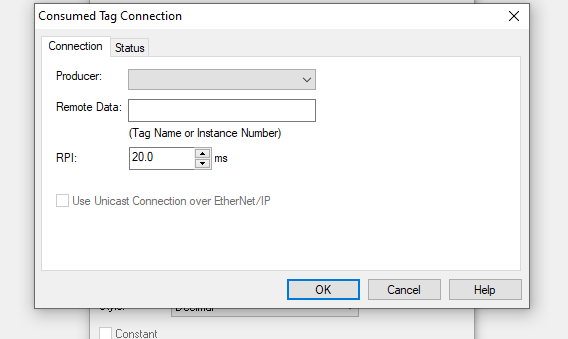
The Producer selects the TwinCAT3 Ethernet/IP Scanner connection masquerading as the Rockwell PLC that was just added.
Remote Data is set to the TWIN_OUT Tag that was just added.
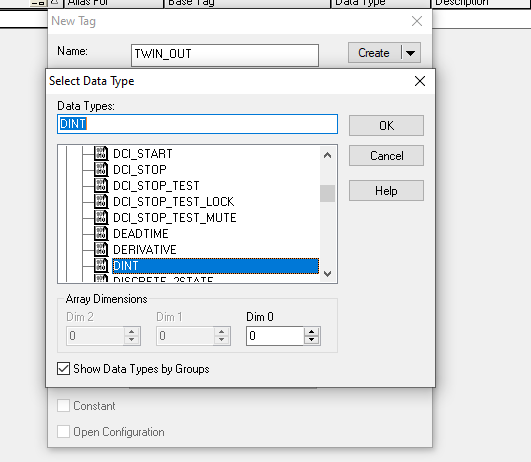
Data Type
The next step is to set the data type.
Let’s also match the data type here to the Tag set in TwinCAT3.
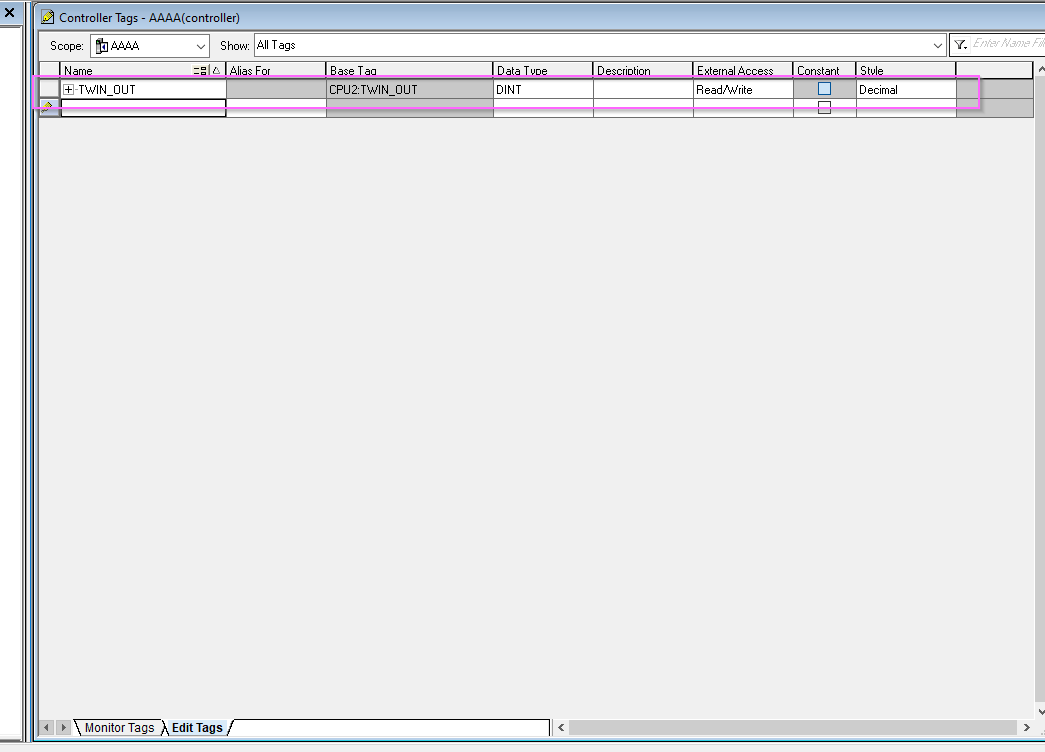
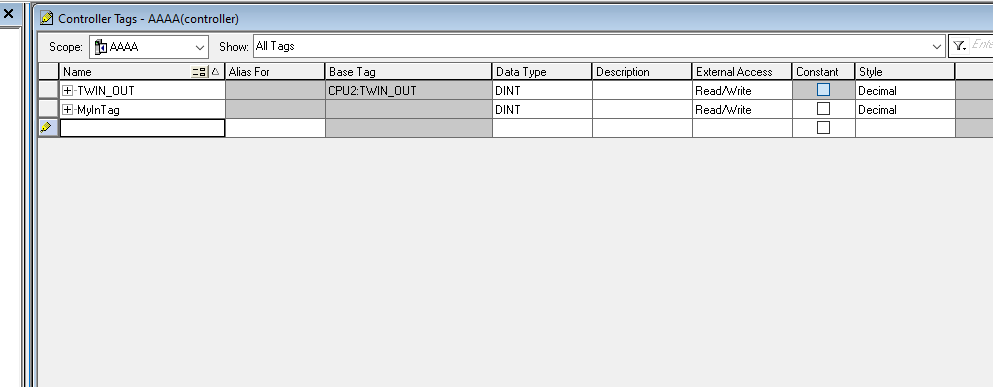
Result
Done!Consumer Tag has been added.
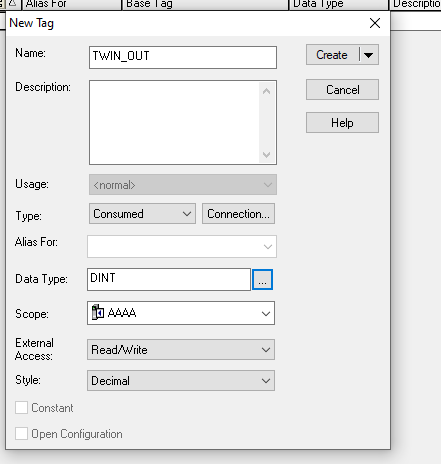
Finally, click the Create button to save the Tag settings.
Done!
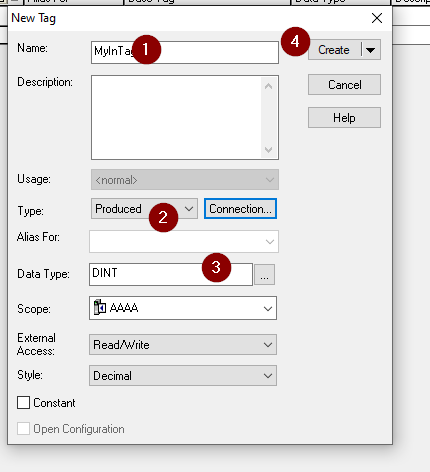
Producer Tag
Now set the Producer Tag.This Tag is the output data of Rockwell, i.e., the input data on the TwinCAT3 Ethernet/IP Scanner side.Right click on the Controller Tag>New tag to add a new tag.
As in the previous operation with the Producer Tag, only the Type will be set to Produced.。
Result
Done!
A Producer Tag has also been added.
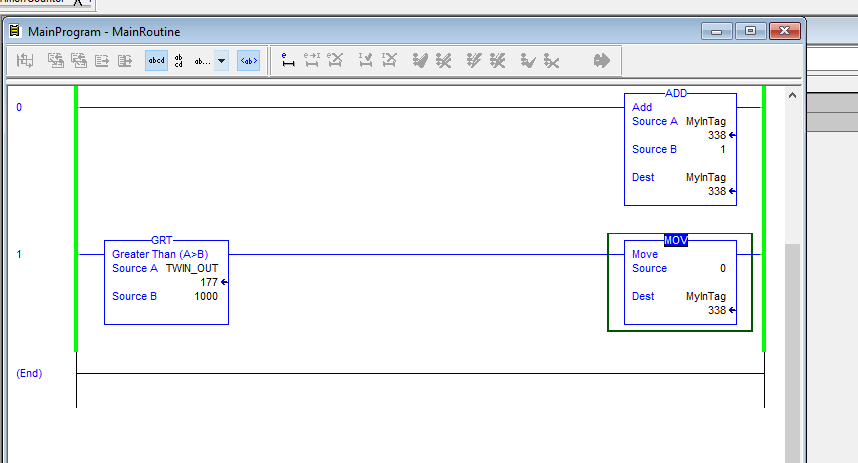
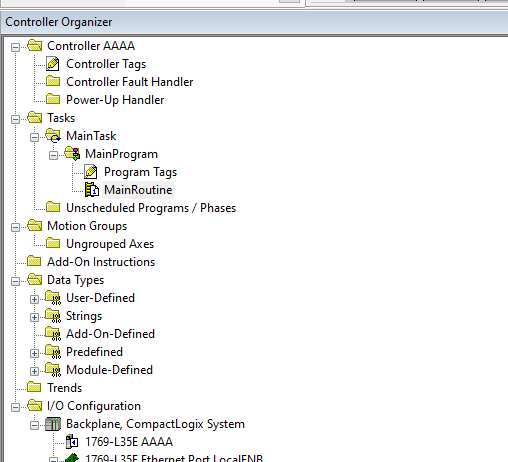
PROGRAM
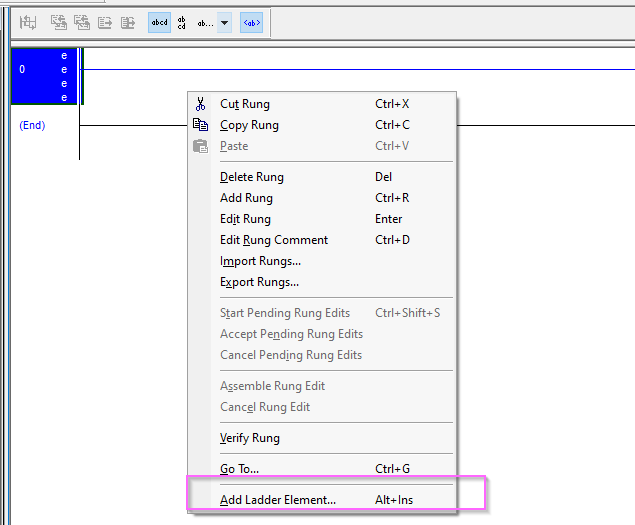
Finally, to create a simple communication program, click Task>Main Task>MainProgram>MainRoutine.
Add a new free circuit with Add Rung.
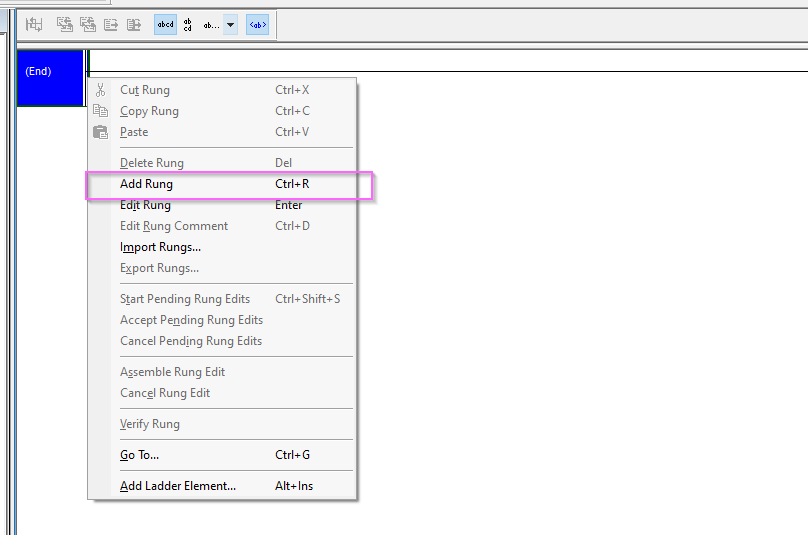
Done!

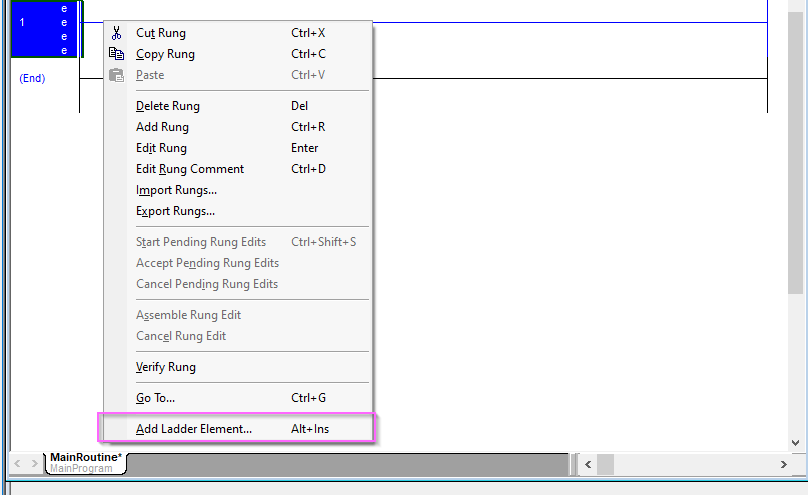
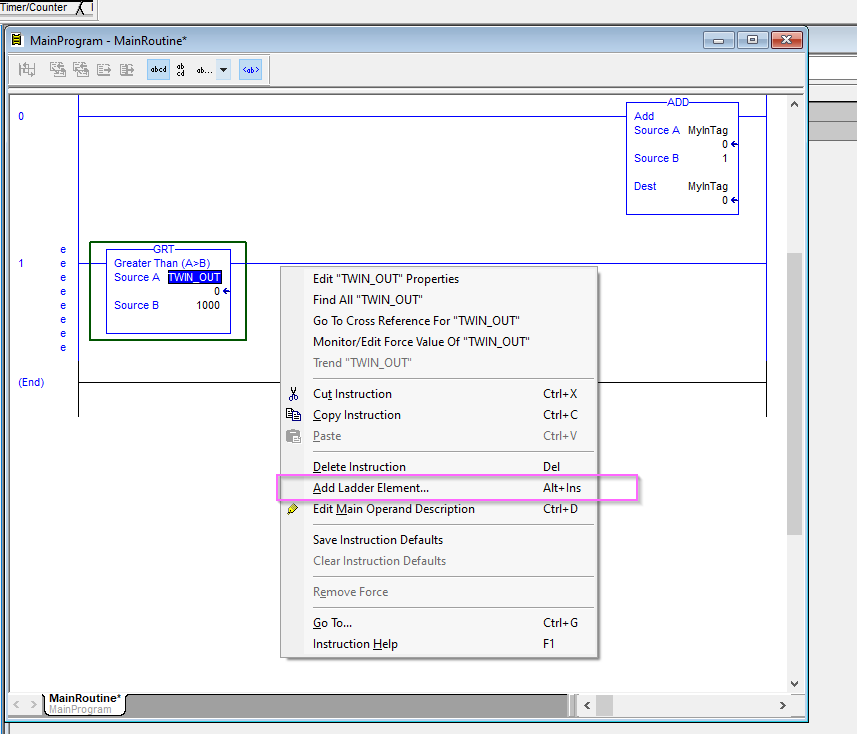
Add Ladder Element to add a ladder component to Rung.
This is the screen for adding ladder components.
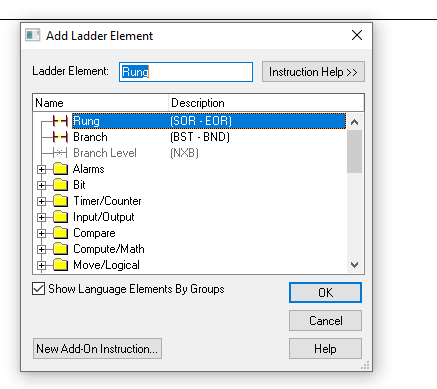
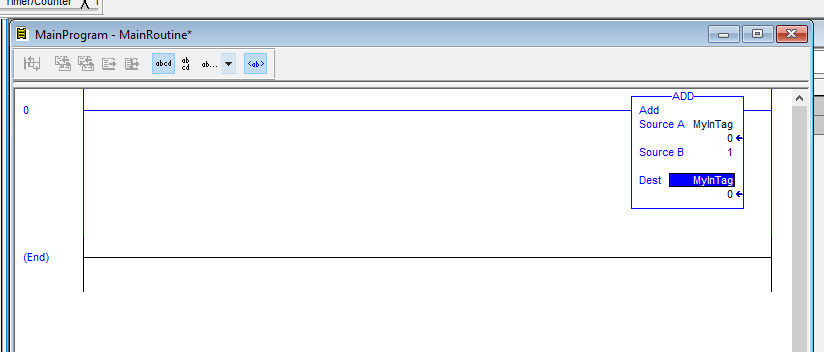
Add the ADD function.
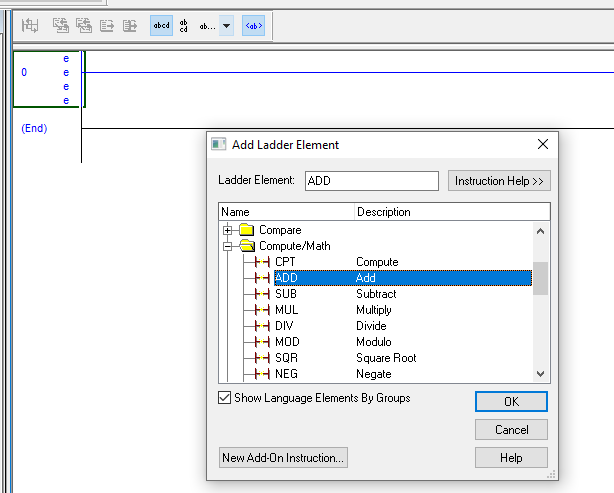
Done!
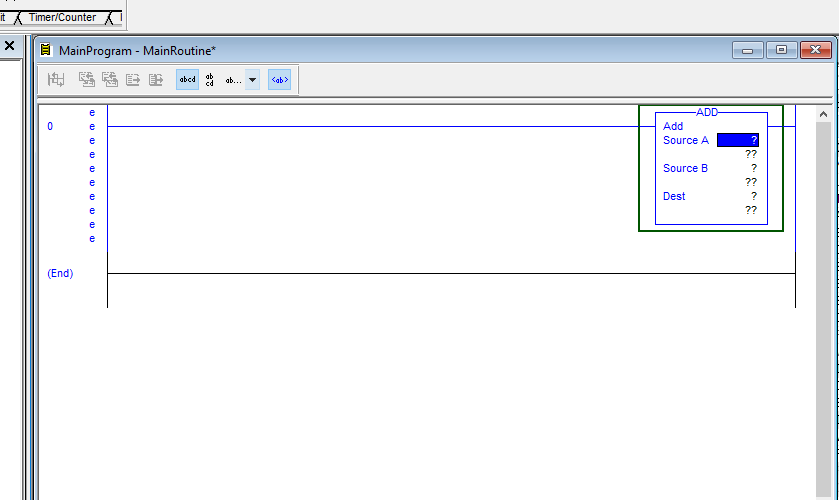
Add 1 to MyInTag (output of Rockwell PLC) for each Cycle.
Add other ladder components.
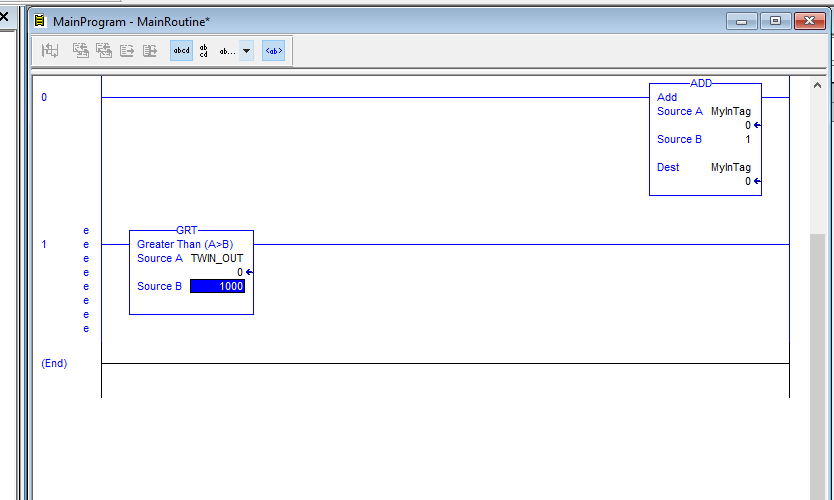
Add GRT function.
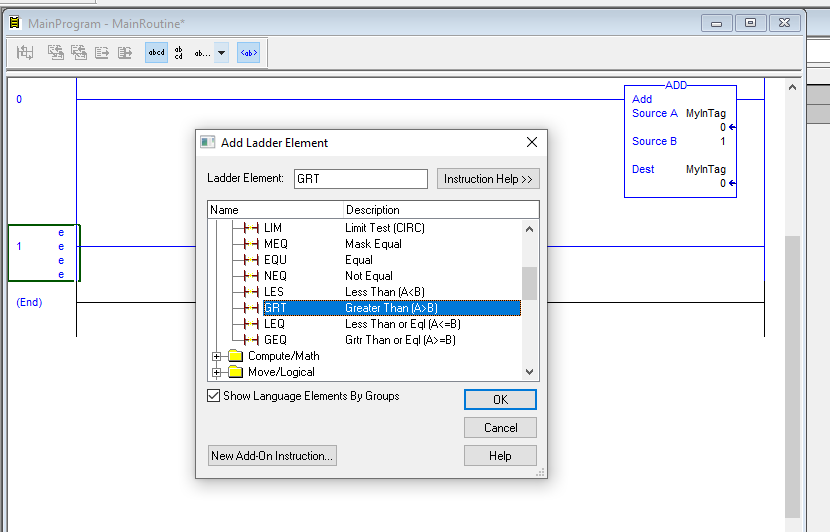
This is a comparison function, True if A is greater than B.
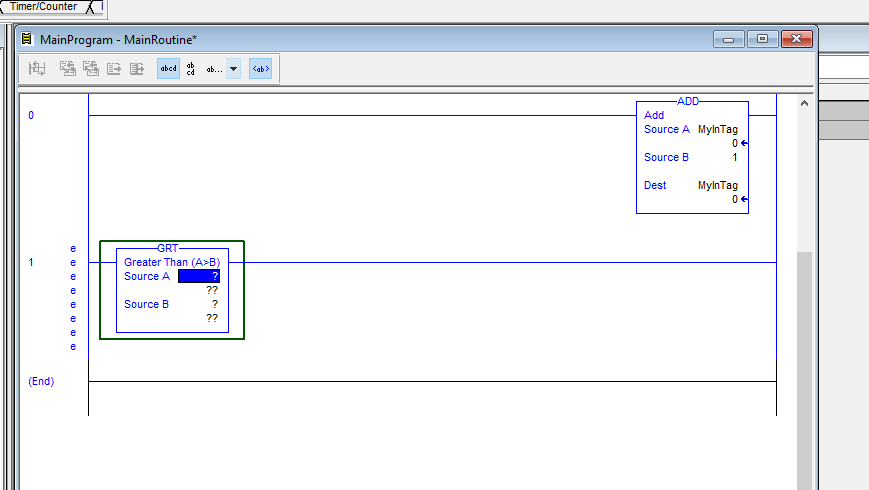
True when TWIN_OUT is greater than 1000.
Add Ladder Element to add the following ladder components
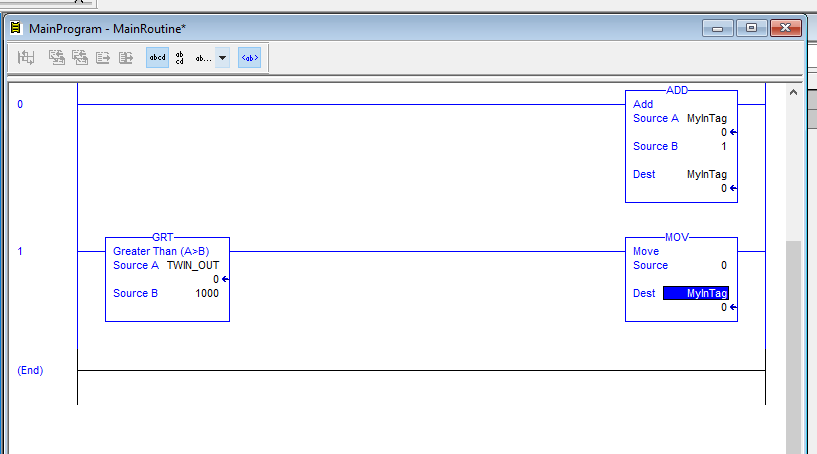
Add MOV function and store 0 to MyInTag to 0 if TWIN_OUT is greater than 1000.
Download
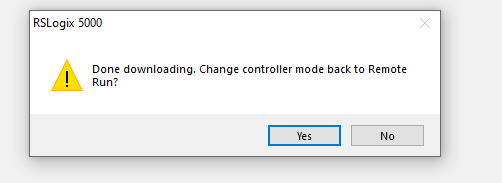
Finally, to download the program on the Rockwell side, go to Communication>Download.
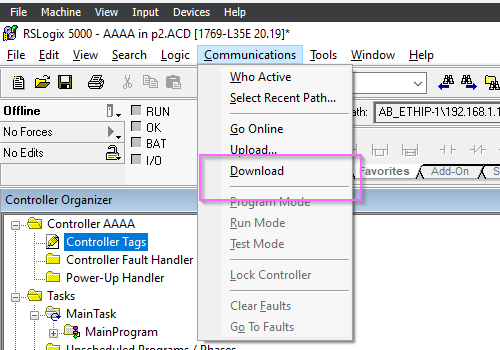
Proceed with Download.

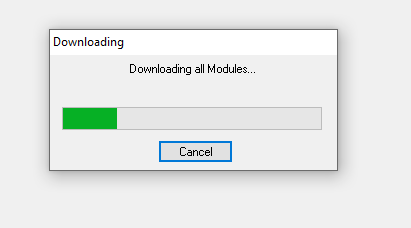
Please wait a moment…
Proceed with Yes.
Result
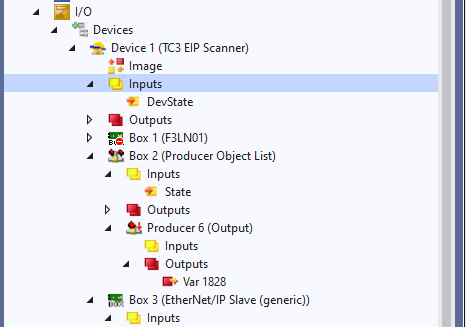
Finally, let’s check the communication between the Ethernet/IP Scanner: click on EIP Scanner>Producer Object List>State.
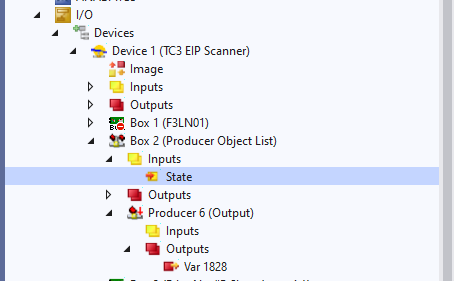
The current value of State is 0, i.e., there are no errors.
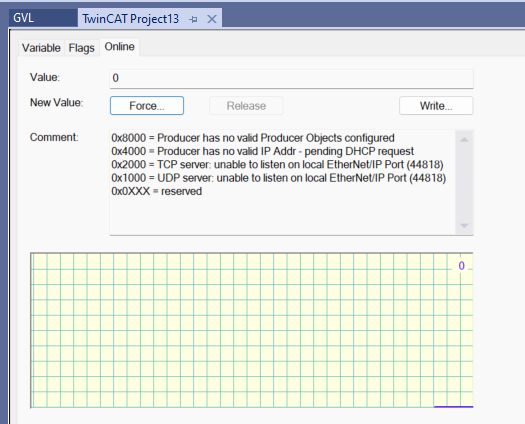
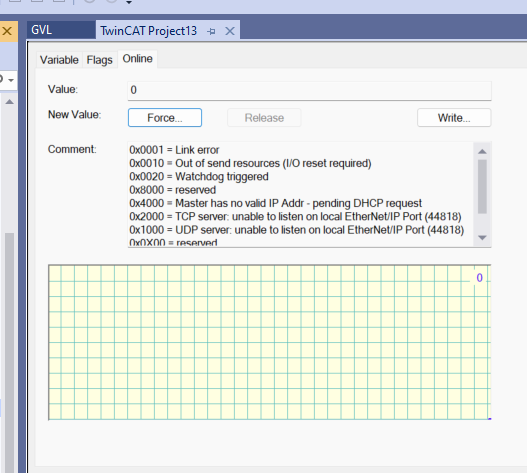
Next, check the DevState variable of the EIP Scanner itself.
The current value is also zero, which means there are no communication errors.
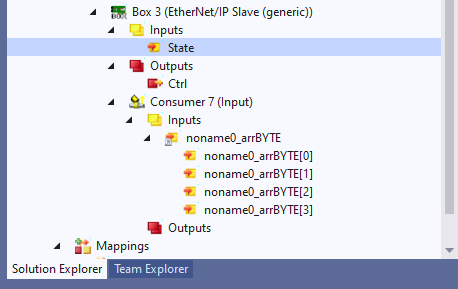
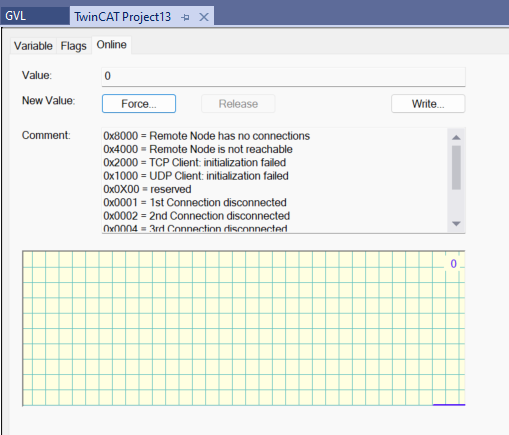
Finally, also check the State variable for the Generic Ethernet/IP Slave.
The current value is also zero, which means there are no communication errors.
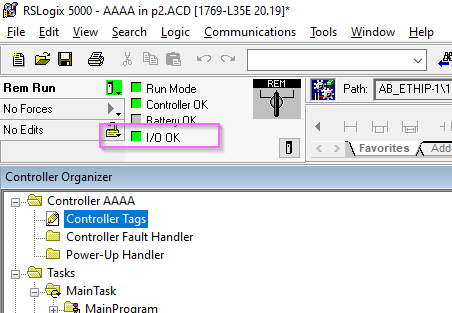
The I/O OK LED from RSLogix5000 is lit green and no communication error has occurred.
You can also see the Forward Open success Response from Wireshark.

We were able to exchange data successfully with Rockwell PLC and TwinCAT PLC.