In this article, we will use the Beckhoff TwinCAT TF6701 to send data to devices registered in the Azure Iot Hub.
Let’s get started!
Azure Iot Hub?
Microsoft Azure IoT Hub is an IoT suite within the Azure cloud that provides multiple services for connecting IoT devices to Azure services, processing incoming messages and sending messages to devices.
Also, from a device perspective, Microsoft Azure IoT Hub functionality enables simple and secure connections between IoT devices and Azure services by implementing bi-directional communication between devices and the Azure IoT Hub.
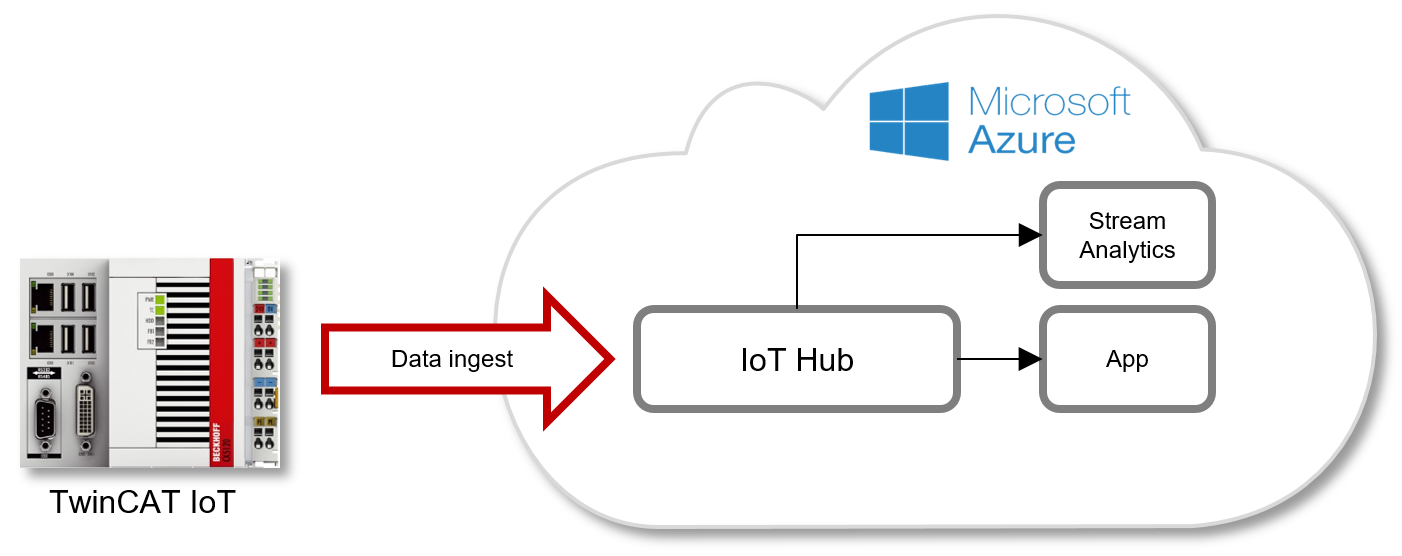
Azure IoT Hub and TwinCAT IoT
It was explained earlier that Microsoft Azure IoT Hub provides multiple communication interfaces for receiving or sending messages (e.g. MQTT).
Therefore, TwinCAT IoT can be used to send messages to and receive messages from Microsoft Azure IoT Hub, control Device Twin and execute method calls on devices.
Note that the structure fbMqttClient.stTLS.sAzureSas allows the transfer of SAS Tokens that can be generated by Azure IoT Explorer.
When publishing data to the IoT Hub, the Topic must be specified in the following format.
| devices /deviceId/messages/events/readpipe |
Implementation
This article presents an Example that uses an MQTT Function Block in a PLC to connect to the Microsoft Azure IoT Hub and send data.Note that the Message Broker can be accessed via MQTT and requires authentication with a SAS Token that can be generated from the Azure IoT Hub platform using e.g. Azure IoT Explorer.
AZURE Side
Add IotHub
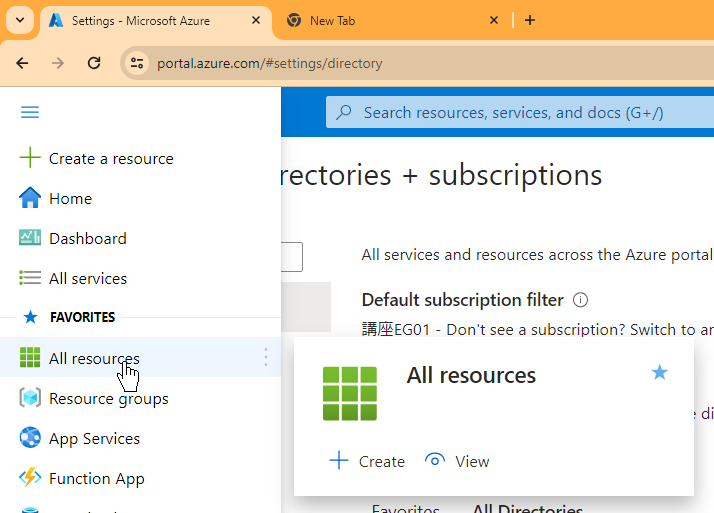
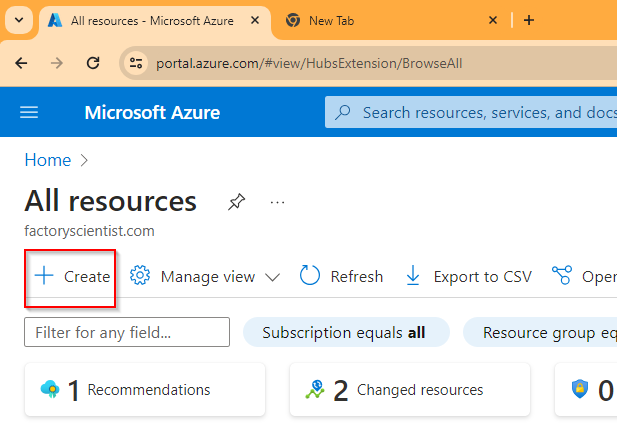
Login to Microsoft Azure and open All Resources.
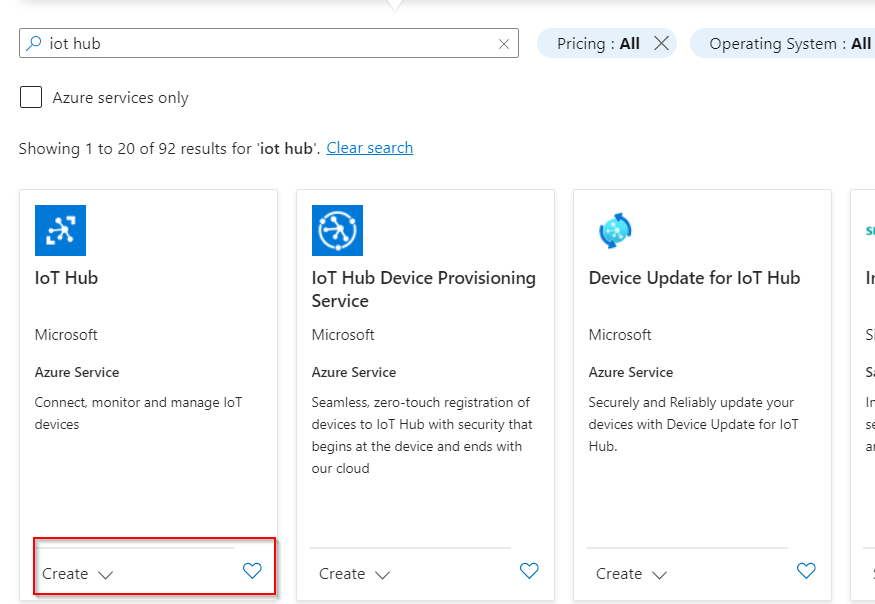
Createで新しいIot Hubを作成します。
Search Iot hub and open the Drop-list in Create.
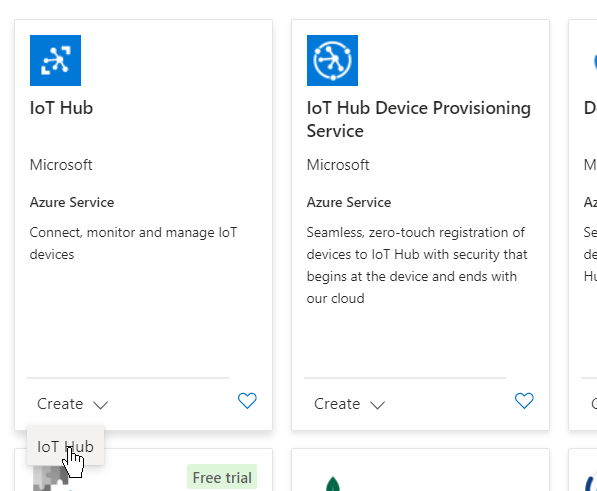
Click on Iot Hub.
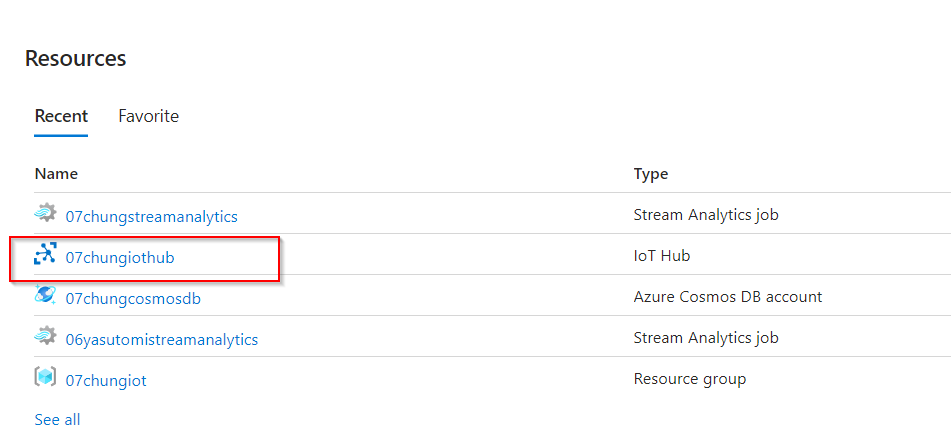
Done!A new Iot Hub has been created.
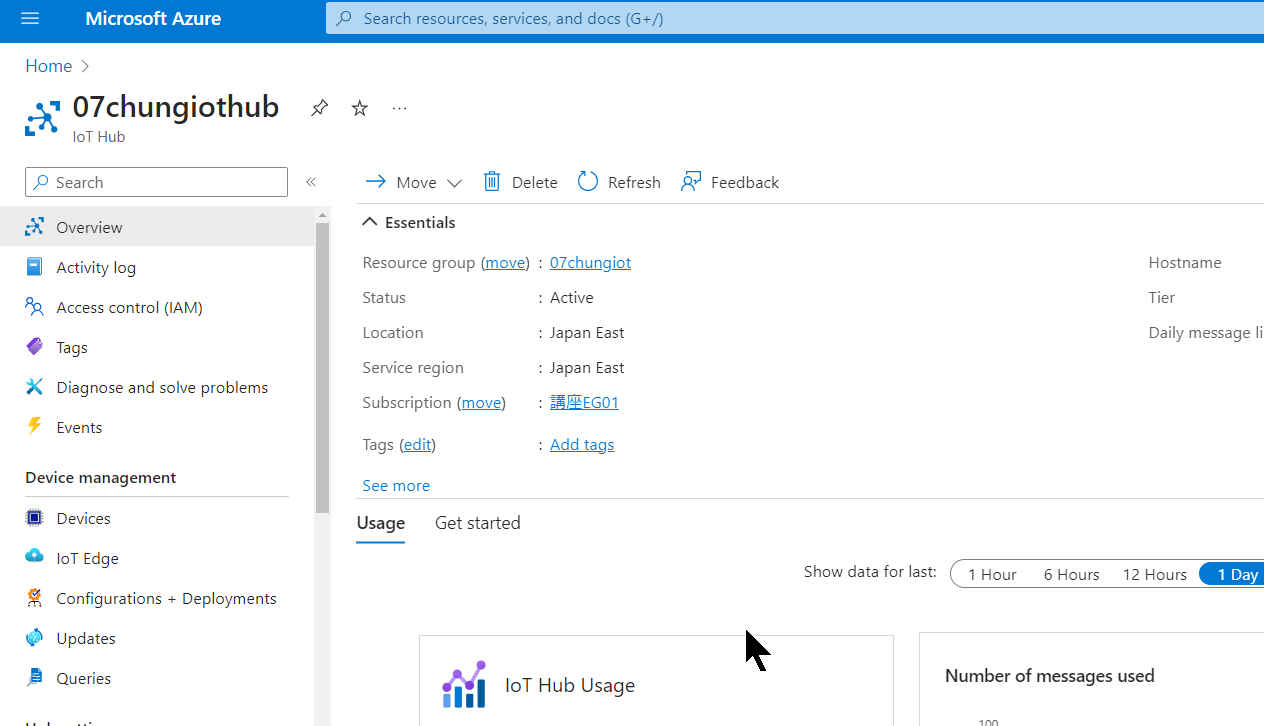
This is the Iot Hub Dashboard.
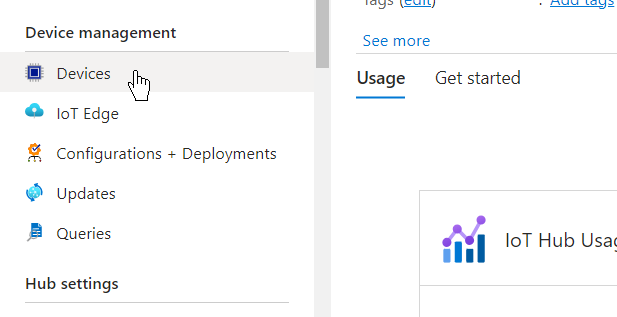
Add Devices
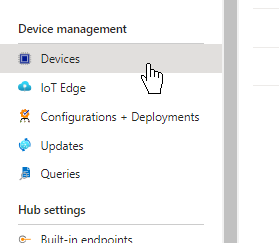
Next, to add Devices, click Devices Management>Devices.
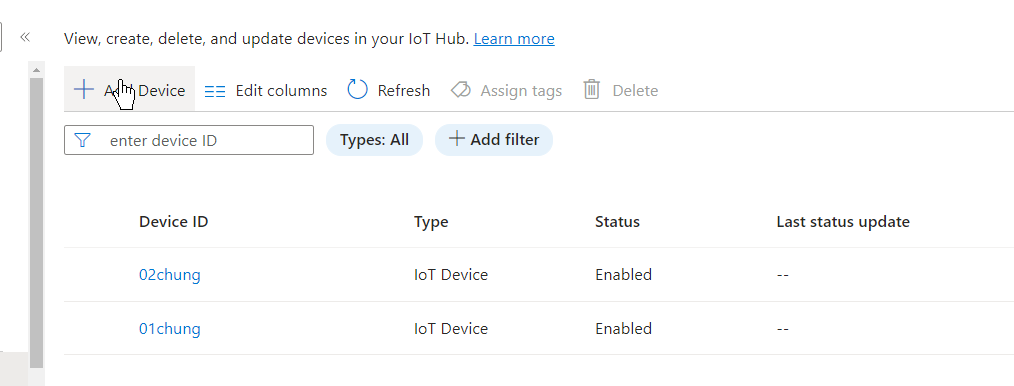
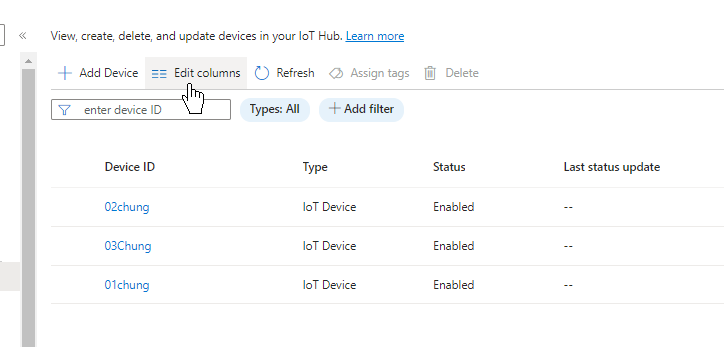
Add new devices under Add Devices.
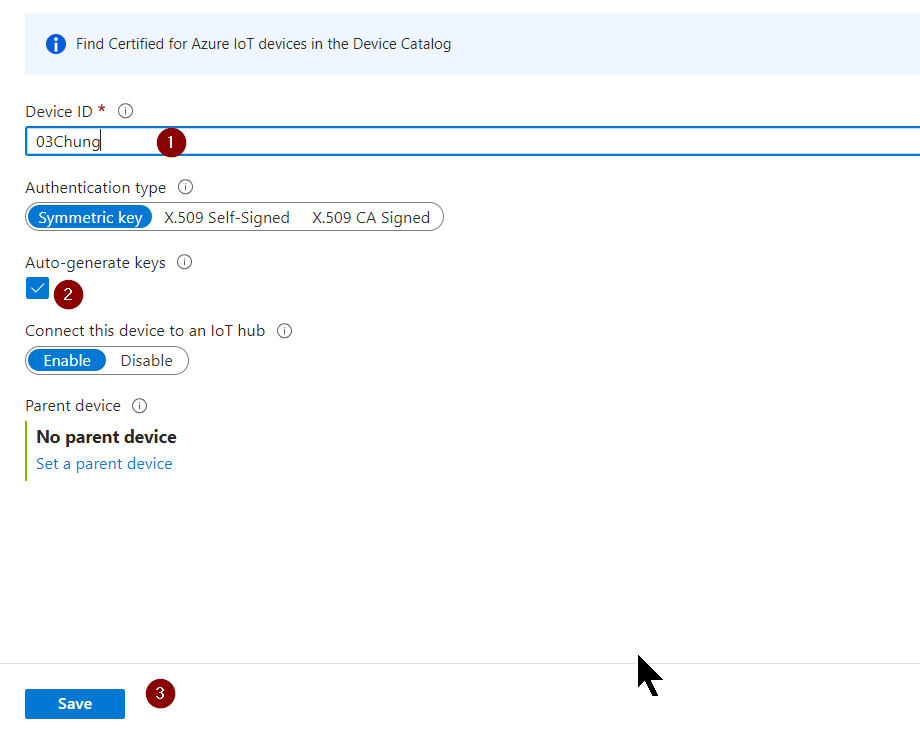
Enter the Device ID, put in the Checkbox for Auto-generate keys and Save.
Refresh to update the Dashboard.
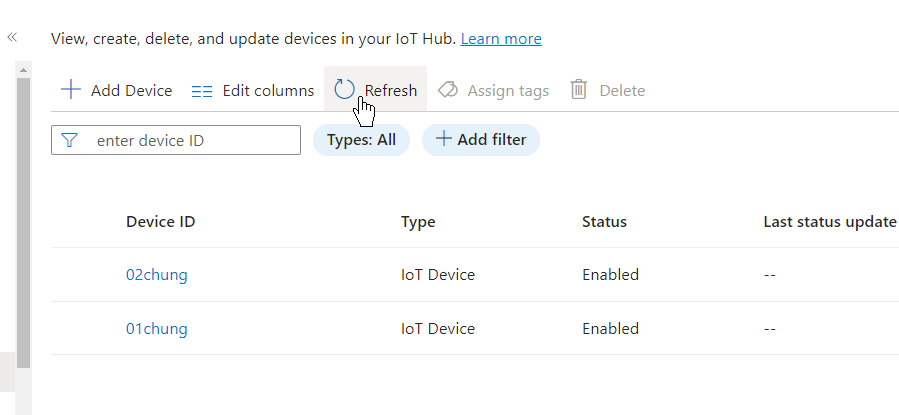
Done!The device you have just added is now registered.
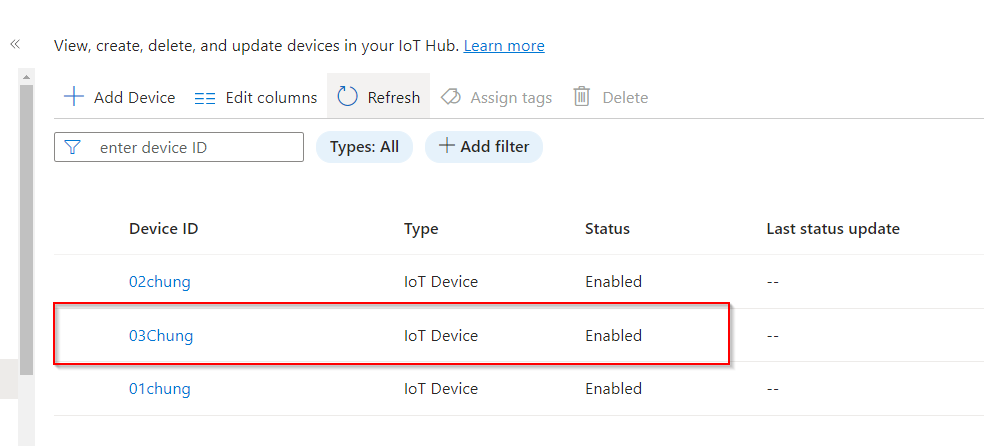
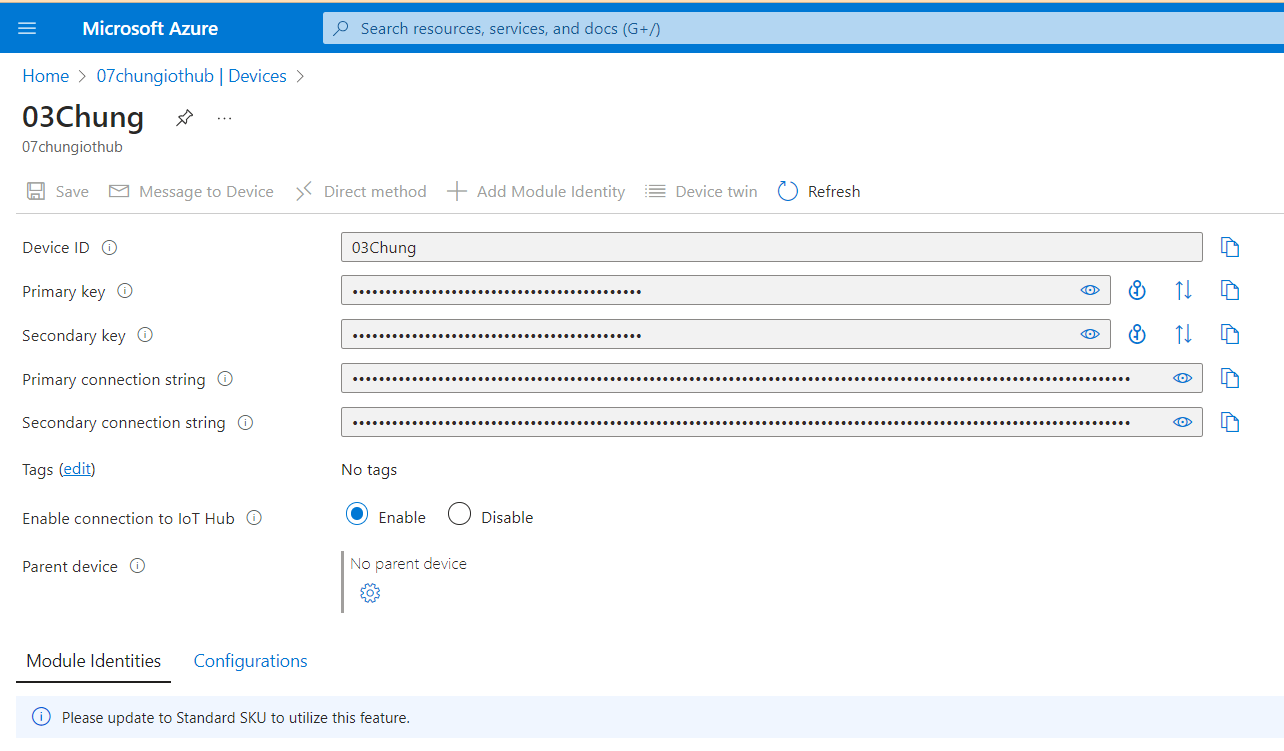
This is the Dashboard of the device.
Window Side
When establishing a connection to the Microsoft Azure IoT Hub via MQTT, the CA certificate must be specified and the Baltimore Cyber Trust Root CA can be used as the CA certificate.
Start the run command in the Start menu.
Start mmc.exe.
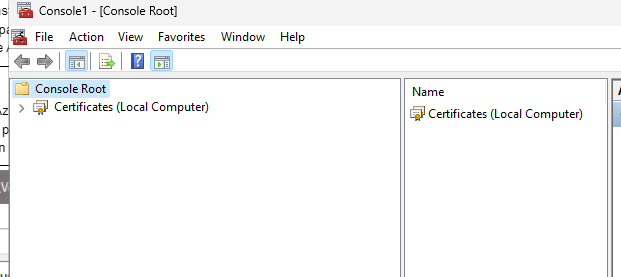
Console has been activated.
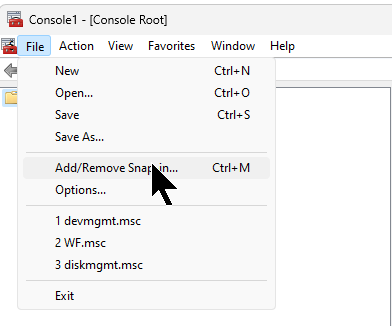
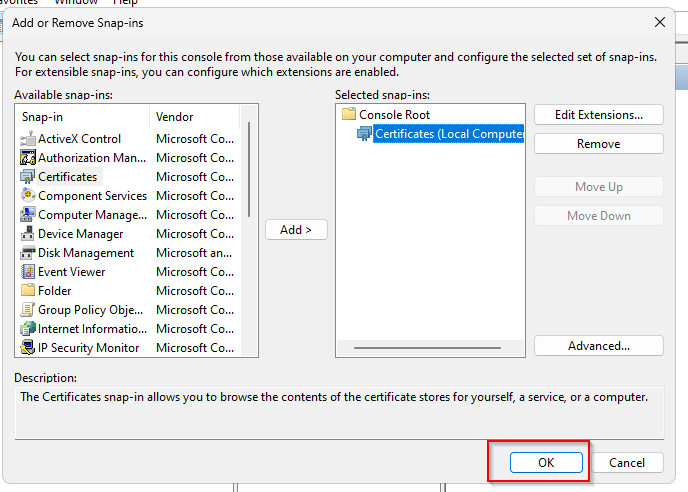
Click File>Add/Remove Snap-in.
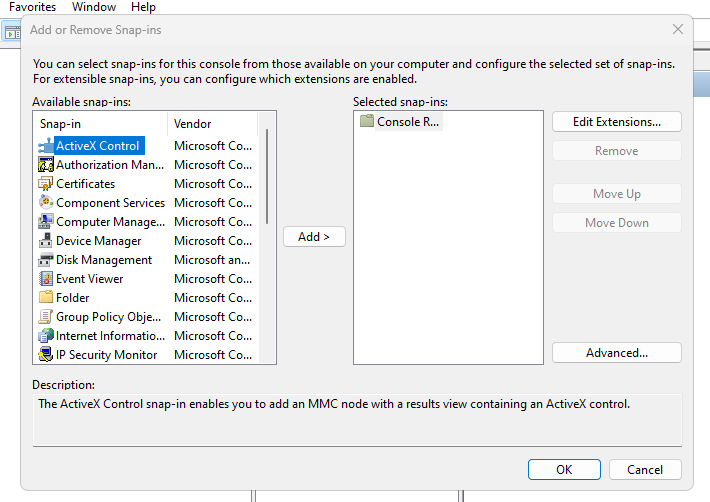
The Snap-ins build screen is now displayed.
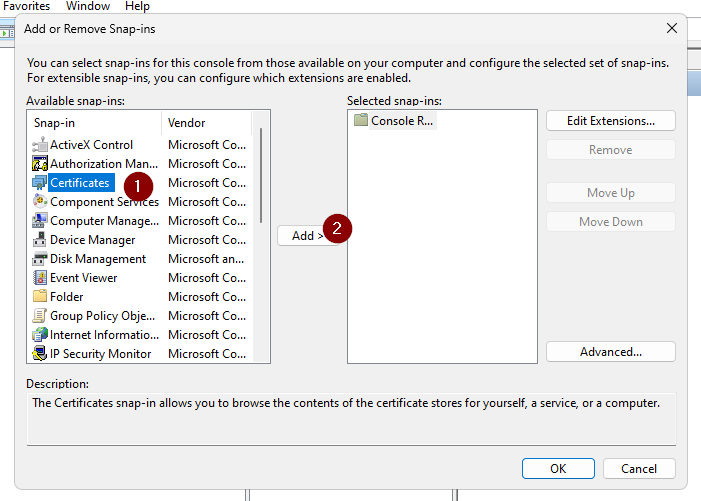
Select Certificates and add Certificates with Add>.
Define administrative rights for the certificate and save the settings with Finish.

Select Local Computer > Finish to complete.
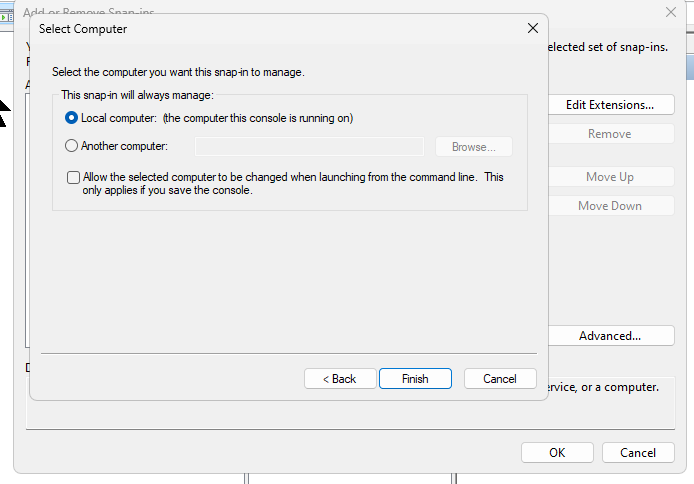
Done!Finally, click on the OK button.
We created a certificate.
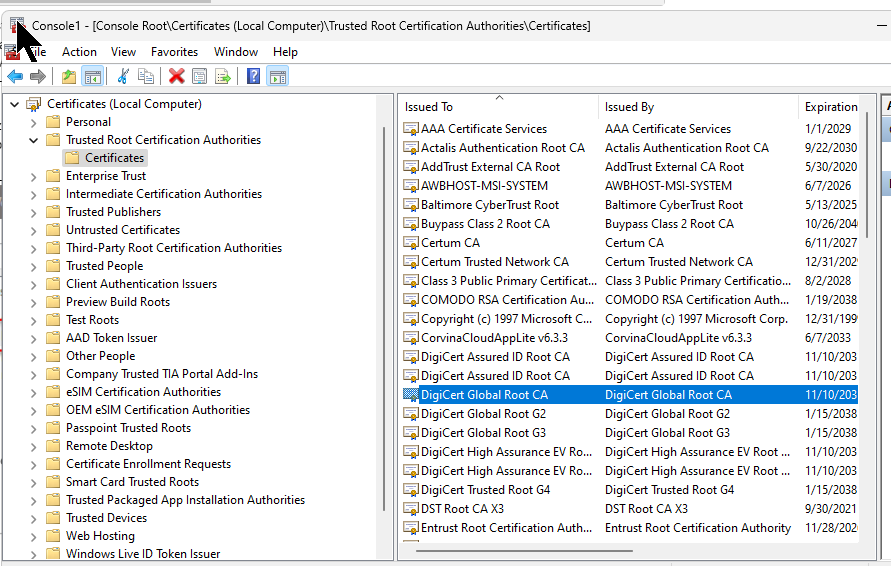
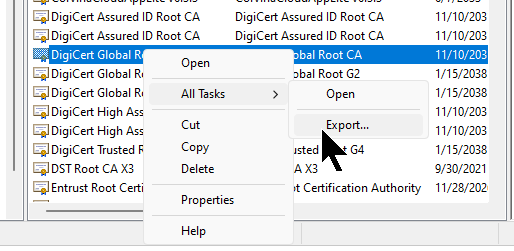
Select DigiCert Global Root CA under Trusted Root Certification Authorities>Certificates.
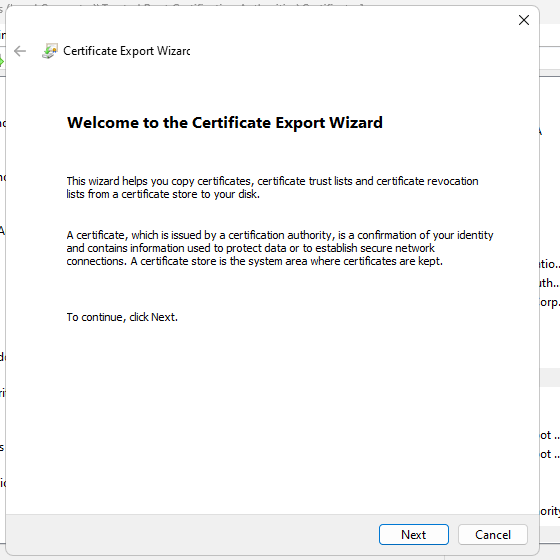
Right-click DigiCert Global Root CA>All Tasks>Export to export the certificate.
Proceed with Next.
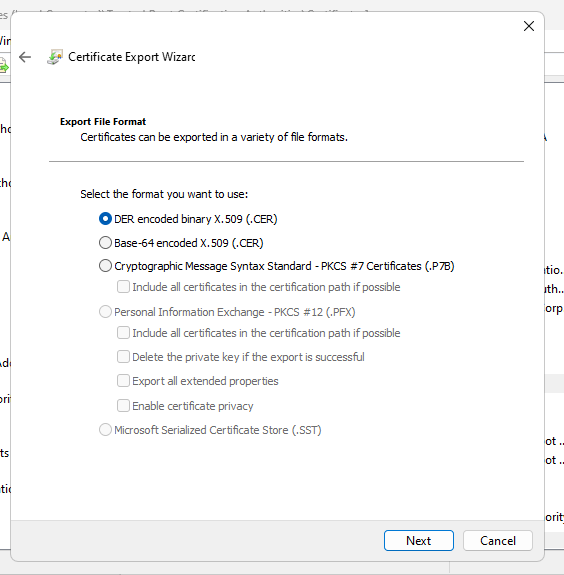
Select the Export Format for the certificate and press Next to proceed (in this case DER Format will be used).
You can set up an Export destination.
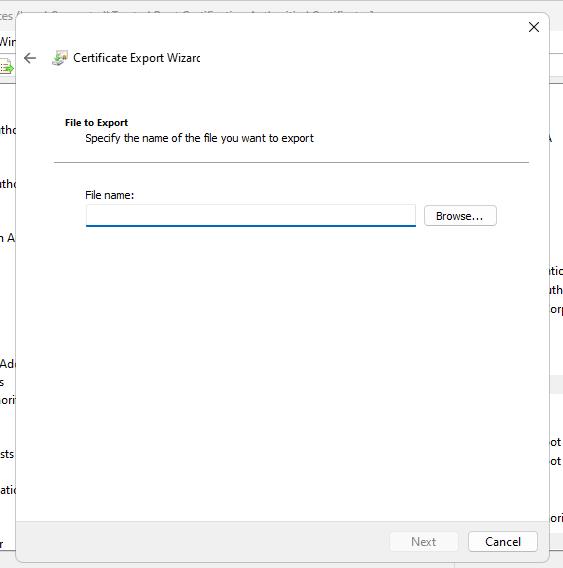
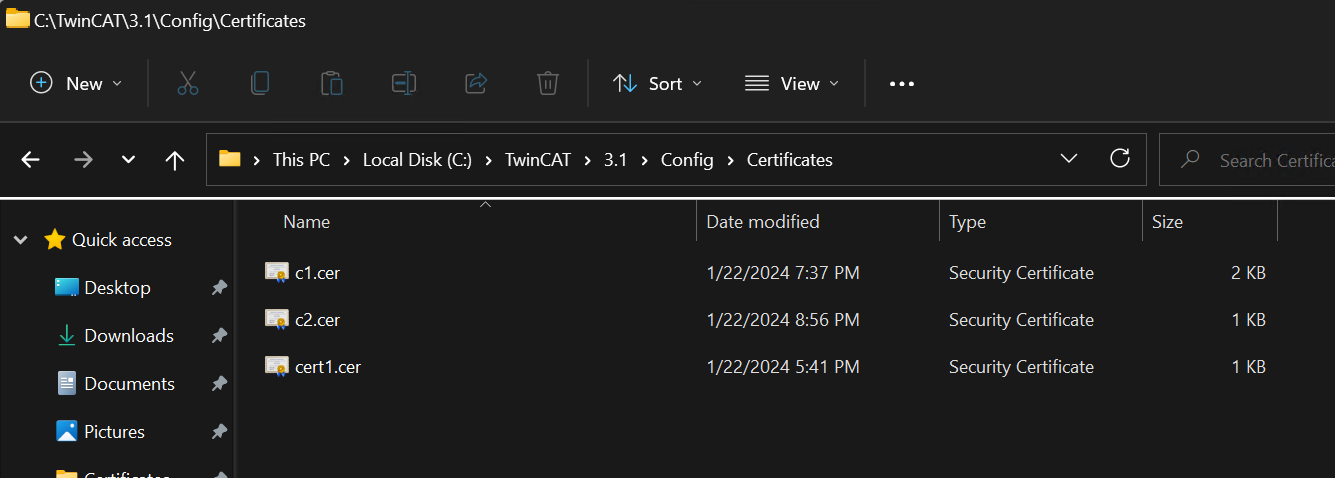
Finally, store the Exported certificate in the following Directory.
| c:\TwinCAT\3.1\Config\Certificates\c2.cer |
Beckhoff’s Online Help states that the CA location is Optional because the CA is searched in the default location, but the CA file must be stored in the specified location or the default location CA files must be in PEM format, It doesn’t matter what extension the file has.
Let’s talk a little about digital certificate files, which have a variety of filename extensions, such as .crt, .cer, .pem and .der. These extensions generally correspond to the two main encoding schemes for X.509 certificates and keys.
- PEM (Base64 ASCII)
- A PEM (originally “Privacy Enhanced Mail”) is the most common format for X.509 certificates, CSRs and encryption keys and is a text file containing one or more items in Base64 ASCII encoding, each item having a plain text header and footer (e.g. —–BEGIN CERTIFICATE—– and —–END CERTIFICATE—–)。A single PEM file can contain an end entity certificate, a private key or multiple certificates that form a complete chain of trust Most certificate files downloaded from SSL.com are in PEM format.
- PEM files are usually found with the extensions .crt, .pem, .cer and .key (for private keys), but may be found with different extensions. For example, the SSL.com CA bundle file is available from the certificate order download table and has the extension .ca-bundle.
- DER (Binary)
- Distinguished Encoding Rules (DER) are binary encodings of X.509 certificates and private keys Unlike PEM, DER-encoded files do not contain plain text statements such as —–BEGIN CERTIFICATE—– DER files are most commonly found in the Java context.
- DER-encoded files usually have the extensions .der and .cer, etc.
Azure Iot Explorer
Download Azure Iot Explorer at the following Link and install the tool.
https://github.com/Azure/azure-iot-explorer/releases
Click Connect via Iot Hub connection string.
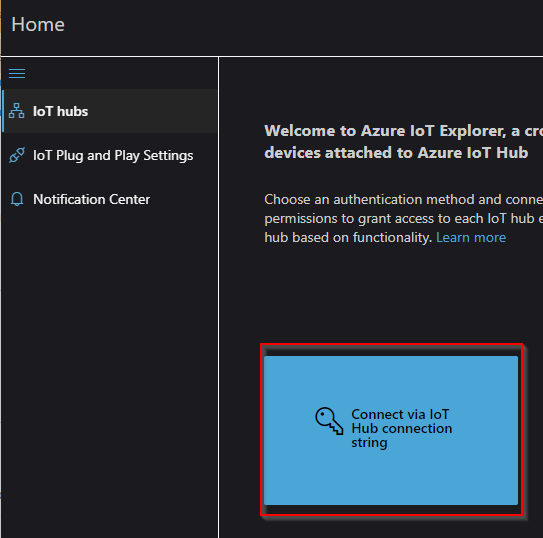
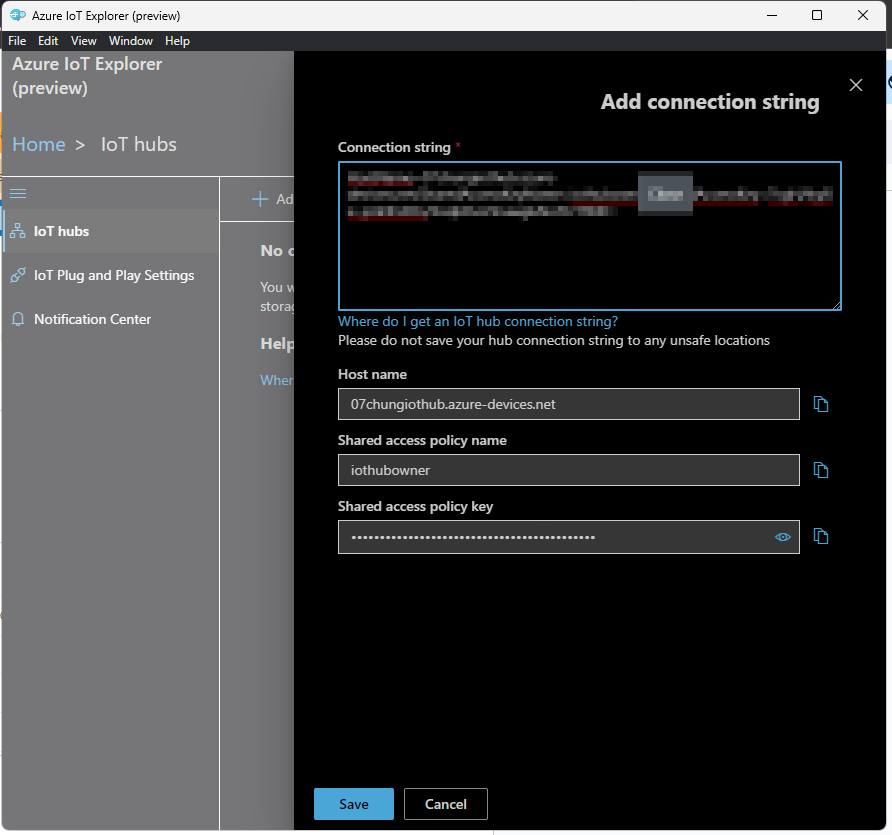
Add Connection to add a new Iot hub connection.

The Connection String configuration screen appears.
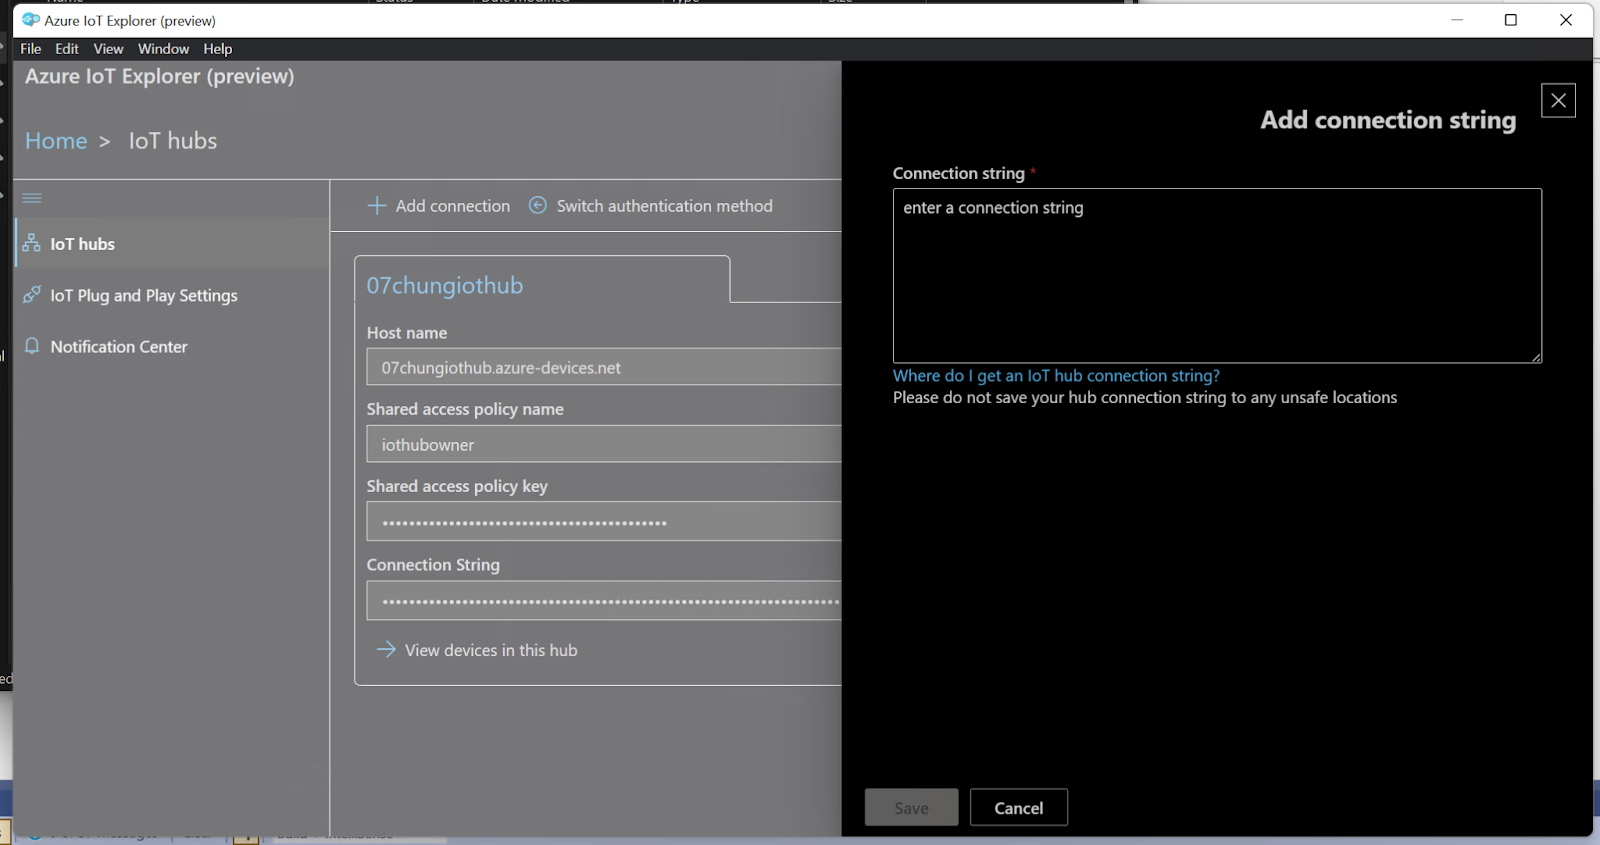
Go to the Iot Hubs Dashboard and click Security settings>Shared access policies.

Click on iothubowner.
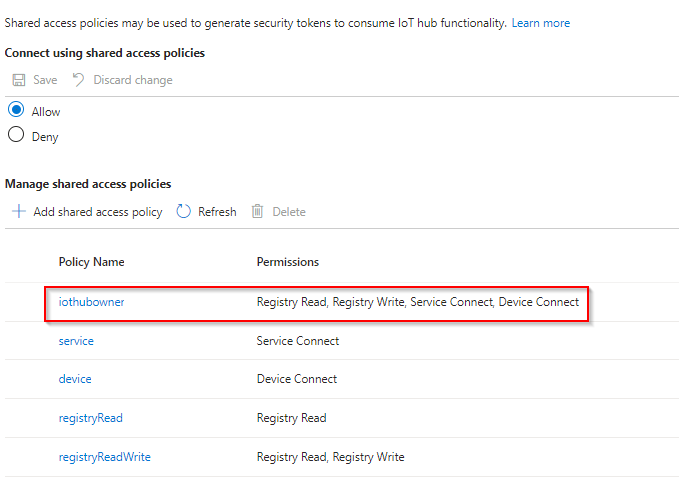
Copy primary connection string.
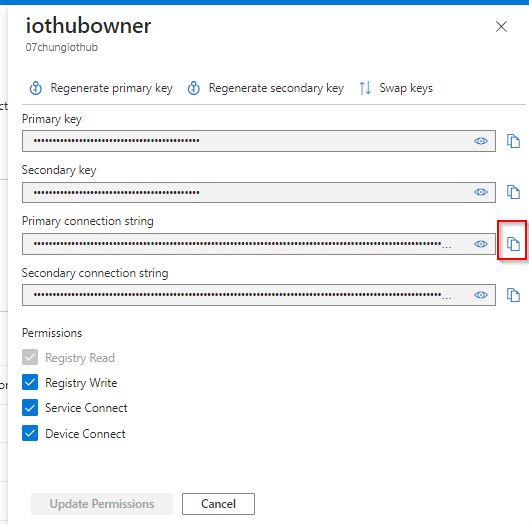
Paste into the Connection string in Azure Iot Explorer and Save the configuration.
Once the iothub has been added, click View devices in this hub.
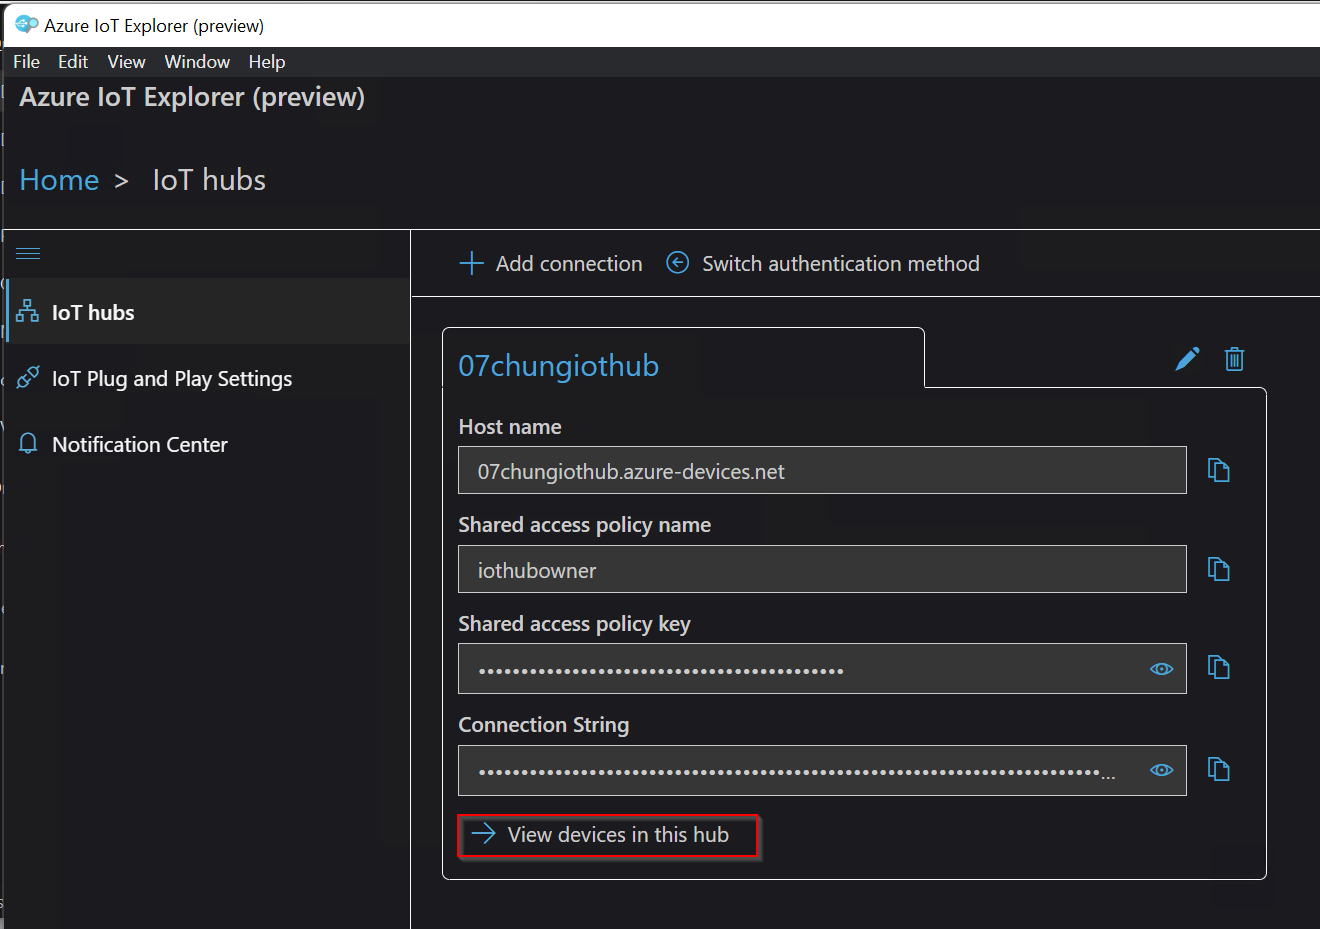
Done!You can list the Devices that are now configured in the iothub.

Click on 03Chung, which you have just added.
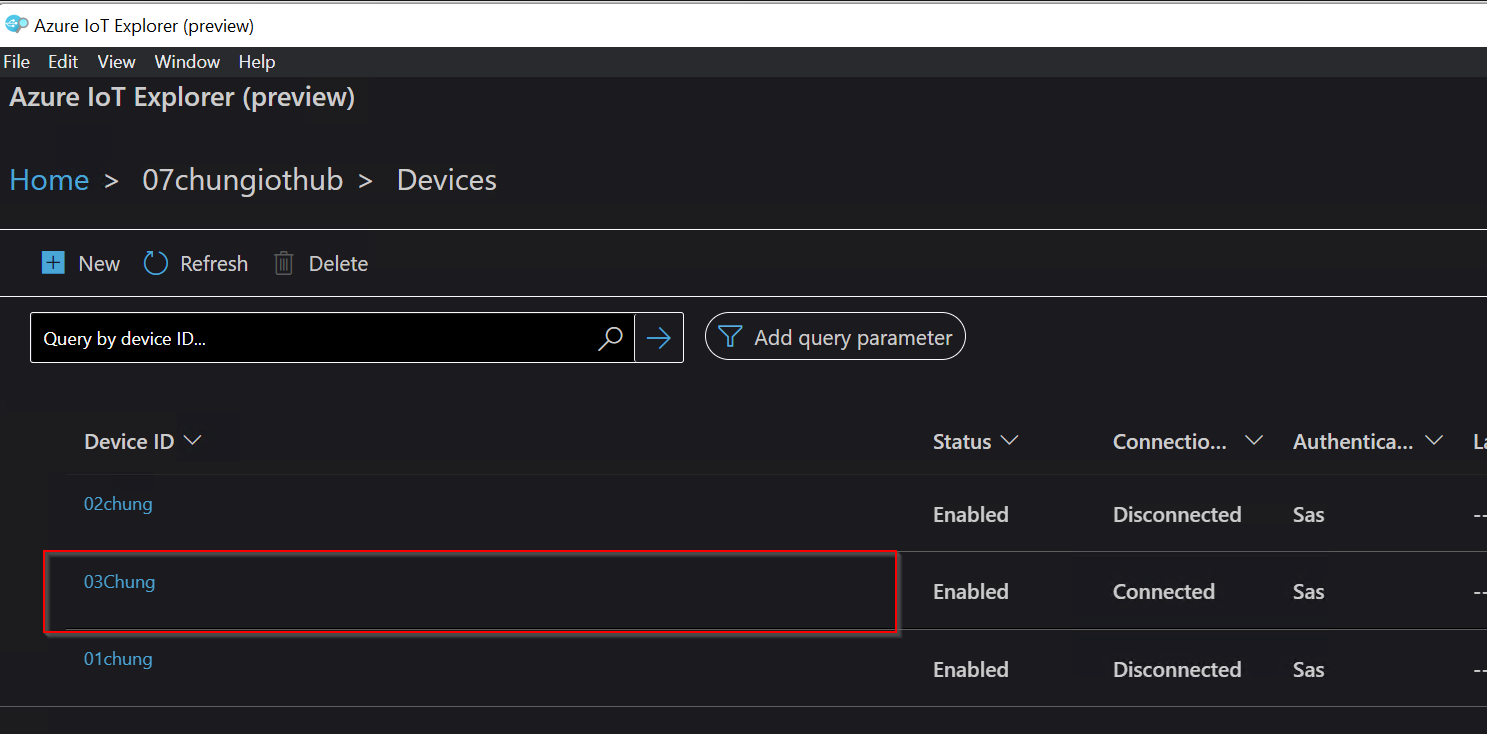
Lists information on connecting to device 03Chung.
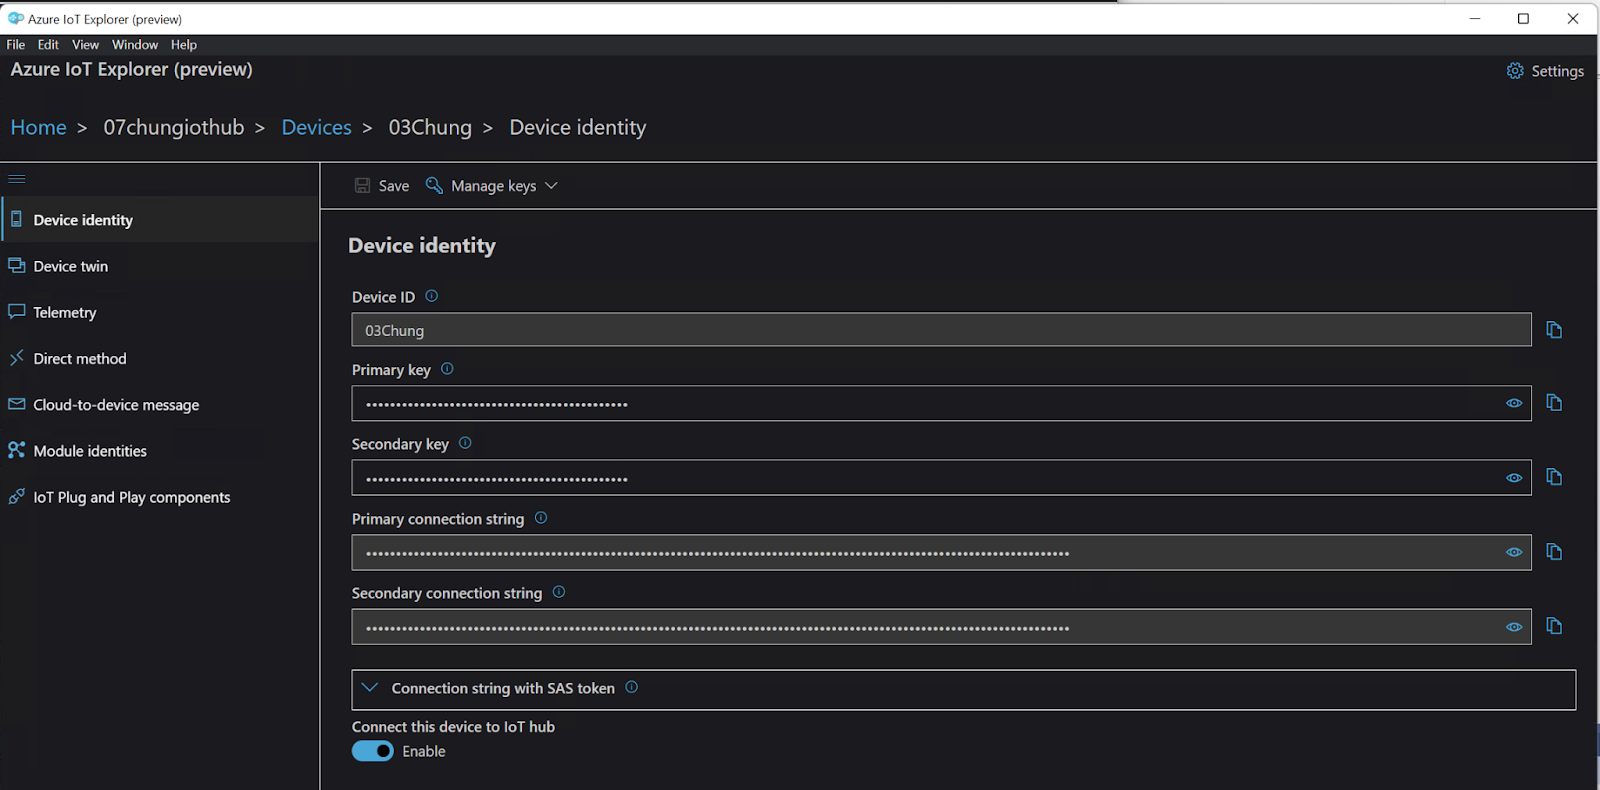
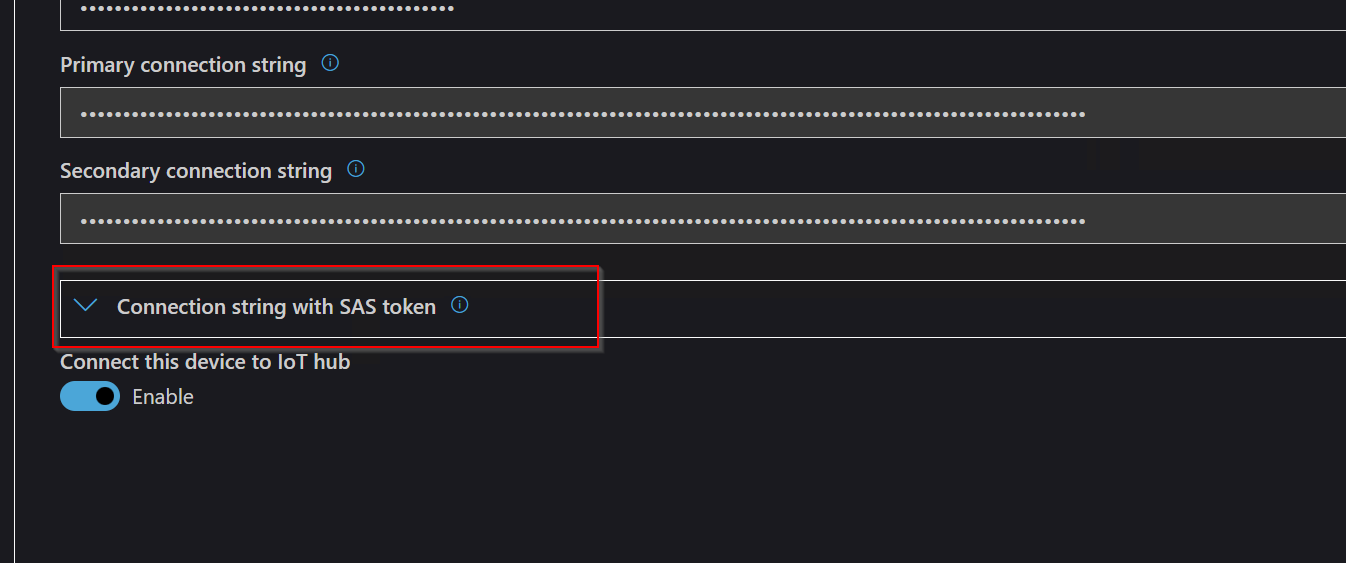
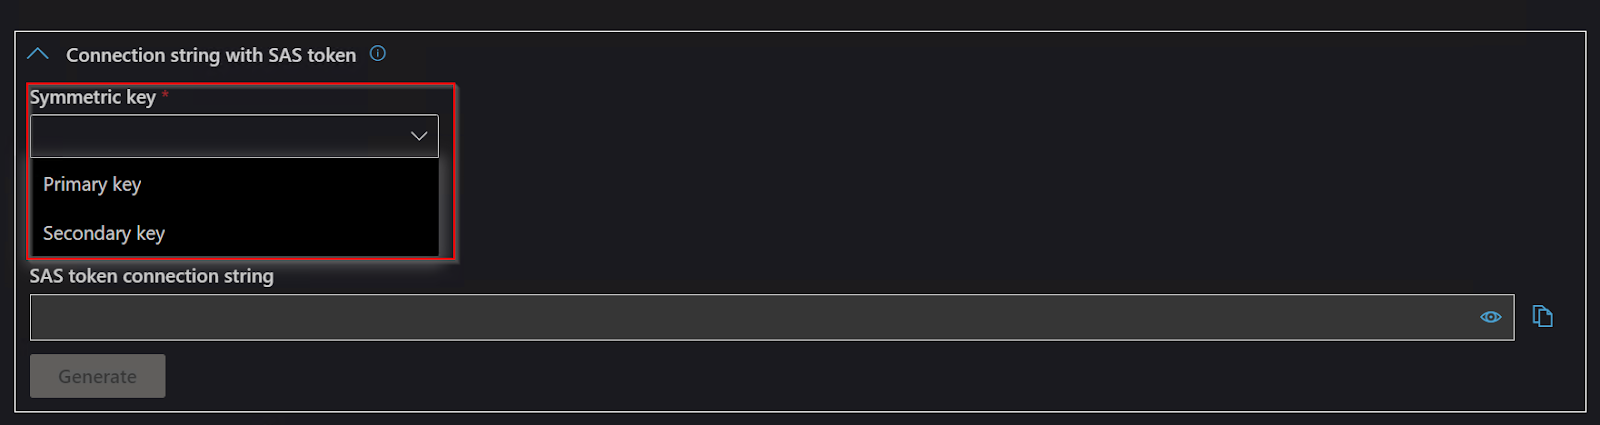
To connect the TwinCAT TF6701 to the Azure Iot Hub, a SAS Token needs to be set and the Connection String with SAS token is expanded.
The Option to generate a SAS Token is now displayed.
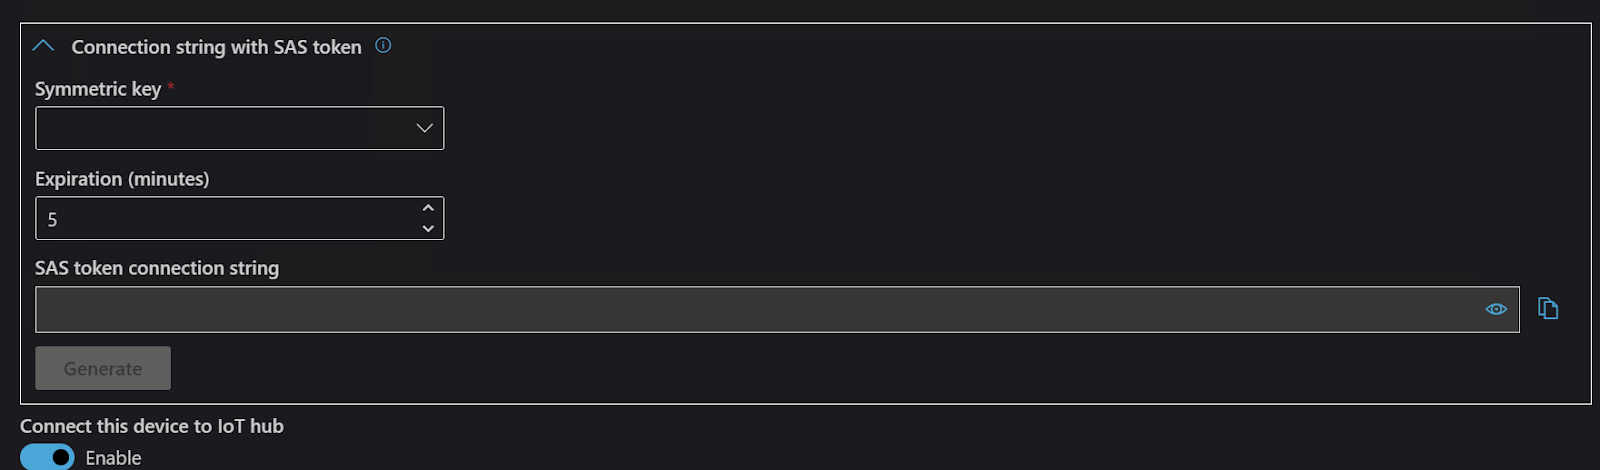
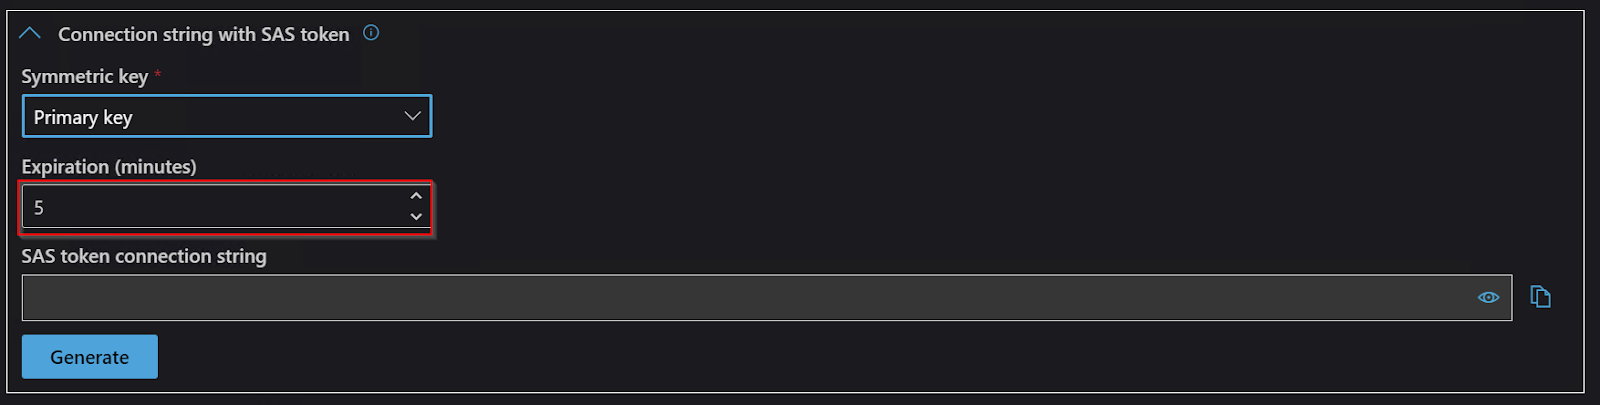
You can choose to generate a SAS Token from a Primary or Secondary key from the Symmetic key Drop-List.
Expiration allows the expiry date of the generated SAS token to be set.
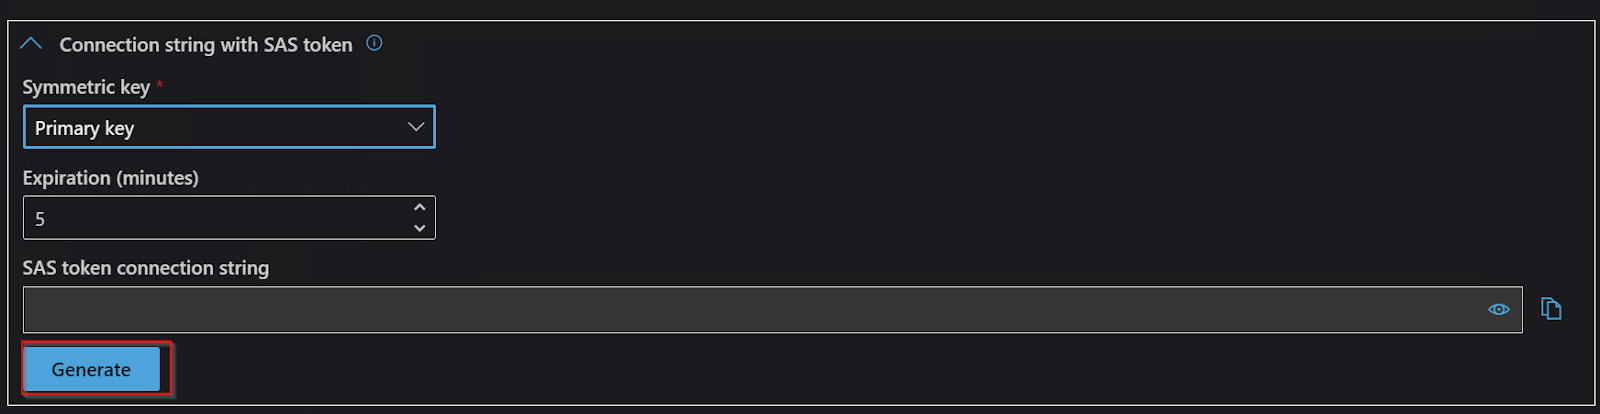
Finally, click Generate to generate a SAS token.
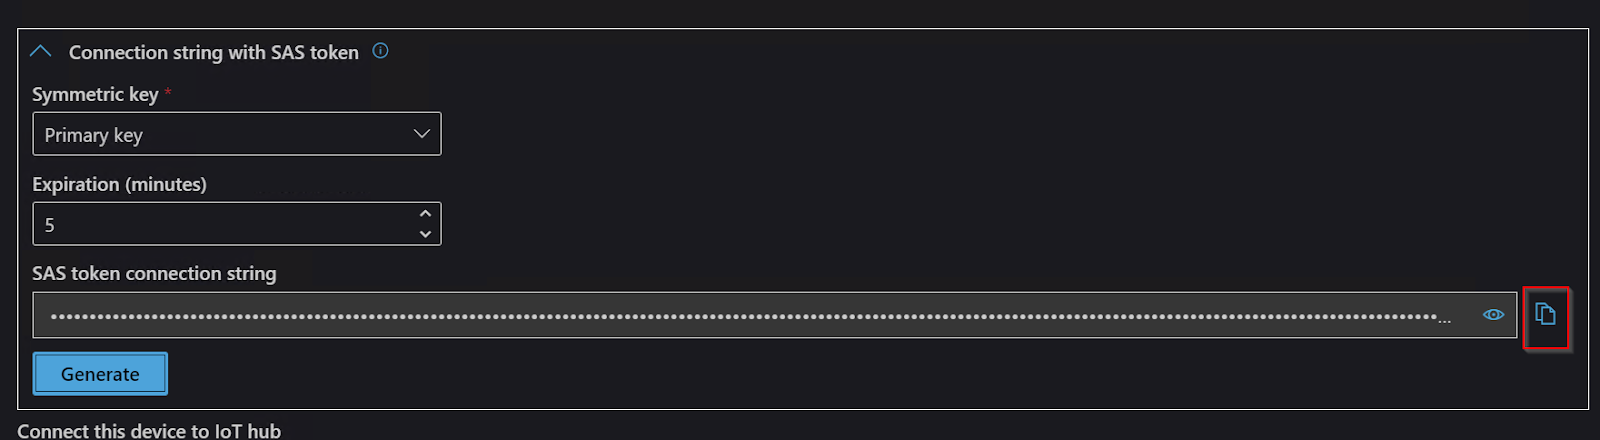
Done!Copy the SAS token and save it on Notepad or similar.
TwinCAT3 Side
The next step is to build the TwinCAT3 side.
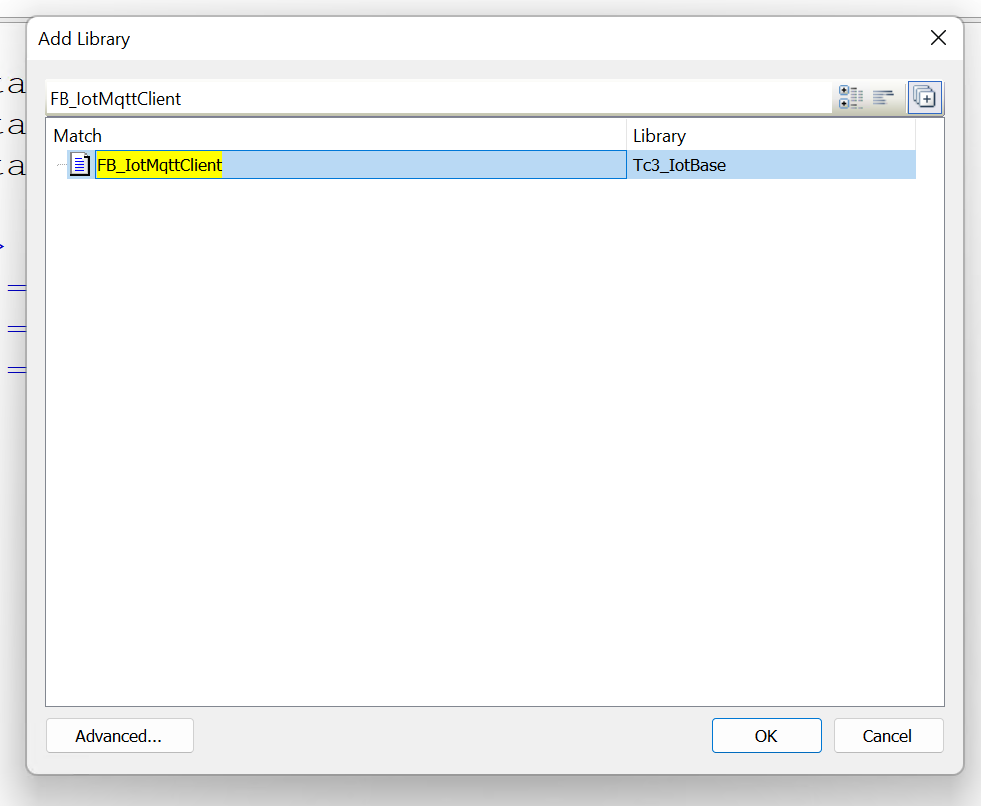
Add Library
This article adds the FB_IotMqttClient library to be used.
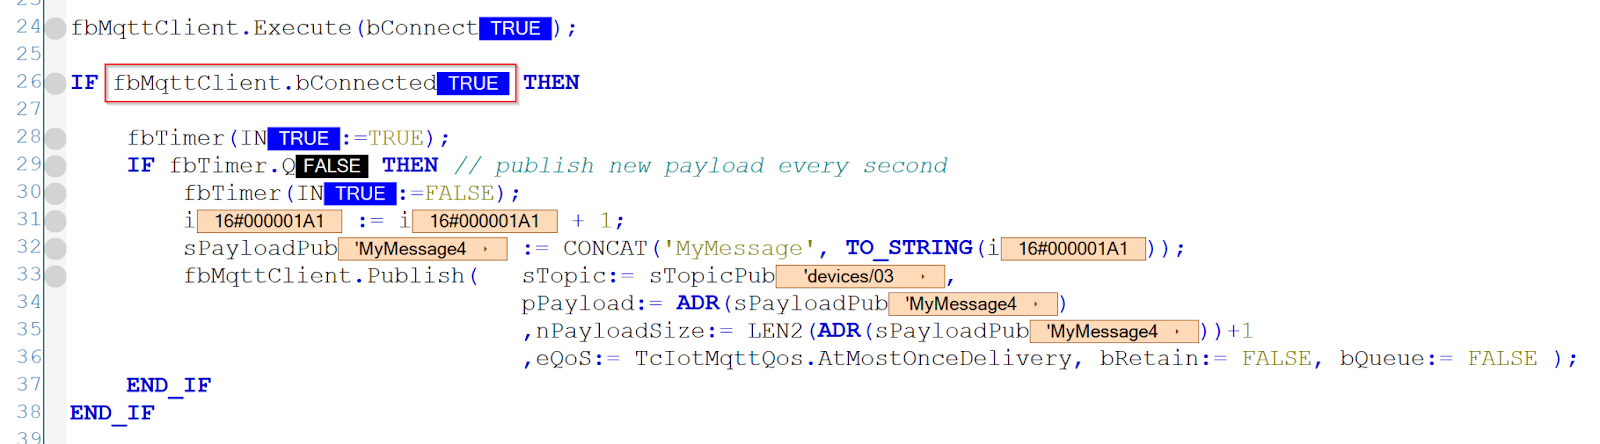
MAIN
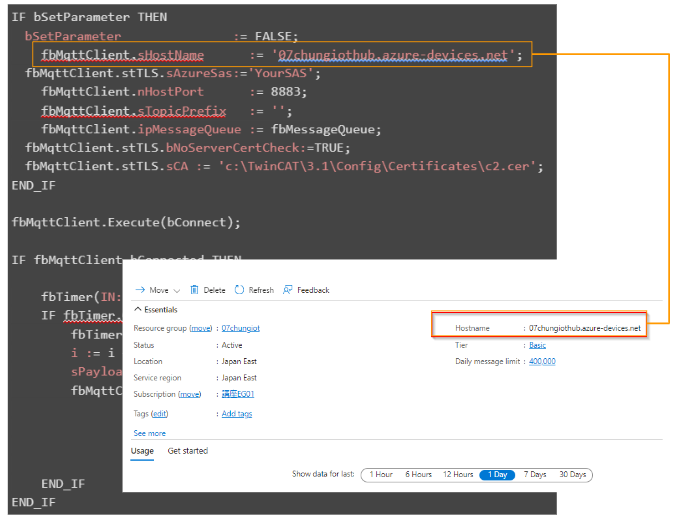
This code shows the parameters required to establish a connection to the Azure IoT Hub. The parameters are essentially static parameters and can also be specified in the declaration part when instantiating the MQTT client.
VAR
| PROGRAM MAIN VAR fbMqttClient : FB_IotMqttClient; bSetParameter : BOOL := TRUE; bConnect : BOOL := TRUE; sTopicPub : STRING(255):=’devices/03Chung/messages/events/readpipe’; sPayloadPub : STRING(255); i : UDINT; fbTimer : TON := (PT:=T#10S); fbMessageQueue : FB_IotMqttMessageQueue; fbMessage : FB_IotMqttMessage; bSubscribed:BOOL; END_VAR |
CODE
| IF bSetParameter THEN bSetParameter := FALSE; fbMqttClient.sHostName := ’07chungiothub.azure-devices.net’; fbMqttClient.stTLS.sAzureSas:=’YourSAS’; fbMqttClient.nHostPort := 8883; fbMqttClient.sTopicPrefix := ”; fbMqttClient.ipMessageQueue := fbMessageQueue; fbMqttClient.stTLS.bNoServerCertCheck:=TRUE; fbMqttClient.stTLS.sCA := ‘c:\TwinCAT\3.1\Config\Certificates\c2.cer’; END_IF fbMqttClient.Execute(bConnect); IF fbMqttClient.bConnected THEN fbTimer(IN:=TRUE); IF fbTimer.Q THEN // publish new payload every second fbTimer(IN:=FALSE); i := i + 1; sPayloadPub := CONCAT(‘MyMessage’, TO_STRING(i)); fbMqttClient.Publish( sTopic:= sTopicPub, pPayload:= ADR(sPayloadPub) ,nPayloadSize:= LEN2(ADR(sPayloadPub))+1 ,eQoS:= TcIotMqttQos.AtMostOnceDelivery , bRetain:= FALSE, bQueue:= FALSE ); END_IF END_IF |
Hostname
The Hostname can be found on the Iot Hub Dashboard.
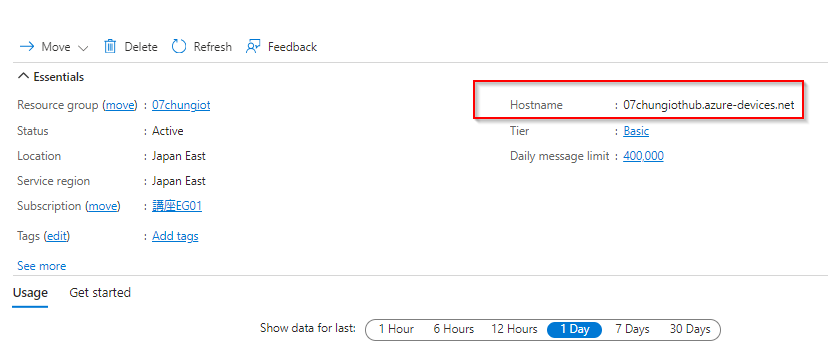
Hostname should be set to sHostName.
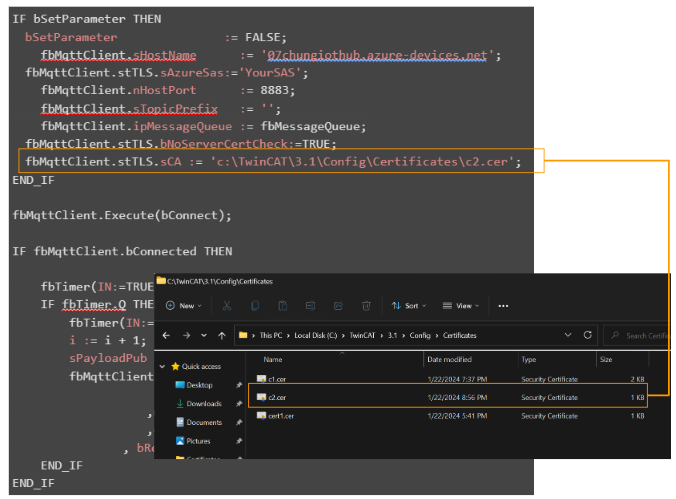
CA Location
Set stTLS.sCA to the location where the certificate you have just Exported is stored.
Result
If the project is Downloaded to TwinCAT Runtime and bConnected is TRUE, the TwinCAT Runtime is already connected to the Azure Iot Hub.
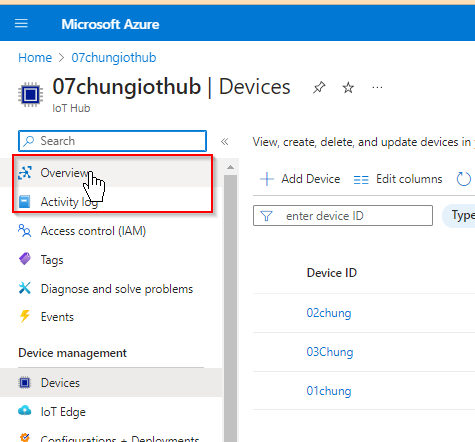
To check the device’s connection status from the Azure Iot Hub Dashboard, click Devices management>Devices.
Click Edit columns.
Add Columns for Last activity and Last reported connection state.
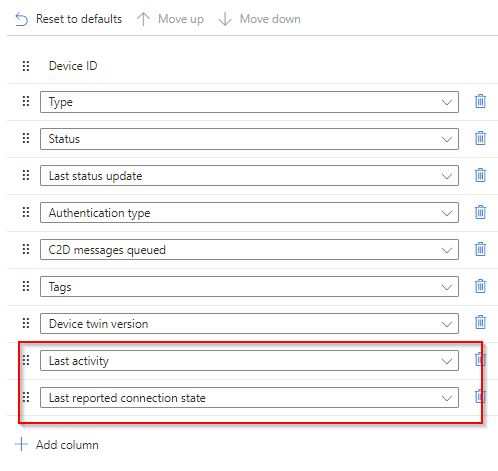
The order in which Columns are displayed can be adjusted, as shown in the diagram below.
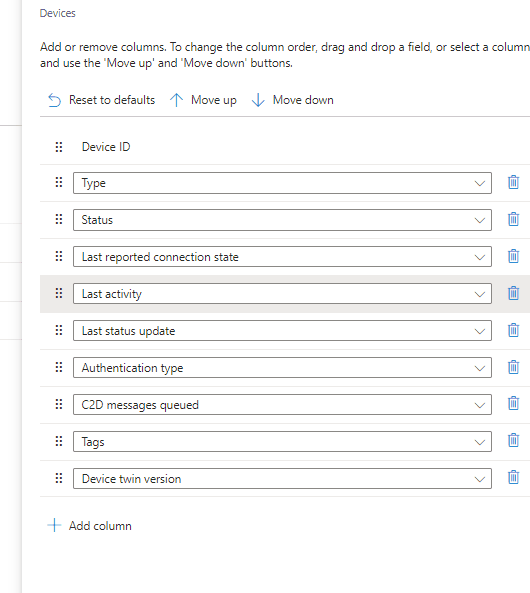
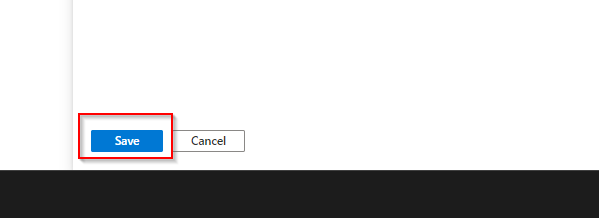
Finally, click Save to save the settings.
Last report connections status=Connected, device 03Chung has connected to the Azure Iot Hub.

Now click on Overview.
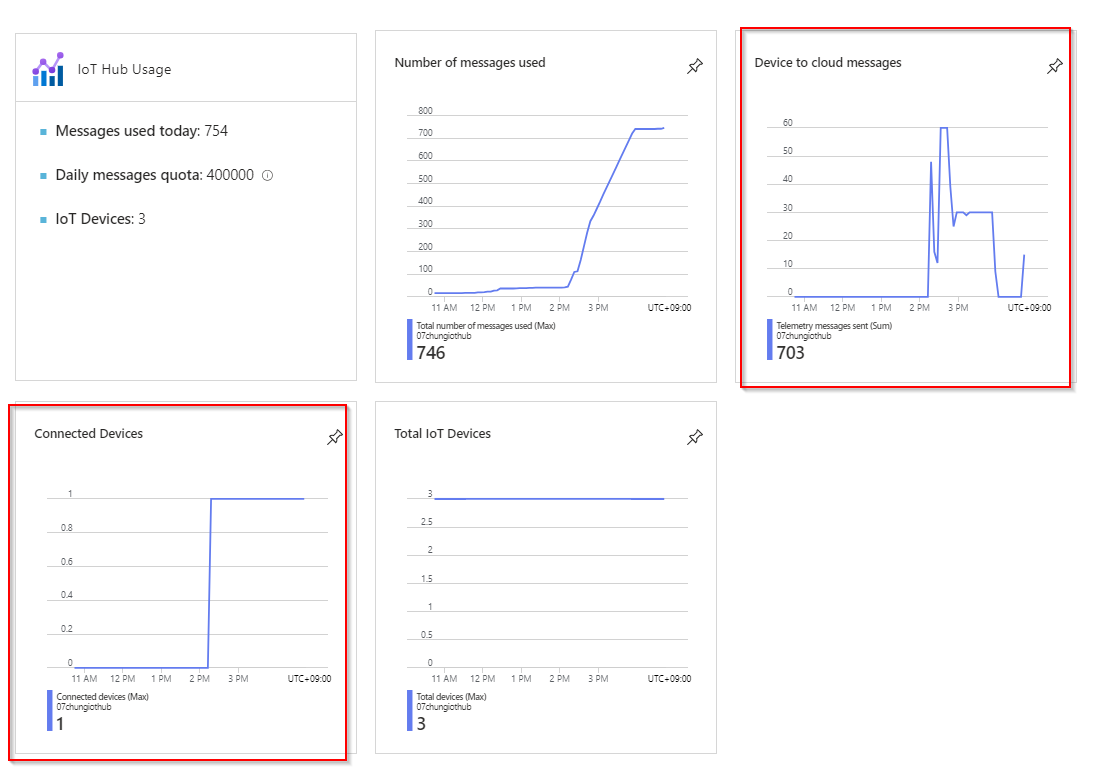
This is the Iot Hubs Dashboard.
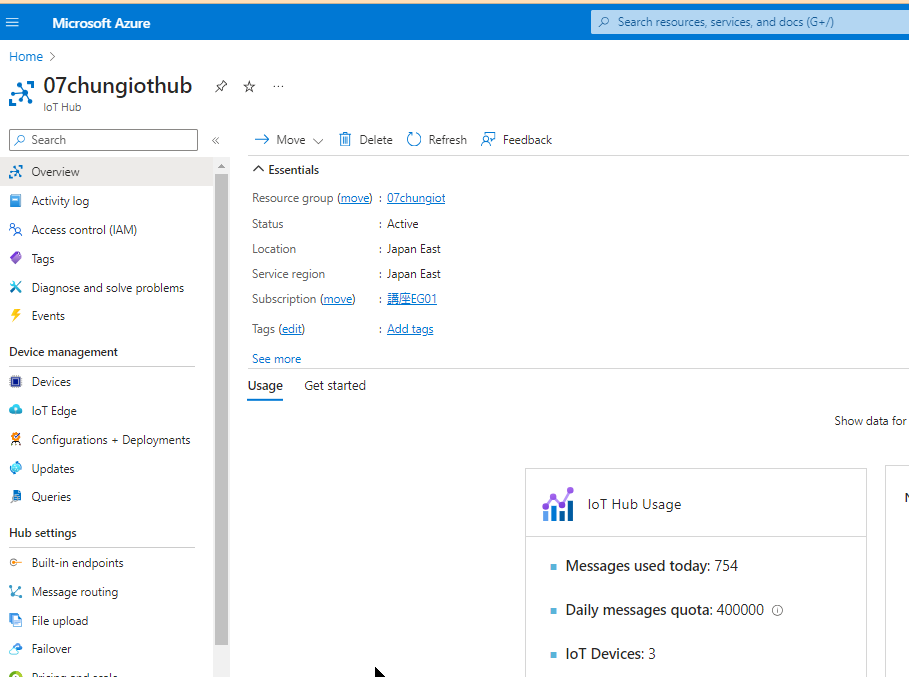
From the Connected Devices field, you can see how many devices are currently connected to the Azure Iot Hub. You can also check the number of messages sent from devices to Azure Iot Hub in Device to cloud messages.
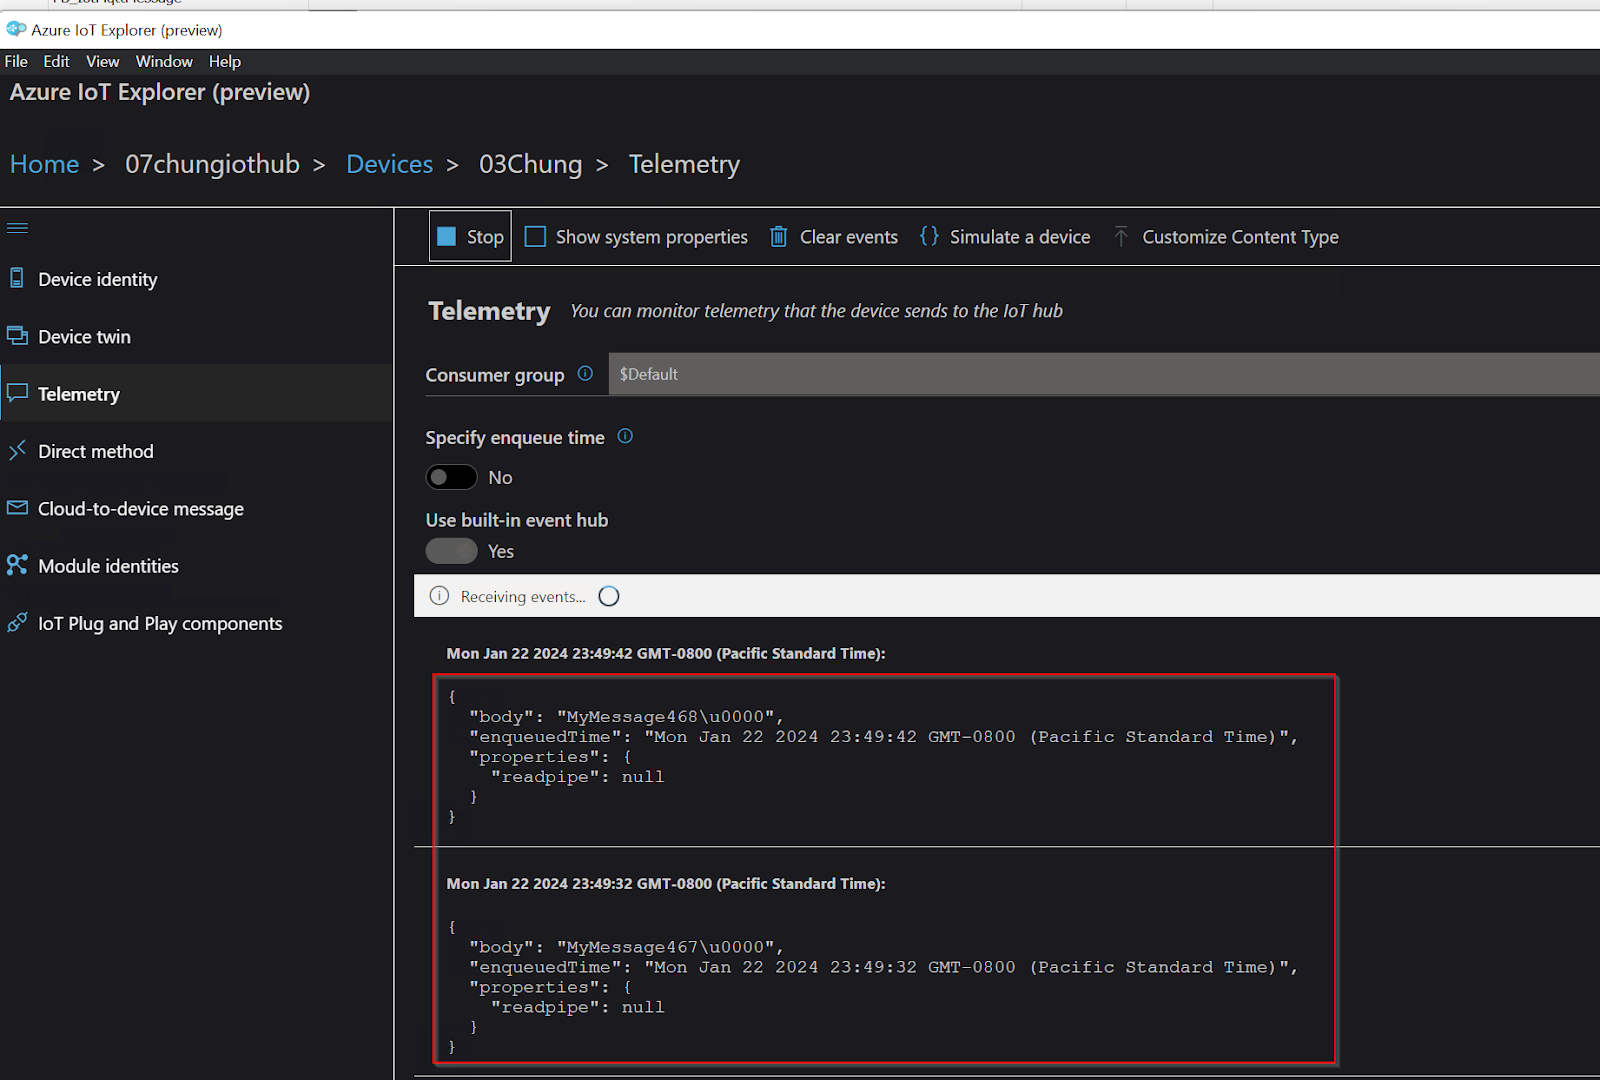
Now start Azure Iot Explorer>Telemetry function.
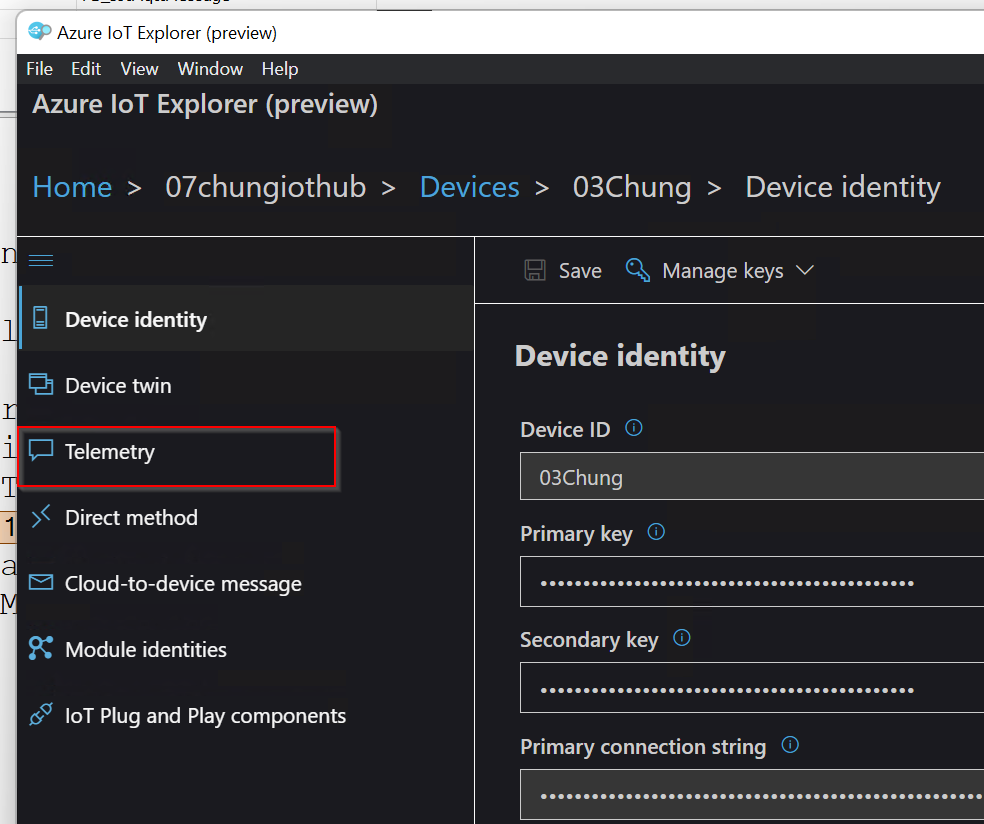
Click the Start button.

Done!The data transmitted from TwinCAT3 was visible.
IF can not connect..
If you cannot connect to Azure IoT Hub, check your firewall settings. Also, for MQTT communication with Azure IoT Hub, the outgoing TCP port (8883) must be available by default on the MQTT client (IPC running Tc3_IotBase).
If Tc3_IotBase is used, the port configuration should check the input parameter nHostPort in Function Block FB_IotMqttClient.