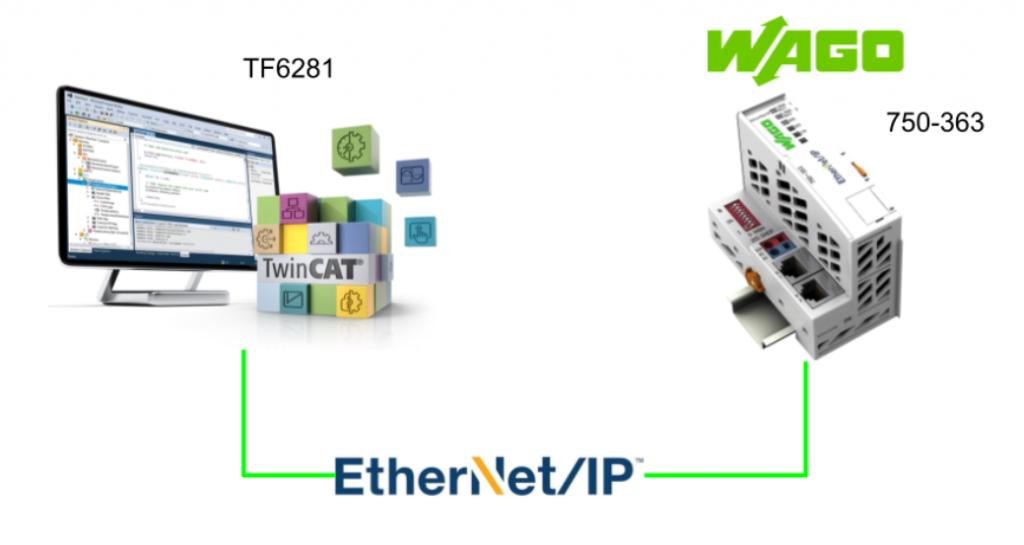
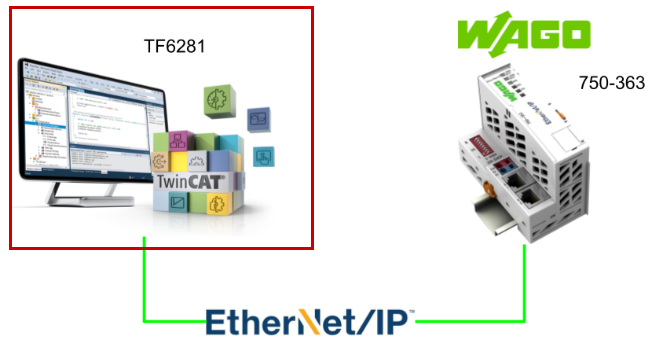
Recently, we’ve received numerous requests asking us to create an article on connecting TwinCAT3 TF6281 and WAGO 750-363. In response to these requests, we’ve created this guide.
Alright, let’s enjoy the FA!
Foreword
Thank you from the bottom of my heart for visiting my technical blog and YouTube channel.
We are currently running the “Takahashi Chris” radio show with Full-san (full@桜 八重 (@fulhause) / X) which I deliver every Wednesday night.
Sharing, not hoarding, technical knowledge
We publish technical information related to factory production technology and control systems for free, through blogs and videos.
With the belief that “knowledge should be accessible to everyone,” we share practical know-how and real-world troubleshooting cases from our own field experience.
The reason we keep it all free is simple: to help reduce the number of people who struggle because they simply didn’t know.
If you’ve ever thought:
- “Will this PLC and device combination actually work?”
- “I’m having trouble with EtherCAT communication—can someone test it?”
- “I want to try this remote I/O, but we don’t have the testing environment in-house…”
Feel free to reach out!If lending equipment or sharing your configuration is possible, we’re happy to verify it and share the results through articles and videos.
(We can keep company/product names anonymous if requested.)
How can you support us?
Currently, our activities are nearly all unpaid, but creating articles and videos takes time and a proper testing environment.If you’d like to support us in continuing and expanding this content, your kind help would mean a lot.
Membership (Support our radio show)
This support plan is designed to enhance radio with Mr Full.
https://note.com/fulhause/membership/join
Amazon Gift List (equipment & books for content production)
Lists equipment and books required for content creation.
https://www.amazon.co.jp/hz/wishlist/ls/H7W3RRD7C5QG?ref_=wl_share
Patreon (Support articles & video creation)
Your small monthly support will help to improve the environment for writing and verifying articles.
https://www.patreon.com/user?u=84249391
Paypal
A little help goes a long way.
https://paypal.me/soup01threes?country.x=JP&locale.x=ja_JP
Just trying to share things that could’ve helped someone—if only they’d known.
Your support helps make knowledge sharing more open and sustainable.
Thank you for being with us.
soup01threes*gmail.com
Technical knowledge shouldn’t be kept to ourselves.
Reference Link
http://soup01.com/en/?s=TF6281
Implementation
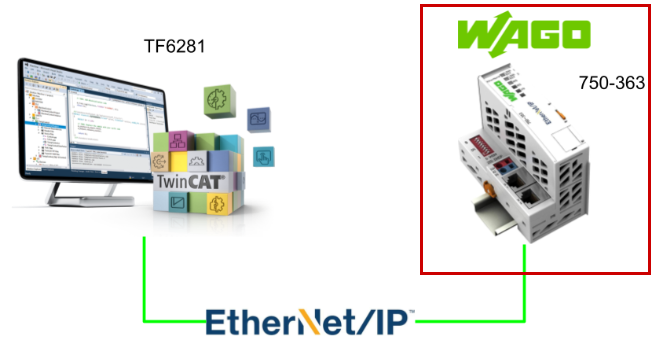
WAGO Side
First, configure the WAGO 750-363 side.
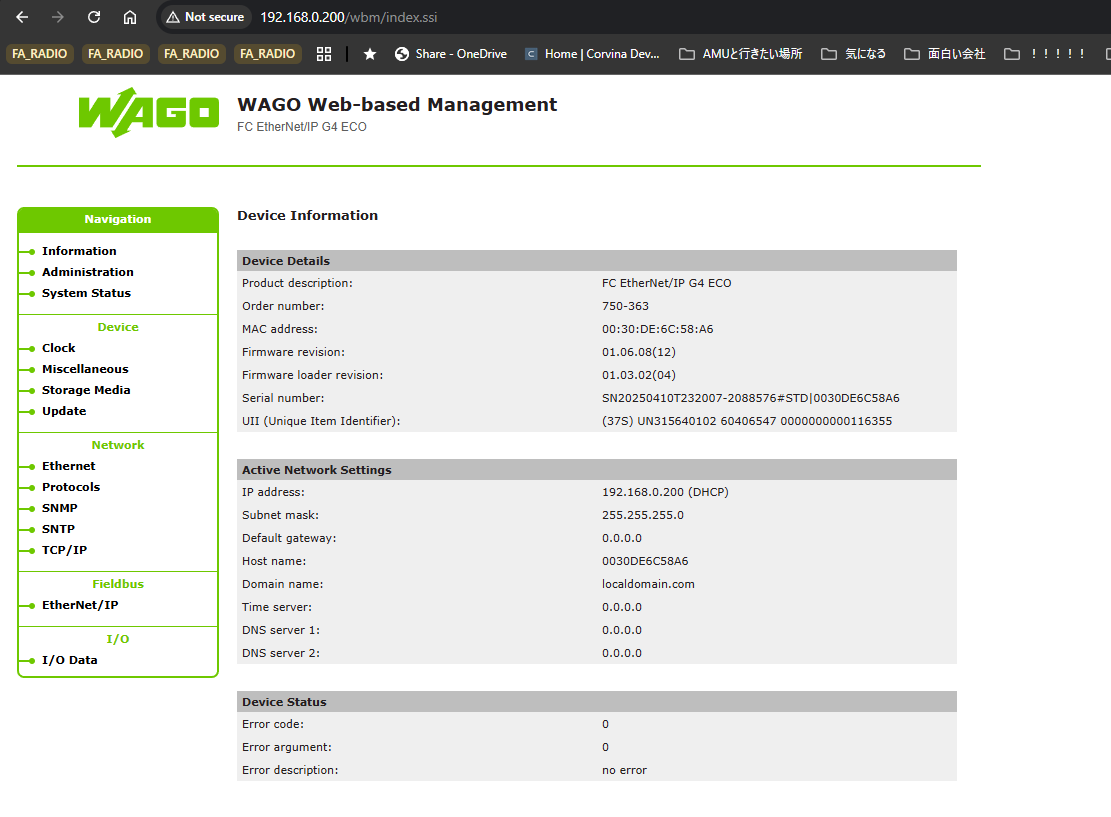
Web Server
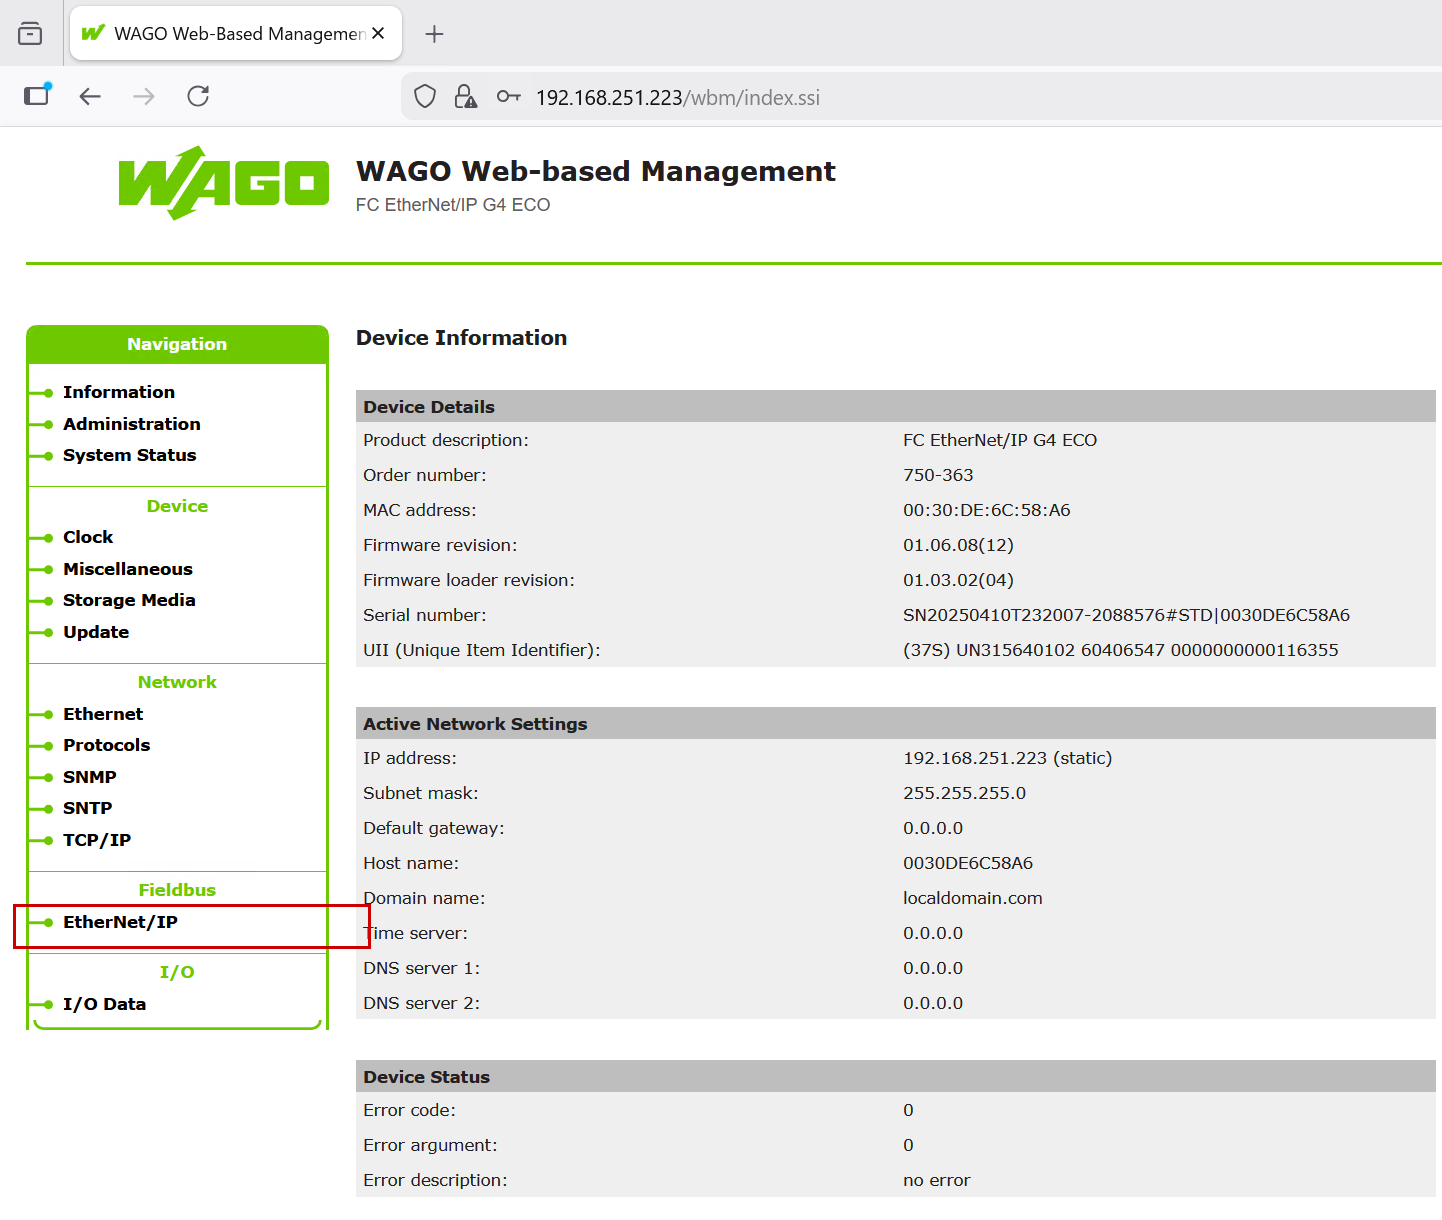
First, set a fixed IP address via the DIP switches, then access the web server on the WAGO Ethernet/IP Coupler 750-363.
Network Ethernet
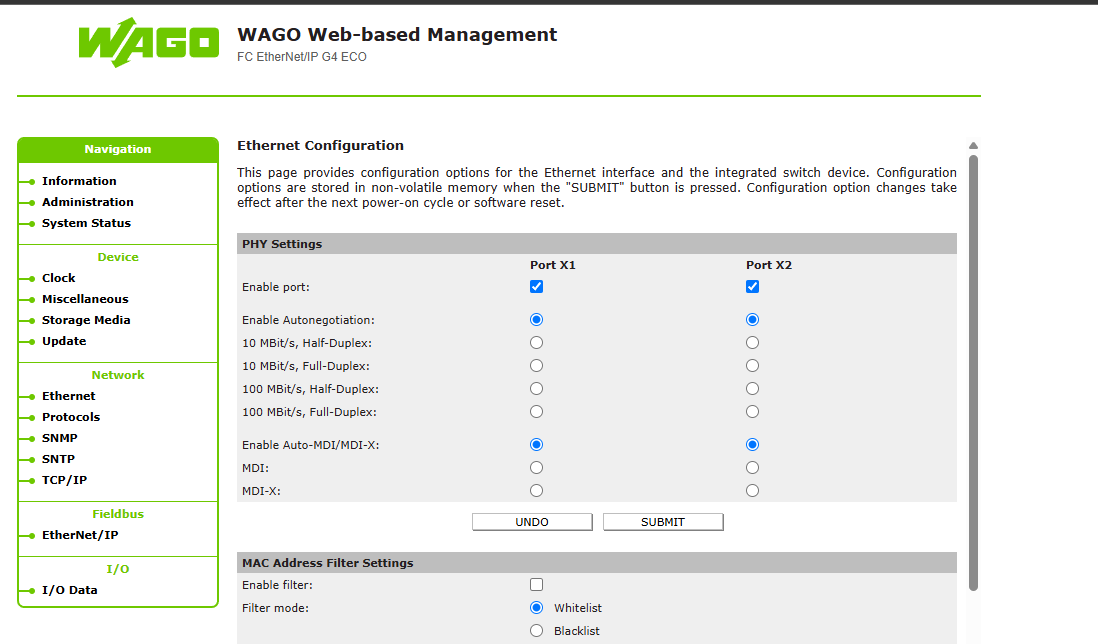
Click Network→Ethernet.

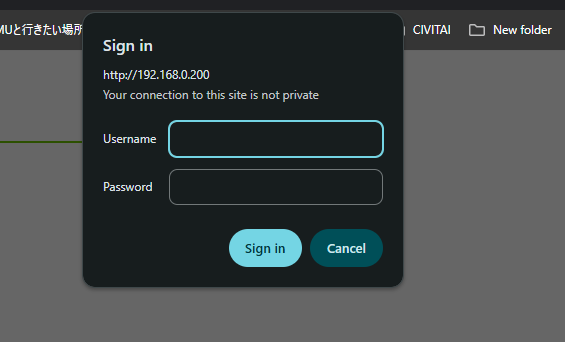
To change Ethernet settings, you must log in. These are the coupler’s default settings.
- Username:admin
- password
- Username:user
- password:user
Done!From this screen, you can configure settings such as enabling or disabling the PORT.
IP Configuration
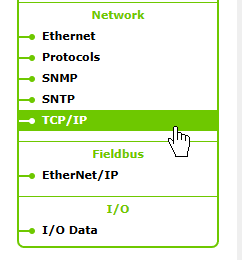
Next, to change the Ethernet/IP coupler’s IP address and other settings, click Network → TCP/IP.
This is the TCP/IP settings screen.
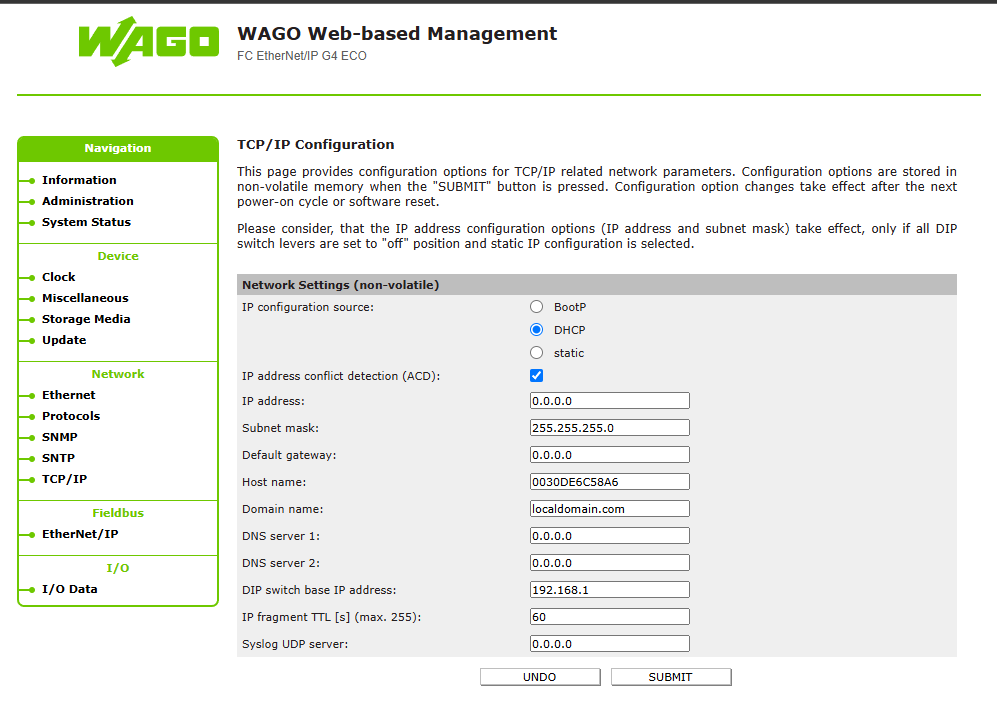
Set the IP address and click SUBMIT to enable the settings.
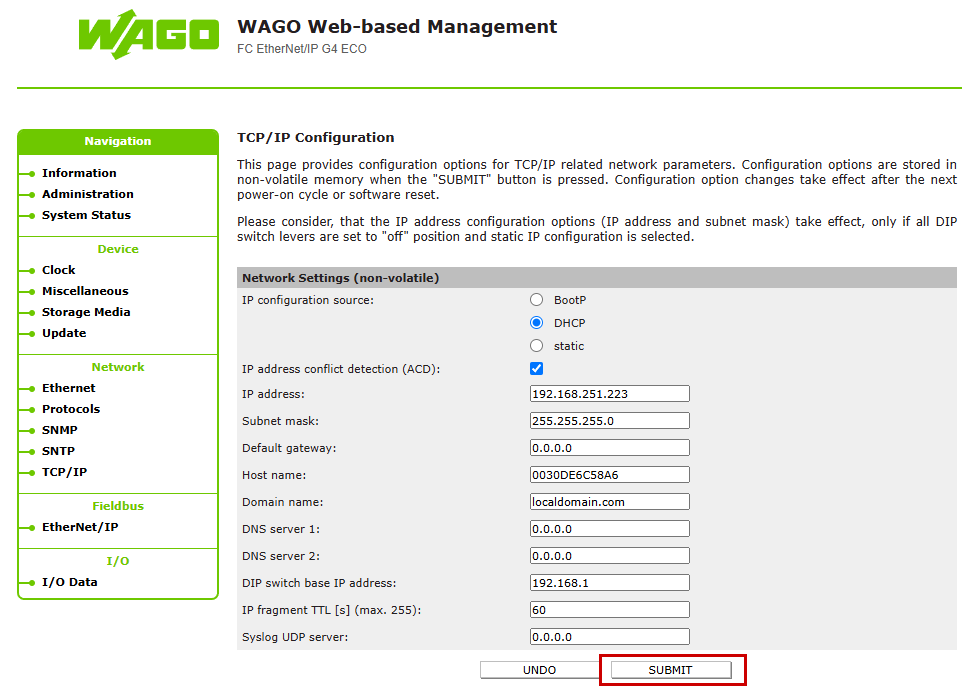
Also, don’t forget to set the IP configuration source to Static.
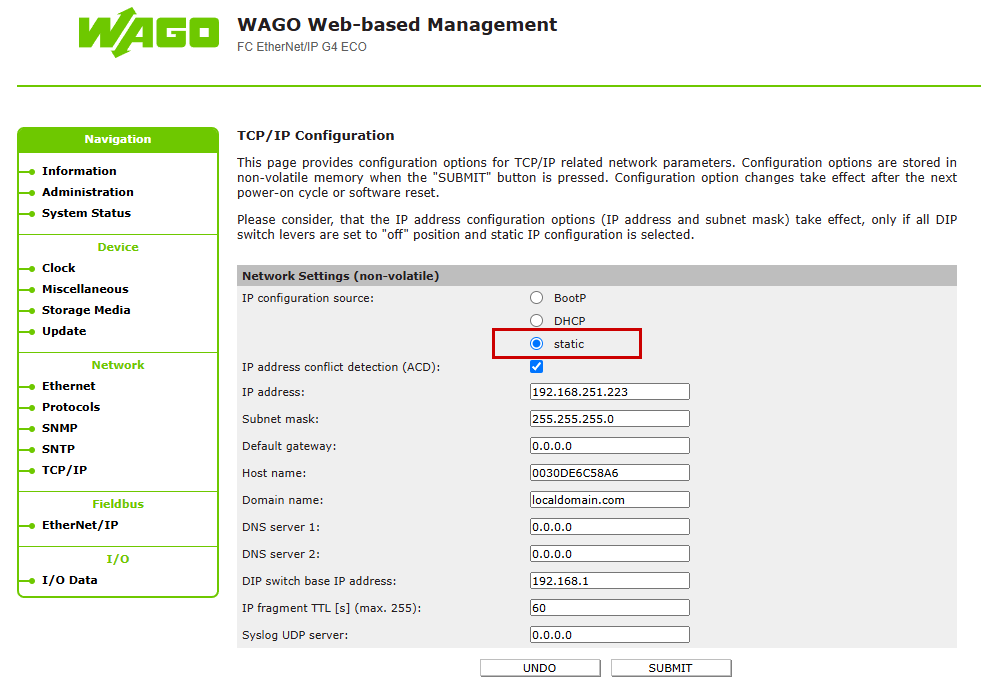
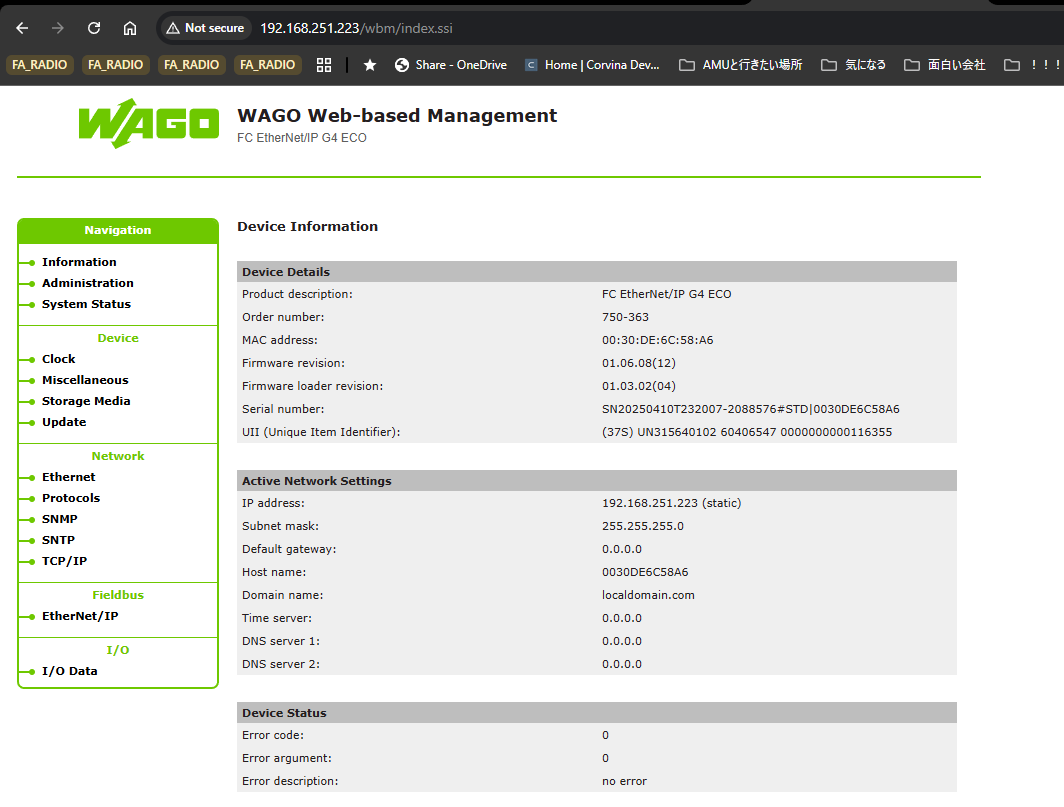
Done!The IP address has been changed.
Fieldbus
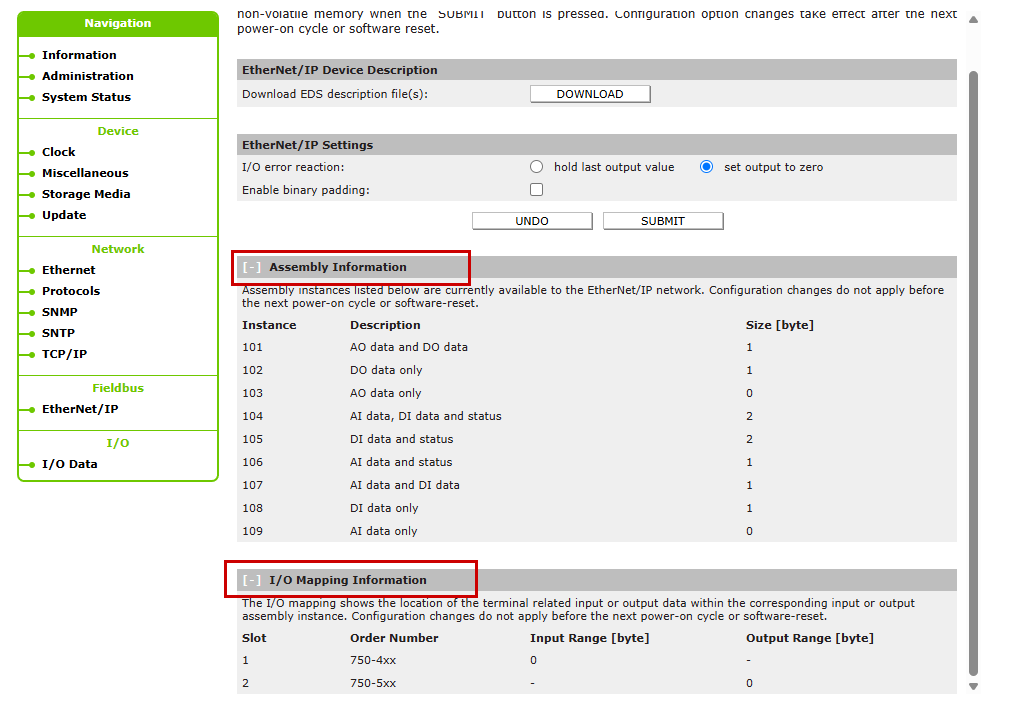
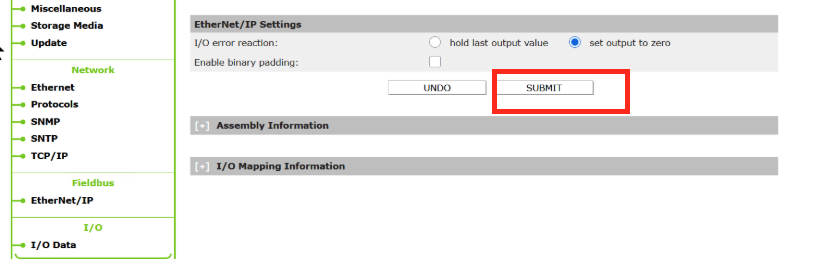
Next, verify the Ethernet/IP settings for the WAGO Ethernet/IP coupler. Click Fieldbus → Ethernet/IP.
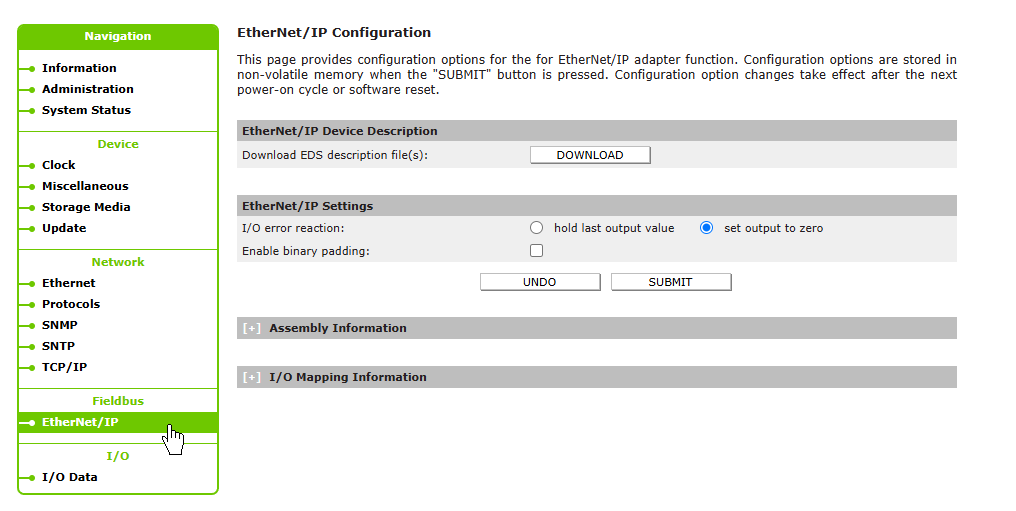
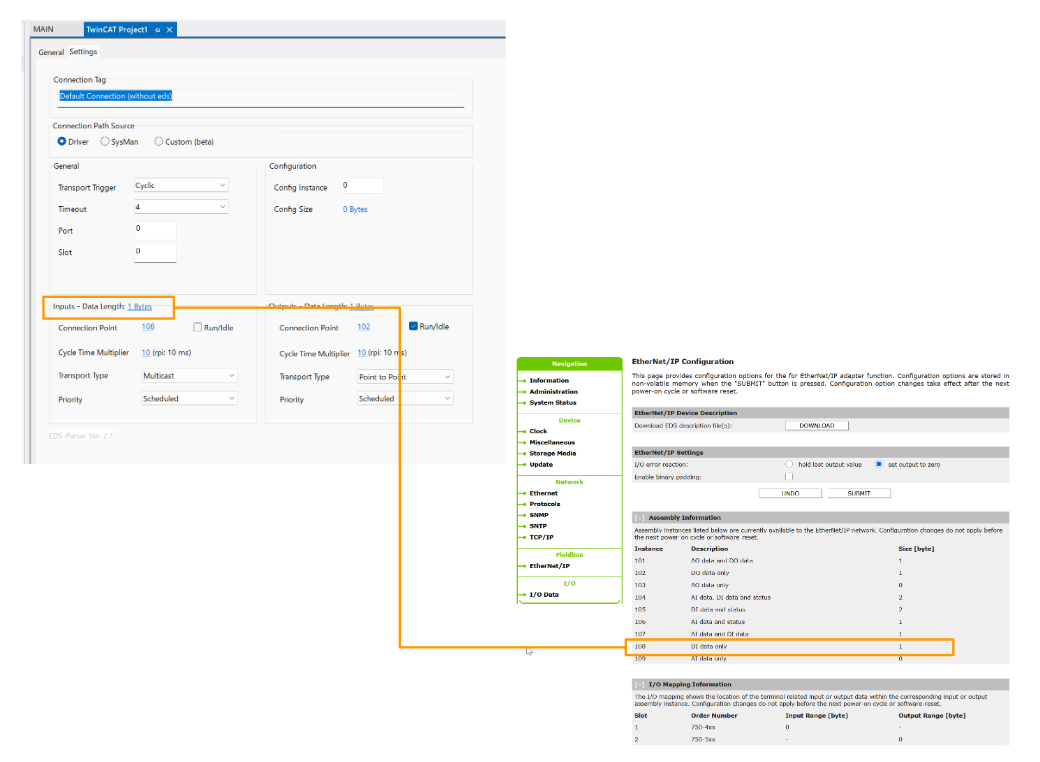
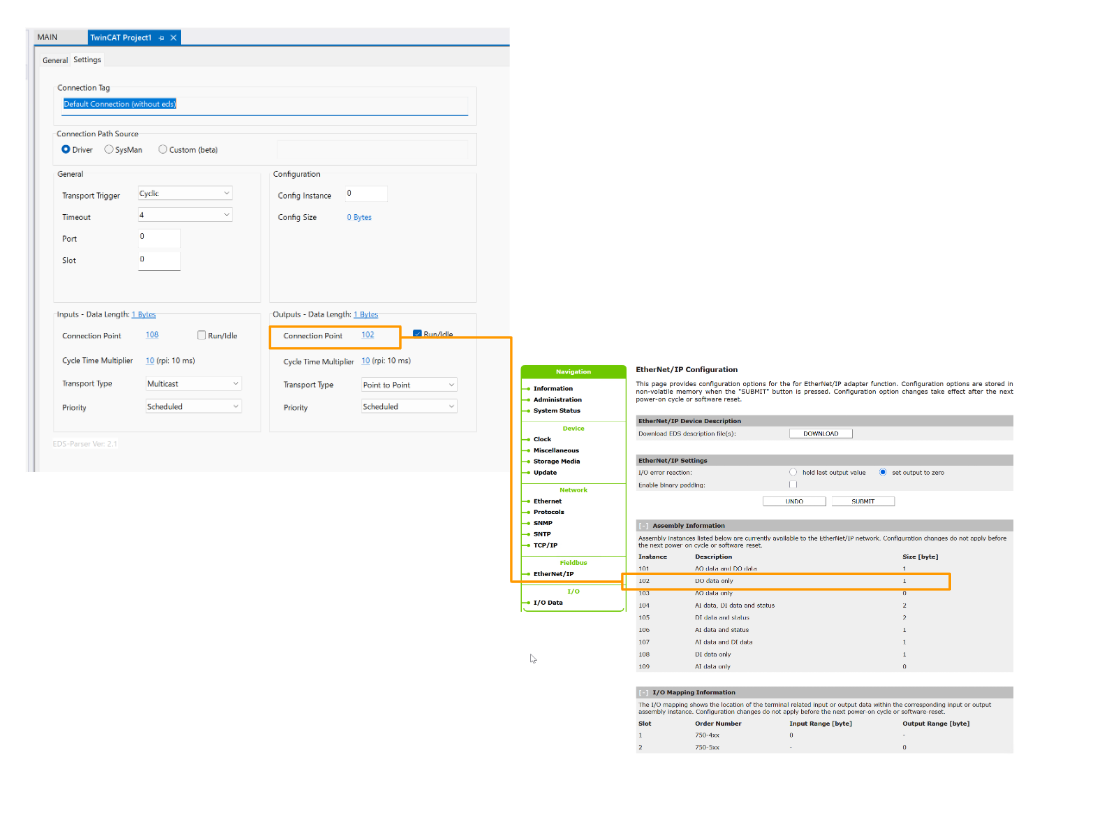
This time, only 750-1417 and 750-1515 are being used, so the size is set to 1 byte only in both the Assembly Information and I/O Mapping Information.
Download EDS File
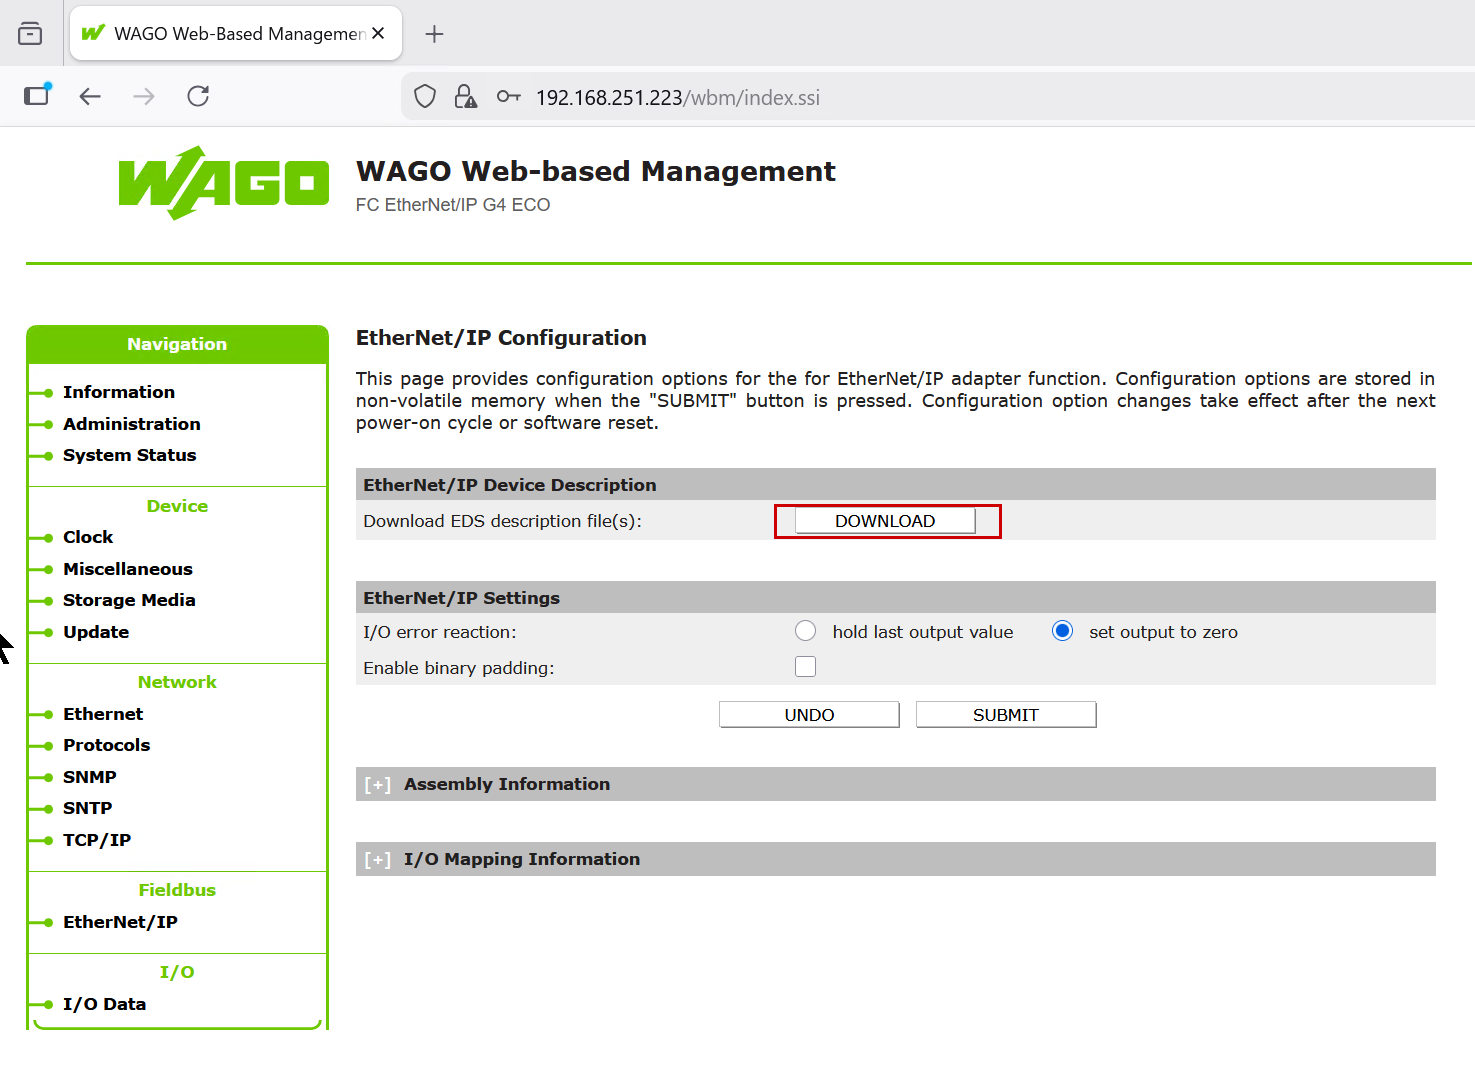
Finally, download the EDS file for WAGO’s 750-363.
Click Fieldbus → Ethernet/IP.
Click the DOWNLOAD button.
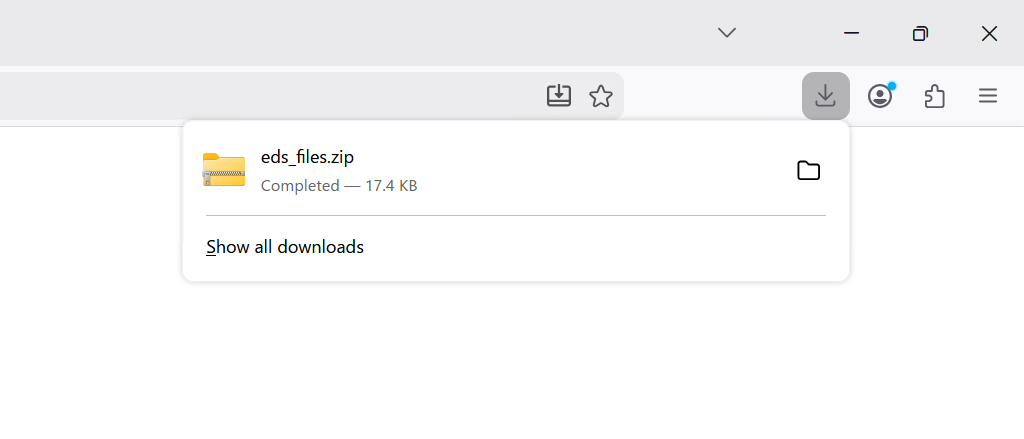
A ZIP file like the one shown below was downloaded.
Confiugration SUBMIT
Finally Go to Fieldbus→Ethernet/IP→SUBMITto save the configuration of the currently installed modules using the button.
Beckhoff Side
Next, configure the Beckhoff TwinCAT3 side.
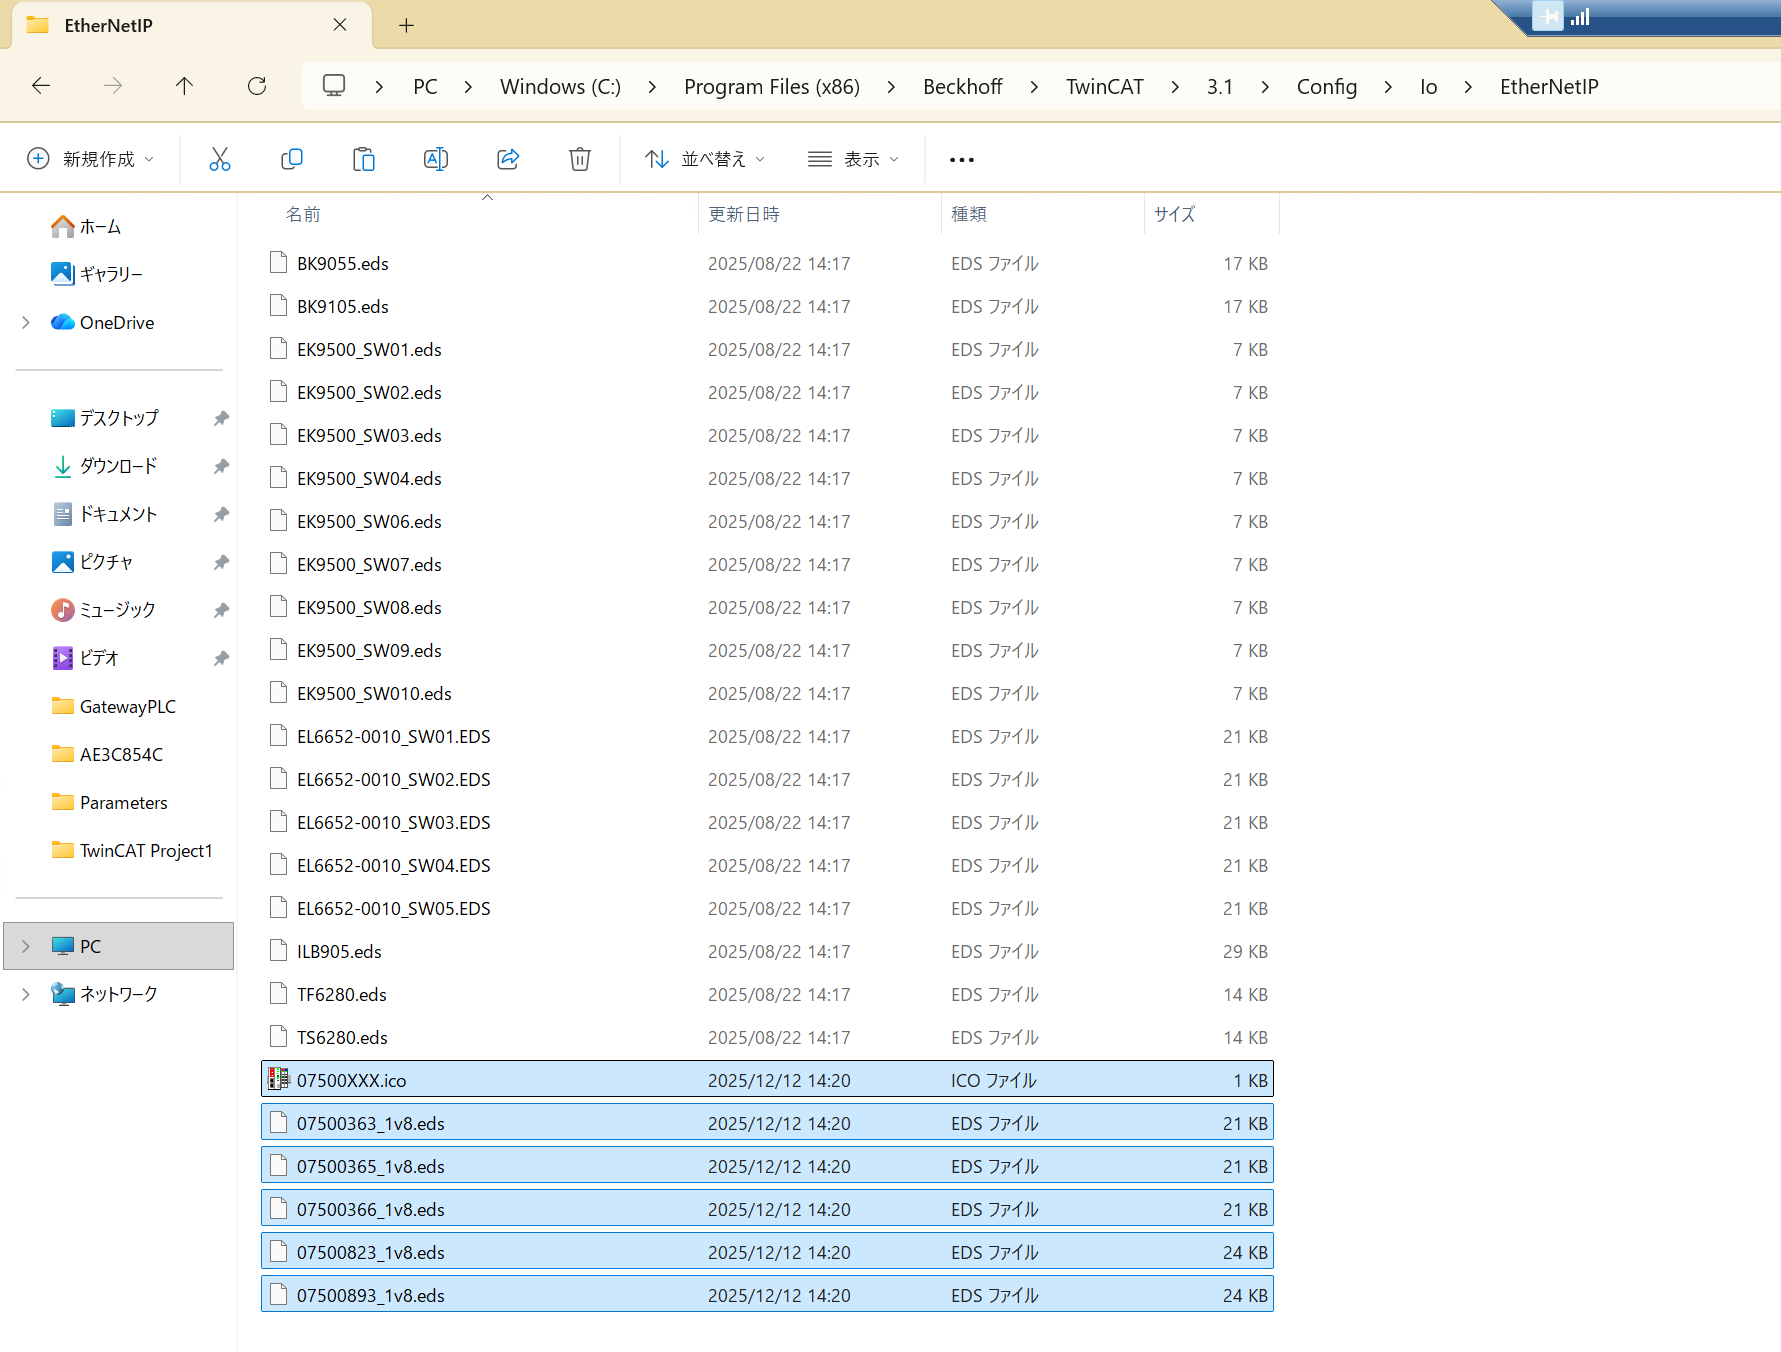
Install EDS File
Since we are using the 4026 for this article, please save the EDS file downloaded from the WAGO coupler earlier into the directory shown below.
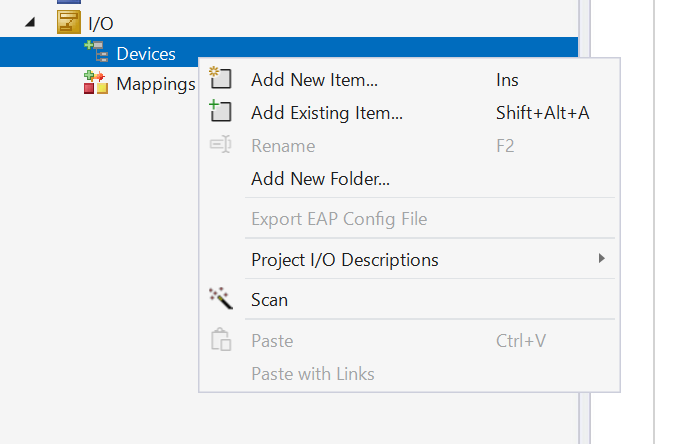
Add Ethernet/IP Driver
Etherent/IP Driverを追加するために、Devices→右クリック→Add New Itemします。
Click Ethernet/IP → Ethernet/IP Scanner.
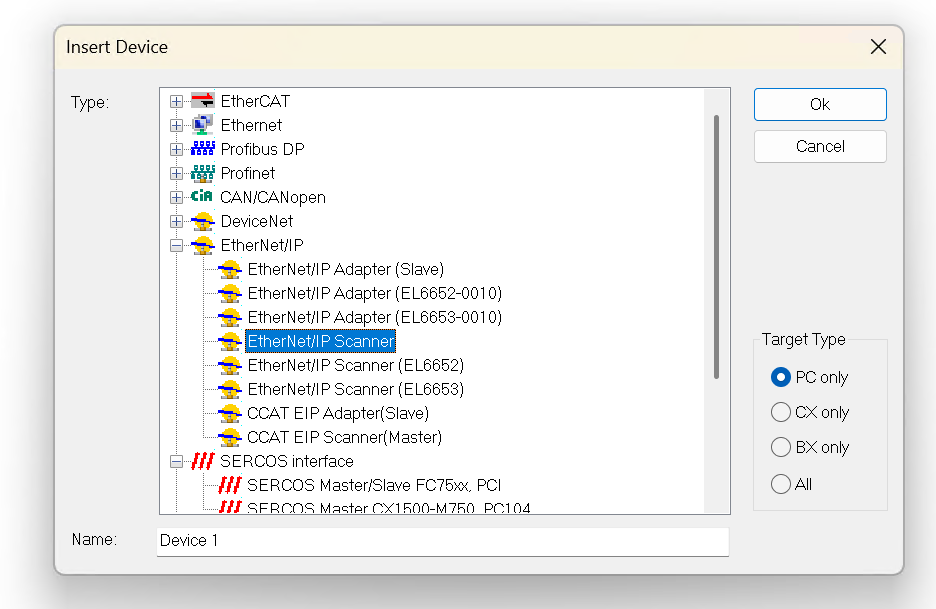
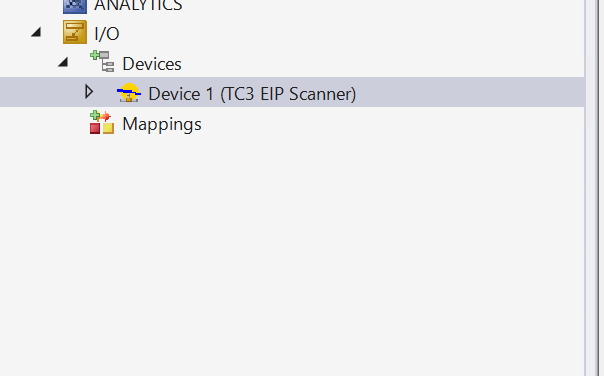
Done!Ethernet/IP Scanner has been added.
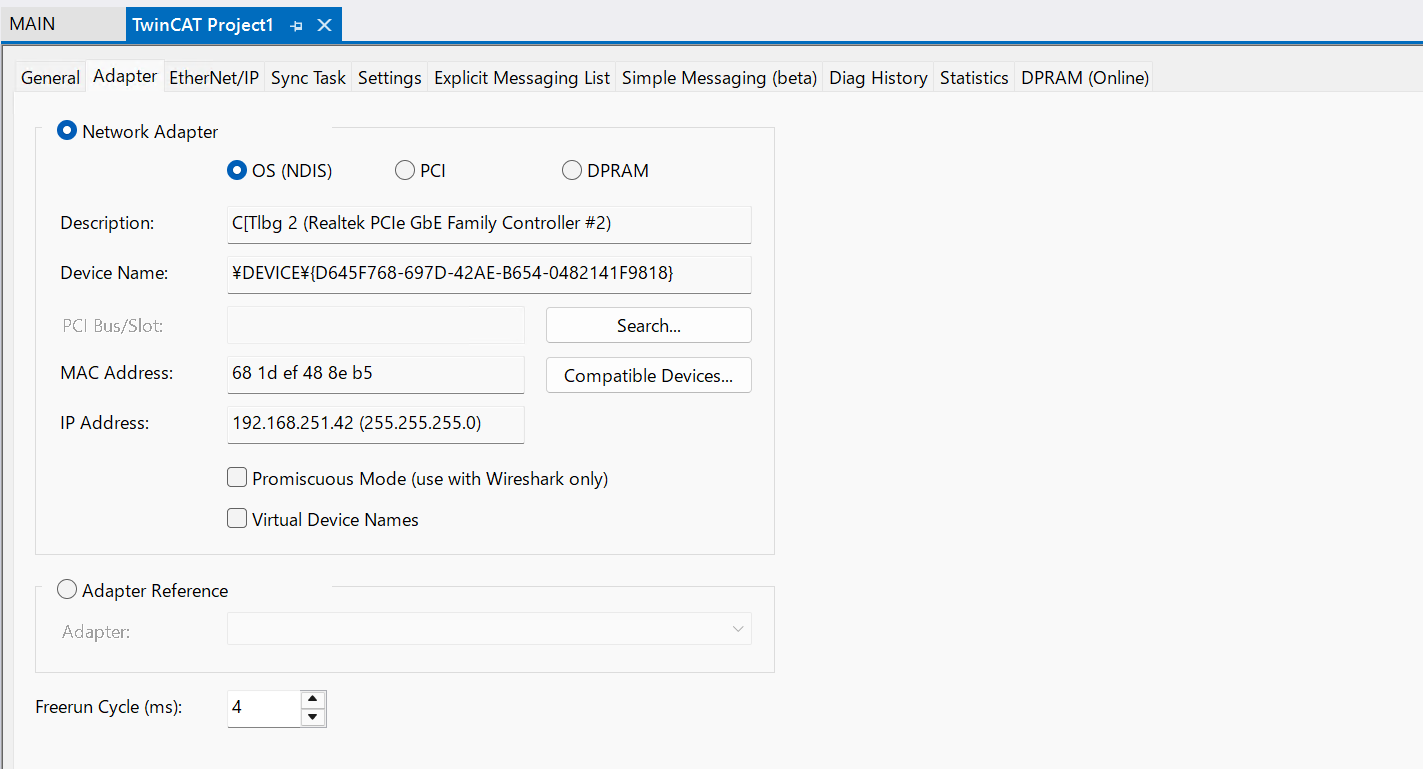
Configure Ethernet Adapter
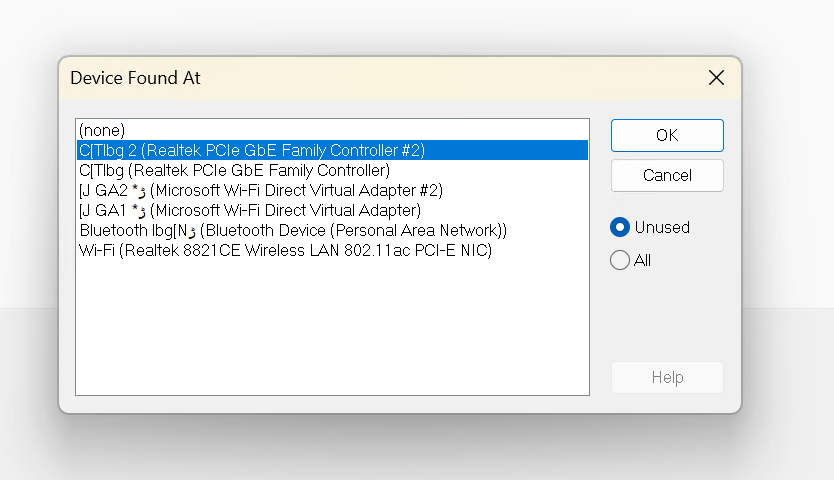
Next, click Adapter to configure the Ethernet Driver that operates Ethernet/IP.
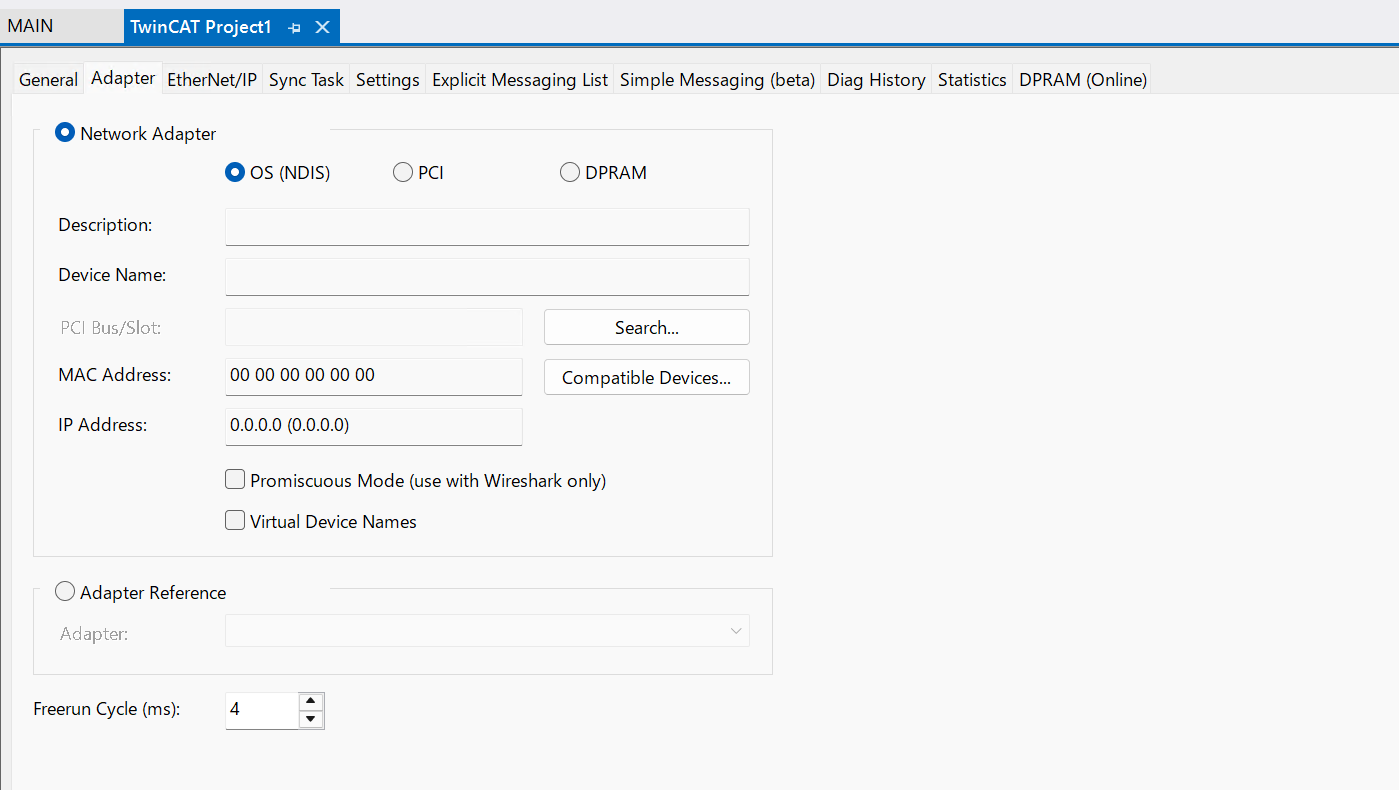
Configure the Ethernet interface to be used as an Ethernet/IP Scanner.
Done!
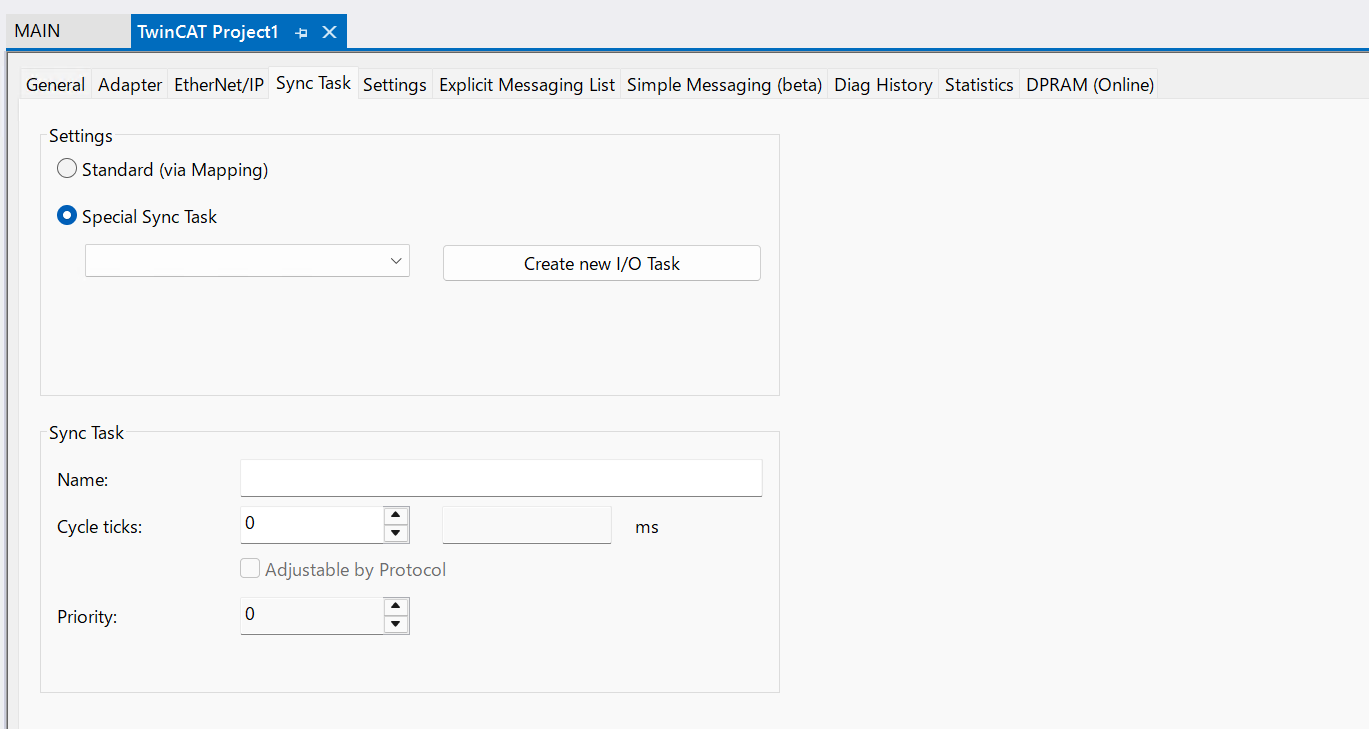
Configure Task
Next, open the Sync Task Tab, select Special Sync Task, and then create a new I/O Task.
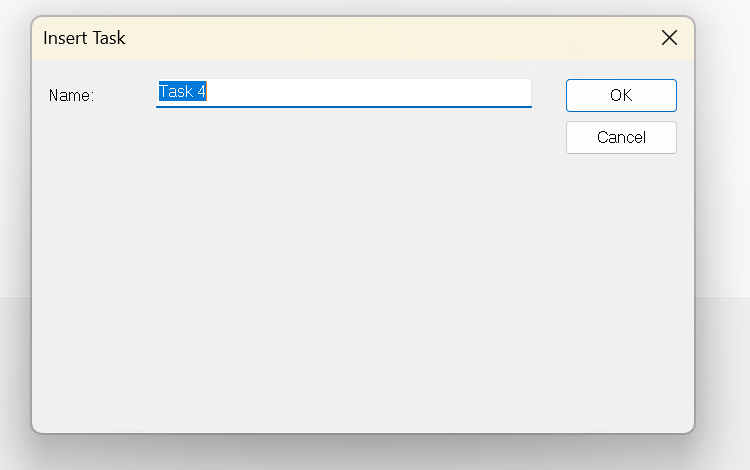
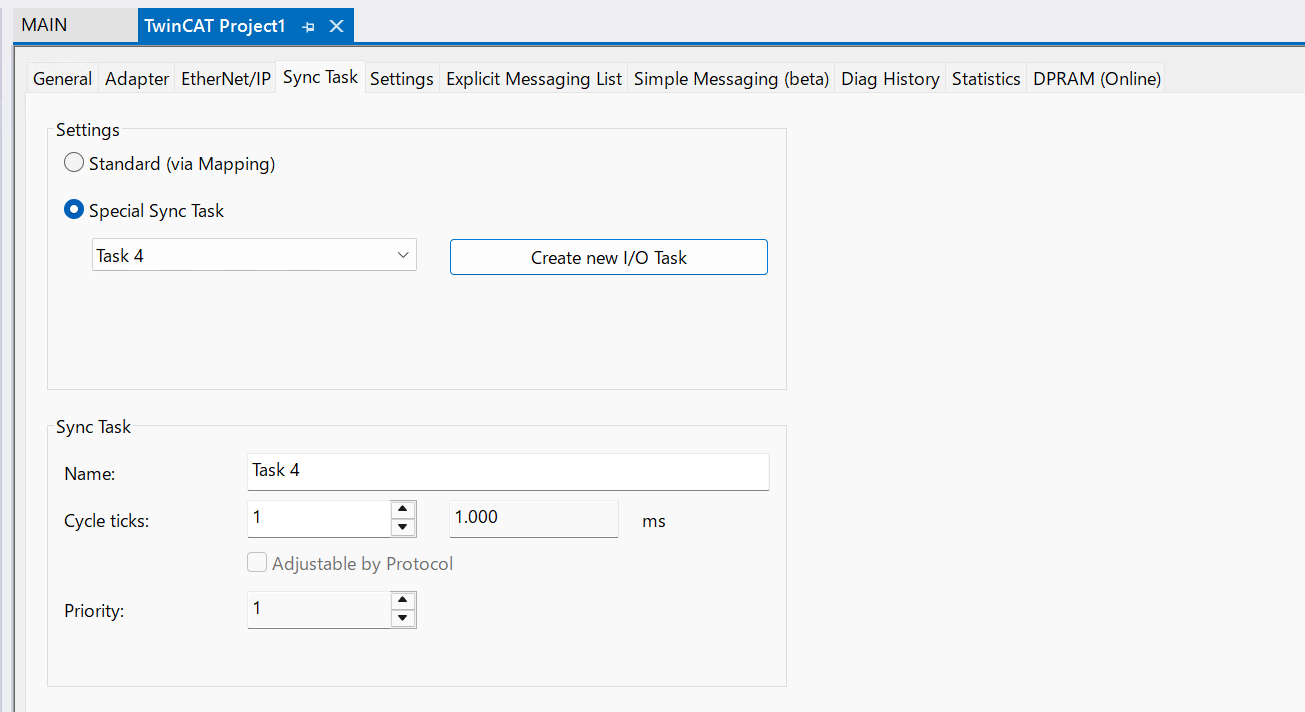
Set the task name.
Done!A task for Ethernet/IP has been added.
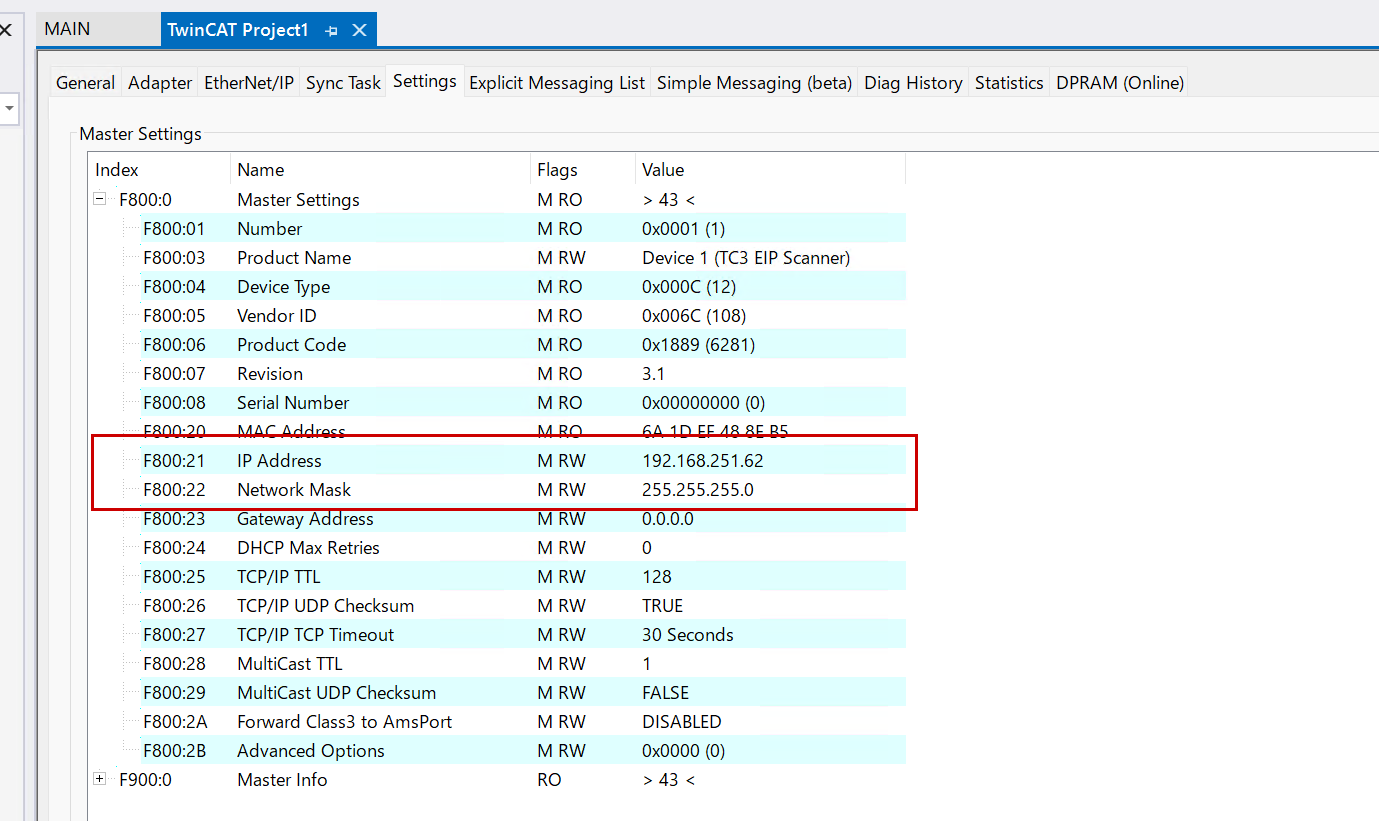
Settings
Next, configure the Ethernet/IP Scanner’s network settings by opening the Settings Tab. Then set the IP Address and Network Mask as shown in the figure below.

Done!
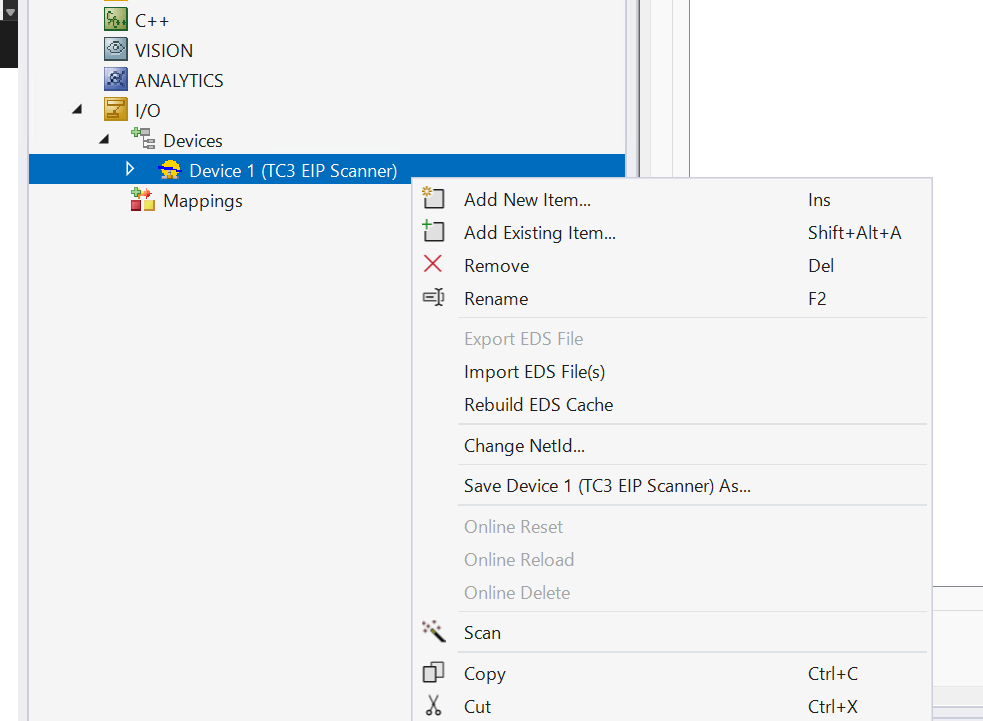
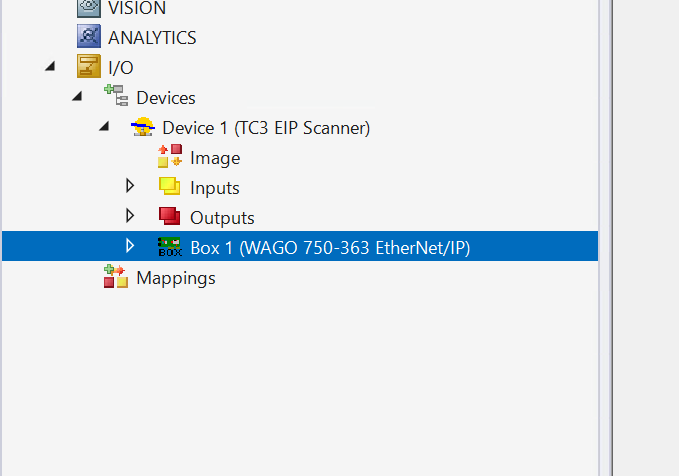
Add Coupler
Next, to add the WAGO 750-363 Ethernet/IP coupler used in this article, right-click Device1 and select Add New Item.
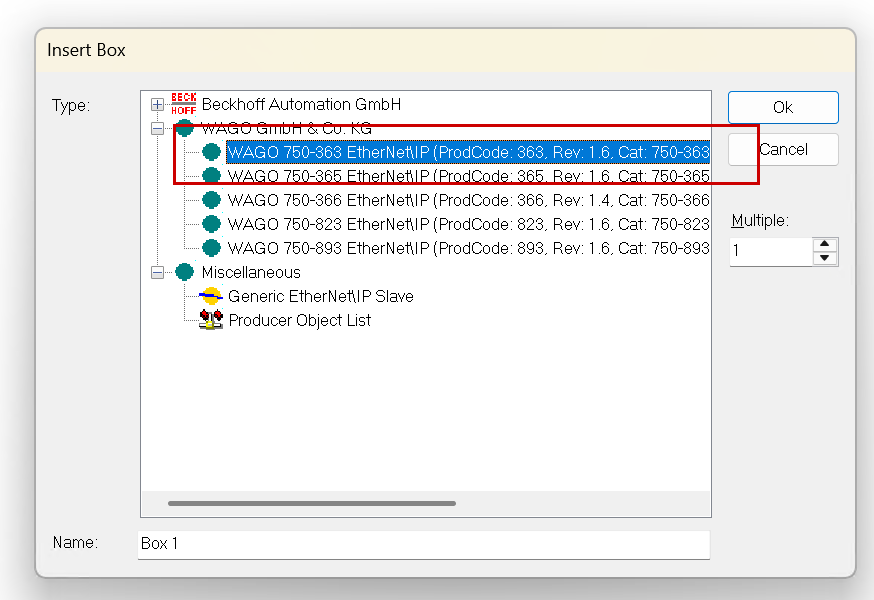
Select WAGO 750-363 and proceed with OK.
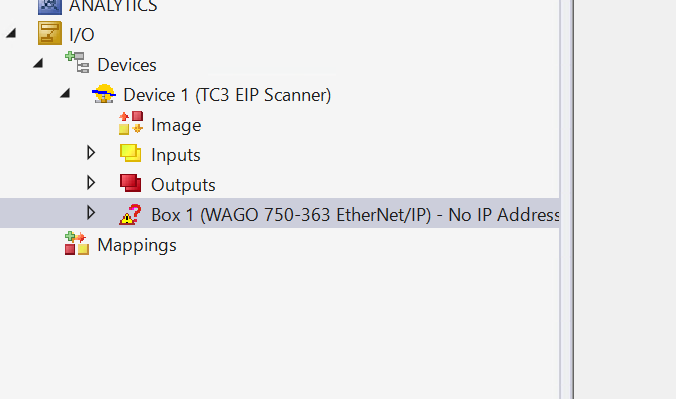
Done!WAGO 750-363 has been added.
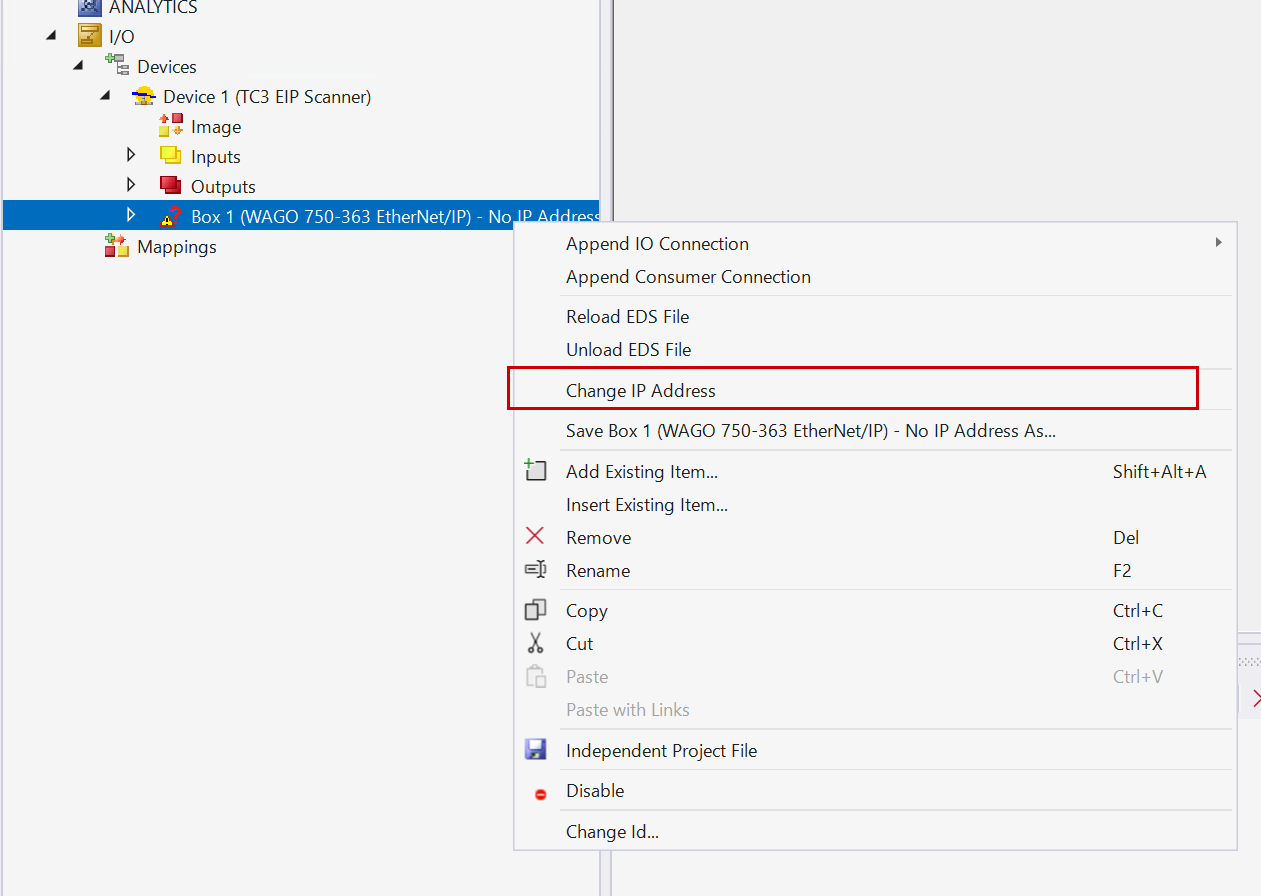
Change IP
Next, to change the IP address of that coupler, right-click and select Change IP address.
Set the IP address to match the configuration of 750-363.

Done!
Configure Connections
750-363 To add an IO Connection for connecting to the WAGO Ethernet/IP coupler, right-click → Append IO Connection → Default (Without eds).
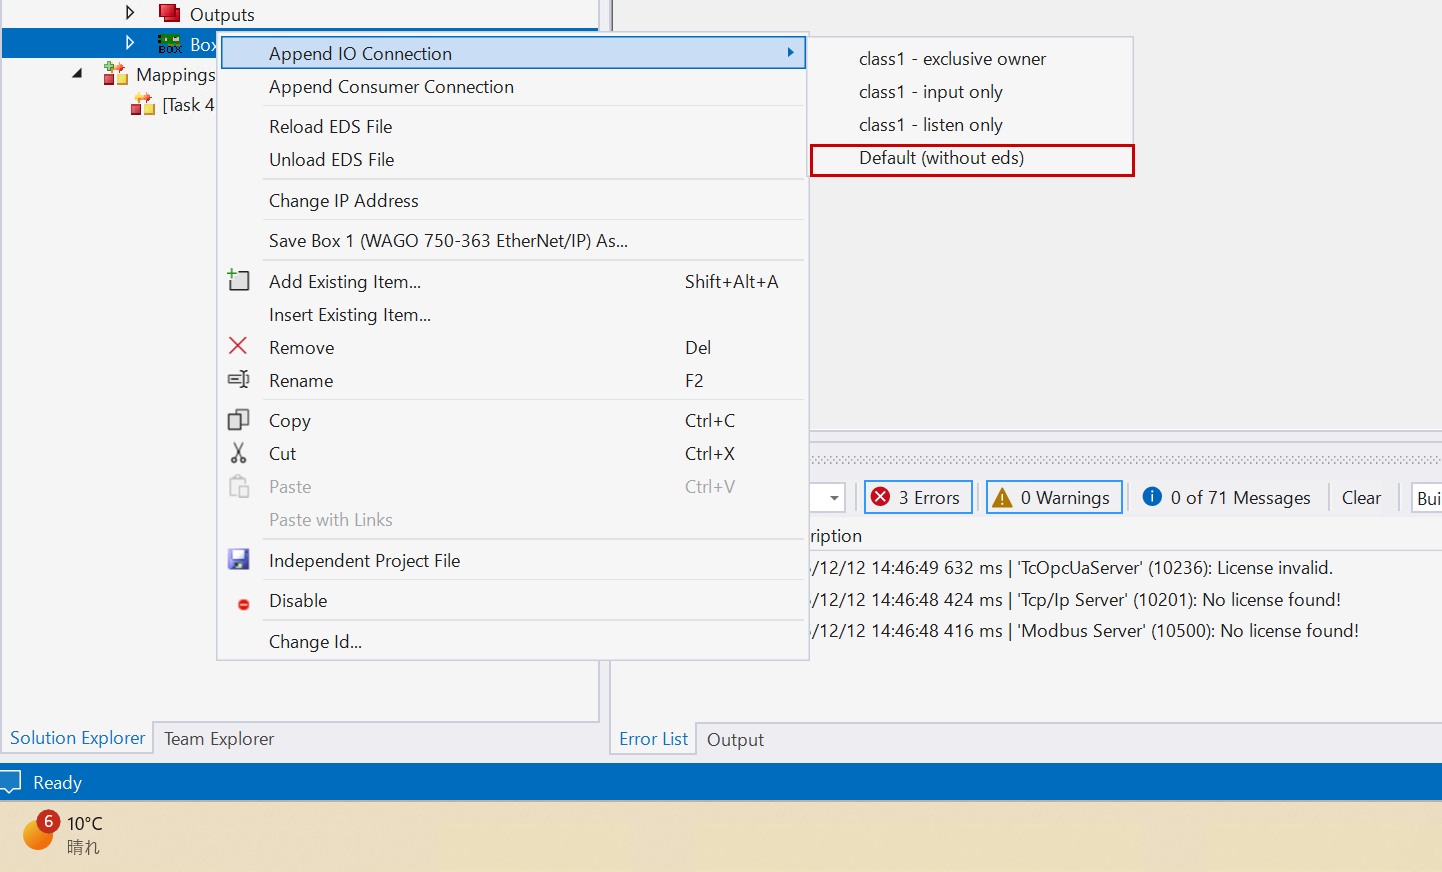
Done!Connection added.
Settings
cNext, open Settings and configure it as shown below.
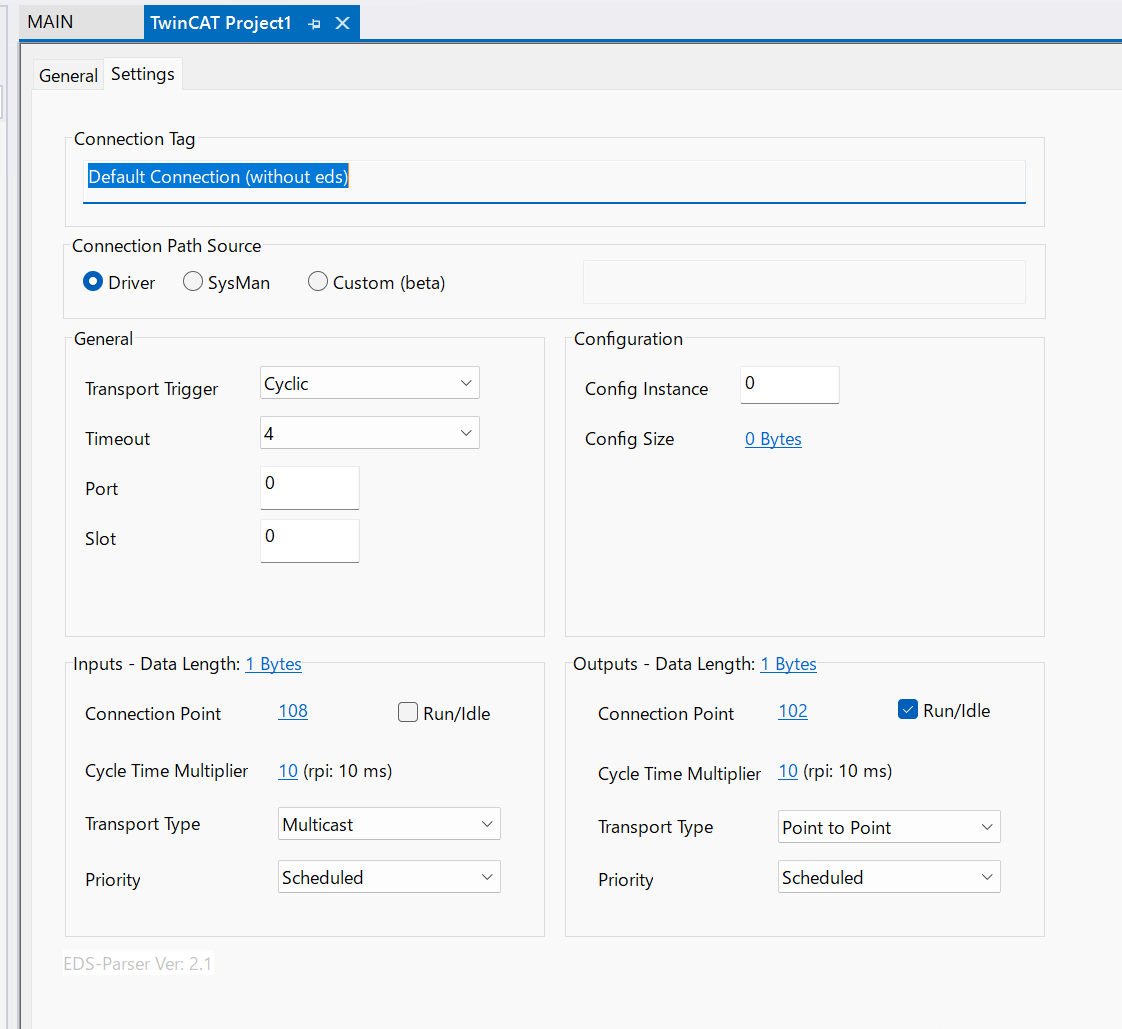
This is the Ethernet/IP Fieldbus screen for WAGO’s 750-363.

Inputs-Size
The input data size is 1 byte.
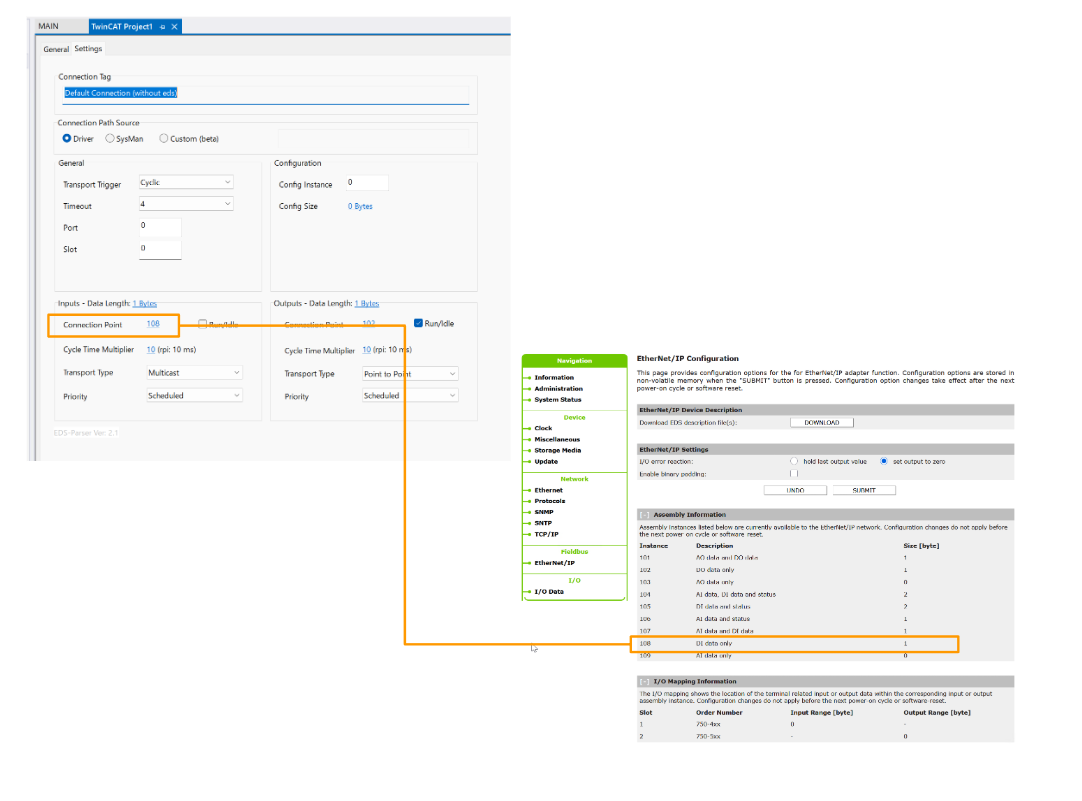
Connection Point
Connection Point is 108.
Outputs-Size
The output data size is 1 byte.
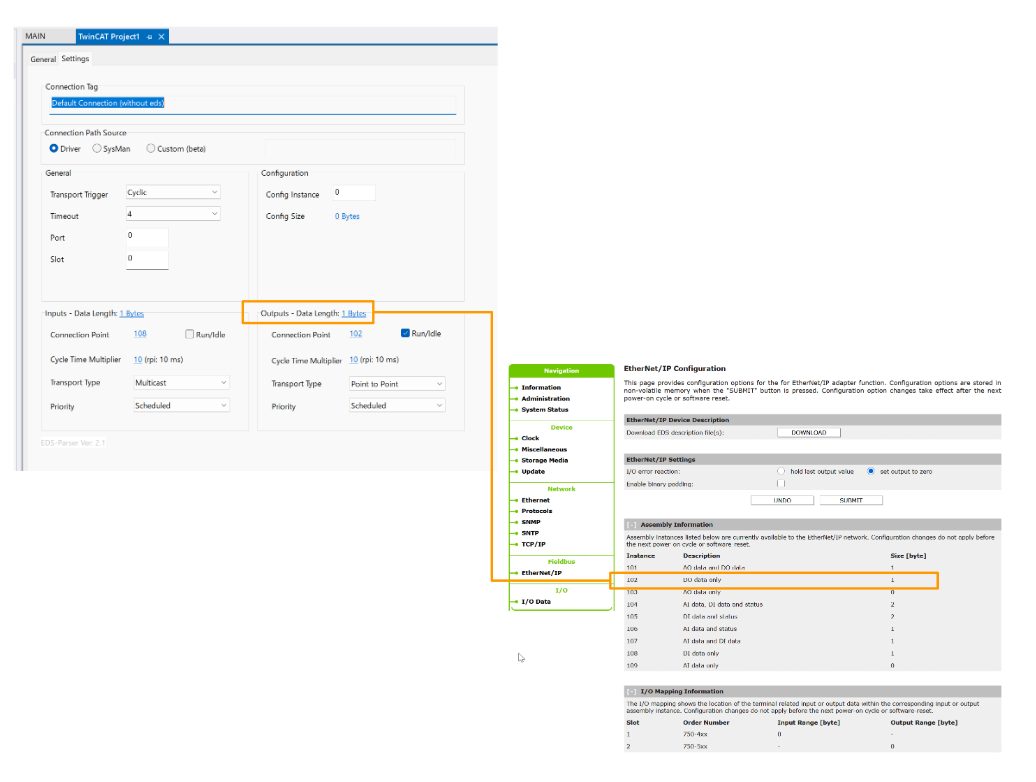
Connection Point
Connection Point is 102.
PLC
Next, we will create a PLC program for the communication test.
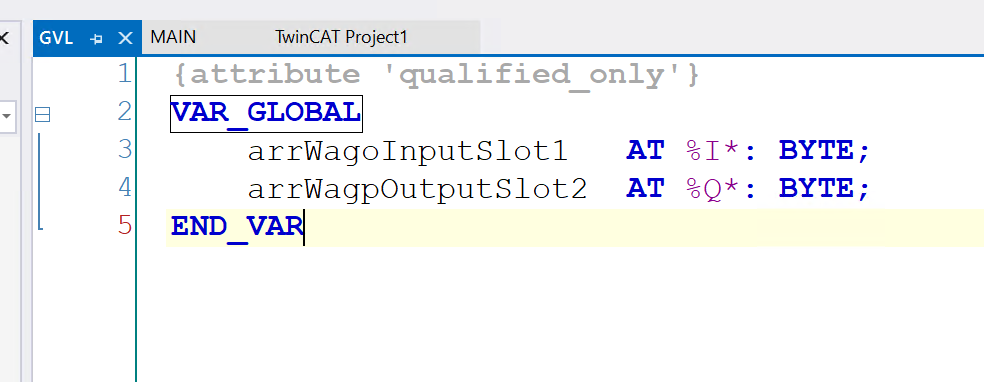
GVL
Global Variables Listを作成し、下図のようにProcess 入出力変数を定義します。
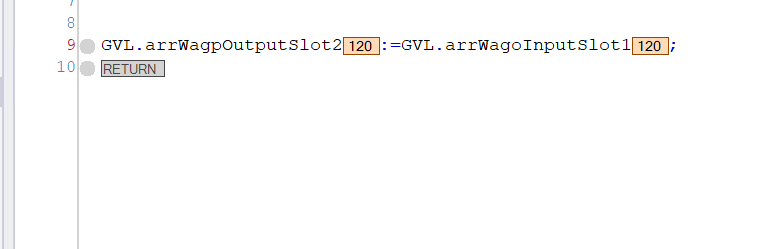
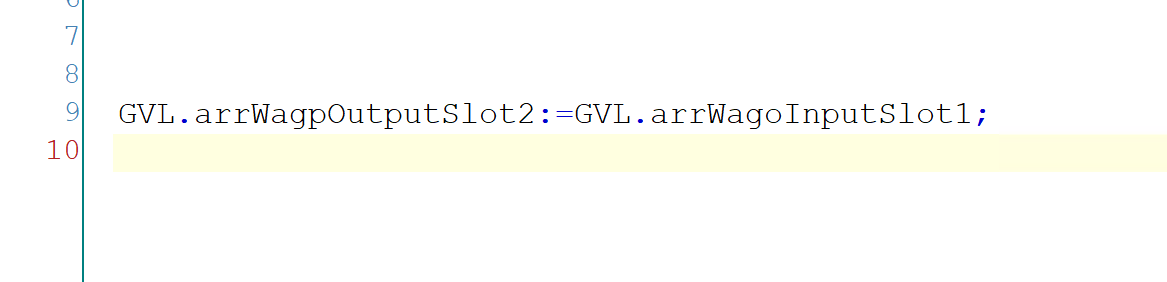
Program
Next, we will create a program that loops back the input data directly to the output.
Build
Compile the project.
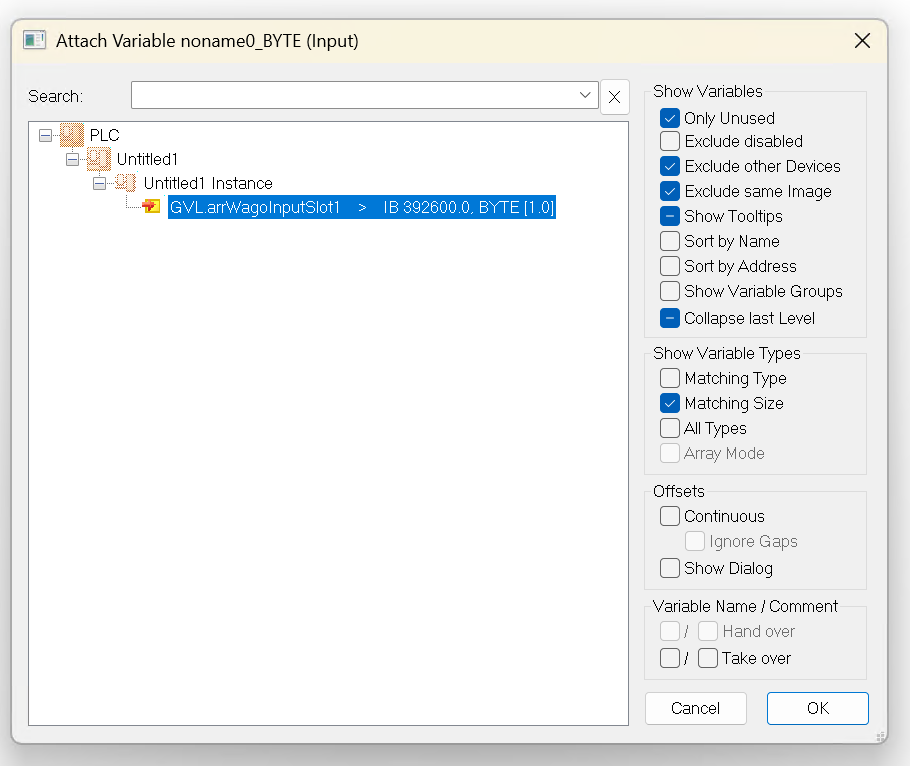
Link Input
Right-click on the connection you just added → Inputs → Change Link.

Assign the input variables defined earlier.
Link Output
先程追加した接続→Outputs→右クリック→Change Linkします。
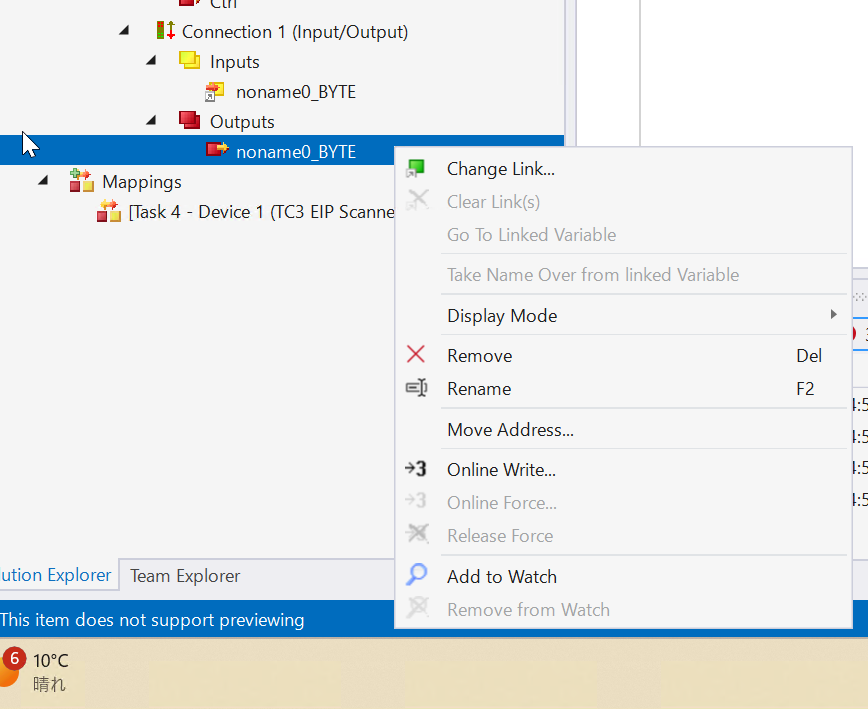
Assign to the output variable defined earlier.

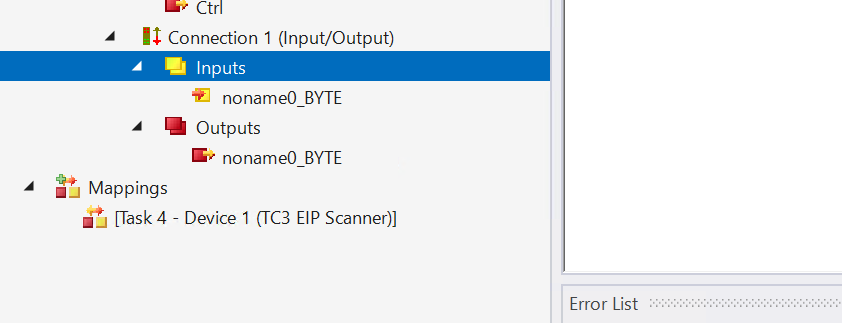
Result
Done!As shown in the diagram below, communication between TwinCAT3 and WAGO 750-363 via Ethernet/IP is currently working properly.

Then, we receive the input data and loop it back directly to the output.