In this Tutorial, I will explain how to configure the Profinet Controller in the raspberry pi with Codesys Runtime.
PI4 Setting
You can get more information in the Online Help.
/etc/CODESYSControl_User.cfg
Open and Add the below codes into the .cfg file.
| [SysEthernet] QDISC_BYPASS=1 Linux.ProtocolFilter=3 [SysSocket] Adapter.0.Name=”eth0″ Adapter.0.EnableSetIpAndMask=1 |
/etc/dhcpcd.conf
Set the Static Ip as 0.0.0.0.
| interface eth0 static ip_address=0.0.0.0 |
Install the Vlan
| sudo apt-get install vlan # Install VLAN package sudo modprobe 8021q # Load 8021q kernel module |
And then restart your Raspberry.
Codesys Side
Open your Codesys Runtime, Device>Add Devices.
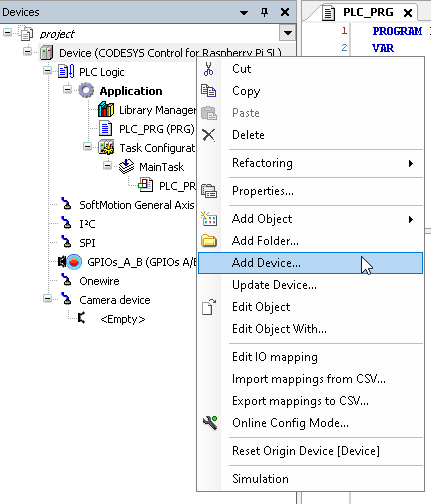
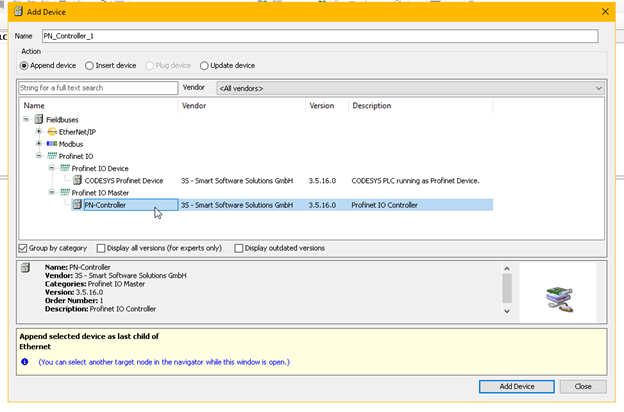
Choose ProfinetIO>ProfinetIO Master and Add Devices.
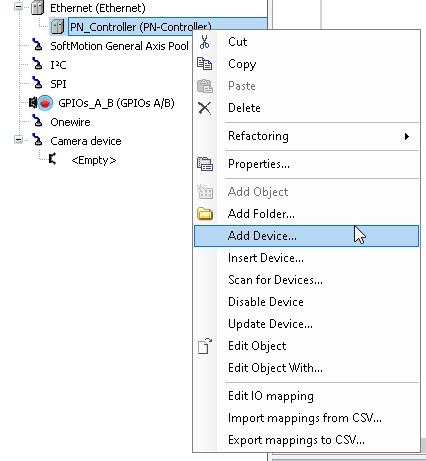
Right Click the PN_Controller that you inserted in the previous step, Add Devices.
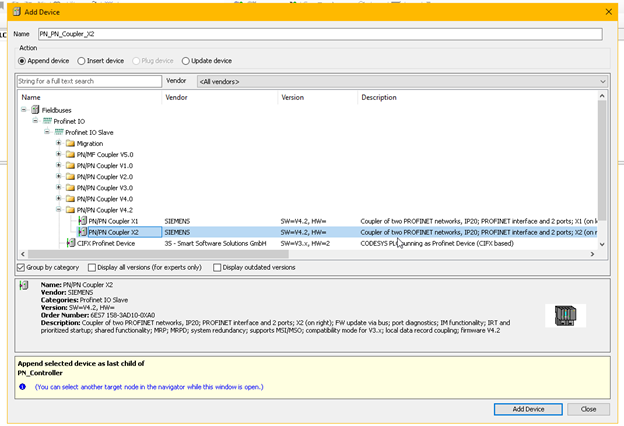
All the Profinet IO Devices that you installed in your PC are shown.
Please choose the Device that is connected in your Network.
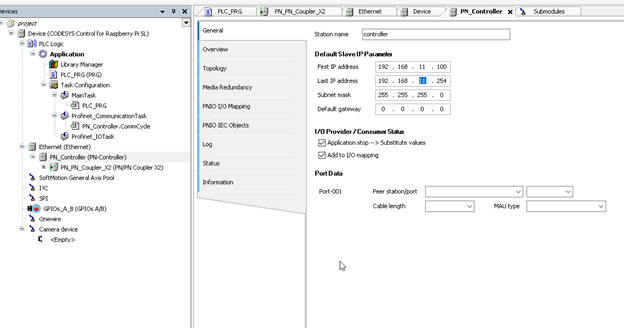
Now we need to configure the ProfineIO Controller.
Go to Device>Send Echo Service to check the connection between your PC and Raspberry.

The connection is normal if the screen below is displayed.

Click the Ethernet and Go to General>Network interface, Click the .. Button.
You need to choose the Network interface for the Profinet IO Controller.

In this case, we will use eth0.

And then we need to define the IP address range of the Profinet Devices.
In this tutorial we will configure the range from 100-254.
Finally Please Login the project to your Runtime and restart it.