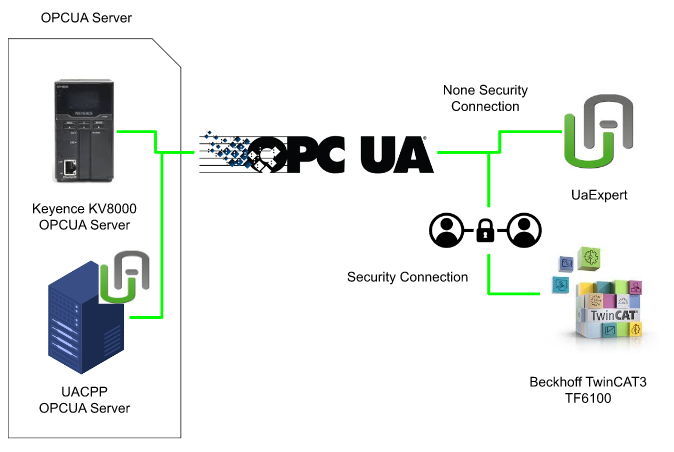
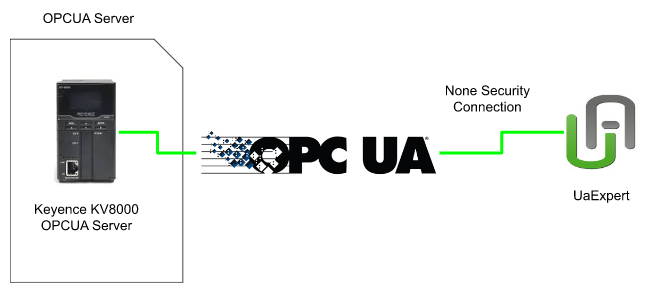
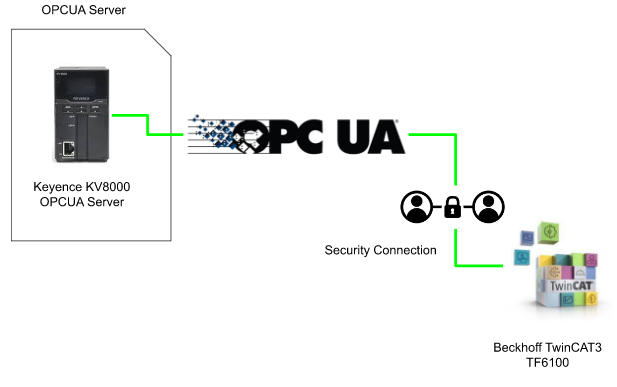
This article introduces the procedure for connecting OPC UA Security Channel with Keyence KV8000 and TwinCAT TF6100. First, we will connect from UaExpert to Keyence KV8000 with Non Security Connection. After that, a testing with OPC UA CPP Server and TwinCAT with Security Connection is shown.Finally, we will connect TwinCAT3 and Keyence KV8000 with TwinCAT Security Connection.
Reference Link
http://soup01.com/en/category/protocol-en/opcua-en/
Video-Japanese Version
Video-English Version
Version
Please make sure your KV Studio version is larger than >11.5 for using the OPC UA server features.

Keyence Side
New Project
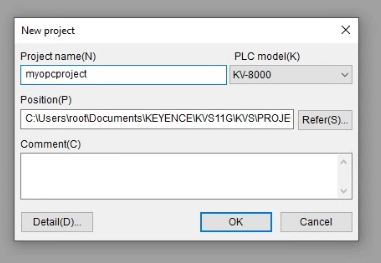
Go to File>New Project to create a new Project.

Enter the Project name> OK.
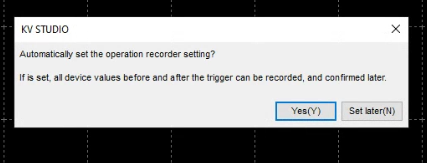
Here are some new tools in KV Studio V11.5, just press “Set later” to skip it.
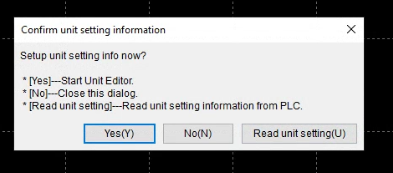
Press Yes to start the unit Editor.
Unit setting
Hardware Configuration screen is shown and we can configure the module or change the parameters in here.

Detail setting can be configured by clicking the CPU.

IP Addressing
Go to Base and configure the IP address and subnet mask,based on your application.

OPC UA
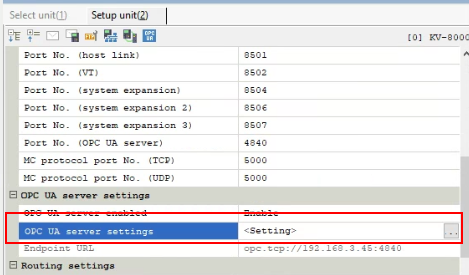
Then we can configure the OPC UA server in the “OPC UA server settings” Tab.
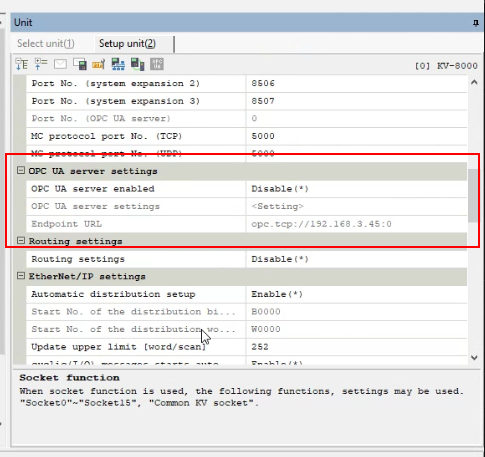
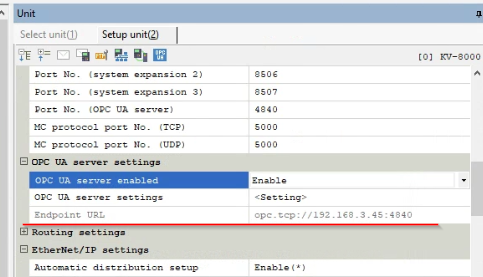
Change the “OPC UA server enabled” to “Enable”.

Press OK to pass the warning, because by enabling the OPC UA server, the 3 third party can access the variable inside the CPU.

Endpoint URL is shown and this Endpoint URL is used in the later step.
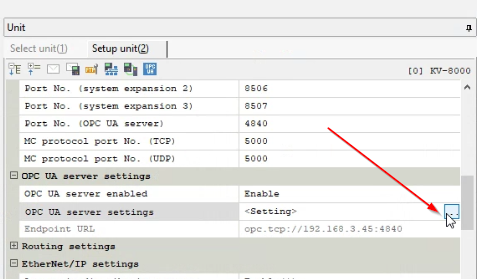
Security Setting
You can click the … Button to configure the advanced security setting of the OPC-UA Server.
File>Close to save your setting.

OPCUA Variables
After the OPC UA server is configured, we can create some variables for the server.
Go to Unit configuration >Variable .

A OPC UA row is inserted in the variable table.

Let’s create some variables inside!

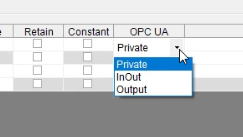
There are 3 types of OPCUA variable type here.
- Private – internal variables that 3rd OPC-UA Client can not access.
- INOUT – a variable that 3rd OPC-UA Client can read/write the value.
- OUT – a variable that 3rd OPC-UA Client can only read the value.

Transfer to PLC
Go to Monitor/Simulation > Transfer to PLC -> Monitor mode to transfer your project to CPU.

Continue sending.

A firmware update is necessary because the cpu firmware is old.

Firmawre update
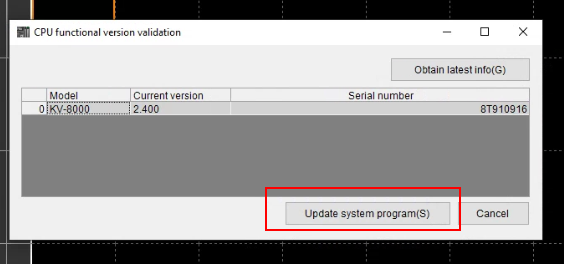
Go to Tool>Functional version validation >PLC.

Click the “Update system program” Button.
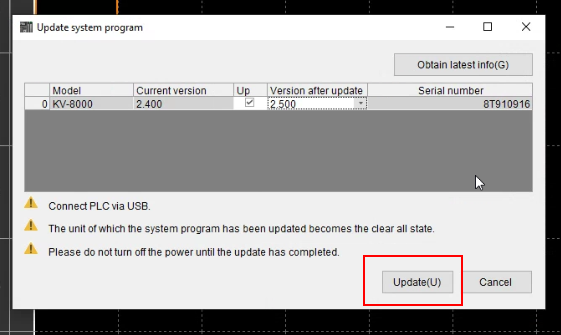
Check the “Up” checkbox.

Click the “update” button to start the firmware update process.
The firmware update process will clear “all” the data inside the CPU – Press yes.
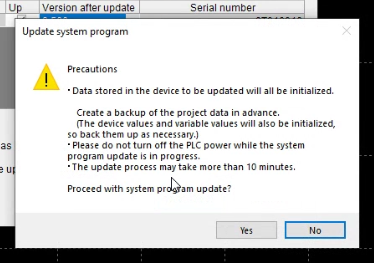
The firmware update process can only execute in Program mode.

It will take you around 5-10 mins.

Done!
Check it
The firmware is v2.5 now!

Transfer Again!
Let’s transfer the project again!

Select all>Execute.

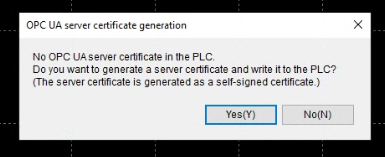
Press yes to create the certification for the OPC-UA server.
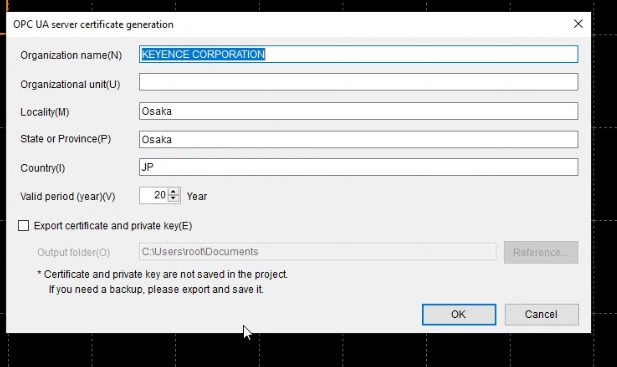
Enter the information for your Certification.
Done! And check the “Export certificate and private key “ button>ok.
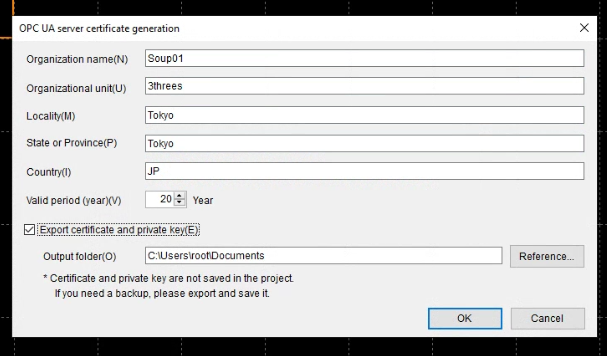
.der and -key.bin are exported.

Test1- Connection test with UaExpert
Before we start to play with TwinCAT, Let’s use the UaExpert to check the connection status with the Keyence OPC UA Server.
Press + Button to add the opcua server.

Go to Custom Discovery >Double click you add server.

Paste the URL that you configured in the Keyence side.
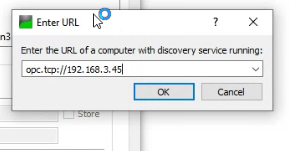
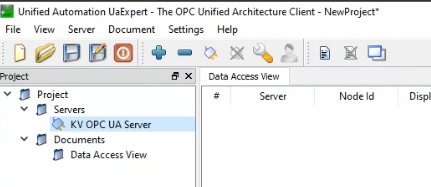
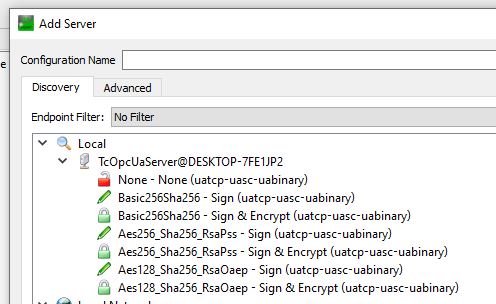
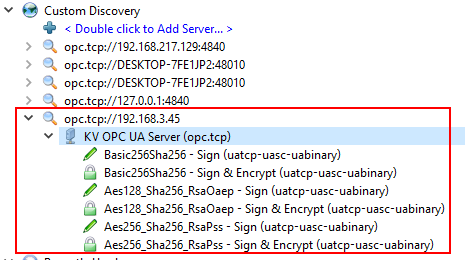
KV OPC UA Server is found!

Double Click the Server to select the Connection method.

Let’s choose None.

OPC UA Server is inserted in your project.
Connect Server!

Press “Trust Server Certificate” to Continue.

The connection between the keyence server is established.
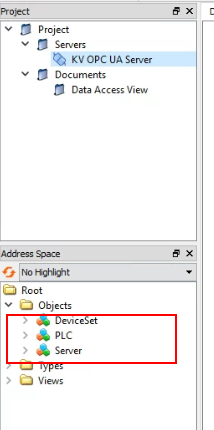
Drop the Global variables that we defined in the KV Studio to the Data Access View field.

The current value, data type..etc of these node’s information are shown.

Press the Value field.

You can enter the value now.

But the value of that node can not be changed.

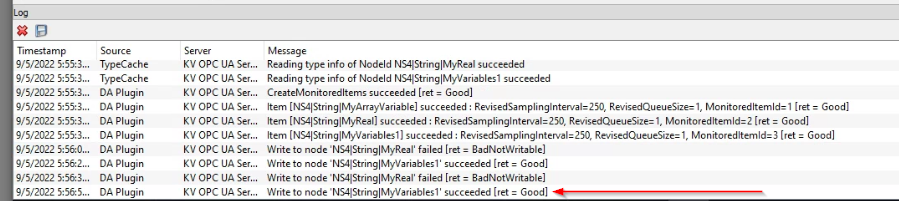
Because the Node we configured in KV Studio is “Read”, a BadNotWriteable message is shown in the log viewer.

Let’s do the same operation to other variables – and the value can be modified.

Value is changed – and “succeeded [ret = Good] “ is shown in the log viewer.
Security Connection?
I believe that one of the major reasons why OPCUA has grown so rapidly in Industry 4.0 is the unification of security. Communication security policies can be set to protect OPC UA communication messages from eavesdropping and tampering. A security policy is a combination of algorithms with signing and encryption.
- A signature is encrypted information attached to guarantee the validity of a certificate and data.
- Encryption is an algorithm that converts data in order to protect it from eavesdropping and tampering by third parties during transmission and reception of data.
There are two main layers in the OPC-UA Security.
- Transport Layer
- Application Layer
One OPC-UA Server provides multiple End Points, and the Client side can choose the connection destination. It indicates what security features are required based on its End Point Url character. (Security Mode, Policy, etc.), the client must satisfy the conditions.
For example, in the Transport Layer, the End-point requires a signed and encrypted Package,
Application Layer requires Username and Password, etc.
The Transport Layer consists of establishing a “trusted” communication relationship by verifying certificates on the Client/Server. Of course, in the Application Layer, as I said earlier, User authentication is also possible.
Security Policy
Security Policy is a feature of the Signed and encryption combination.
(You can connect without the security function by setting it to “None”., but it is not recommended.)
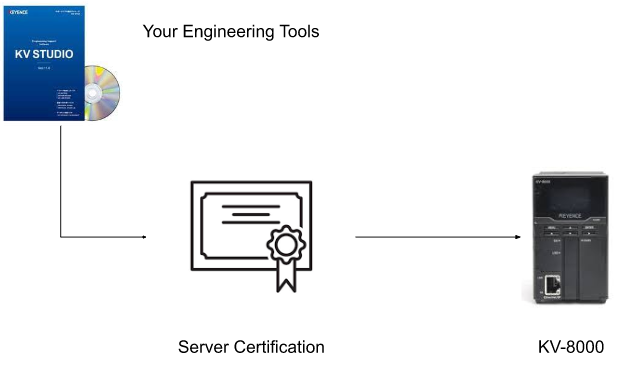
Server Certification
We can image the Server Certification as proof of the OPC-UA Server itself. If you want to use the security function, the Client needs to register the Server’s Certification.
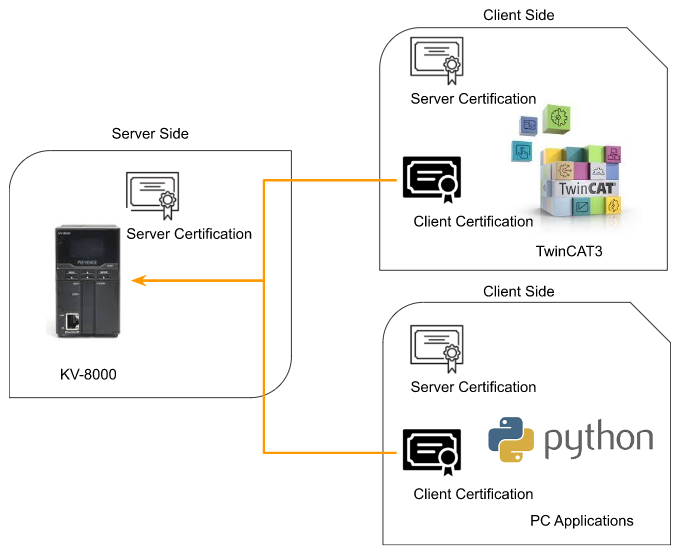
Certificate Exchange
This is the actual flow for certificate authentication. By default the TwinCAT OPC UA Server and Client automatically generate a Self-Signed certification for the operation.

Step1:OPC-UA Server Generate the Certification
A Self-Signed certificate is automatically created when the OPC-UA Server function is enabled and transferred to the KV8000 CPU.
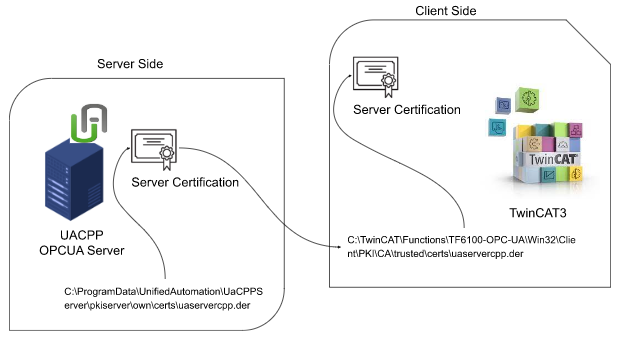
Step2:Transfer the Server Certification to the Client Side
The certification file will transfer to the client side.( we can image it as the server will copy the certificate to the client side)
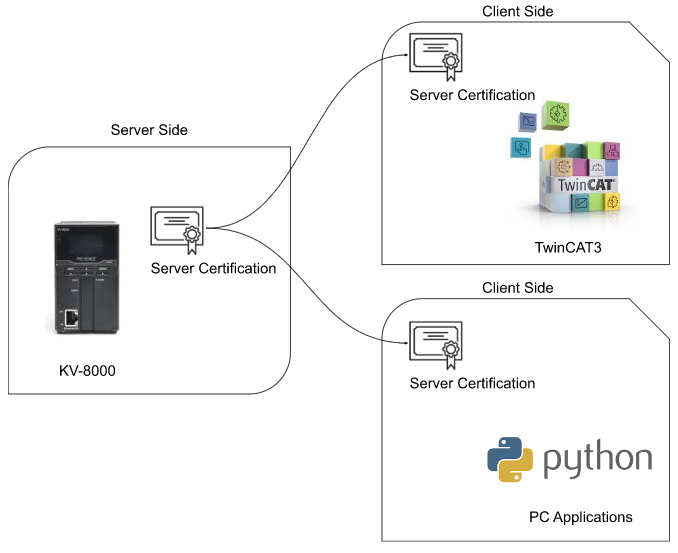
Step3:Client try to connect the OPC UA Server
OPC UA Client will use the server certificate and it’s self certificate to connect to the OPC UA Server.
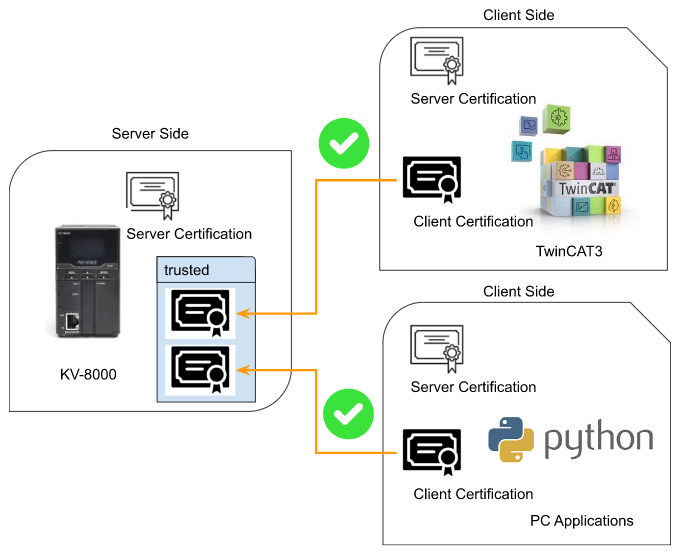
Step4.1 Trusted it!
The certificate will auto transfer to the “Trusted” folder if OPC UA Server trueset the client Certificate.
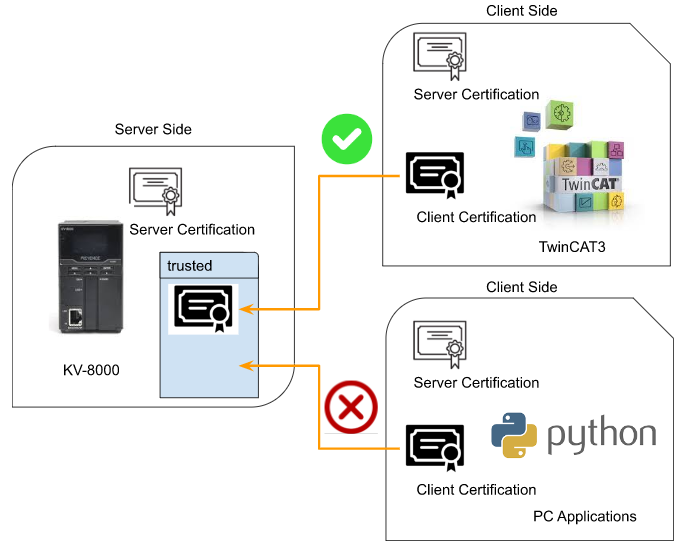
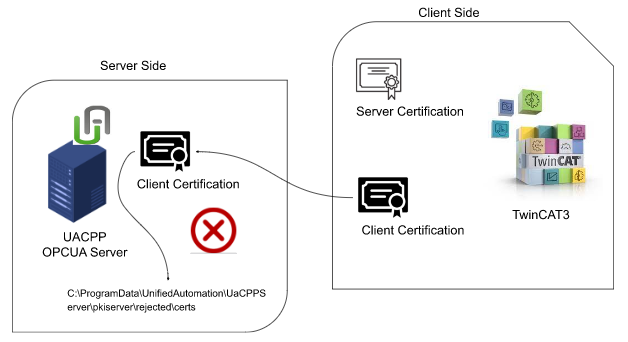
Step4.2 If no Server Certification..
The connection will not be established – although the Client certificate is in the Trusted folder, the client does not have the server certificate.
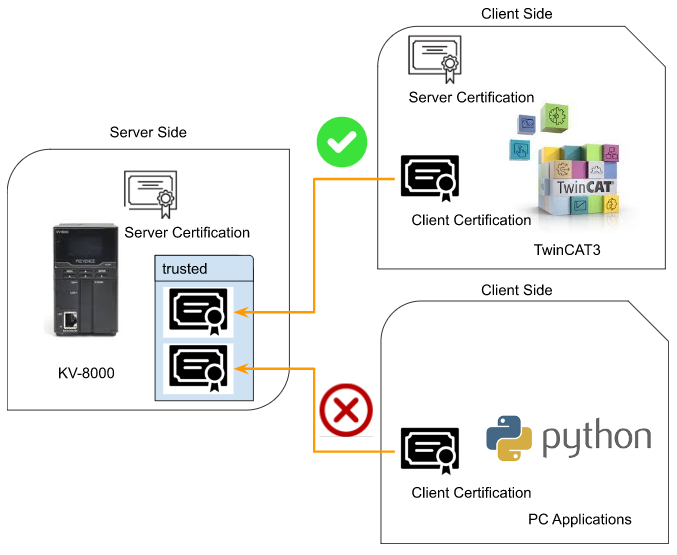
Step4.3 if Certification not in trusted Folder
Also, Although the OPC UA Client has the server certificate, the client certificate is not in the Server Trusted Folder – the Connection will not be established.
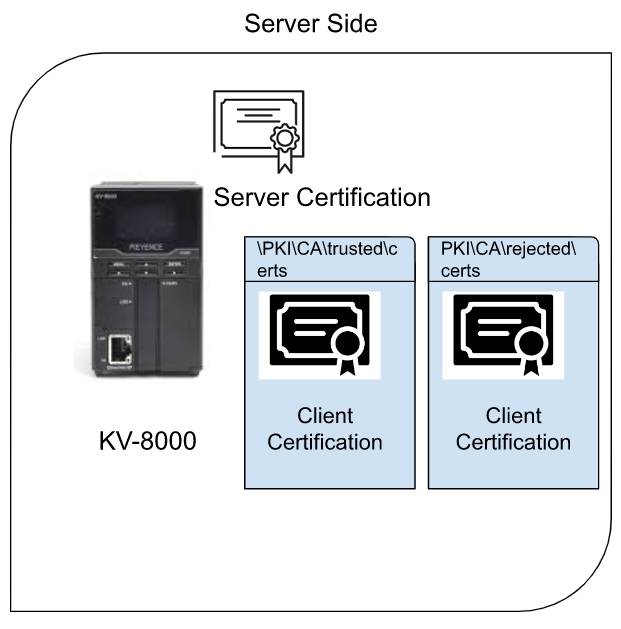
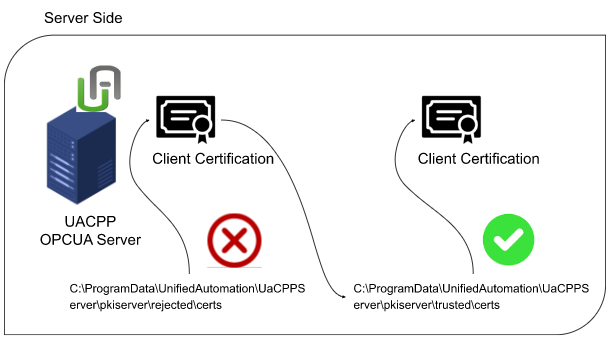
Step4.4 trusted And rejected Folder
Client certifications are stored in \PKI\CA\trusted\certs and PKI\CA\rejected\certs like this. In extreme terms, if you copy the certification from PKI\CA\rejected\certs and move it to the PKI\CA\trusted\certs folder, the connection will succeed.
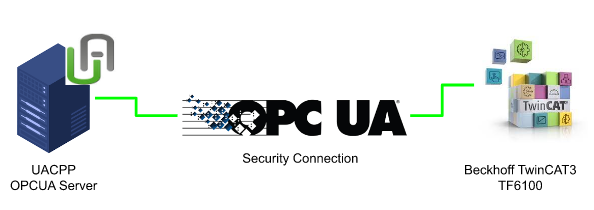
Test2- Beckhoff TwinCAT3 Connect with UACPP OPCUA Server
Configuration
Before actually connecting with the OPC-UA Server of Keyence KV8000, we will try to connect the UA-CPP OPC UA Server and Beckhoff TwinCAT3 TF6100 with a security connection channel.
Server Certification Structure
Let’s understand the role of several folders for security connection with CPP OPC-UA Server.
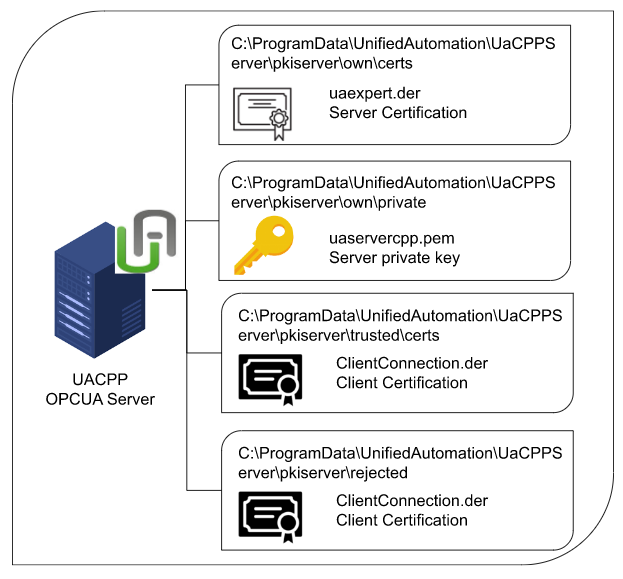
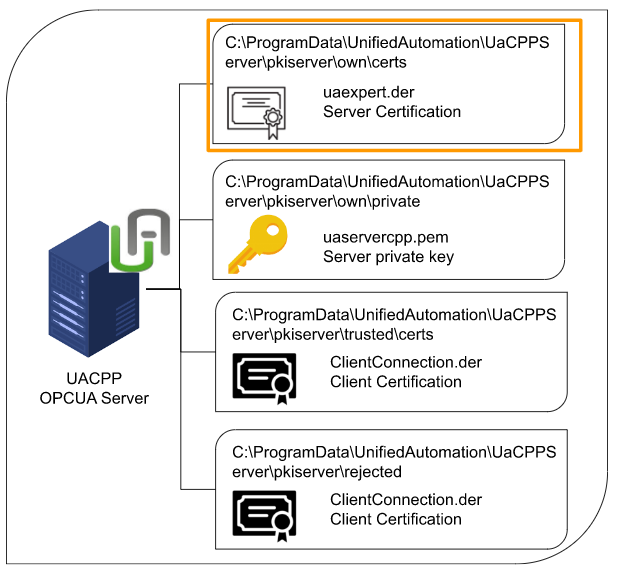
pkiserver\own\certs
The .der file stored in that folder is a certificate of Sever’s identity. Do you remember the certification exported from KV Studio earlier? Exactly the same role.
pkiserver\own\private
The .der file stored in that folder is a proof of being the Server itself. Do you remember the certification exported from KV Studio earlier? exactly the same role
The .pem File saved in that folder is the Private Key used to encrypt the data, and that Key should never be disclosed.
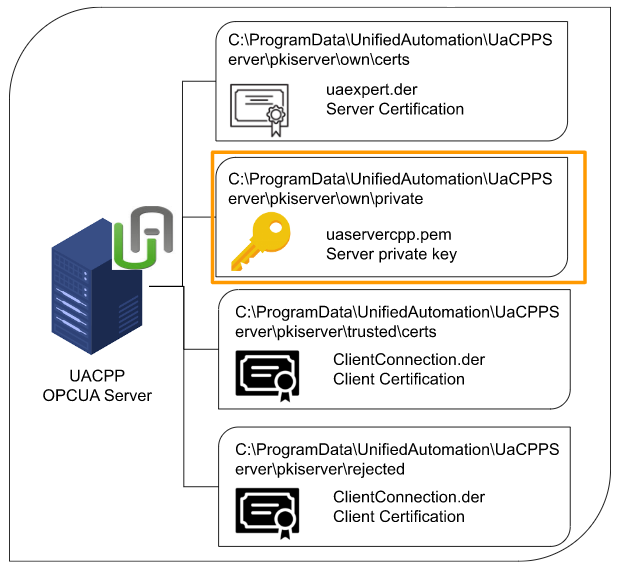
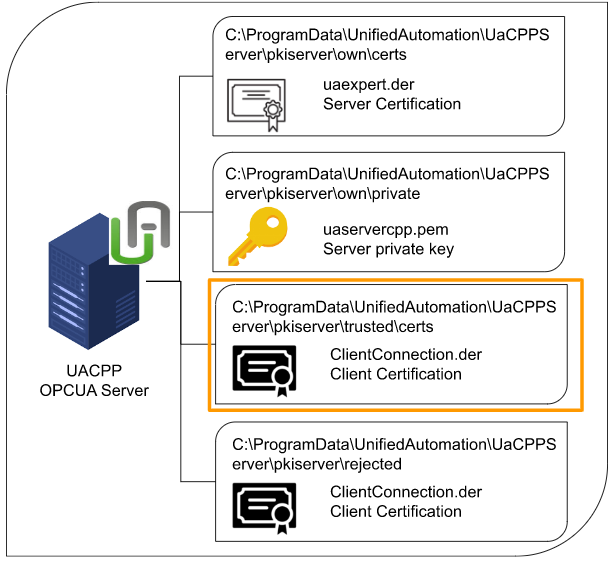
pkiserver\trusted\certs
The .der file saved in that folder is where the certificate of the trusted connection client.
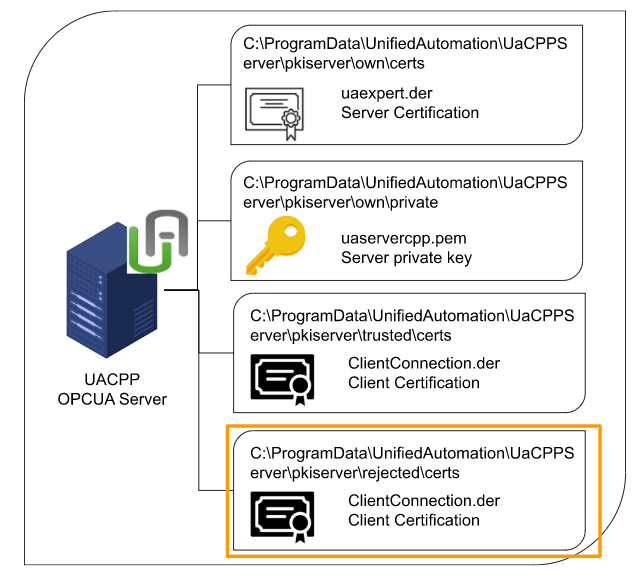
pkiserver\rejected\certs
The .der file saved in that folder is the destination of the client’s certificate that the connections are refused.
TwinCAT3 OPCUA Client Structure
Now the twincat side and the folder name are the same as the Server side.
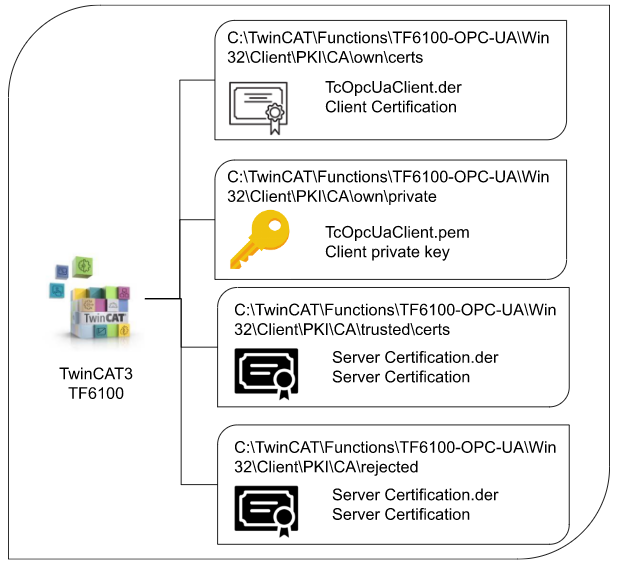
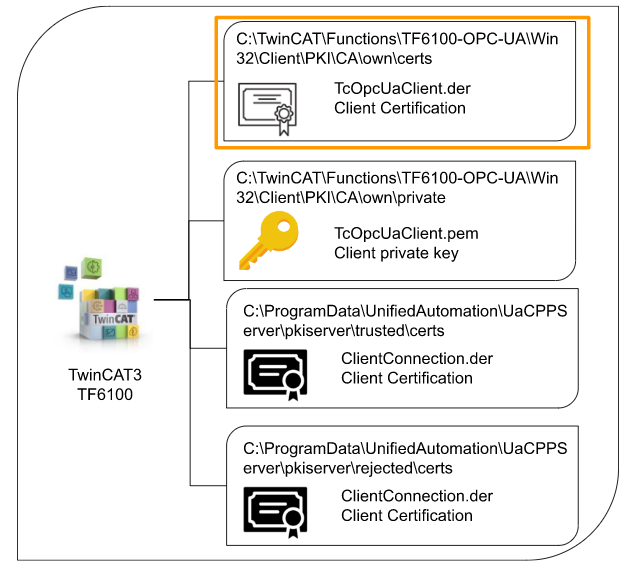
Client\PKI\CA\own\certs
The .der file stored in that folder is a certificate of the client itself. Do you remember the certification exported from KV Studio earlier? Exactly the same role.
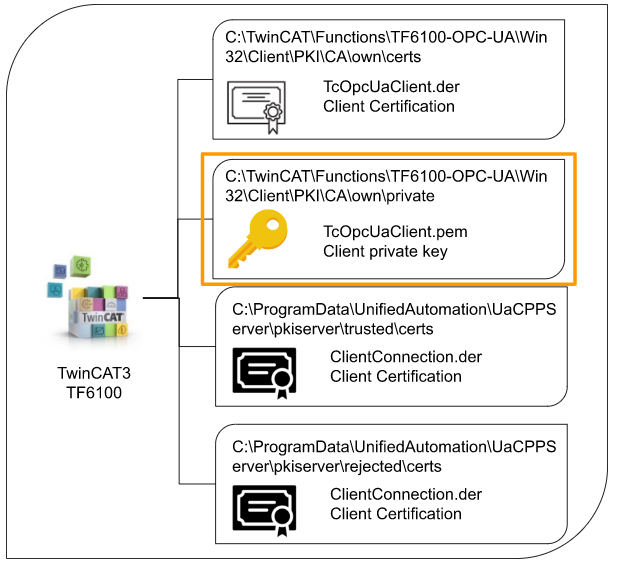
Client\PKI\CA\own\private
The .pem File saved in that folder is the Private Key used to encrypt the data, and that Key should never be disclosed.
Create your own certification!
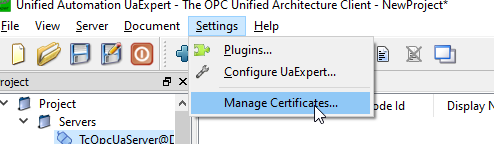
If you don’t want to use the TwinCAT Default Certification File, you can also generate a certificate from UaExpert. Launch UaExpert > settings> Manage Certificates.
Click the Create new Application Certificate Button.

Enter your certificate information.

Click the refresh button to update the certificate screen,

Click the “Open certificate Location” button to open the certificate directory.

the Pki/own/certsのuaexpert.der is your certification.

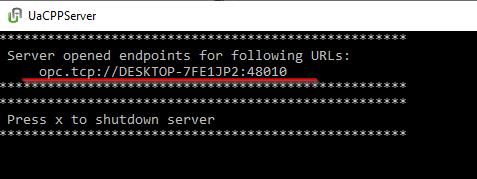
Start the OPC-UA CPP Server
Launch the OPC-UA CPP Server and opc.tcp://yourservername:48010 is the End-point url of your OPC-UA Server.
TwinCAT3 Side
Now we can configure the TwinCAT3 SIde.
Add Virtual OPC-UA Device
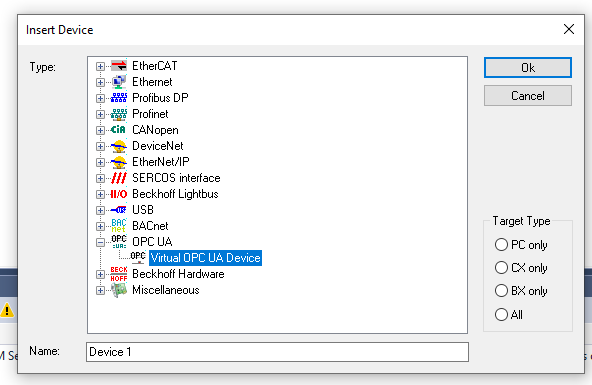
Go to I/O>Devices>Add New Item.

Choose OPC UA>Virtual OPC UA Device>ok.
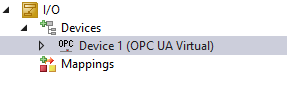
OPC UA Virtual is inserted.
Add OPC-UA Client IO
Device1>right click>Add new item to insert the new OPC-UA Client IO.
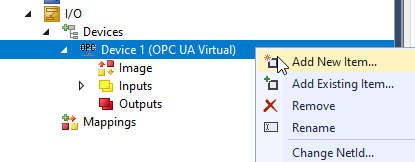
Choose OPC UA Client[Module]>ok.

OPC-UA Client IO is inserted in your project.

Settings1- Endpoint Configuration (None)
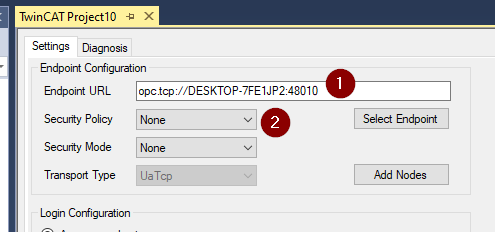
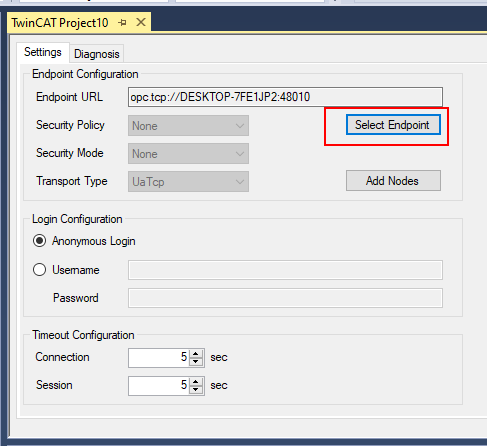
Click the OPC-UA Client IO and enter the Endpoint of the OPC-UA Server,configure the Security Policy as None.
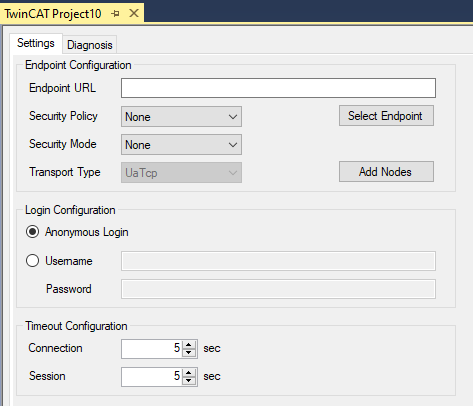
Paste your OPC-UA CPP Server Endpoint URl and configure the Security Mode as None in Security Policy.
Add Node
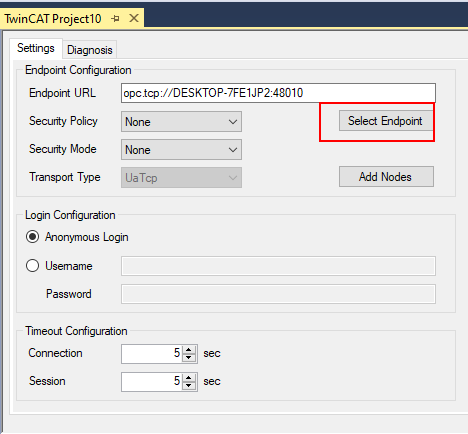
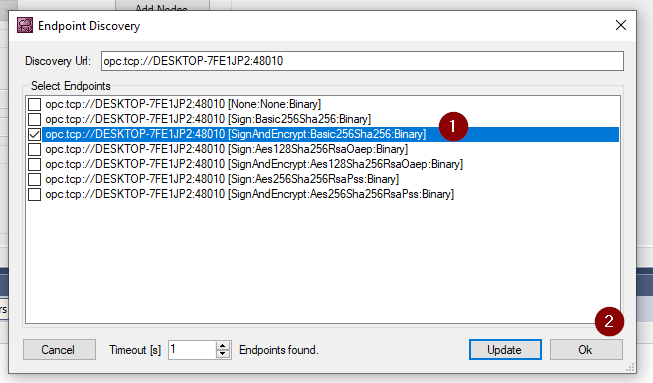
Click the Select Endpoint.
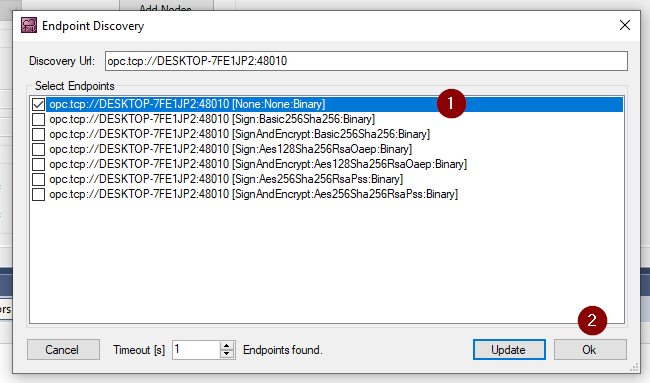
Enter the “opc.tcp://yourname:48010[None;None;Binary]” Checkbox >ok.
Press the Add Nodes button to access the Server.

The select Node screen is shown if the connection is established.
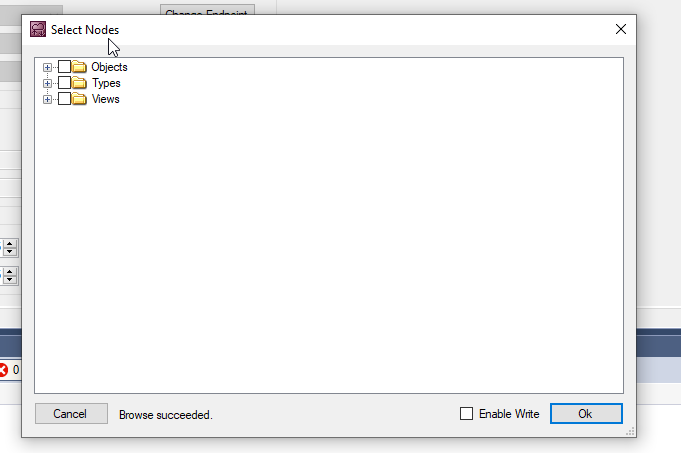
Expand the Dynamic>Scalar and check some nodes inside the folder > Check the “Enable Write” button>OK.

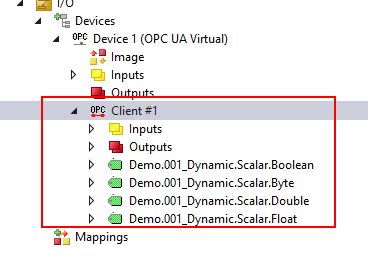
Some nodes are inserted inside the Client#1.
Download
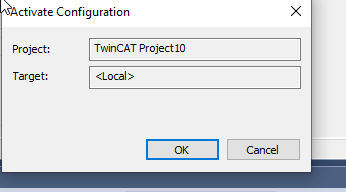
Press “Activate Configuration” to download the hardware configuration.

OK.
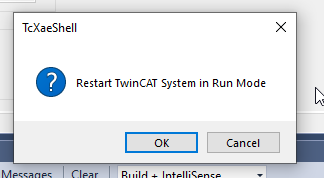
Switch the TwinCAT Runtime to Run Mode.
The gear icon is changed to green.

Test it!
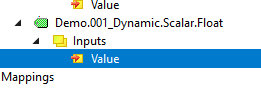
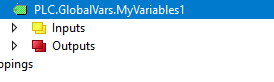
Expand Client#1>open the Node>Inputs>Value.

The Boolean value is changed between 1 and 0.

Let’s monitor one more variable and the node’s value is changed also.

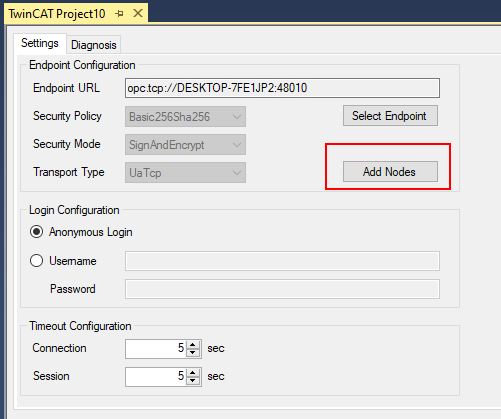
Settings2 – Endpoint Configuration (Security Connection)
Now we can try to establish the connection with the security channel.
Click the Select Endpoint button.
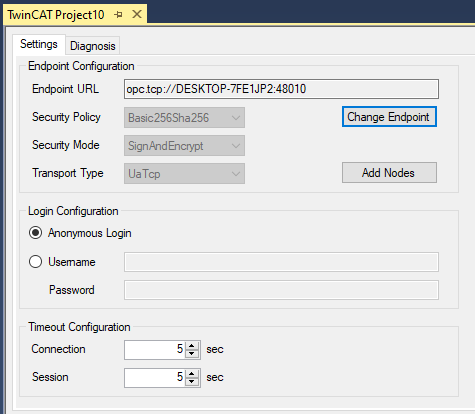
Check the “opc.tcp://yourname:48010[SignAndEncrypt;Basic256Sha256;Binary]” option>ok.
The security Policy and Security Mode are updated,
Add Node
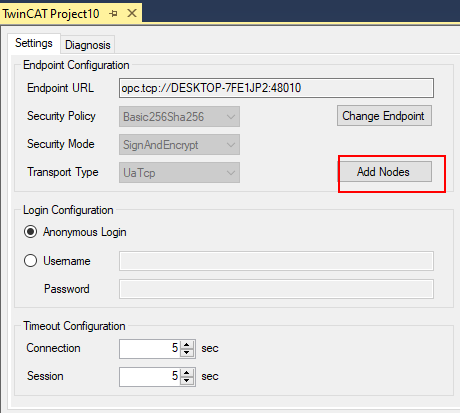
Press the “Add node” button to access the OPC-UA CPP Server with the [SignAndEncrypt;Basic256Sha256;Binary] Mode.
Error message “Something odd happened while connecting!” is shown.
Press Detail(1) to get more information.

BadSecurityChecksFailed.–> Check Trustlist & Certificate on Server is shown – it means the certificate had a problem.

Add Certification in TwinCAT3 Side
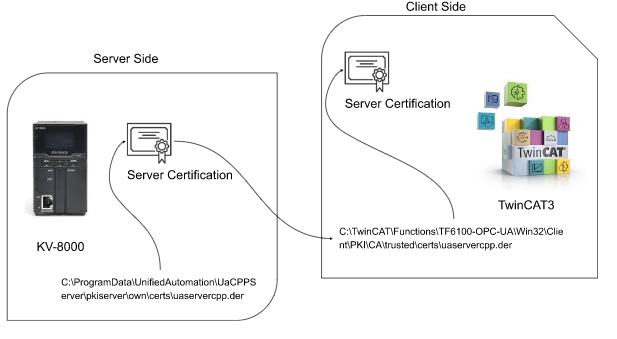
Copy the server certificate from this path.
| C:\ProgramData\UnifiedAutomation\UaCPPServer\pkiserver\own\certs\uaservercpp.der |
Paste to this TwinCAT Directory.
| C:\TwinCAT\Functions\TF6100-OPC-UA\Win32\Client\PKI\CA\trusted\certs\uaservercpp.der |

We move the OPCUA CPP Server certificate to the trusted folder of twincat.
It means – TwinCAT Client trusts the OPC UA CPP Server.
Connect to UAServer
Press the Add Nodes button again!
Same error is shown..

Add TwinCAT3 Certification into rejected folder
There is one certificate in the UaCPPServer/pkiserver/rejected folder. Basically, the Server rejects the Certification of a Client connecting for the first time. The rejected Client’s Certifications are then stored in this Directory.

It means – TwinCAT OPC-UA Client is trying to connect to the OPC-UA CPP Server. Because OPC-UA CPP server does not have the Twincat3 client Certificate in the Trusted Folder, OPC-UA CPP Server will reject the connection and move the twincat3 certificate into the rejected/certs/ directory.
we will move the Rejected Certification isto /UaCPPServer/pkiserver/trusted/certs.

In other words, the OPC-UA CPP server is certifying that the TwinCAT3 connection is trusted.
Let’s try again.
Done! The select Node screen is shown! please choose some nodes and OK.

Some Nodes are inserted in Client#1.

Add Certification inTwinCAT3 Side
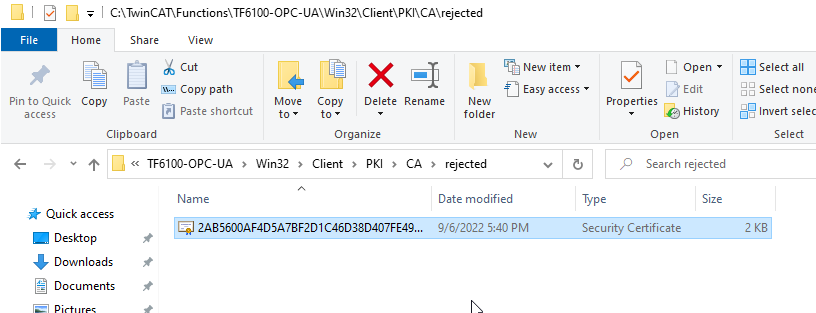
Finally we put the TwinCAT rejected Certificate from this directory :
C:\TwinCAT\Functions\TF6100-OPC-UA\Win32\Client\PKI\CA\rejected to
C:\TwinCAT\Functions\TF6100-OPC-UA\Win32\Client\PKI\CA\trusted\certs.
Download
Download the Hardware configuration again.
OK.
Switch the TwinCAT3 Runtime to Run.
The gear icon is changed to green.
Test It!
The Node value is changed forever – it means the connection is established.


Test3-Play with Keyence KV8000
Once the OPC-UA CPP Server and security connection are OK, let’s finally connect to the Keyence KV8000’s OPC UA Server.
Keyence KV8000 Side
Security Connection Settings
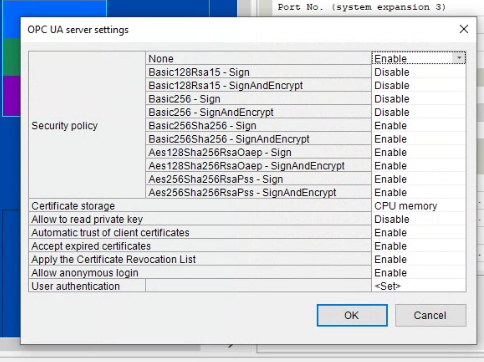
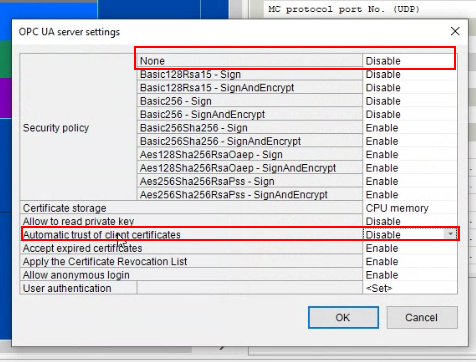
Open the Unit Editor in the OPC UA Server settings>OPC UA server setting>click the ..Button.
Please disable this two options:
- Security Policy None
- Automatic trust of client certificates
Program
Now we can create some programs to check the connection.

Check It
Let’s check the connection first by using UaExpert. The option of None is invisible now.
Certification Setting
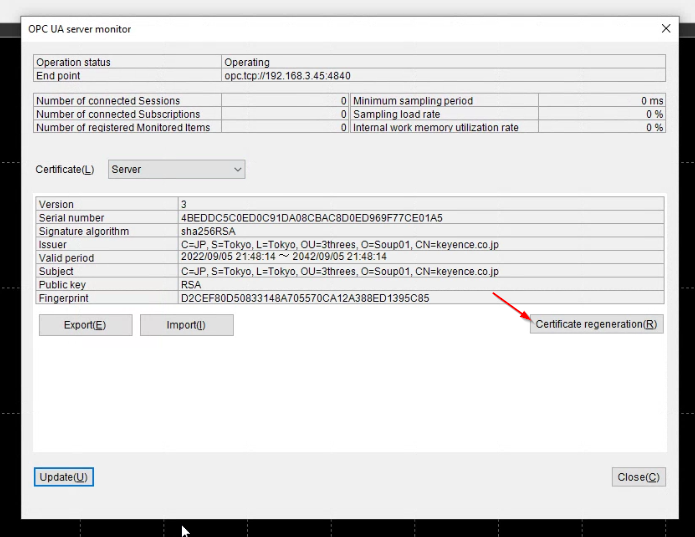
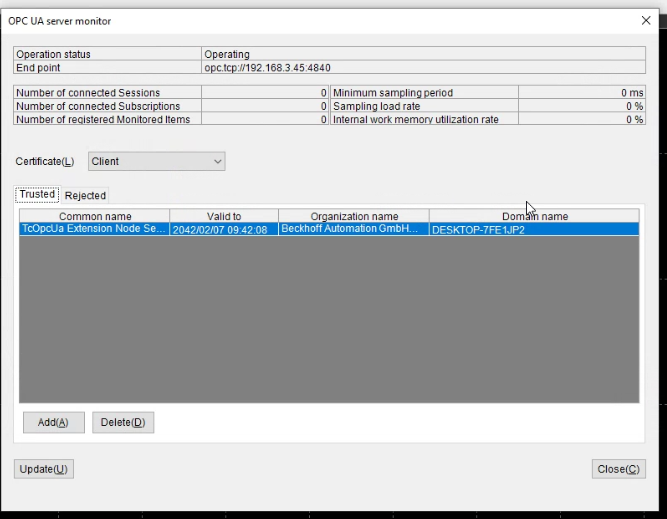
Switch the KV Studio to Monitor Mode and Monitor the OPC-UA status by Unit configuration>[0] KV-8000>right click>OPC UA server monitor.

The certificate of KV8000 is managed here.

Let’s update the screen first.

We can create the new certification also.
Client Side
Choose Client in the Certificate list.
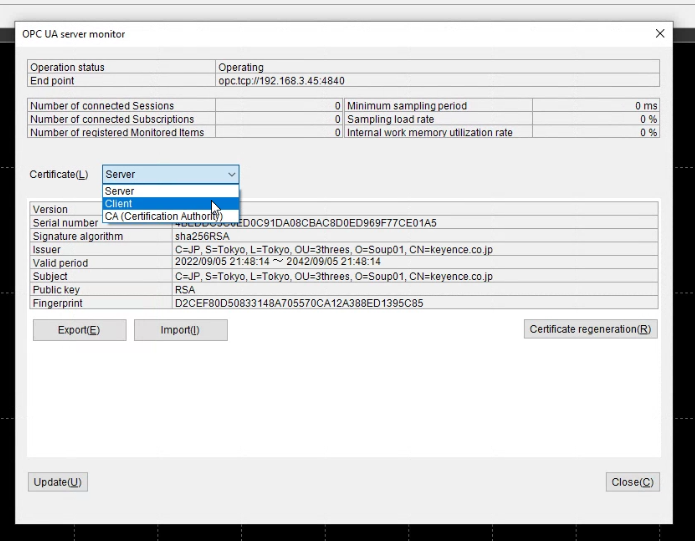
All certificates registered inside the server can be viewed here.

TwinCAT3 SIde
Endpoint
Do the same operation as the previous step, open the Settings Tab.

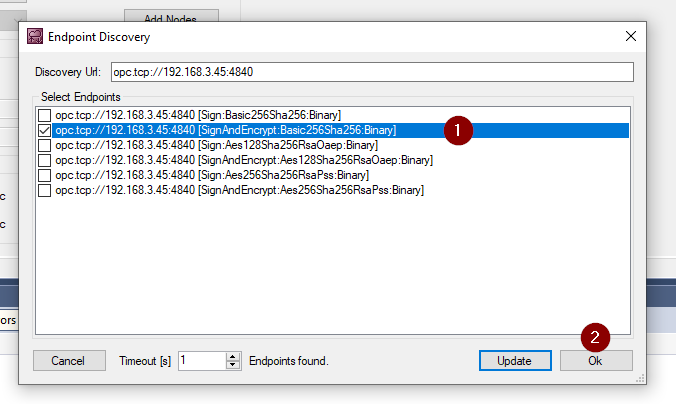
Press the Select Endpoint.

Select the opc.tcp://yourname[SignAndEncypt,Basic256Sha256Binary] options and OK.
Connect to KV8000 OPC UA Server
Press Add Nodes to try to access the Keyence KV8000 OPC-UA server.

Press Trust Button to trust the Server Certificate.

Error is shown again.
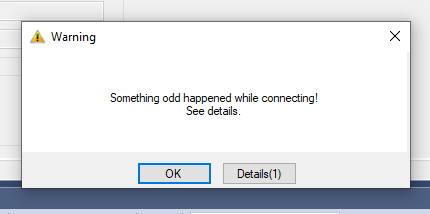
Same Certification problem is shown here.

Go to Directory
C:\TwinCAT\Functions\TF6100-OPC-UA\Win32\Client\PKI\CA\trusted\certs to check the server certificate – TwinCAT3 side is OK because the certificate exists.

It means that the certificate of KV8000 is transferred to TwinCAT3 and TwinCAT3 Trust the KV8000 Certificate.
Back to the KV Studio side and Launch the OPC UA server Monitor. Select the Client in the Certificate list and the twincat certificate is shown in the reject tab. It is because we configured the security setting – disable the auto accept certificate function.

Add to certification in Server
Choose the Twincat Certificate > Trust.

Done!

The Beckhoff TwinCAT3 Certification is trusted now.
Try Again
Let’s Try again.

Select Nodes screen is shown. we did it.
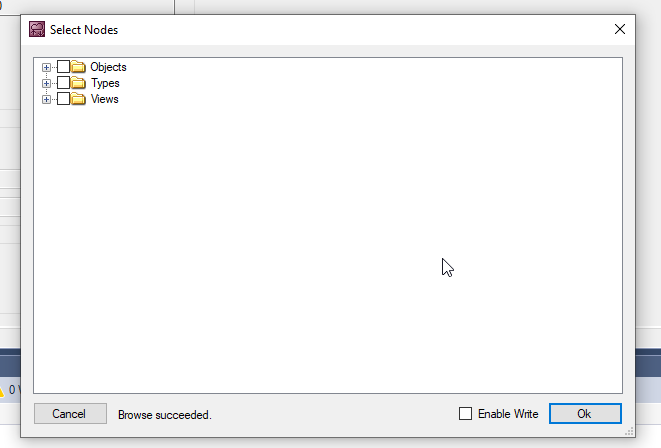
Select some Nodes and check the Enable Write Checkbox>OK.

Some Nodes are inserted in the Client#1.

Download
Download the hardware configuration again.
OK.
Switch TwinCAT Runtime to Run Mode.
The gear icon is changed to green!
Test it!
Read
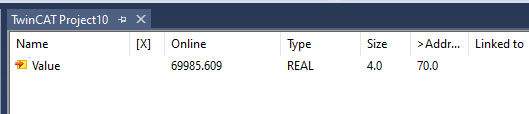
Let’s check the current value of KV-8000.
As the image below, the OPC-UA Server Node ‘s value are read.
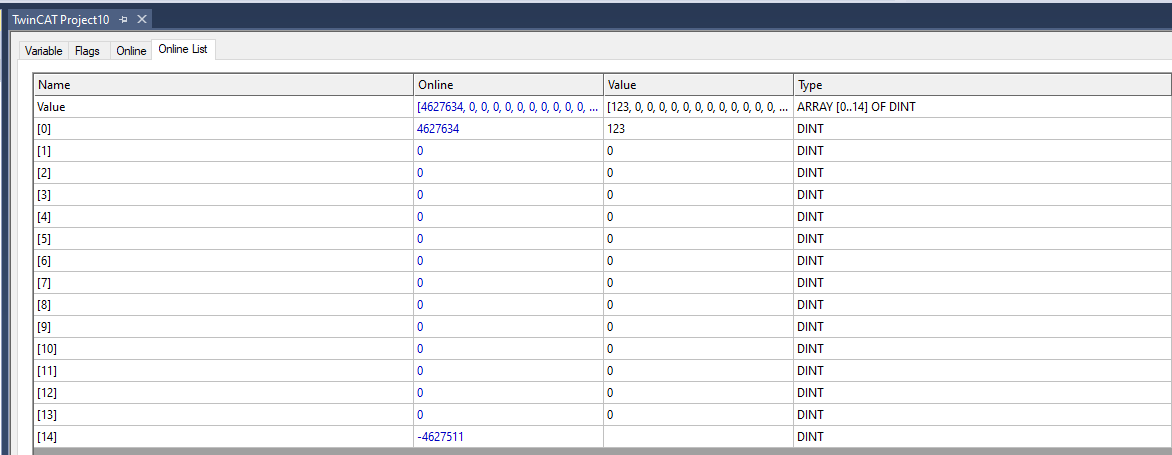
Because some nodes are configured as “Output”(read only), the Output field is invisible on the twinCAT side..

Write
Let’s change some nodes in the KV-8000 Server. Go to Client#1>Outputs>Write enable.
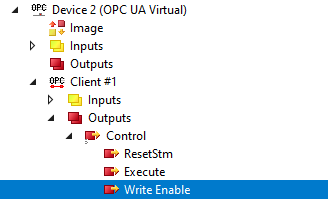
Change the value to True.

Click Value[2].
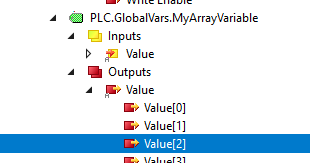
And write some value in this node.

Go to the Monitor/Simulator>Registration monitor window inthe KV Studio to check the condition of opc-ua.
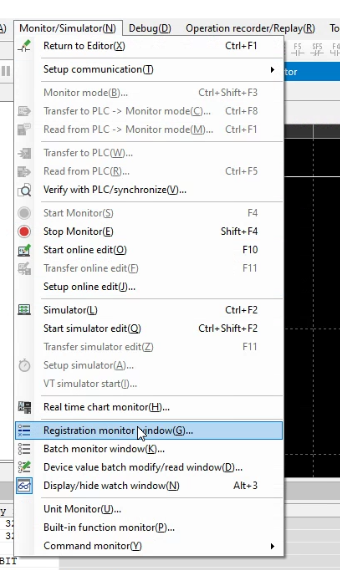
Enter the OPC-UA variables inside – we can confirm the Value now.
