When developing a project, what do you do when you want to reuse the same program for another project? Probably the most common is Copy-paste. This is fine for small projects, but as the application grows, libraries allow us to manage the Functions and Function Blocks we have created.
By using libraries, we can manage the software we have created in multiple projects. First of all, it is a given that different devices will have different functions, but even so, there will always be common parts. In the software development world, that library management concept is quite common.
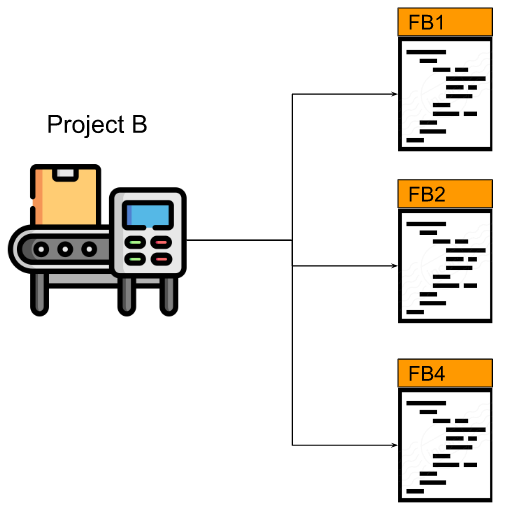
For example, this project has FB1, FB2, and FB3.

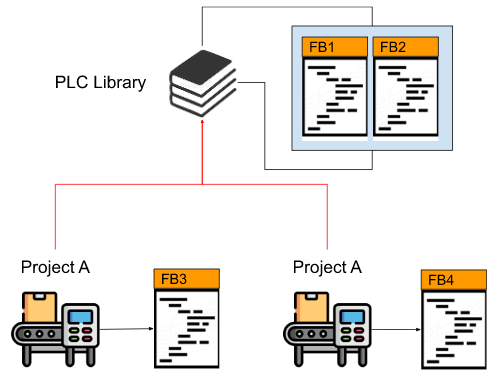
If you have a new project and it has FB1,2,4. You would always open Project A, copy FB1 and FB2, and paste them into ProjectB, just the way you would do it. In fact we can create a library and move FB1 and FB2 as part of that “Library”.
In this way, the same library is referenced in each PLC Project. It is a waste of time to reinvent the wheel again since the program has been created.
What are the advantages of using the library?
- Software is modular,for example, if I have software for cylinders, I can use the cylinder’s library, and if I have software for logging, I can use the logging’s library.
- Each library is independently tested
Create Library
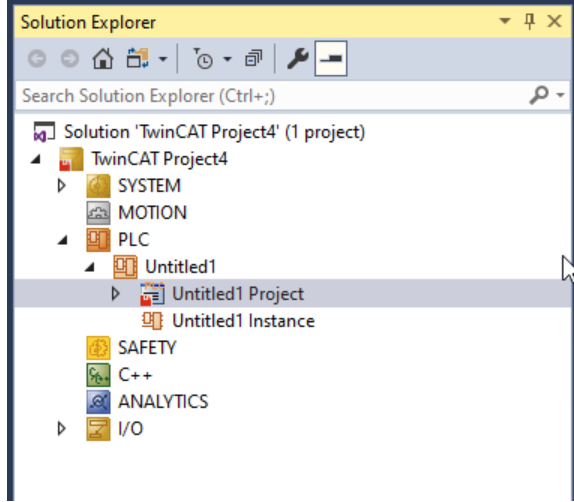
Initially, create a project for the library.
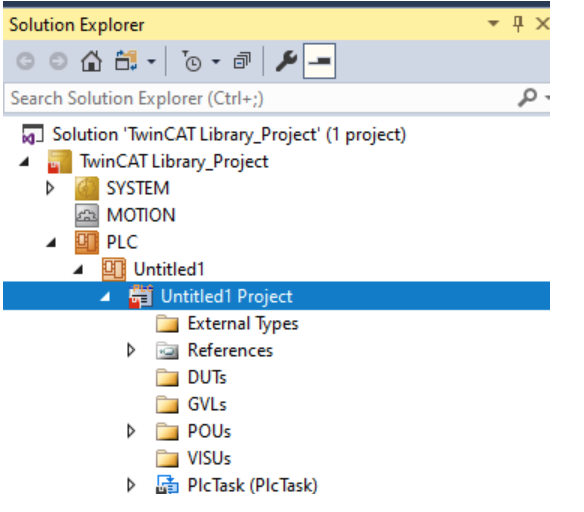
In this article, we made one FB and one FC each for the library.
Library Codes
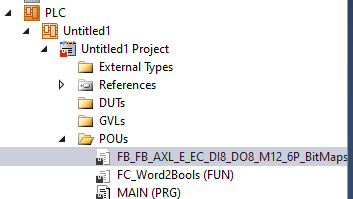
Create a Function Block and Function to be made into a library for the first time.
FB_FB_AXL_E_EC_DI8_DO8_M12_6P_BitMaps
the first one is FB_FB_AXL_E_EC_DI8_DO8_M12_6P_BitMaps. The Function Block is a modified version of the Function Block I made when I started up the old EtherCAT Slave IP67IO made by Phoenix Contact.
| FUNCTION_BLOCK FB_FB_AXL_E_EC_DI8_DO8_M12_6P_BitMaps VAR_INPUT i_ModuleOut:ARRAY[1..8]OF BOOL; END_VAR VAR_OUTPUT q_ModuleIn:ARRAY[1..8]OF BOOL; q_DataOK :BOOL; END_VAR VAR DI1,DI2,DI3,DI4,DI5,DI6,Di7,DI8 AT %I*:BIT; DO1,DO2,DO3,DO4,DO5,DO6,DO7,DO8 AT %Q*:BIT; WcState AT %I*:BIT; END_VAR //In q_ModuleIn[1]:=DI1; q_ModuleIn[2]:=DI2; q_ModuleIn[3]:=DI3; q_ModuleIn[4]:=DI4; q_ModuleIn[5]:=DI5; q_ModuleIn[6]:=DI6; q_ModuleIn[7]:=DI7; q_ModuleIn[8]:=DI8; //Status q_DataOK:=NOT WcState; // DO1:=i_ModuleOut[1]; DO2:=i_ModuleOut[2]; DO3:=i_ModuleOut[3]; DO4:=i_ModuleOut[4]; DO5:=i_ModuleOut[5]; DO6:=i_ModuleOut[6]; DO7:=i_ModuleOut[7]; DO8:=i_ModuleOut[8]; |
FC_Word2Bools
Next is Function. This is a program that breaks down a simple WORD into Bools.
| FUNCTION FC_Word2Bools : Array[0..7]of bool VAR_INPUT w16:WORD; END_VAR VAR END_VAR FC_Word2Bools[0]:=w16.0; FC_Word2Bools[1]:=w16.1; FC_Word2Bools[2]:=w16.2; FC_Word2Bools[3]:=w16.3; FC_Word2Bools[4]:=w16.4; FC_Word2Bools[5]:=w16.5; FC_Word2Bools[6]:=w16.6; FC_Word2Bools[7]:=w16.7; |
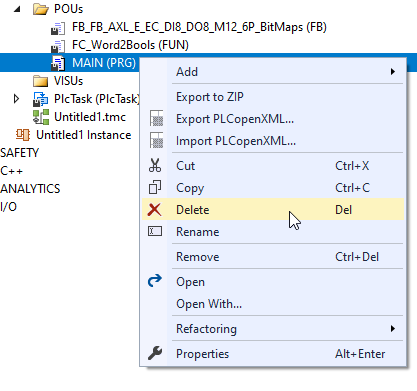
Delete the MAIN POU
Because it is a library,of course you don’t need MAIN, please delete it.
Library Properties
There are a few settings that need to be made before the library can be exported. We will now explain them one by one, so don’t worry.
Go to Project>Right Click>Properties.
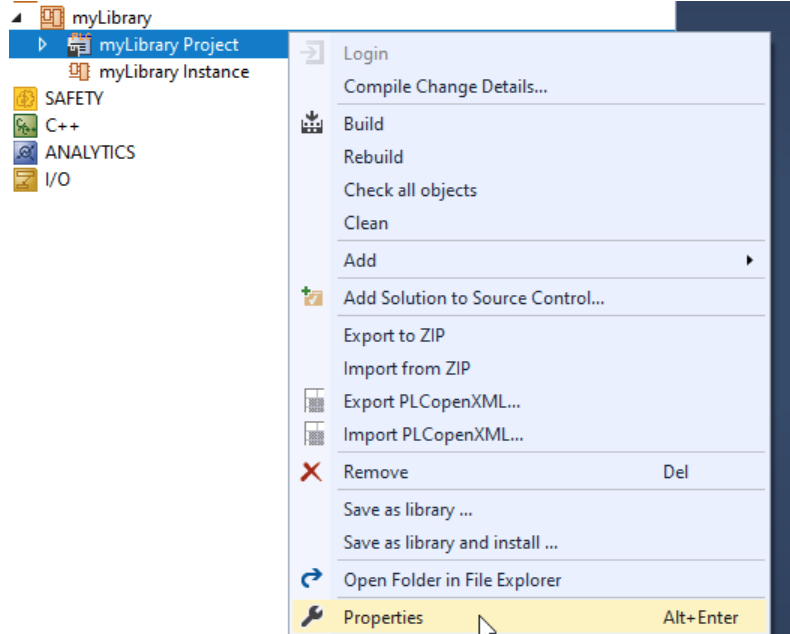
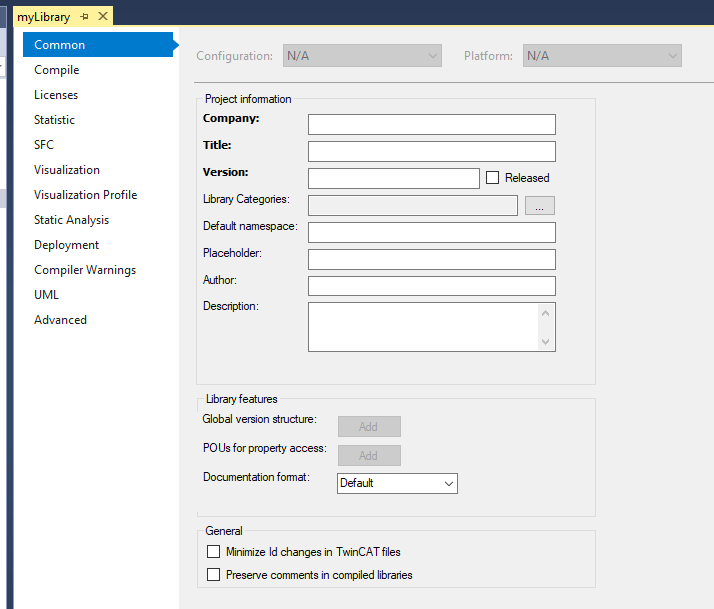
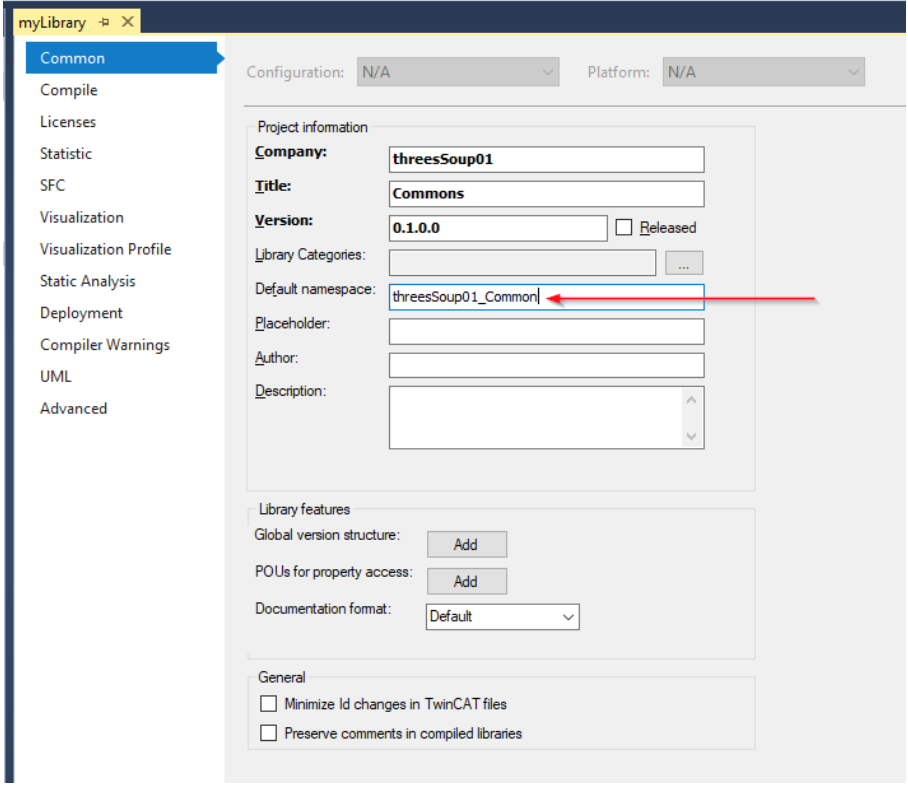
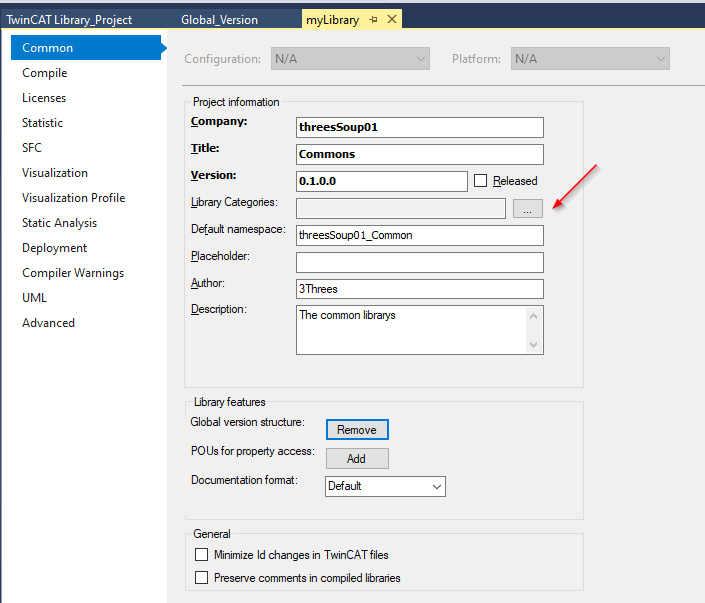
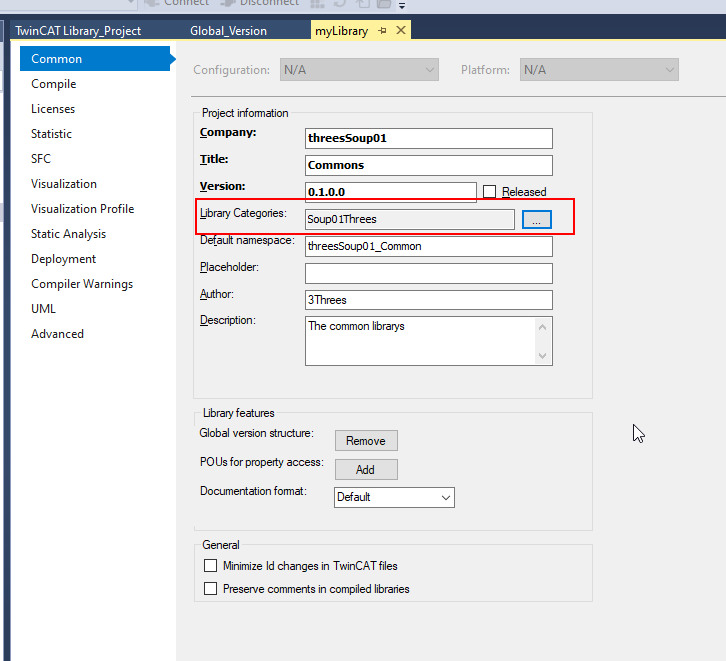
This is what the library screen looks like.
Company
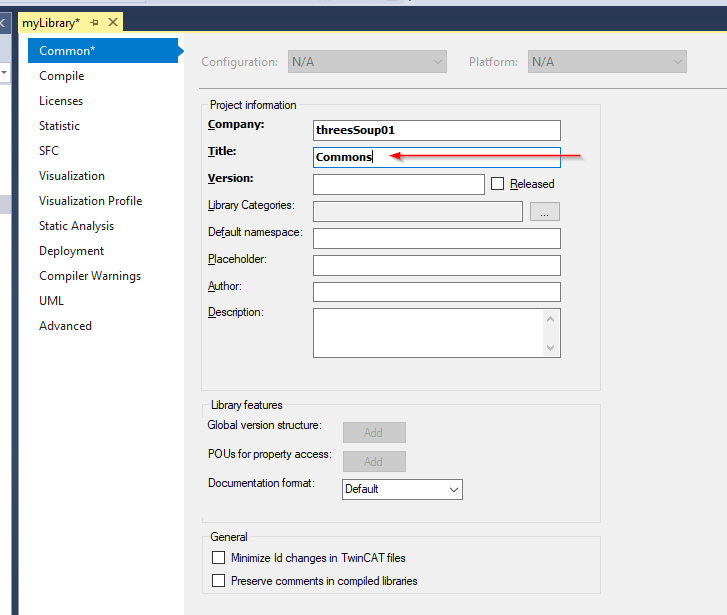
The first one is Company, or company name. In my case, it is threesSoup01.

Title
Title is the name of the library. For now, it should be Commons. In fact, if it is Drive-related, use “Drive”, if it is cylinder-related, use “SV”, or any other name that is easy to understand.
Version
This is the current version of the library. The larger the number, the more recent the version.
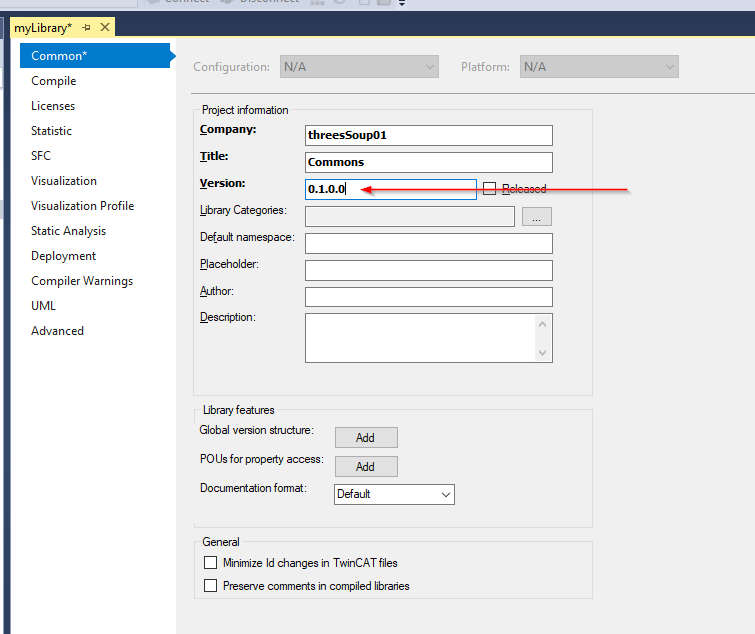
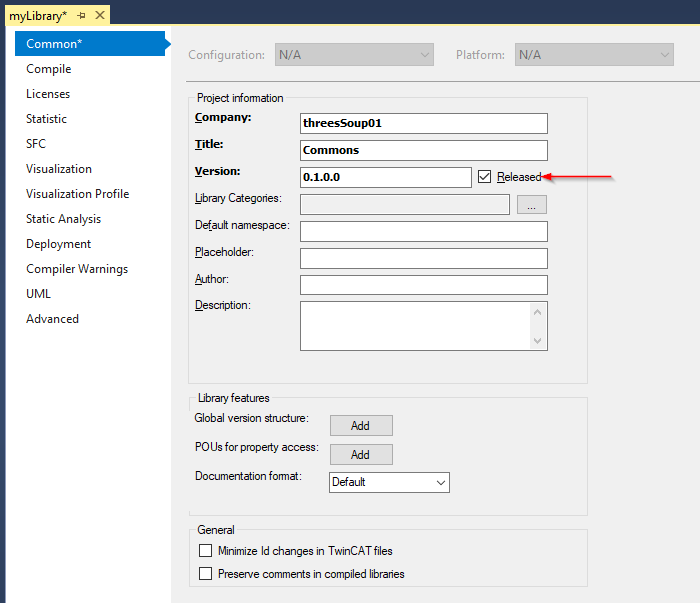
Released Checkbox
The Released Checkbox indicates whether the library is also official for that version. If the library is still in Beta and not yet official, please remove the Released Checkbox, as the contents of the library cannot be changed with the Released Checkbox in place.
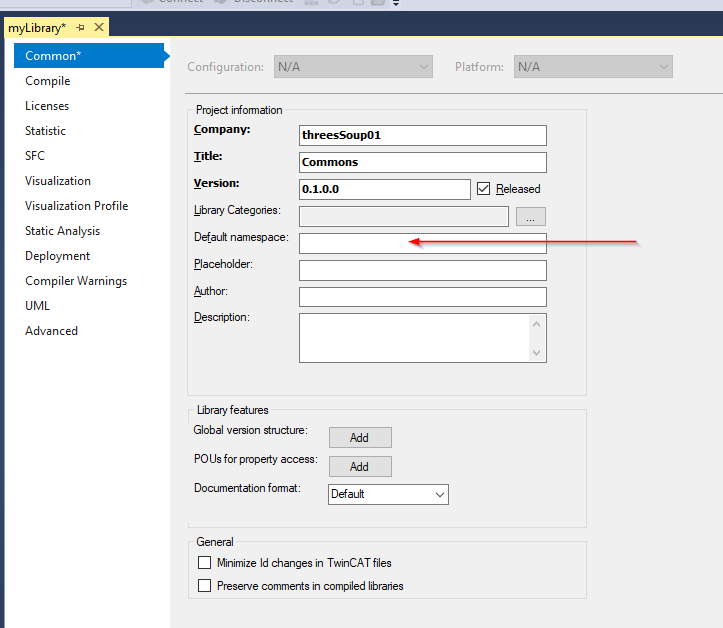
Default namespace
The concept of Namespace plays a very important role in library management.
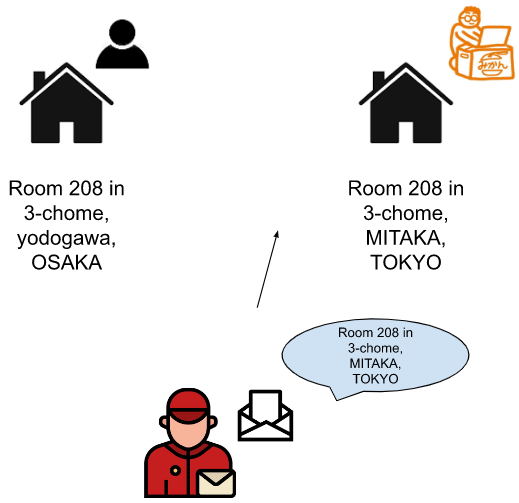
Before proceeding with the setup, let me explain the concept of Namespace. For example, a mailman wants to deliver a letter to my house. My address is 3-chome, room 208, but there are so many rooms in Japan with 3-chome, room 208, that the mailman cannot find my address.
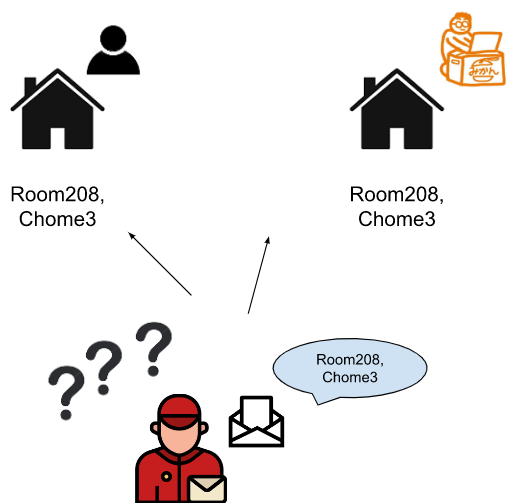
So, the address can be separated into Room 208, 3-chome ABC-cho, Mitaka-shi, Tokyo and Room 208, 3-chome DFC-cho, Yodogawa-ku, Osaka-shi, Osaka, etc. There are many Room 208 in 3-chome, but only one in ABC-cho, Mitaka-shi, Tokyo.
Since the Namespace is the same in Library management, there will inevitably be times when the names overlap when creating a library. Namespace is used as a countermeasure. My Namespace is soup01.servo and Mr. A’s Namespace is A.servo, so when using Mr. A’s software, you can use A.servo.Enable(). Enable() when using my software, such as soup01.servo.Enable() when using my software.
Now enter treesSoup01_Common.
So if you want to use this Library, it will be treesSoup01_Common.YourFB.
Author
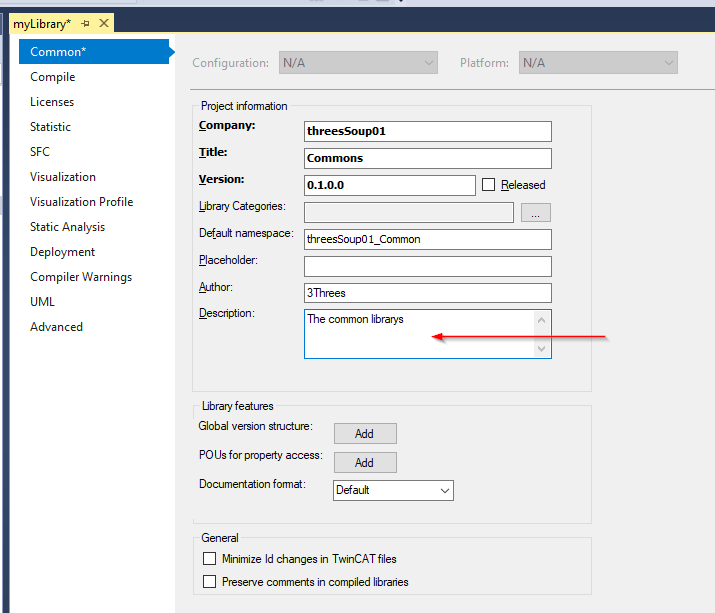
Author is the person who created the library. In this case, it is me.

Description
Include a brief description in the Library.
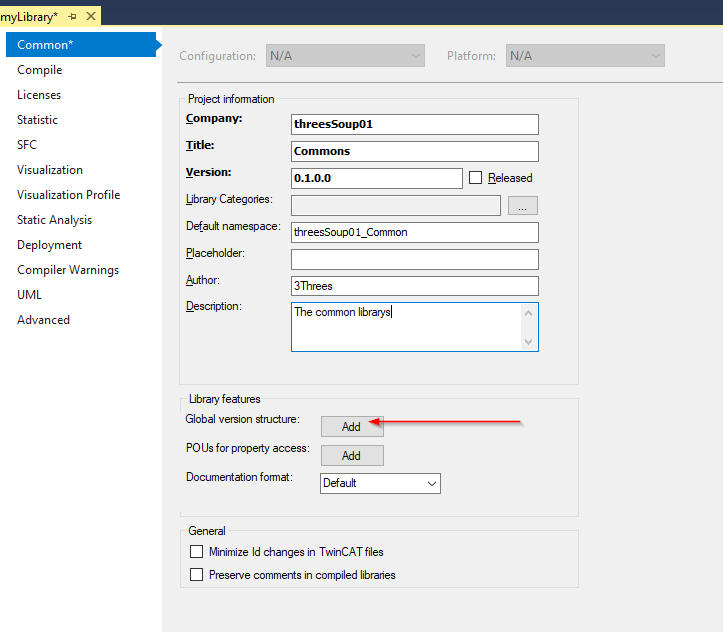
Global version structure
Next is the Global version structure. Press the ADD button to create a variable in the GVL (Global Variable List that shows the current library version).
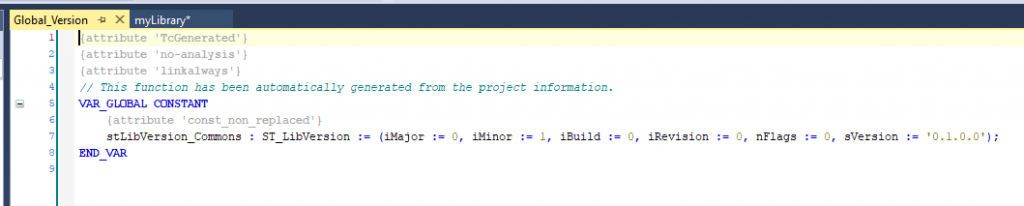
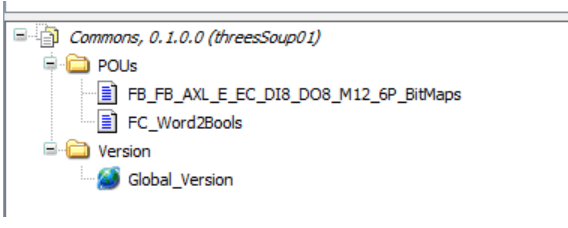
A folder for Version is created and a GVL named Global_Version is generated inside.
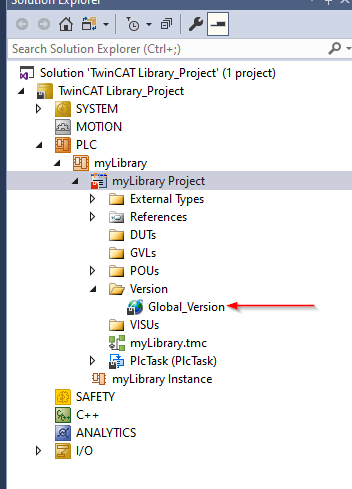
In it, ST_LibVersion is the Data Type variable, which clearly indicates the version of the corresponding library.
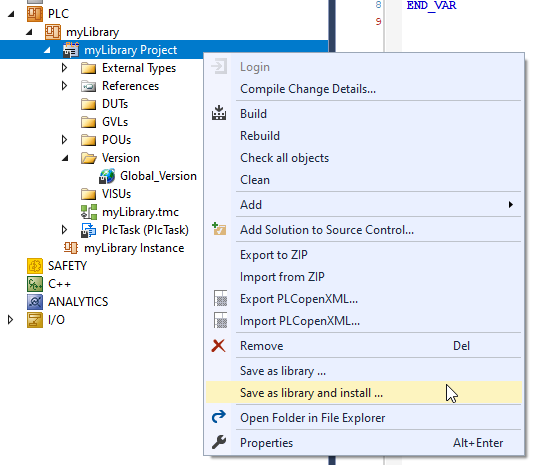
Save and Install
Finally, right-click on Project>Save as library and install.
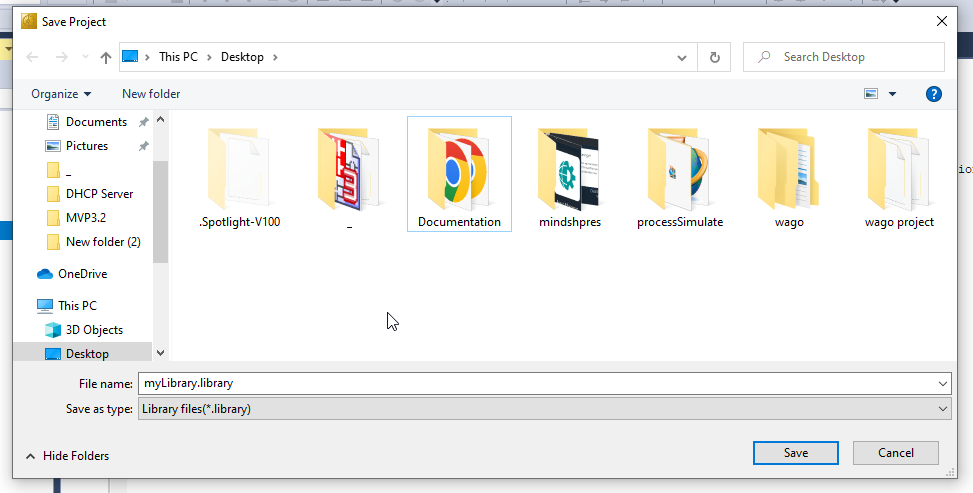
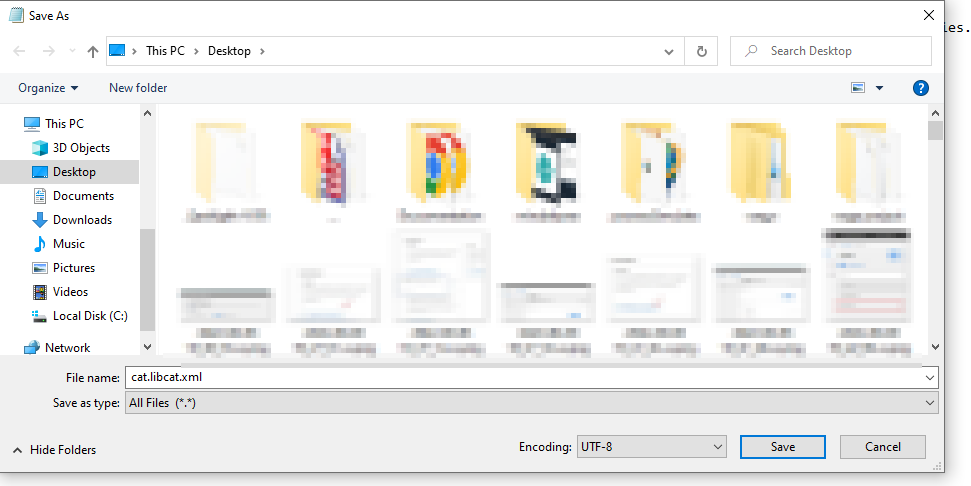
Save the file as a .library File.
Import your Library
Once the library is prepared, the next step is to import the library from another Project.
Click on Your Project>References.
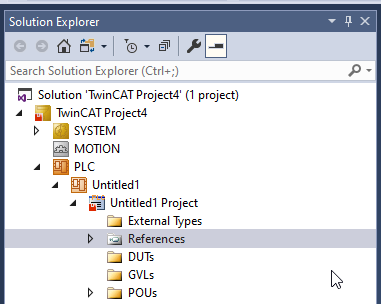
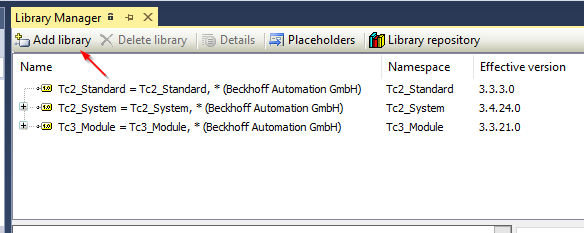
Click Add library.
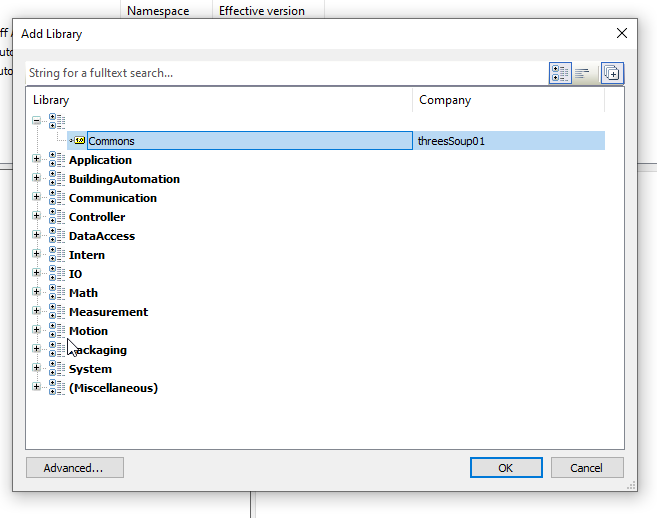
Oepn the (Miscellaneous).
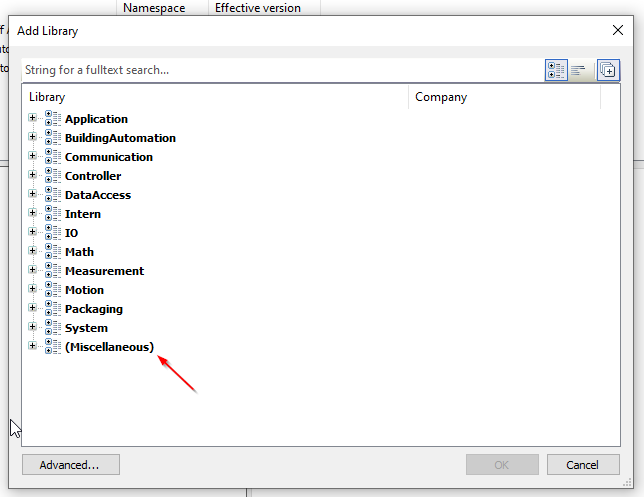
Then you see a library called Commons (which we just created), and Company is treesSoup01! (which we just created), and Company is treesSoup01. choose that Commons >OK.
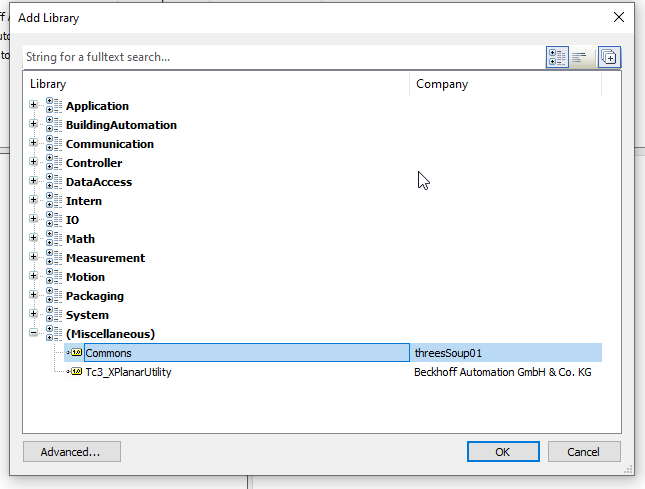
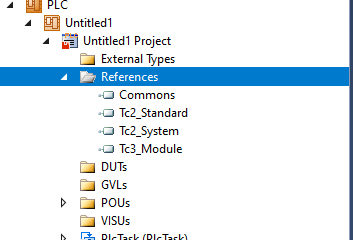
The library has been added.
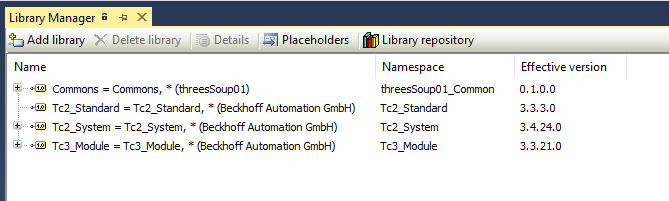
The library contains the FB, FC and Global_Version created earlier.
Miscellaneous?
Miscellaneous means something else. When you create a library, you want to divide the catalog properly into categories. Now go back to the Library project, and you will see a section called Library Categories. Click the … button next to it.
Download template.libcat.xml from here.
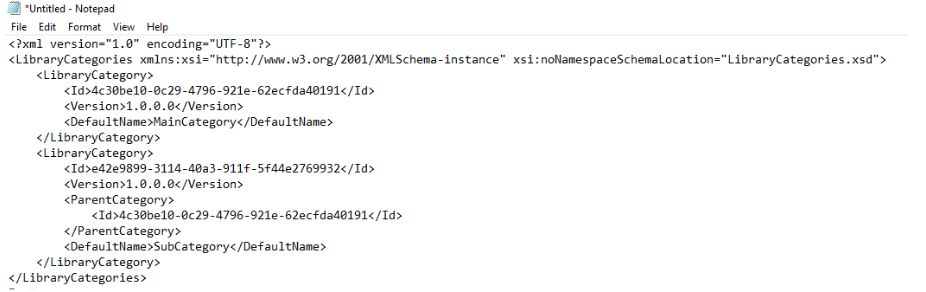
When you open it, you will find this XML inside.
.
There is a common catalog, e.g., Drive catalog, and below that, it is divided into smaller sections, such as Beckhoff,Mitsubishi. But this time we will set it up simply. Modify it like this. In other words, leave only one LibraryCategory.
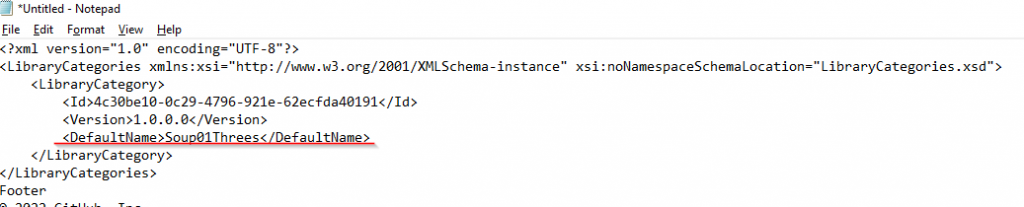
And put the catalog name in the DefaultName field.
The next step is to change the Id item.
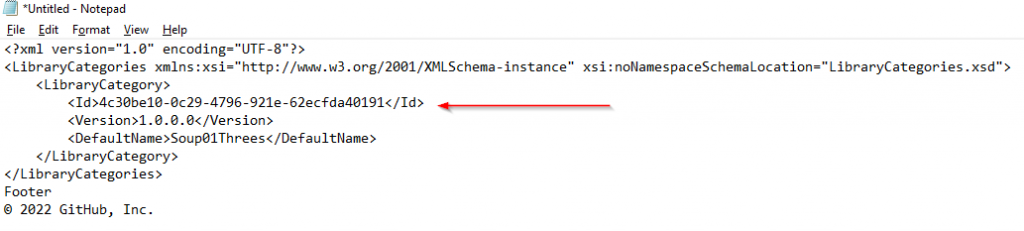
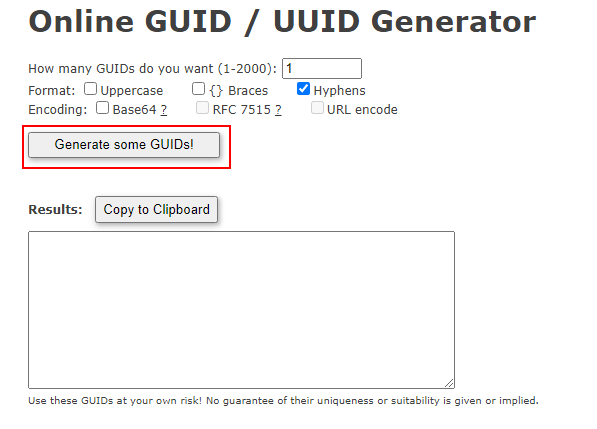
What you need is a GUID. Access the following LINK and generate random GUIDs with Generate some GUIDs!
https://www.guidgenerator.com/online-guid-generator.aspx
The final File will be as follows.
| <?xml version=”1.0″ encoding=”UTF-8″?> <LibraryCategories xmlns:xsi=”http://www.w3.org/2001/XMLSchema-instance” xsi:noNamespaceSchemaLocation=”LibraryCategories.xsd”> <LibraryCategory> <Id>3b5f5476-b03c-4a04-afc3-2c98ee1e5941</Id> <Version>1.0.0.0</Version> <DefaultName>Soup01Threes</DefaultName> </LibraryCategory> </LibraryCategories> |
Save the File as cat.libcat.xml.
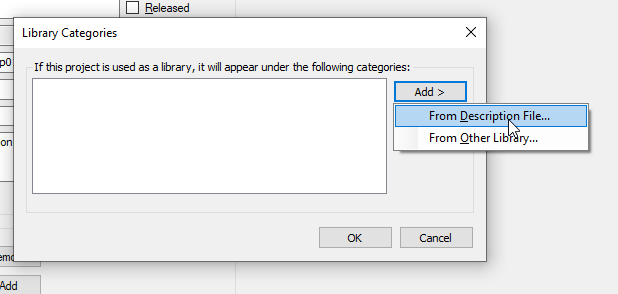
Returning to the earlier discussion of the library setup screen, click the Add> button.

Select From Description File.
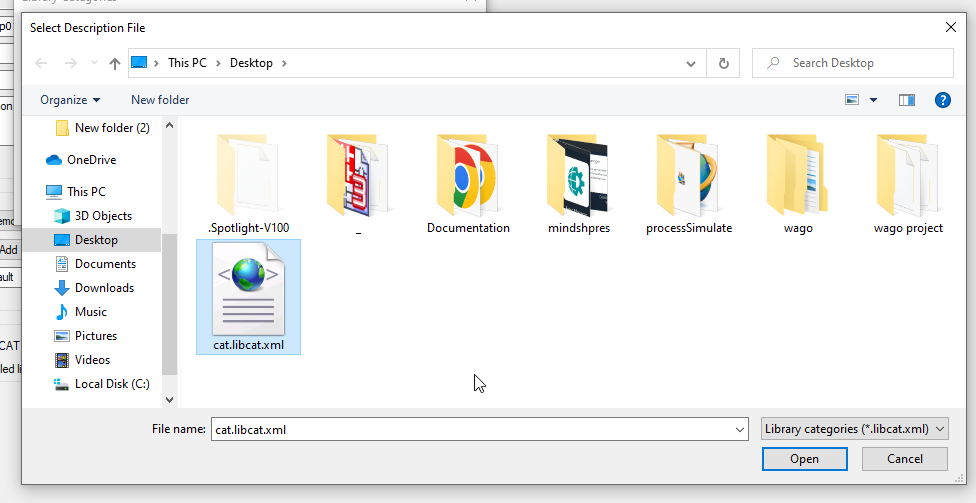
Select the .libcat.xml you just created and >Open it.
The catalog described in .libcat.xml will be displayed and confirmed with OK.
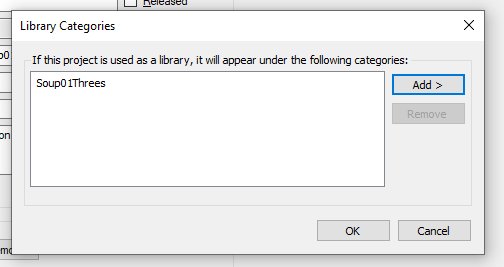
Library Categonies are OK to set!
Save the changes again with Save as Library and install.
GUID?
GUID (Globally Unique Identifier) or UUID (Universally Unique Identifier) is a 128-bit integer used for resource authentication. GUID is a term commonly used by developers of Microsoft-related software. The algorithm used to generate the 128-bit data is so unique that if the GUID is generated 1,000,000,000 times per second for a year, there is a 50% chance that the two are identical.
Import again
Now try to import the library from another Project again.
If you are unable to view the catalog as shown below, close the project and try again.
The catalog is now displayed!
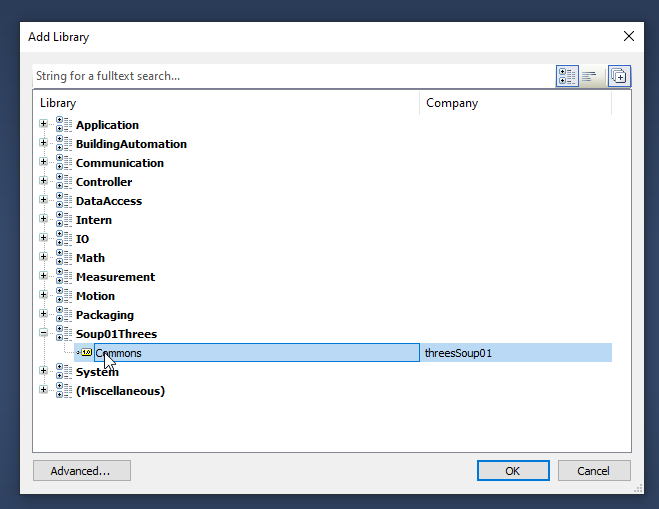
When you add that Library, it will be reflected in the Reference column.
Use it your Project
Use the last one in your project.
