This is the second episode of the Visual Components Tutorial. This time we will introduce the basics of robot manipulation, adding tools, TCP, Action Configuration, and more.
Let’s get started!

Reference Link
Your Target!
At the end of this Tutorial, everyone will be able to create a similar Pick and Place Application in Visual Components.
Add Robot
First, add the robot from the catalog to Visual Components. If you do not know how to add components, please refer to Part 1 of Reference Link.

Operation your Robot
Before creating a robot program from Visual Components, let’s first go over some basic robot operations. Open the PROGRAM TAB.

Operation as Jog
First, let’s try JOGGING the robot with Visual Components. Double-click on the robot and you will see a control panel on the right side with a Joints item.
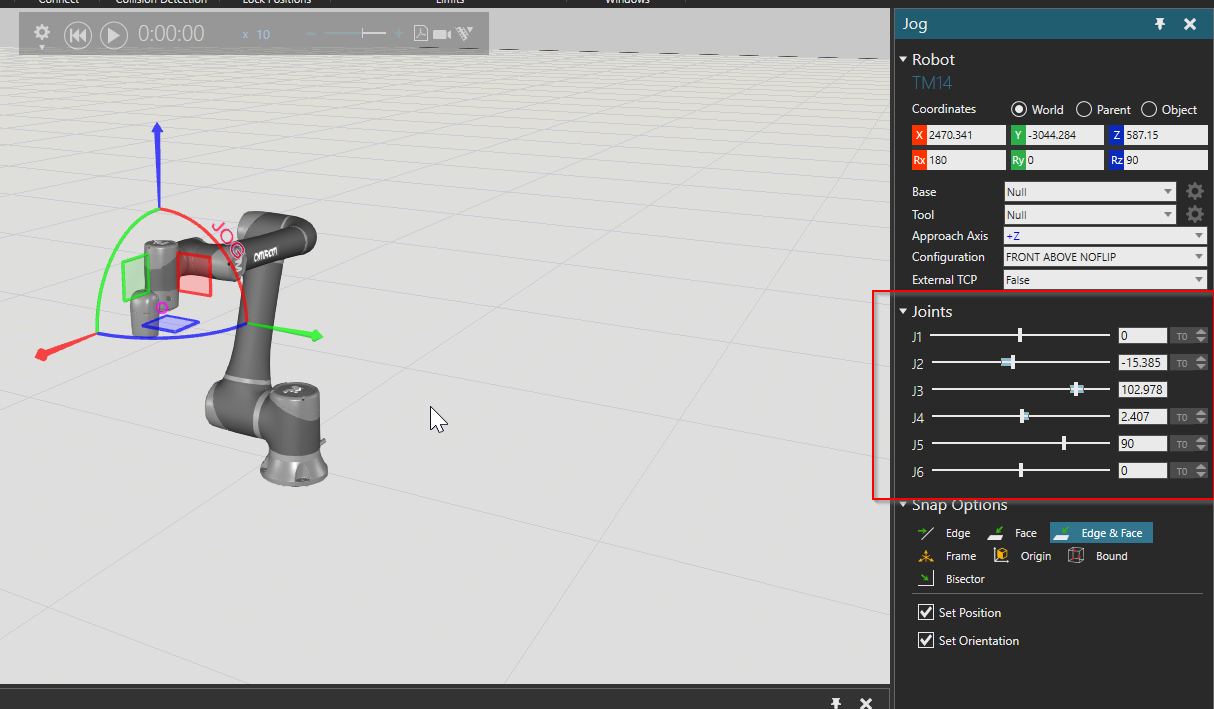
In this way, the robot can be moved directly from the Slide Bar.
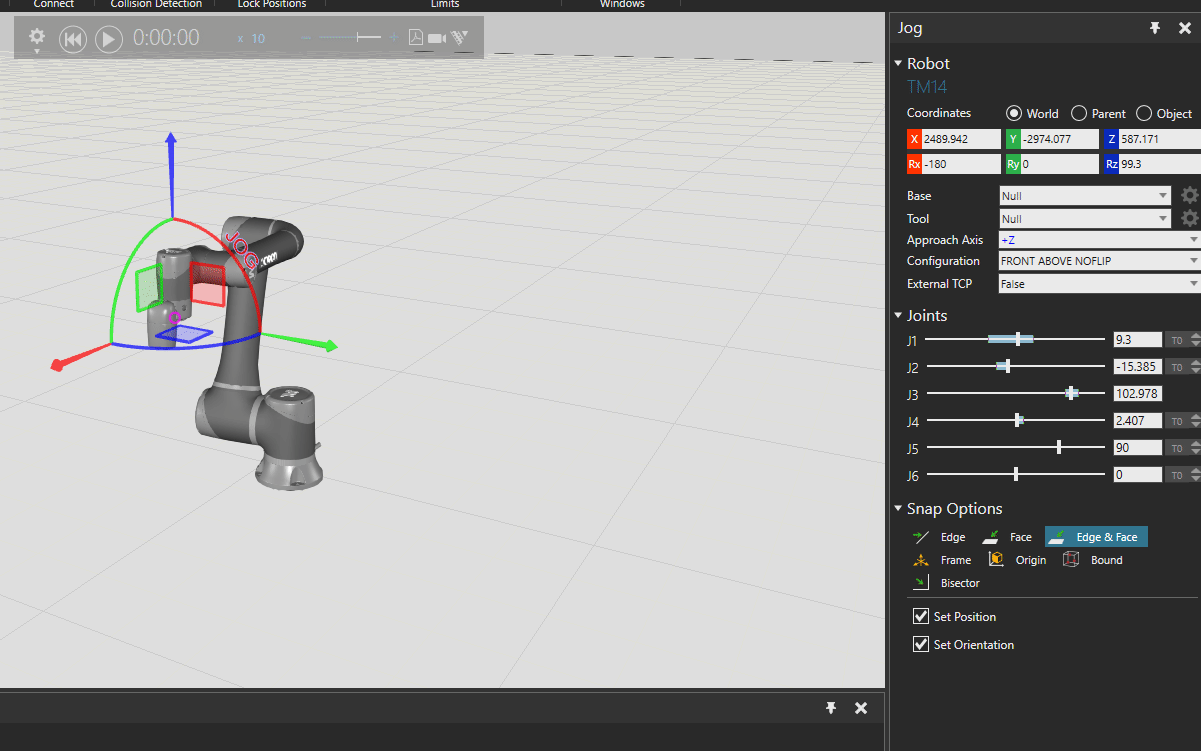
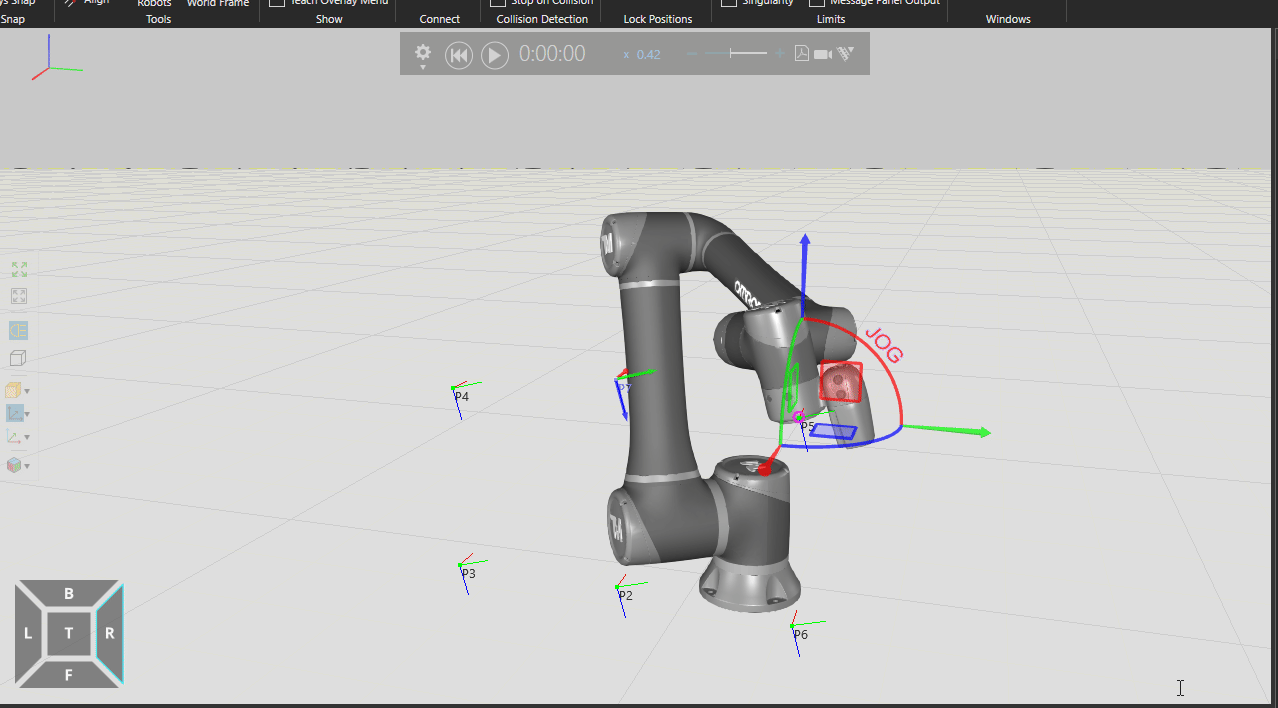
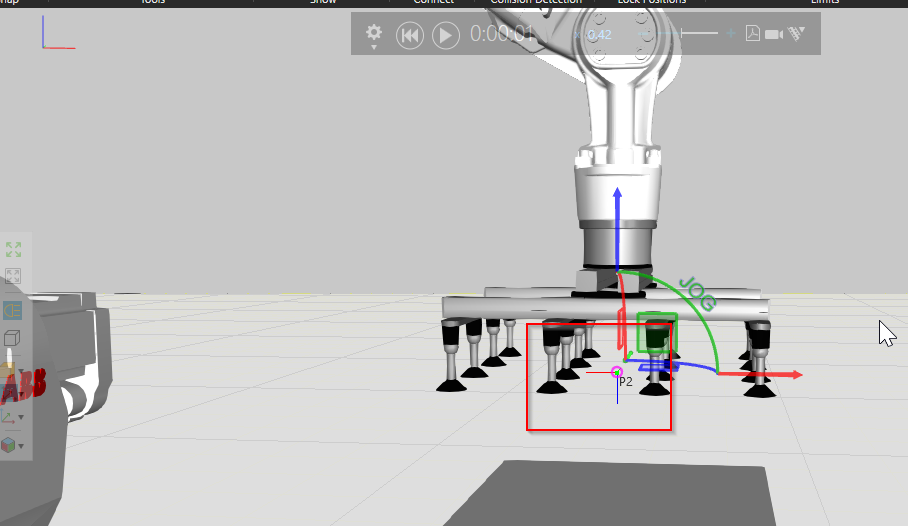
Operate as Coordinates
Next, let’s move the robot in the coordinate system along the TCP. You can see the ICON of the coordinates at the tip of the robot and the XYZ arrows.

Thus, by moving the Mouse while pressing the arrow on the coordinates, the robot moves along the TCP.

Operate with AnyDirections
In fact, there is a small round ICON from the tip of the robot, and this TCP Point allows the robot to move more freely.
It offers even greater flexibility than the arrow control of the robot just described.

Do Some Robot Program
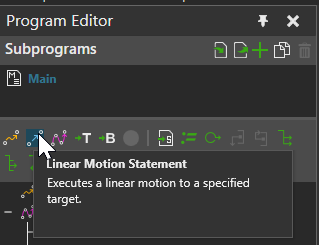
Once you know the basic operations of the robot, the next step is to create a robot program from Visual Components: from the PROGRAM TAB, there is a Subprograms item that allows you to control the robot’s Teaching and other operations by simply clicking on it.

First, let’s make a Linear Motion Statement.
Thus, the current position of the LIN robot is P1, and the LIN creates robot commands such as Move Linear and Speed of 1000 m/s.

Let’s move the robot through a few scenarios using the operations described earlier and create a Move Linear command.
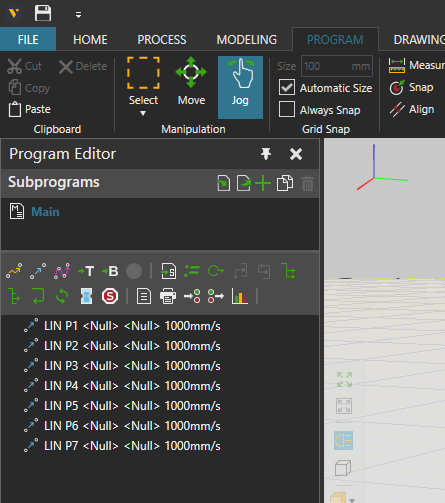
In the Subprograms section, there is the word Main, and the Main program contains the robot commands we have just created, and they are executed in the order from top to bottom.

Play!
Now let’s run Simulation with the Play button.

Done!The robot program was created by simply clicking on it.
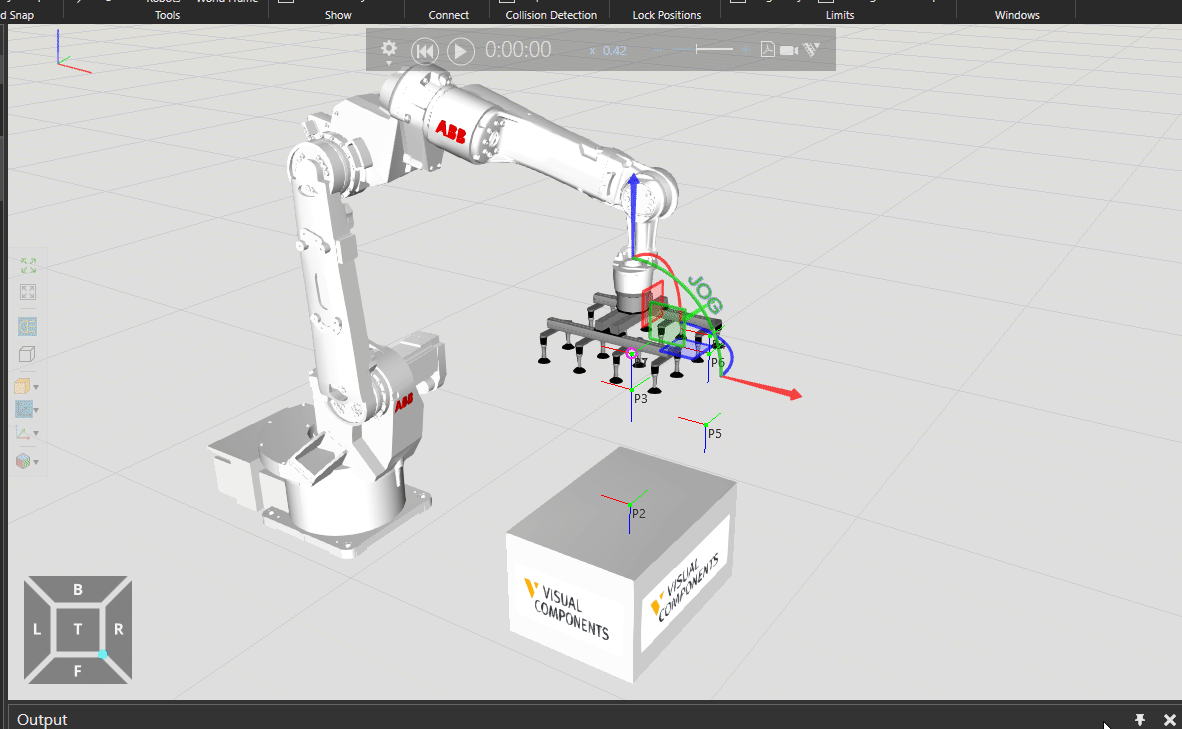
Create a pick and places
Once you understand the basics, let’s create a Pick and Places application. Delete the previous Omron robot and now add the ABB robot.

Add Tools
Now we can add the robot Tool. Go Robot Tools>Smart Suction Gripper from the catalog and add it into your Work Space.

Done! Tool has been added.
Next, move the tool toward the robot in Pnp Mode.
A green arrow will appear when the tool is somewhat close to the robot.
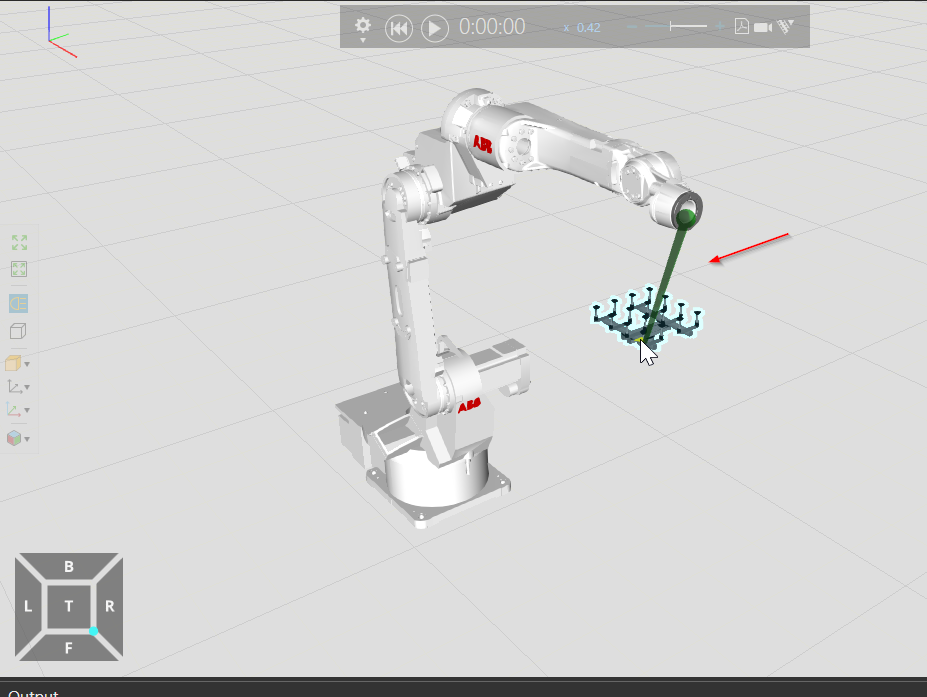
Let’s add tools to the robot like this.

Add Box
Now put in a box to Pick the Robot, search for BOX and add the Visual Components Box to the Work Space with Drop.

Done!A box has been added.

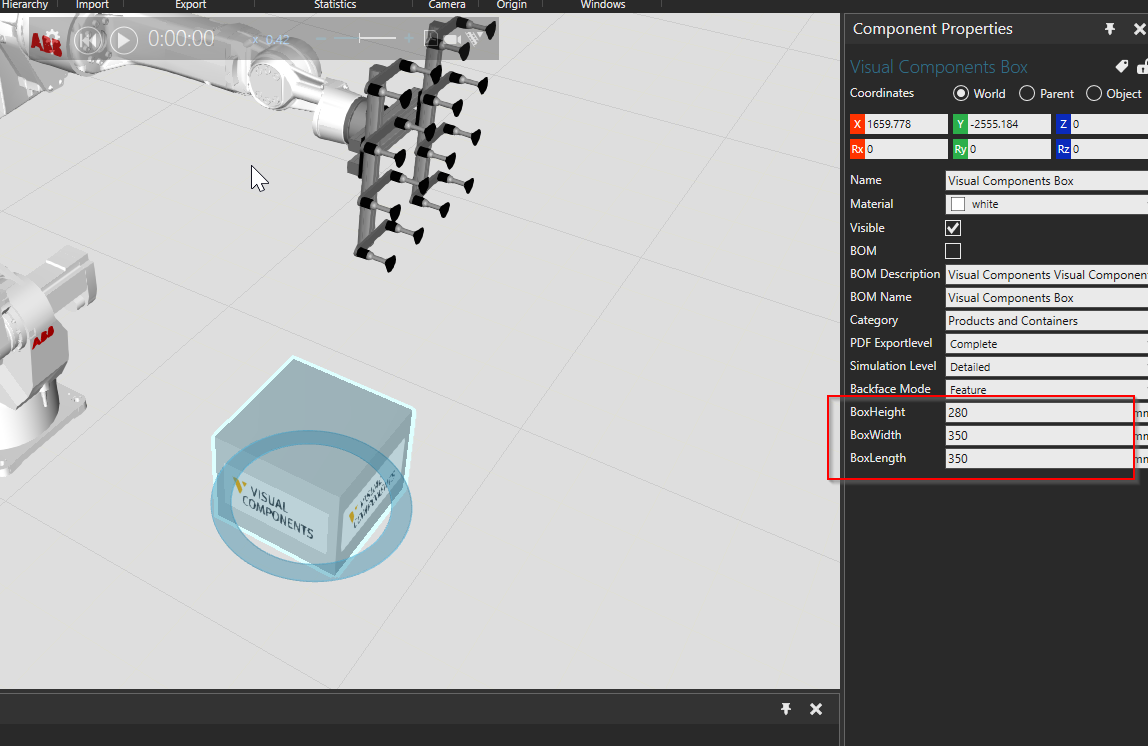
Change size
By default, the box size is a bit small, so adjust the size by Click on the box and adjust HWL from Properties.
But Tcp..
But when I actually move it around, I feel like the TCP is not quite right.
Change TCP
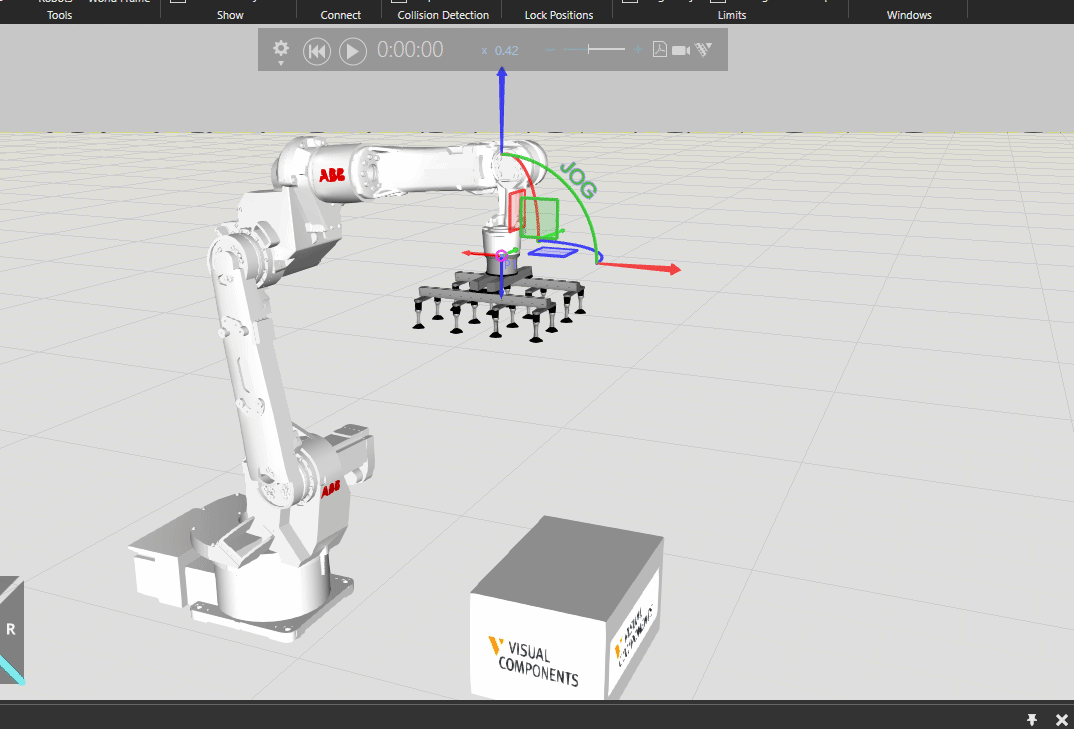
Because that the tool has been added, the robot’s TCP is no longer at the tip of the 6th axis, and at the tip of the tool. Click on the robot and select Tool from the Selection List.

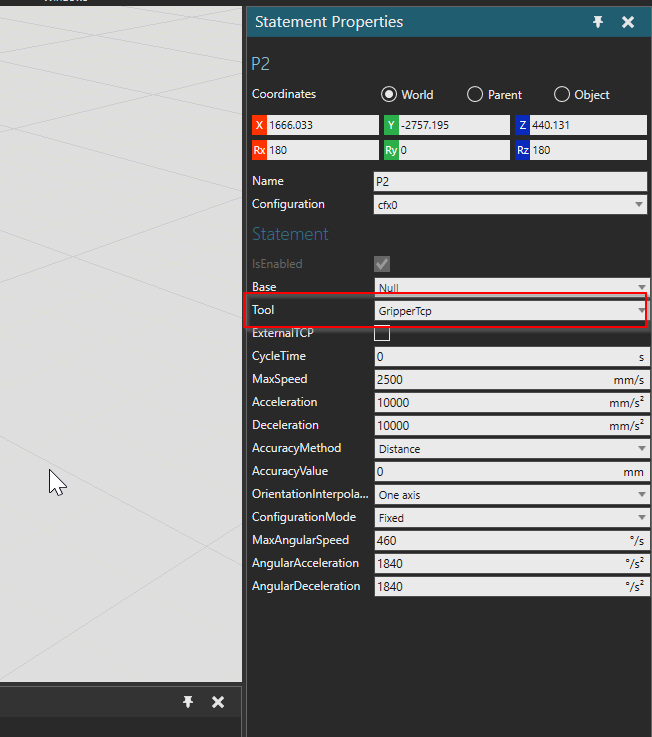
So, change Tool to GripperTcp (i.e., the Gripper attached to the robot that we just added).
If you zoom in on the tip of the tool, you will see a small blue-colored round button in the middle of the tool. This blue circle is now your robot’s TCP.
Done!

View
There is a tab called Cell Graph to list what parts and objects are actually in your Cell.
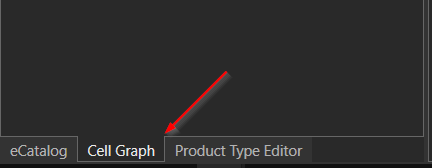
From that Tab, you can see all the Objects in the current Cell. So you can clearly see that there is a robot, a tool, and one more box in the cell.

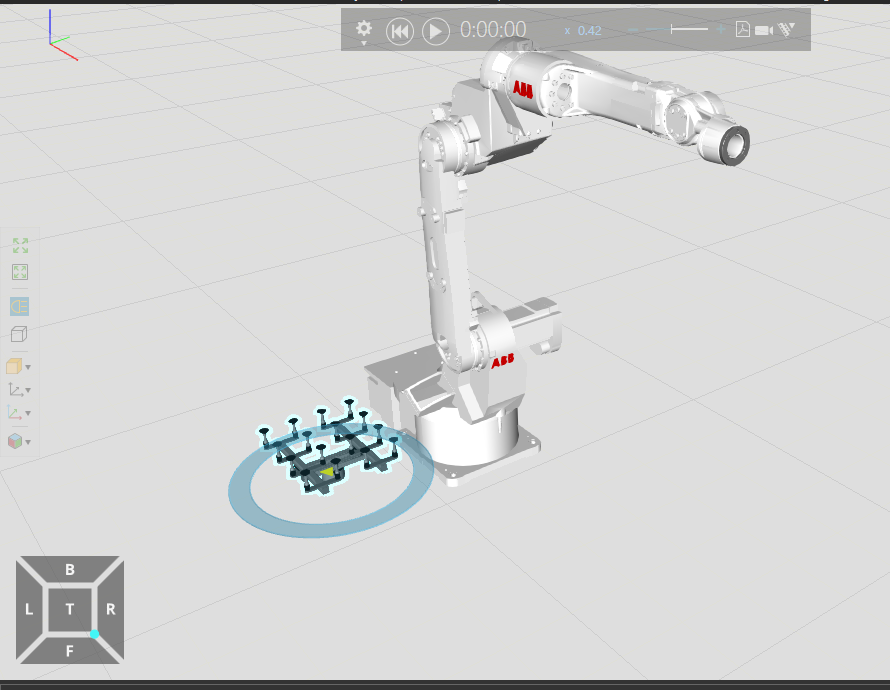
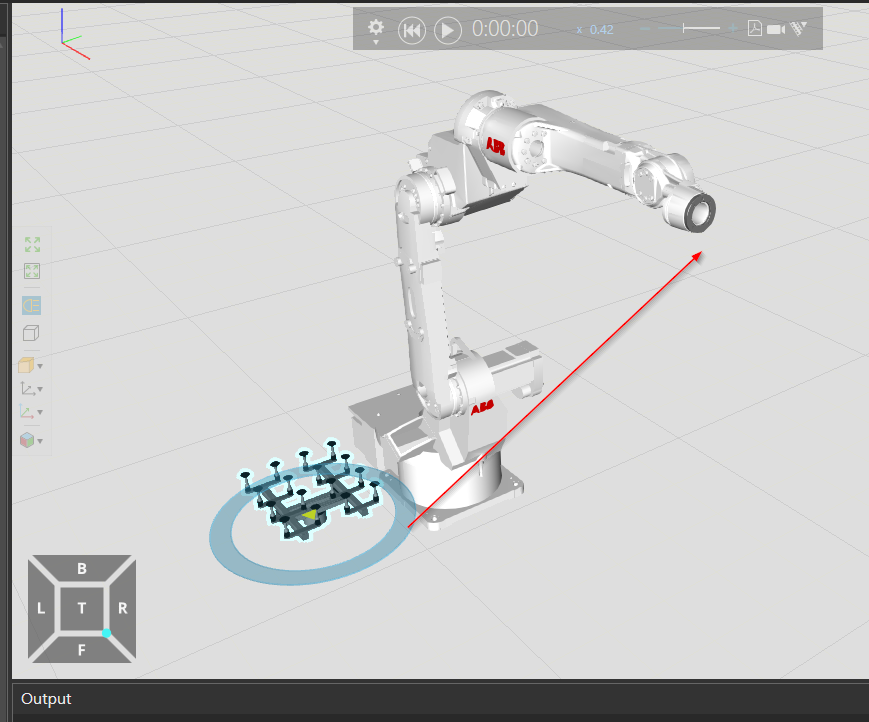
Test it
Now, set the Pick and Place Points for the robot.

Done!

Action Configuration
In the previous test, the robot could not lift the box,the robot needs to be configured to move something in Visual Components. Let’s click on the robot and look at the Actions Configuration section.

The following is a brief section of the Actions Configuration settings.
- Output can be set to a number, such as 1, 2, or 3, and is linked to the actual robot command.
- On True is the action to be performed when the Output is set to True.We set the Action to Grasp.
- On False is what is done when the Output is False. Now we understand that if Release is set, the robot will release whatever it is holding.
- Now that On True is set to Grasp, the Grasp-related settings will be displayed.
- Grasp
- DetectionVolumeSize indicates the distance of an object (box, bottle, whatever) from the TCP. In other words, it is an image of how close the object will be taken.
- Using Tool is the tool to be used.
- Release
- GravityDirection is the direction of release.
- Grasp

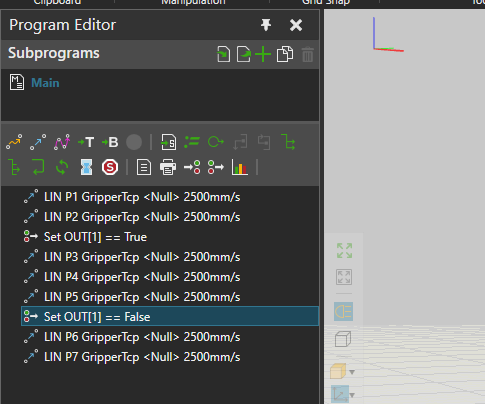
Insert Output Statement
After explaining the Actions Configuration, the next step is to add commands to the robot program to set Output=True when the robot wants to lift the box ,and Output=False when it wants to release the box.
In the PROGRAM TAB, there is an ICON named Set Binary Output Statement.

Set OUT[0] == False has been added. The OUT[0] is a numeric setting exactly like Output1,2,3 in the Actions Configuration that was just added.
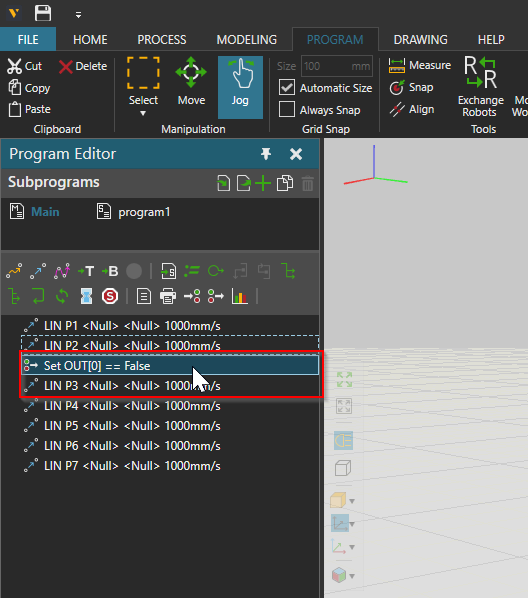
Actually, there is also a Statement Properties on the right, and OutputPort uses Output[0] with Default=0. This time we want to use Output[1], so put 1 in OutputPort.

Done!

Now Out[1] is set to True when the LIN P2 GripperTcp command completes execution.
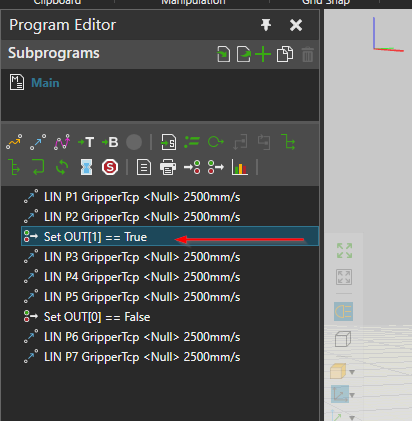
The same operation should also be used to insert Set OUT[1] == False.
Test again!
Congratulations! You now have a Pick and Places application with Visual Components!