This article introduces the visualisation settings for the status monitoring of the safety controller EK1960 using the Alarm Logger, Event Logger and File Explorer functions of the Beckhoff TE2000. The next article in Part 3 will explain how to set up FSOE custom connections. Stay tuned!
Come on, let’s enjoy FA!
Foreword
Thank you from the bottom of my heart for visiting my technical blog and YouTube channel.
We are currently running the “Takahashi Chris” radio show with Full-san (full@桜 八重 (@fulhause) / X) which I deliver every Wednesday night.
Sharing, not hoarding, technical knowledge
We publish technical information related to factory production technology and control systems for free, through blogs and videos.
With the belief that “knowledge should be accessible to everyone,” we share practical know-how and real-world troubleshooting cases from our own field experience.
The reason we keep it all free is simple: to help reduce the number of people who struggle because they simply didn’t know.
If you’ve ever thought:
- “Will this PLC and device combination actually work?”
- “I’m having trouble with EtherCAT communication—can someone test it?”
- “I want to try this remote I/O, but we don’t have the testing environment in-house…”
Feel free to reach out!If lending equipment or sharing your configuration is possible, we’re happy to verify it and share the results through articles and videos.
(We can keep company/product names anonymous if requested.)
How can you support us?
Currently, our activities are nearly all unpaid, but creating articles and videos takes time and a proper testing environment.If you’d like to support us in continuing and expanding this content, your kind help would mean a lot.
Membership (Support our radio show)
This support plan is designed to enhance radio with Mr Full.
https://note.com/fulhause/membership/join
Amazon Gift List (equipment & books for content production)
Lists equipment and books required for content creation.
https://www.amazon.co.jp/hz/wishlist/ls/H7W3RRD7C5QG?ref_=wl_share
Patreon (Support articles & video creation)
Your small monthly support will help to improve the environment for writing and verifying articles.
https://www.patreon.com/user?u=84249391
Paypal
A little help goes a long way.
https://paypal.me/soup01threes?country.x=JP&locale.x=ja_JP
Just trying to share things that could’ve helped someone—if only they’d known.
Your support helps make knowledge sharing more open and sustainable.
Thank you for being with us.
soup01threes*gmail.com
Technical knowledge shouldn’t be kept to ourselves.
Reference Link
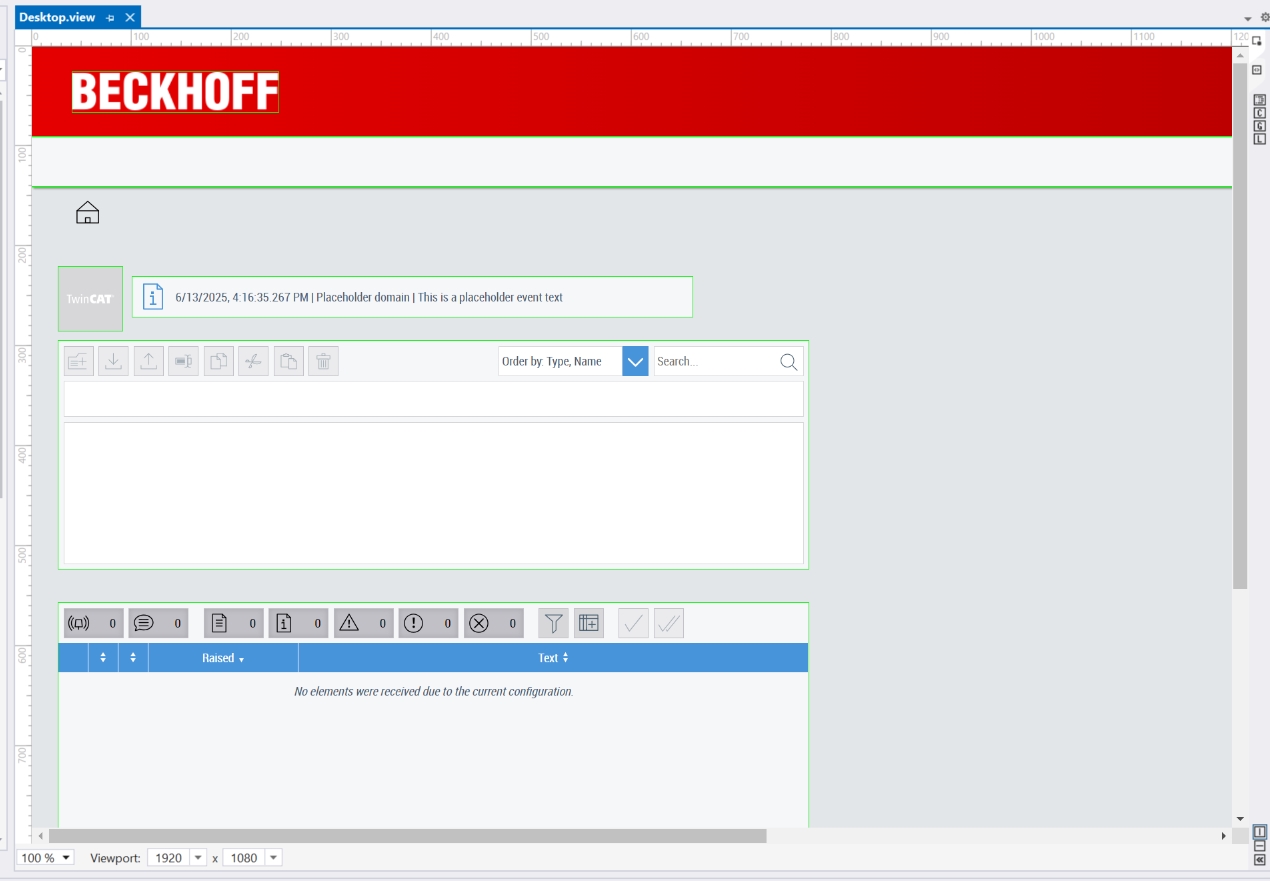
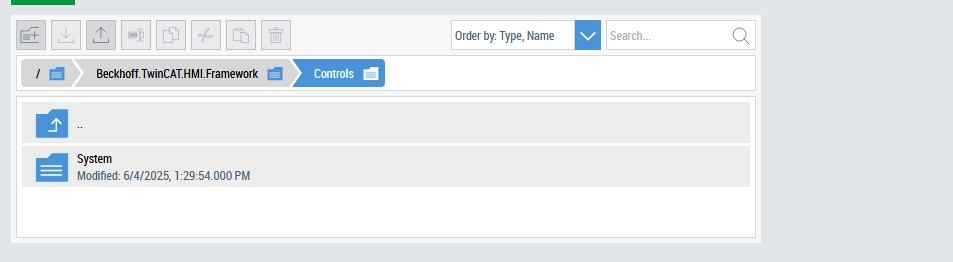
File Explorer
File Explorer can be used to view and navigate through folders and files on the server. It can also upload and download files, and move and copy files and folders on the server.
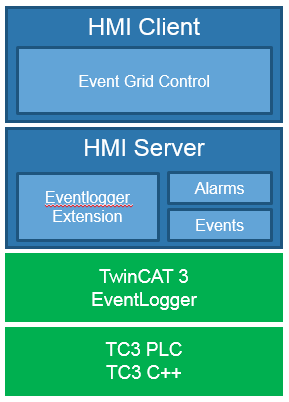
Event systems
The TwinCAT HMI has various extensions for implementing event systems. Alarm and EventLogger are presented in this article.
Alarm
The Alarm extension allows you to set your own alarms for the TwinCAT HMI. The extension monitors symbols at defined intervals and can generate a message if a value exceeds or equals a defined limit value.
system requirement
- Windows 10 (32/64-bit)
- Windows 11
- TwinCAT BSD
EventLogger
The EventLogger extension can be used to integrate the TwinCAT EventLogger. This extension is used to read the messages available in the EventLogger and make them available to clients. Clients can query the data using filters. This allows the creation of filters for past or current events only.
Implementation
TwinCAT Runtime
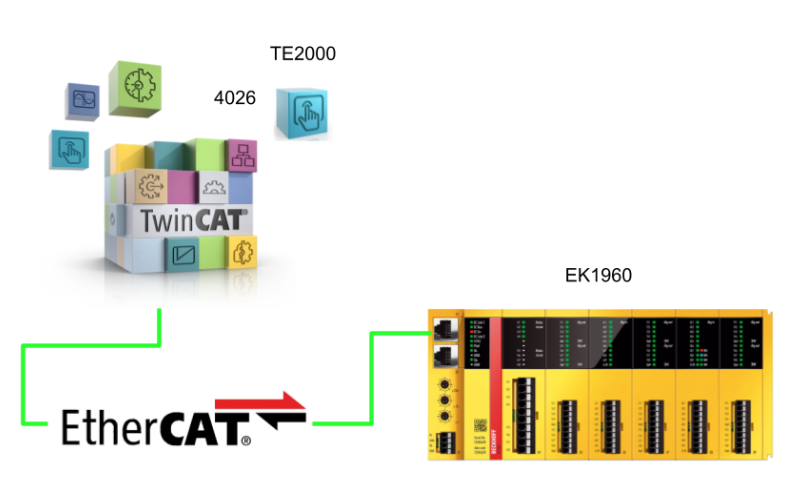
First, three input variables for alarms are added to the GVL of the non-safety PLC. The three variables will be the data received via EtherCAT communication with the EK1960.

EK1960
Let’s build the 1960 side.
Add Output Data
As you want to send e.g. emergency stop signals from the EK1960 to the TwinCAT Runtime via EtherCAT, you can add several variables at the same time via Alias Devices>Add multiple Standard Variables.
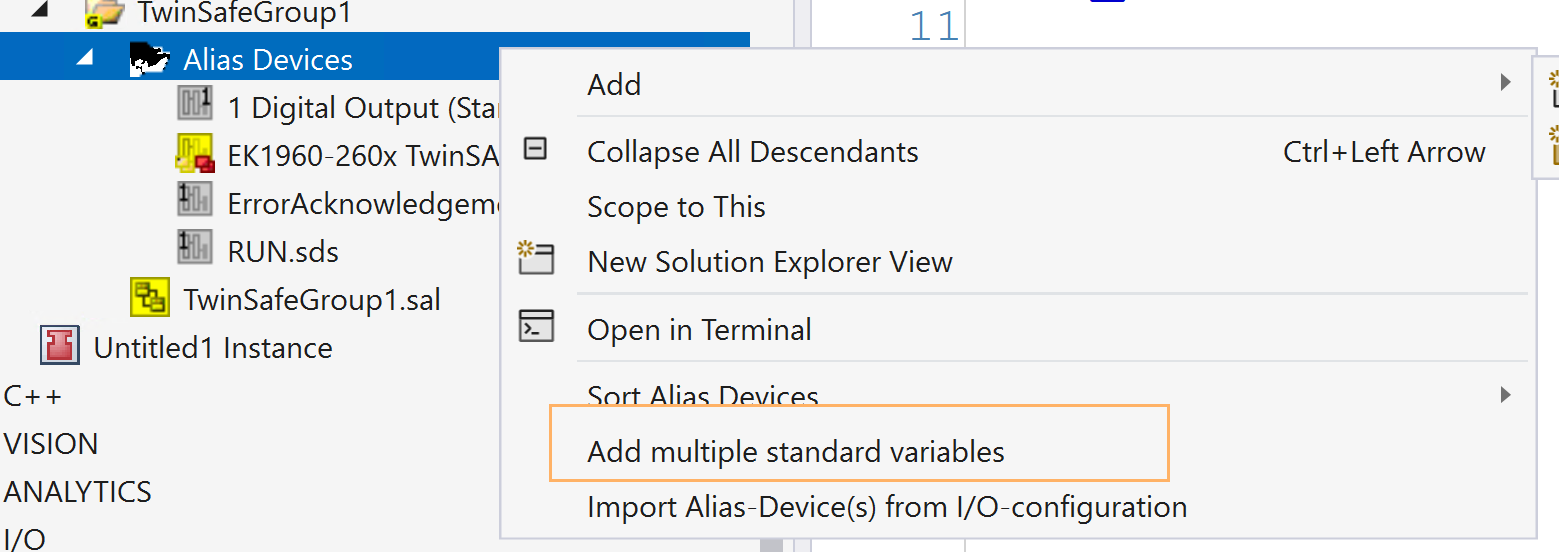
The Add Variables in Bulk screen is displayed.
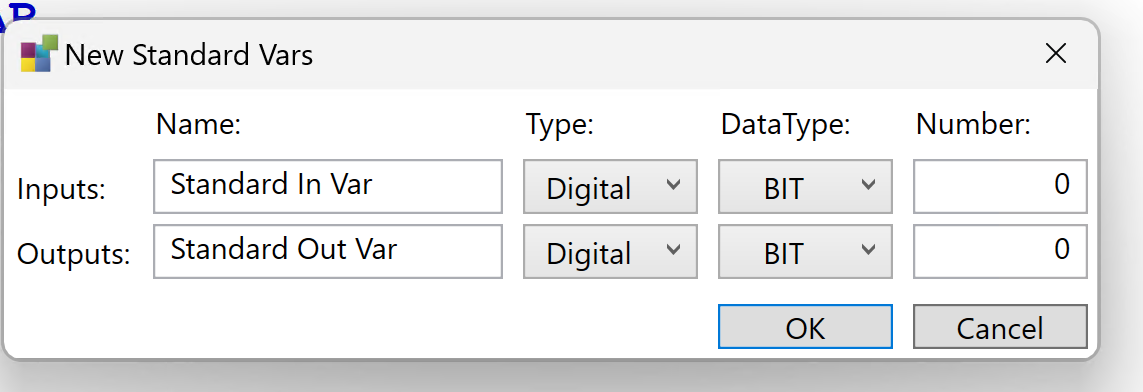
For example, if you want to add three INPUTs at once, enter 3 in Number.
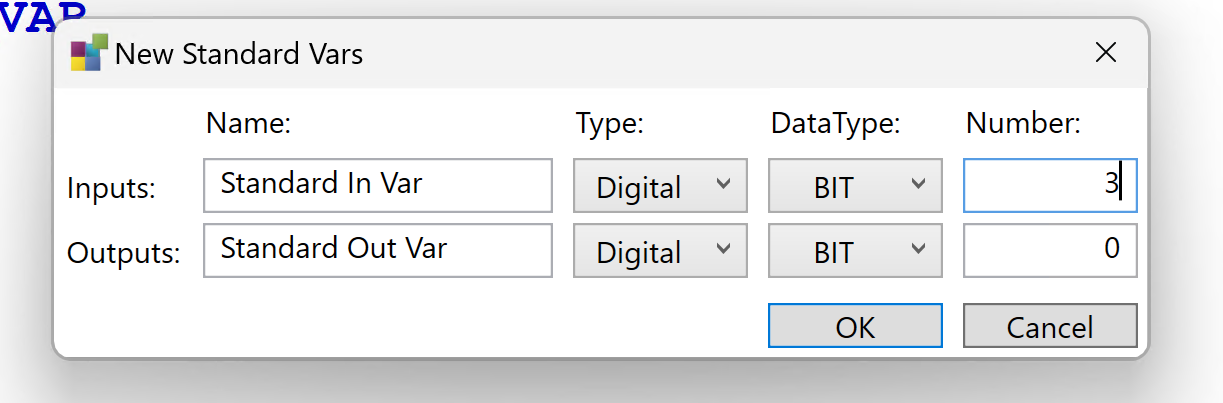
Done!
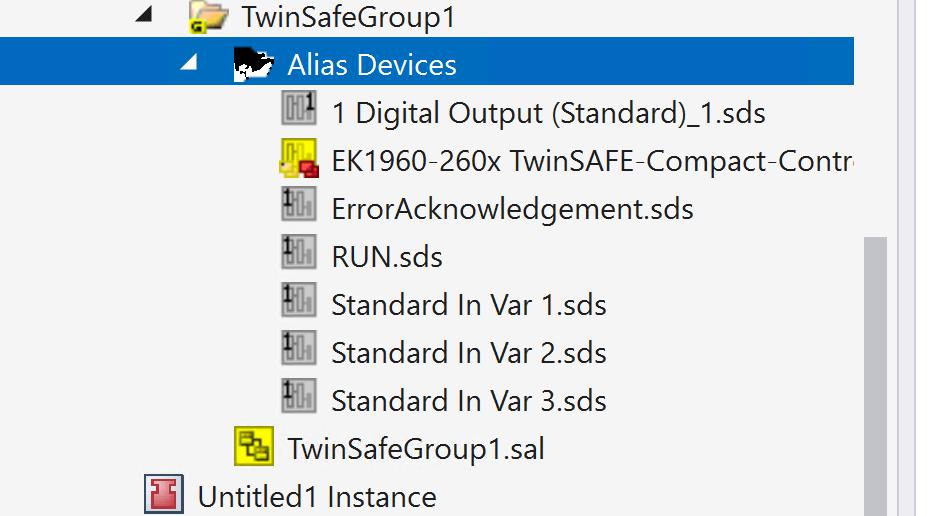
Three additional non-safety output data will be added in this article.
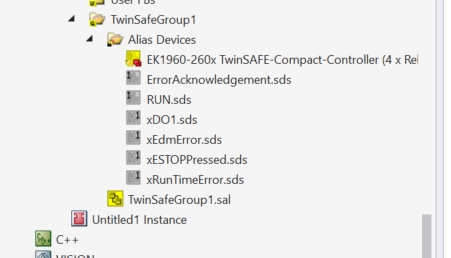
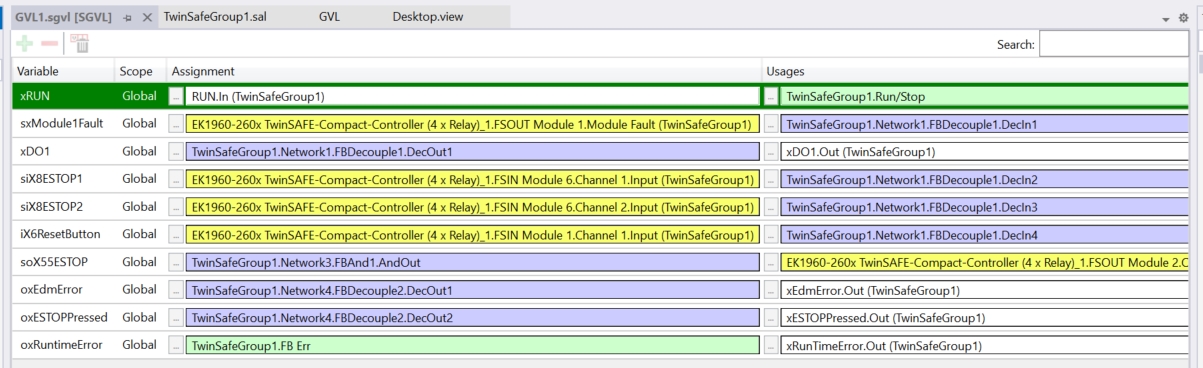
GVL
This is the safety variable. Tie it to the three non-safety variables you have just added.
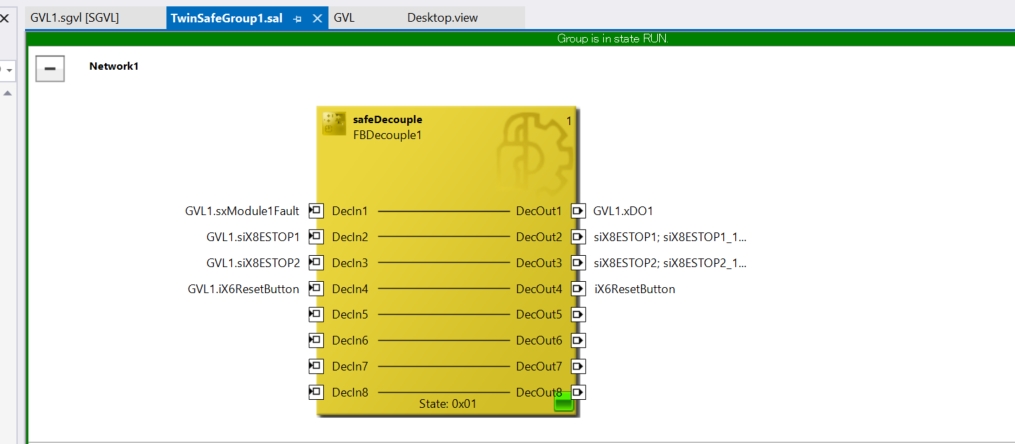
Program
The safety programme is not much different from Part 1, adding another two emergency stop signals from Network 1 to DecOut.
Alarm Configuration
The next step is to configure the TE2000 alarm and Event settings.
Plug-in Installation
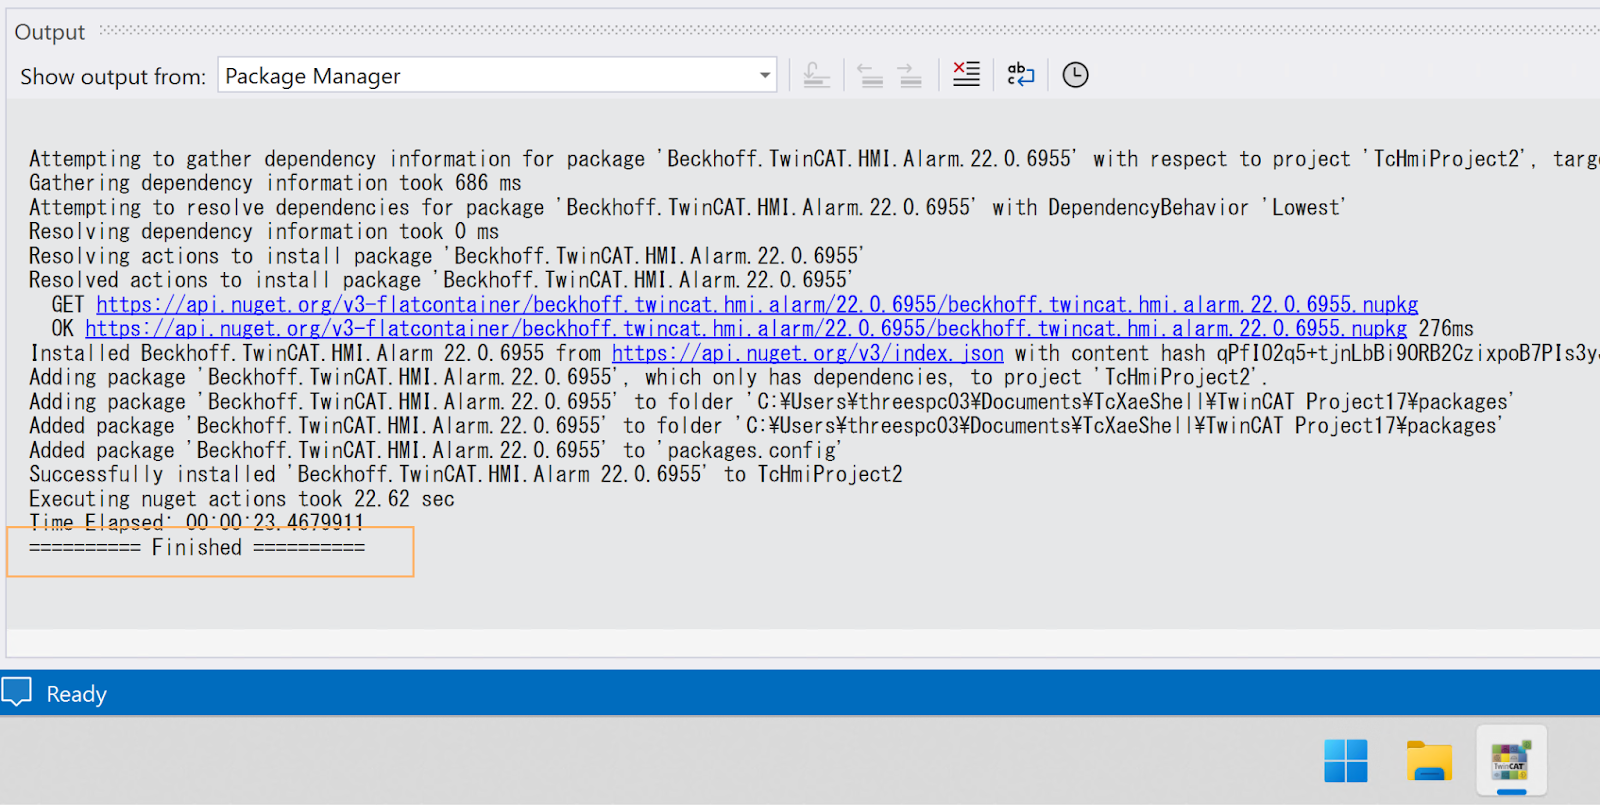
To use Alarm and Event Logger on the TE2000, you need to install the Plug-in from NuGet, search for Alarm and Event Logger from NuGet and install it.
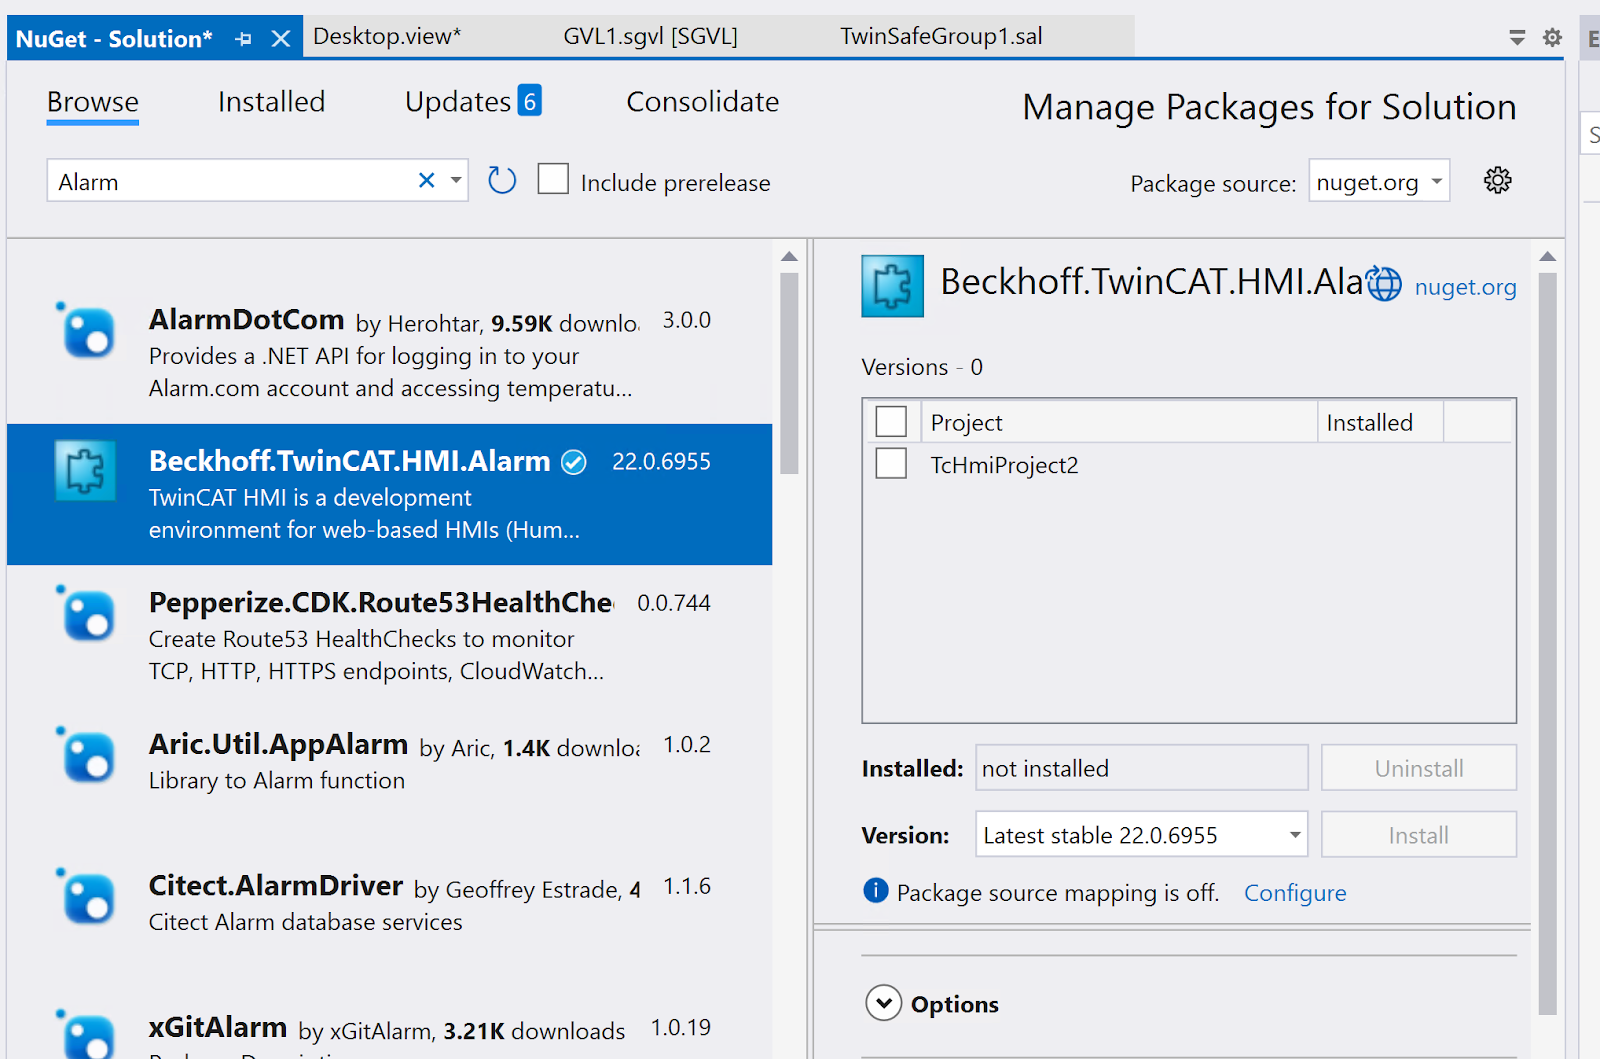
When the installation is complete, the Output Log will show “Finished”.
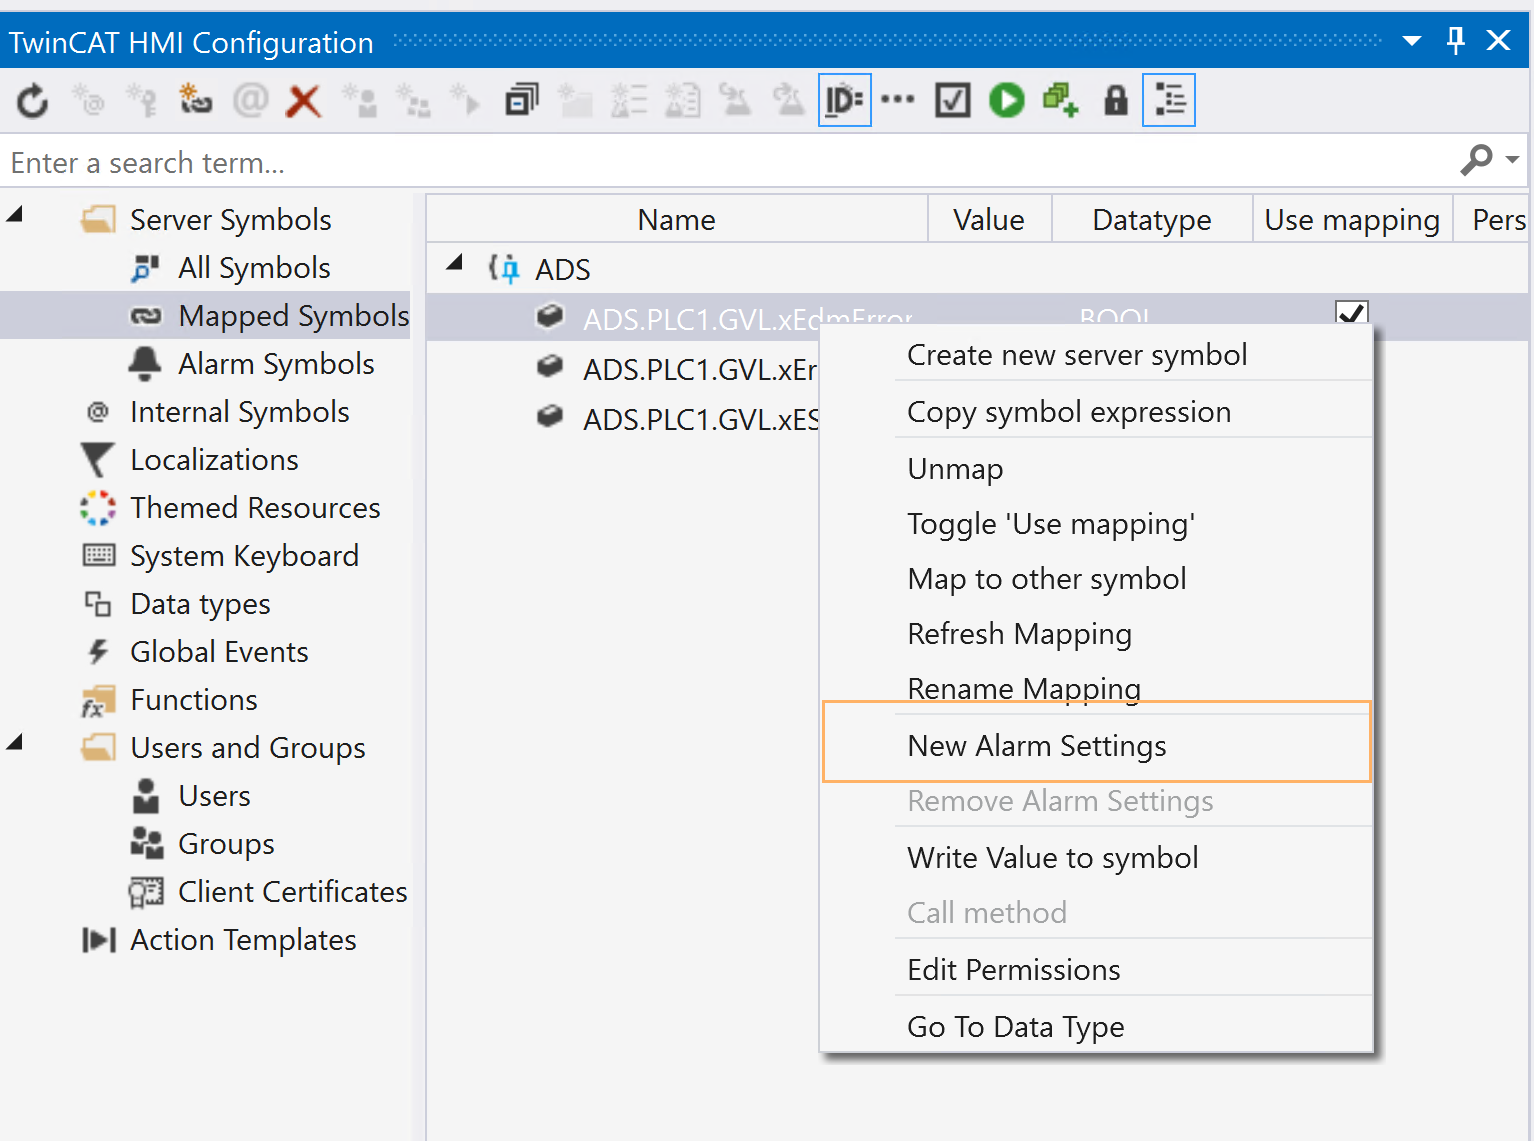
Adding alarms
An item called TcHmiAlarm is added to the HMI project. Click on that TcHmiAlarm.

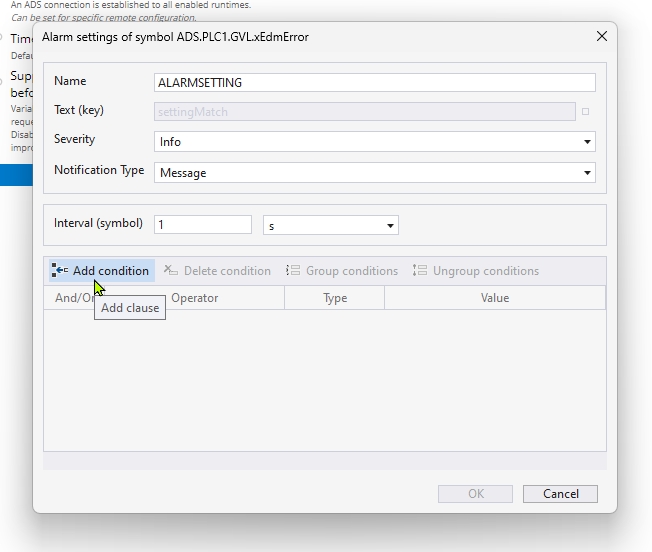
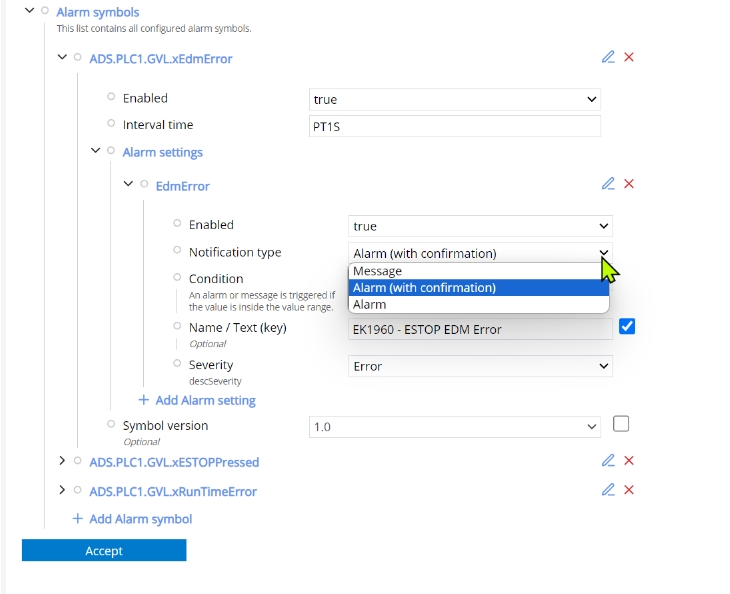
You have mapped the TwinCAT Runtime and the three Bool variables in this article with ADS. Right-click on that variable>New Alarm Settings.
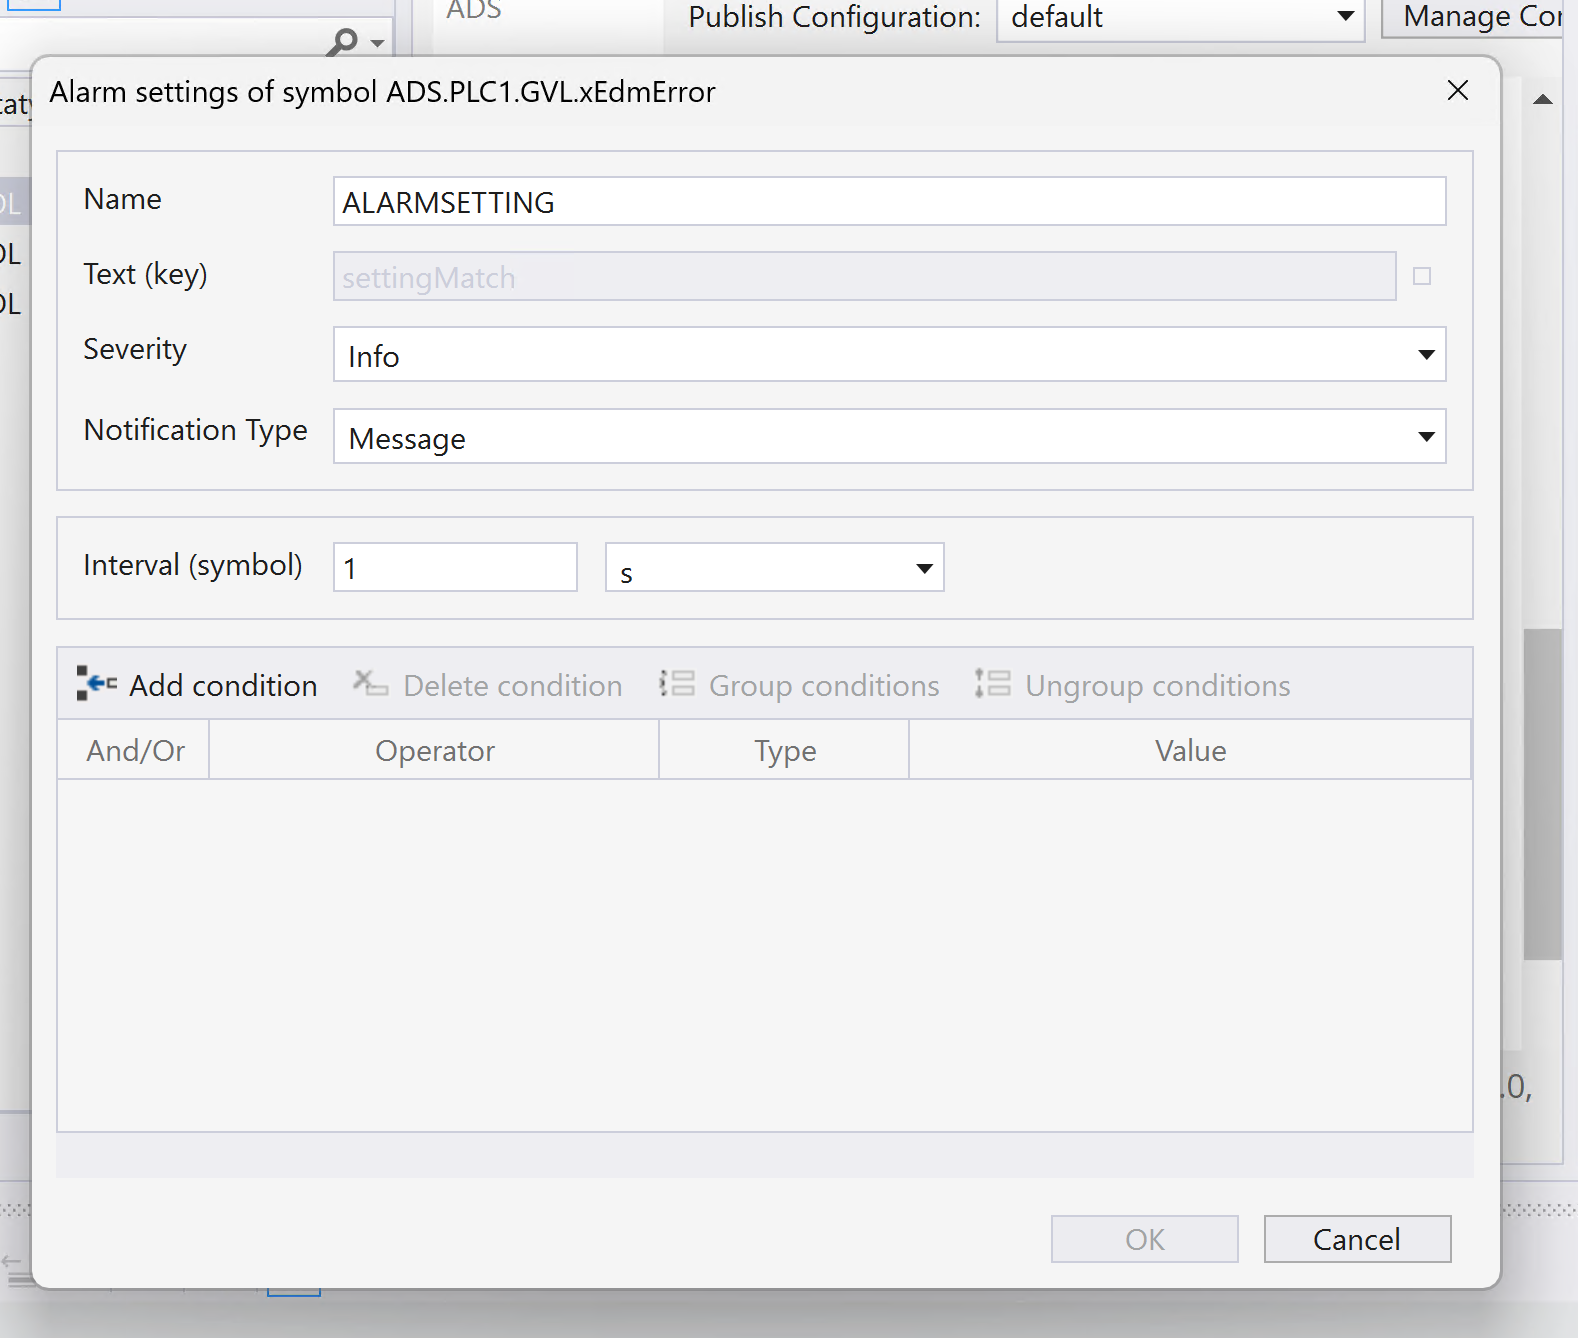
The Alarm settings screen appears.
- Name is the alarm
- Severity is the severity of the alarm
- Notification indicates whether the alarm needs to be reset or not.
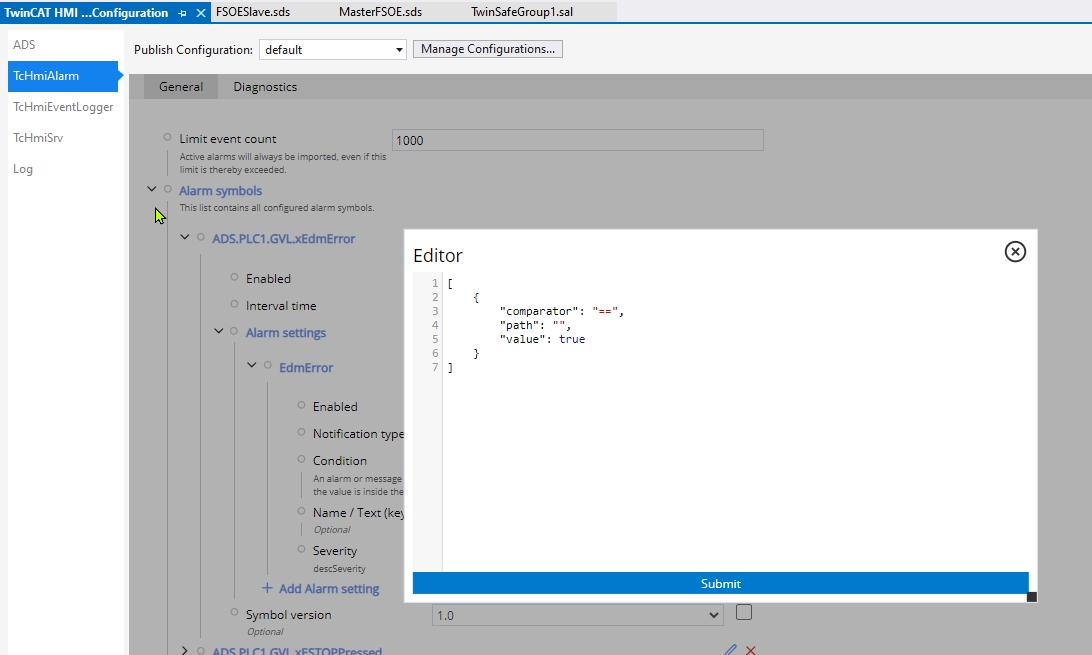
Finally, click on the Add Condition button to change the Trigger condition of the alarm.
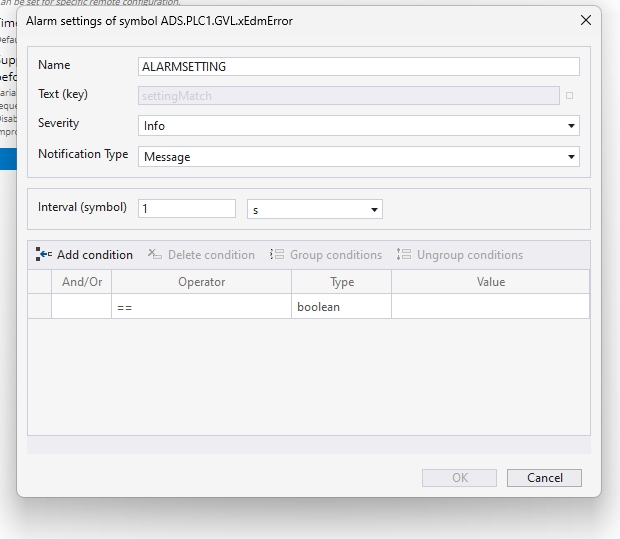
The alarm configuration screen is displayed and the alarm Trigger condition is added with Add Condition.
New Trigger conditions have been added.
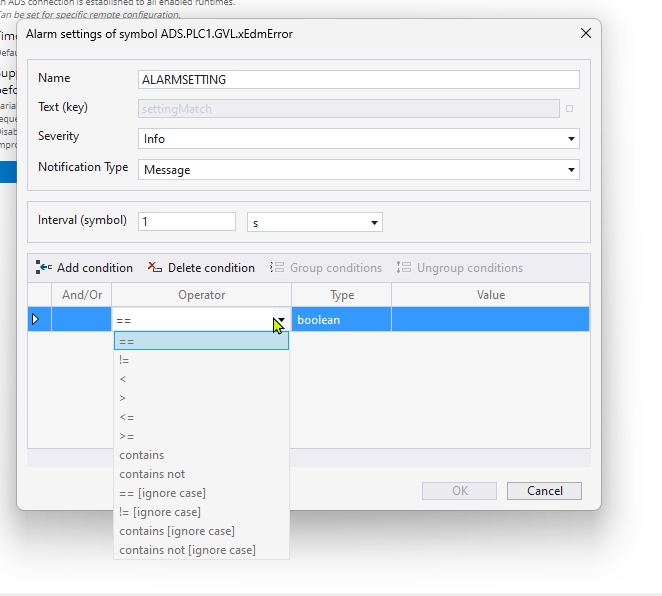
The operator sets the comparison conditions.
sets the value to Trigger.
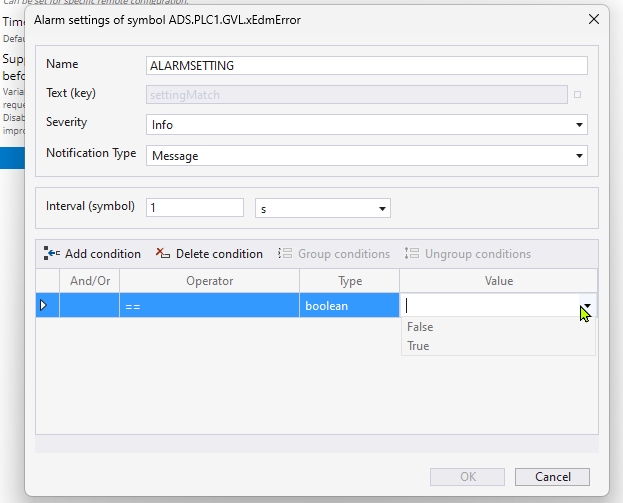
Done!Alarms have been added.
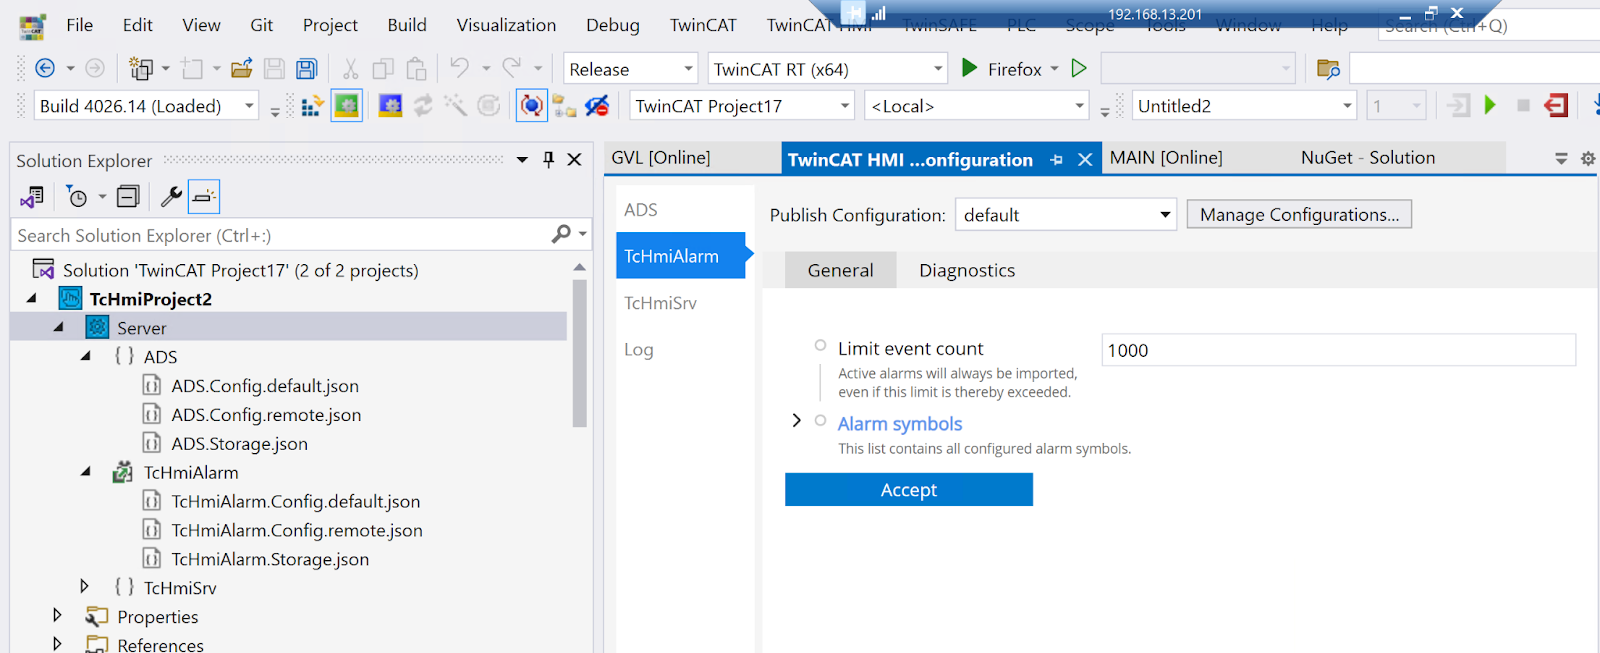
Next, open TcHmiAlarm and you will see the alarm you just added.
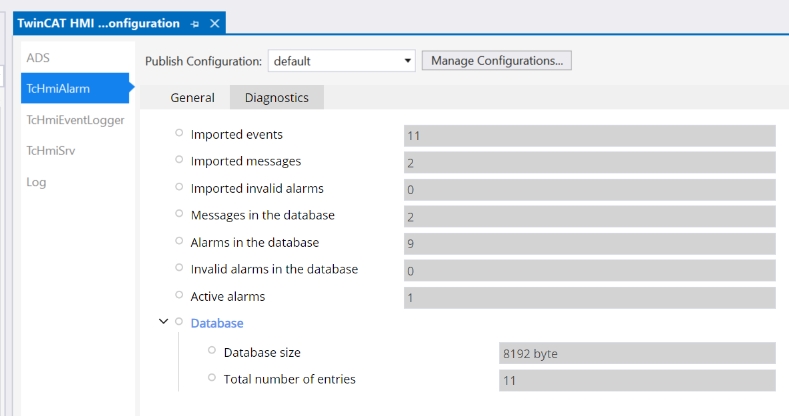
The Diagnostics Tab allows you to check the current status of Alarm.
If you want to add an alarm from this screen, click “+Add Alarm Symbol”.
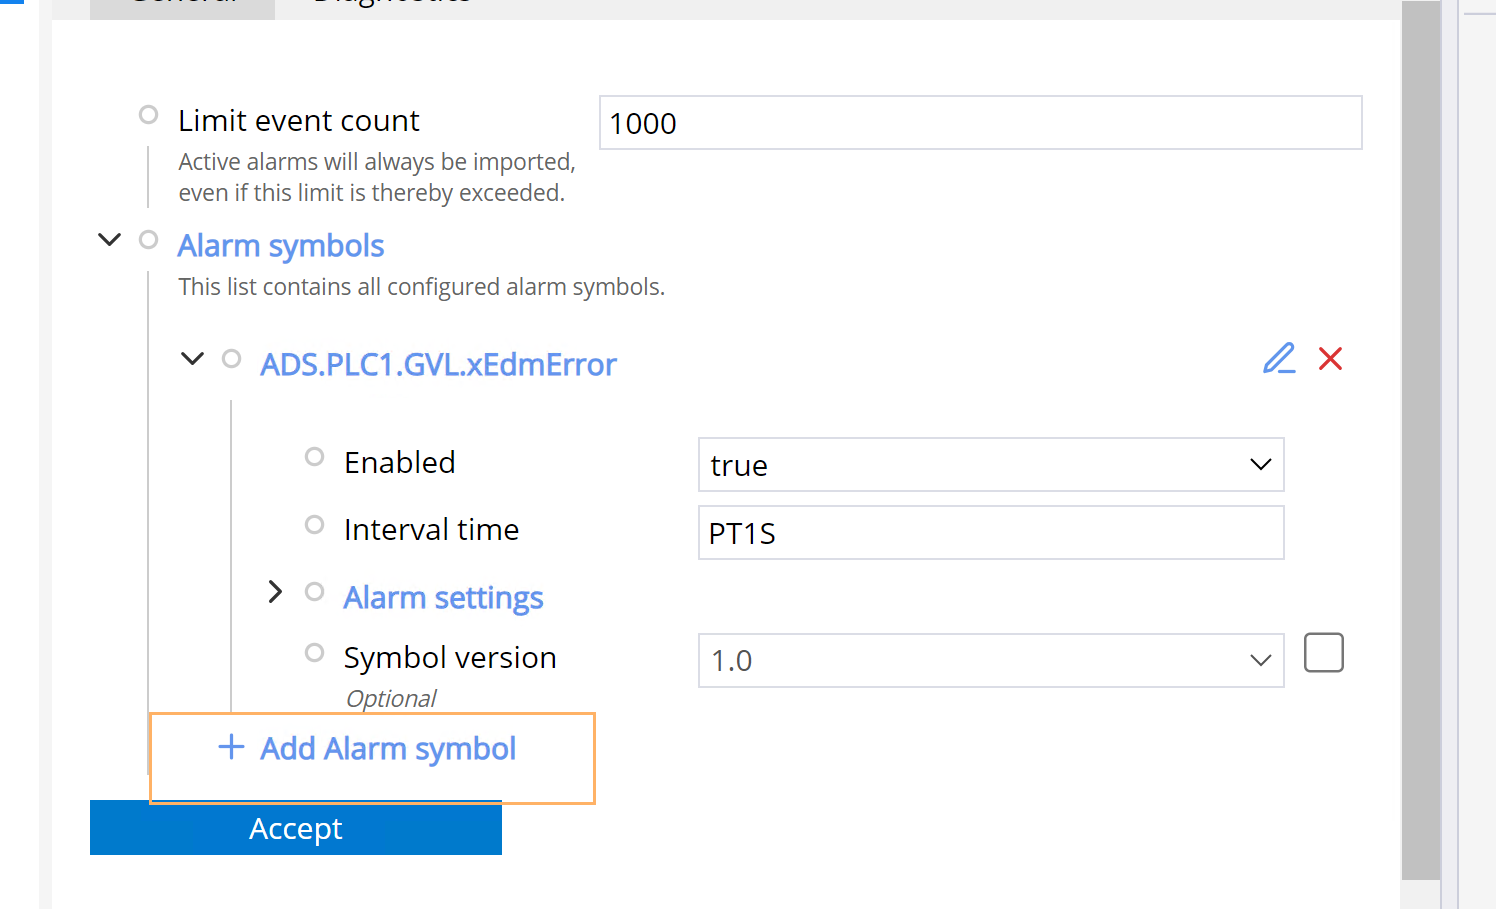
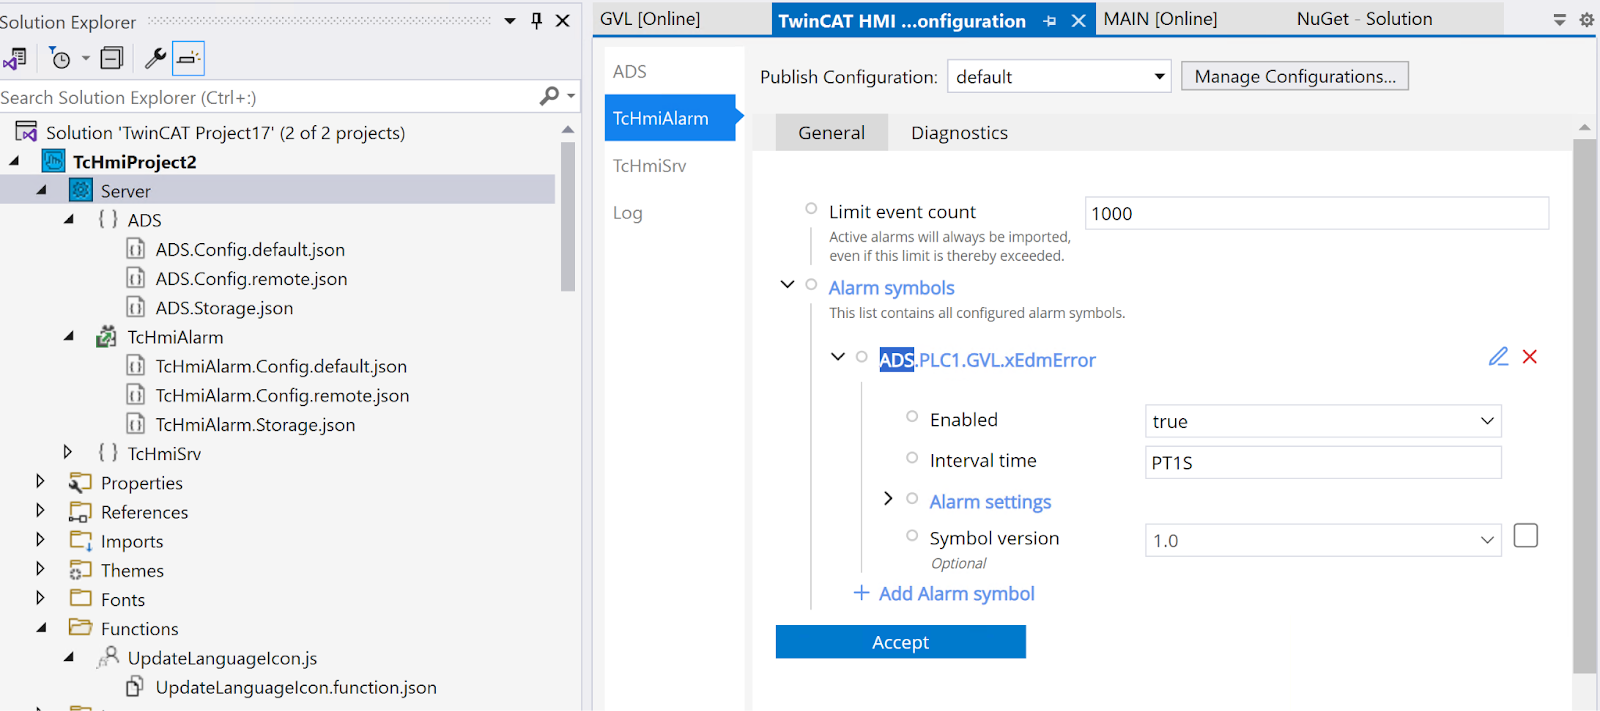
Open Alarm Settings.
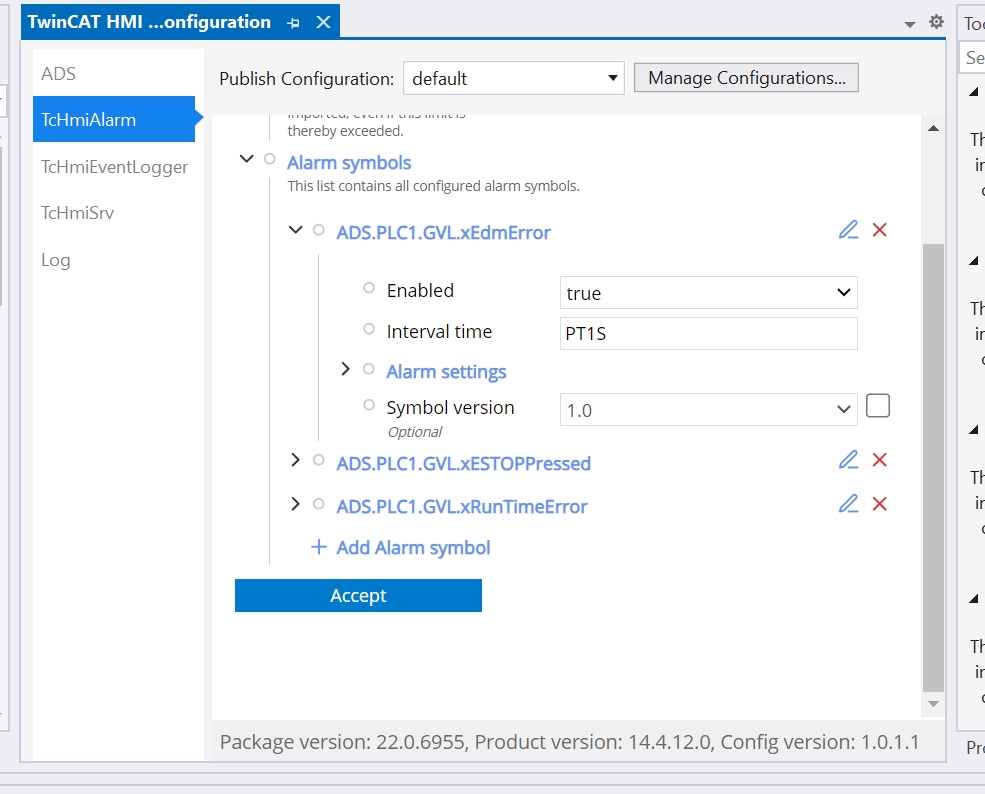
Detailed settings for each Alarm can be changed.
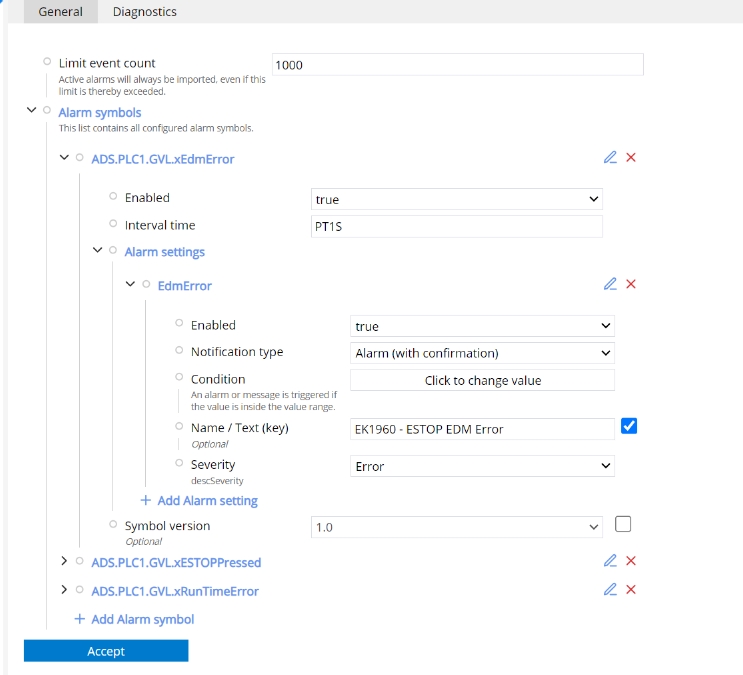
Alarm Name
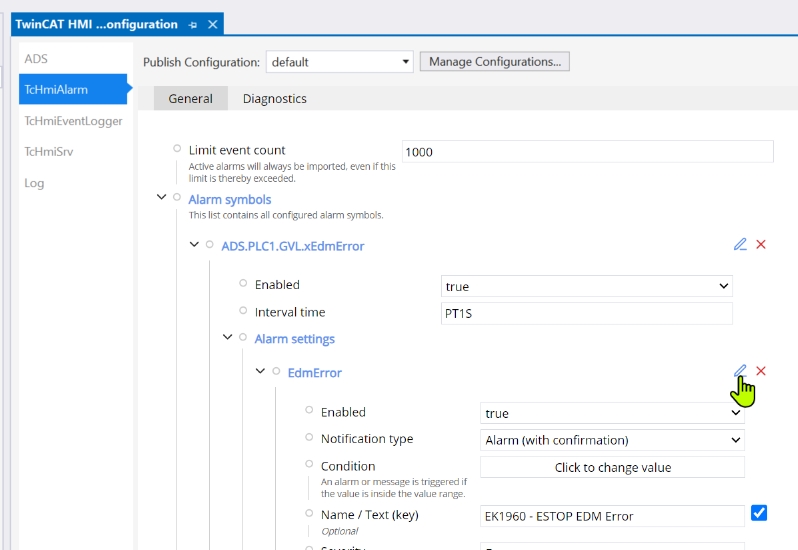
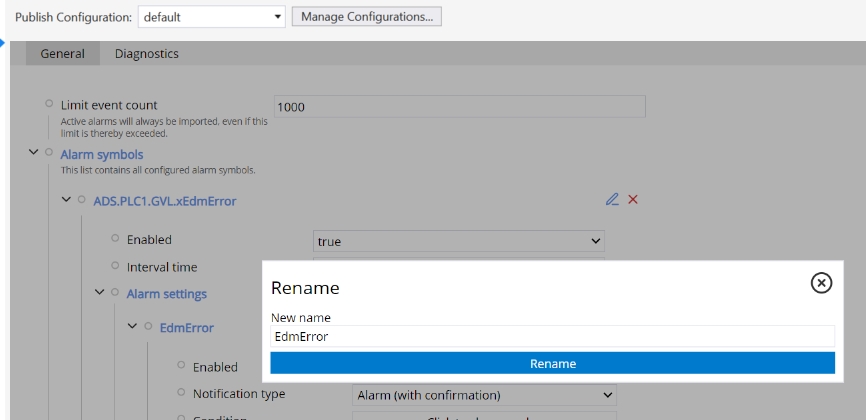
Click on the pencil icon below to change the alarm name.
Enabled
Enabled is TRUE or FALSE to enable or disable the alarm.

Notification Type
Notification Type can be set to change whether an alarm is mandatory for reset.
Name/Text
The display text of the corresponding alarm can be changed in Name/Text.
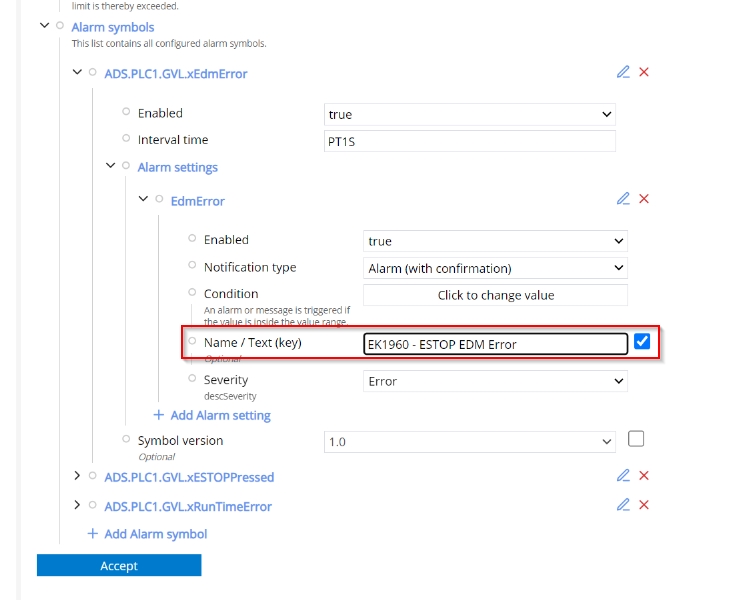
Condition
Condition can set Trigger conditions for alarms.
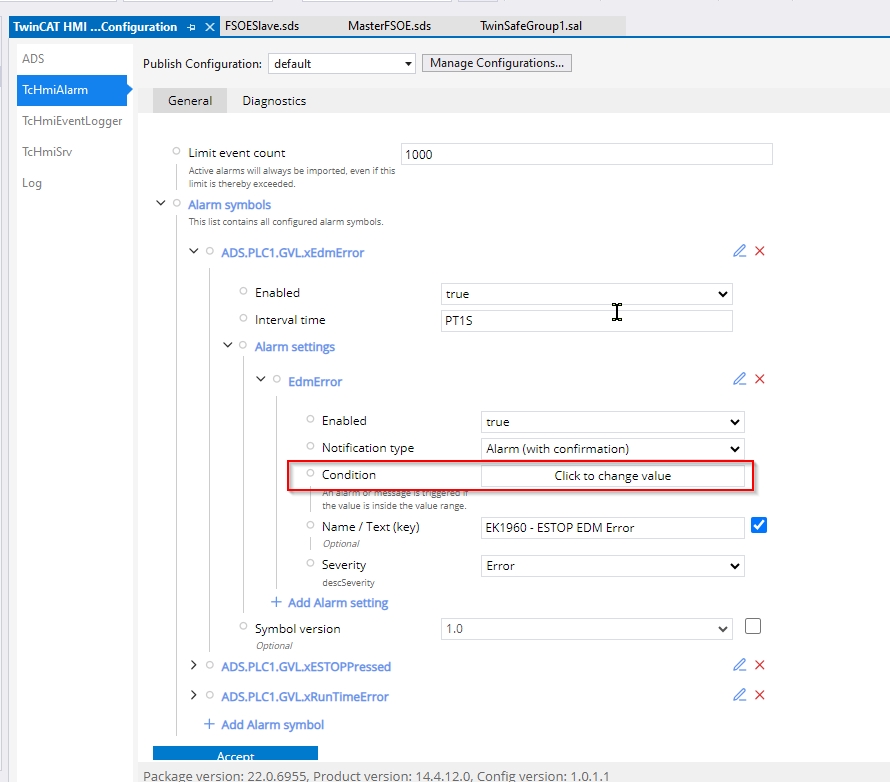
Trigger conditions for alarms are displayed here in JSON Format.
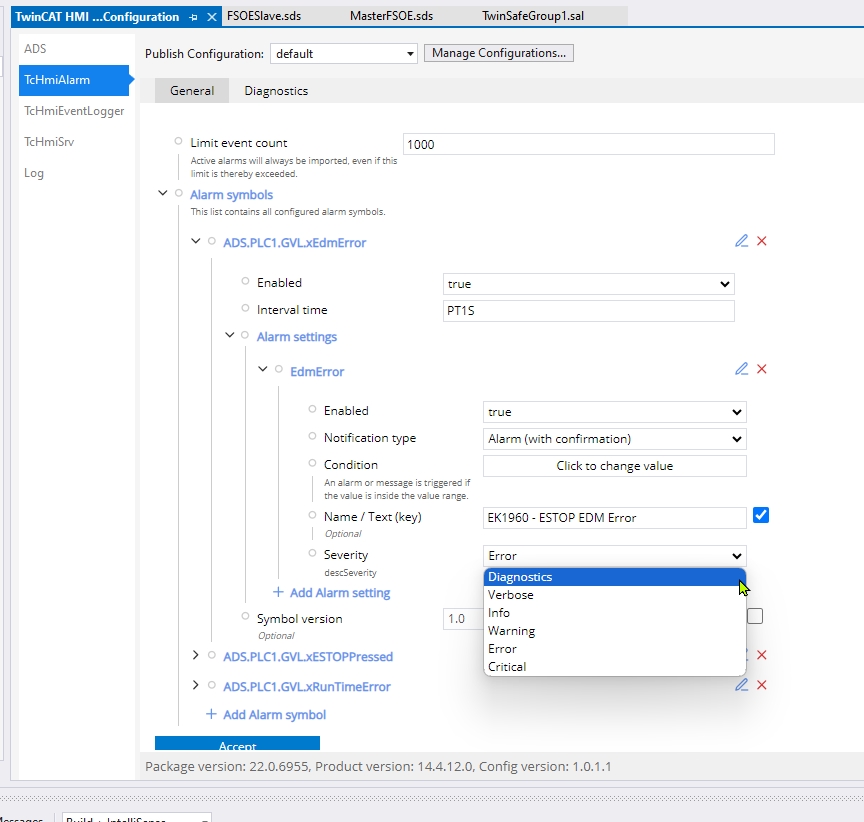
Severity
This item allows you to adjust the severity of the alarm.
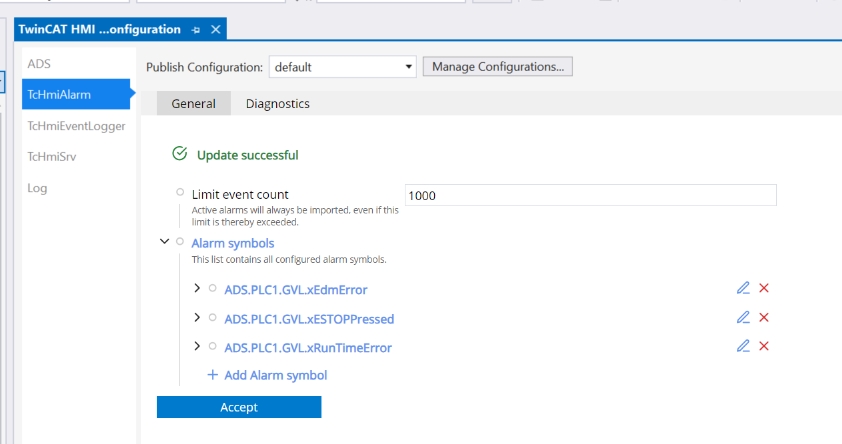
Result
Done!We have added three alarms in this article. Finally, click Accept to save the settings.

Done!
Event Logger
Next, let’s take a look at the Event Logger. This Plug-in does not require any special configuration.
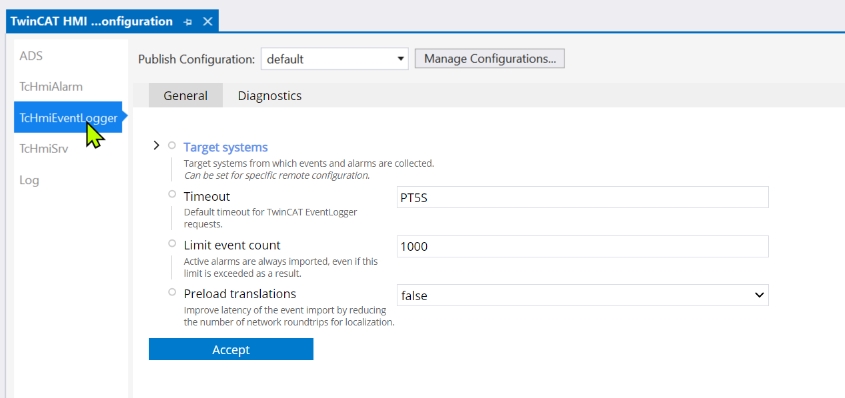
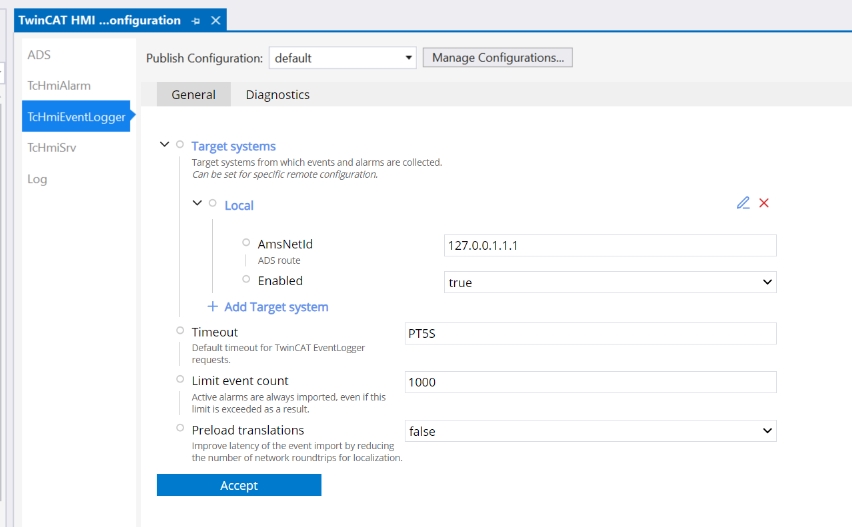
The General Tab allows you to see the connections for each TwinCAT Runtime you are currently collecting.
You can check the status of the Diagnostics TabEvent Logger.

Screen
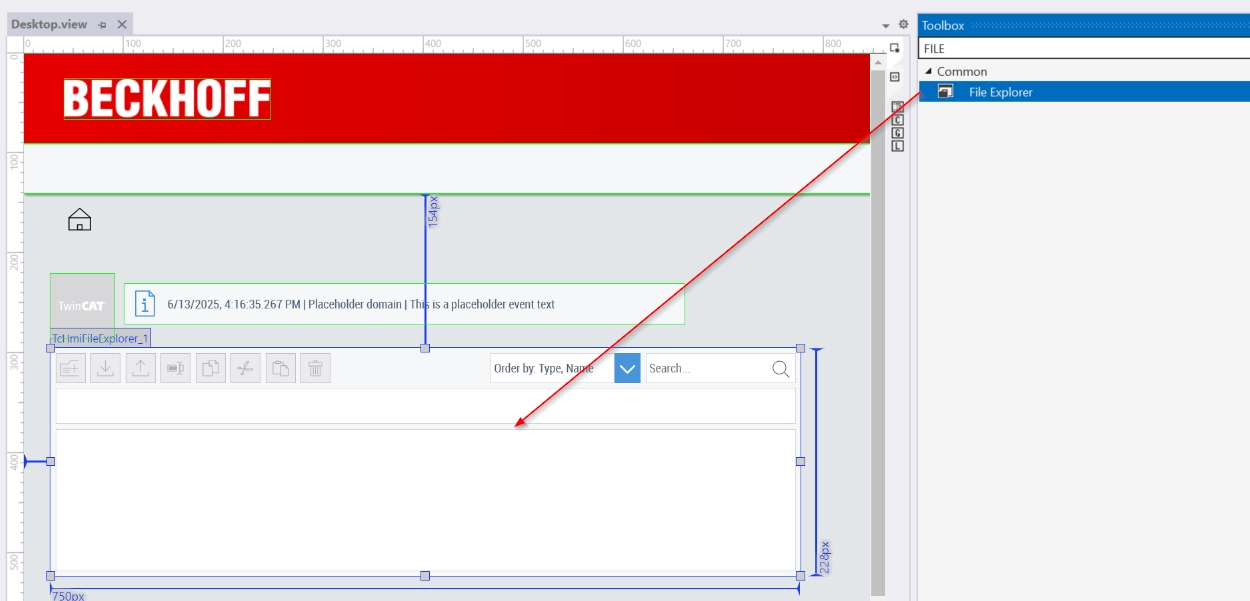
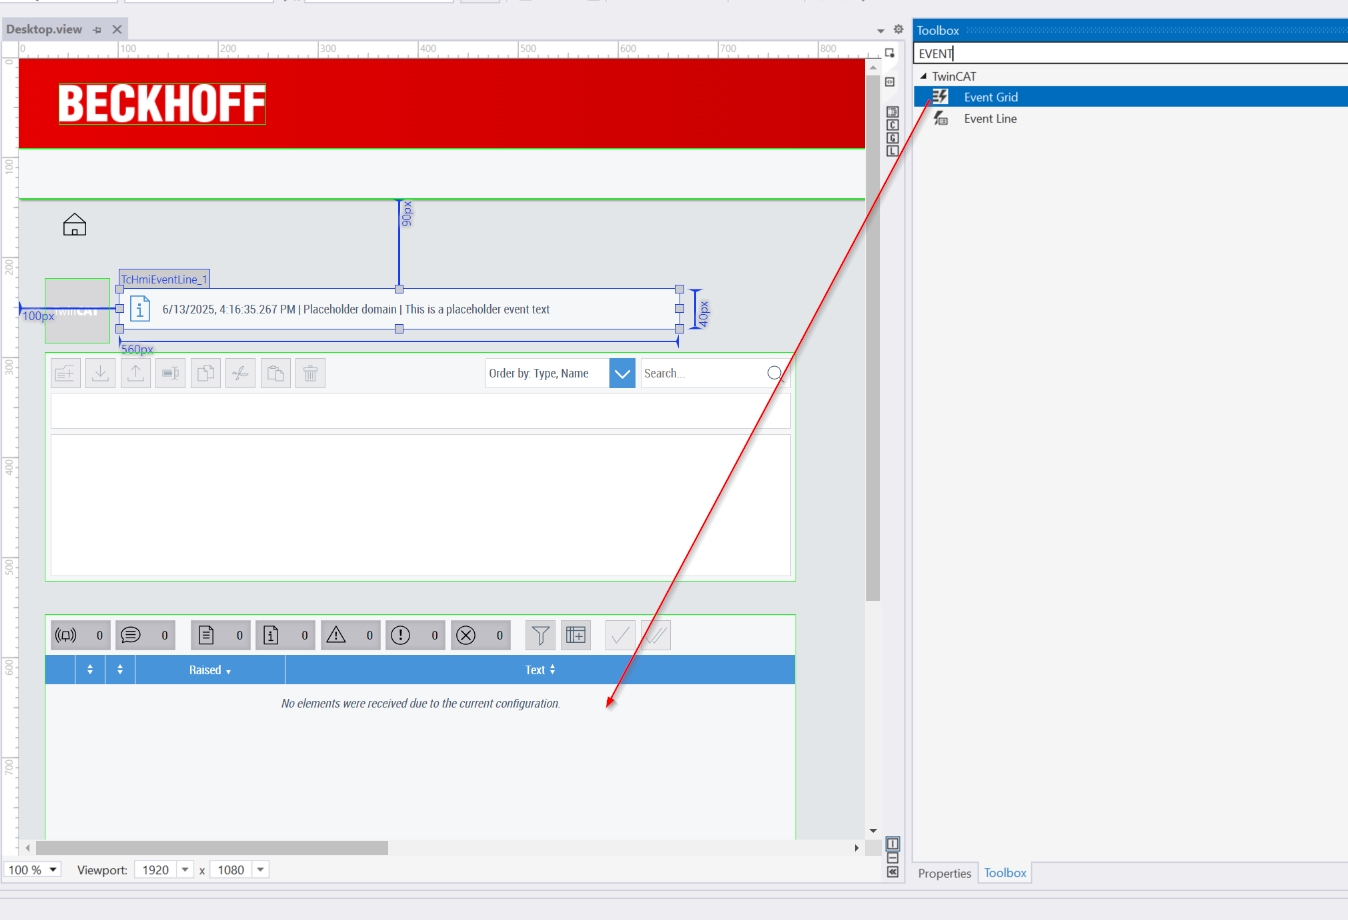
The last step is to build the screen.
Search for File from the Toolbox and add File Explorer. There is no need to configure that component.
Next, search for EVENT from the Toolbox and add an Event Grid (like an alarm table) and an Event Line (displaying the most recently occurred Event).
Result
Download the TE2000 project to HMI Server and check the results.
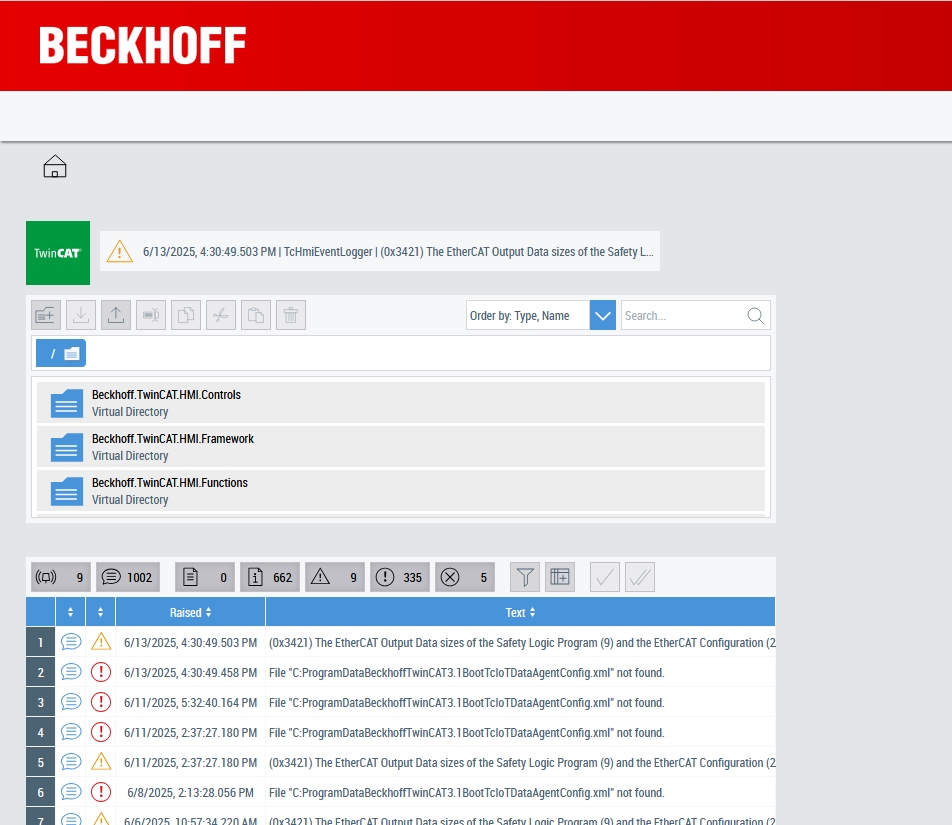
The File Explorer was able to access the File in Runtime.
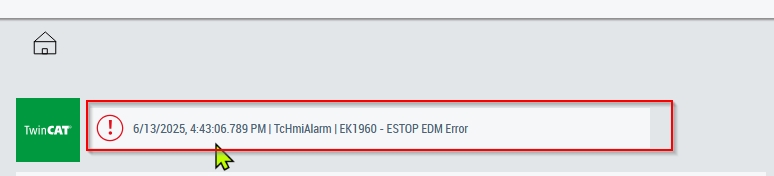
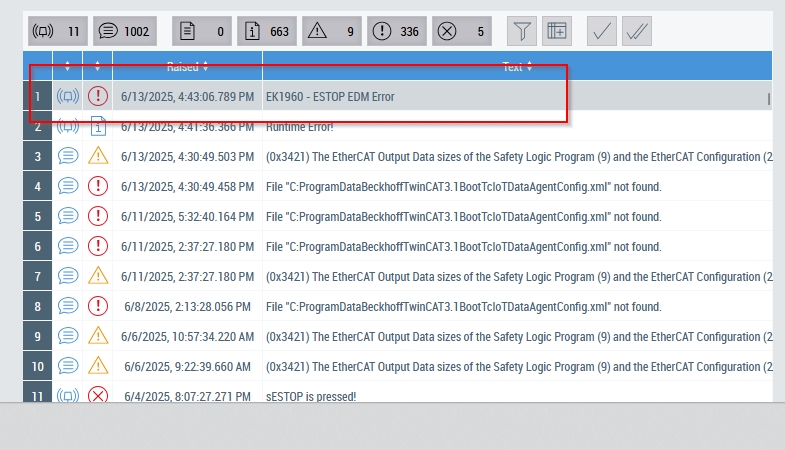
Next, let’s look at the Event Grid: when many Events occur, it is difficult to see which one is an alarm from the screen.
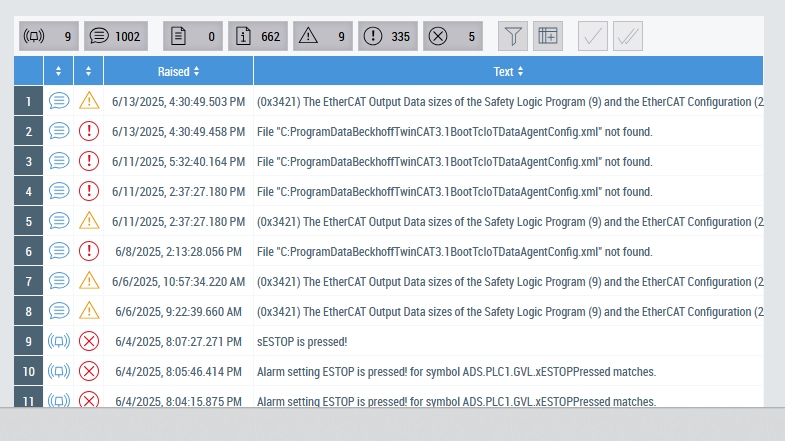
Use the Filter function in the red frame to Fitler the events that are not needed.
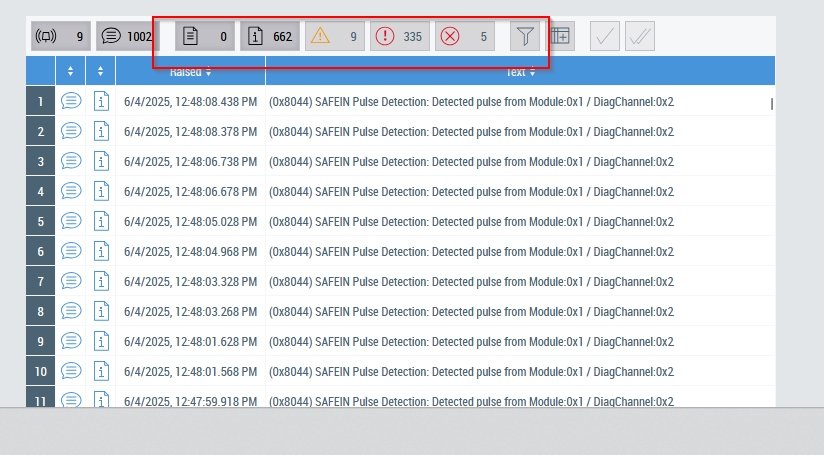
As shown below, only the alarms we just created are displayed.
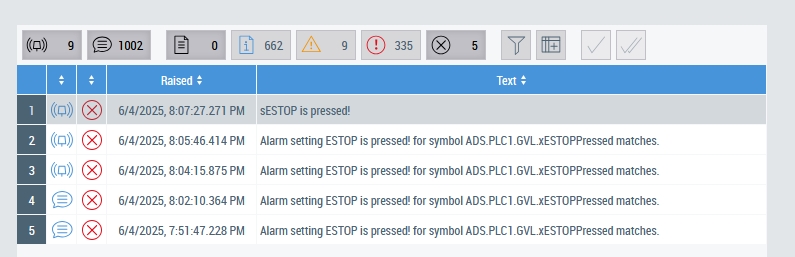
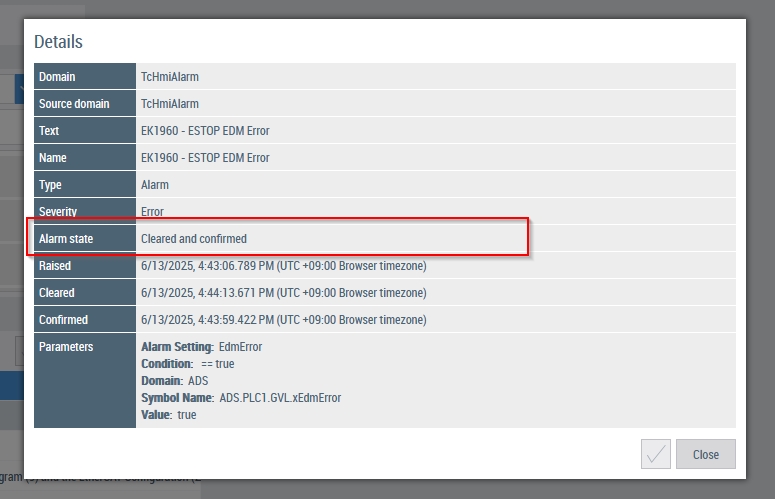
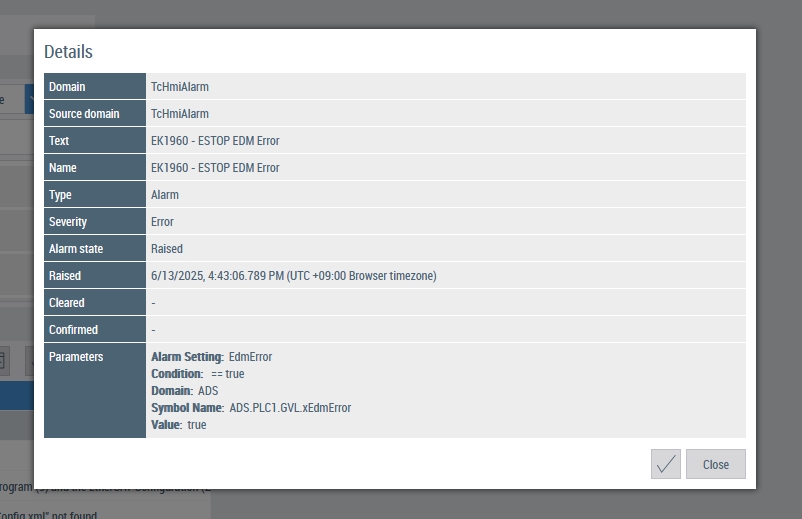
Click on the alarm to see the corresponding alarm information on the Details screen.
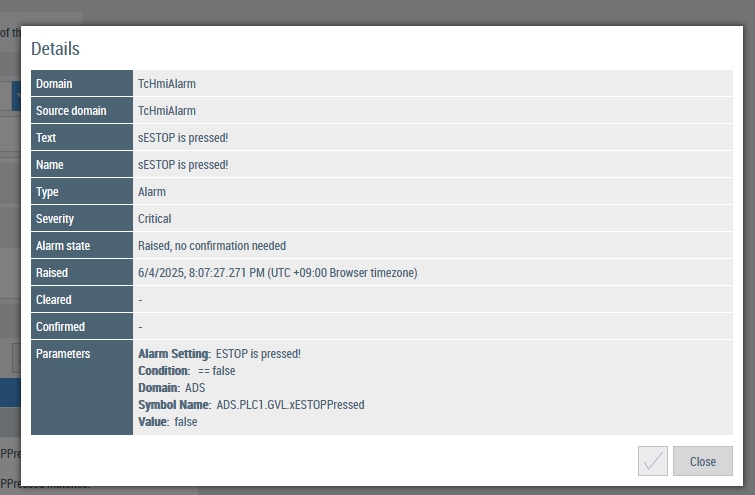
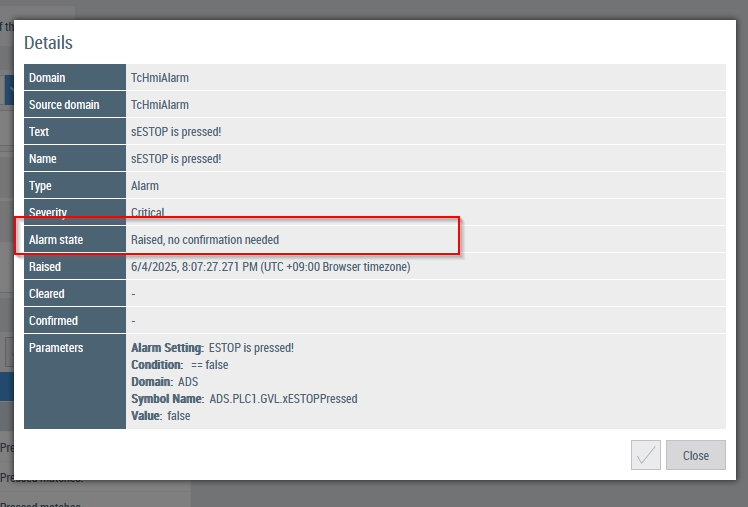
Alarm State says that Confirmation is not needed. That is because we just set it up.
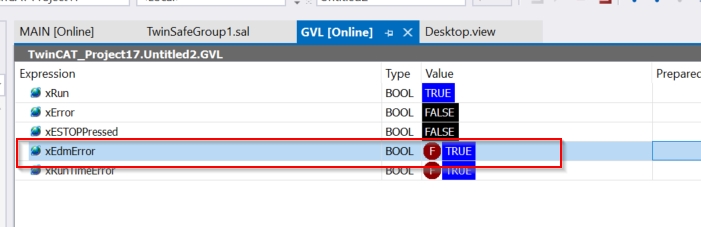
The last step is to Trigger the alarm required for reset.
Done!Alarms are now displayed on the Event Grid.
This is the screen where the alarm occurred but has not been confirmed.
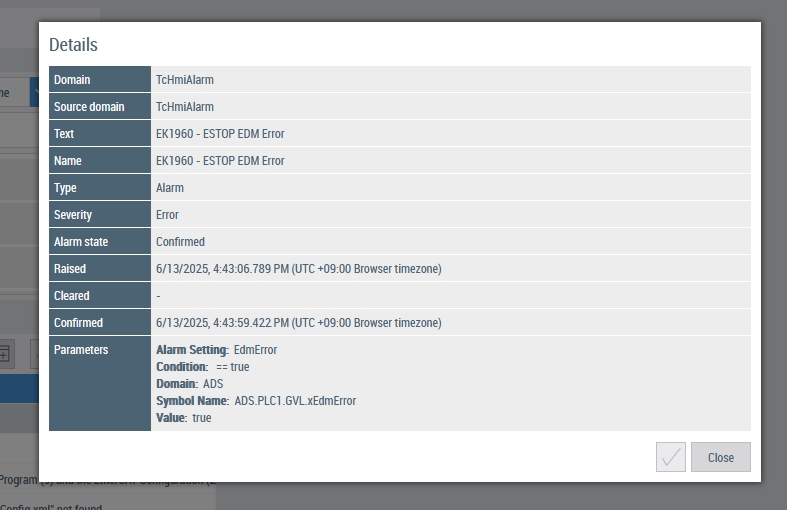
Click the CHECK button to confirm the alarm.

The Alarm State has changed to Confirmed.
Finally, when I transitioned the alarm device to TRUE->FALSE, the Alarm State changed to Cleared and confirmed.