EK9160 is a device that provides a solution for non-programming Iot Applications.EK9160 will convert E-Bus Signal to MQTT/OPCUA and we can configure the parameter from the Web-Browser, without any additional software.
Sorry that I do not have EtherCAT IO cards like EL1008, Publish the IO status to Broker can not be tested in this tutorial. But you can know what EK9160 is, how to configure it, Connect to the built-in OPCUA Server and MQTT Broker..etc.

Support Protocol
MQTT Client is supported , And a built-in OPC UA Server is installed inside the device.
General MQTT/AWS/Azure are supported.
Power Supply
DC24v is used for this device.

DIP Switch
There is a DIP Switch in front of the Devices and Let you set the Network configuration as a Static IP/DHCP Server/Reference from Beckhoff Device Manager.

Here are the features of DIP Switch.
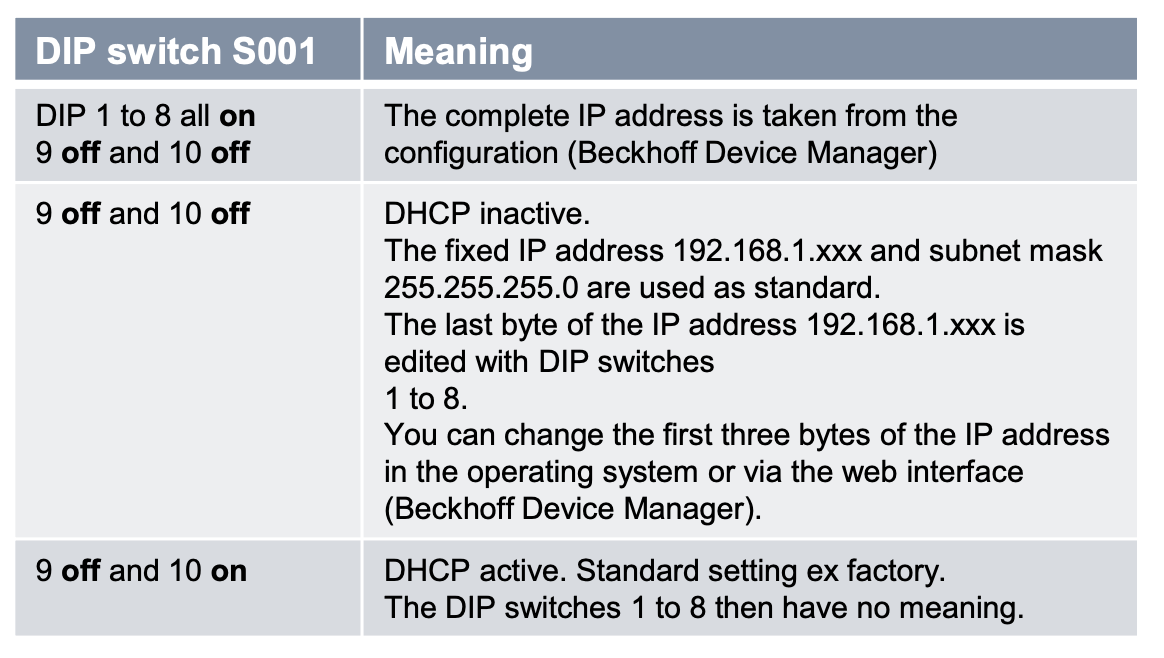
DIP Switch 1,2 is On , so 192.168.1.3 is set.

Configuration
Now we will configure the setting, please access the below link:
please change ip to match with your IP.
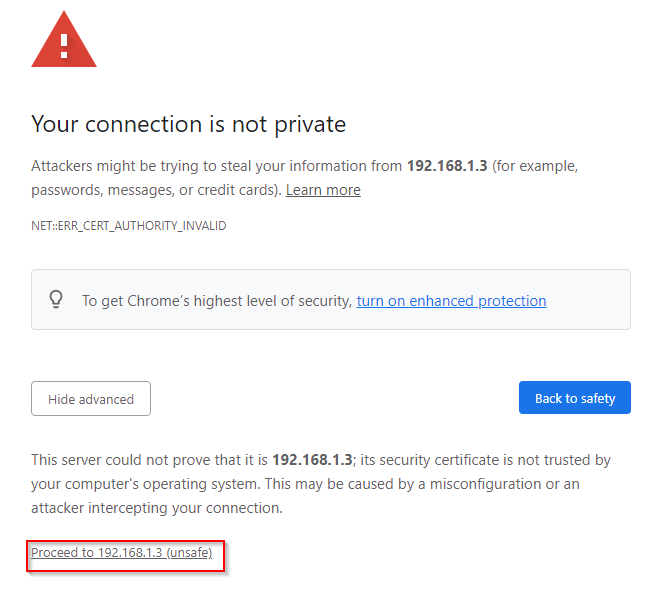
Click the Advanced Button.

Click the Proceed to your IP(Unsafe) and Access the Beckhoff Device Manager.
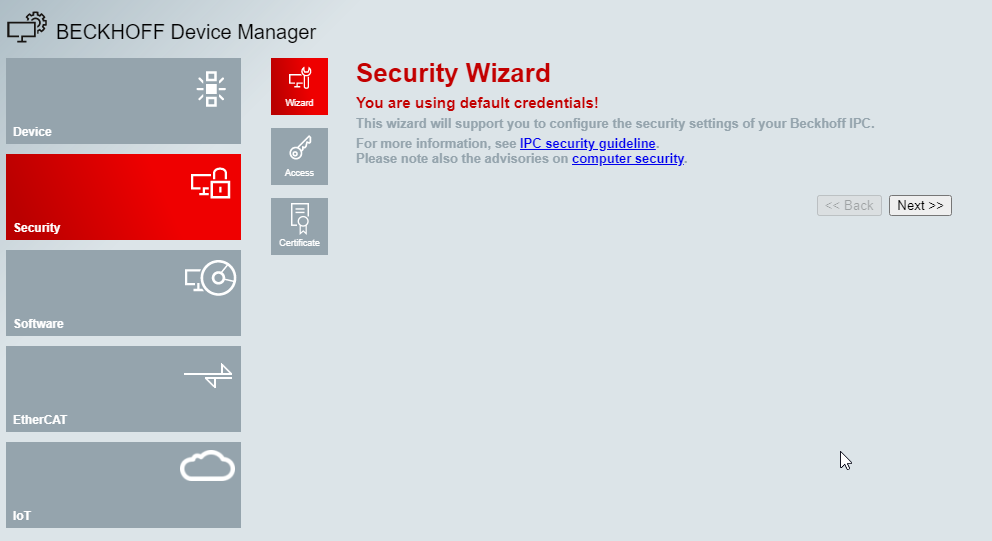
Please input the Username and Password and here is the default setting;
Username:Administrator
Password:1

The Browser is refreshed to the Beckhoff Device Manager.
Connection with OPC UA
As we wrote before, a built-in OPCUA Server is installed inside this device.Now we will use the UaExpert Software to access the Server.

Please follow this tutorial to get more information about the UaExpert and get the download link:
Start up the UaEpert.

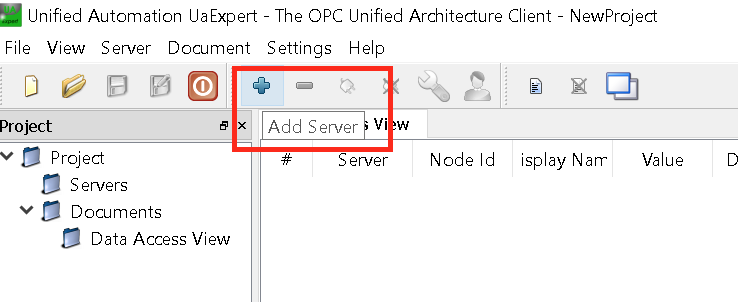
Press the + Button to add a Server.
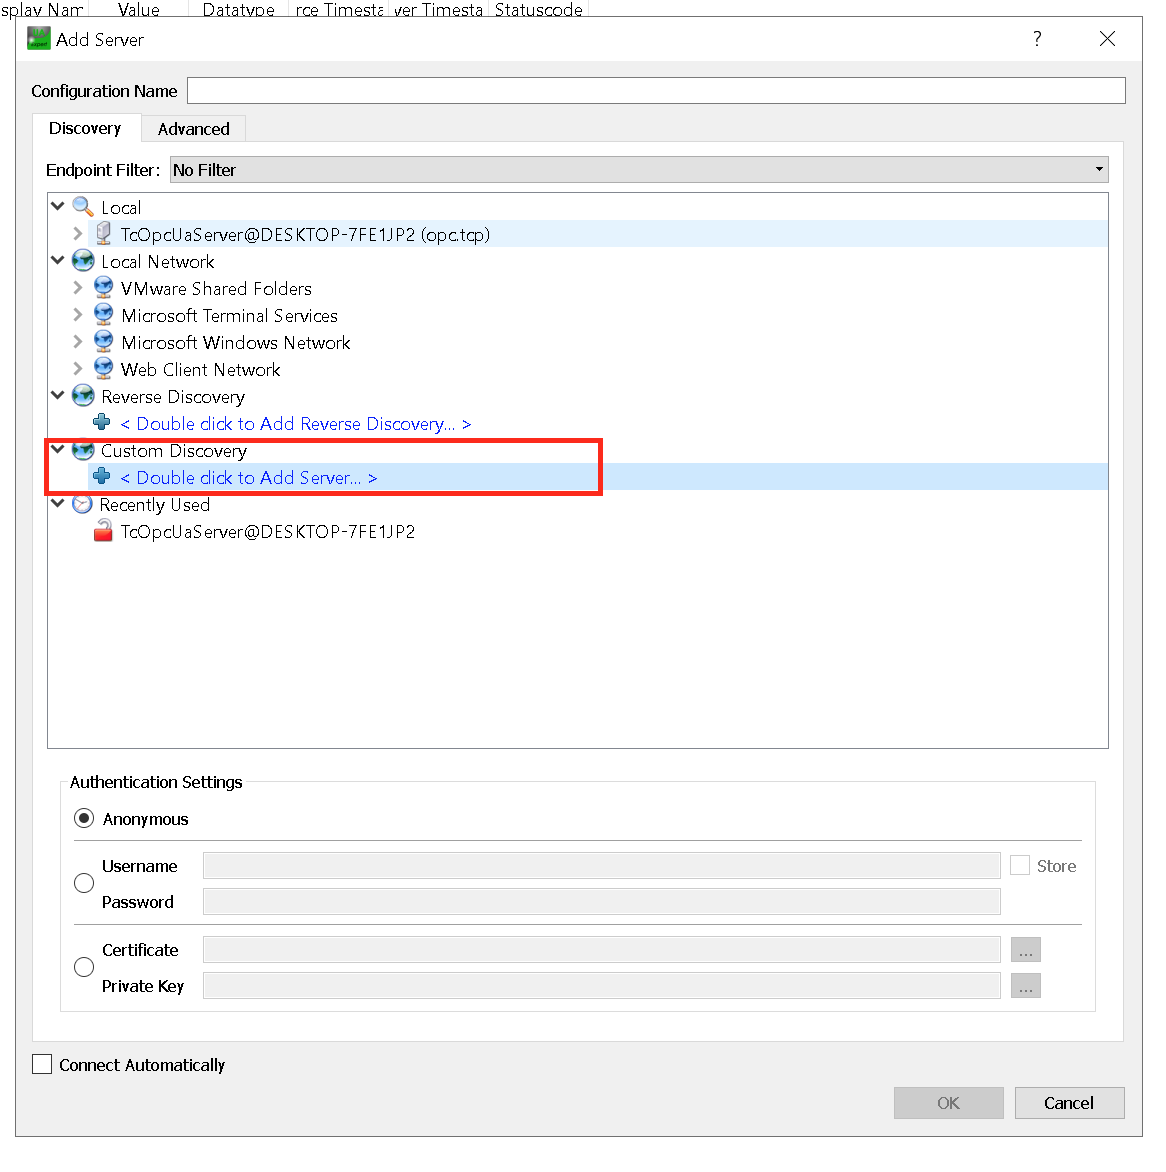
Select the Custom Discovery and press the + button.
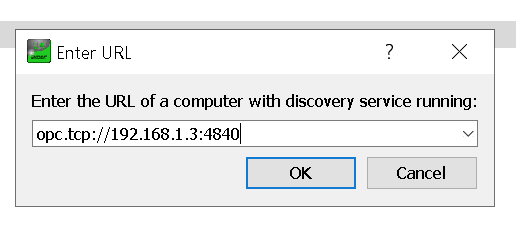
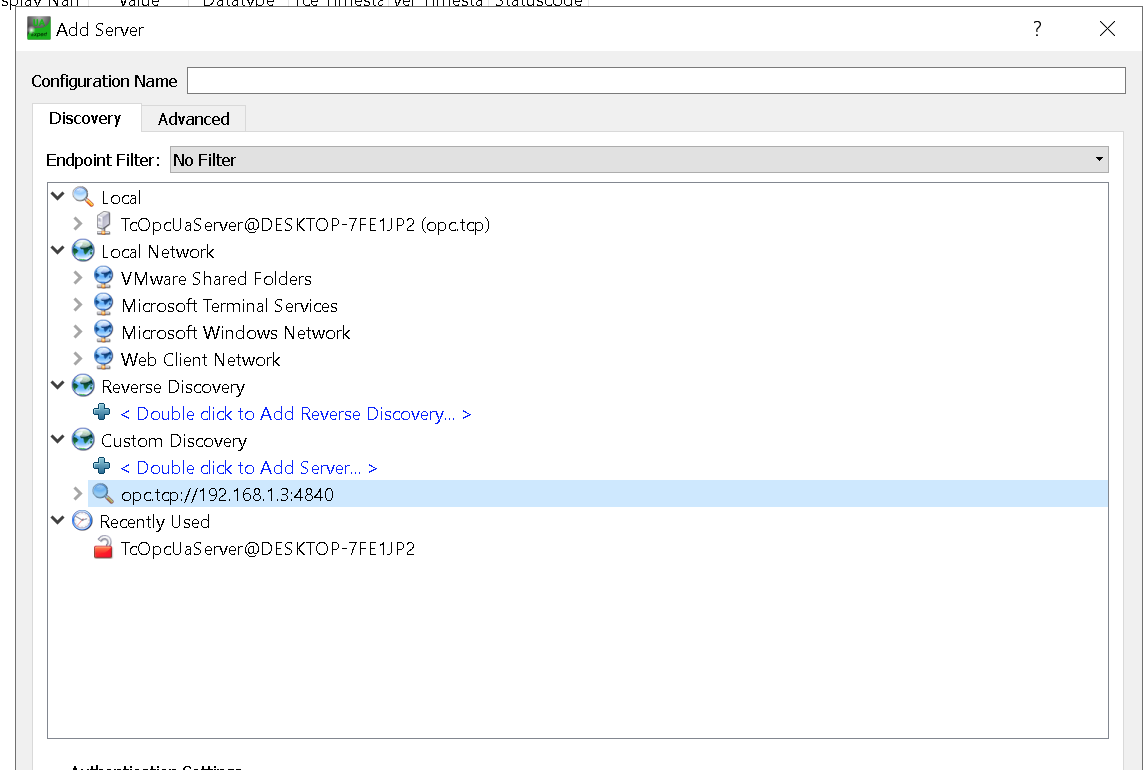
Enter the URL of OPC UA Server and replace it with your IP.
Double Click the Server that you inserted.
Yes.

2 Login Methods are shown.
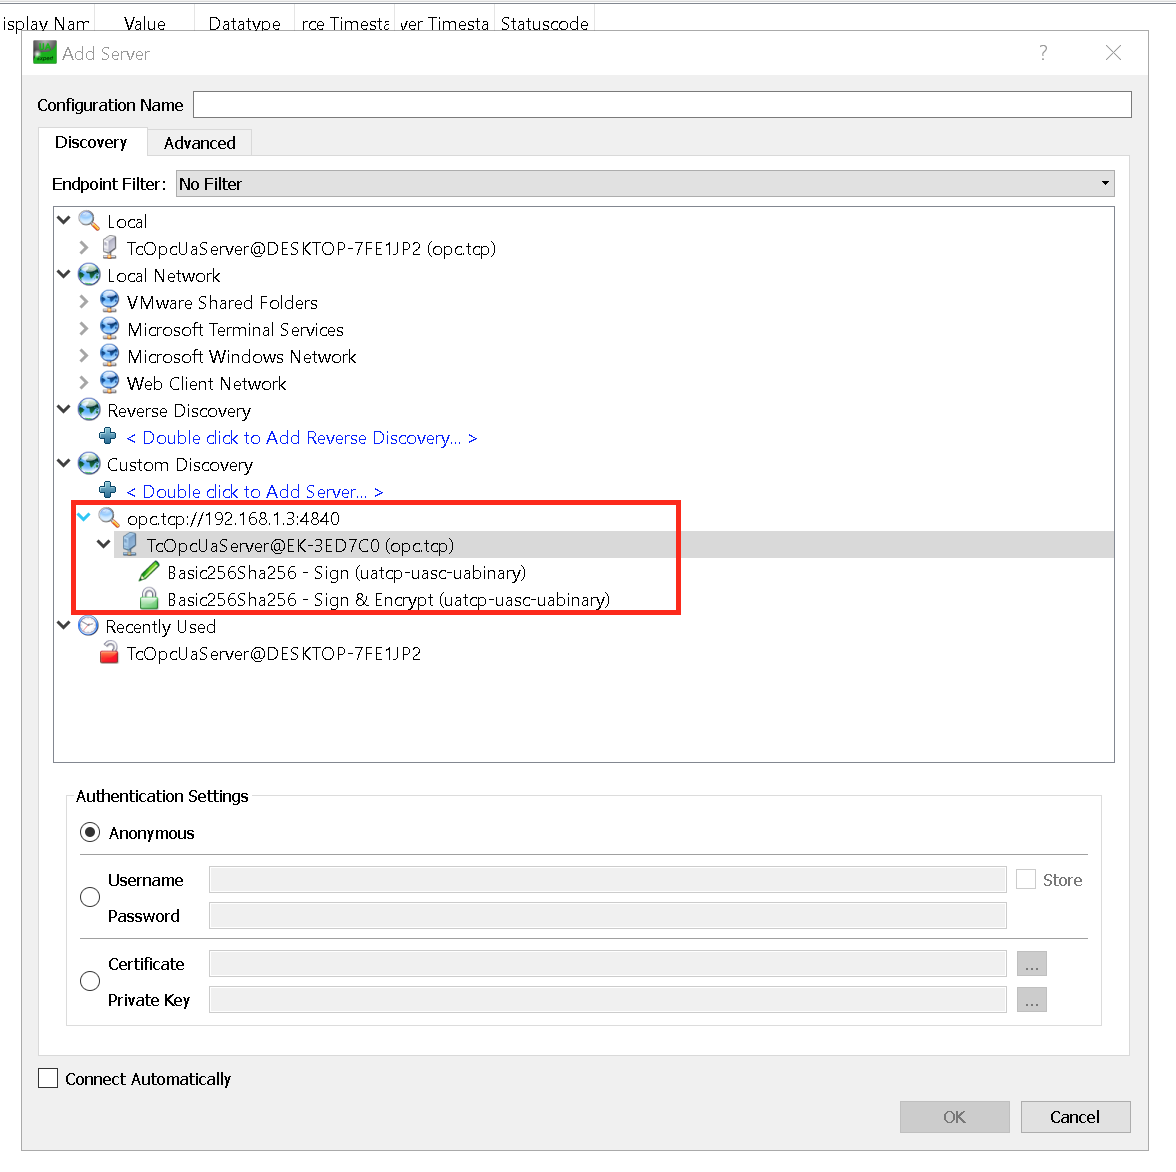
Click the Sign Method.

And A Certificate Error is shown by UaExpert.
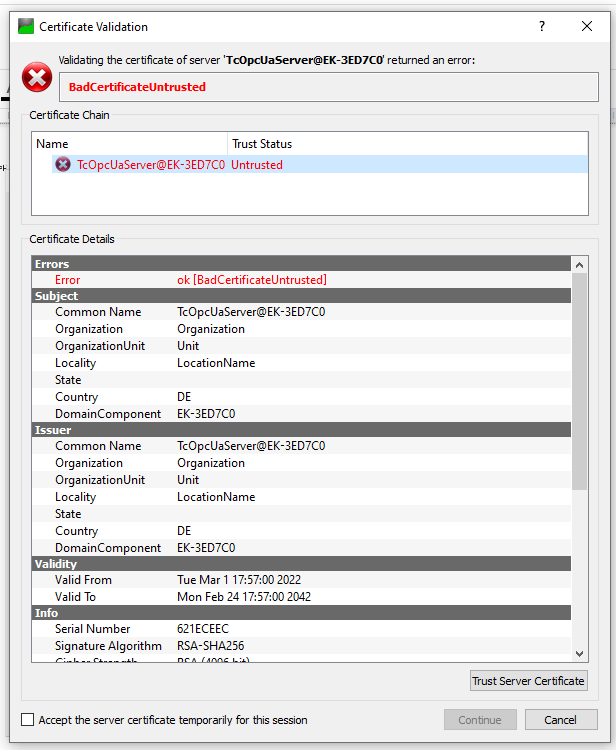
Trust Server certificate and Continue.

After the connection is established, Let’s drop some Nodes from Server status and VendorServerinfo.
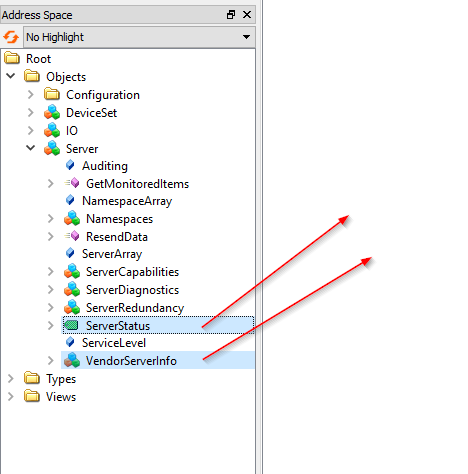
The time is continually updated, and you can view the AmsNetID also.

Connection with MQTT
Finally we will configure the device to connect to MQTT Broker.
Setup a Broker in Linux
a Broker is configured in the Linux OS and please follow these links.
Configuration
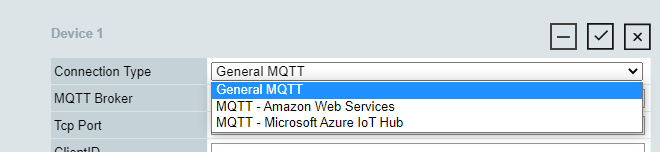
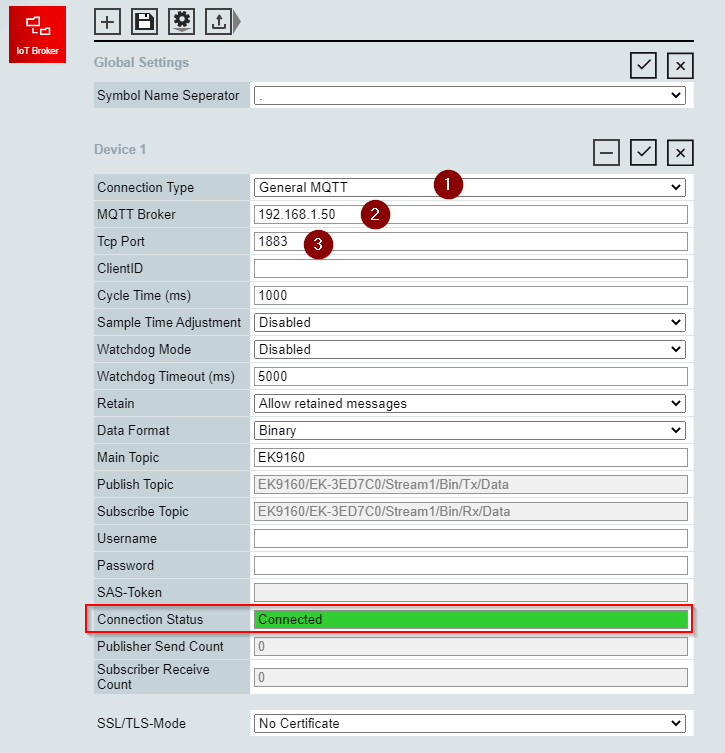
Go to the Configuration and click the Iot tab.

Connection Type:The type of MQTT Broker
MQTT Broker:The IP of MQTT Broker
Tcp Port:The Port of MQTT Broker
Connection Status:The current status of connection between MQTT Broker.
Subscribe
We can use the following command to subscribe to the topic from EK9160 Device.
| mosquitto_sub -h 127.0.0.1 -d -t EK9160/# |
Result
The message is received from EK9160, EK-3ED7C0 is the serial number of your device.
| Client (null) sending CONNECT Client (null) received CONNACK (0) Client (null) sending SUBSCRIBE (Mid: 1, Topic: EK9160/#, QoS: 0, Options: 0x00) Client (null) received SUBACK Subscribed (mid: 1): 0 Client (null) received PUBLISH (d0, q0, r1, m0, ‘EK9160/EK-3ED7C0/Stream1/Desc’, … (17 bytes)) {“Online”:false} |