This series of articles will be devoted to various Codesys articles using TURCK’s TBEN-L5-PLC-11. The first tutorial begins with a brief introduction to the TBEN-L5-PLC-11 and its start-up.
Let’s enjoy FA.

TBEN-L5-PLC-11?
The TBEN-L5-PLC-11 is a Codesys-based PLC designed in a fully enclosed housing with IP65/IP67/IP69K protection from Turck. The Ethernet port serves as an interface for programming, configuration, and Ethernet/fieldbus communication.
- The Ethernet port can be used as an interface for programming, configuration, and Ethernet/field bus communication.
- Two serial interfaces COM 0 and COM 1 are available for connecting serial RS232 or RS485 devices.
- CANopen or SAE J1939 device via two CAN interfaces CANout and CANin TBEN-L… -PLC-… CANout and CANin via two CAN interfaces.
- To connect digital sensors and actuators, the device incorporates eight digital I/O channels that can be used as inputs or outputs without configuration.
- The USB device port mini USB B socket can be used as a service interface for device DTM and as a programming interface for CODESYS.
- The USB host port USB2.0-A socket is used to connect a USB memory stick for program backup, program recovery, firmware update, and data synchronization.
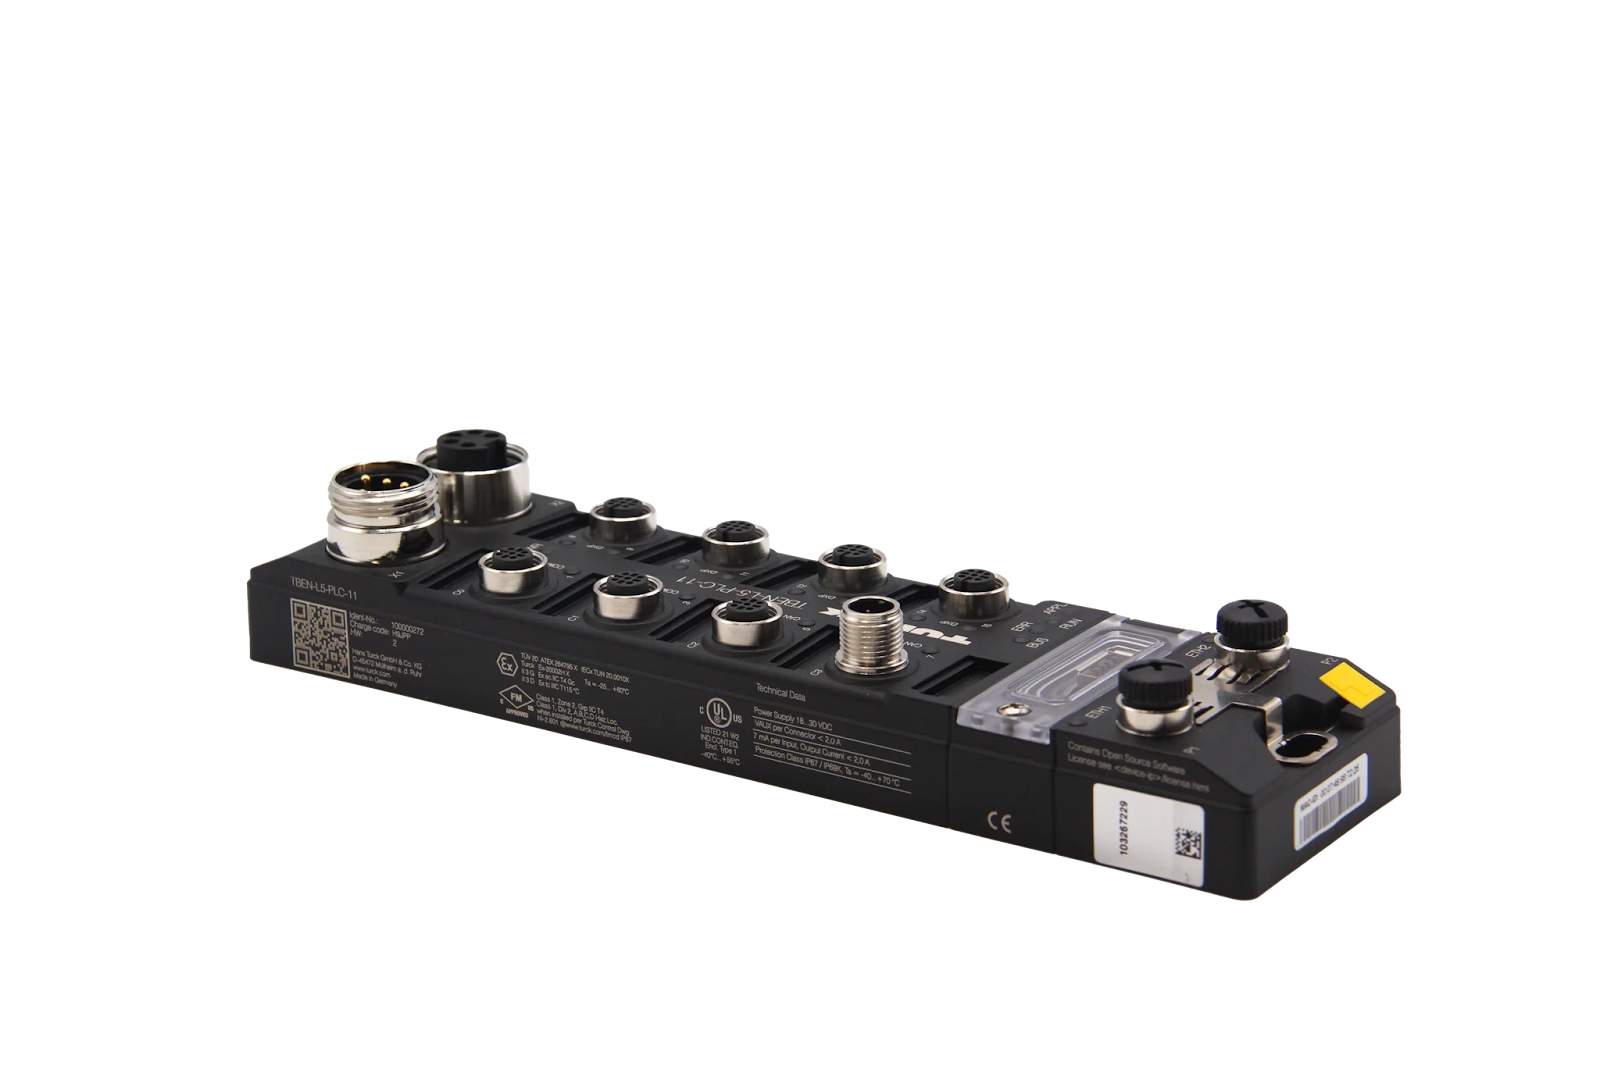
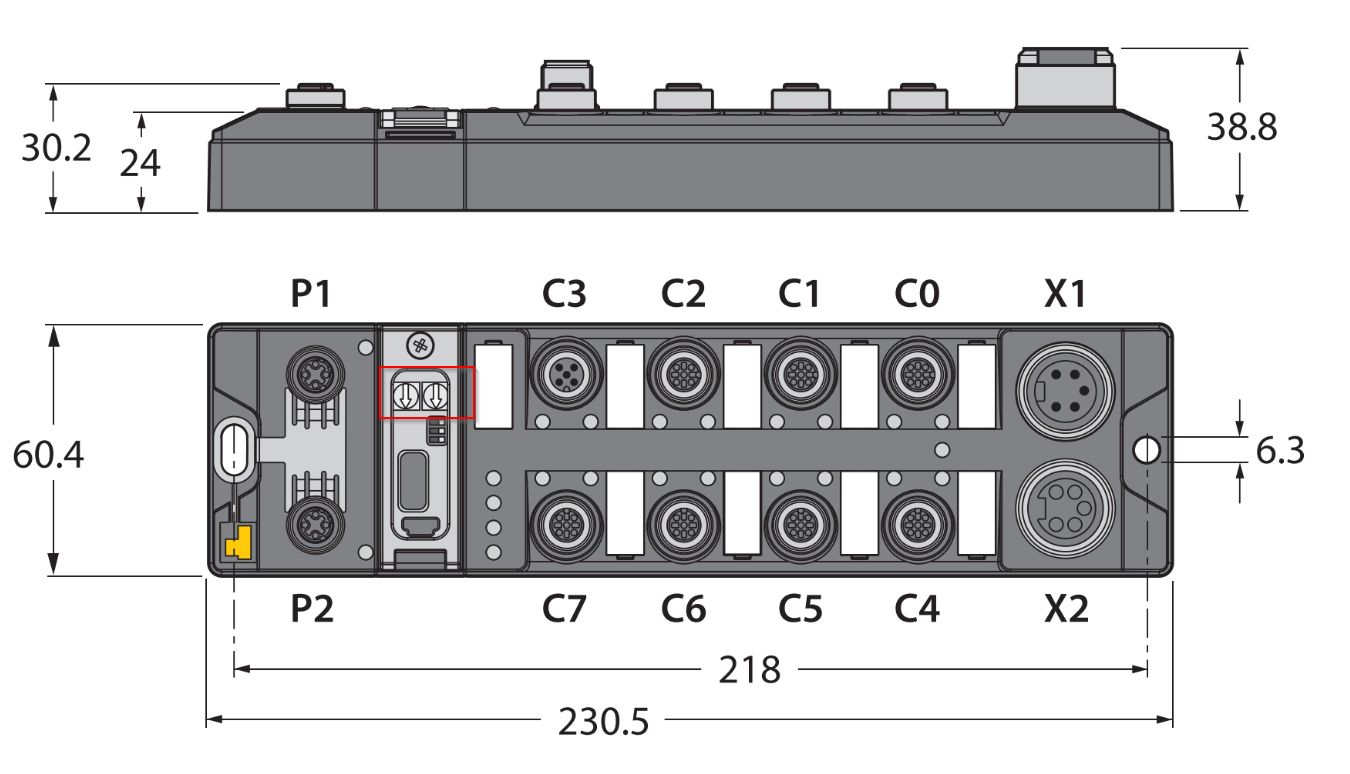
Layout
This is the Layout for TBEN-L5-PLC-11.
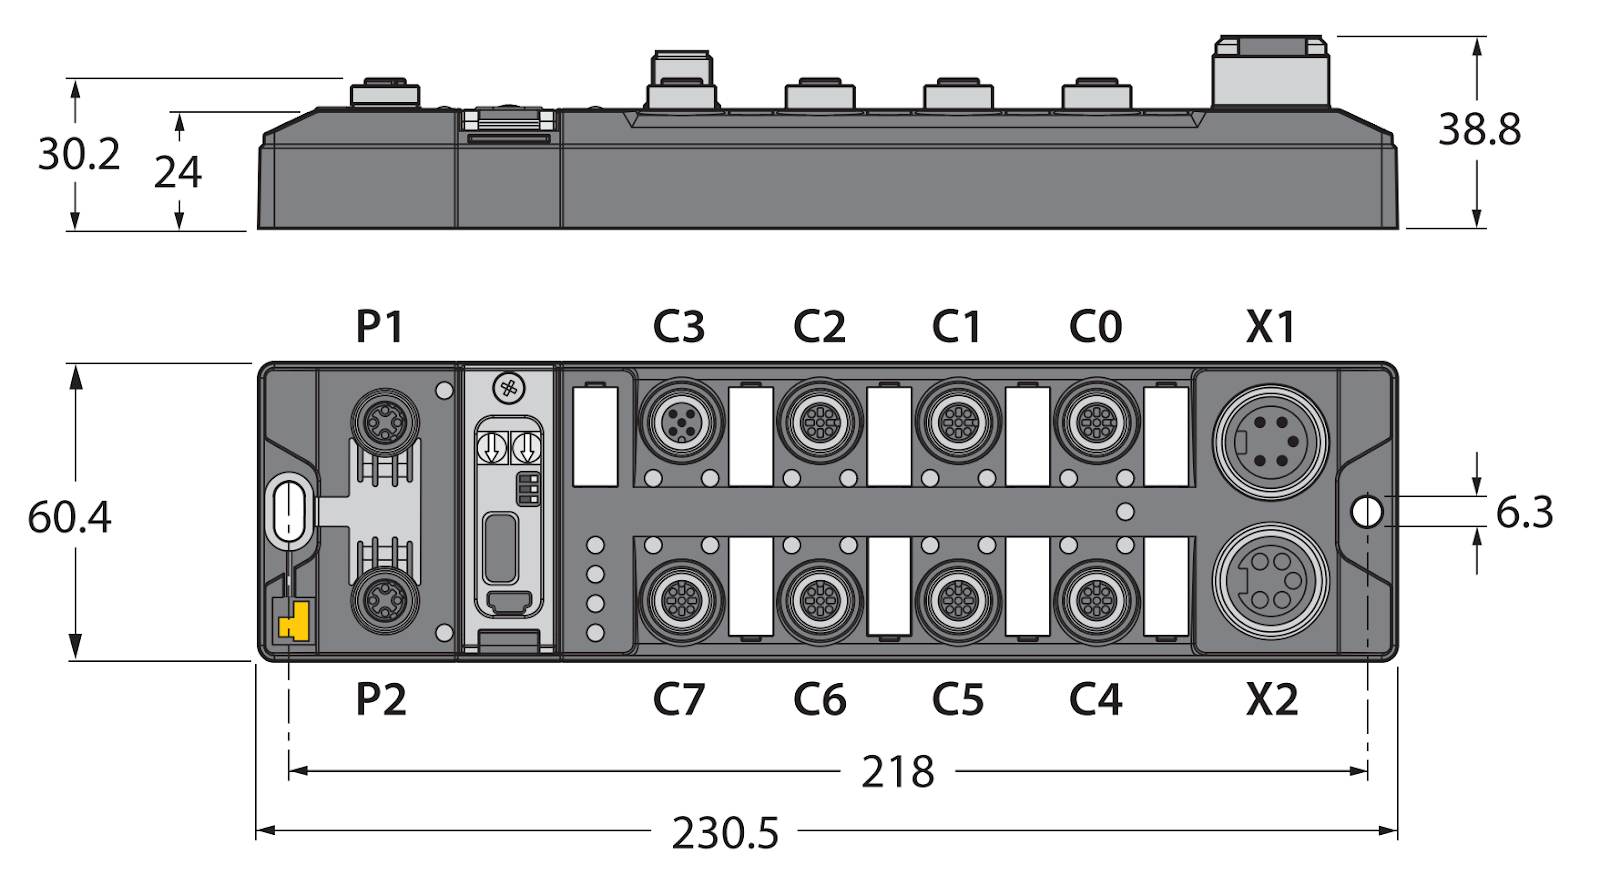
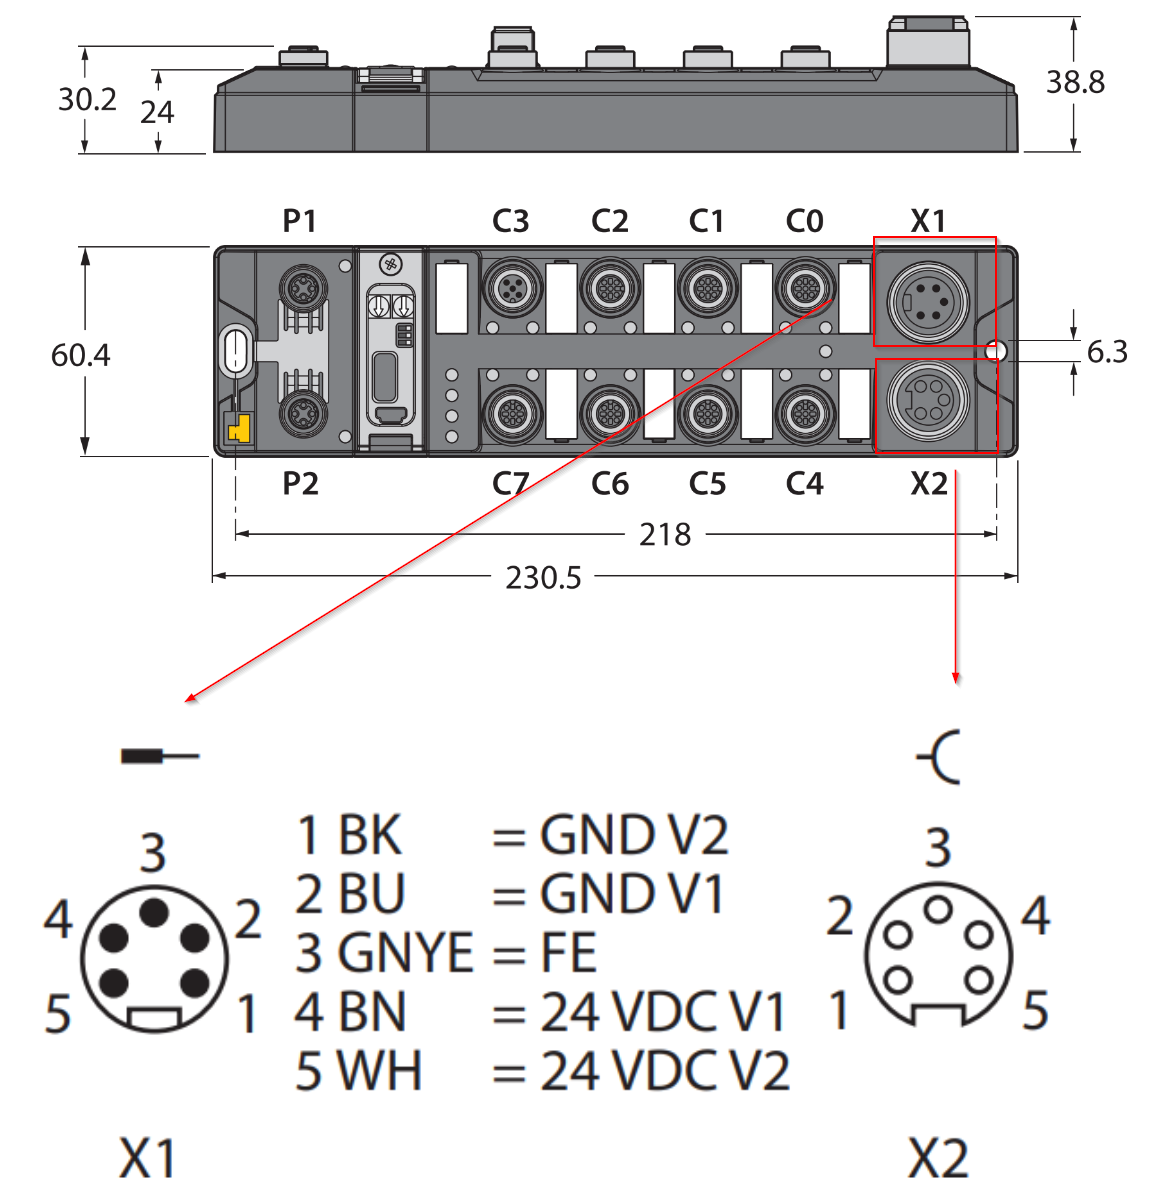
X1/X2
X1 and X2 of TBEN-L5-PLC-11 are power ports.
- X1: Used as power feed.
- X2: Continue to supply power to the next node
The TBEN-L5-PLC-11 is also divided into V1 and V2.
- V1 System voltage: Supply 1
- V2 Load voltage: Power supply 2
System voltage (V1) and load voltage (V2) are input and monitored separately.
In case of allowable undervoltage, the connector turns off according to the supply concept of the module; in case of V2 undervoltage, the LED PWR turns from green to red; in case of V1 undervoltage, the LED PWR turns off.
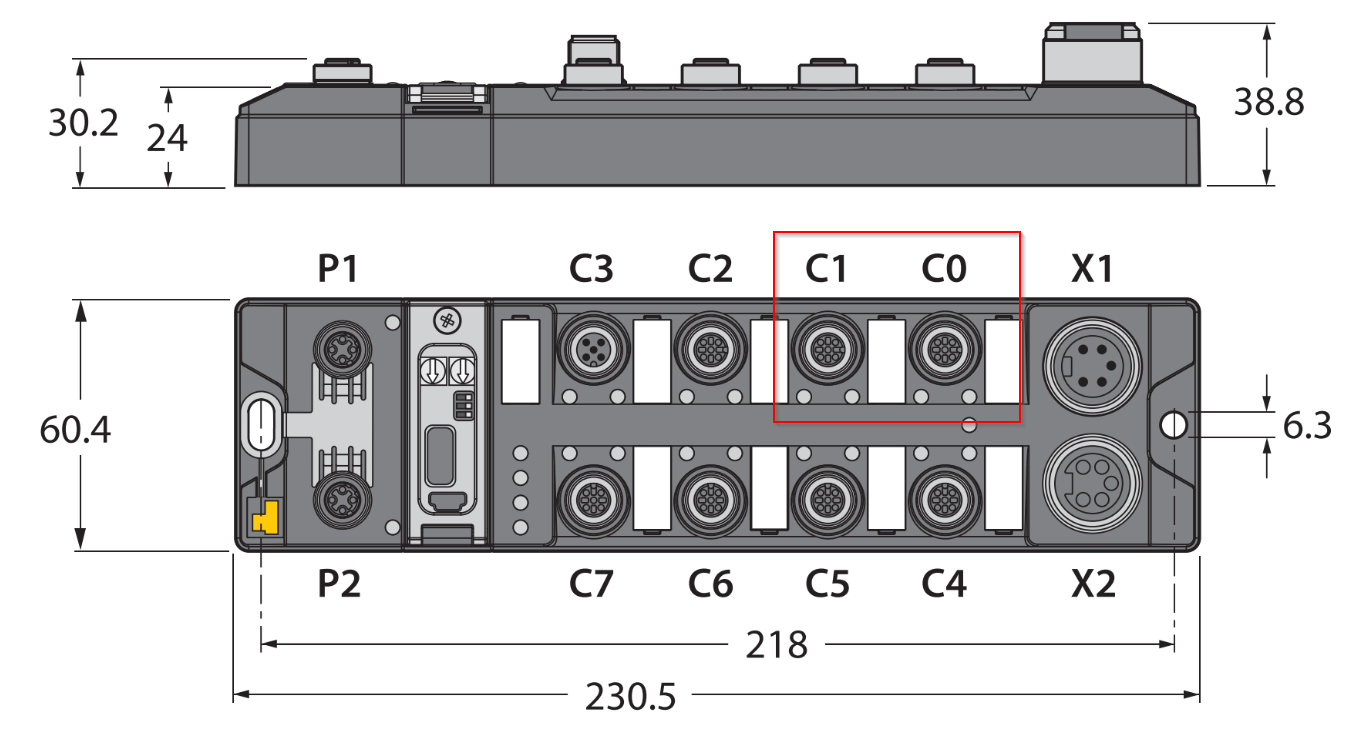
C0/C1
C0️ and C1 of TBEN-L5-PLC-11 are provided as COM0️ and COM12 Serial Port and this interface can be used to connect serial devices.
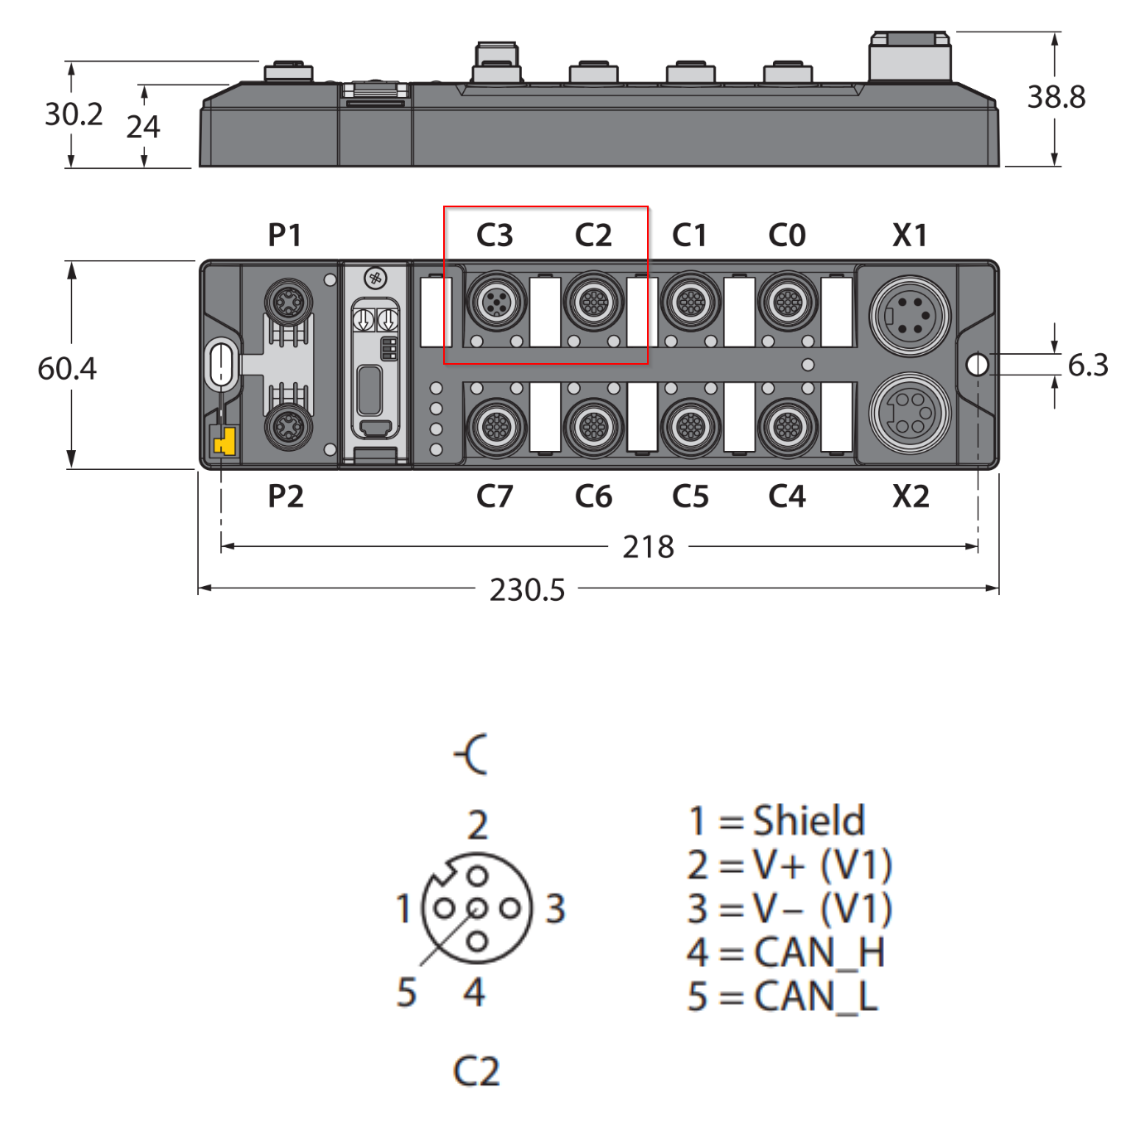
C2/C3
C2 and C3 of TBEN-L5-PLC-11 are provided t as CAN Port and this interface can be used to connect CAN devices.
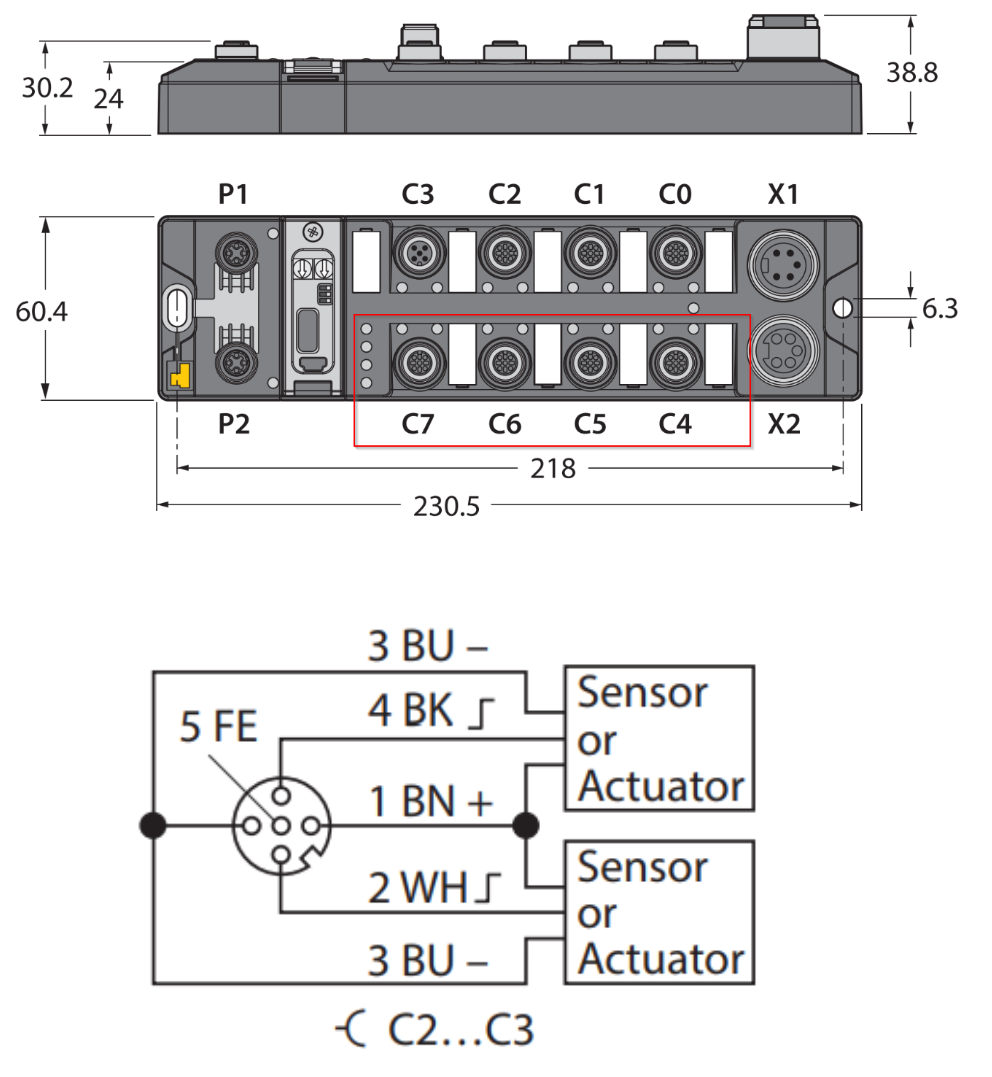
C4/C5/C6/C7
C4/C5/C6/C7 of TBEN-L5-PLC-11 are provided t as DIO Port and this interface can be used to connect Sensor or Actuator.
USB
This USB Port can be used as a Service Port and has functions such as connection and commissioing from Codesys.
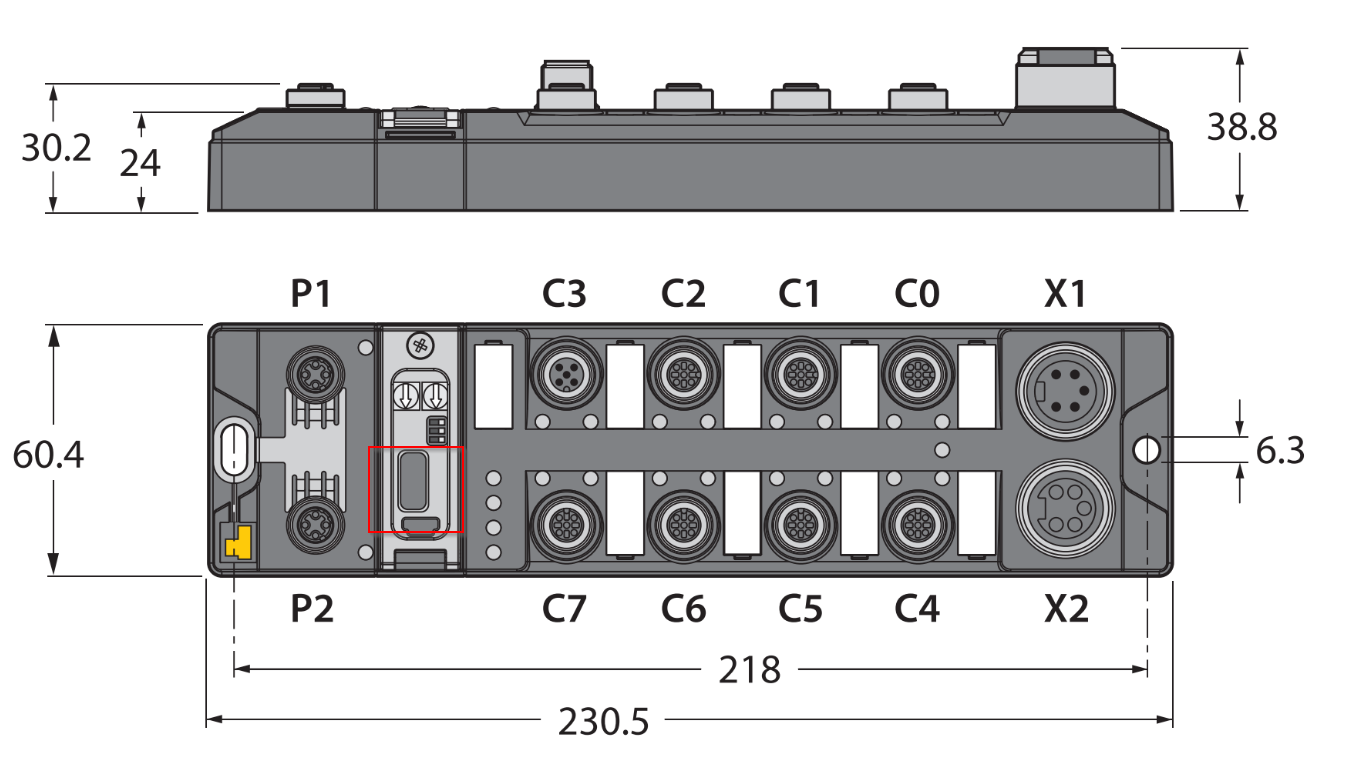
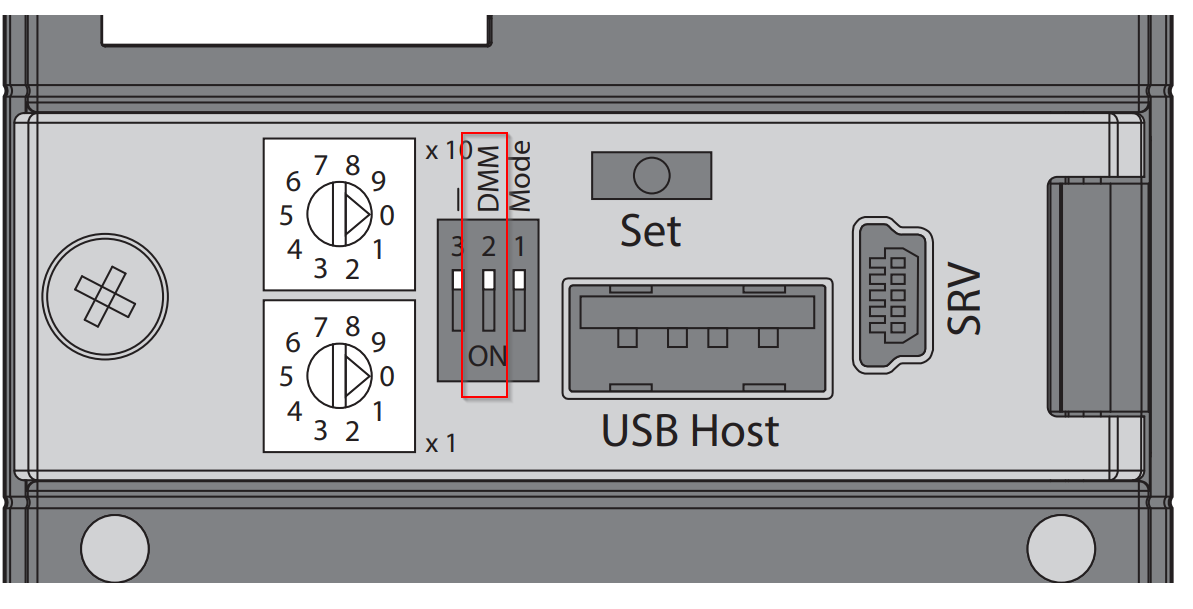
DIP Switch
The functions of the two Ethernet ports on the TBEN-L5-PLC-11 vary depending on the settings of the DIP switches on the main unit.

DMM Mode
The second DIP switch allows you to change the operating mode of the two Ethernet ports on the TBEN-L5-PLC-11 main unit.
DIP Switch 2=0
The Ethernet Port is in switch mode, and the two Ethernet ports are treated as an autocross switch with one IP address and one MAC address; the IP address varies depending on the rotary switch next to it.
DIP Switch 2=1
The Ethernet Port is in Dual MAC mode, and the two Ethernet ports are treated as Ethernet ports with separate IP and MAC addresses; the IP address of Port 1 is changed by the rotary switch next to it, while Port 2 can be changed from a Web Port 2 can be changed from a Web Server or DHCP server.
Rotary Switch
The IP setting method changes depending on the combination of the Rotary switch and DIP switch 1 “Mode”.
DIP Switch 1=0,Rotary Switch=1…99
The last byte of the IP address, the network configuration is stored in non-volatile memory, and addresses from 1 to 99 can be selected.
DIP Switch 1=0,Rotary Switch=0
IP addresses are fixed as follows
IP address: 192.168.1.100
Subnet mask: 255.255.255.0
Gateway: 192.168.1.1
DIP Switch 1=1,Rotary Switch=40
Port1 is in DHCP mode.
DIP Switch 1=1,Rotary Switch=50
The module will be in PGM mode and IP addresses will be assigned manually via the Turck Service Tool, FDT/DTM, or a web server.
Default IP address: 192.168.1.254
DIP Switch 1=1,Rotary Switch=60
モジュールはPGM-DHCPモードになり、ゲートウェイは、固定 IP アドレスが割り当てられるまで DHCP リクエストを送信します。もしDHCP Clientは、DTM またはウェブ・サーバー経由でゲートウェイに IP アドレスが割り当てられると、自動的に機能を非アクティブにします。
DIP Switch 1=1,Rotary Switch=90
The module enters F_Reset mode, returns all device settings to their default values
to default values and deletes all data in the device’s internal flash.
Implemenation
Now let’s actually start up Turck’s TBEN-L5-PLC-11 PLC.
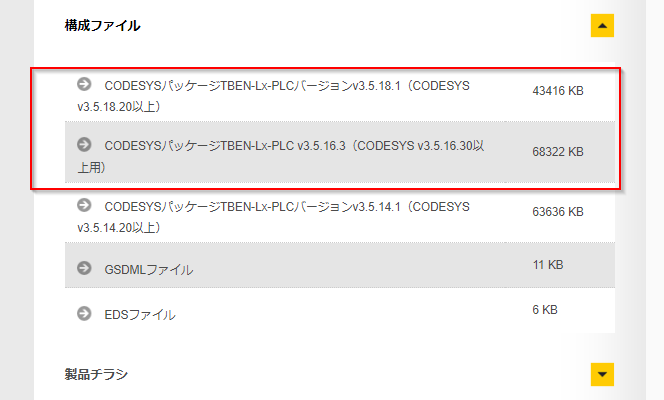
Download Packages
Download the Codesys Support Packages for TurckTBEN-L5-PLC-11 from the link below.
https://www.turck.jp/ja/product/100000272
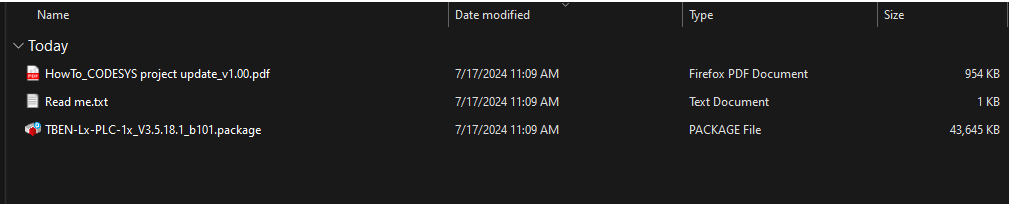
Install Packages
Unzip the Packages you just downloaded and launch XXXX.package.
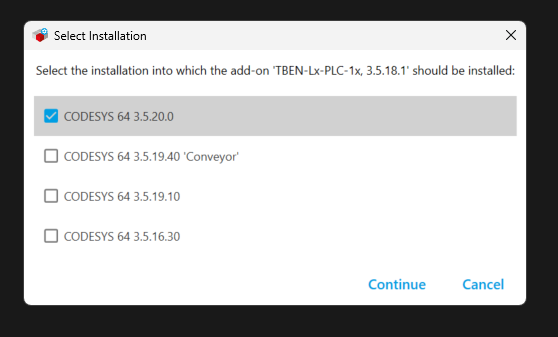
Select the Codesys version in which you want to install Turck’s TBEN-L5-PLC-11 Packages and proceed with Continue.
Agree to the license, etc., and click Continue to proceed.

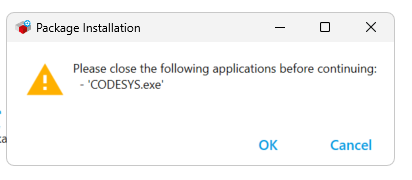
If Codesys is running, close the Codesys software and run it again with OK.
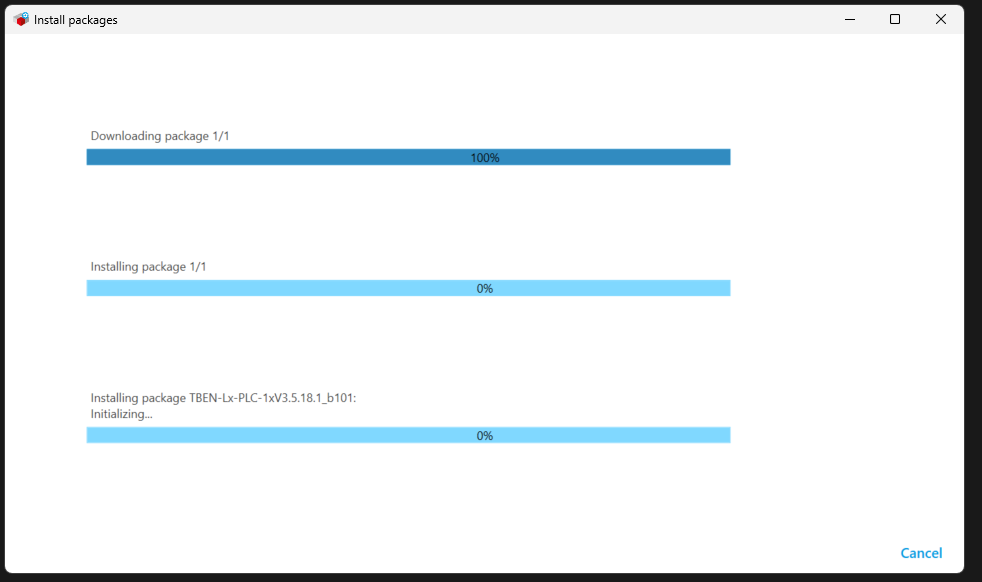
Just a second..
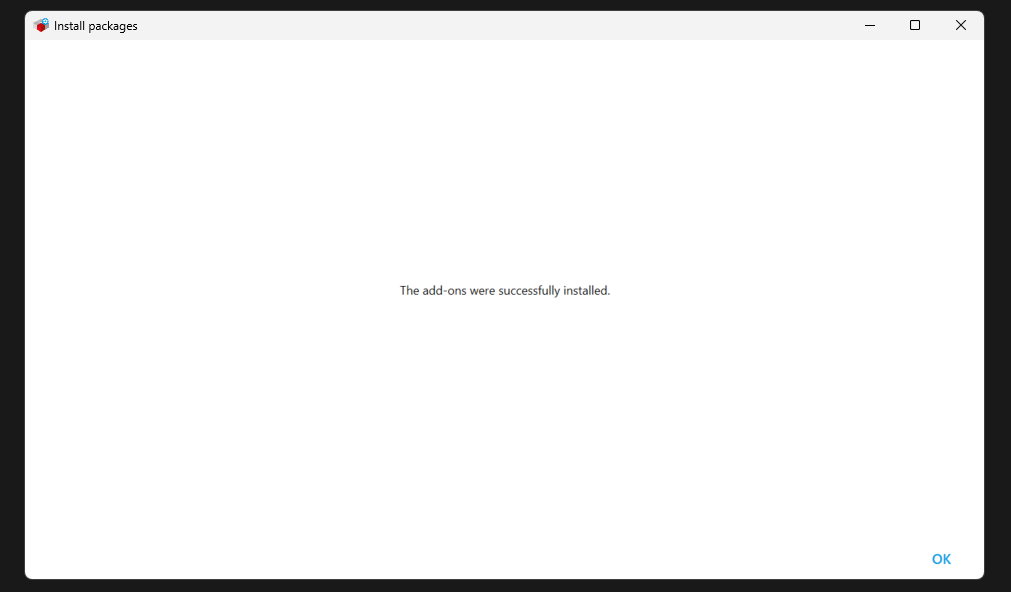
Done!
Create New Project
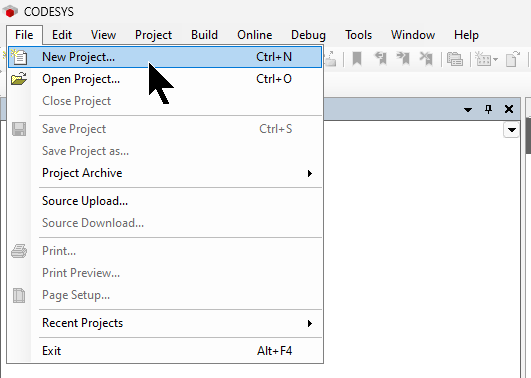
Start Codesys and create a new project at File>New Project.
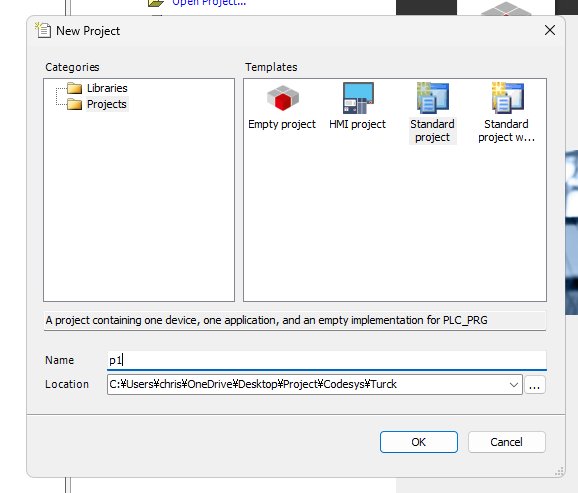
Select Standard Project, enter a project name, and press “Ok” to proceed.
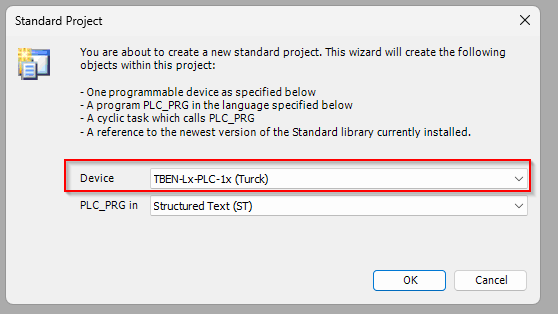
Since you have just installed the Packages for TBEN-L5-PLC-11, select TBEN-Lx-PLC-1x (Turck) from the Drop-List of Devices and proceed with >Ok.
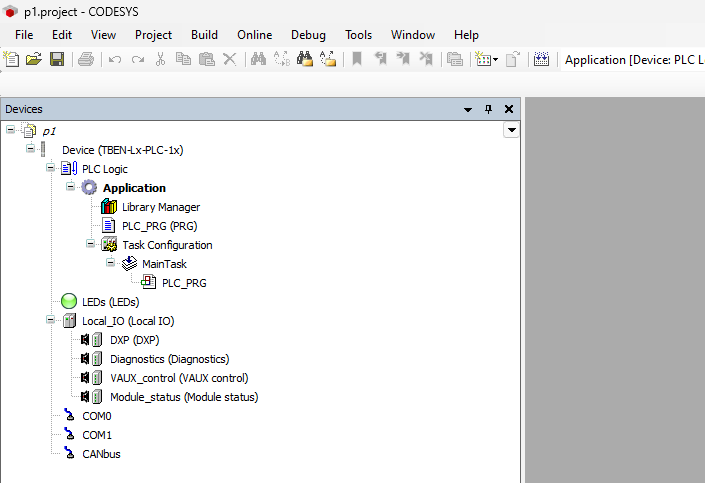
Done!New projects have been added.
Using TAS Software
TBEN-L5-PLC-11 Download and launch Turck’s TAS software from the link below to know the IP address of the device and other information.
Then the TAS software will be launched from the Web Browser and you will agree to the license.

This is the TAS software provided by Turck.
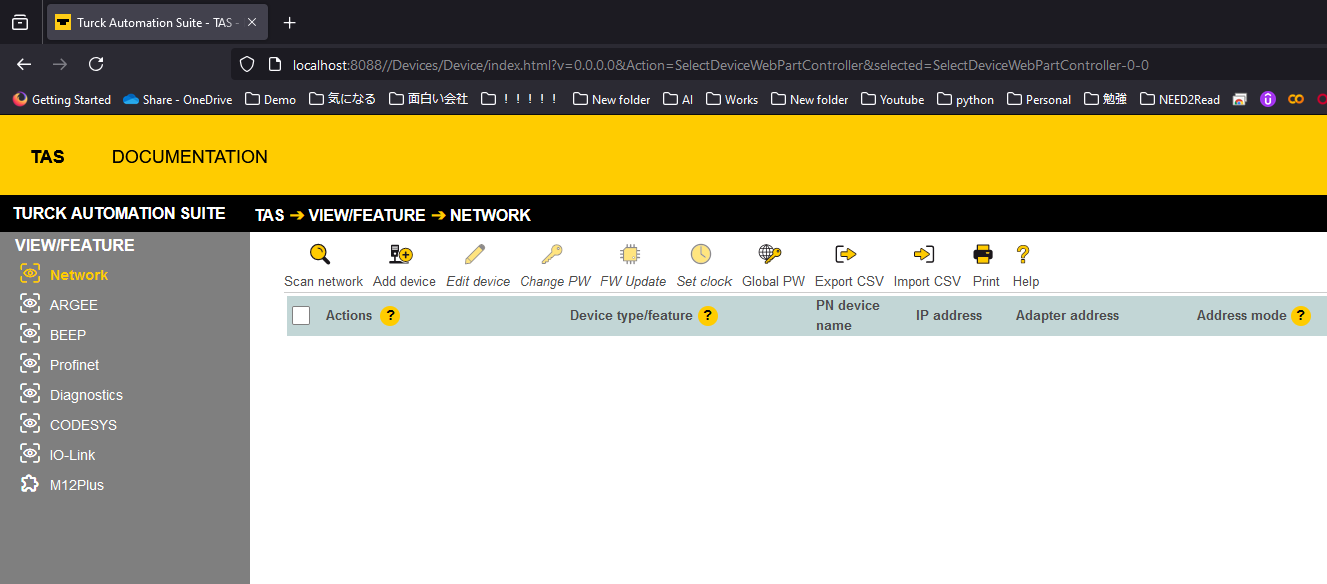
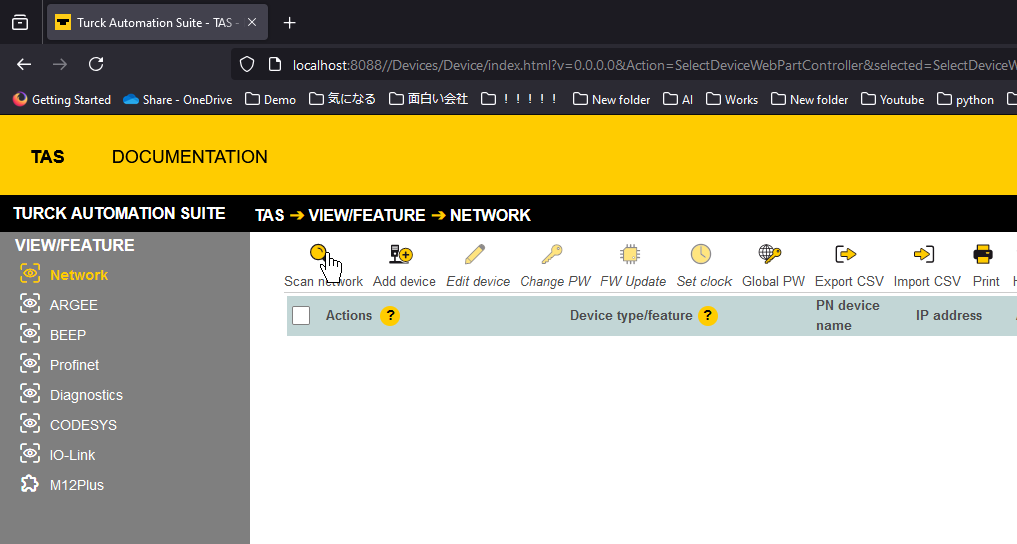
Click on Scan Network.
Just a second..

When the Retrieving info from devices text appears, it means that the device has been found, so please wait a little longer.

Done!
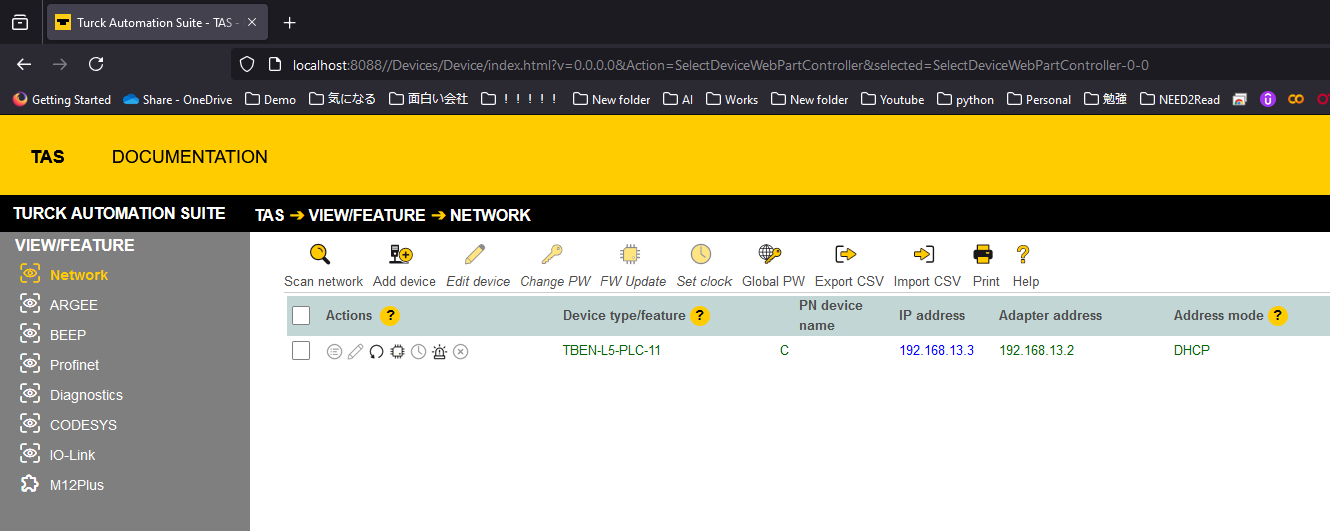
Connect to Hardware
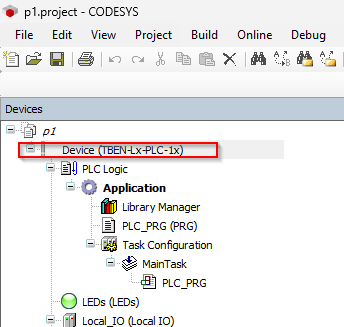
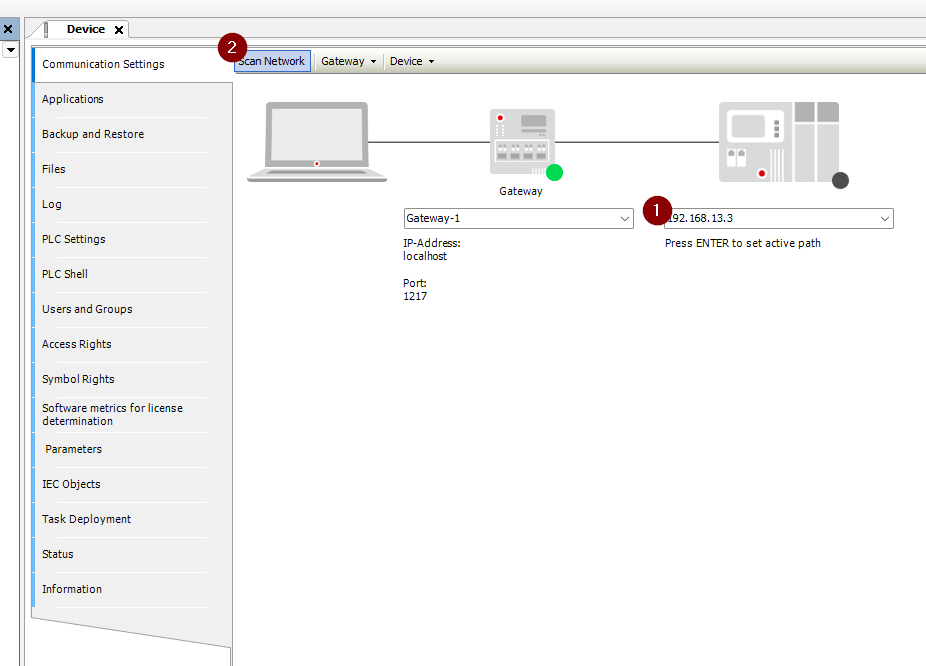
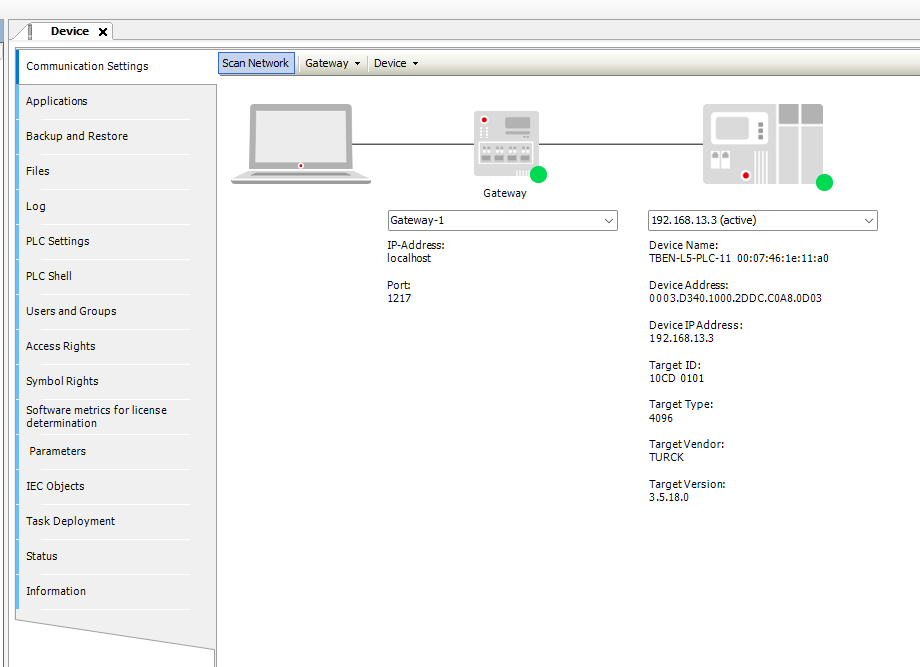
Next, return to the Codesys project and click on Devices.
In Communication Settings>IP, enter the IP you have just obtained from TAS and press Enter.
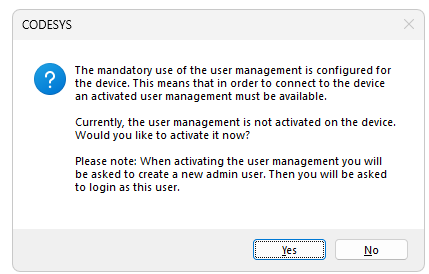
If first time..
If this is the first time the device in question has used Codesys, a message similar to the one below will be displayed.
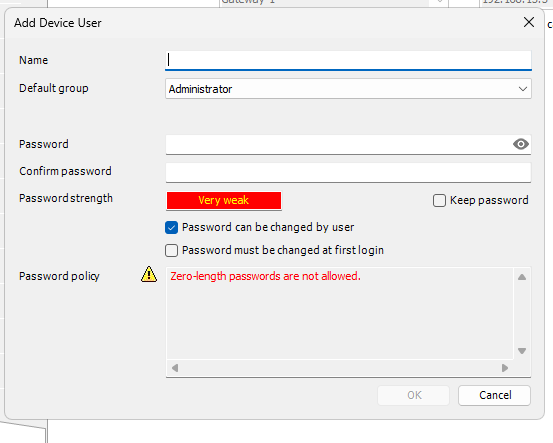
Set the Username and Password.
Next, enter the information you have just set up and login to Runtime.
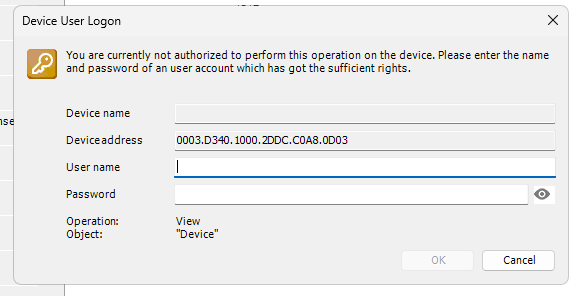
Done!TBEN-L5-PLC-11 found.
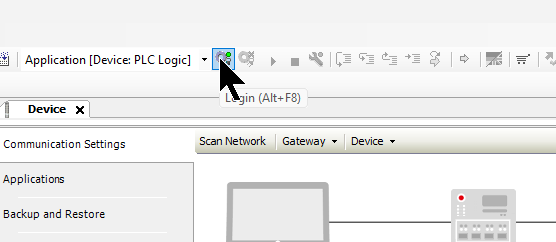
Login
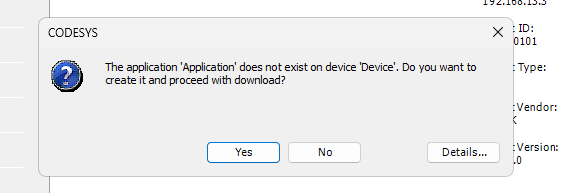
Click Login and Download your project to TBEN-L5-PLC-11.
Proceed with Yes.
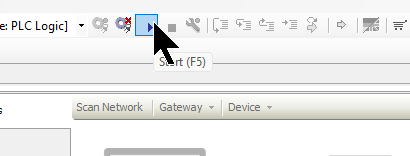
Start your Application!
Finally, click the Start button to run the program.