This article explains how to install CDP Studio on WAGO PFC200 from scratch.
Now, let’s get started with IEC-61499 on the WAGO PFC200.

Reference Link
https://cdpstudio.com/manual/cdp/toolkits/kit-wago-linux.html
https://cdpstudio.com/manual/cdp/wagopfcio/demo-wagopfcioserver.html#install-sd-card-image
https://cdpstudio.com/manual/cdp/wagopfcio/demo-wagopfcioserver.html
Support Devices
From 2024.5, CDP Studio supports the following WAGO devices
- WAGO TP 600 range of devices (762-410x, 762-520x, 762-630x and compatible)
- WAGO Edge Controller (752-8303 and compatible)
- WAGO CC100 (751-9301, 751-9401 and compatible)
This toolkit may also support other ARMv7 32-bit devices running the Linux operating
Update your CPU Firmware
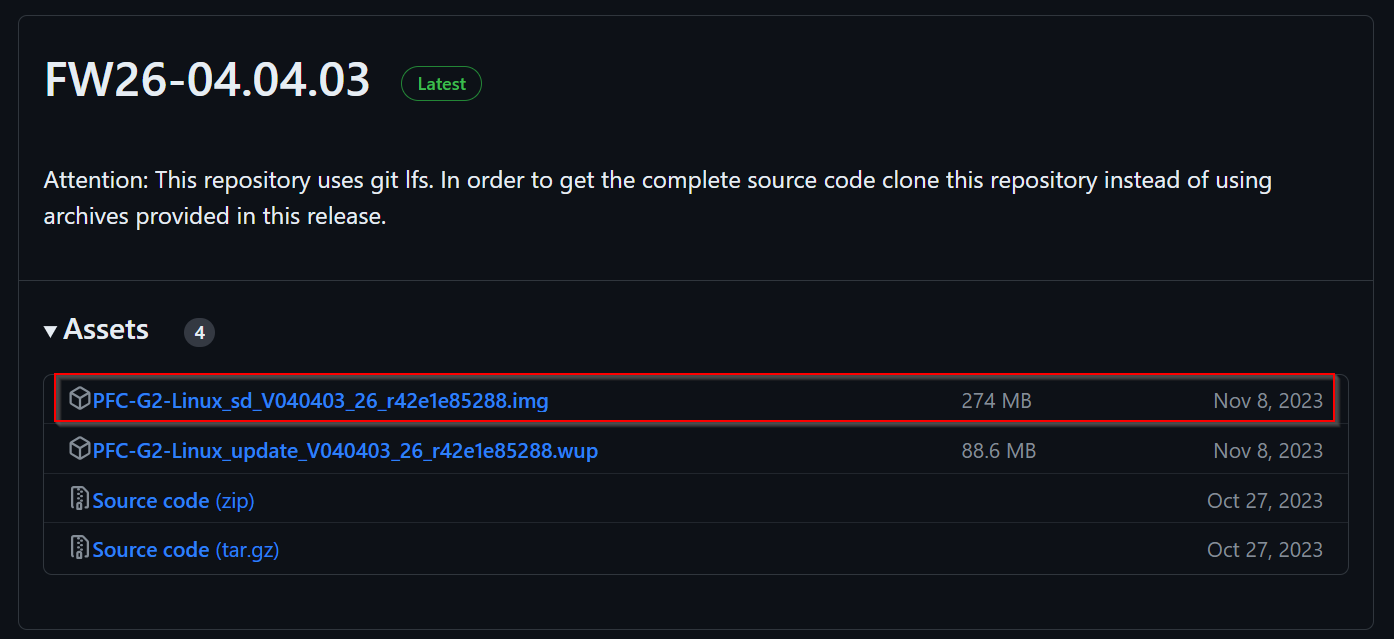
Download the latest Wago Firmware from the link below.
https://github.com/WAGO/pfc-firmware-sdk-G2/releases
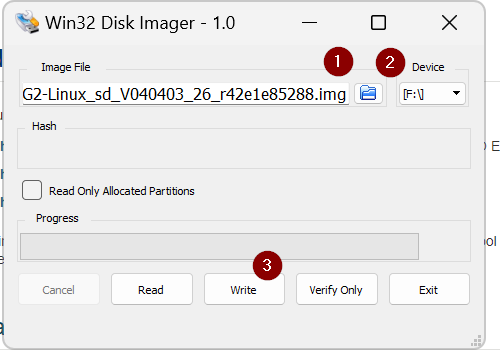
Use software such as Win32 Disk Imager to write the image file to the SD Card.
Insert SD Card into PFC200
Install the SD CARD into the WAGO PFC200.
PFC200 Configuration
The next step is to set up PFC 200.
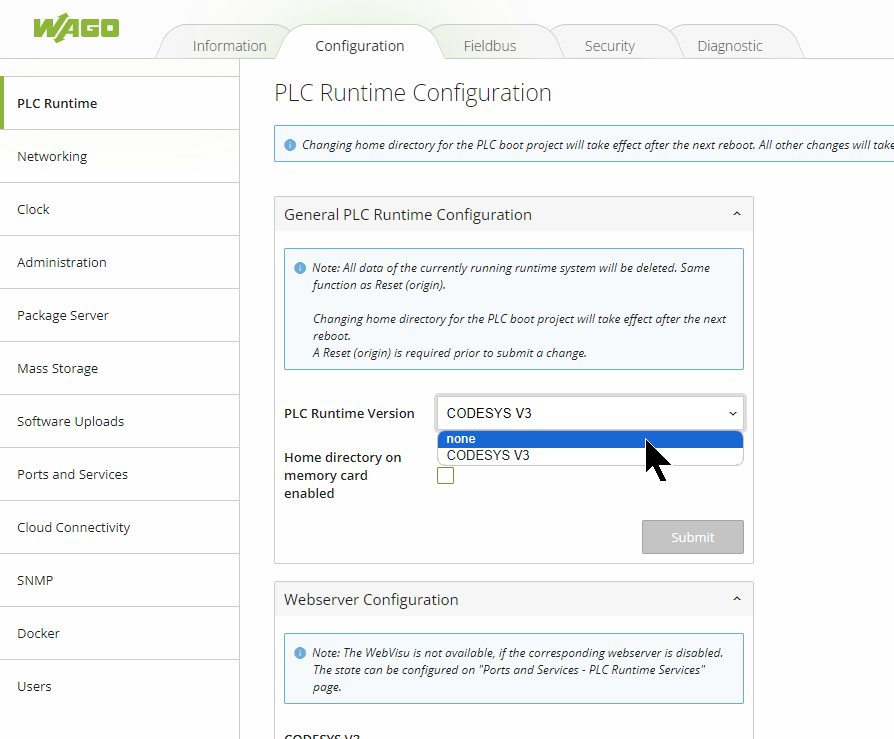
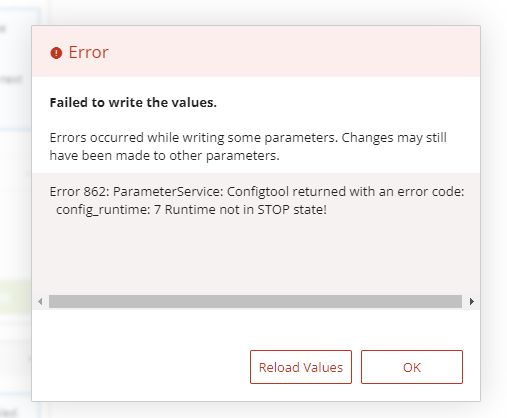
Disable PLC Runtime
Access the PFC200 Web Server, open Configuration>PLC Runtime, and set PLC Runtime to None.
If an error occurs, change the WAGO PFC200 Controller to Stop Mode.
Check the box for “Home directory on memory card enabled” and click “Submit” to change the setting.

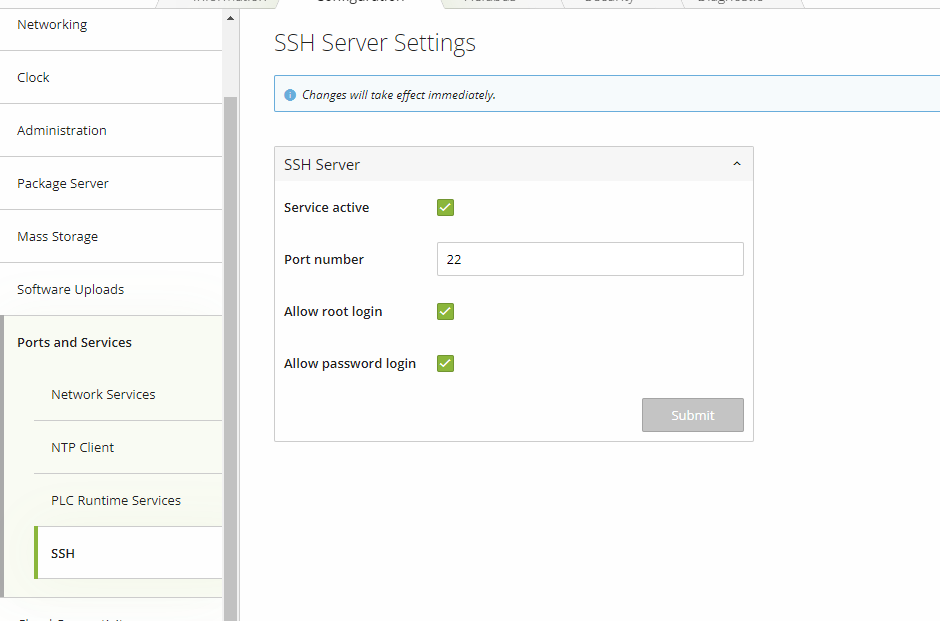
Enable SSH Server Settings
Open Ports and Services>SSH.

Enable SSH Server.
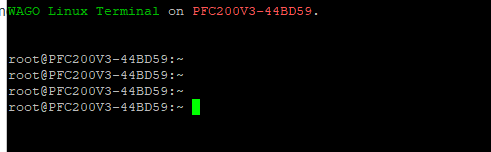
Try to Login as root
Login Putty and try to login root User.
It will be root/wago.
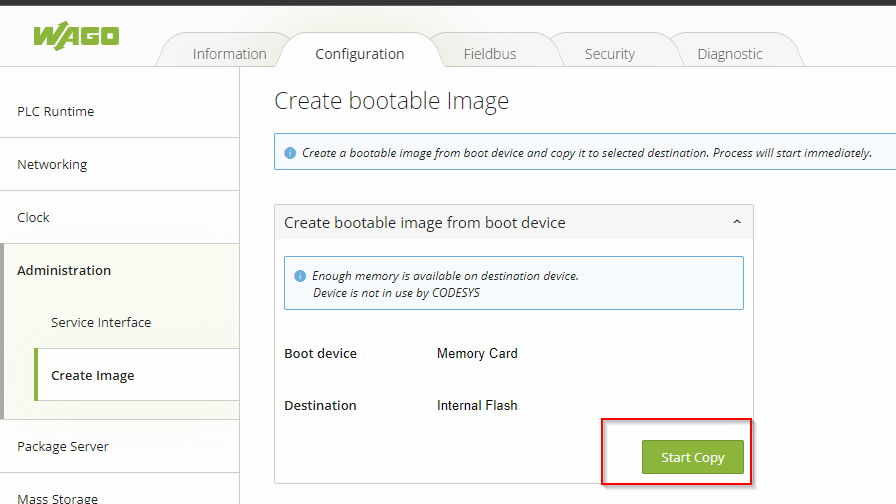
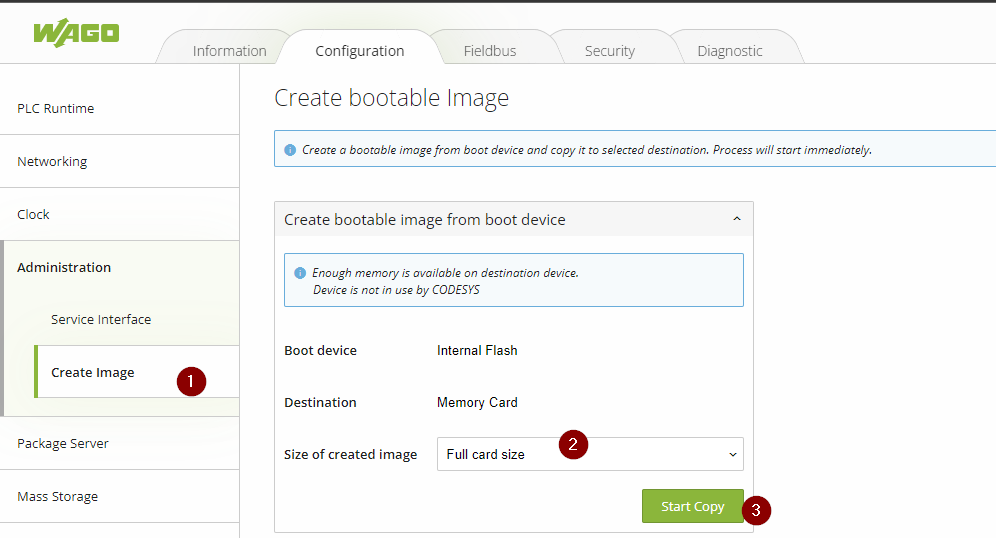
Create bootable Image
If you have an official Wago image on the SD card, start the WAGO device with the SD card inserted and copy the image from the SD card to the Internal flash using the following procedure:
Also, confirm that the message “Enough memory is available on the destination device. Device is not in use by CODESYS” is displayed.
If all of the above requirements are met, click “Start Copy. Do not turn off the device during the copy process. Wait until the copy process is complete.
Create a boot image by going to Administration>Create Image>Start Copy.
Just a second..
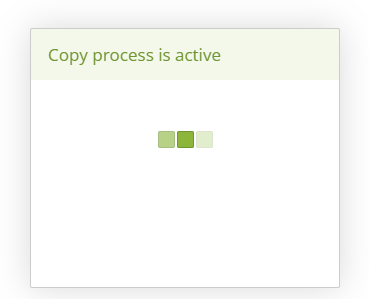
Done!

Remove SD Card
Power down the PFC200 and remove the SD Card.
Power ON Again!
Turn on the power once more.
Create bootable image from boot device Again
To use the full size of the SD card, it must be resized; the easiest way to do this in Wago Web Server is to specify “Full card size” and copy Wago’s internal flash image to the SD card. full card size” and copy it to the SD card.
Open Configuration>Administration>Create Image, set Size of created Image to Full card Size, and click Start Copy.
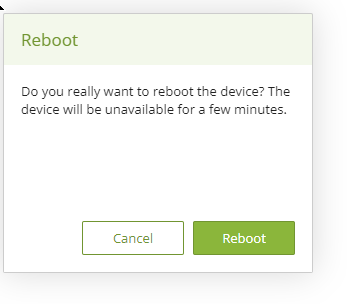
Reboot
PFC200を再起動しましょう。
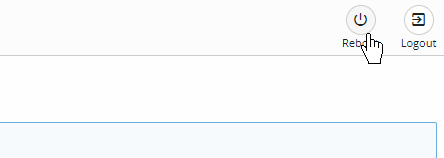
Proceed with Reboot!
Access WagoIo via K-bus
The next step is to build the CDP Studio side.
CDP Version
This is the CDP Studio Version used in this article.

Select Network
Set the Ethernet Interface to be connected to WAGO.

Set the WAGO Login Username and other settings.

Select your Applications
Set the application.
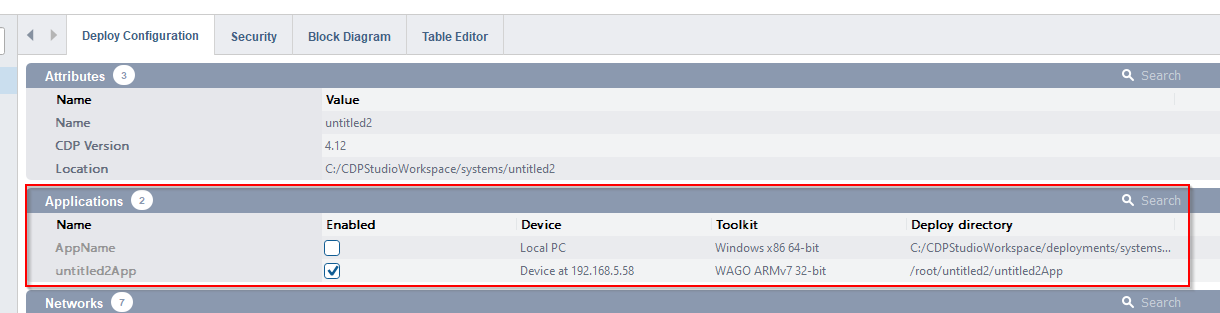
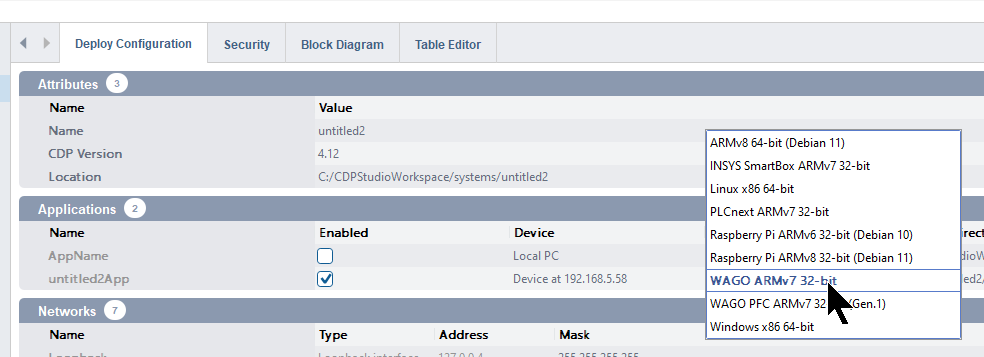
Select the Toolkit
This Toolkit allows building applications based on CDP 4.12 or later for WAGO TP 600, Edge Controller (752-8303), CC100, PFC 100/200 Gen.2 on ARMv7 32-bit based platforms.
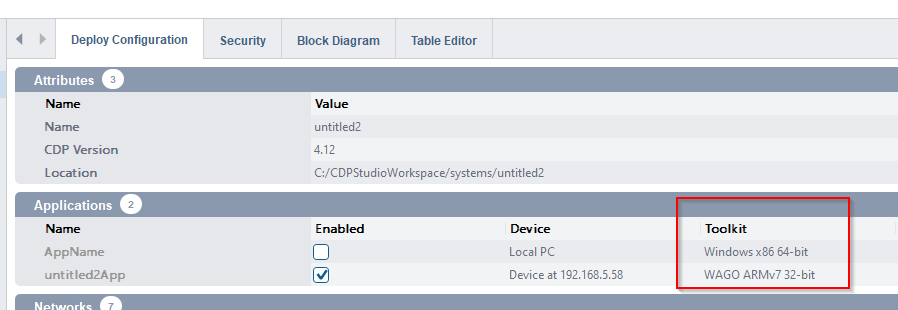
There is a Drop-List in the Toolkit item, and other Toolkits can be set.
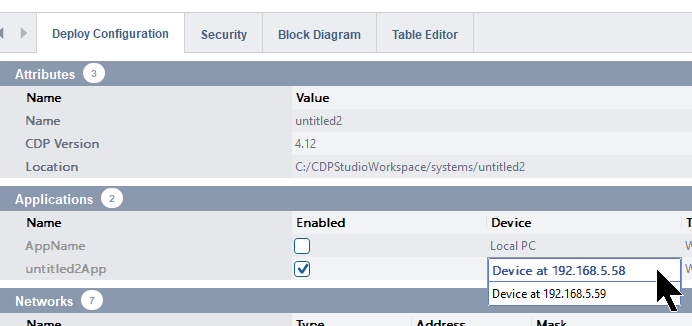
Select your devices
Download the application to WAGO PFC200, so choose the IP address of PFC200 in Device.

There is also a Drop-list in the Device item, and the appropriate device should be selected.
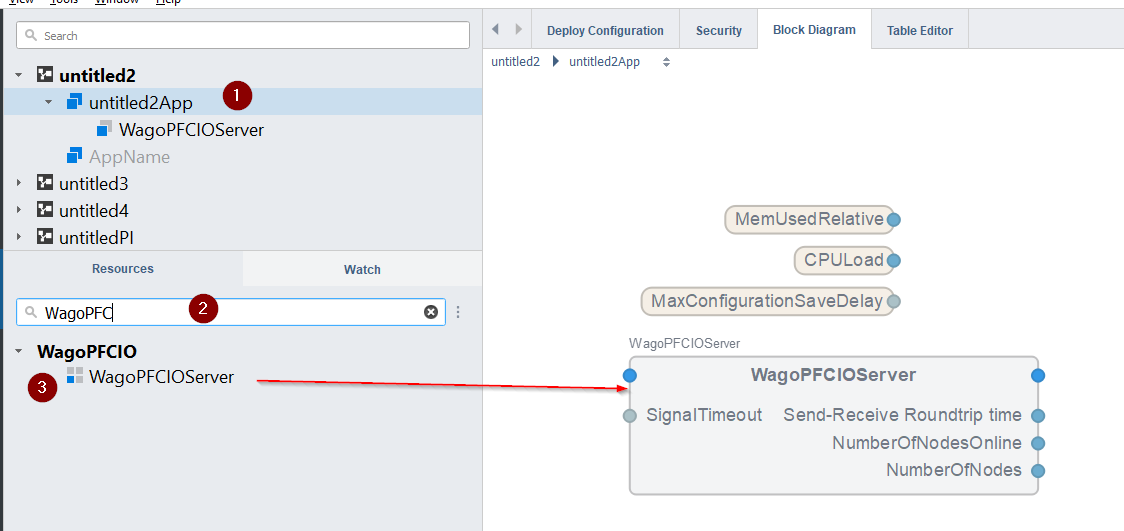
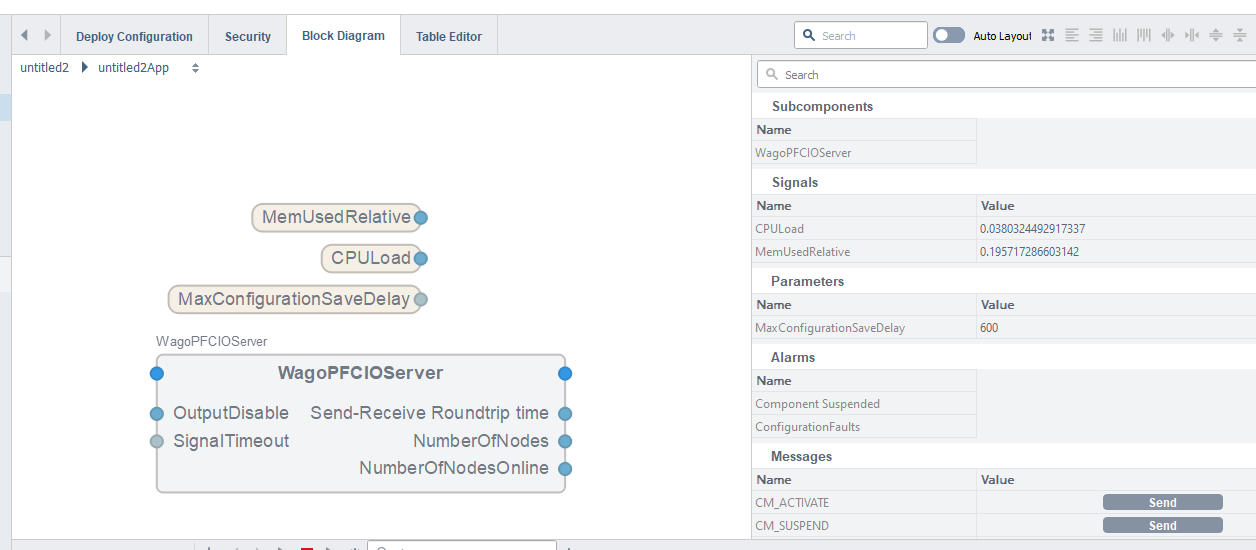
WagoPFCIOServer
It is its IOServer that converts the CDP signal to Wago KBUS data and from Wago KBUS to CDP signal. This IOServer must operate at least at 20 Hz, or the output will be set to 0 by the hardware.
Note that WagoPFCIOServer verifies the physical configuration of the module via ADI and compares it to the one created in CDP Studio. If there is a discrepancy between the physical configuration and the configuration created in CDP Studio, WagoPFCIOServer will abort. You will then need to fix the problem with the configuration or physical and restart the application. The same applies if the physical bus is changed during execution.
Add WagoPFCIOServer to your project.
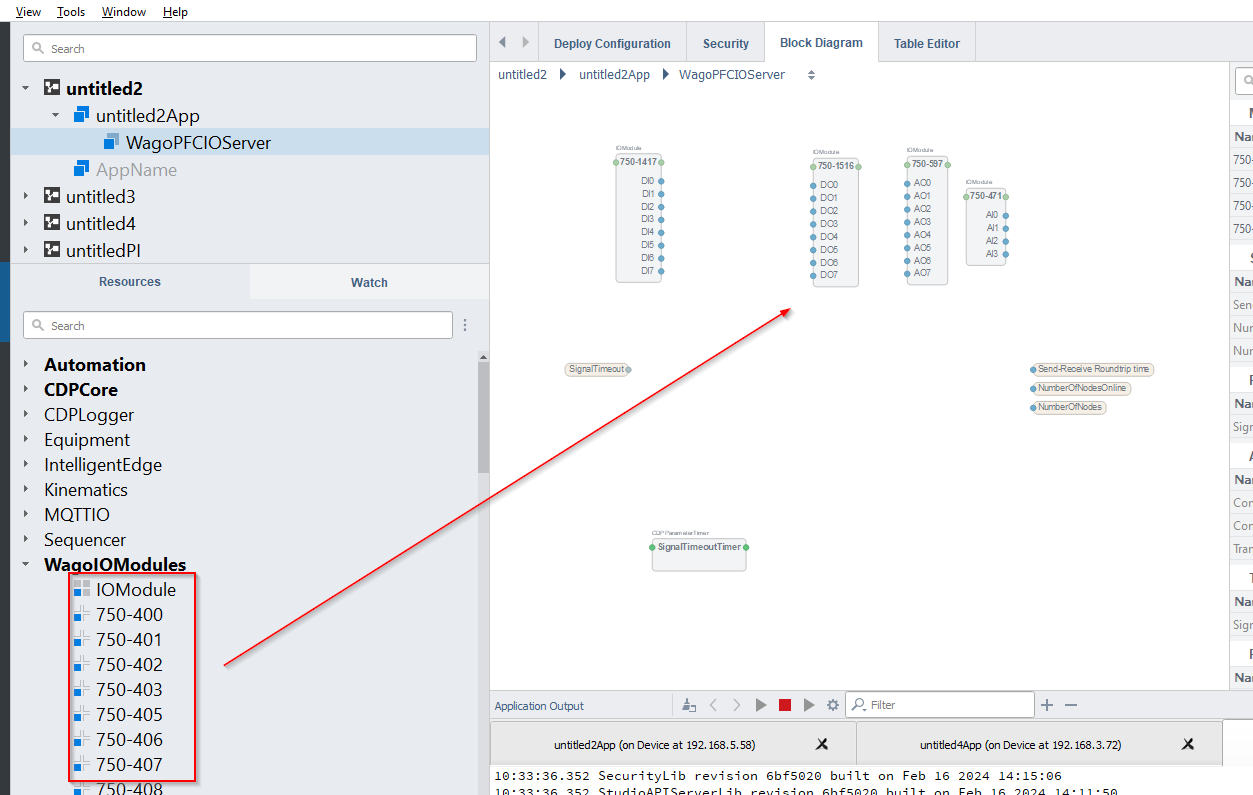
DropIO Block
Next, add the Module Block according to the actual module installation order.
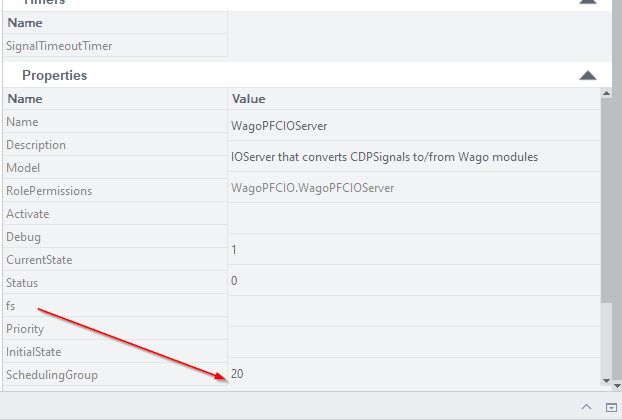
fs
As I mentioned earlier, IOServer must operate at a minimum of 20hz.
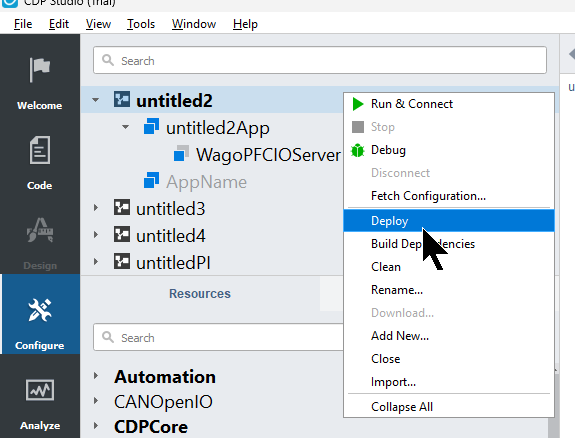
Deloy
Finally, click Deploy to download the program to PFC200.
Run & Connect
Run & Connect to launch the application.
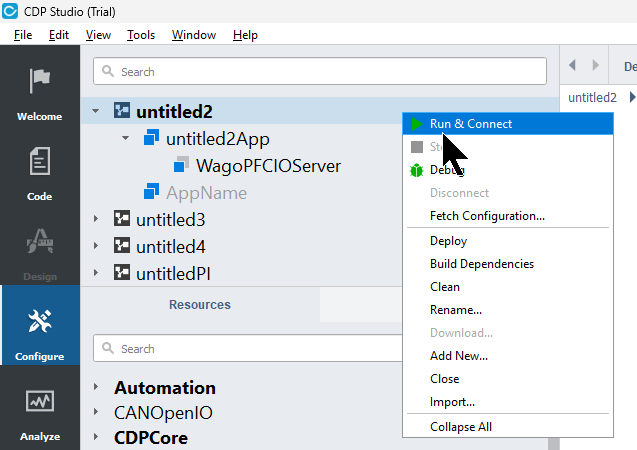
Done!I was able to start it without error.
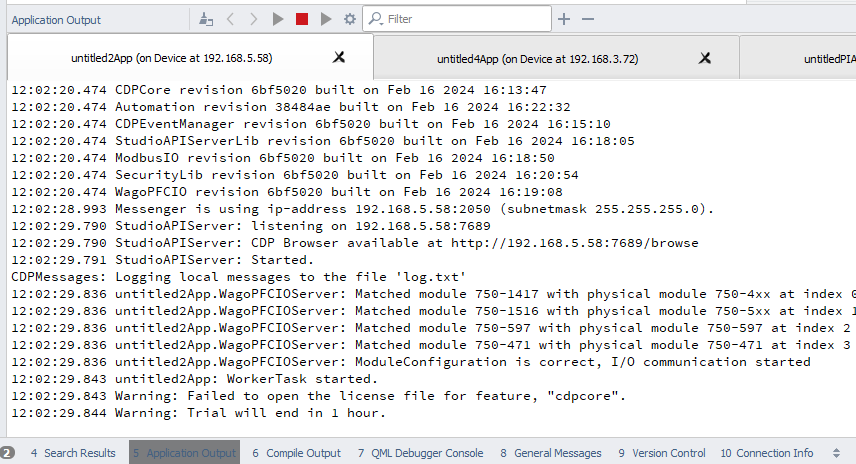
Result
CPU and memory usage could be obtained from CDP Studio projects.
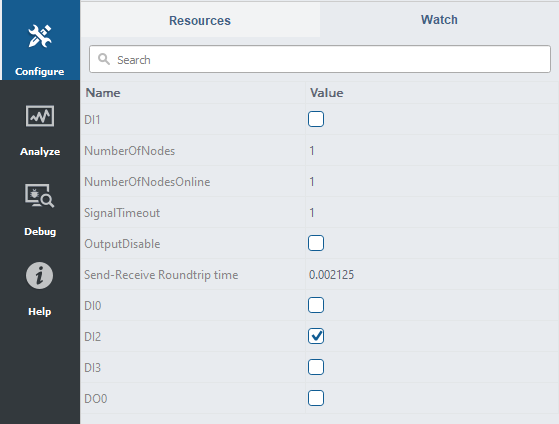
Add Watch Table to the output channels of the output module 750-1417 installed in PFC200.
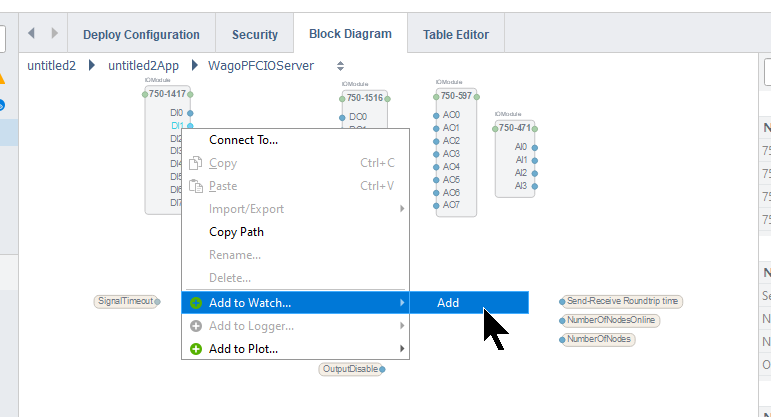
The corresponding DI/DO status can also be updated and monitored.