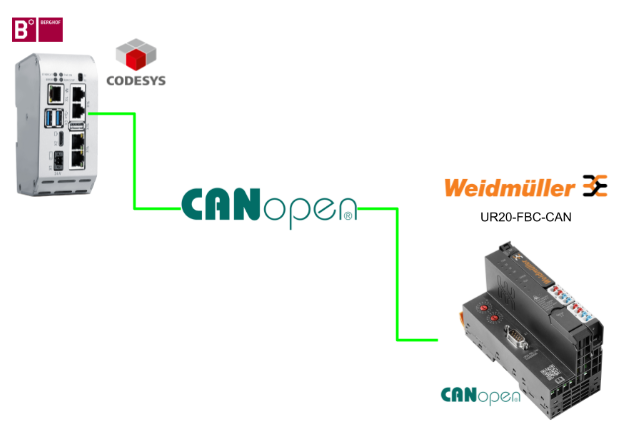
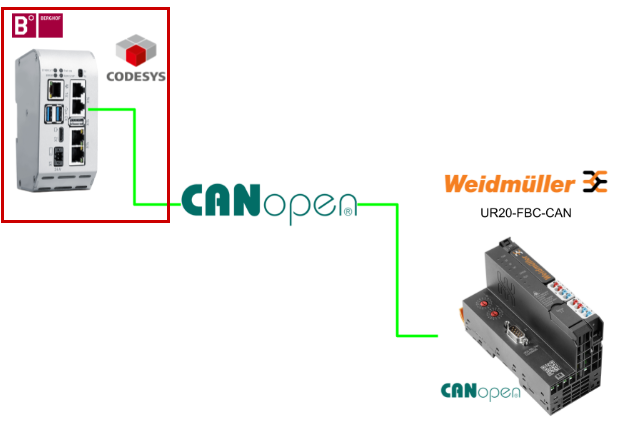
Here is the third episode of our introduction to BERGHOF’s Raspberry Pi-based modular CODESYS PLC. This time we will start up CAN Master and communicate with Weidmuller’s UR20-FBC-CAN CANOPEN Coupler.
Thanks to BERGHOF for providing the equipment.
Let’s enjoy FA.
Reference Link
http://soup01.com/en/category/weidmuller/
UR20-FBC-CAN?
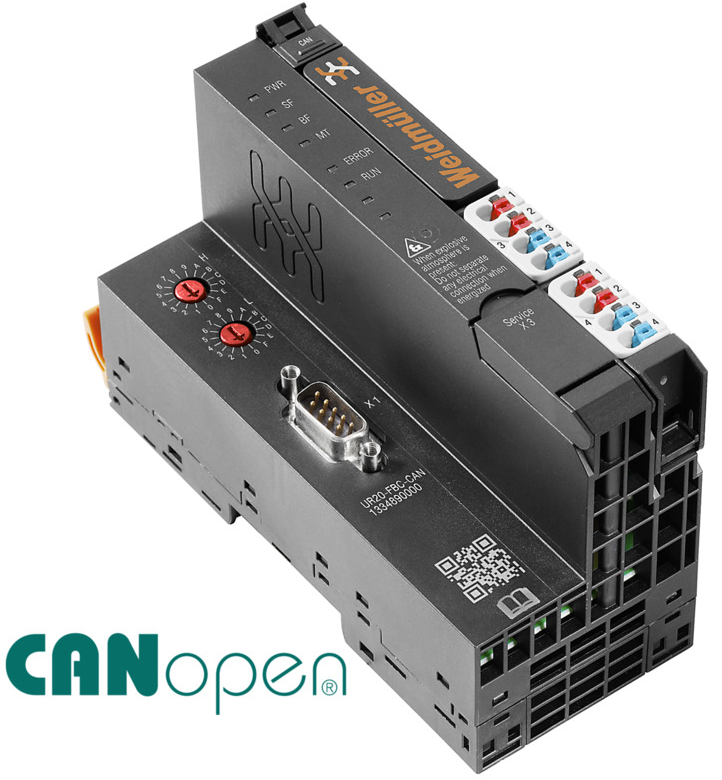
The UR20-FBC-CAN fieldbus coupler is designed in accordance with international standards (EN 50325-4). It is the head module of the u-remote system bus and can connect up to 64 active u-remote modules.
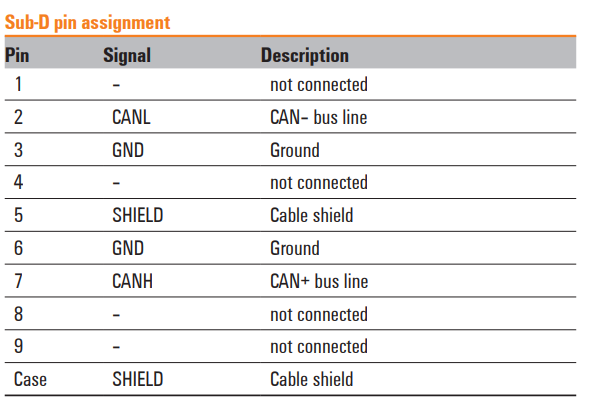
The CANopen coupler also has a 9-pole Sub-D connector (male) and supports the CiA DS401 device profile.
In addition, it can be accessed by a web server application via a USB service interface. Thus, all information such as diagnostics, status values, parameters, etc. can be read and all connected modules can be simulated or forced to operate.
The station’s main power supply is built into the coupler. Power is supplied from two 4-pole connectors and is divided into input and output current paths.
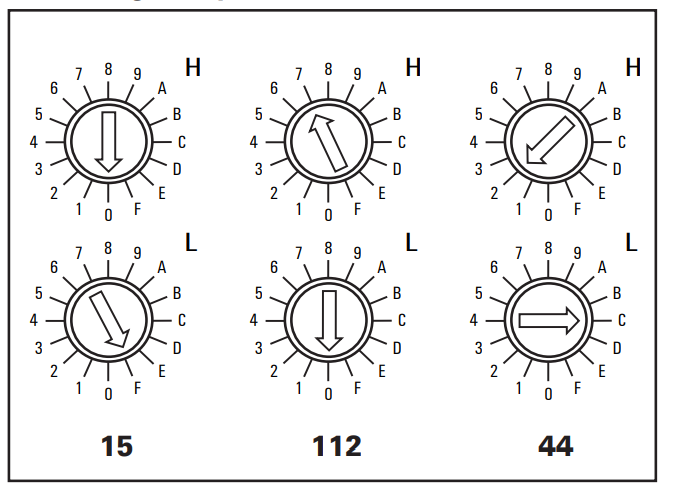
Addressing
The address of the UR20-FBC-CAN fieldbus coupler can be set with two rotary switches, and up to 124 addresses (1 to 124) can be assigned.
On the Coupler itself, the most significant digit can be set with rotary switch H and the least significant digit with rotary switch L. The switches are displayed in hexadecimal (0-9, A=10, B=11, C=12, . .F=15).
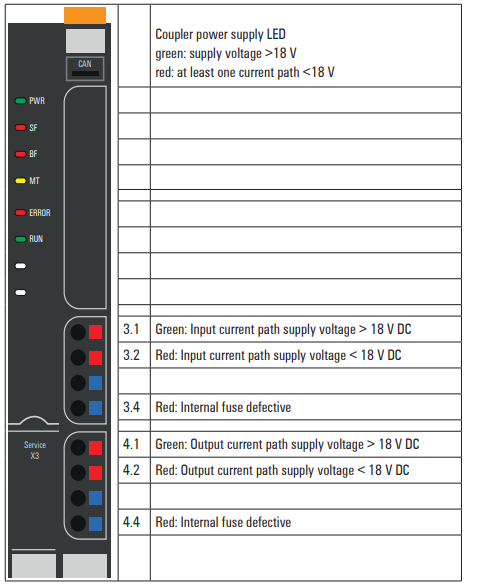
LED
This is the LED display of the UR20-FBC-CAN fieldbus coupler.
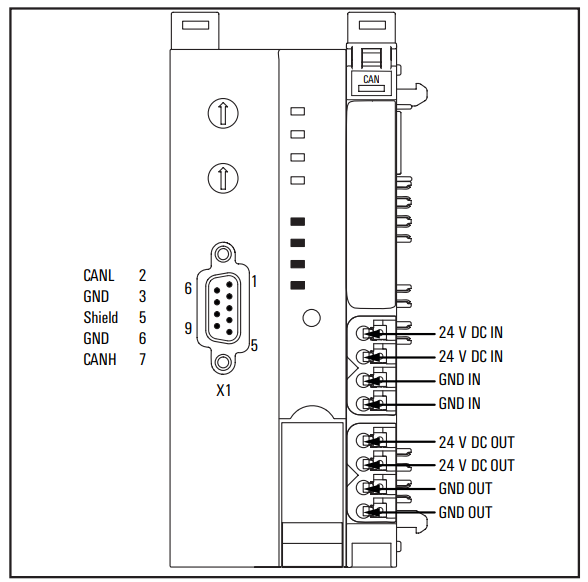
Connector
This is a diagram of the UR20-FBC-CAN fieldbus coupler’s power supply and CAN communication connector layout.
Implementation
Wiring
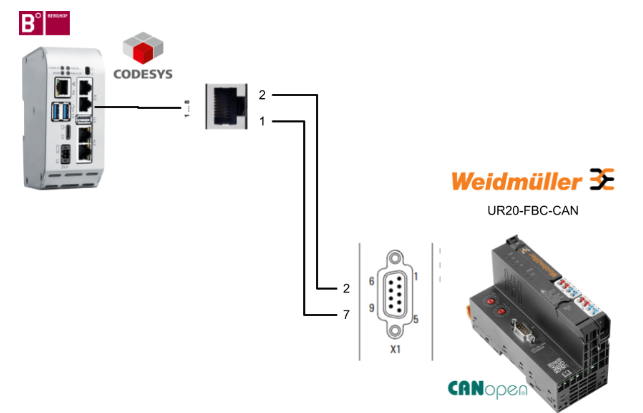
The X16 Port on the Berghof Controller’s controller body is an RJ45 CAN OPEN Port.
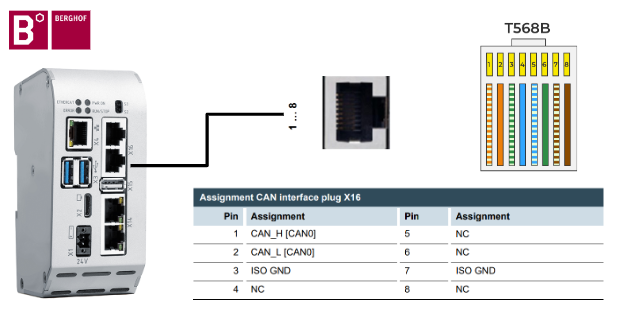
Here is a wiring diagram of the X16 Port of Berghof Controller’s controller and Weidmuller’s UR20-FBC-CAN CANOPEN Coupler.
Weidmuller Side
Let’s built from Weidmuller’s UR20-FBC-CAN.

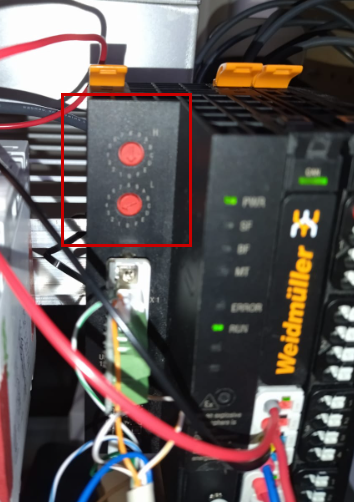
Station Setup
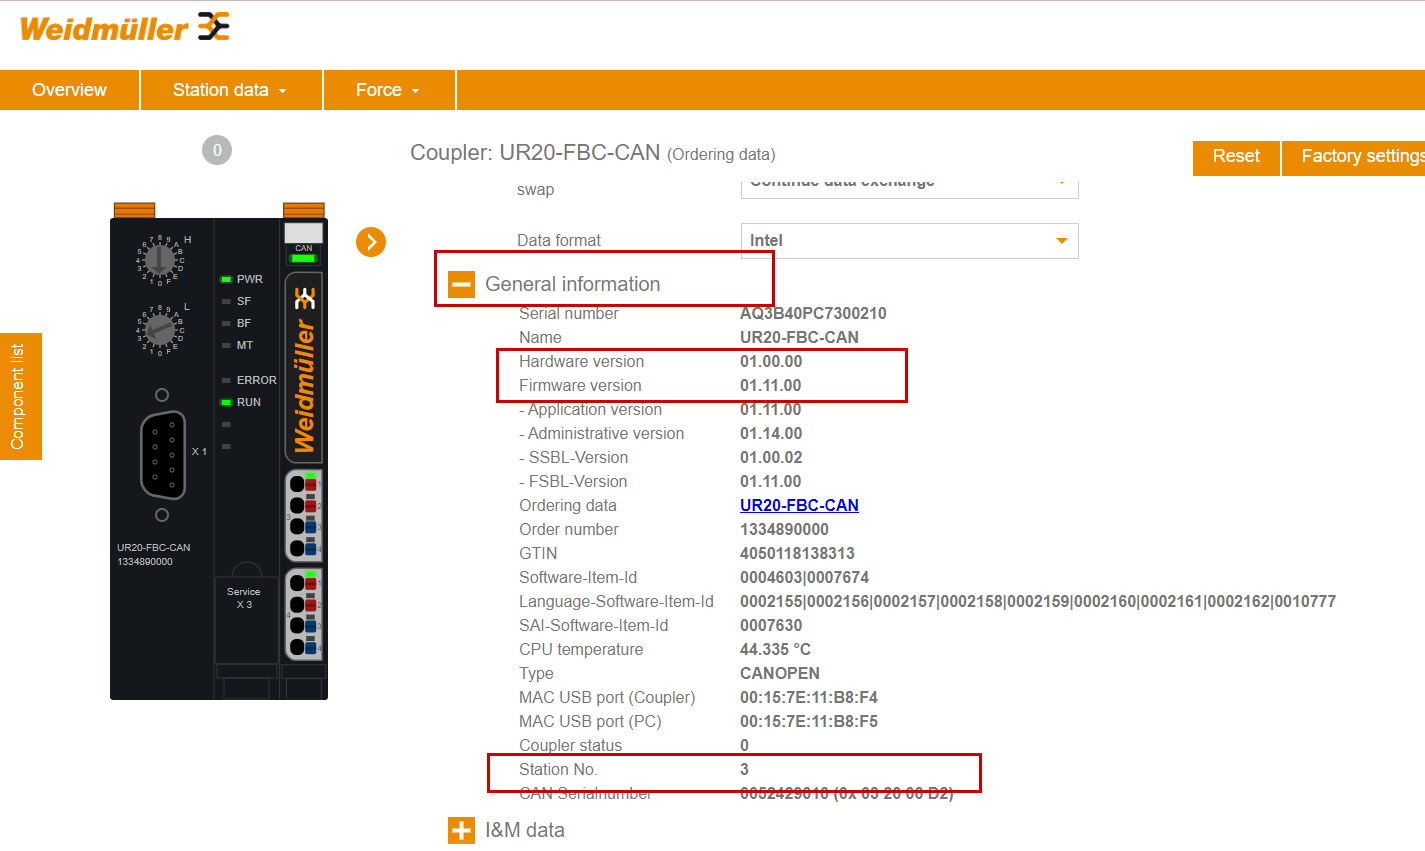
Set the station number using the rotary switch on the UR20-FBC-CAN Coupler main unit. In this article, the station number is set to 3.
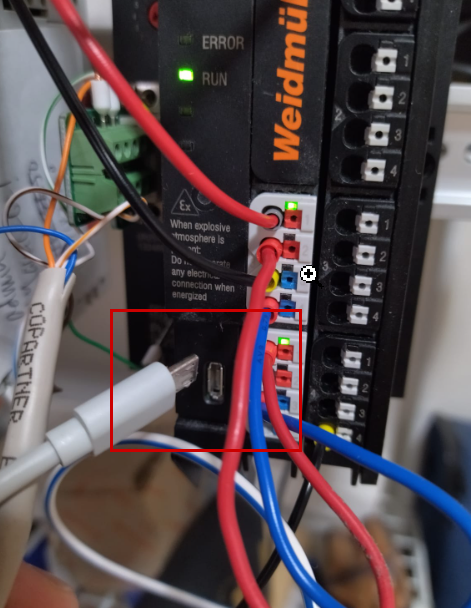
Web Server
Next, connect the USB PORT on the UR20-FBC-CAN Coupler main unit to the PC.
The IP address of the Service USB Port of the UR20-FBC-CAN Coupler is 192.168.1.202. This is the Web Server of UR20-FBC-CAN.
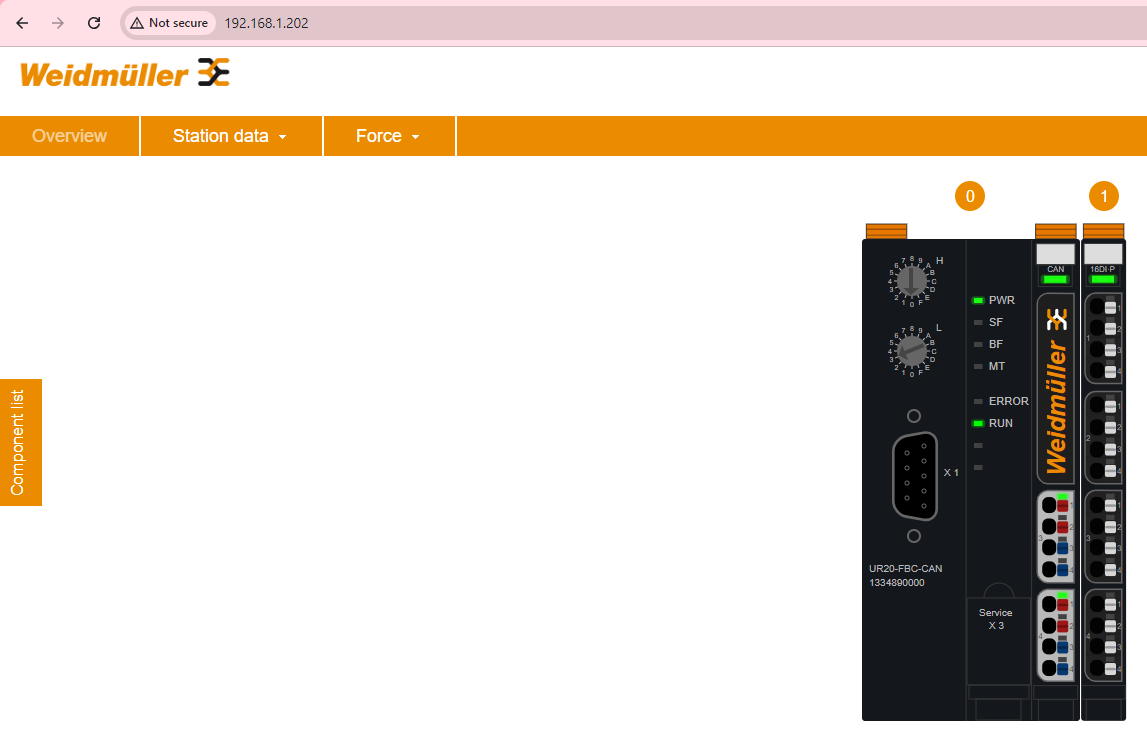
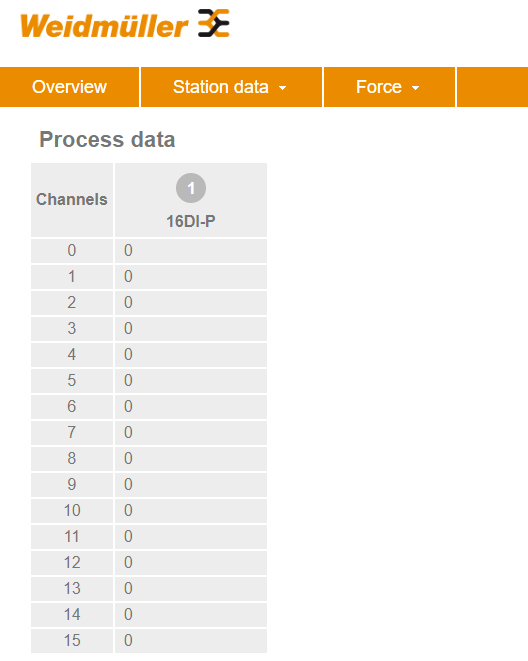
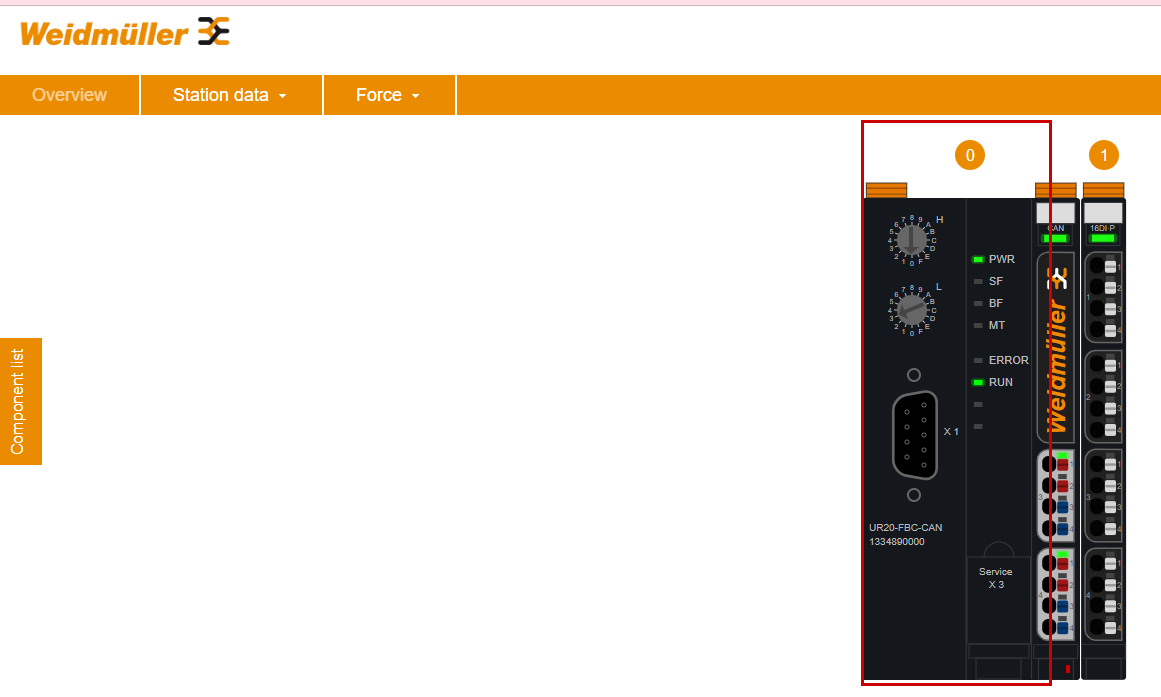
Process data
You can check Coupler’s Process Data directly from the webserver.
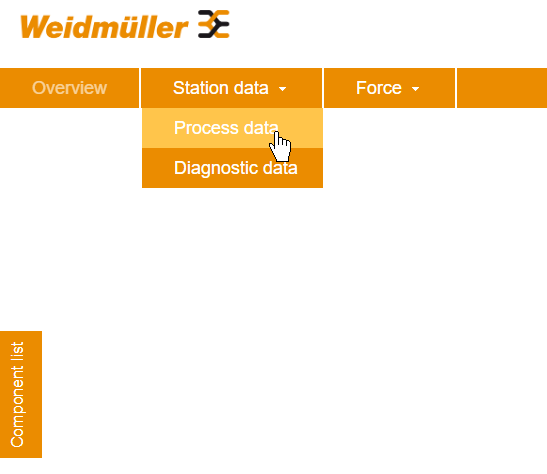
In this article, only one 16-point digital input is installed, but you can check the input/output data of all modules.
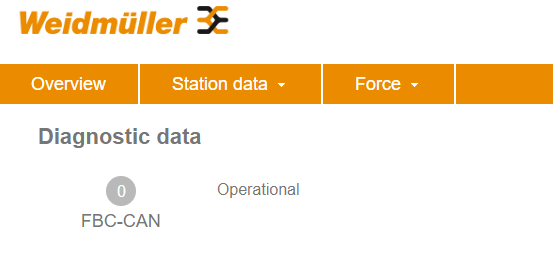
Diagnostic data
You can also check Coupler’s diagnostic information from the Web Server.
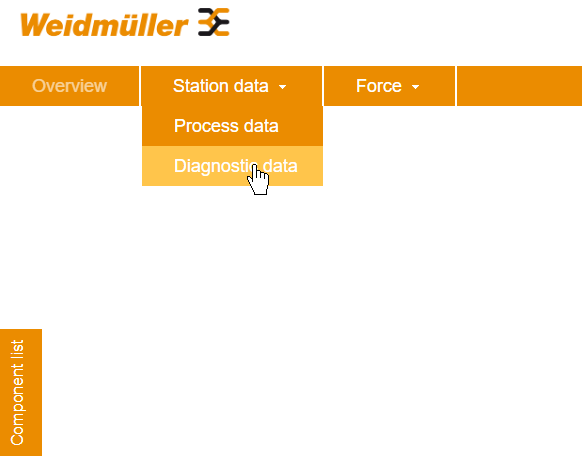
Here is the Coupler current operating status.
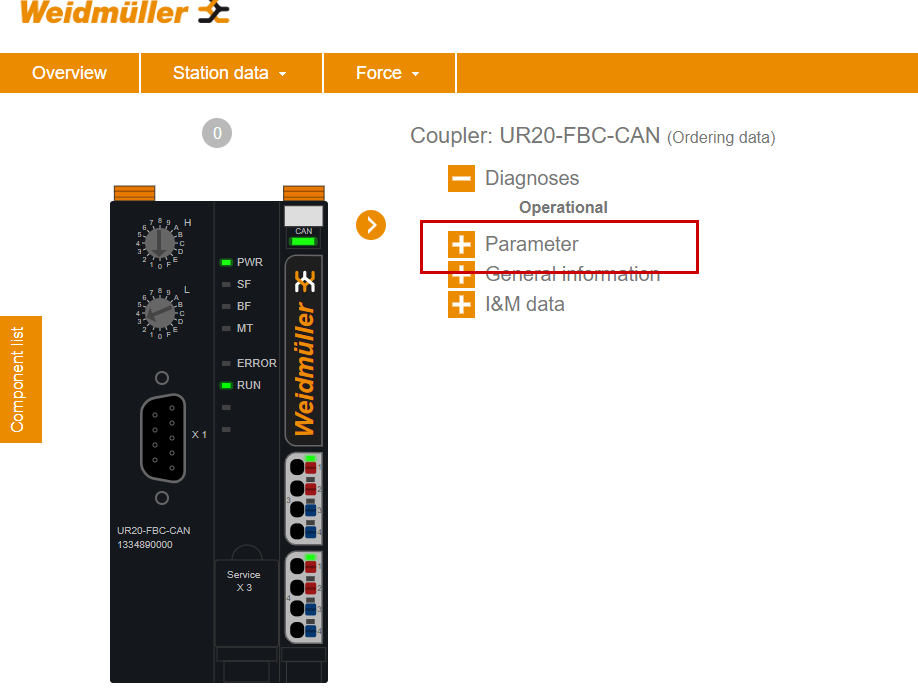
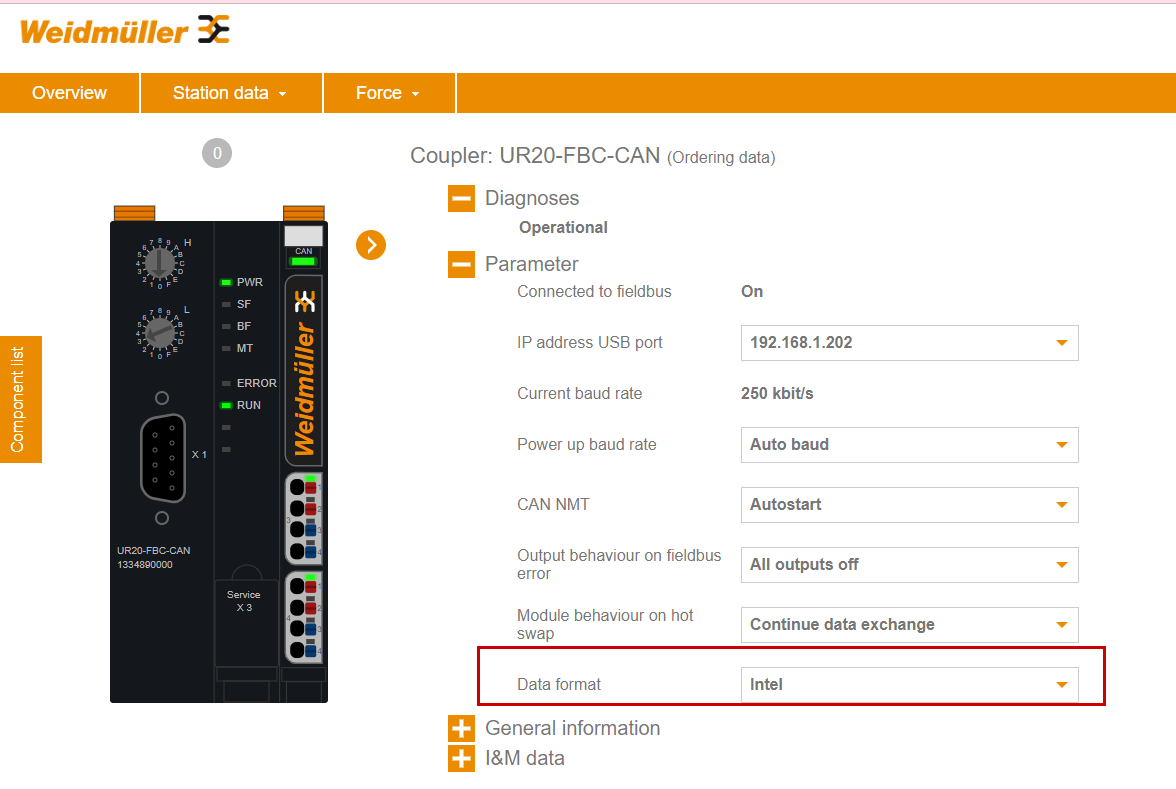
Coupler Parameter
Next, click on the Coupler picture and set the device parameters.
Expand the Parameter Menu.
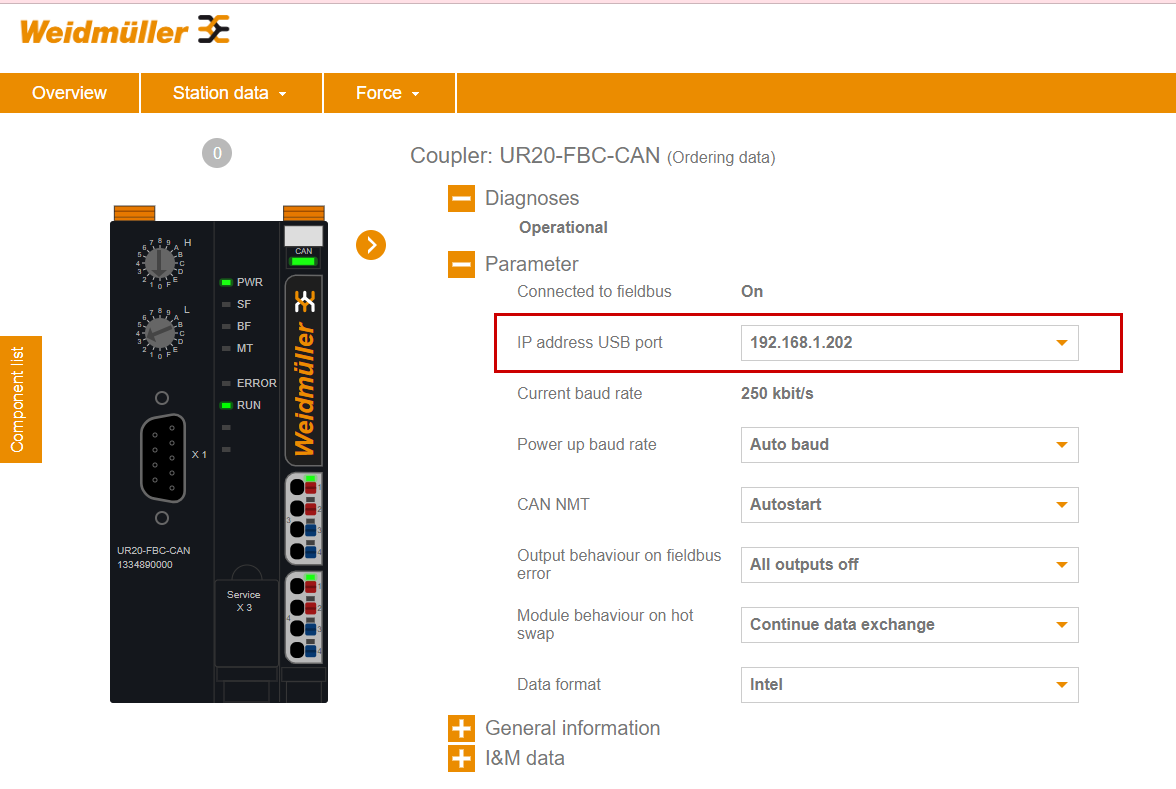
IP address
You can change the IP address of the USB Service USB Port in the IP address USB port section.
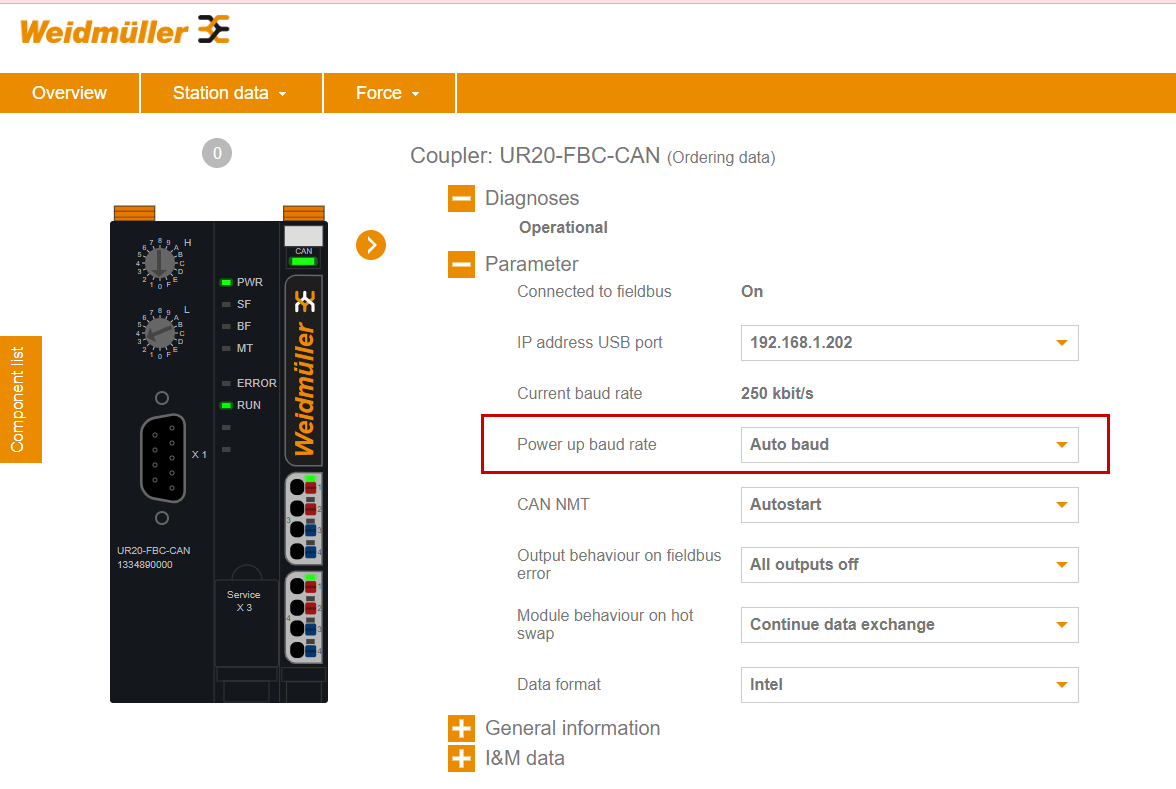
Power up baud Rate
This is the communication speed that Coupler uses when it is turned on. In this article, we set it to Auto baud, so it will match the communication speed of the CAN Master.
Also, if the CAN Master changes the communication speed, the CAN Master must be restarted.
Data format
Data format is set according to the CAN Master side.
General Information
You can check Coupler’s Firmware/Station number on the General Information Tab.
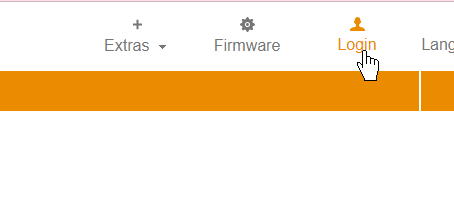
Login
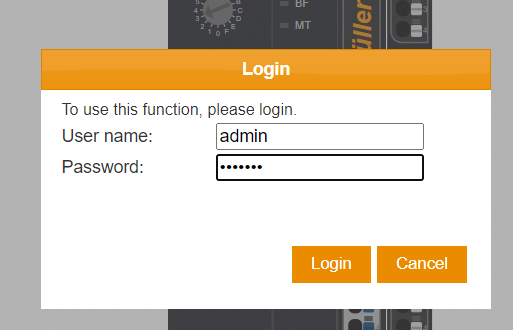
Login admin User on the Web server.
The factory default settings for login data are as follows:
- Username: admin
- Password: Detmold
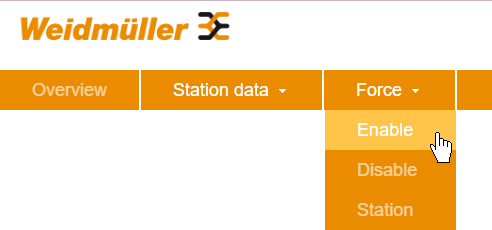
Enable Force Function
After logging in to Admin, you can use the Force function in Web Server. Click Force>Enable.
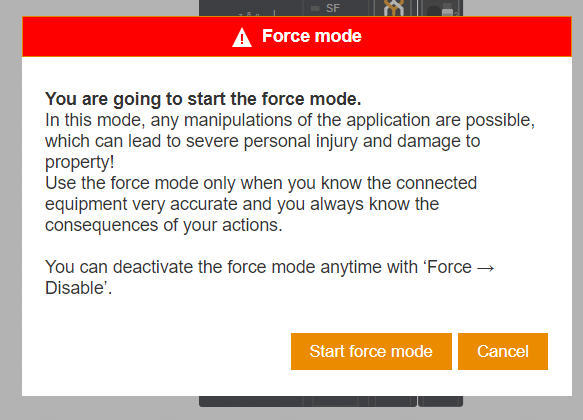
Enable the Force function in Start force mode.
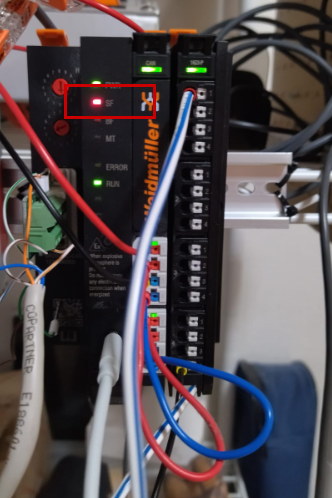
When the Force function is enabled, the SF LED on the Copler flashes.
Force On/OFF IO
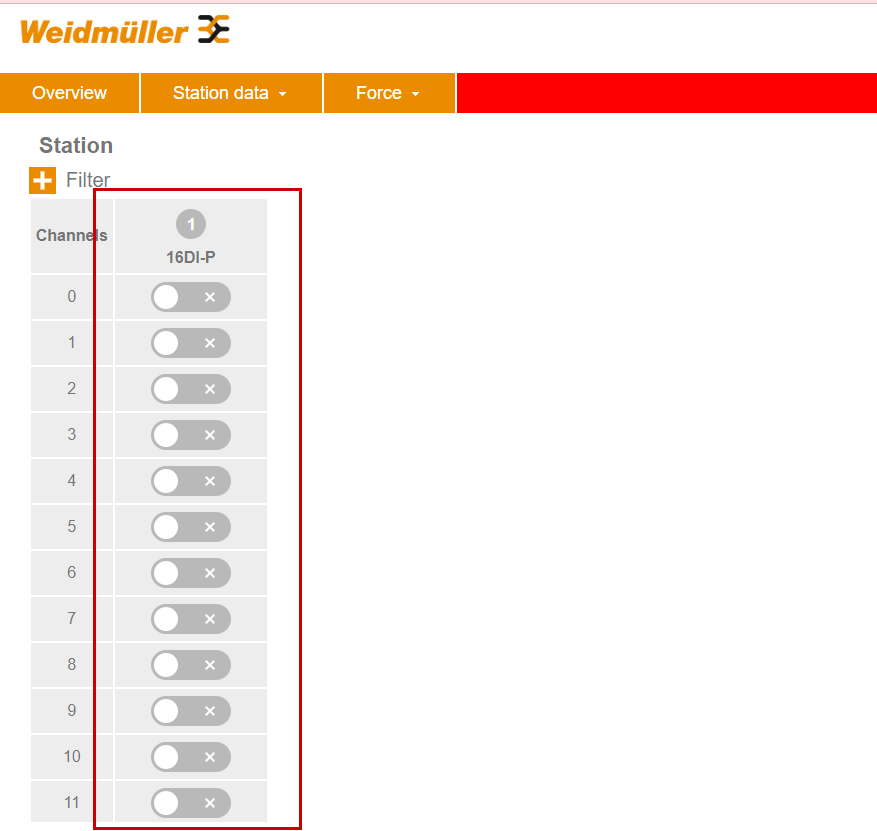
Click Force>station to Force ON/OFF Process IO.
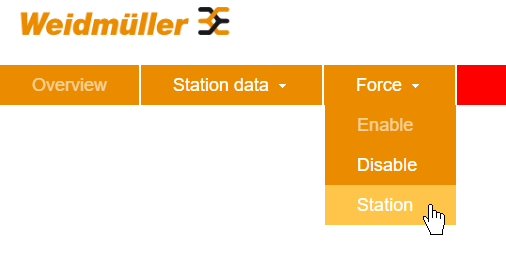
Process IO can be Force ON/OFF on this screen.
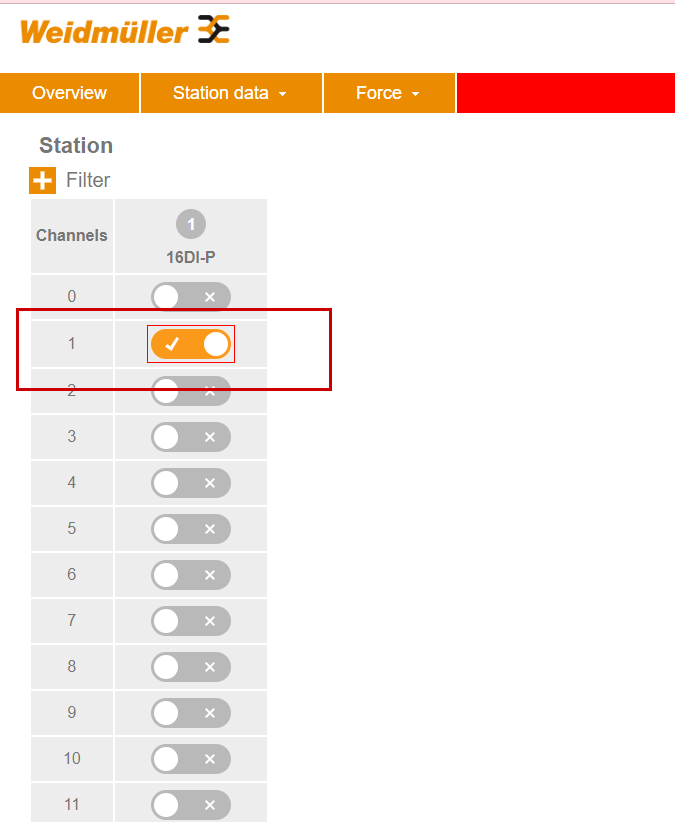
Force OFF
As shown in the figure below, the specified Process IO can be forcibly turned off.
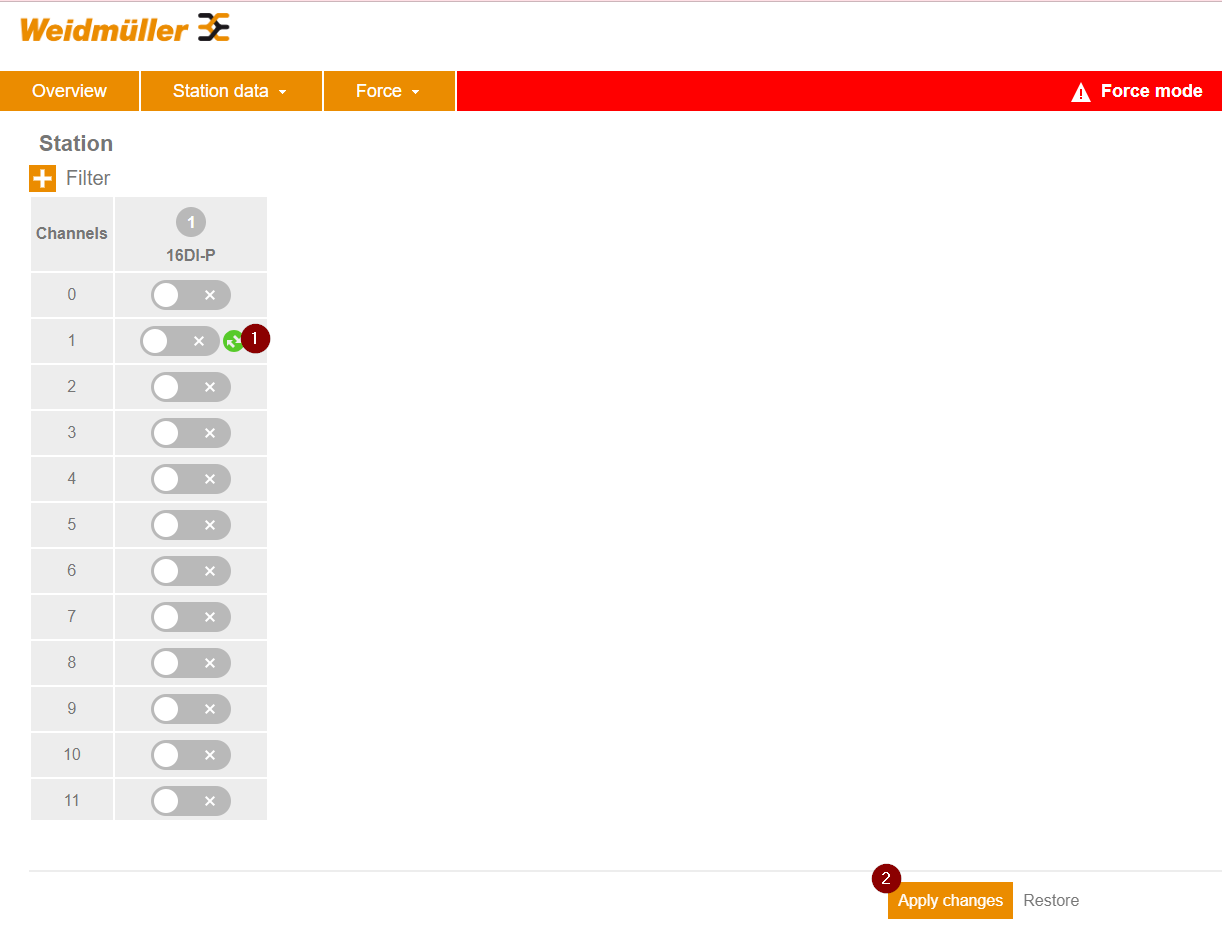
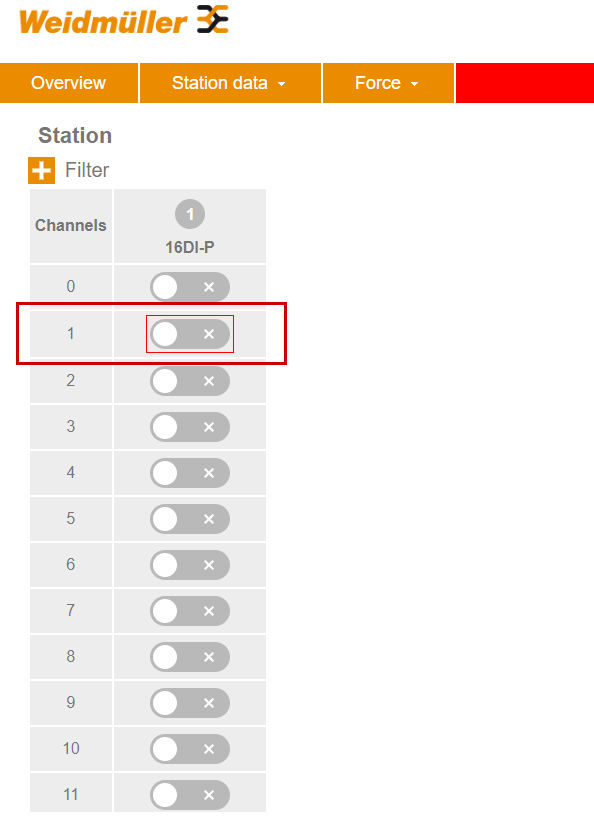
Done!The corresponding IO is marked with a red box and is now forced off.
Force ON
As shown in the figure below, the specified Process IO can be forced ON.
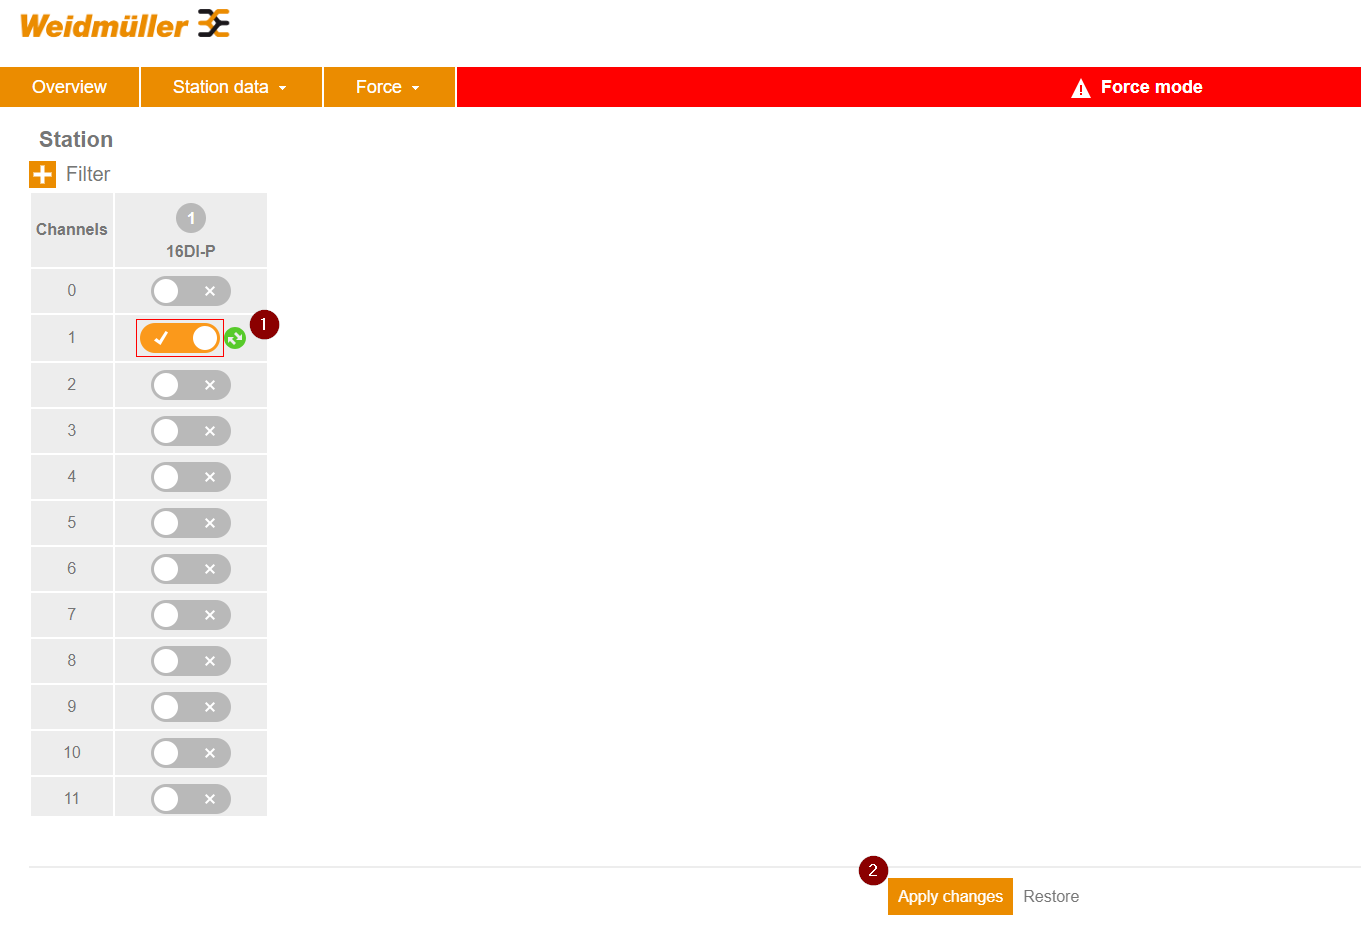
Done!The corresponding IO is marked with a red frame and is now forced ON.
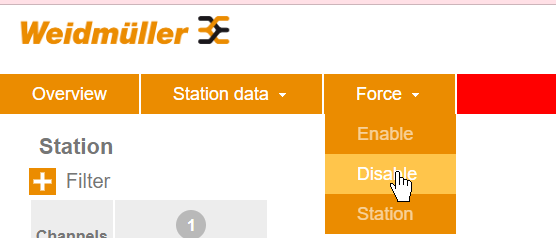
Disable
Do not forget to disable the Force function at the end.
Berghof Side
The next step is to build the Berghof Controller side.
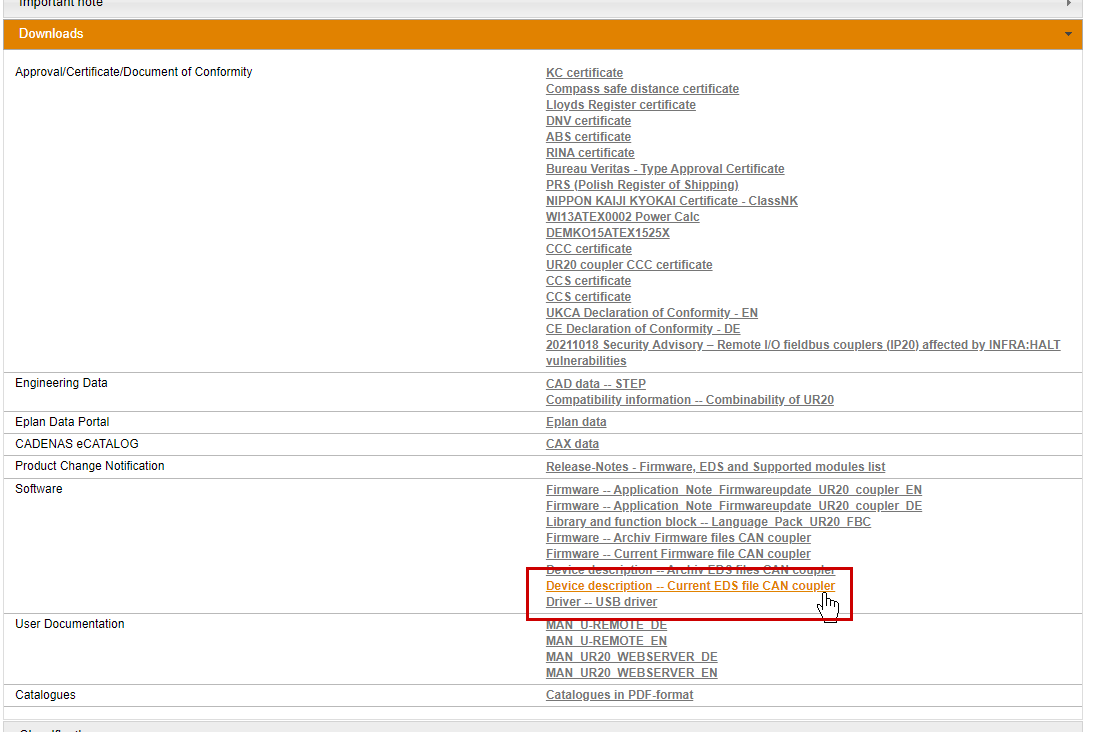
Download EDS File
Download the EDS File of UR20-FBC-CAN Coupler from the link below.
https://catalog.weidmueller.com/catalog/Start.do?localeId=en&ObjectID=1334890000
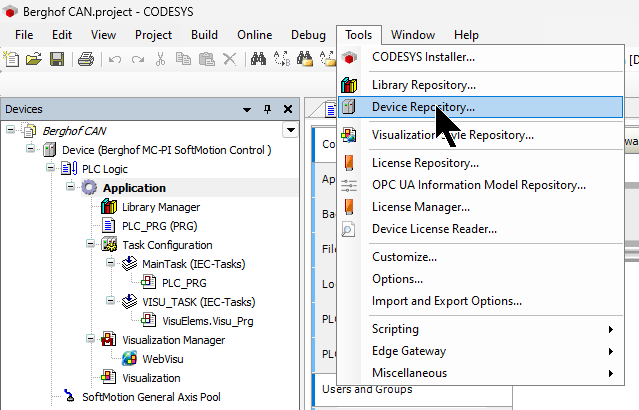
Install EDS File
To install the EDS File from Codesys, click Tools>Device Repository.
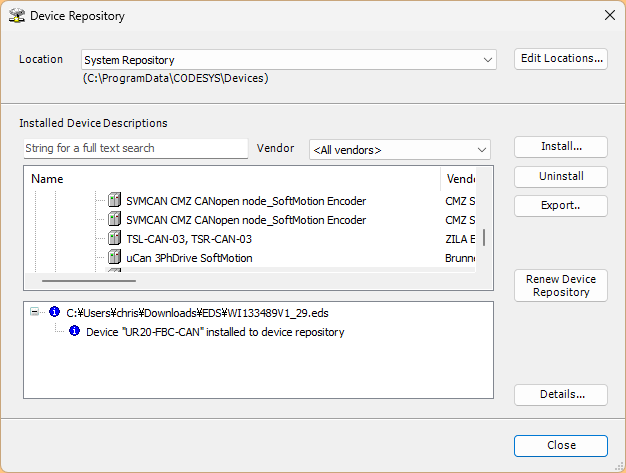
Click the Install button.

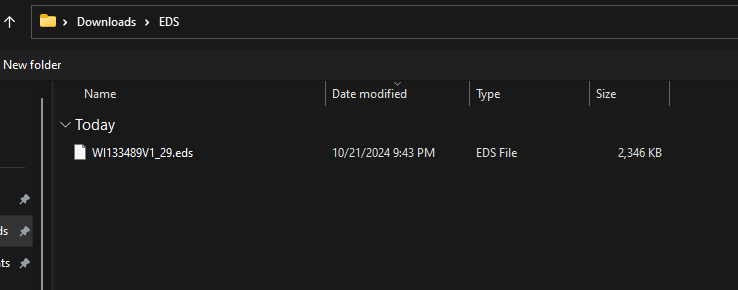
Select the EDS File you have just downloaded.
Done!EDS File has been installed.
Configure CAN Network
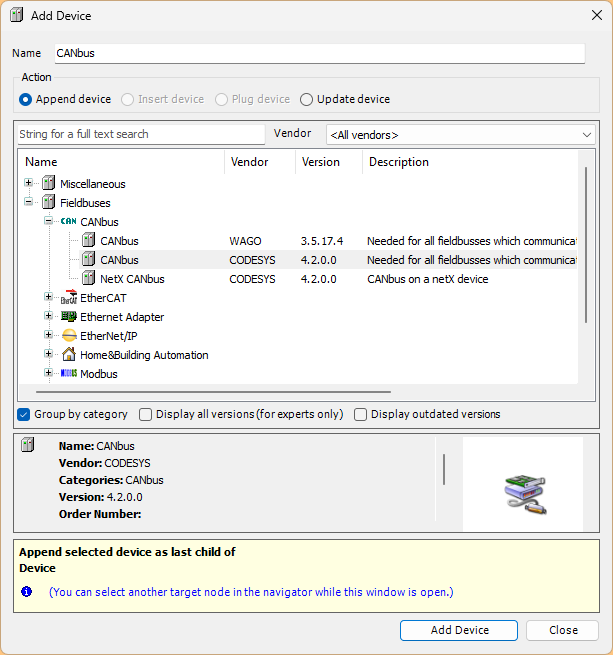
Add CANBus
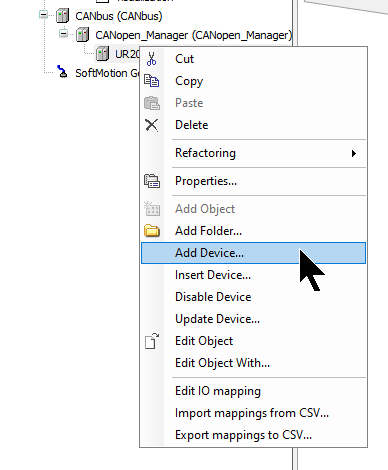
Next, to add a CAN Master to the Berghof MC-PI Controller, go to Device>Right click>Add Device.
Select Fieldbus>CANbus>CANBus.
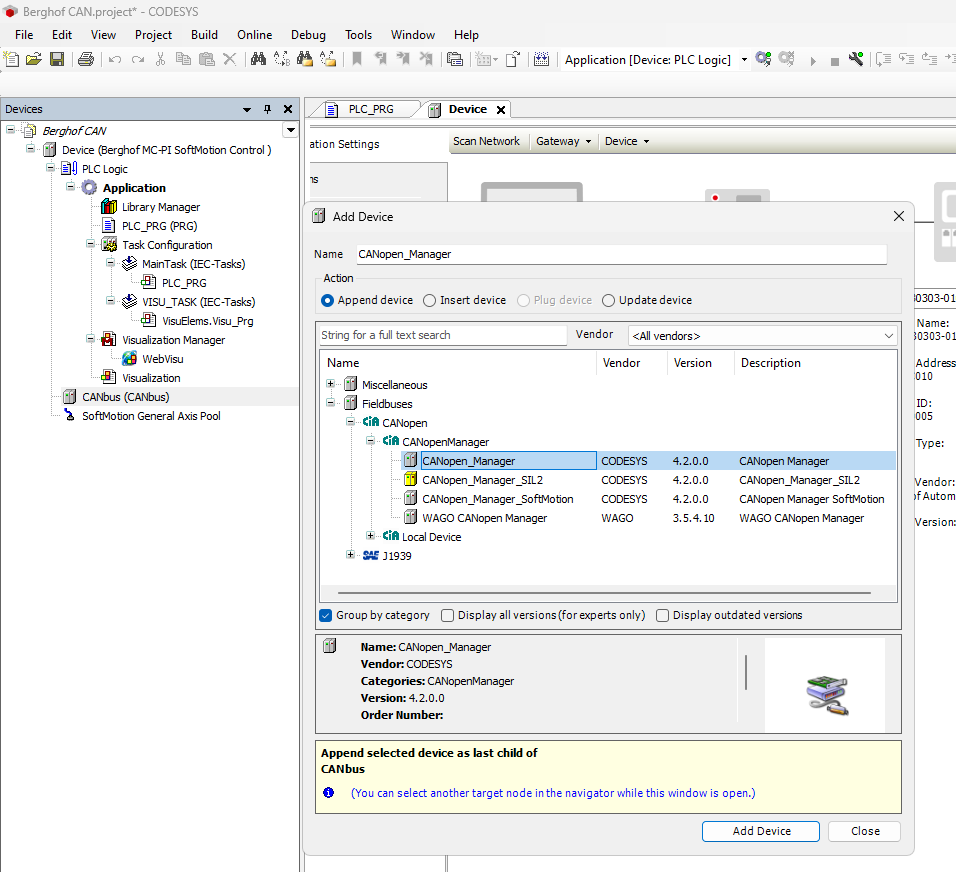
Add CAN Manager
After CANbus has been added, the next step is to click CANopen>CANopenManager>CANopen_Manager.
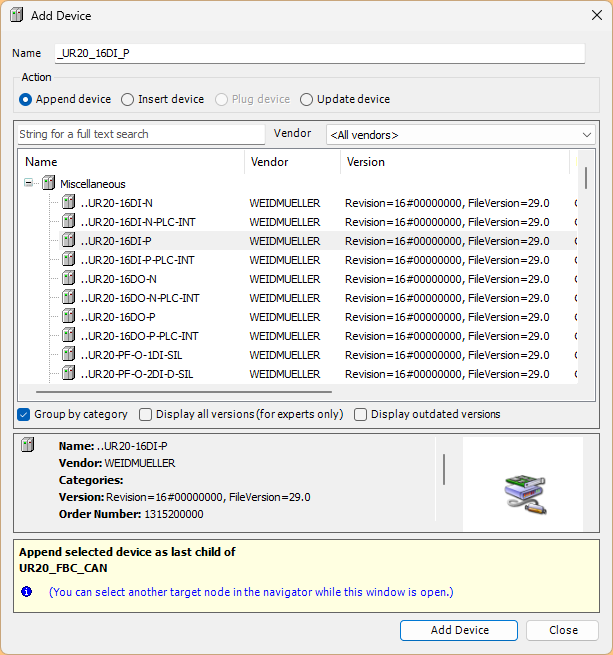
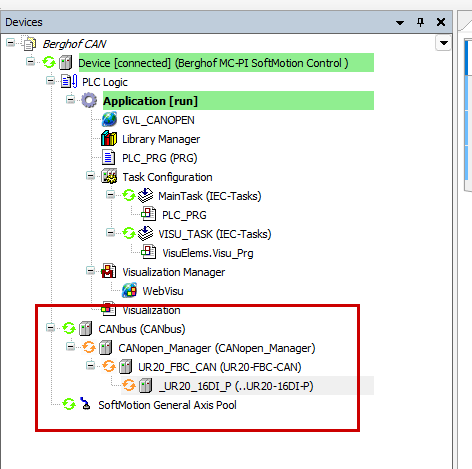
Add UR20-FBC-CAN
This time we will add Weidmuller’s UR20-FBC-CAN Coupler.
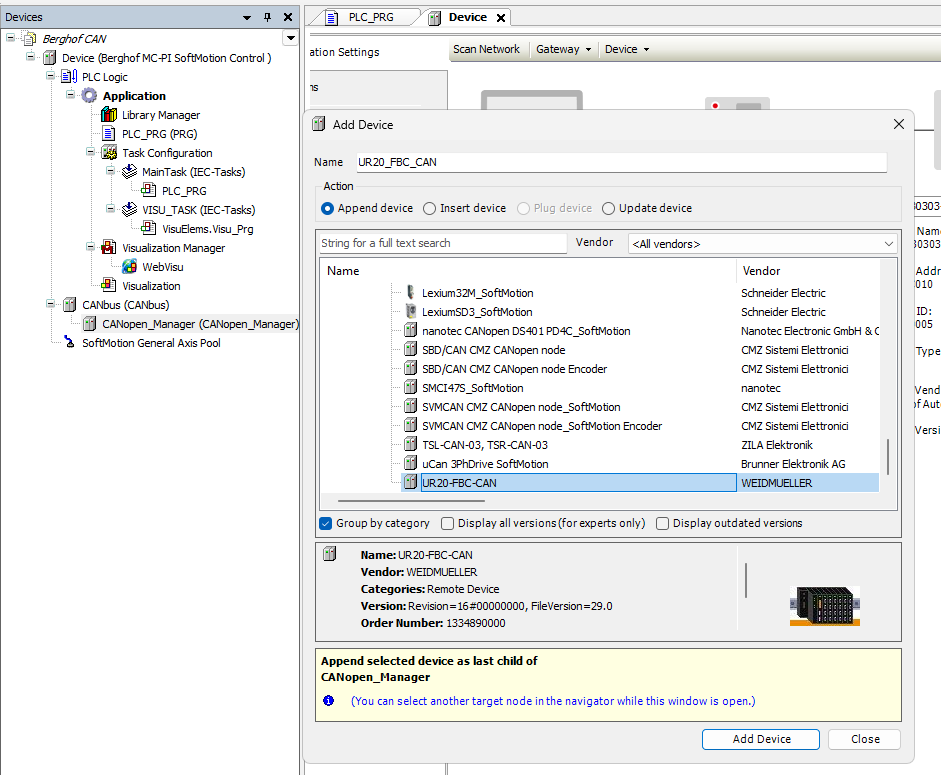
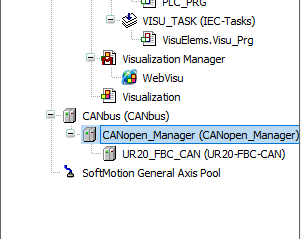
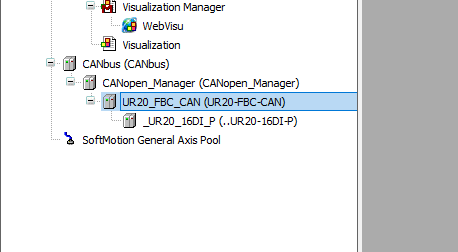
Done!
Add Slot
The last step is to add the 16-point DI module installed in UR20-FBC-CAN.
Select UR20-16DI-P and Add Device.
Done!
Communication Setting
Berghof Controller’s X16 port is Port0, set Network=0, and set the communication speed to 250.
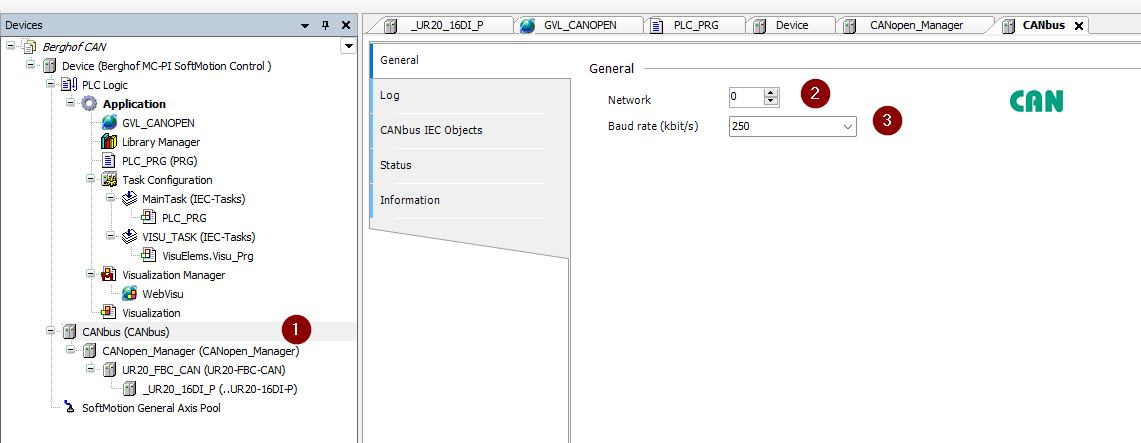
Set the Node-ID of the UR20-FBC-CAN CANOPEN Coupler to 3 to match the actual device.

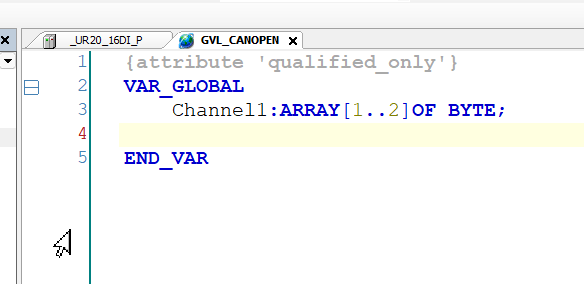
GVL
The next step is to define variables for Mapping with UR20-16DI-P of UR20-FBC-CAN from the Global Variable List.
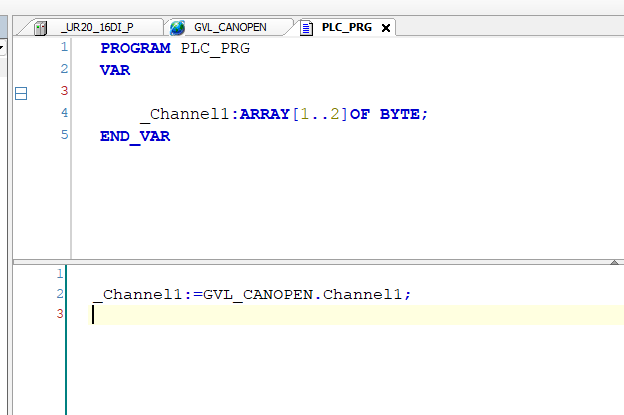
Main
Next, the Main program transfers Process IO data to internal variables.
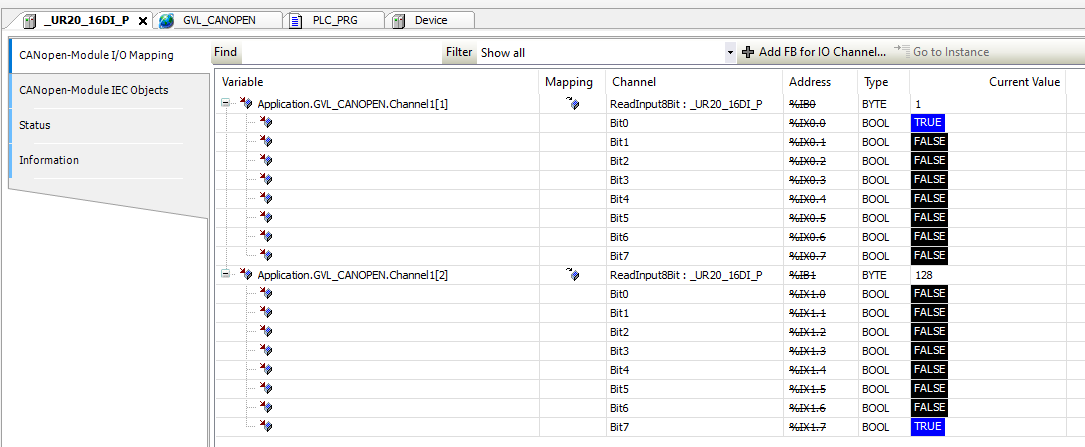
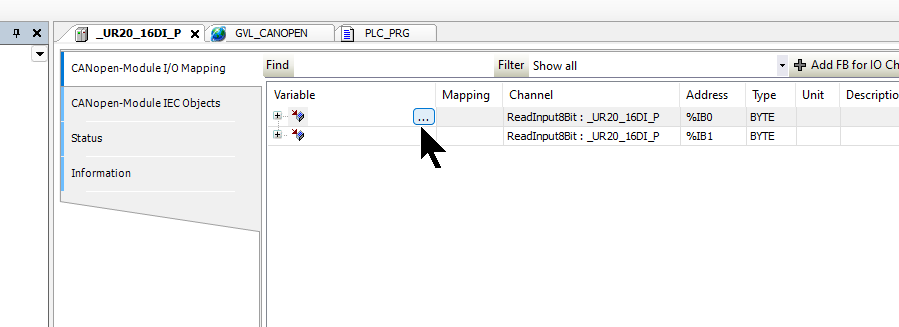
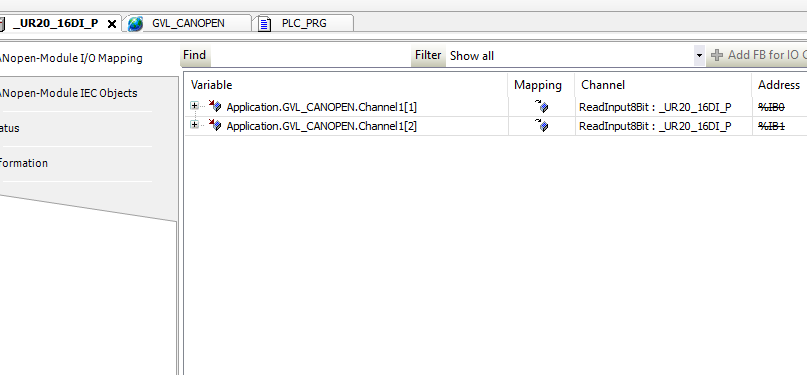
Mapping
Next, click the … button under CANopen-Module I/O Mapping>Variable for mapping with Process IO of UR20-16DI-P.
Select the variable you just defined in GVL.
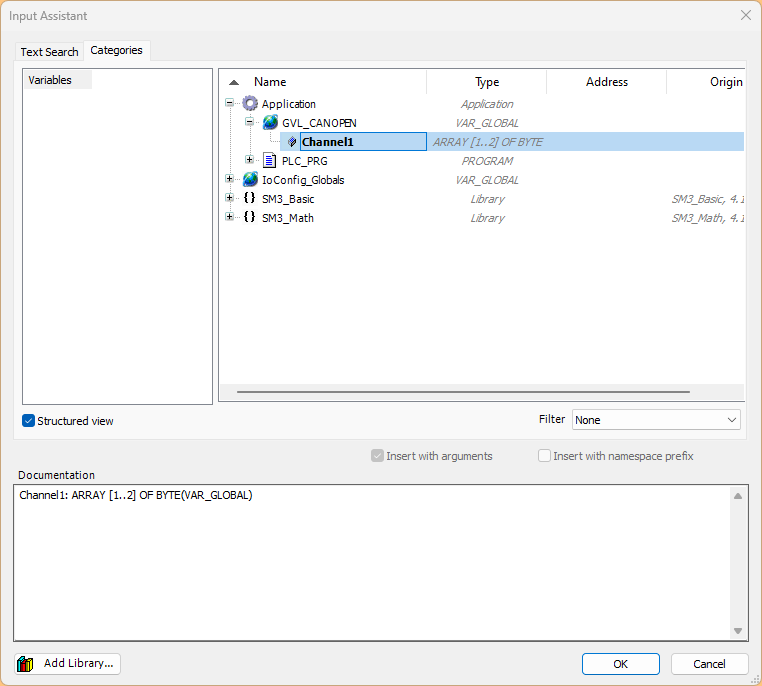
Done!
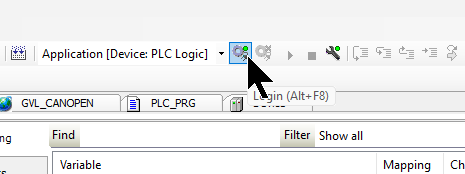
Download
The last step is to download the project to the CPU.
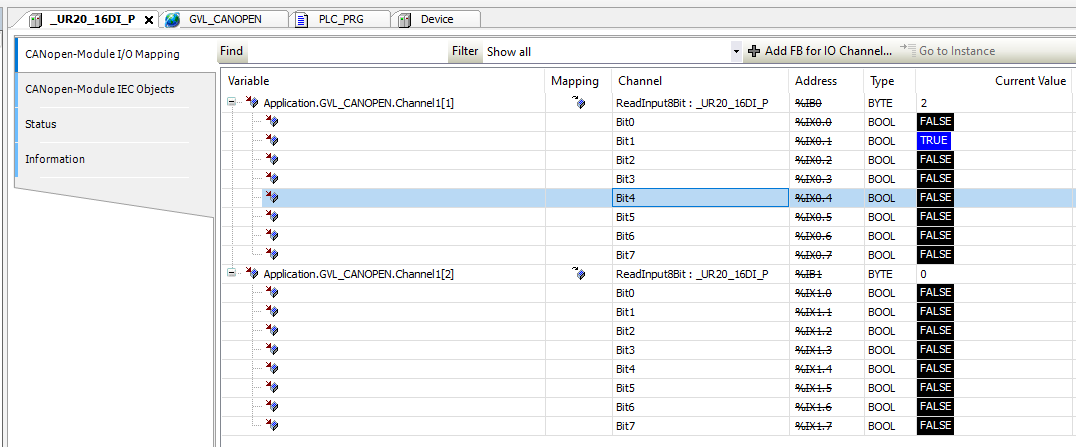
Result
Done!CAN OPEN communication was established with Weidmuller’s UR20-FBC-CAN Coupler.
The input status of the DI module was also checked!