In the last tutorial I explained how to use TF6100 to start up an OPC-UA Server.But you can configure your TwinCAT system as a Client to access other OPC Server.
There are 2 methods to configure your OPC-UA Client – IO Driver or Function Block API.
Configured by IO Driver is used in this post.
Support Data Type

OPCUA Demo Server Installation
You can startup your own OPC UA Server, But here is a faster way to test it.Please download the follow link to install the demo OPC-UA Server.
https://www.unified-automation.com/downloads/opc-ua-servers/opc-ua-c-demo-server.html
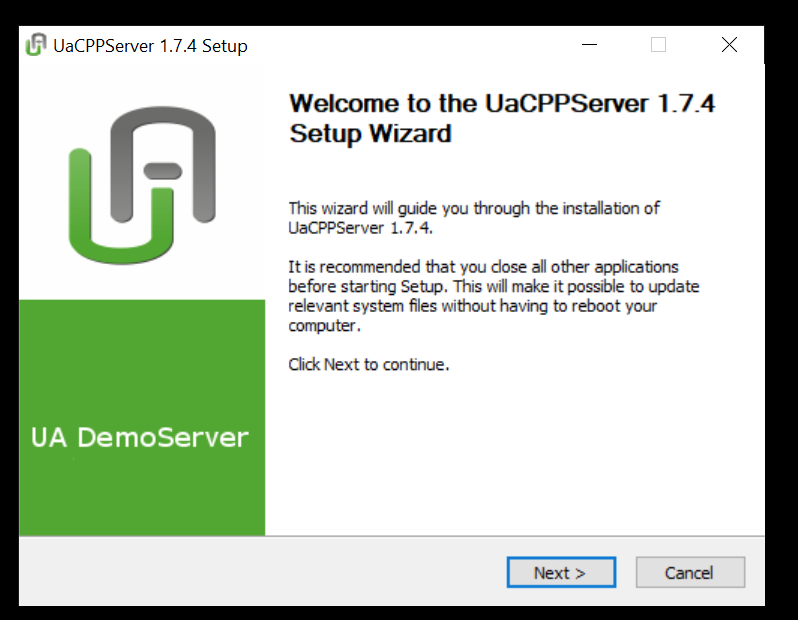
Download the C++ Demo Server – Windows Setup.

Next.
Accept the license and next.
Next.

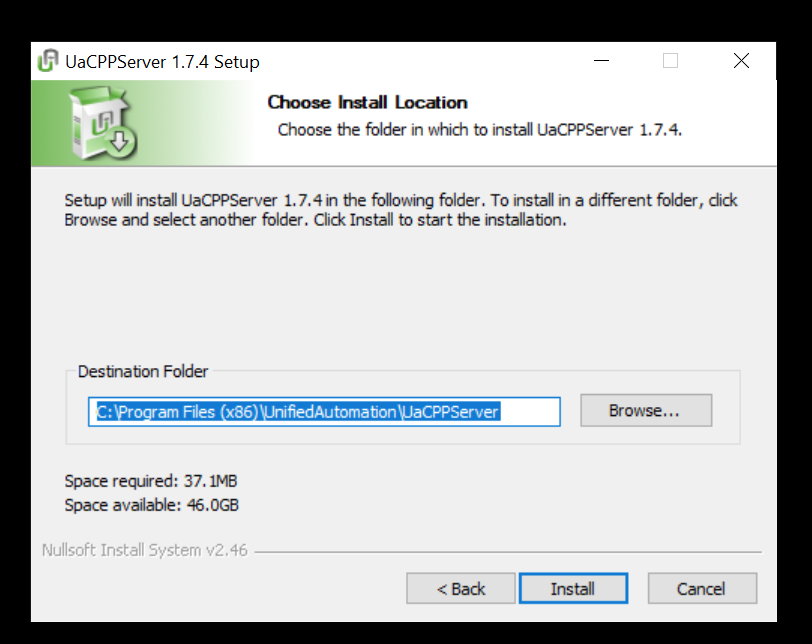
Define your installation path, and press install.
Please wait a mins.

Finished!

OPC UA Server Startup
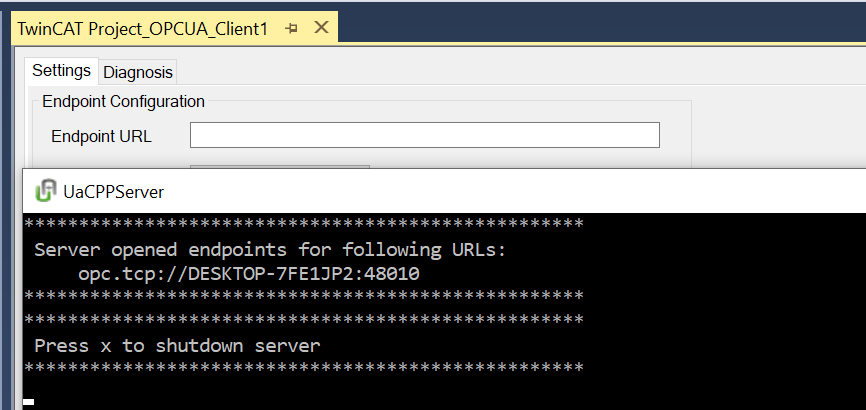
Click the UaCPPServer.
You can see the terminal is started, and view the Endpoint URL.

OPCUA Client IO Setup
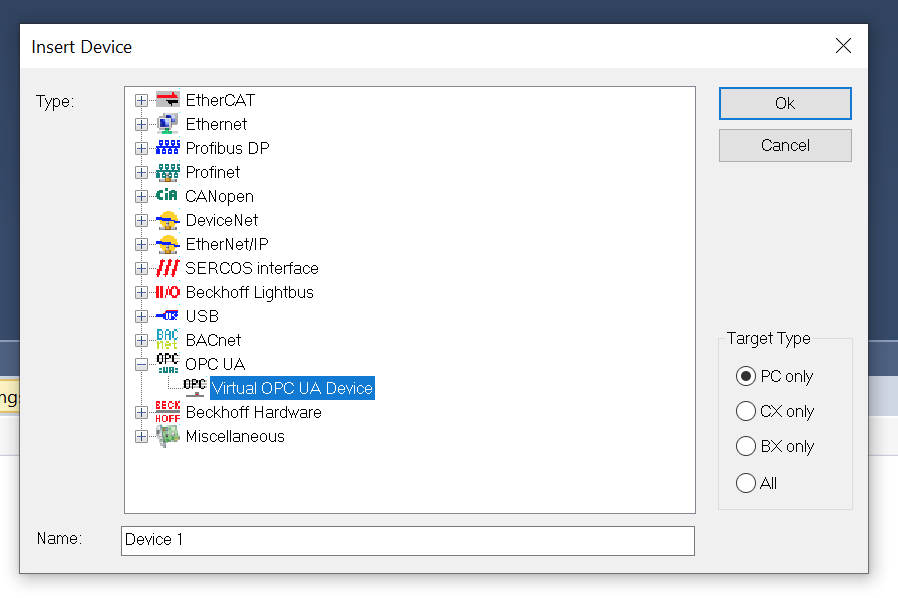
Insert the OPC UA Virtual
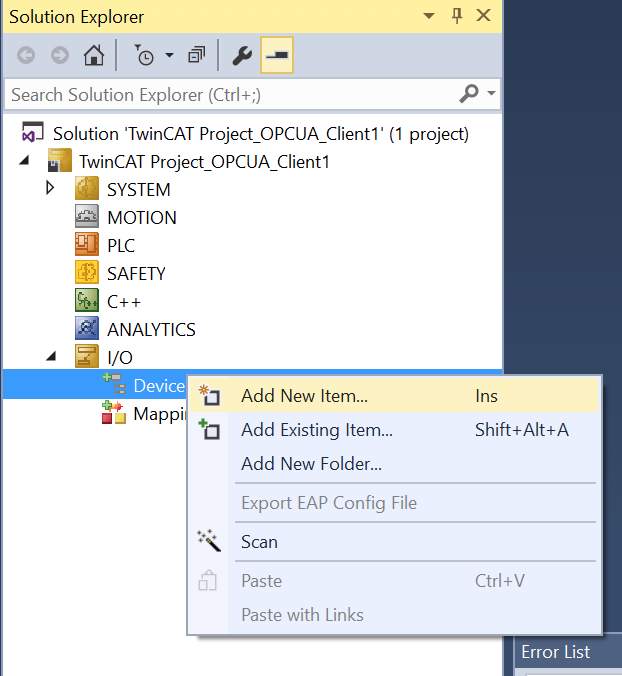
Start your XAE and go to I/O>Device>Add New Item.
Go to OPC UA> Virtual OPC UA Device and OK.
OPC UA Virtual is inserted in your project.
you can map all the input/output for the connection status usage in your application.

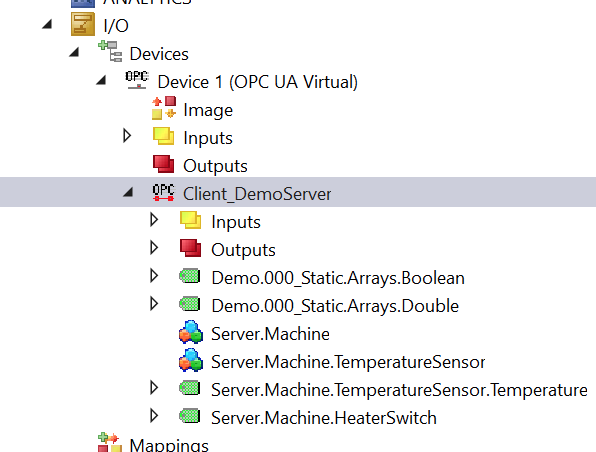
Insert OPC UA Client
Right Click the Device 1 that you inserted before, Add New Item.
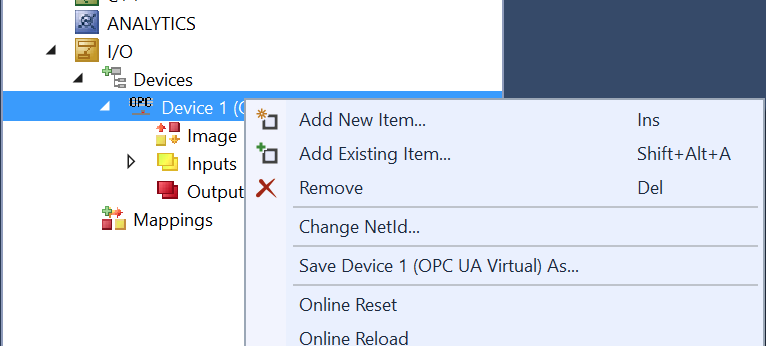
Choose OPCUA Client and press OK.

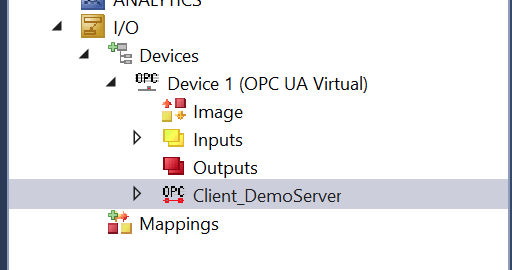
New OPC UA Client is inserted.
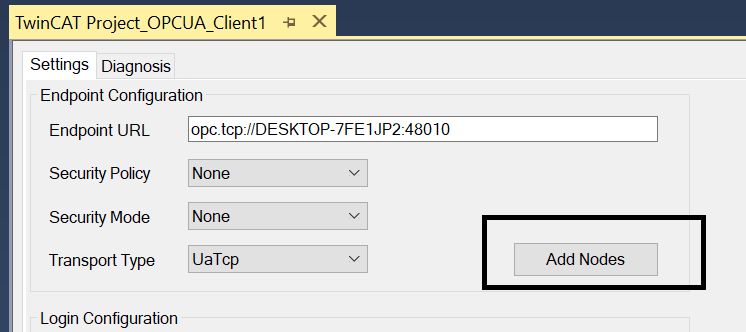
Open the settings > Endpoint URL, and enter the OPC UA Demo Server URL Endpoint that you created before.
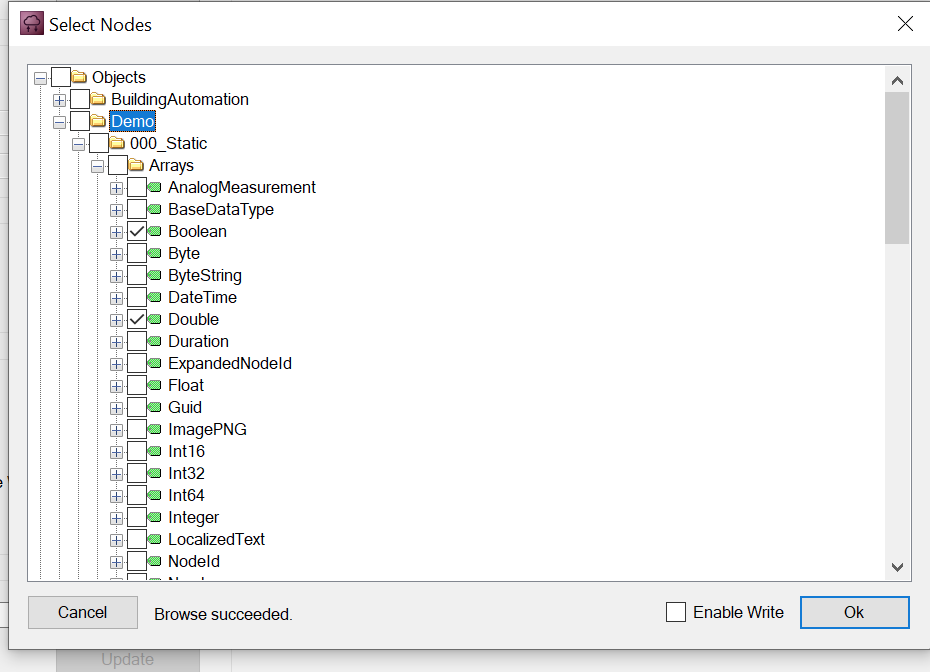
Press the Add Nodes button to add some new nodes.
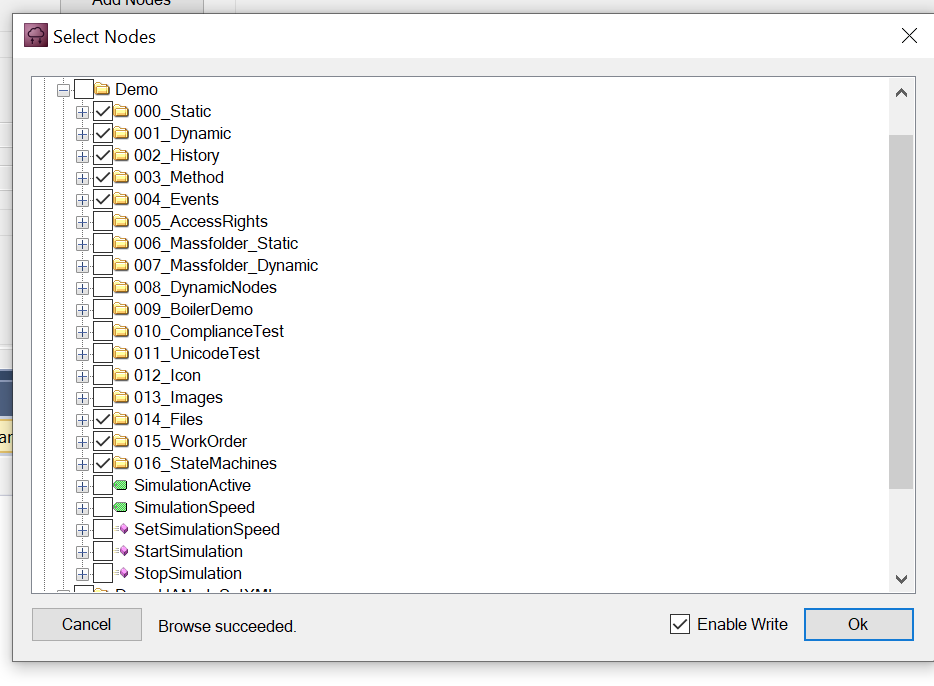
If the connection is established, you can select the nodes that you want to access.
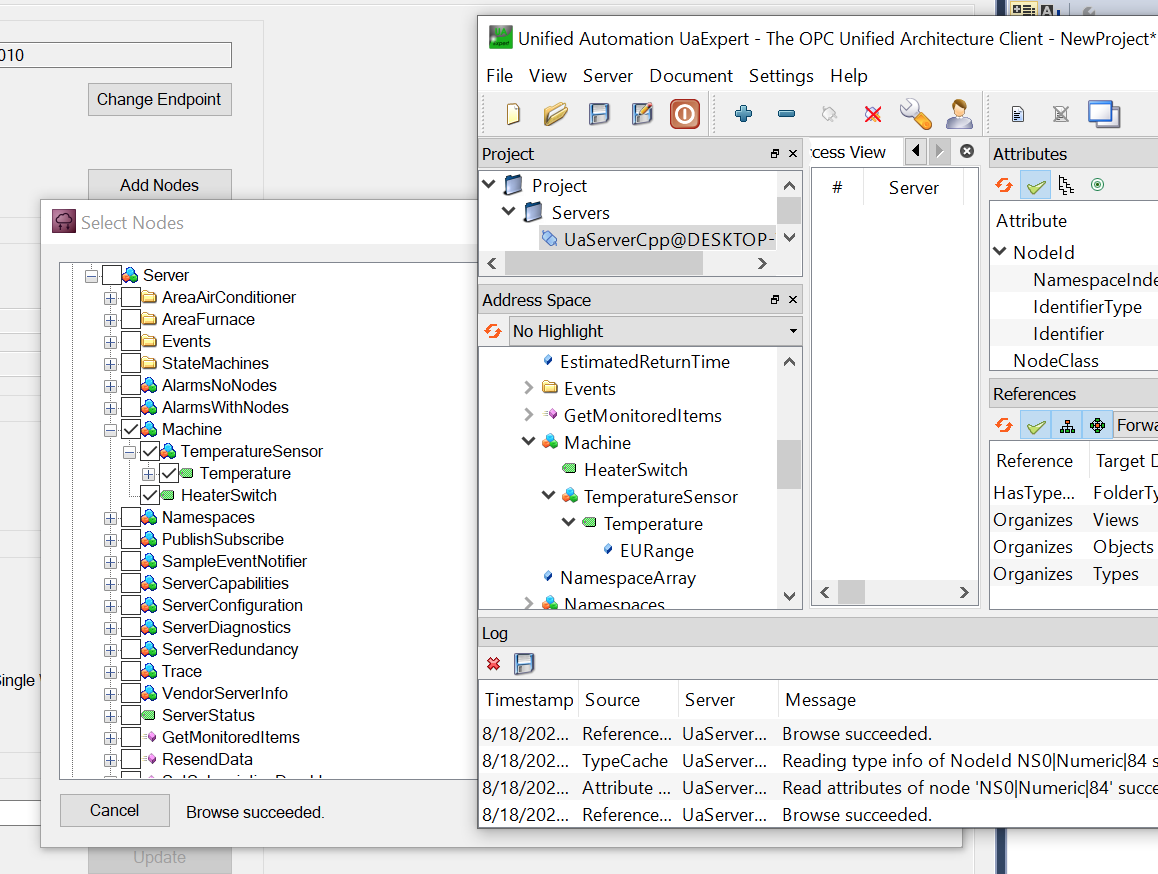
Just select the Nodes that you want and press OK.
The Nodes are inserted in your project.
Read the Node Value
Good! We would try to read the actual values of the nodes.
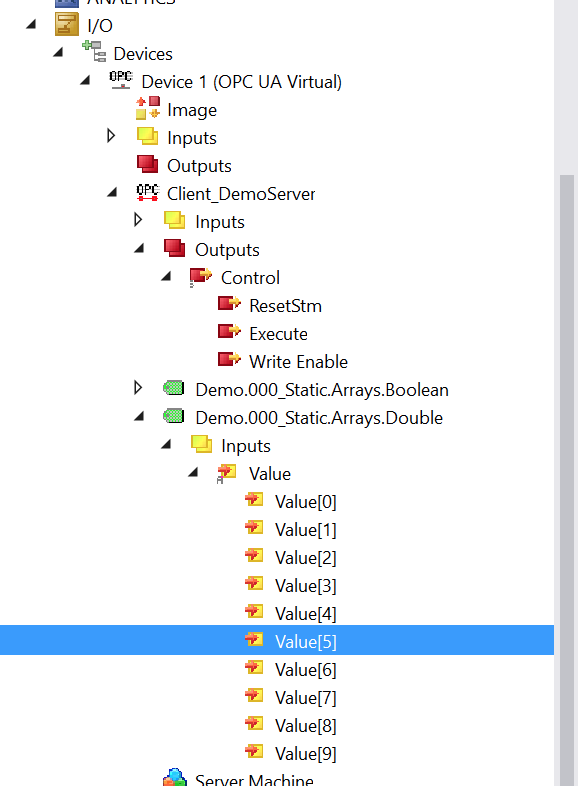
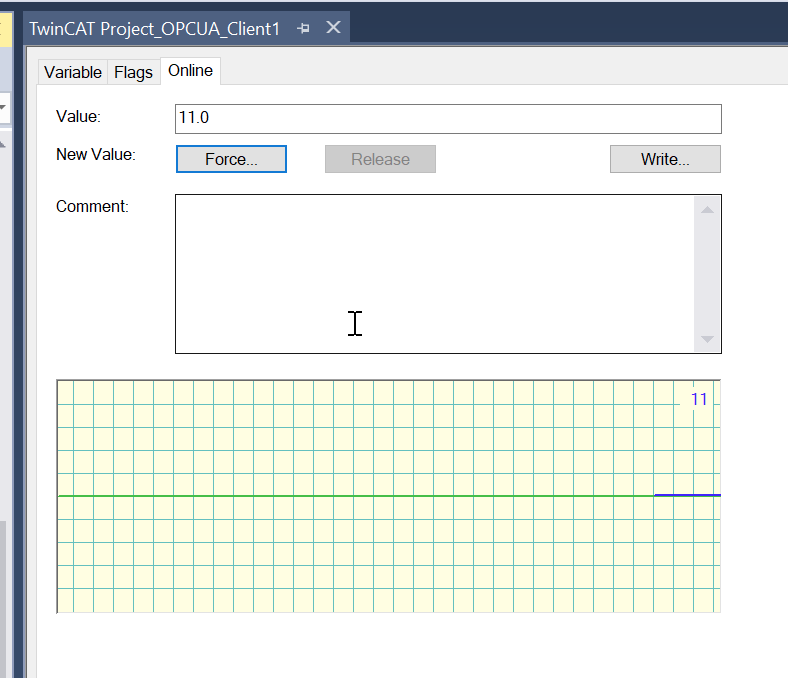
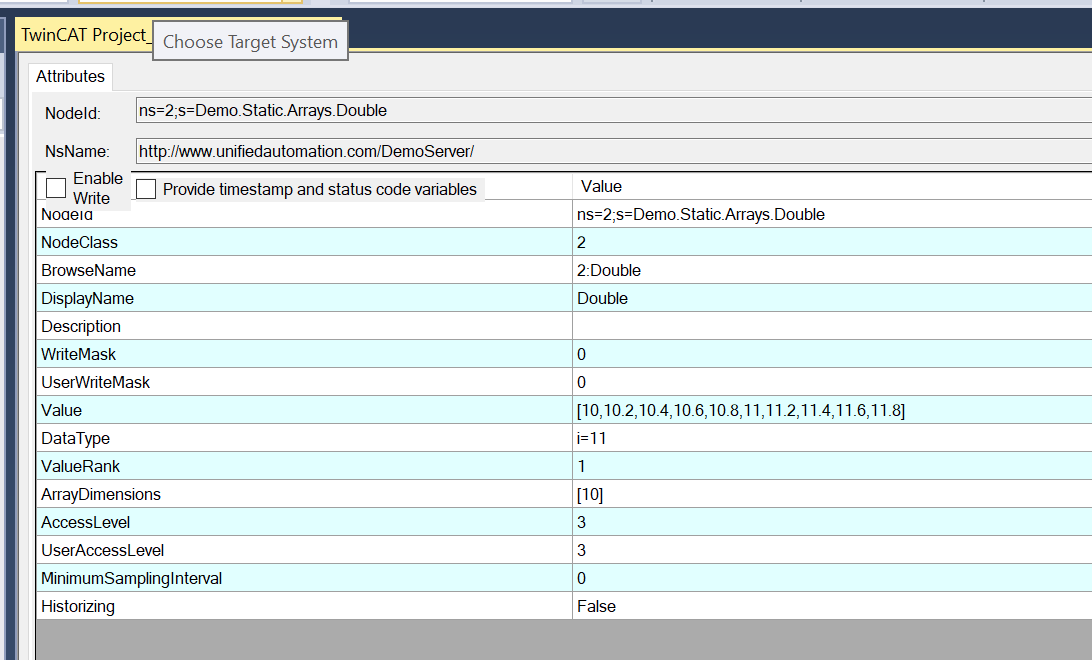
Demo.000_Static.Arrays.Double is an array node with static value, and Let’s read the No[5] elements.Please Double Click it.
Click the Online tab and 11.0 is displayed.
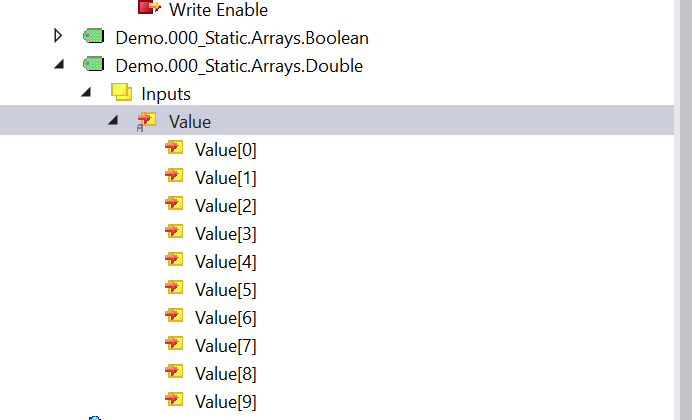
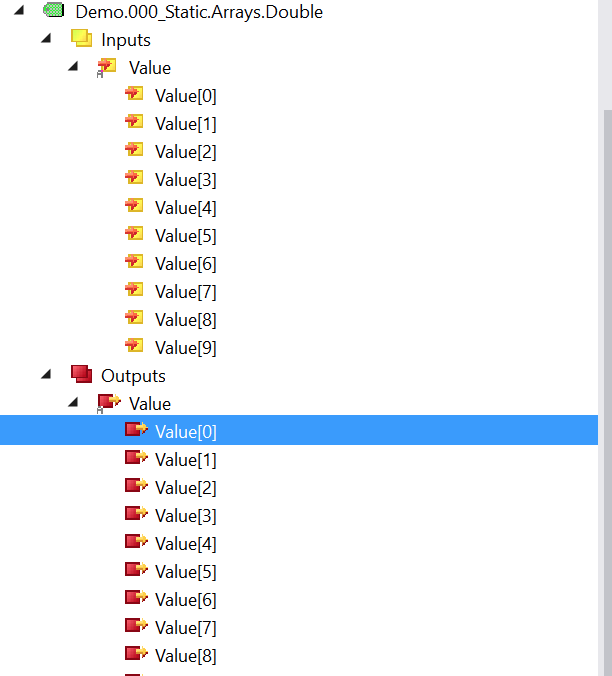
And also you can double click the value to view all the values in the array.
Good.

Write the Node
Now we can try to write the value in a node.
Target is Demo.000_Static.Arrays.Double, and please double click it.

you can view the node attributes . for example the data type,value,etc.
Check the Enable Write Checkbox.

And then click the output item of the process IO.

Omg, Blue Screen..
It seems like there is something wrong in my machine.

Let’s go back to the screen of Add Nodes.
You can see the Enable Write Checkbox here , Right?
Pleae check it.

The Node that you would like to have to write enable attribute, please check the Enable Write Box Also.
Then Download your project again.
Blue Srcreen is shown again if you do not do this.
We will choose Demo.000_Static.Arrays.Double[0] to write a new value.

Let’s set the Execute and Write Enable to True.

And Then click the value[0].
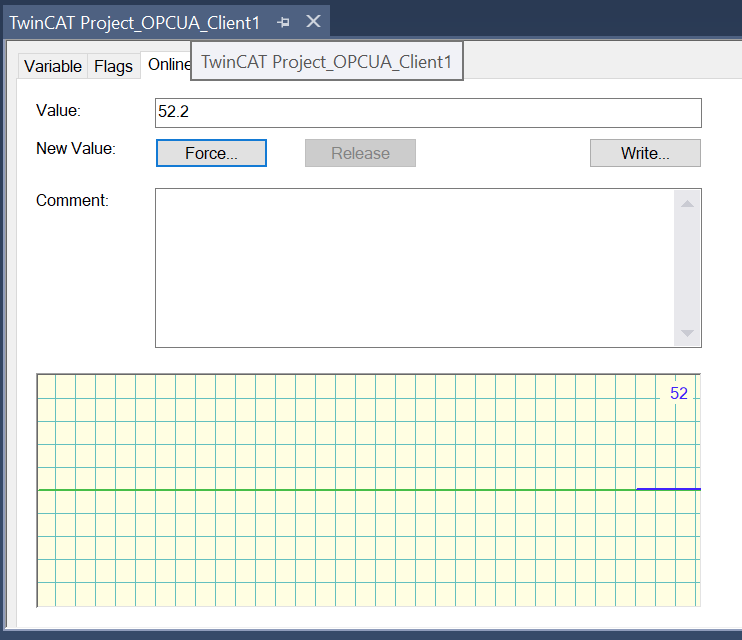
Go to Online and click the write button.

Just input some value that you like, and press ok.

you can see the value has changed!
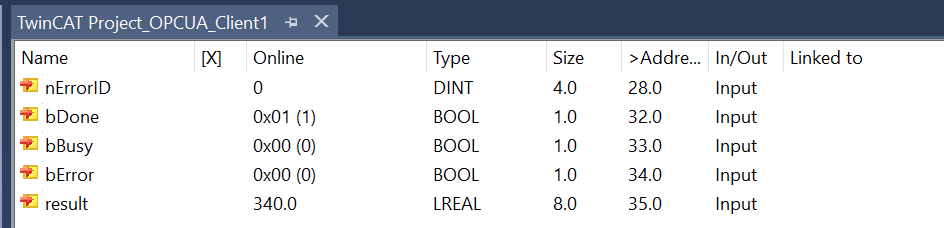
Method実行
And also I will show you how to execute the method inside the OPCUA Server.
Let’s choose Demo.003_method.Multiply in the Demo Server.
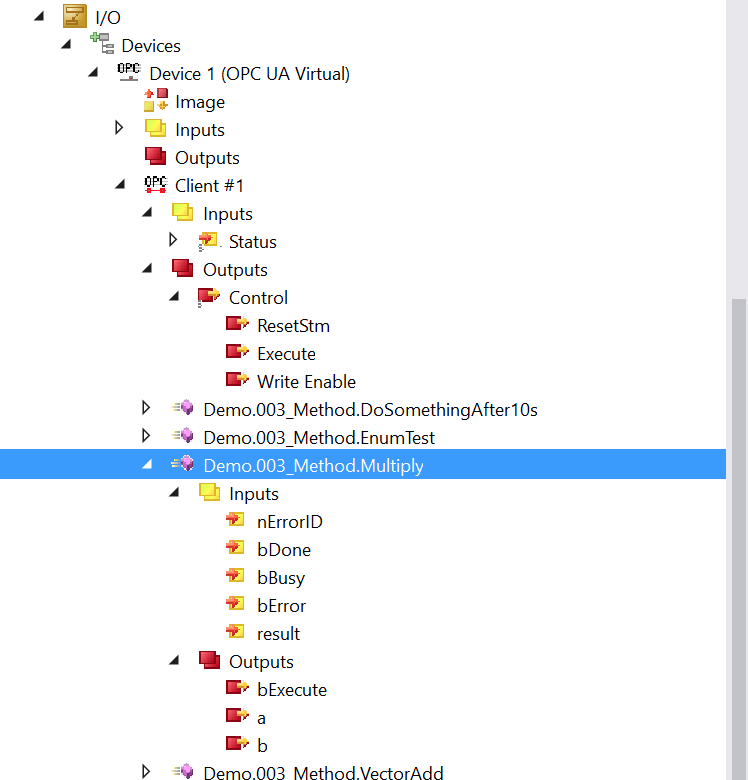
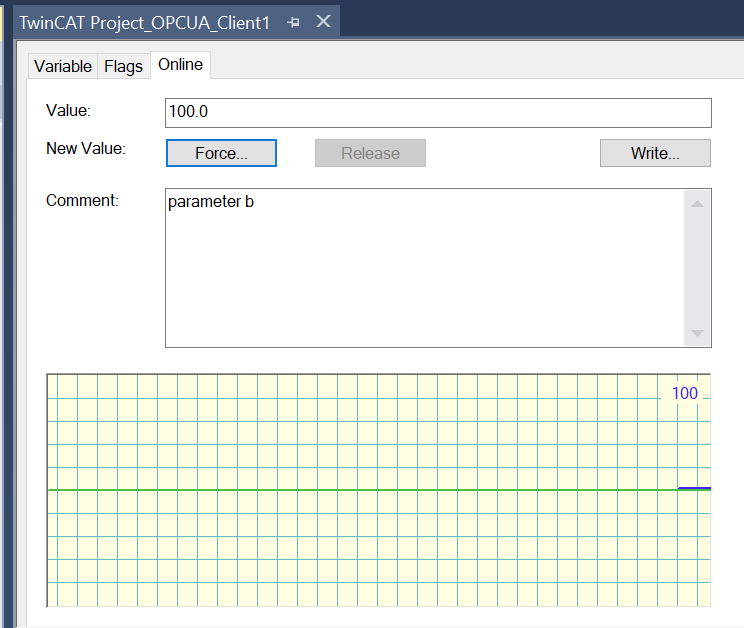
Double Click the parameter a and open the online tab, write some value inside.

As same as parameter b.
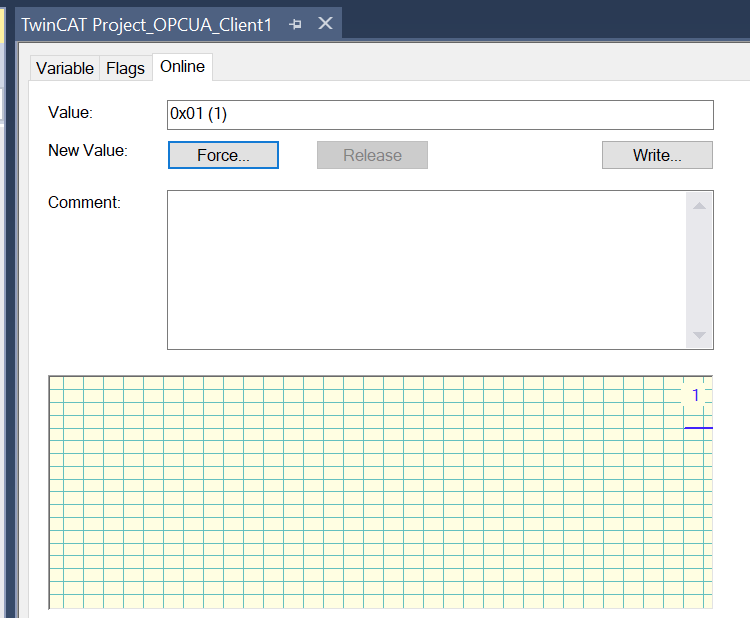
Finally write the true value of bExecute.
You can see the result 😉

And also you can view all values.