This article will introduce concepts related to FX5-OPC usage and OPC UA security. Let’s get started!
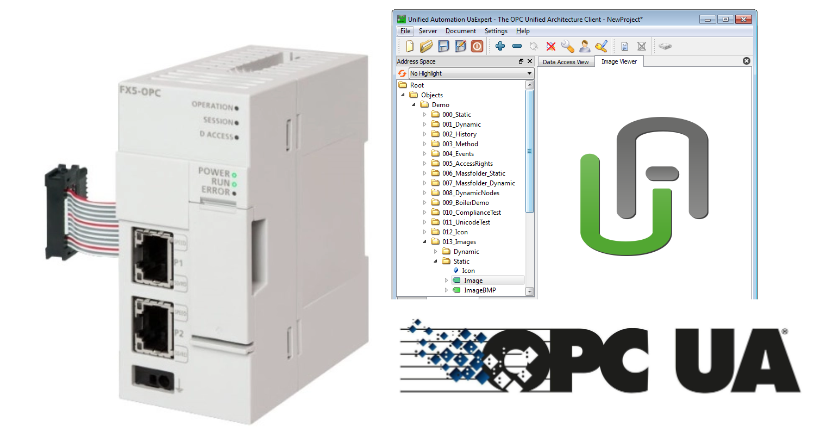
FX5-OPC
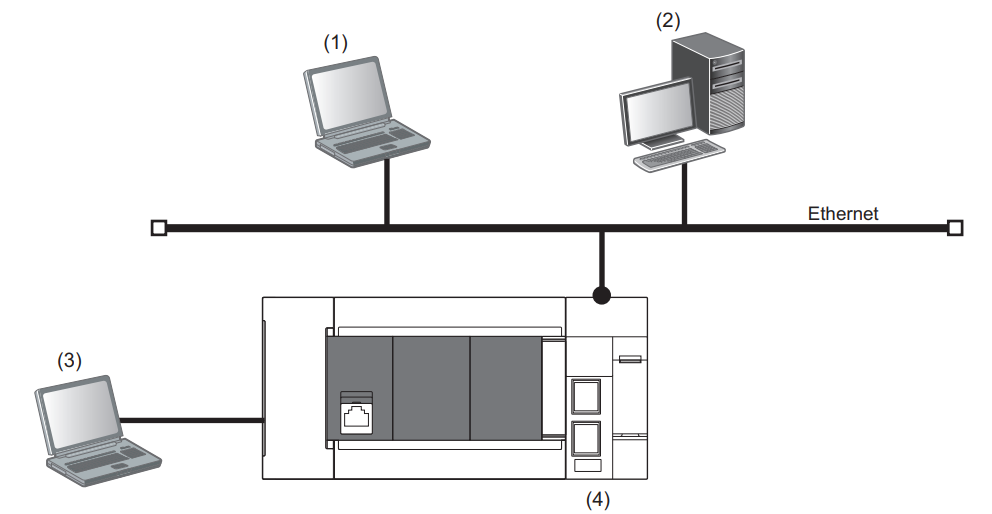
OPC UA is an architecture for exchanging information between applications and devices.
In the form supported by FX5-OPC, information is exchanged between an OPC UA client (external application or device) and an OPC UA server (FX5-OPC).
The information exchanged is modeled as a set of objects and references. A dedicated protocol built on the TCP/IP network layer is used for information transfer; OPC UA communication is suitable for all types of networks, including the Internet, due to its strong end-to-end security.
Server start/stop
FX5-OPC automatically starts the OPC UA server function at startup. It can be stopped and restarted at any time using the OPC UA module configuration tool. When requesting to stop the module, FX5-OPC first closes the TCP sessions of all OPC UA clients before moving to the “stopped” state.
TCP sockets assigned to ports on the OPC UA server are closed while the server is down.
Security
FX5-OPC supports the full security stack of the OPC UA specification for the transport and application layers.
Security configuration
FX5-OPC security can be configured in GX Works3 and the OPC UA Module Configuration Tool, and the security parameters in the OPC UA Module Configuration Tool allow offline editing of various settings as part of OPC UA.
In addition, an administrator password can be set to protect the security parameters stored in the project from unauthorized access.
Security parameters can be written to FX5-OPC using the online function of the OPC UA module configuration tool.
Certificates
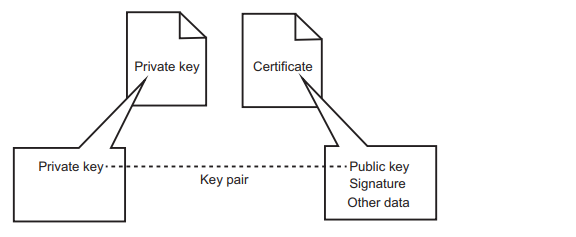
A certificate with an embedded public key and corresponding private key plays a dual role in the security of OPC UA.
First, it is needed to achieve asymmetric encryption and message signing used to establish a secure connection between the OPC UA client and the OPC UA server.
Second, it is also used within the PKI (Public Key Infrastructure) for mutual authentication of client and server.
For enhanced security, the FX5-OPC server certificate is not part of the security settings that can be edited offline and saved in the project file of the OPC UA module configuration tool. So the server certificate and its private key are stored only within FX5-OPC.
When the OPC UA Module Configuration Tool is connected to FX5-OPC, detailed information about the server certificate read from FX5-OPC is displayed, and the server certificate can be regenerated or deleted with the OPC UA Module Configuration Tool.
In addition, server certificates have a certain validity period; FX5-OPC will notify an event (0902H) when 80% of the server certificate validity period has elapsed while the OPC UA server is running.
Rejected certificate
The certificate rejected by the module is stored in FX5-OPC. This can be read and displayed with the OPC UA Module Configuration Tool. Any certificate displayed in the list can be moved to the trusted certificate list.
If the authentication of the connecting OPC UA client fails, the client certificate is added to the list of rejected certificates.
The following is an example of connection authentication failure.
- The connecting OPC UA client presented a self-signed certificate, but no matching certificate is in the current list of trusted certificates.
- The connecting OPC UA client presented a CA-signed certificate, but the Certificate Authority’s certificate is not in the current list of trusted certificates.

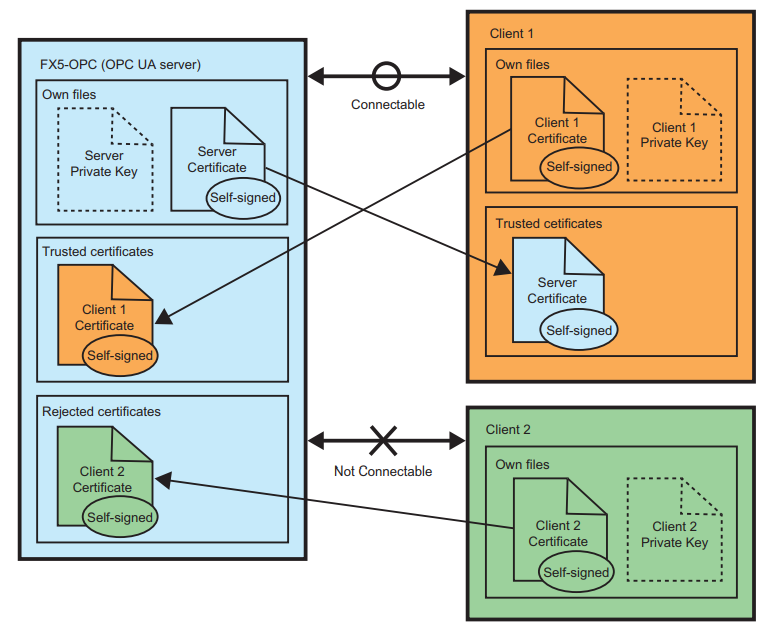
Operations when using self-signed certificates
Certificates can be self-signed or signed by an external Certificate Authority.
If all OPC UA clients and the OPC UA server have self-signed certificates, the server must store the client certificate in a trusted certificate list to establish a secure connection with the client.
- When an OPC UA client connects to a server, the client sends its own certificate with the connection request.
- Next, the server checks whether the client certificate exists in the trusted certificate list.
- If the certificate is present in the trusted certificate list, a secure connection can be established. Otherwise, the certificate is stored in the rejected certificate list.
The operation of the OPC UA client is the same: the OPC UA client must store the server certificate in its own trusted certificate list in order to communicate with the server.
User authentication
Access to FX5-OPC can be prevented by unauthorized users by setting a user name and password. The user name and password can be set with the PC UA Module Configuration Tool.
Endpoint
FX5-OPC has a set of URLs that can be combined with a set of security profiles according to the security settings.
The URLs are in the following format
| opc.tcp://(IP address of an FX5-OPC):4840/Mitsubishi/FX5-OPC. |
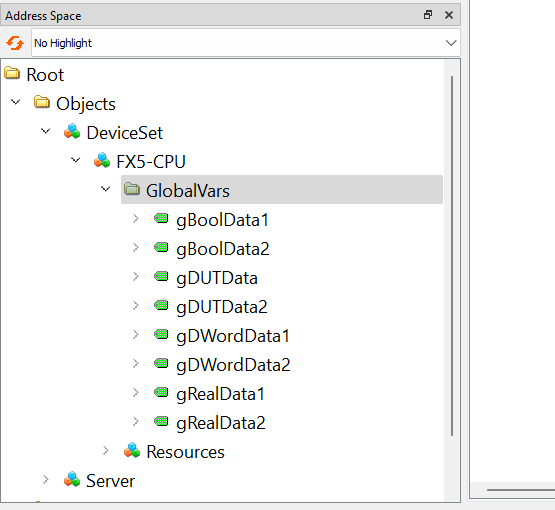
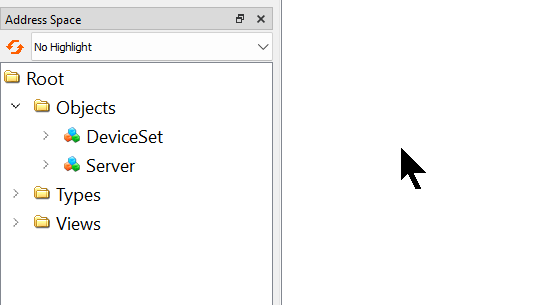
Address space
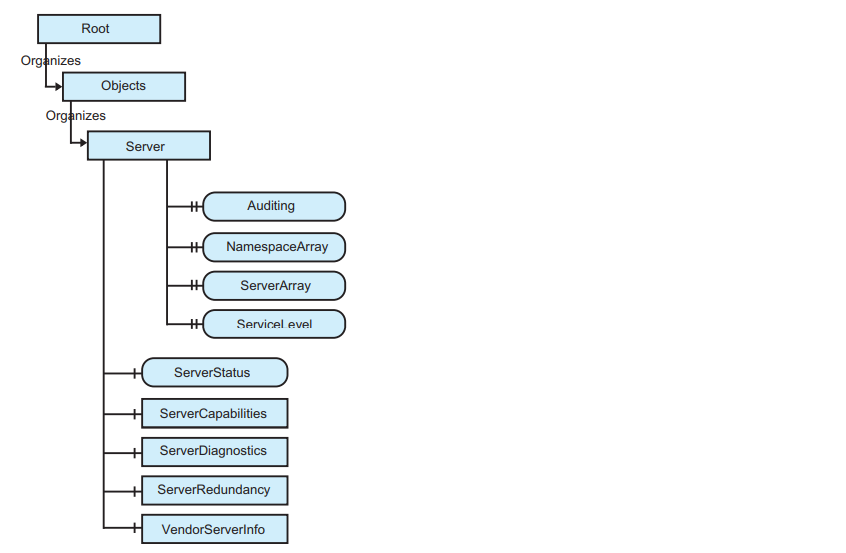
FX5-OPC supports the Core Server Interface of the OPC UA specification.
Overview
The Address space in FX5-OPC contains variables and objects mapped to GX Works3 project data (labels, data types, POUs, etc.) and organized according to the PLCopen information model.
The address space also contains a mandatory server object that provides basic information about the server instance.
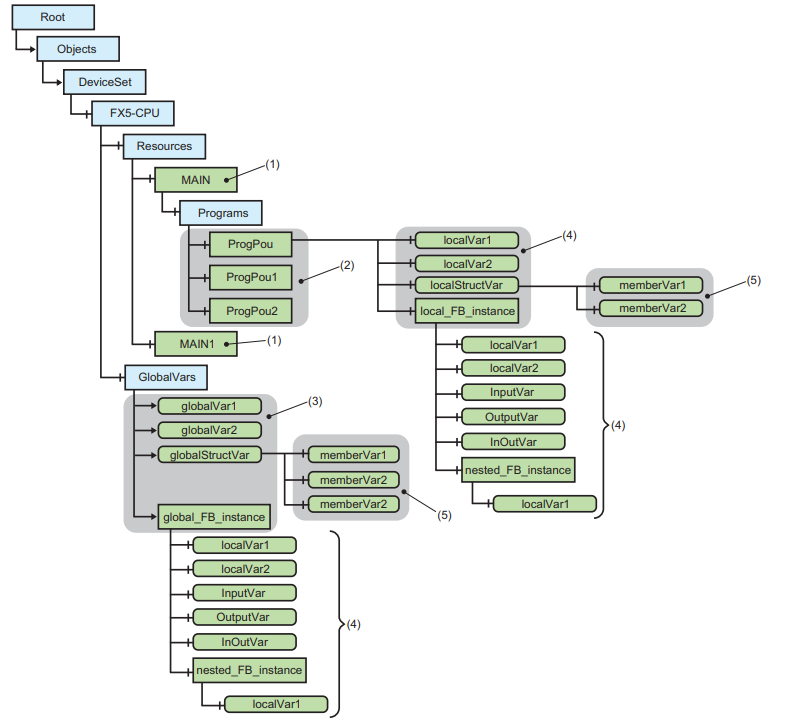
User nodes
Below is an example of an Address space with an instance of a user-defined project element.
The structure of this part is defined by the PLCopen information model and follows the structure of PLC resources.
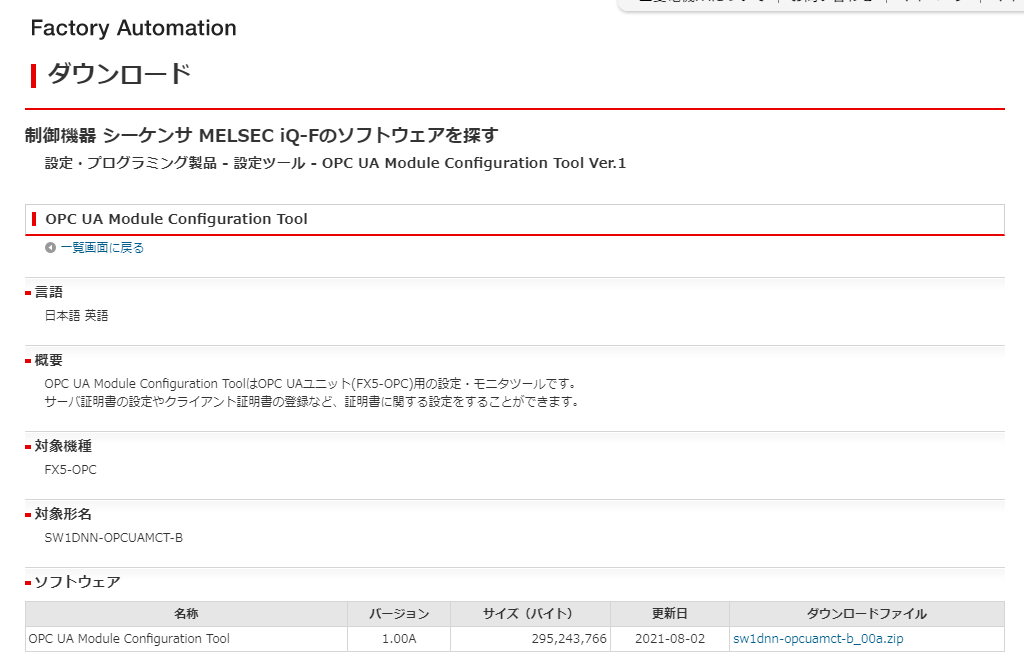
Download Tools
The OPC UA Module Configuration Tool is required to build the security settings for FX5-OPC and can be downloaded at the link below.
Installation Tools
Unzip the Setup file you just downloaded and double-click Setup.exe.
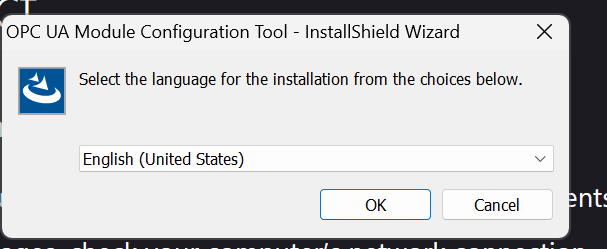
Set the language for installation and press OK to proceed.
Proceed with Next>.
Agree to the license and proceed with Next>.
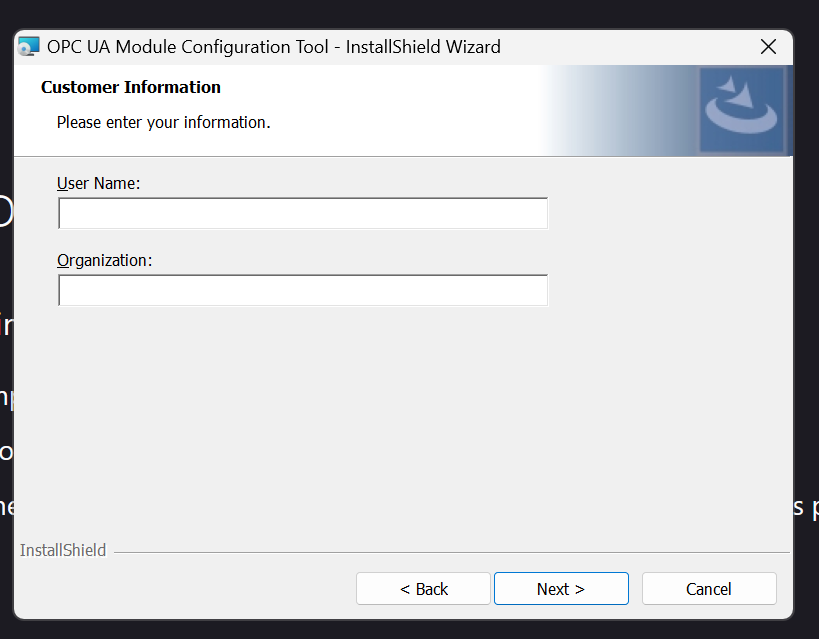
Enter your personal information and proceed with Next>.
Set the installation location for the tool and proceed with Next>.

Start Install.
Wait a second..
Done!
Implemetation
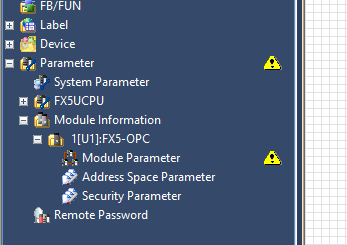
Module Configuration
Open Module Configuration and add FX5-OPC to your project.
Add FX5-OPC into your configuration.
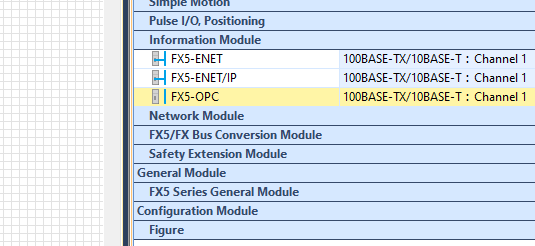
Drop FX5-OPC.
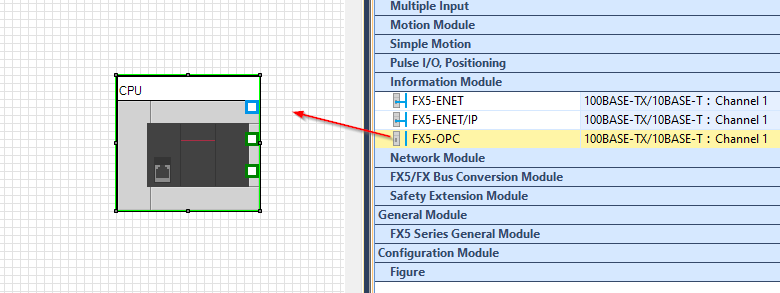
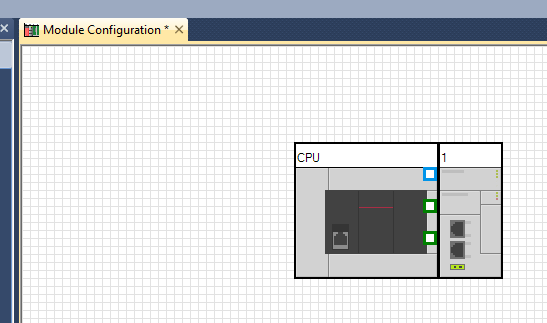
Done!FX5-OPC was added.
Check Parameters
Check Parameter for the first added module, Tool>Check Parameter.
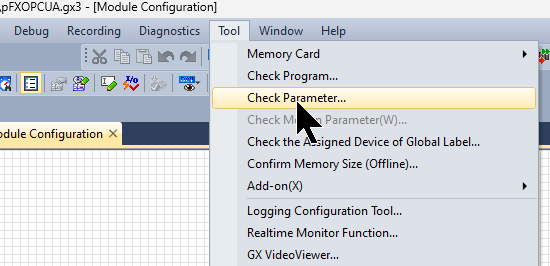
Done!
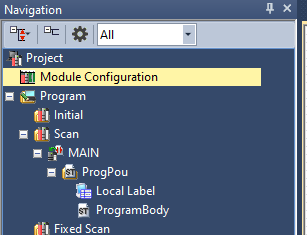
Program
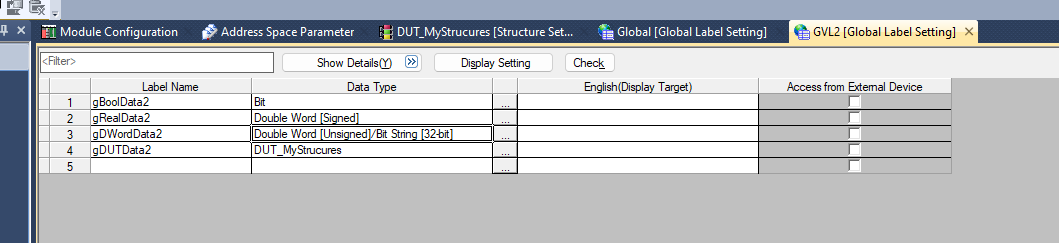
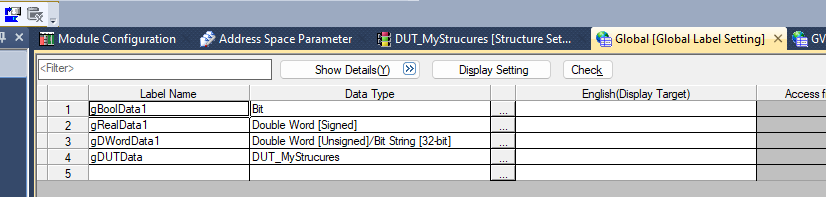
Define variables to be published to the network as Node of OPC UA Server. add two Global Label List to Global Label.
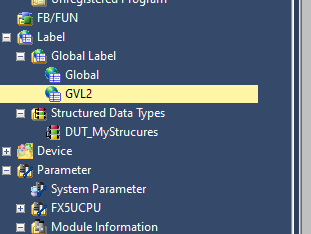
Define the Simple Data Type and structure in the Global Label List.
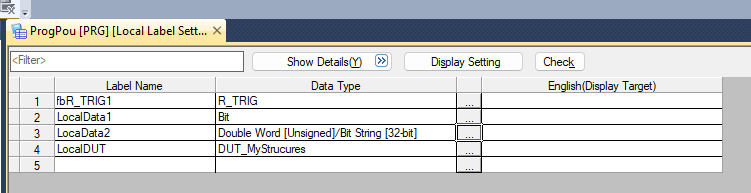
At the same time, define variables to be exposed as OPC UA Node in the program on the Local Label sheet.

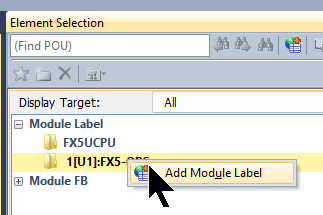
Add Module Label
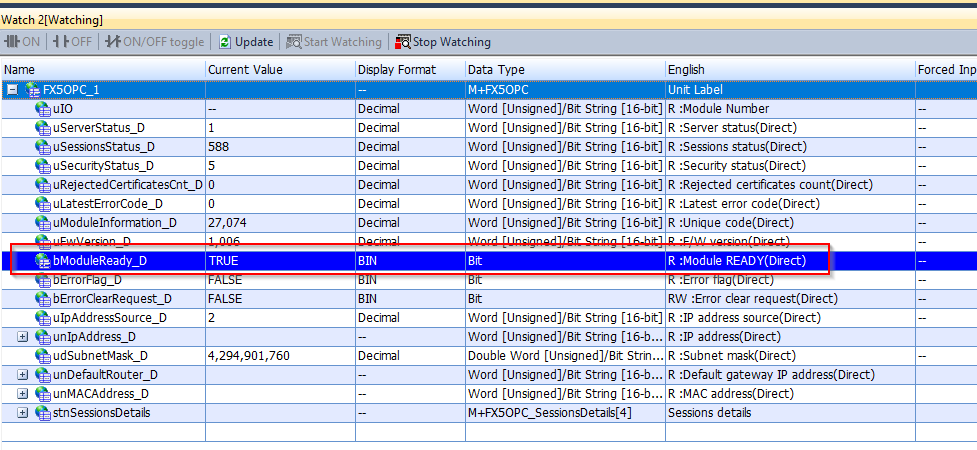
If you want to get the status of FX5-OPC, please access Buffer Memory or add a Module Label.
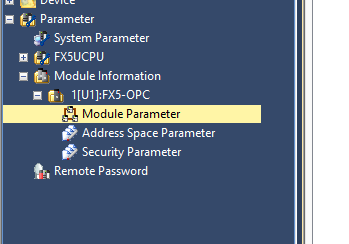
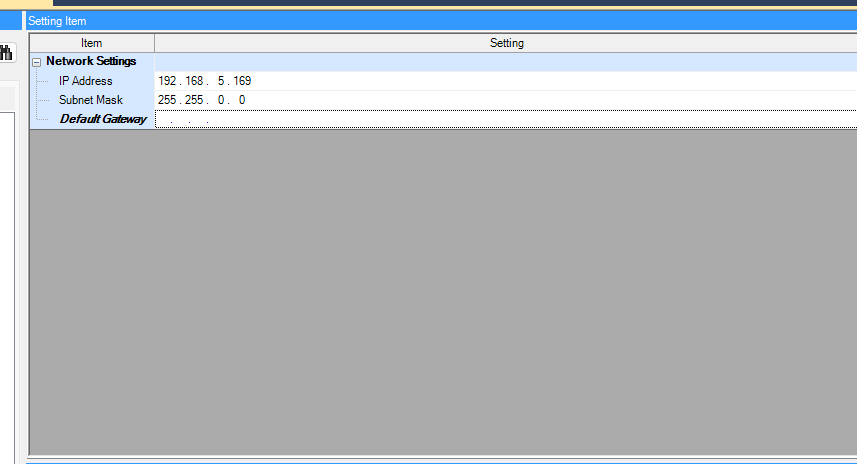
Module Parameters
Configure the FX5-OPC module.
Open the Basic Settings Tab.
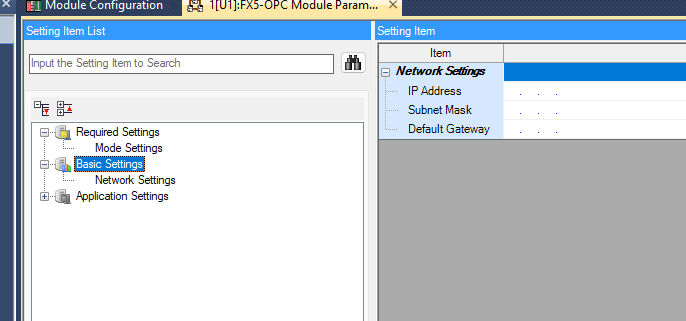
Set IP address, etc. according to your network configuration.
Address Space Parameter
今度はFX5-OPCモジュールのAddress Spaceを設定します。
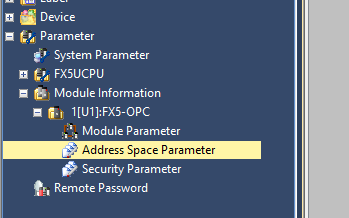
This is the Address Space settings screen.
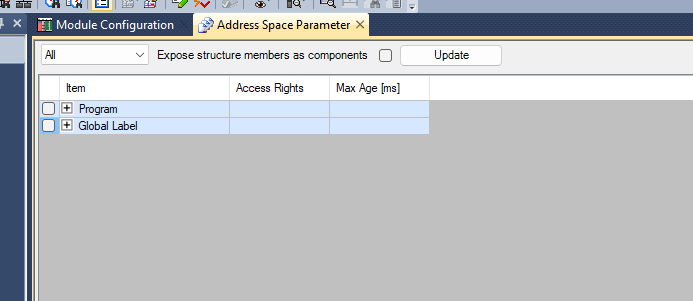
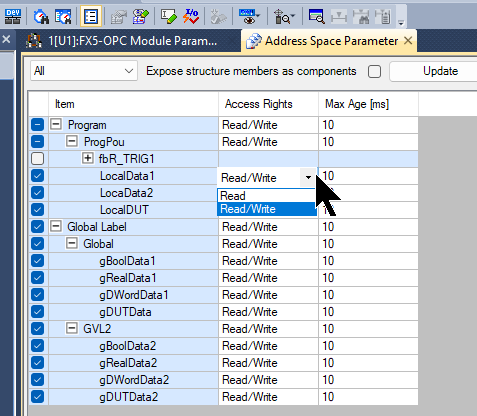
Click the Update button to update the variable list.
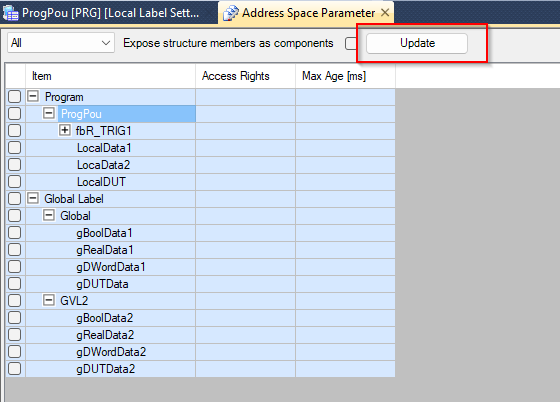
Check in the variables you want to publish to OPC UA Server according to your application.
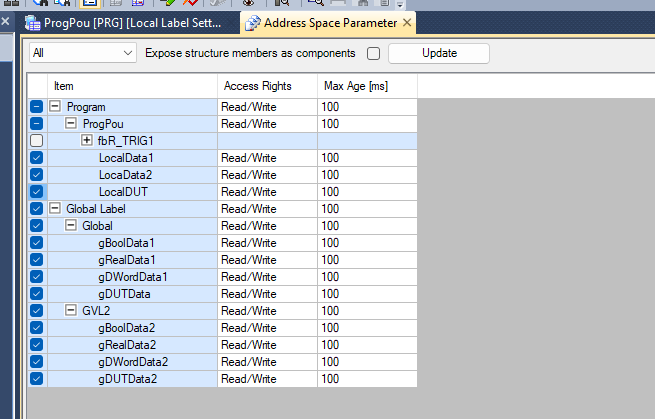
Max Age sets the minimum update period.
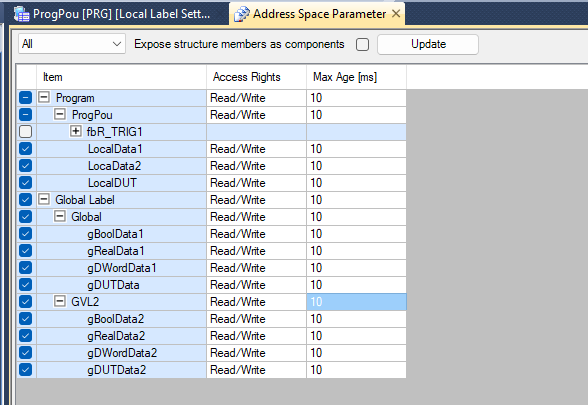
Each variable or structure variable can be set to be read-only or read-write separately.
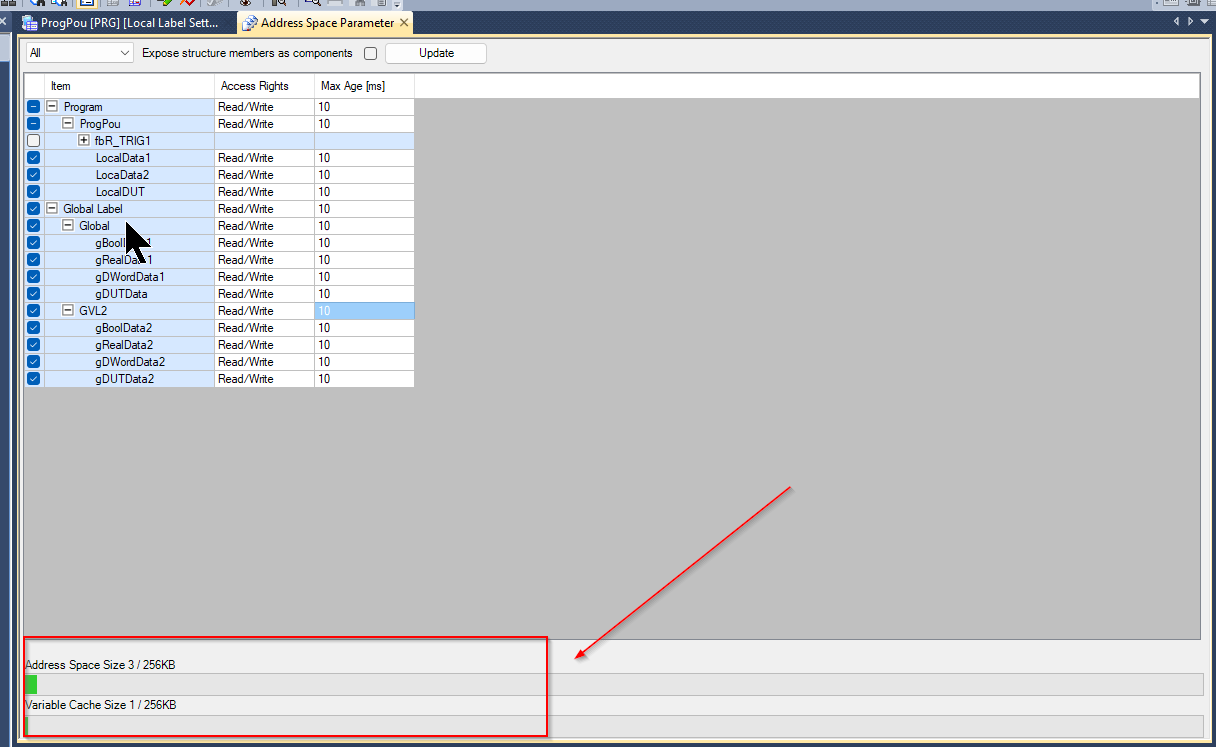
At the bottom of the Tool, you can see the memory size occupied by the current configuration.
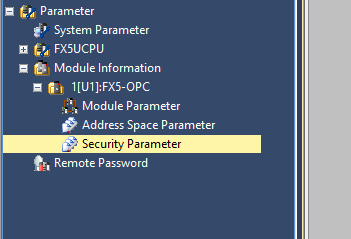
Security Parameter
Next, set the Security Parameter,
This screen shows the security setting screen regarding OPC UA.
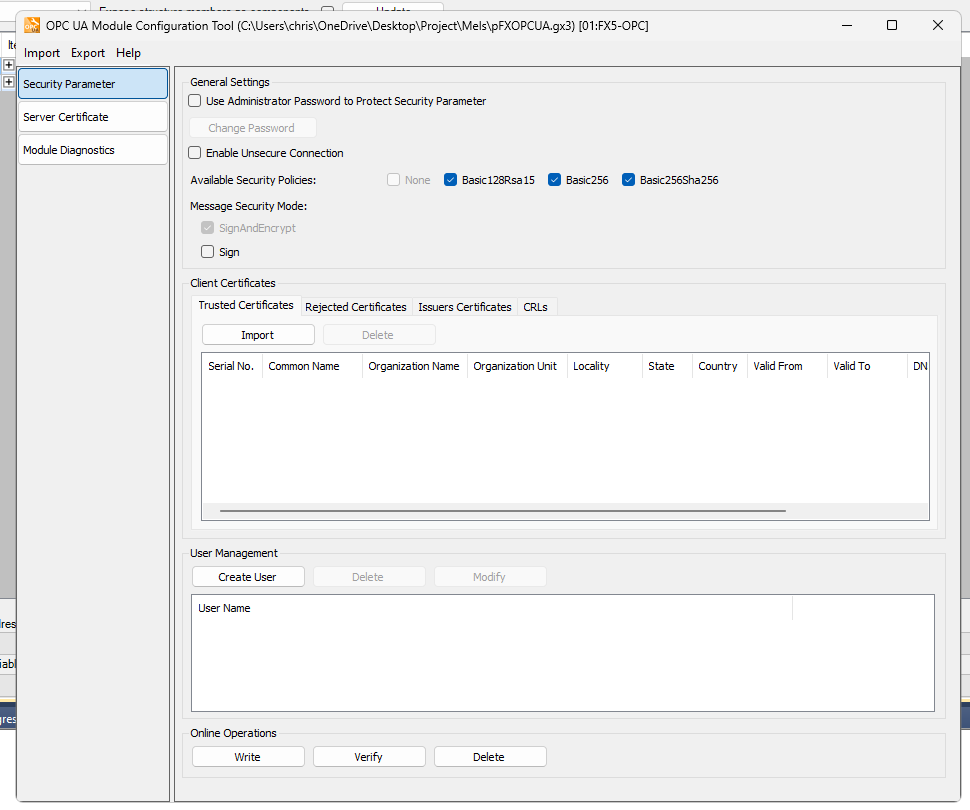
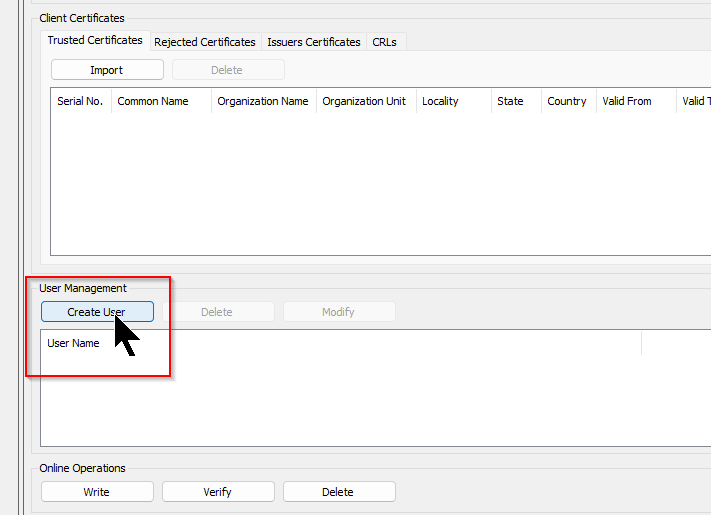
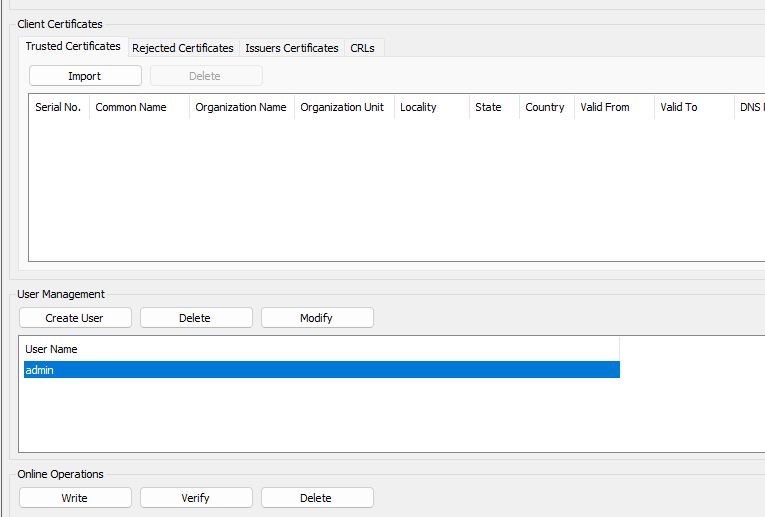
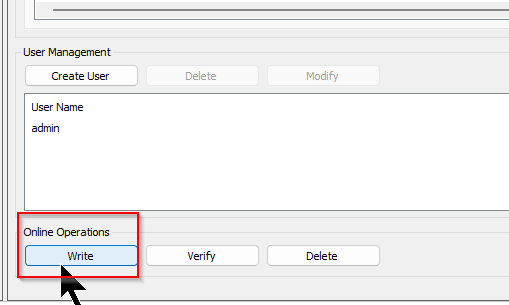
Create User
Create a new User at User Management>Create User. The User is the Login information required when OPC UA Client logs in to OPC UA Server of FX5-OPC.
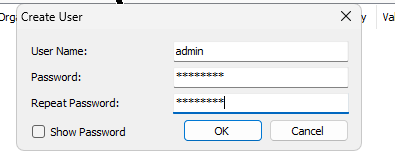
The User Name and Password setting screen will appear.
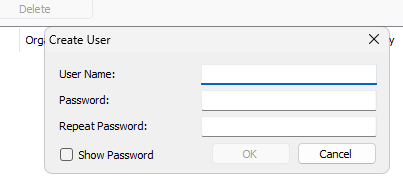
Set the User Name and Password according to your application.
Done!
Write to Module
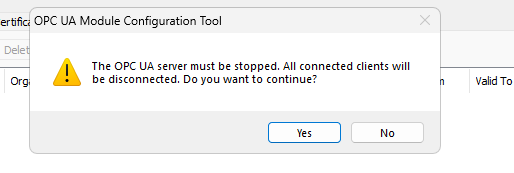
After changing parameters in GXWORKS3, use Online Operation>Write to write the parameters to FX5-OPC.
Write the parameters to the module with Yes.
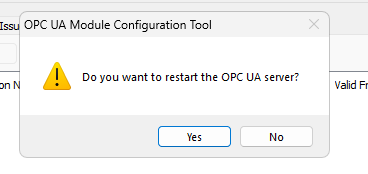
Restart the FX5-OPC module with Yes.
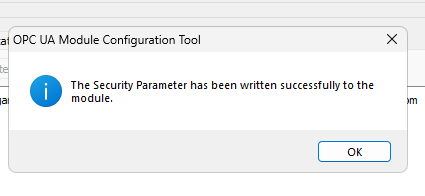
Done!
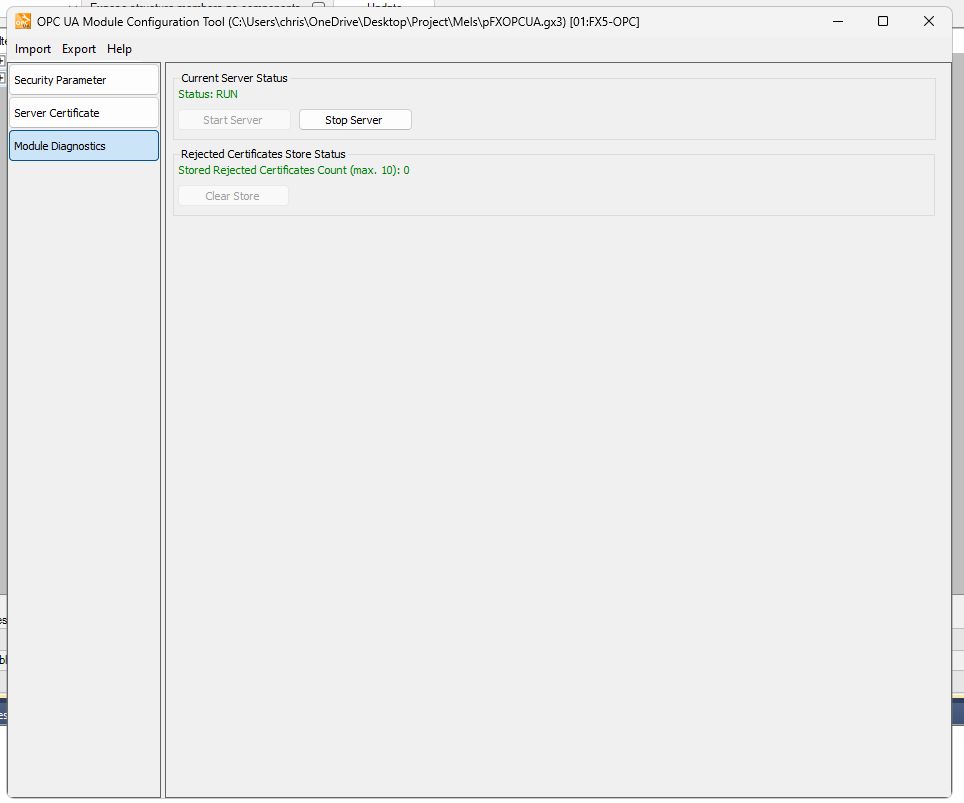
Module Diagnostics
The Module Diagnostics Tab allows you to check the current FX5-OPC module operating status.
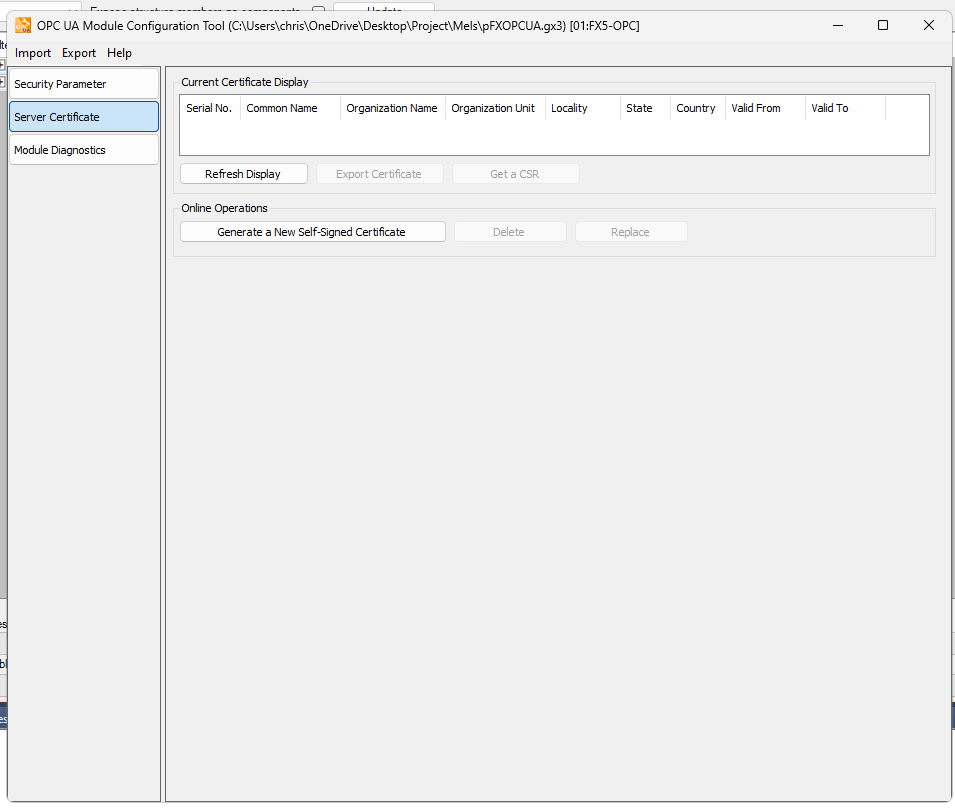
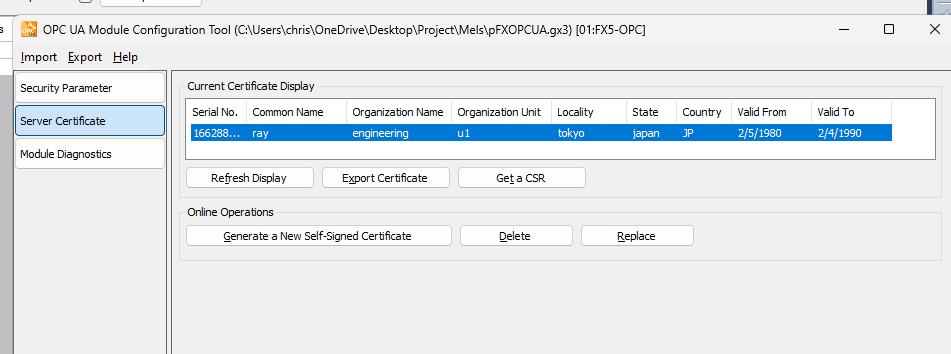
Server Certificate
The next step is to manage the certificate for the FX5-OPC module on the “Server Certificate” screen.
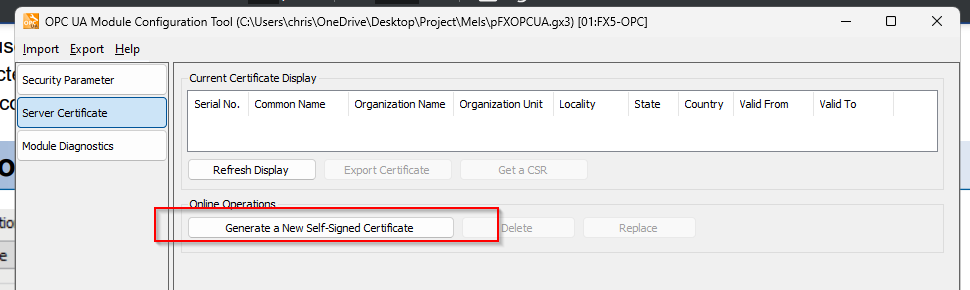
Generate Certificate
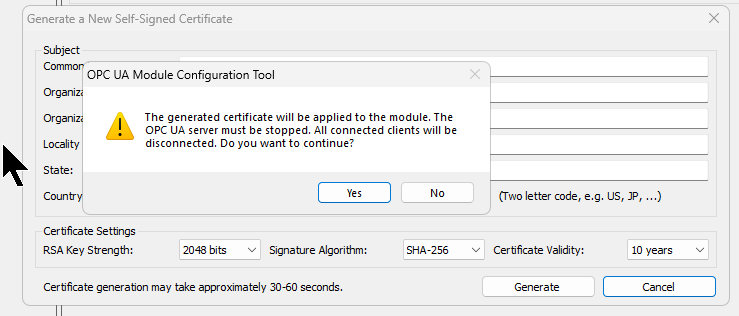
Generate a new certificate at Online Operation>Generate a New Self-Signed Certificate.
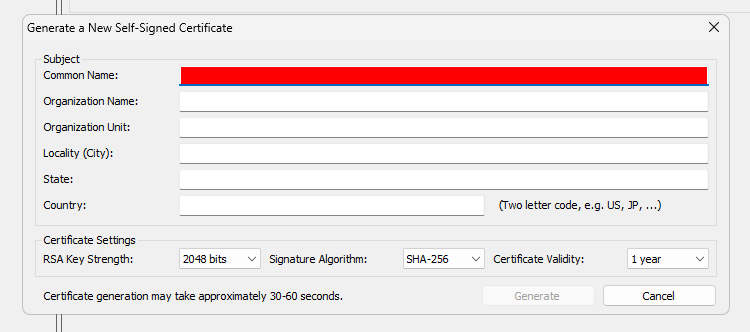
Enter information about your certificate and generate your certificate.
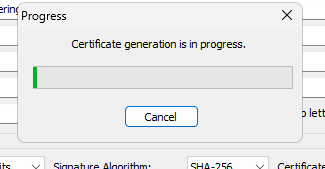
Just a second..
Stop the OPC UA Server in the FX5-OPC module with Yes and Download the certificate to the module.
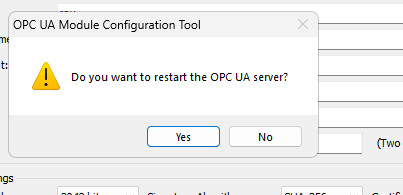
Restart OPC UA Server with Yes.
Done!
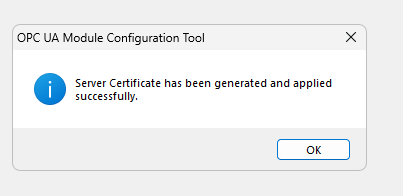
A certificate was issued!
Download
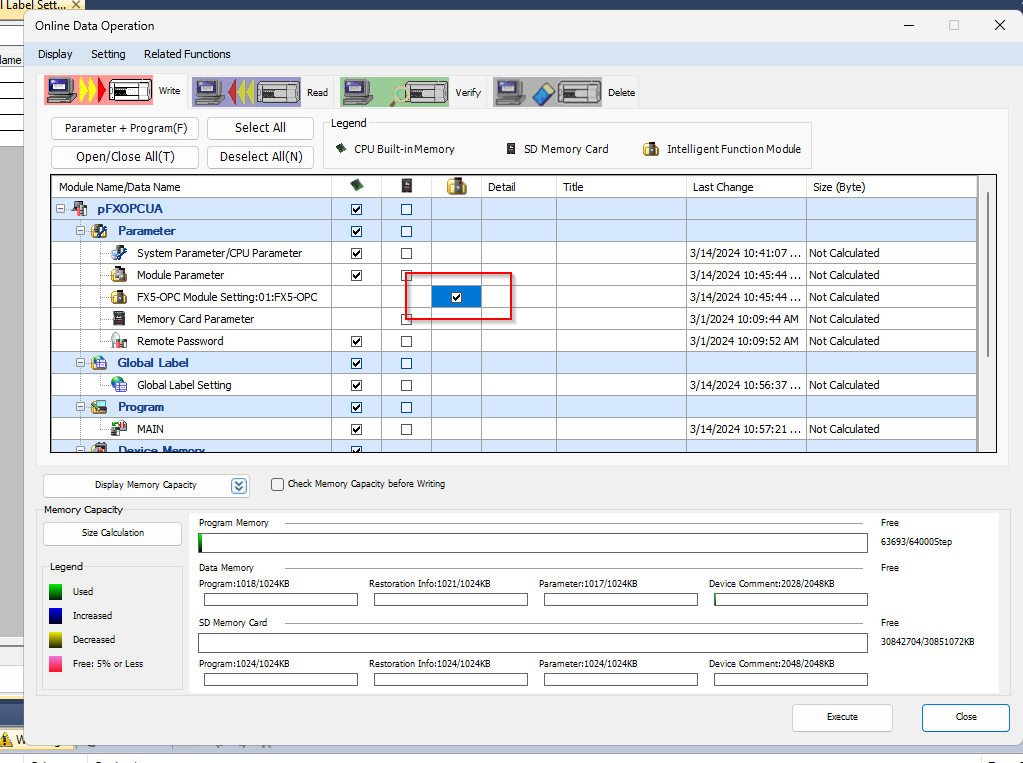
Download the project to the CPU.
Don’t forget the Checkbox for writing parameters for the FX5-OPC module!
Result
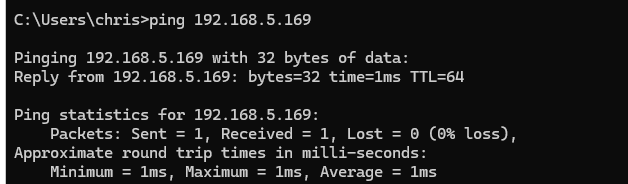
Ping the IP of the FX5-OPC module, which was just configured in GXWORKS, from the PC.
Next, start UaExpert and add a new connection using the + button.
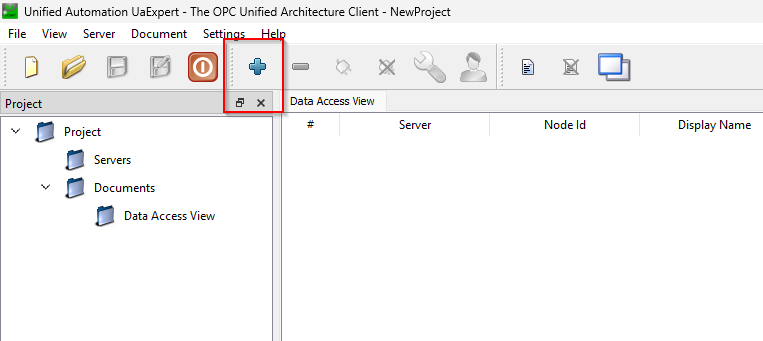
The Add Server screen appears.
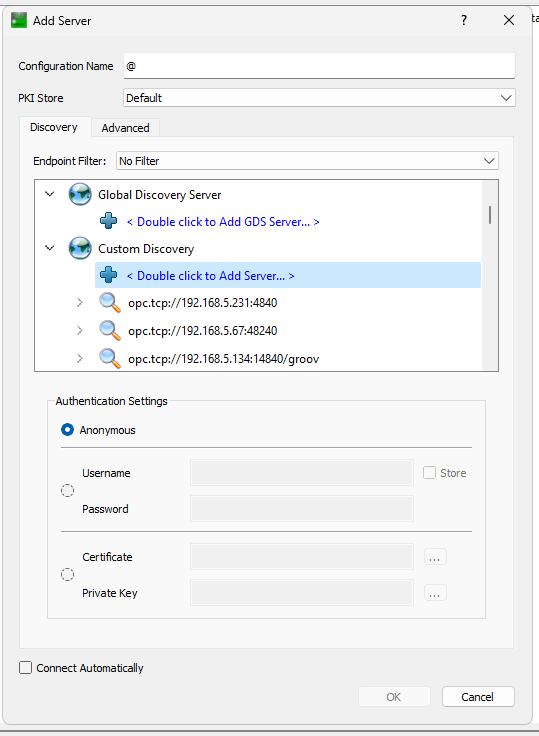
Click on the Advanced Tab to configure the connection settings for the FX5-OPC module.
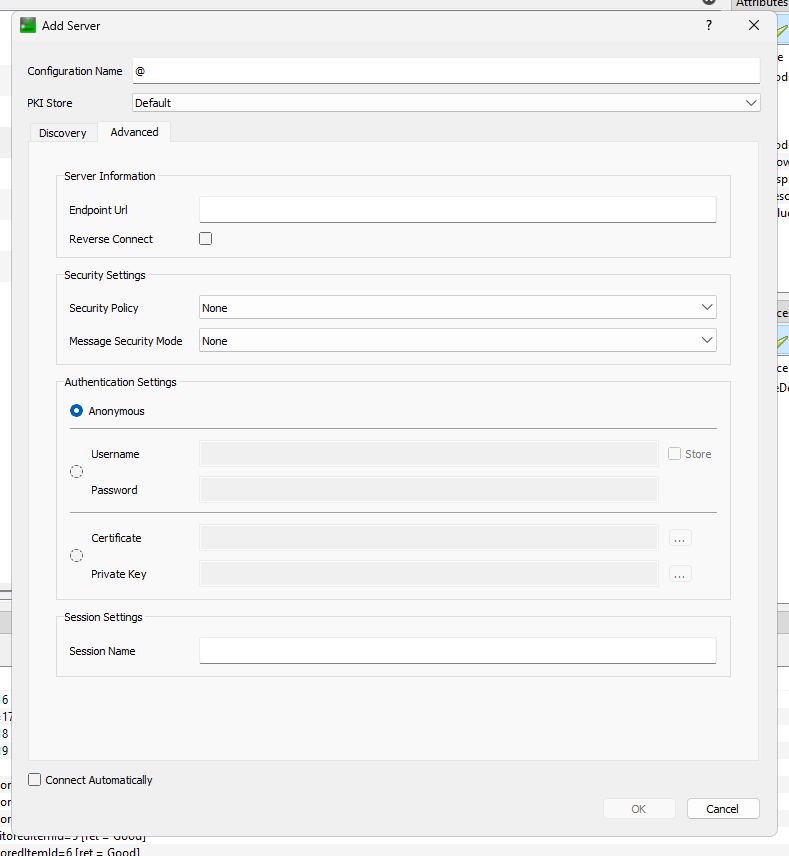
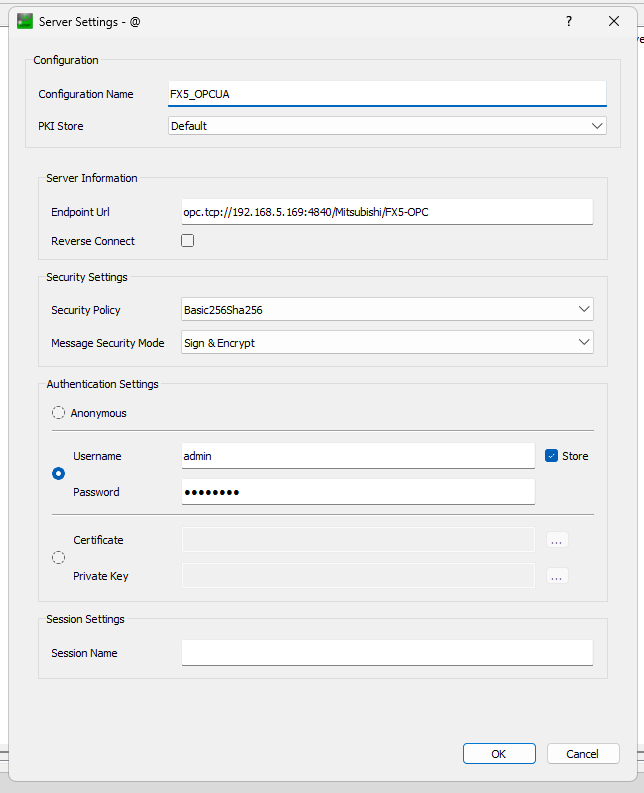
The Endpoint Url should be set according to the following Format.
opc.tcp://(IP address of an FX5-OPC):4840/Mitsubishi/FX5-OPC
Enter the User name and Password that you have just set.
Right-click the Server you just added>Click Connect.
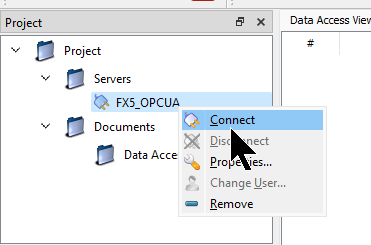
Trust FX5-OPC certificate.
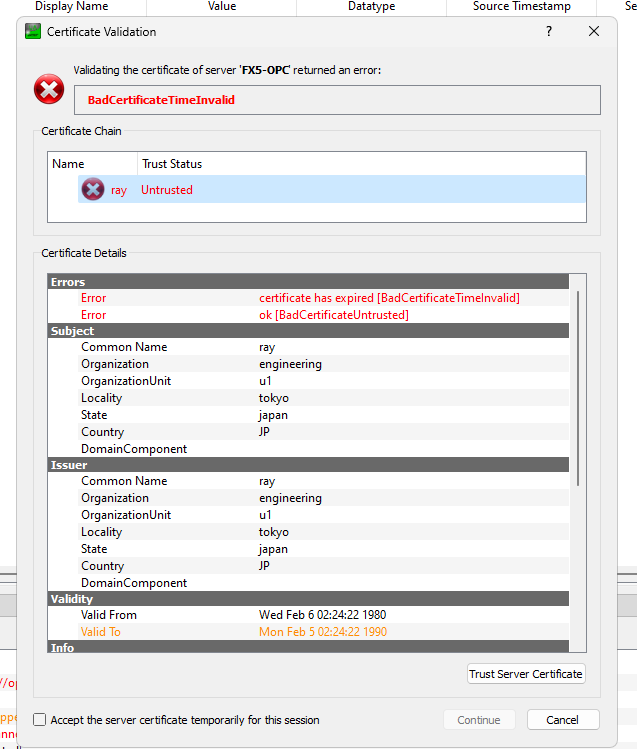
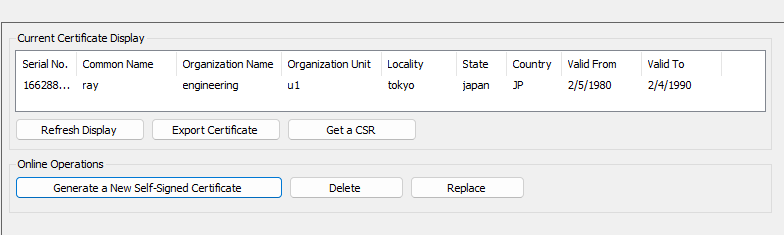
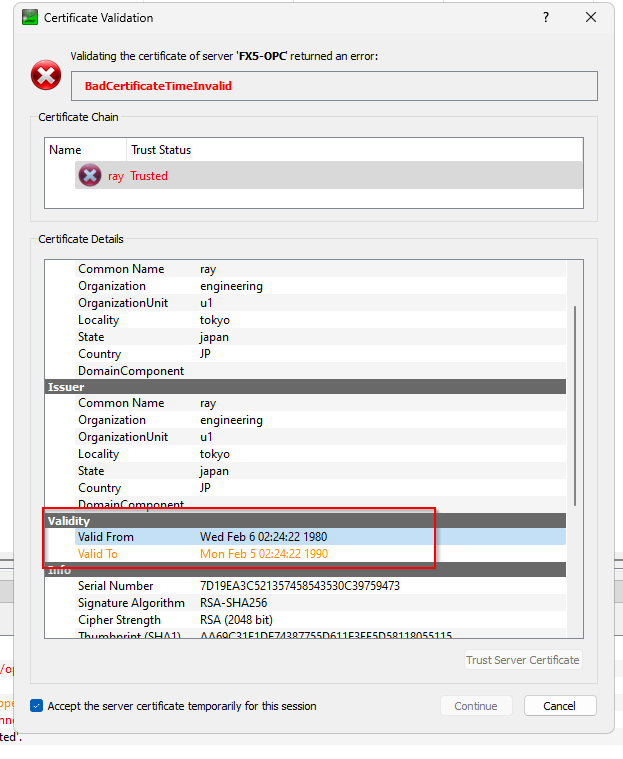
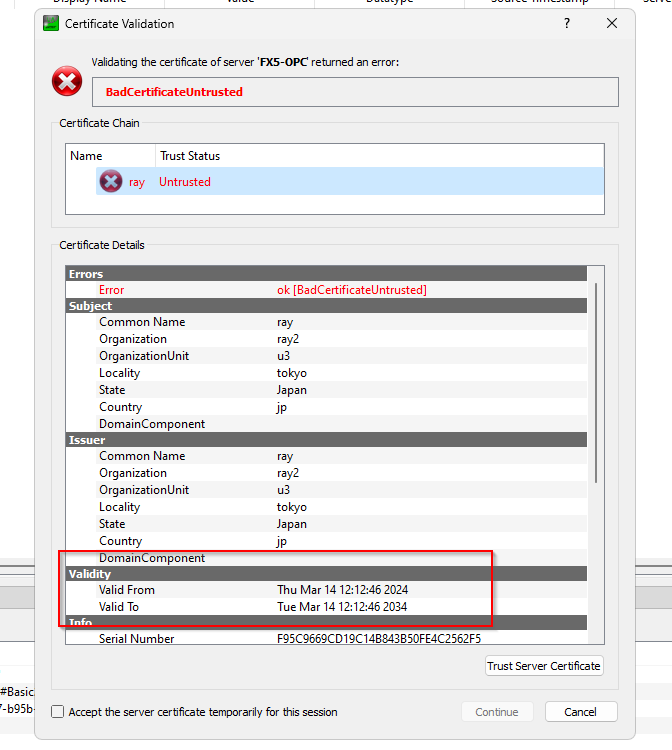
If the FX5 CPU is not time-set, then the dates on the certificate will not match.
For example, as shown below, the dates are from 1980 to 1990, so the certificate can’t be used.
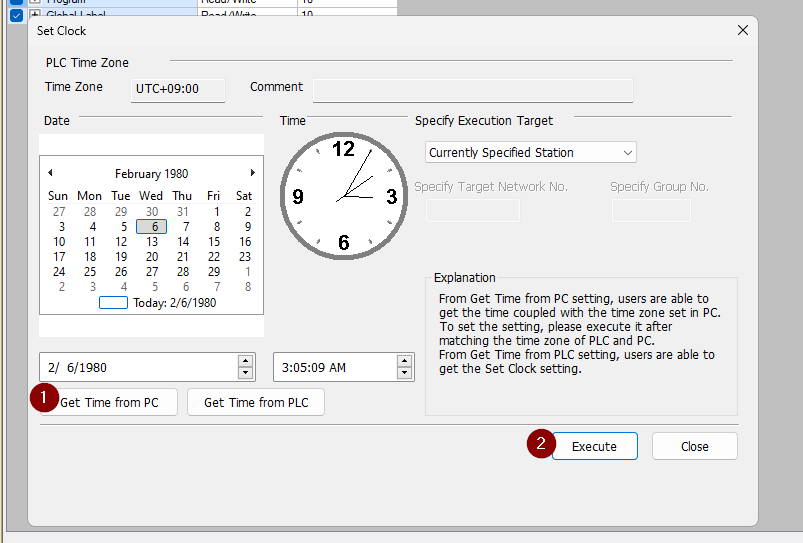
Return to GXWORKS3 and click Online>Set Clock.
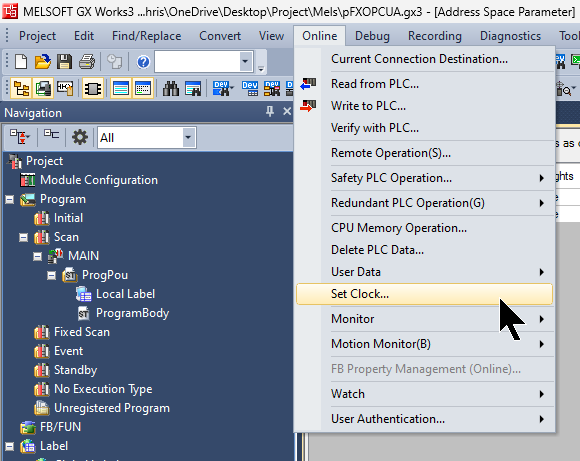
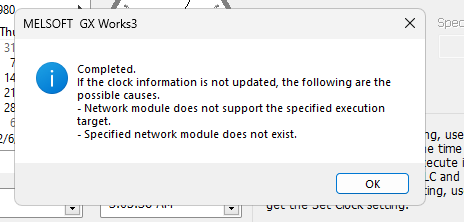
Click “Get time from PC” and change the time in “Execute”.
Done!
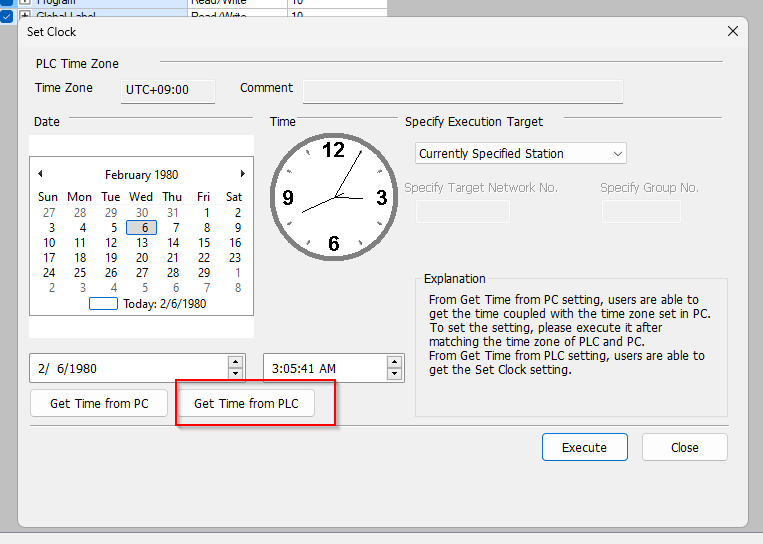
Click Get Time from PLC to get the current CPU time and recheck it.
Now that the CPU time has been reset, generate another certificate from the OPC UA Module Configuration Tools.
The next time you access FX5-OPC from UaExpert, the FX5-OPC certificate time is valid and available for use.

FX5-OPC must manually move the certificate from the “Rejected List” to the “Trust List” for all OPC UA Client initial connections. for all OPC UA Client initial connections.
Below is a screen shot of the OPC UA Module Configuration tool, if you refresh the Rejected List tab with the Refresh button, you will see that our UaExpert certificate is on the rejected list.
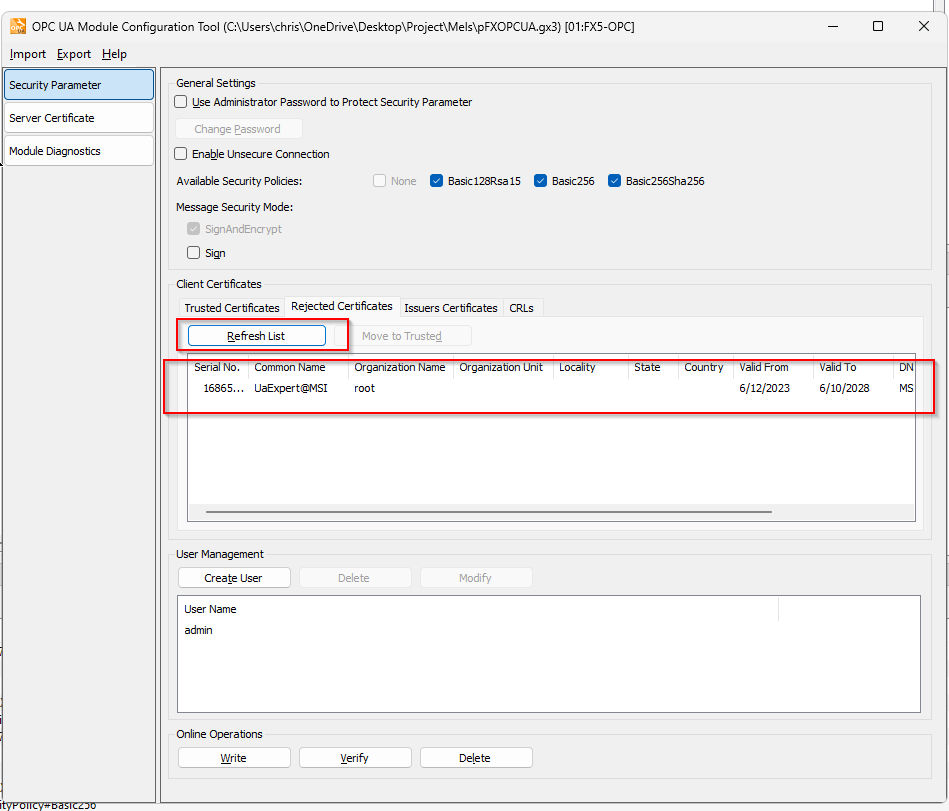
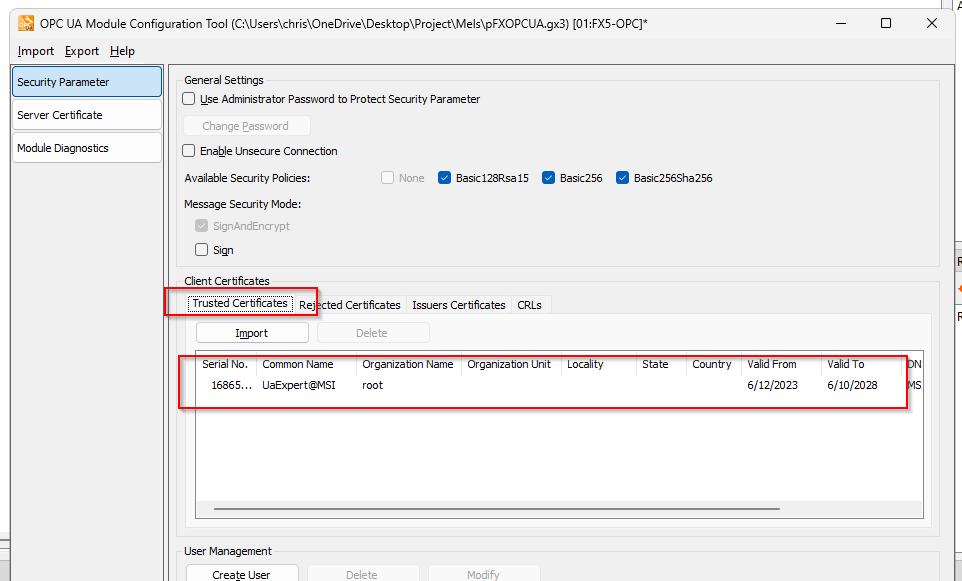
Select that certificate and click > Move To Trusted.

Done!Our UaExpert certificate has now been moved to the Trust List.
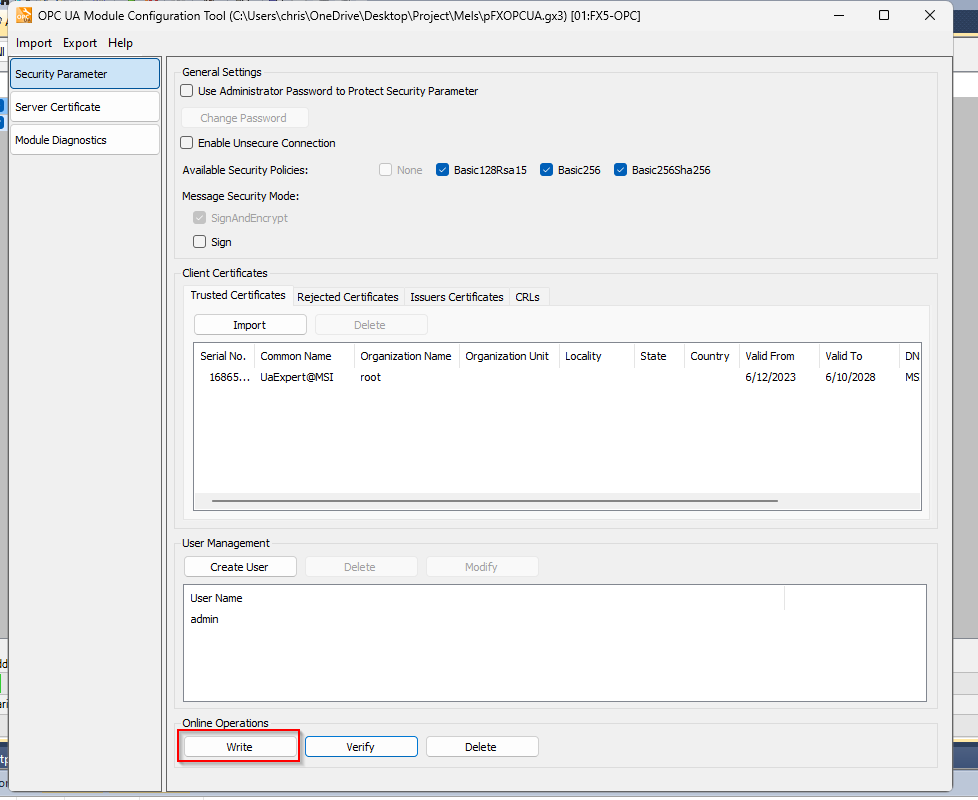
At the end, do not forget to write the Configuration to the Module.
UaExpert and FX5-OPC are now connected.
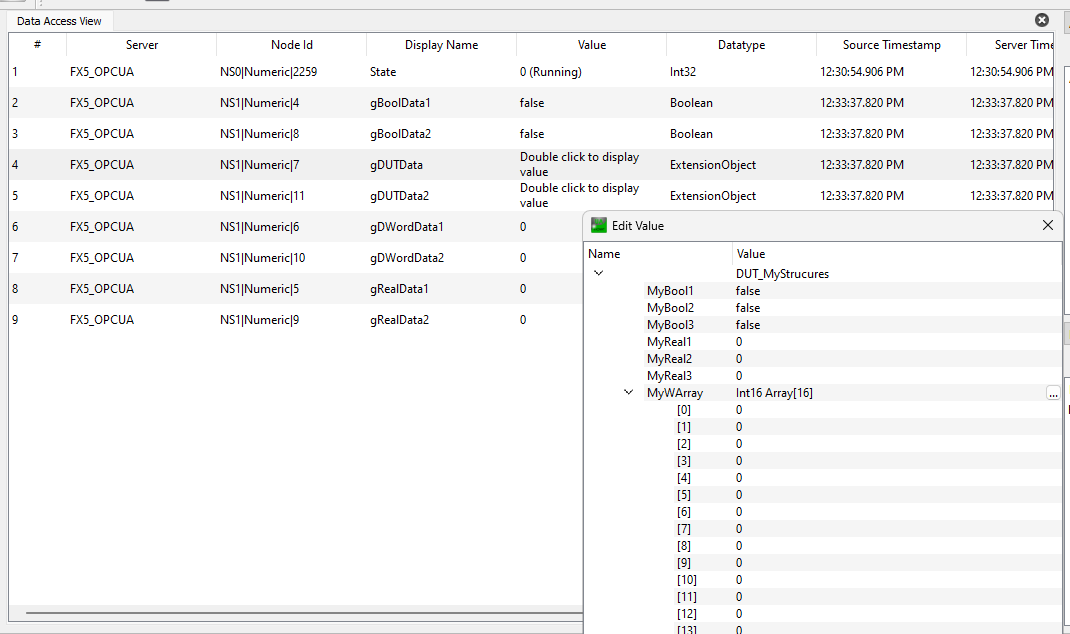
Done!We were able to access the variable we just defined as an OPC UA Server Node.