In this tutorial, I will show you how to install Codesys Runtime into RevPI Connect this time. In fact, it’s just a little more work than installing Codesys Runtime on a regular Raspberry PI.Let’s start!
Thanks!
The RevPI Connect used in this article was lent by PILZ JAPAN.
PILZ
PILZ supports FA sites as a total solution supplier with safety and automation technology solutions, guaranteeing not only human safety, but also machine and environmental safety, to ensure the safe operation of machines and equipment. Pilz has 42 local companies and branches worldwide and is active in various fields such as packaging, the automotive industry, robotics applications, as well as wind power and railway technology.

Office:
〒222-0033 Kanagawa, Yokohama, Kohoku Ward, Shinyokohama, 3 Chome−17-5 いちご新横浜ビル 4階
HP
Be Careful!
Note that PiCtory and Codesys cannot operate at the same time. Every time you put your application into Codesys, RevPI will generate a Hardware Configuration from your Codesys project, overwriting the PiCtory configuration.
So, when Codesys Application is used, PiCtory only plays the role of reading/confirming the current Configuration.
Reference Link
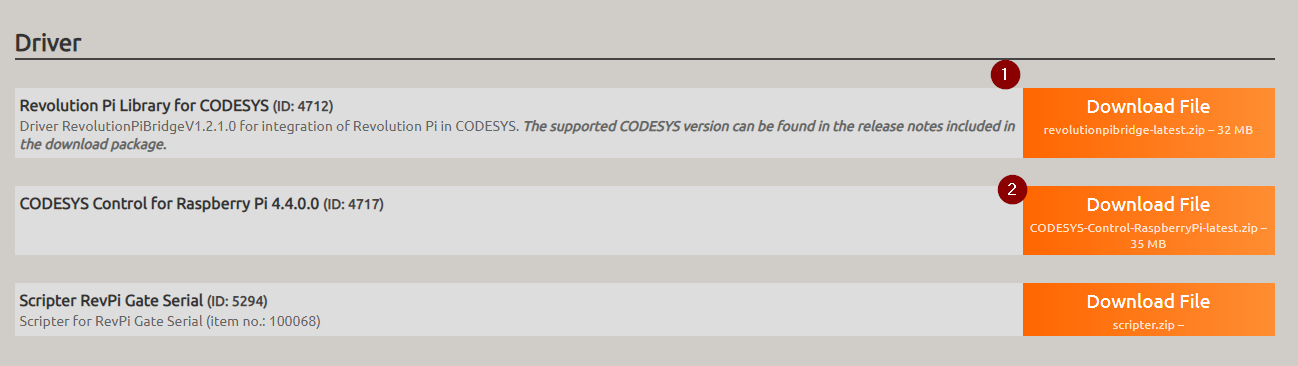
Download Libarary
Follow this link to download the library from Revolution pi library HP and Revolution PI Library for CODESYS・CODESYS Control for Raspberry PI 4.4.0.0 are needed in this tutorial.
https://revolutionpi.com/tutorials/downloads/#
Install Revolution PI Library
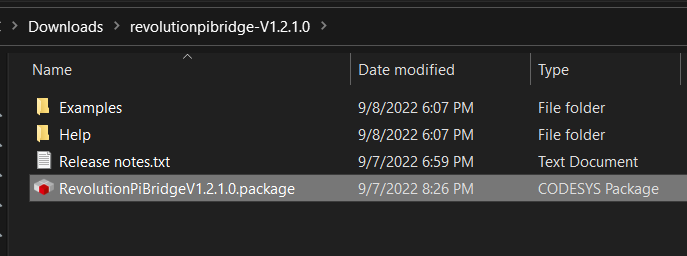
Unzip the Revolution PI Library and Launch the RevolutionPiBridgeVxxxx.package.
You need to choose the target version if several versions of codesys are installed.
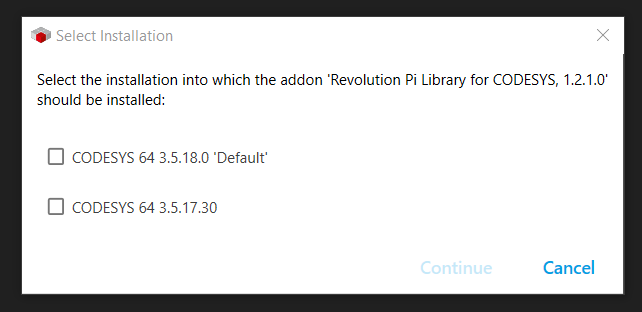
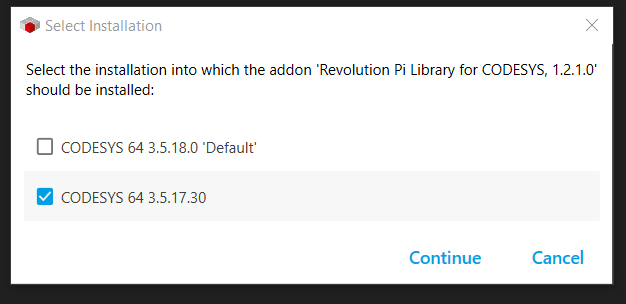
In this Tutorial the package is installed in V3.5.17.30, please check the “CODESYS 64 3.5.17.30” Checkbox>Continue.
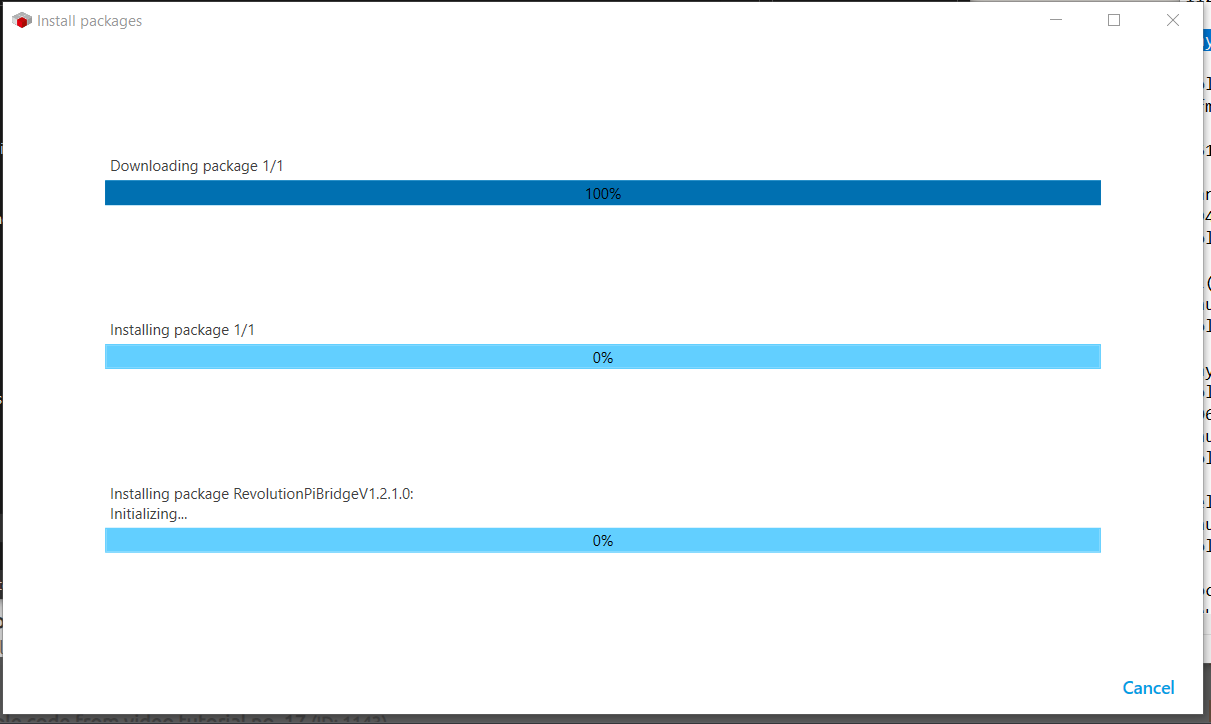
Agree the License>Continue.

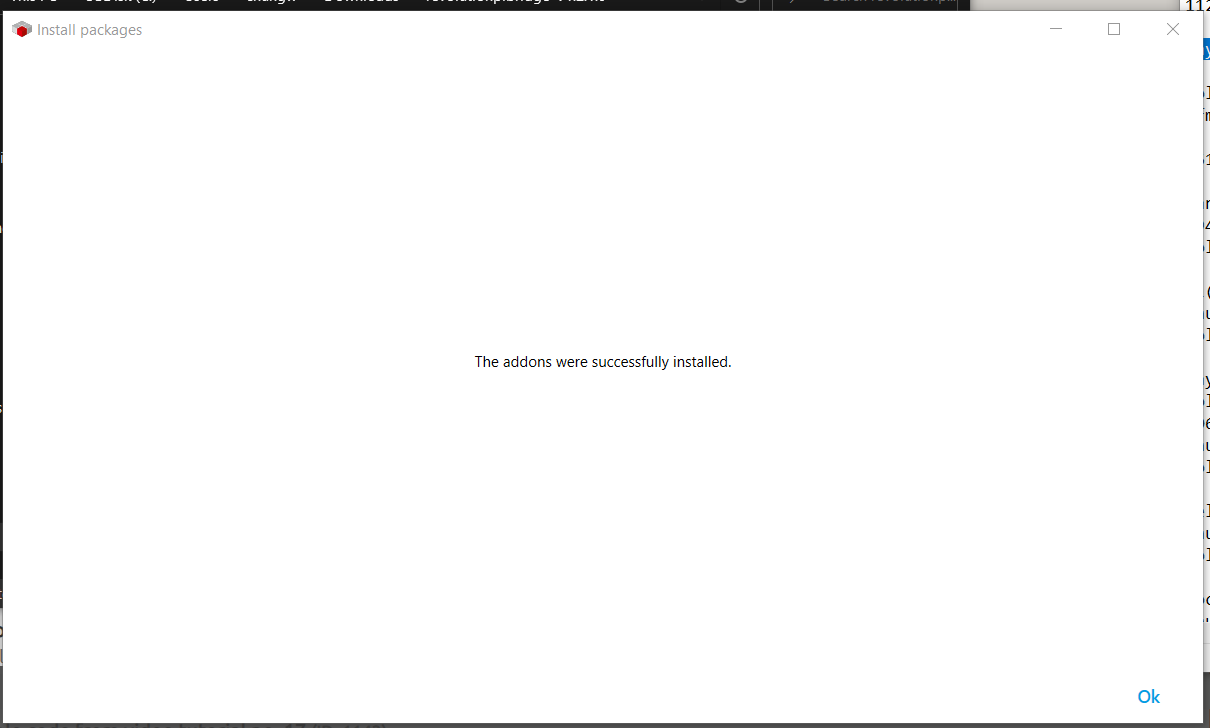
Please wait a mins..
Done!
Install PI Packges
Please download the CODESYS Raspberry Packages from the above Link and install the runtime.
Please follow this link to install the codesys runtime into raspberry pi.
Update Raspbery Pi
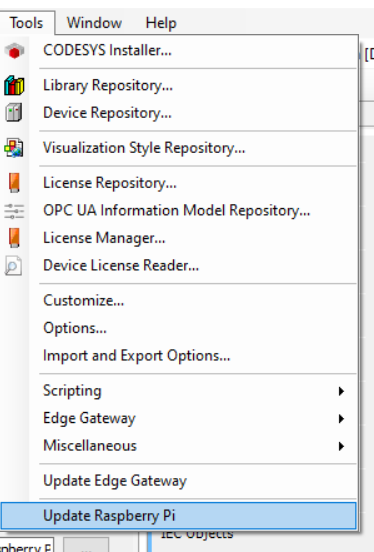
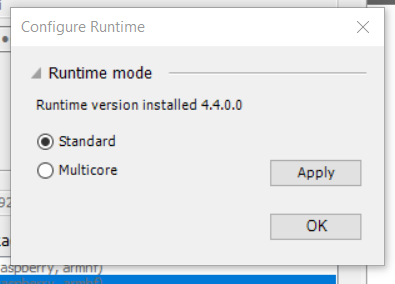
Now we can install the CODESYS Runtime to our RevPI Connect.Launch Codesys>Tools>Update Raspberry Pi.
Choose the Version of CODESYS Runtime Package that you would like to use.
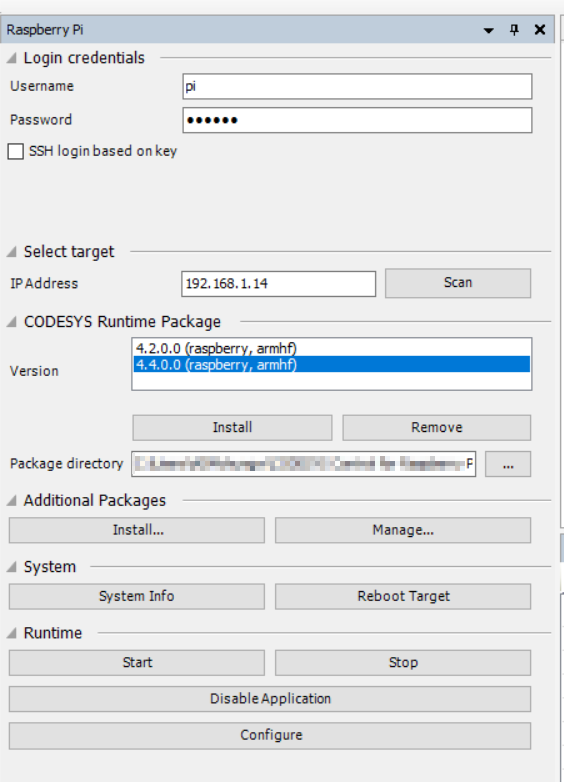
Select the Runtime Mode and Standard is used in my tutorial.
Your First Project!
Now we start to create a project with codesys and download it into your Repi Connect.
Add New Project
Launch CODESYS>Go to File>New Project.

Choose Standard Project>OK.
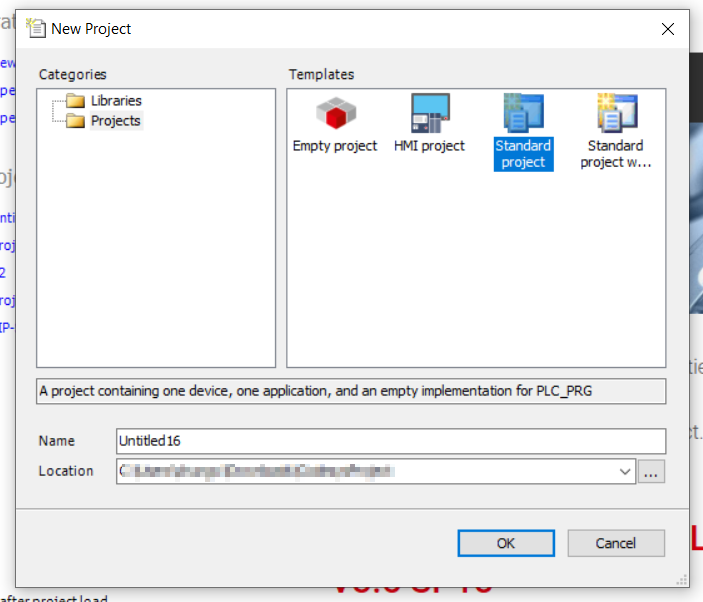
Select CODESYS Control for Raspberry Pi MC SLxxx as the Device Type>OK.

Add Device
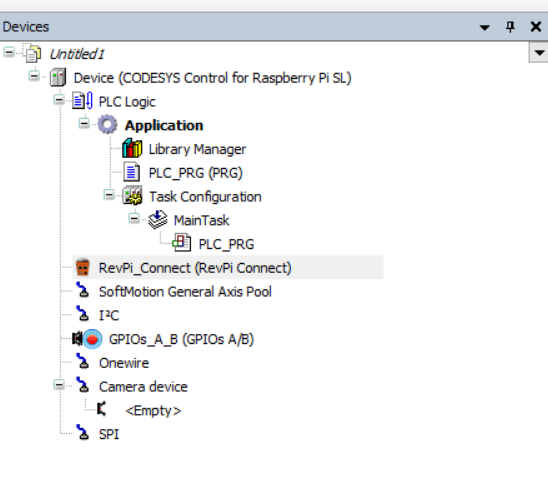
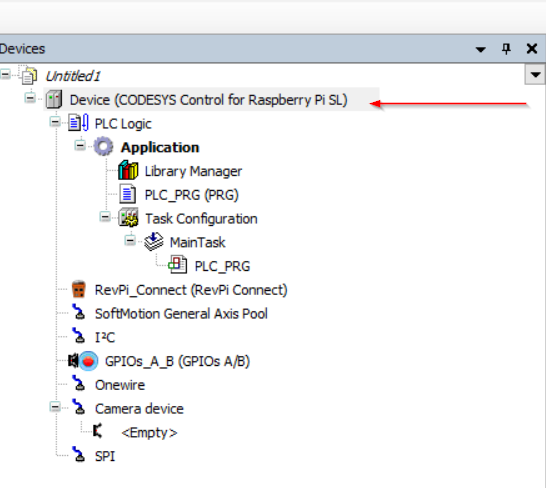
Project is created and now we can add the RevPI Connect into our Project.
Go to Device>Right Click>Add Device.

Search “Pi” and choose RevPi Connect as the target>Add Device.

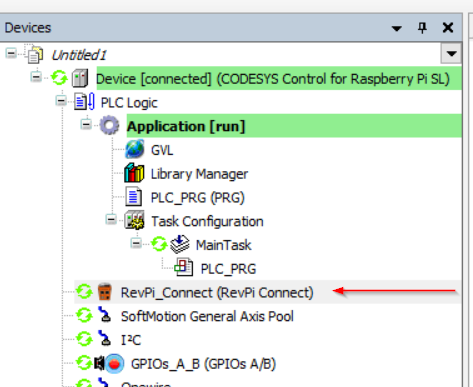
Done!RevPi_Connect is inserted.
ADD GVL
Go to Application>Add Object>Global Variable List to add a GVL.
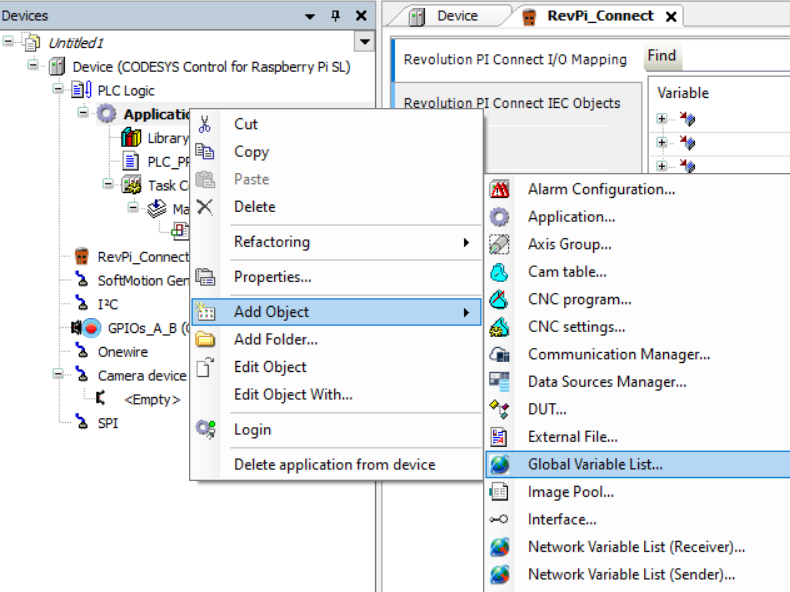
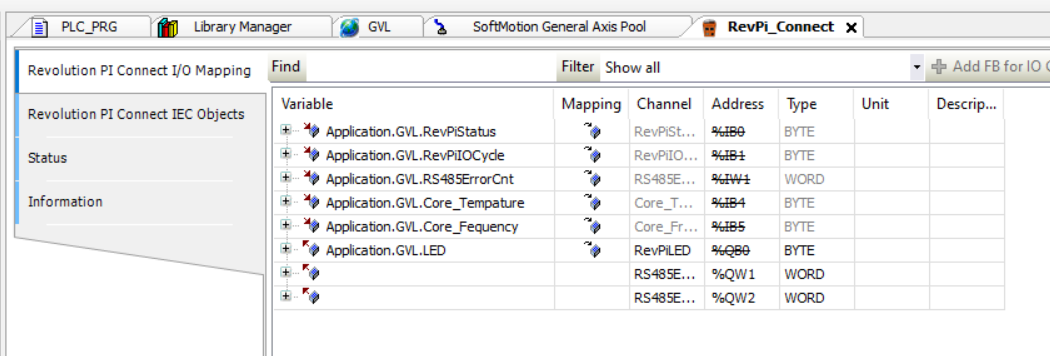
Define the status Bytes variable inside the GVL.
| {attribute ‘qualified_only’} VAR_GLOBAL RevPiStatus :BYTE; RevPiIOCycle :BYTE; RS485ErrorCnt :WORD; Core_Tempature :BYTE; Core_Fequency :BYTE; LED:BYTE; init:BOOL; END_VAR |
Main Program
Now we can take care of the Main Program.
VAR
| PROGRAM PLC_PRG VAR Status:BYTE; IOCycle:BYTE; RS485_ErroCnt:WORD; Core_Temperature:BYTE; Core_Fequency:BYTE; A1,A2,A3 :INT; END_VAR |
PROGRAM
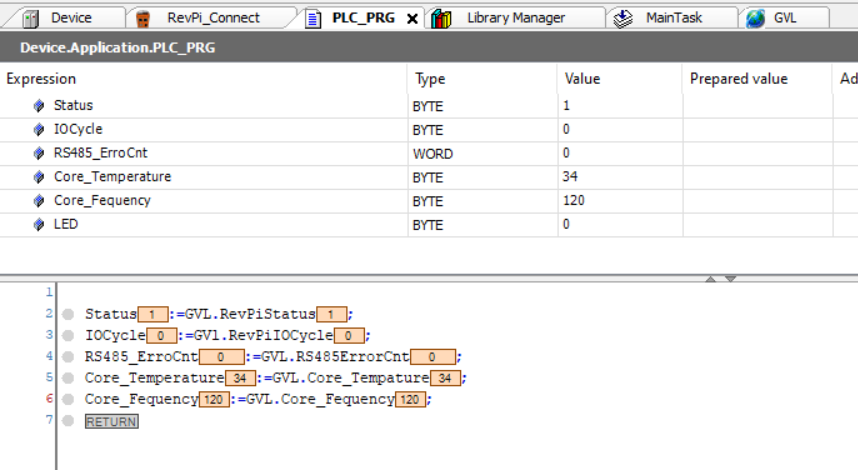
In the Main program , we will get the RevPI status from the Status Bytes and Turn on the LED A1,A2,A3 with different colors.
| Status:=GVL.RevPiStatus; IOCycle:=GVl.RevPiIOCycle; RS485_ErroCnt:=GVL.RS485ErrorCnt; Core_Temperature:=GVL.Core_Tempature; Core_Fequency:=GVL.Core_Fequency; CASE A1 OF 0: GVL.LED.0:=FALSE; GVL.LED.1:=FALSE; 1: GVL.LED.0:=TRUE; GVL.LED.1:=FALSE; 2: GVL.LED.0:=FALSE; GVL.LED.1:=TRUE; 3: GVL.LED.0:=TRUE; GVL.LED.1:=TRUE; END_CASE CASE A2 OF 0: GVL.LED.2:=FALSE; GVL.LED.3:=FALSE; 1: GVL.LED.2:=TRUE; GVL.LED.3:=FALSE; 2: GVL.LED.2:=FALSE; GVL.LED.3:=TRUE; 3: GVL.LED.2:=TRUE; GVL.LED.3:=TRUE; END_CASE CASE A3 OF 0: GVL.LED.4:=FALSE; GVL.LED.5:=FALSE; 1: GVL.LED.4:=TRUE; GVL.LED.5:=FALSE; 2: GVL.LED.4:=FALSE; GVL.LED.5:=TRUE; 3: GVL.LED.4:=TRUE; GVL.LED.5:=TRUE; END_CASE |
Mapping
Finally we need to assign the variables inside the user program to RevPI Connect.

Status Byte
| Bit | Description |
| 0 | piControl driver is operating |
| 1 | At least 1 module is connected with RevPI, but not configured in the project. |
| 2 | At least 1 module is configured in your project, but not connected with RevPI. |
| 3 | The process image area is not enough, please update the PiCotry. |
| 4 | RevPI Gate Module is connected in the left hand side of your RevpI. |
| 5 | RevPI Gate Module is connected in the Right hand side of your RevpI. |
| 6 | |
| 7 |
Login
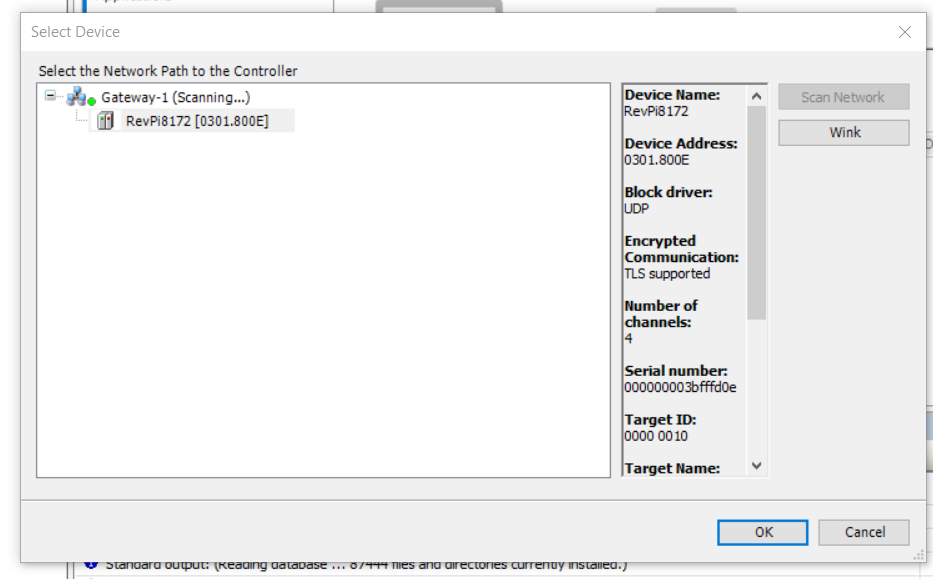
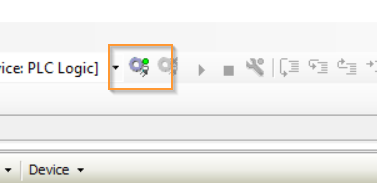
Now we can Download the project to RevPI Connect – Click the Device Icon.
Scan the Network.

Choose RevPIXXX>OK.
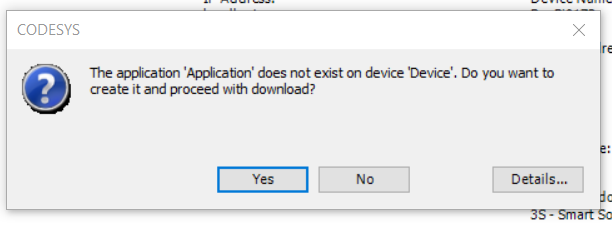
Yes.

Enter your username and password to login with codesys.

Logon..

Done! Connection path is established.

Click the Login button to download the project.
Yes.
Result
We can see a green icon neaer the RevPi_Connect! It means the module is running.
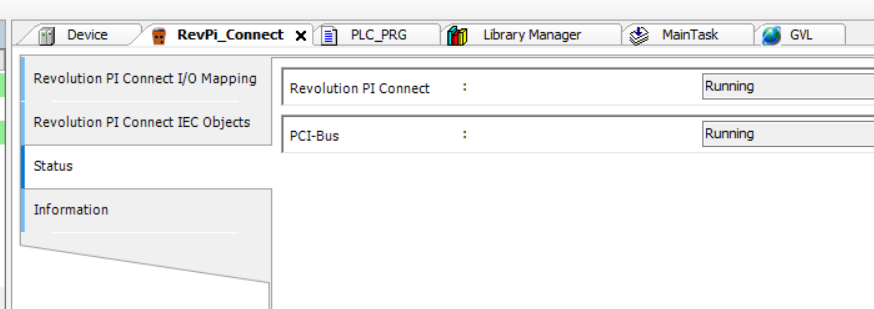
and also the Status is “Running”.
Open the Mapping Tab and you can see the status is 1 – it means the RevPI Connect is operating and temperature and Frequency can also be viewed.