Here is the second episode of the introduction to BERGHOF’s Raspberry Pi-based modular CODESYS PLC. This time the visualization features of Codesys are described.
Thank you for the equipment from BERGHOF.
Come on, let’s enjoy FA.
Reference Link
Implementation‐VNC Server
Configure
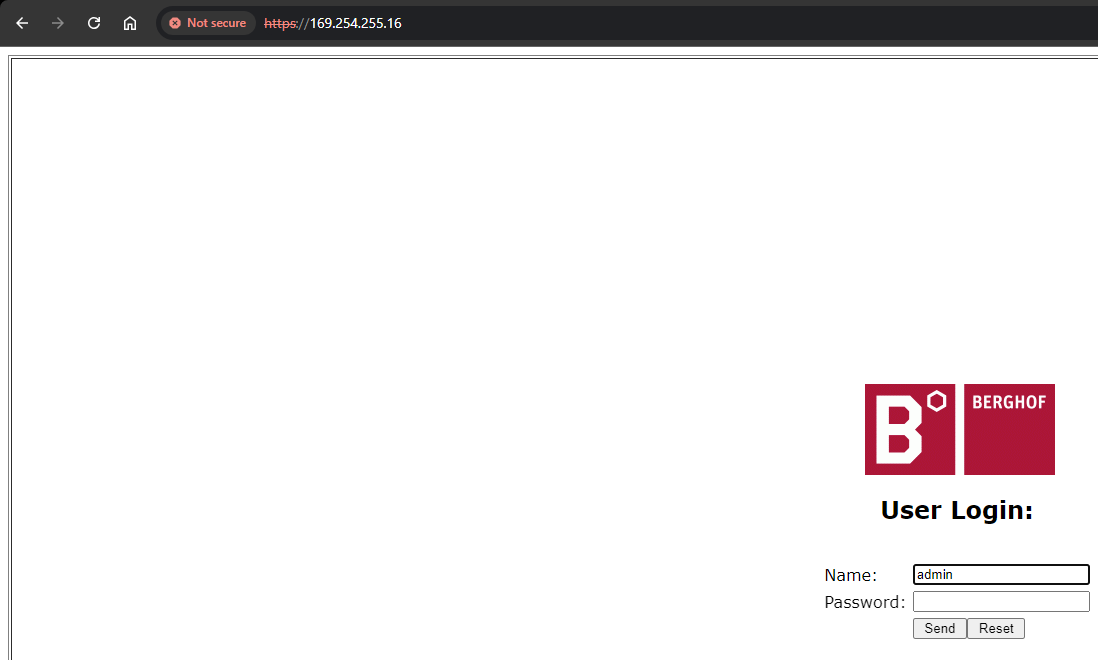
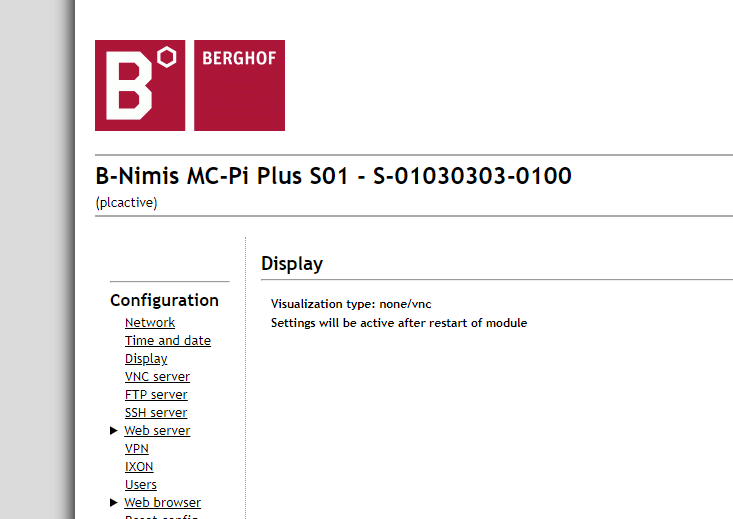
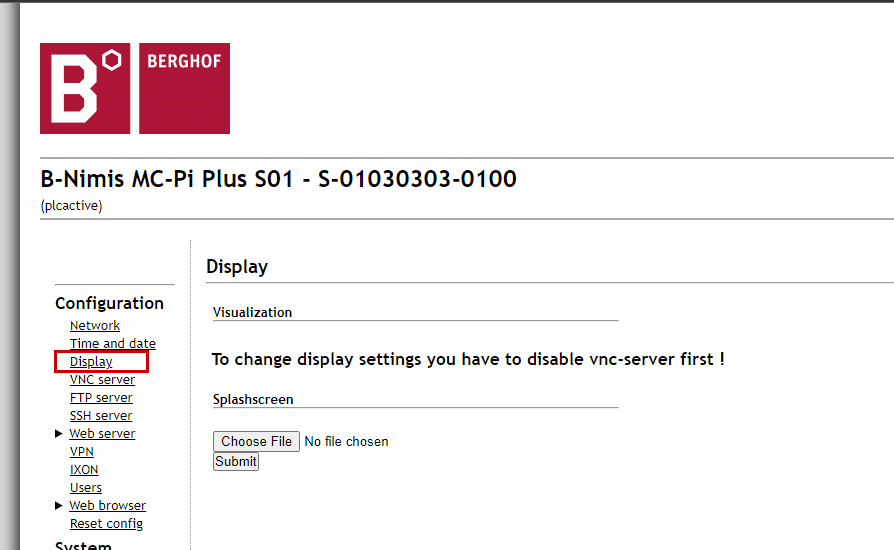
Access BERGHOF’s MC-PI Series Web Server and login.
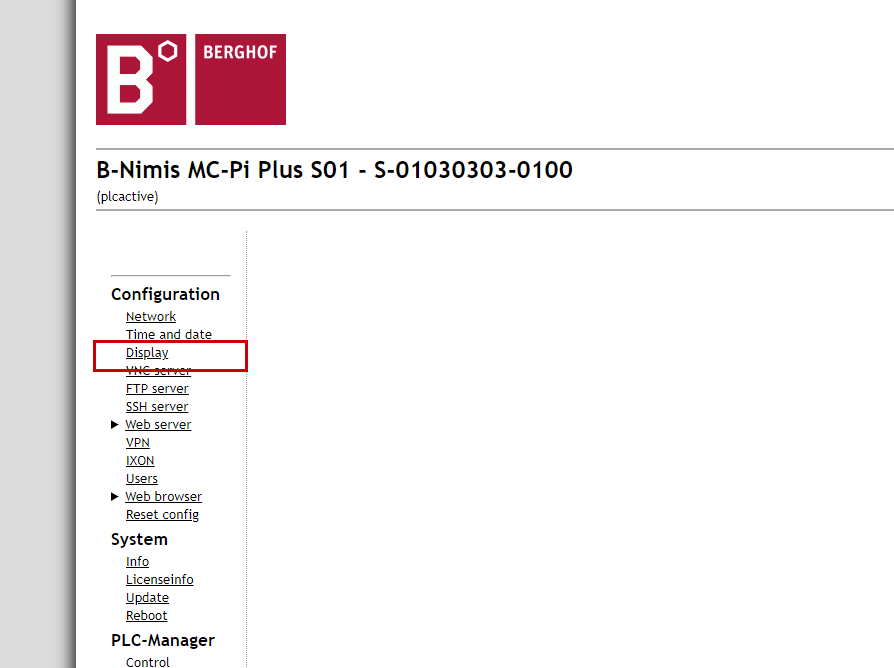
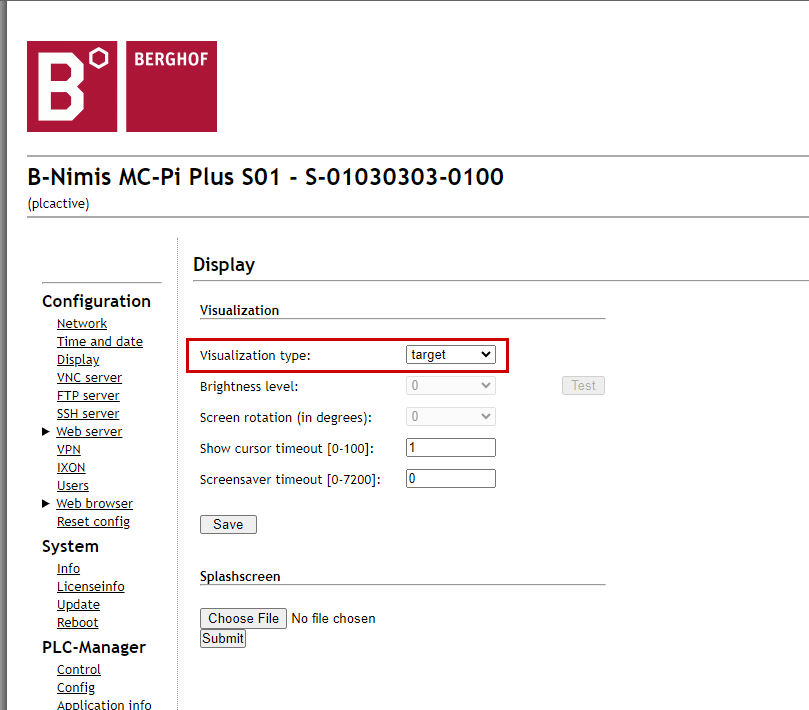
Display
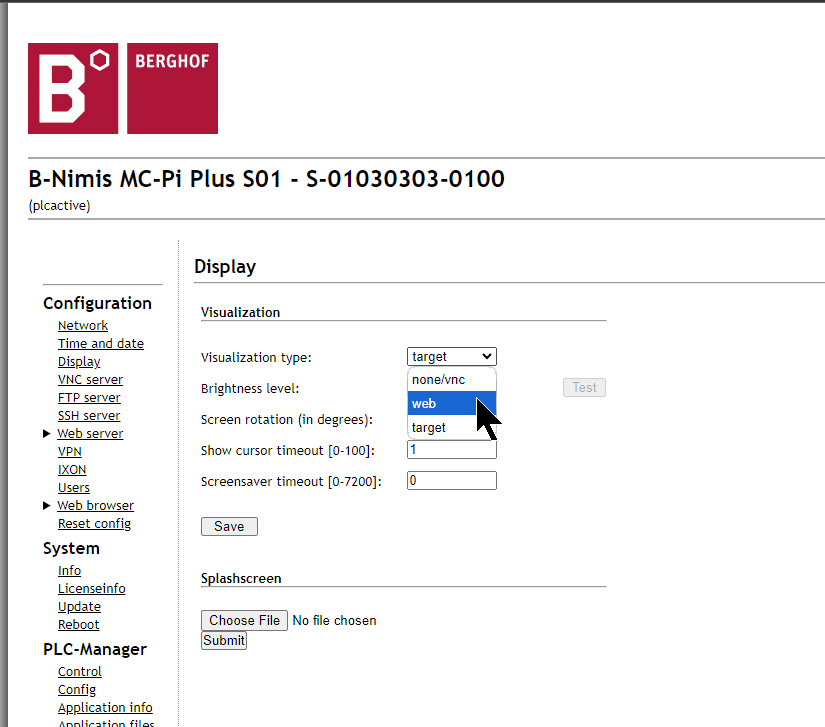
Click Display to change the display settings for BERGHOF’s MC-PI CPU.
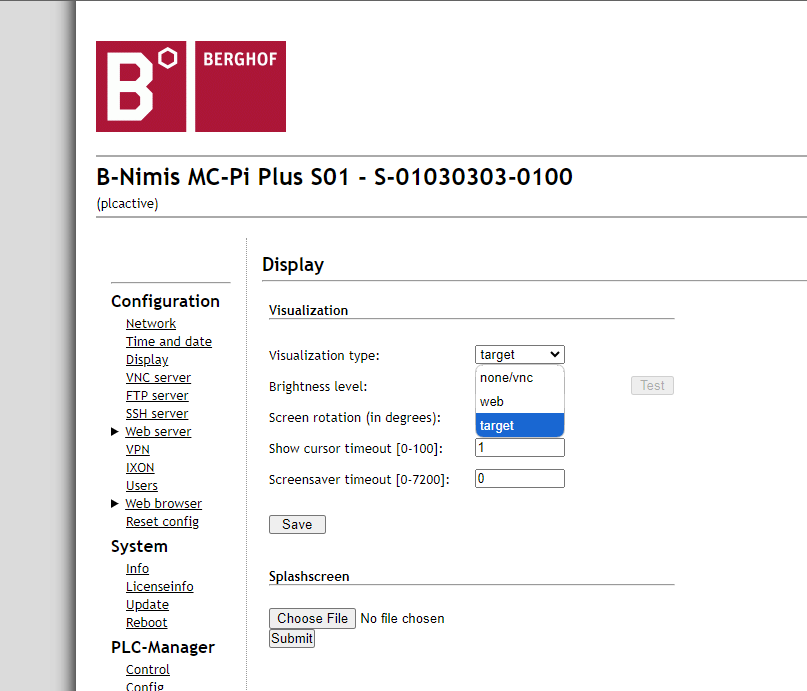
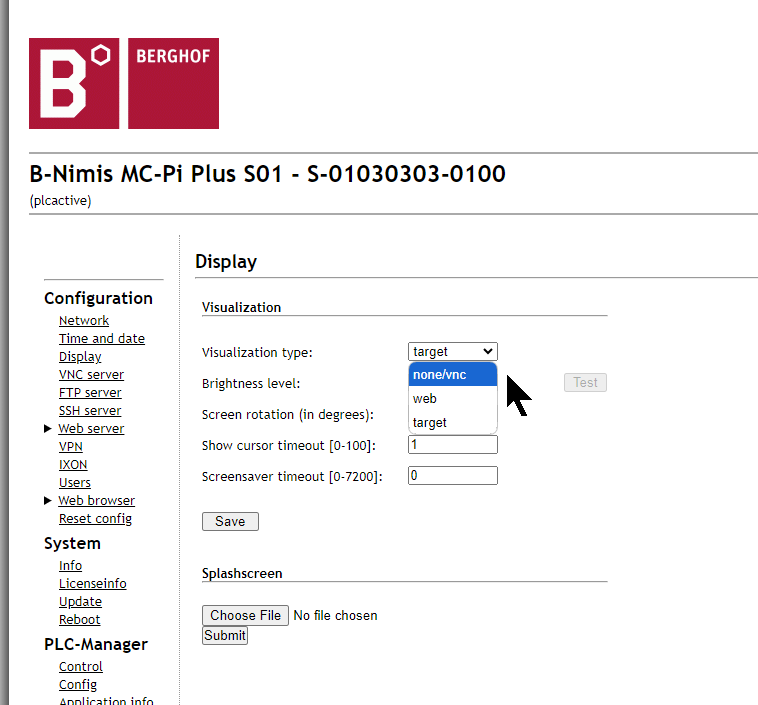
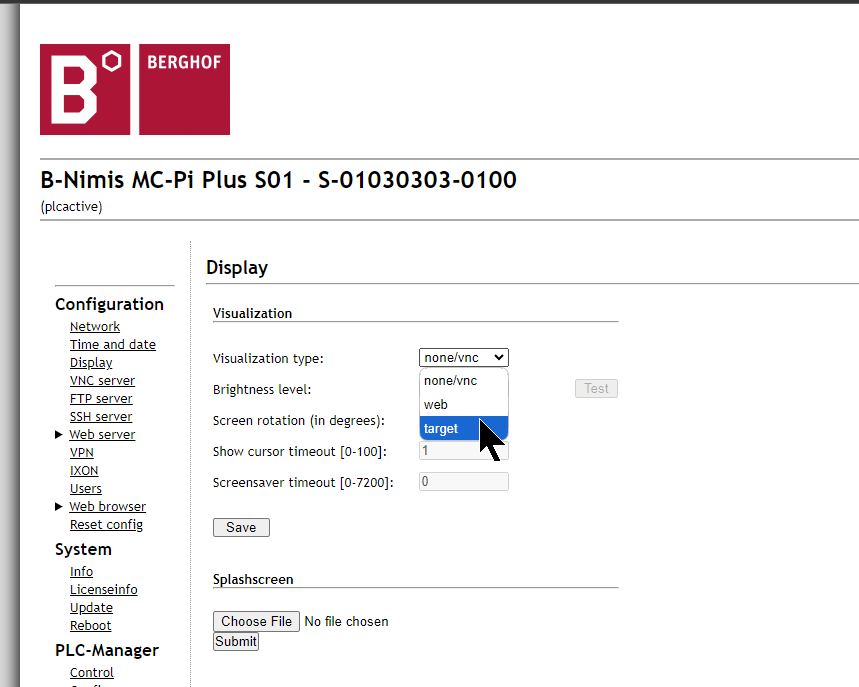
You can change the display settings for BERGHOF’s MC-PI CPU from this screen. To change the settings, select Drop-List under Visualization.
None/vnc, Web, and Target can be selected from the Drop-List.
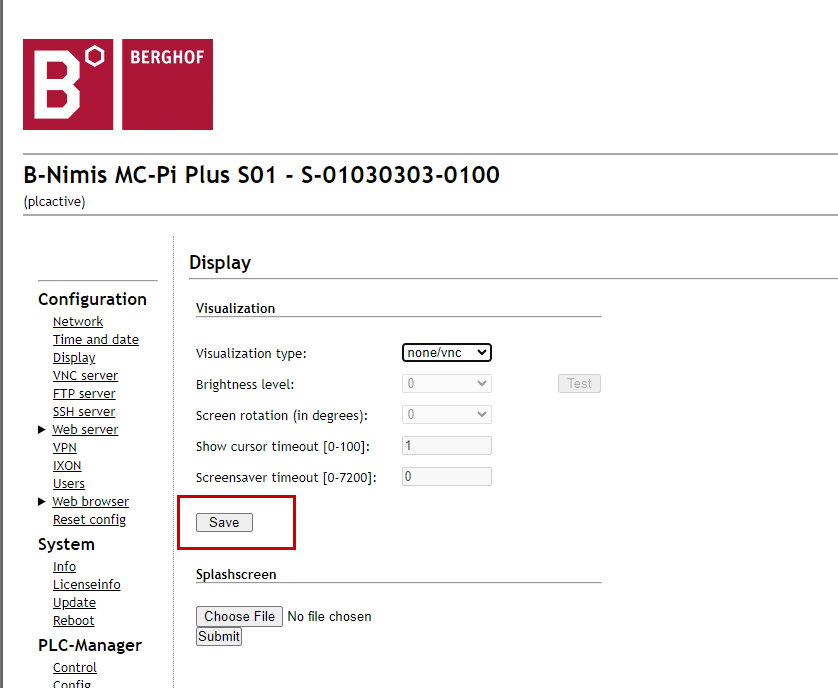
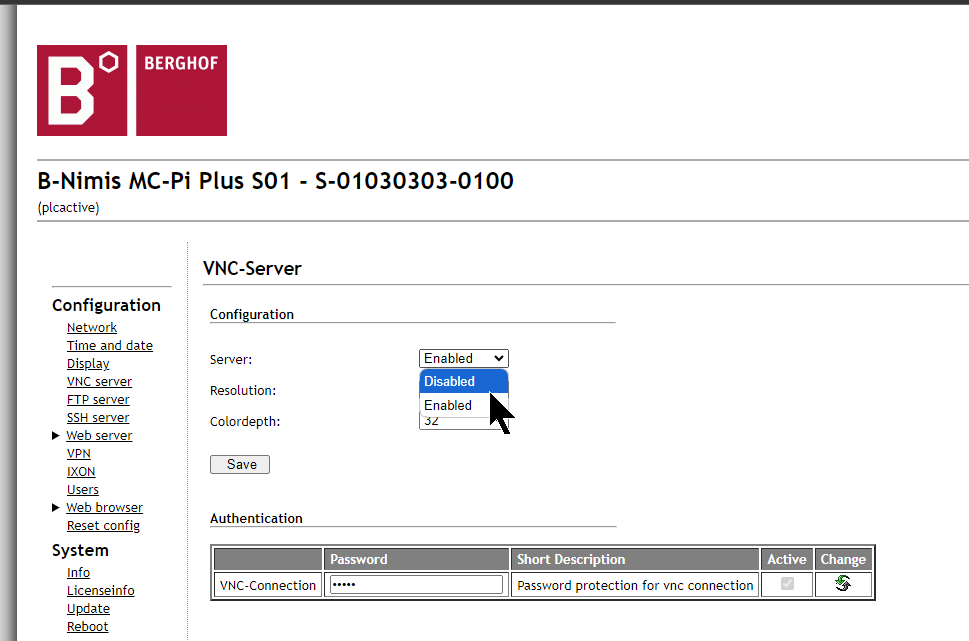
First test the VNC functionality.
Next, save your settings with the Save button.
Done!
Reboot
Finally, reboot BERGHOF’s MC-PI by going to Reboot>Reboot Module.

Codesys Side
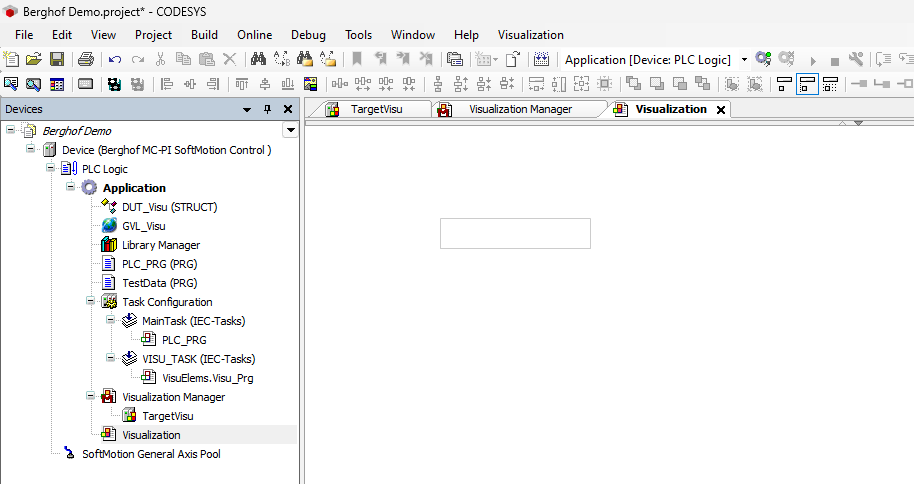
Now we will build the Codesys side.
DUT
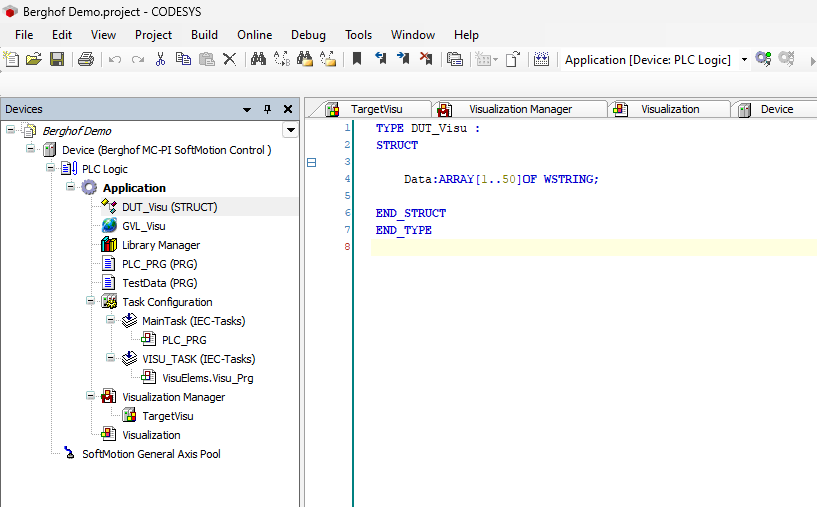
Since it is tedious to define variables one by one, test variables are defined together in a structure.
GVL
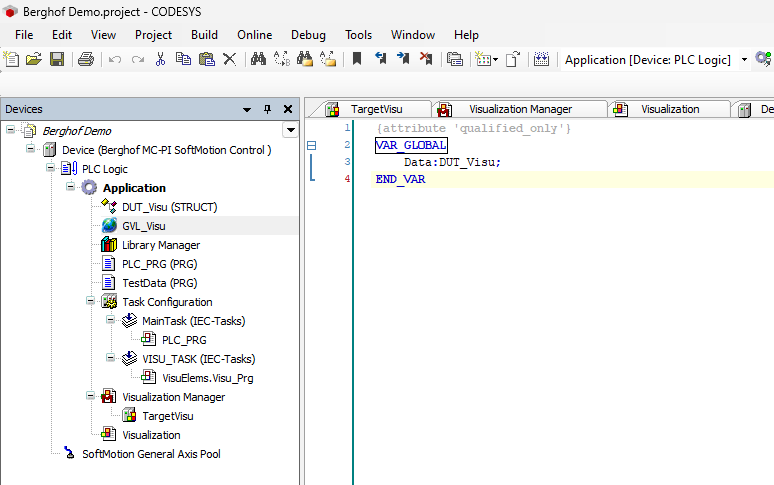
Define variables in the Global Variable List from the DUT defined earlier.
Program
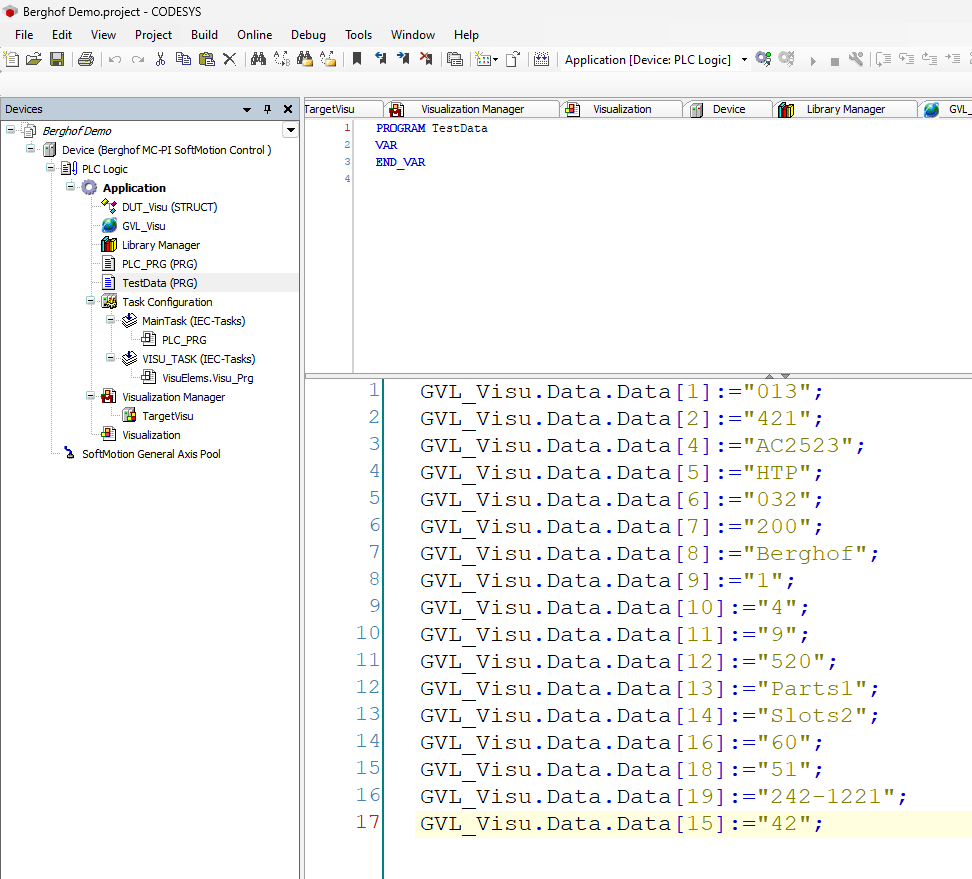
The next step is to create a test program and write data to the variables in the Global Variable List.
The final step is to call the test program you just created from the Main program.

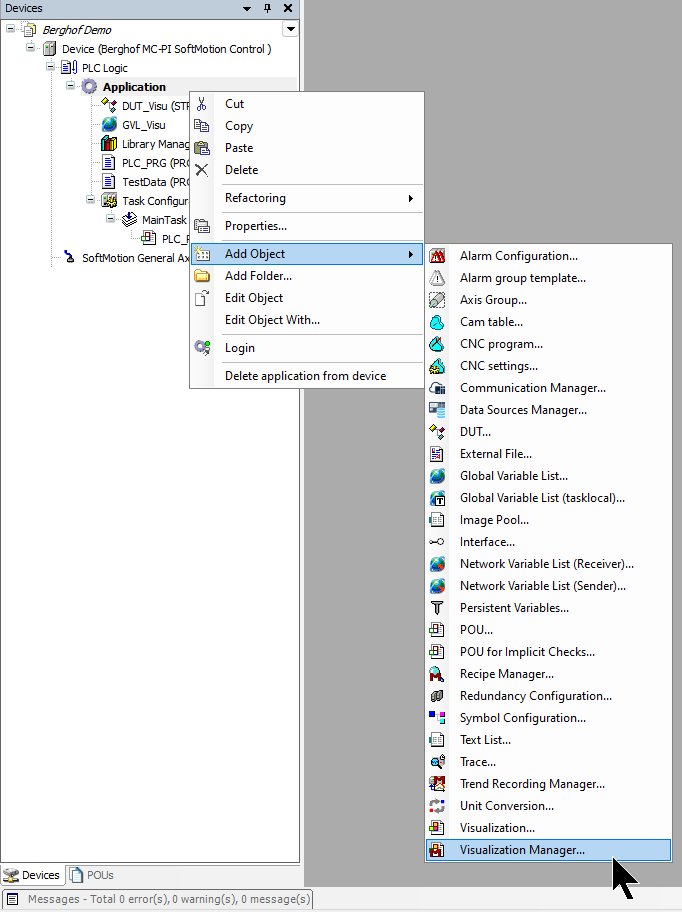
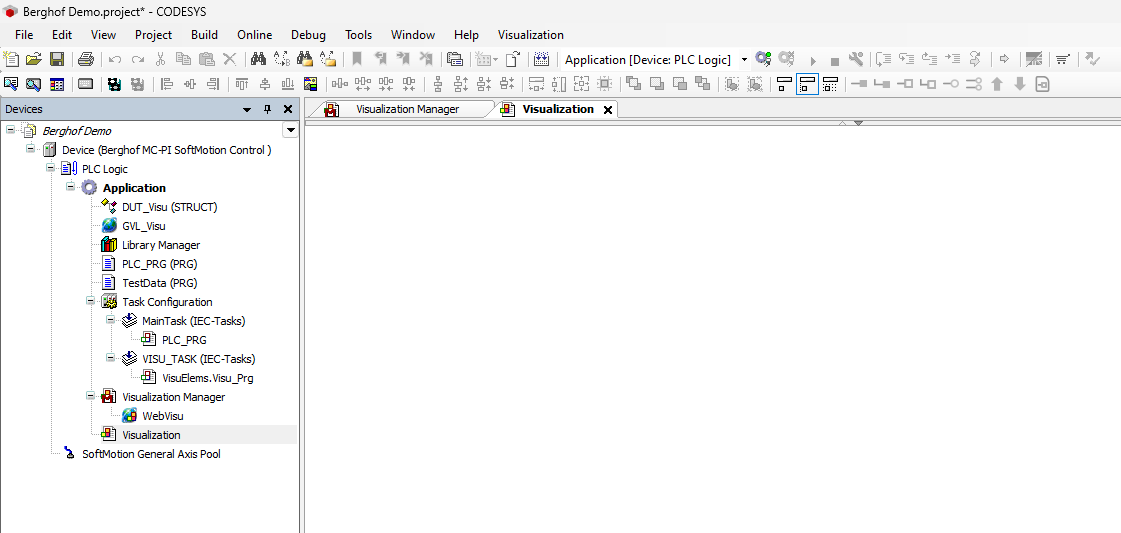
Visualization Manger
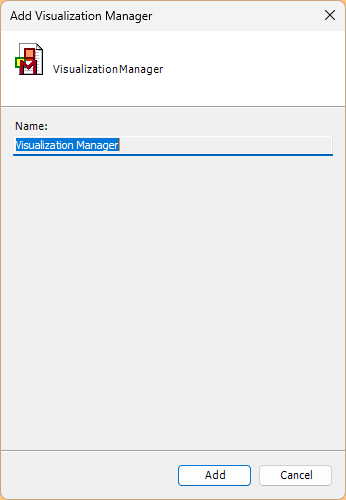
Next, click on Application>Add Object>Visualization Manager to add the Visualization Manger.
Proceed with Add.
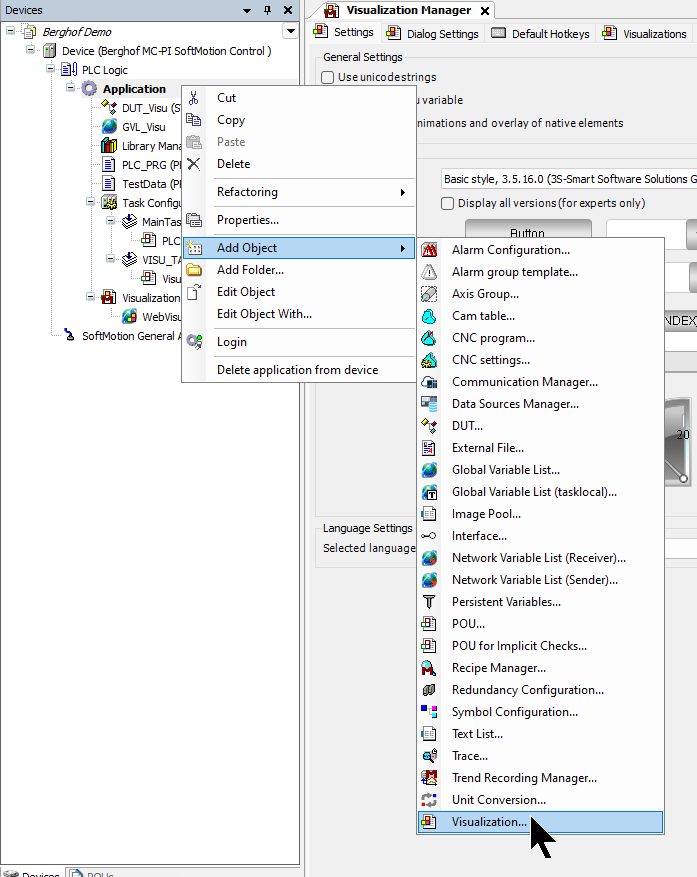
Visualization
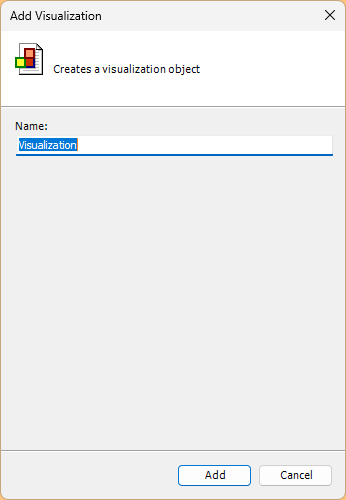
Next, click Application>Add Object>Visualization to add screen data.
Set a name for the screen and add a screen with Add.
Done!
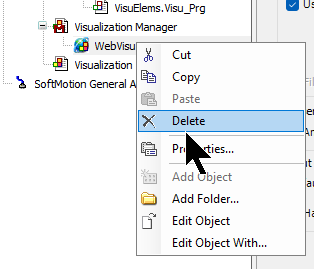
Delete WebVisu
The first functional test is mainly for the VNC Server, so remove WebVisu.
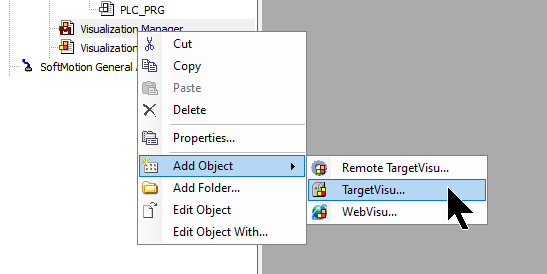
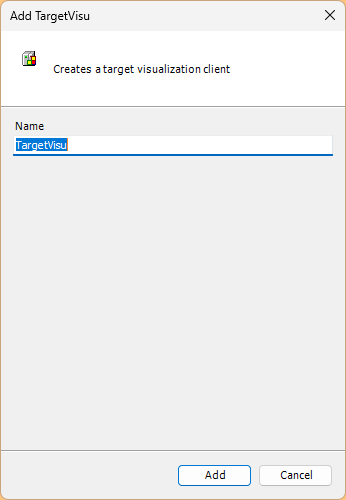
TargetVisu
Add TargetVisu.
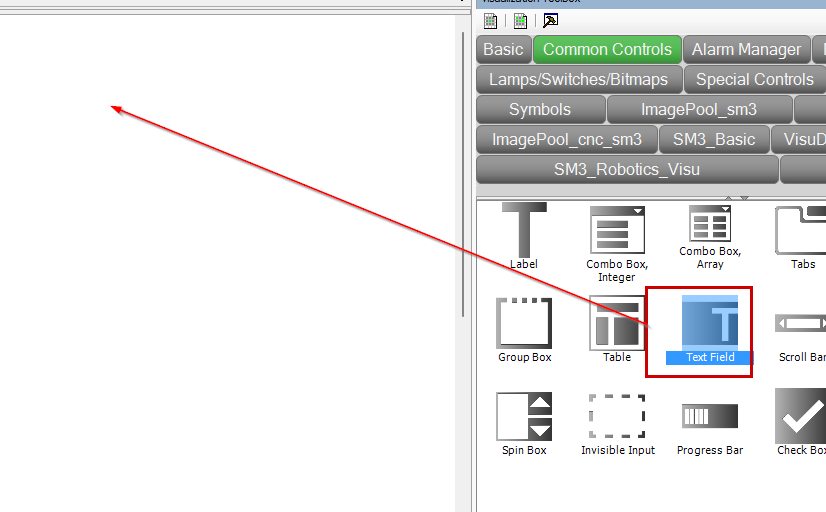
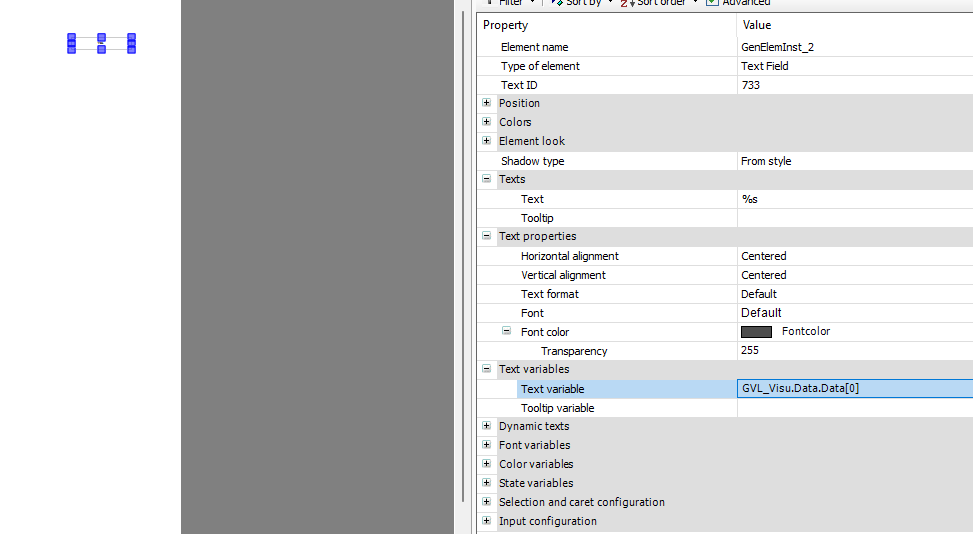
Text Field
Now add a Text Field to the screen. This component can be used to display and change variables.
Done!Text Field has been added.
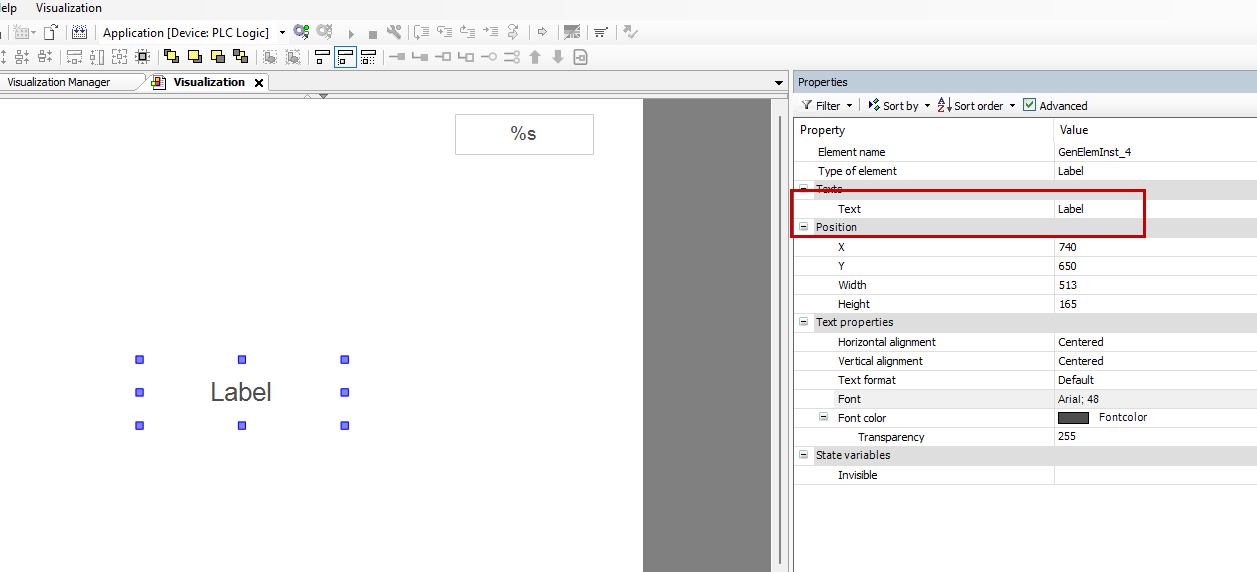
Set the text you want to display in the Text Field from the Text item in Properties.
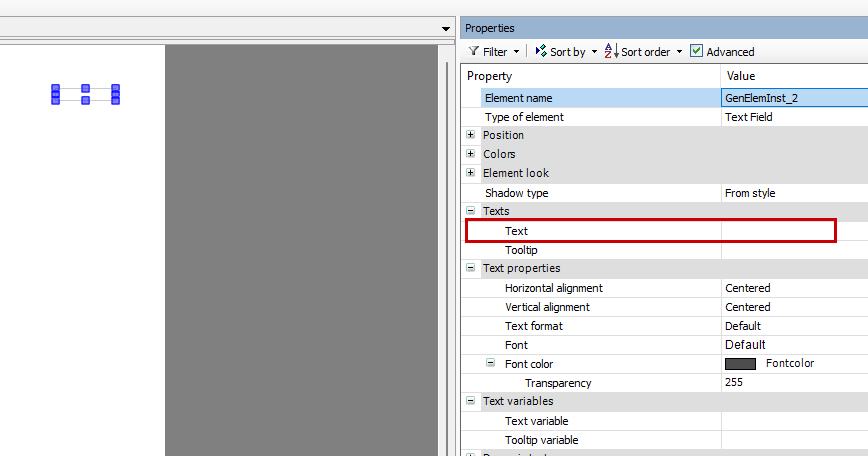
This time it will be set to %s, meaning that the corresponding Text Field will display a string variable.

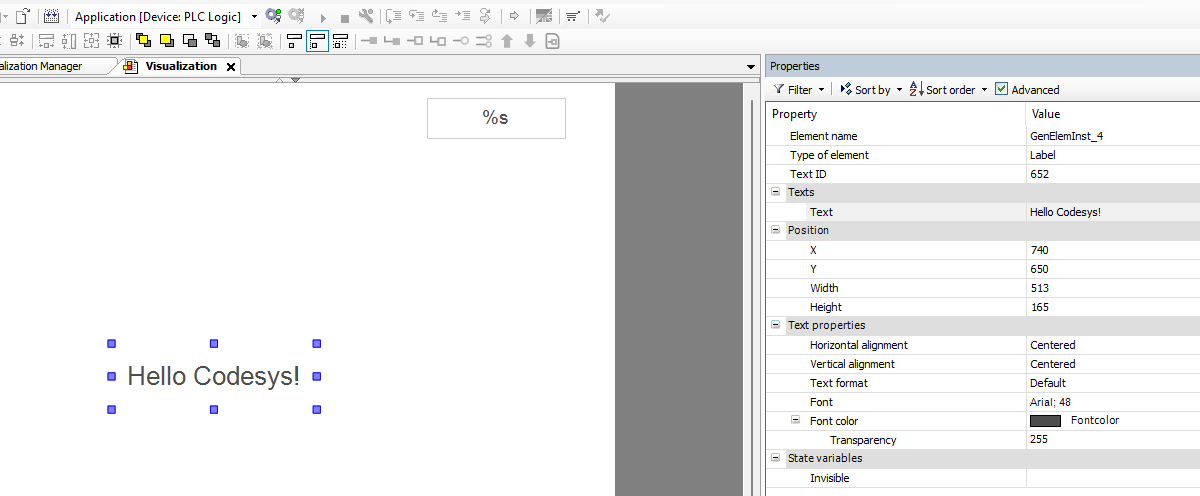
Now click on the … button next to Text variables>Text Variable to set the variables you want to display in the Text Field.
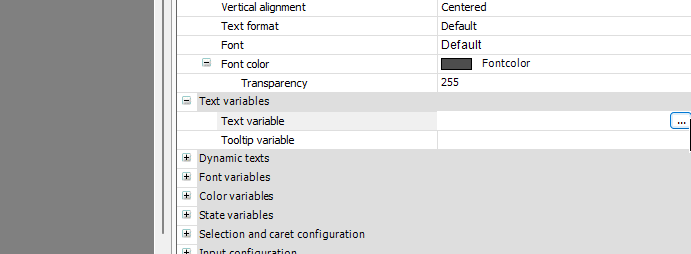
Then, make sure to select the variables you want to display from the Input Assistant.

Done!
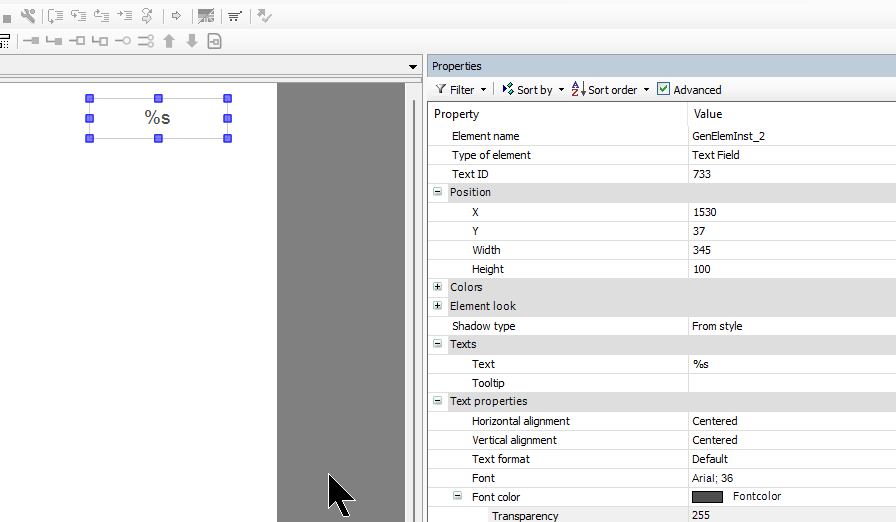
Next, click on the … button next to Text Properties>Font to change the font size and other settings for Text variables.
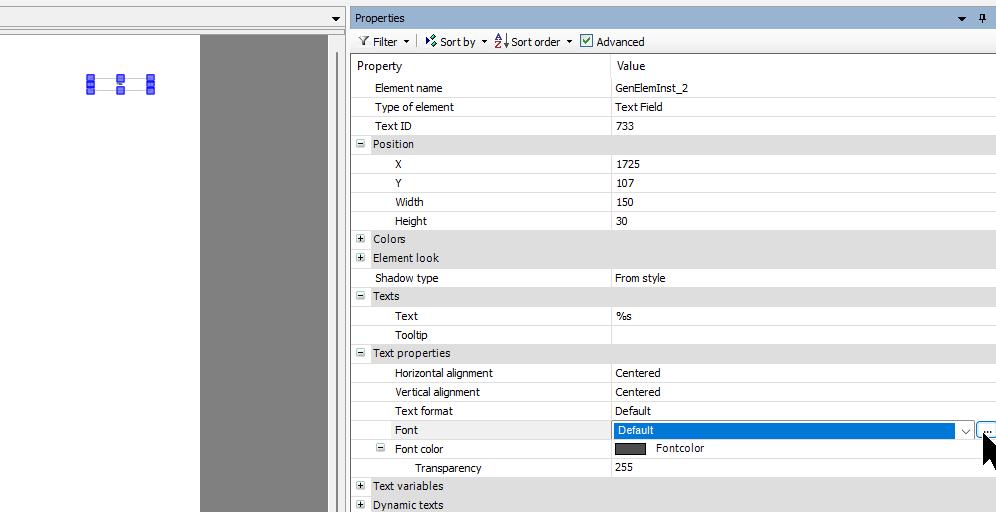
Set the text size and other settings according to the actual application.
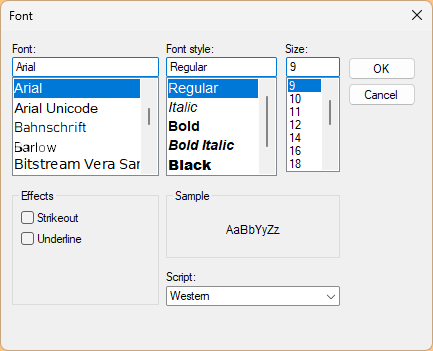
Done!
Label
Now add the Label component.
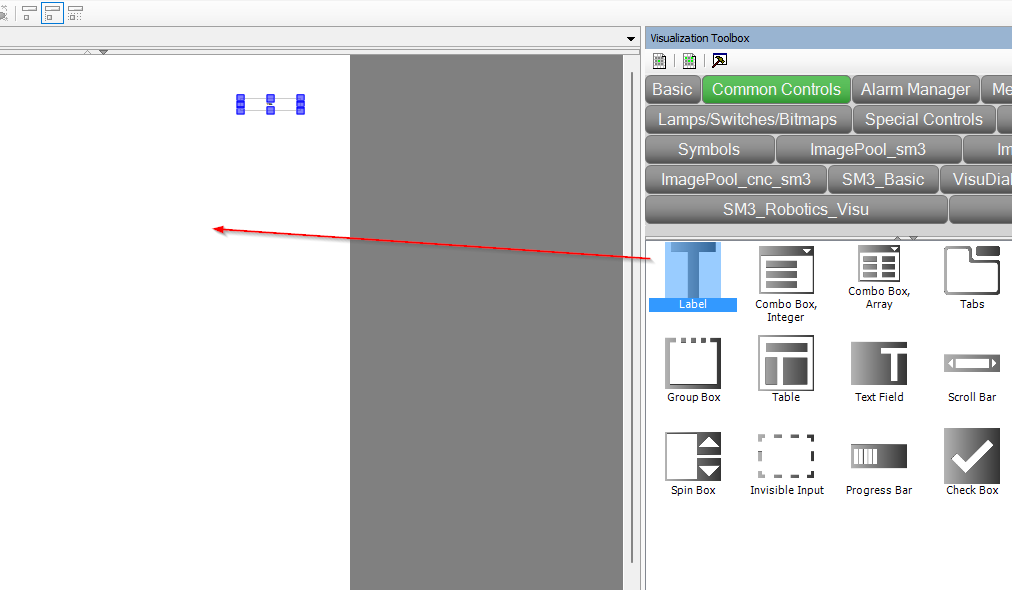
Done!
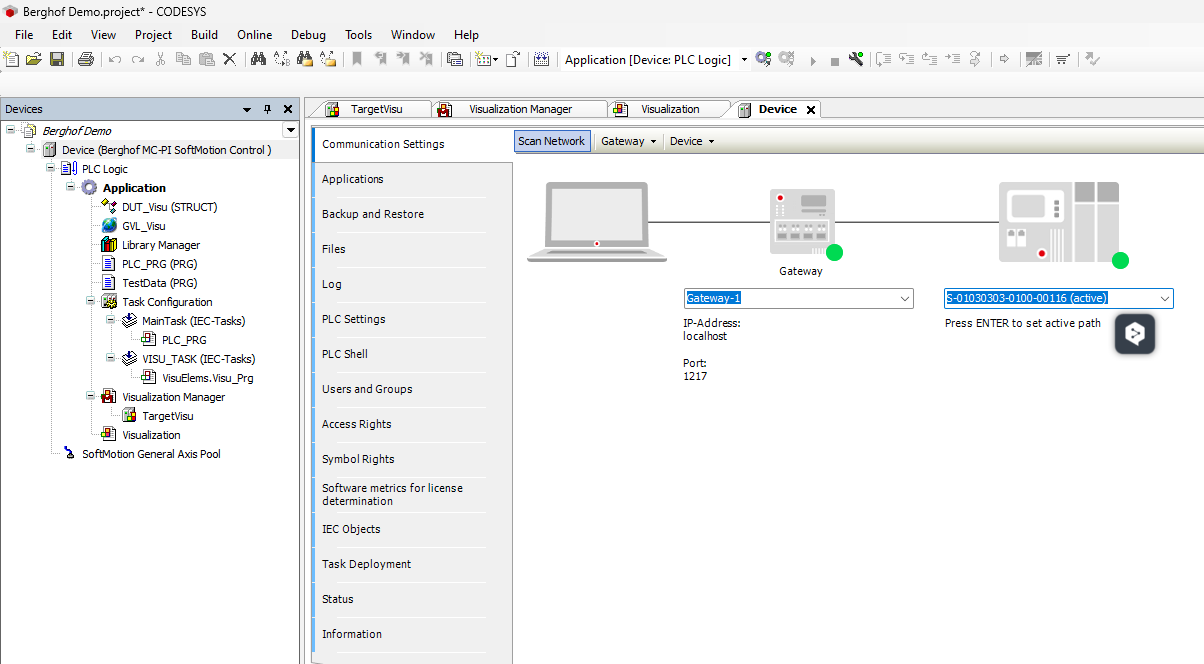
Scan Network
Finally, click on Device>Communication Setting>Scan Network and search for BERGHOF’s MC-PI CPU.
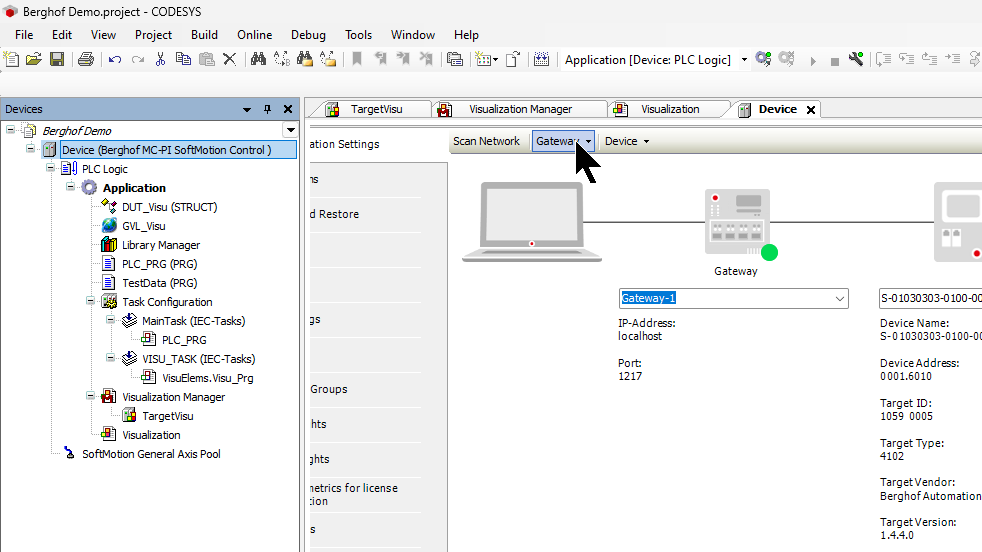
Done!I found the MC-PI CPU from BERGHOF.

We are able to connect to Codesys IDE and BERGHOF’s MC-PI CPU.
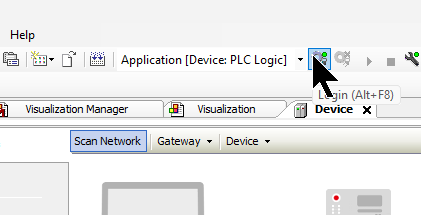
Login
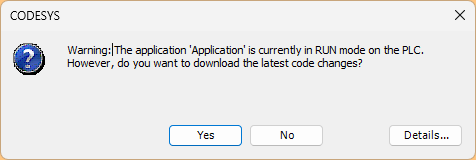
Next, click the Login button to download your project to BERGHOF’s MC-PI CPU.
Proceed with Yes.
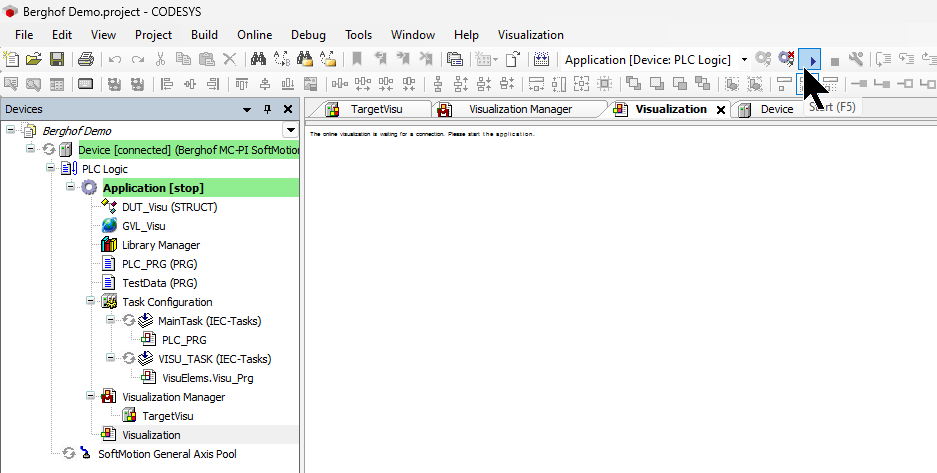
Start
Finally, use the Start button launches Runtime.
Result
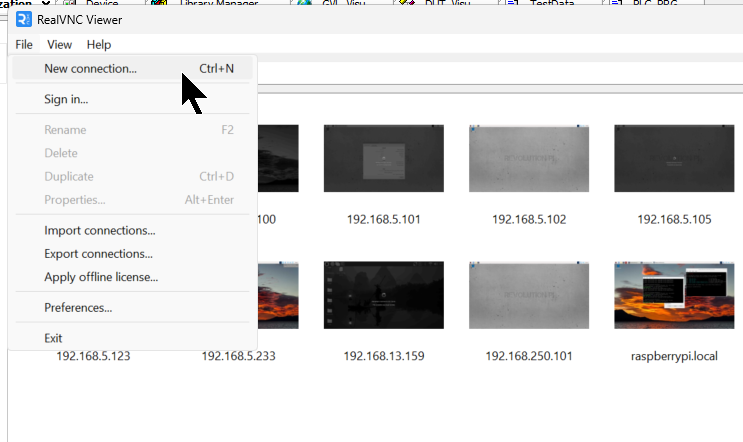
Now, launch the RealVNC Viewer and verify the VNC Server functionality of BERGHOF’s MC-PI CPUs by creating a new VNC connection at File>New Connection.
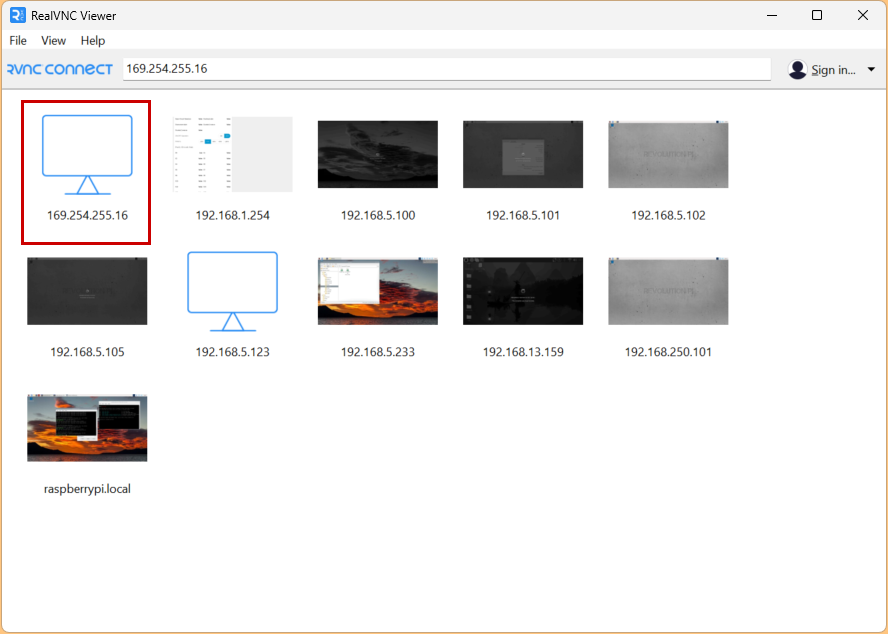
Enter the IP address of the BERGHOF MC-PI CPU in the VNC Server field.

Next, double-click on the Connection you just created.
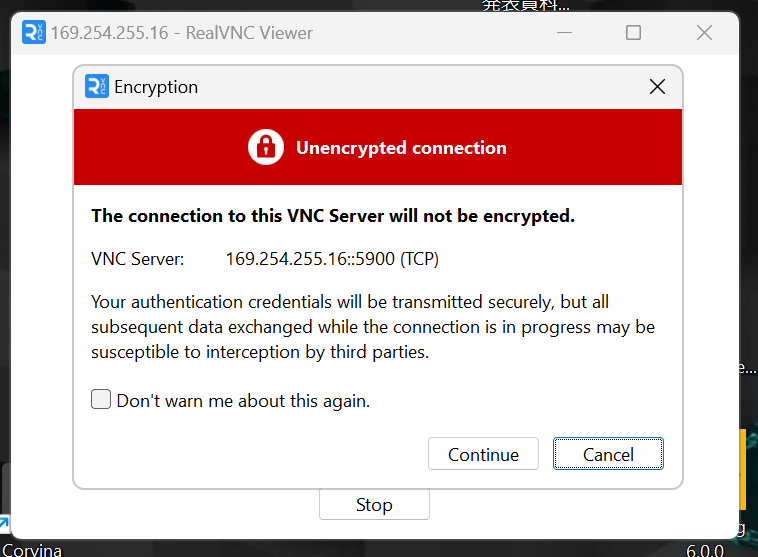
Proceed with Continue.
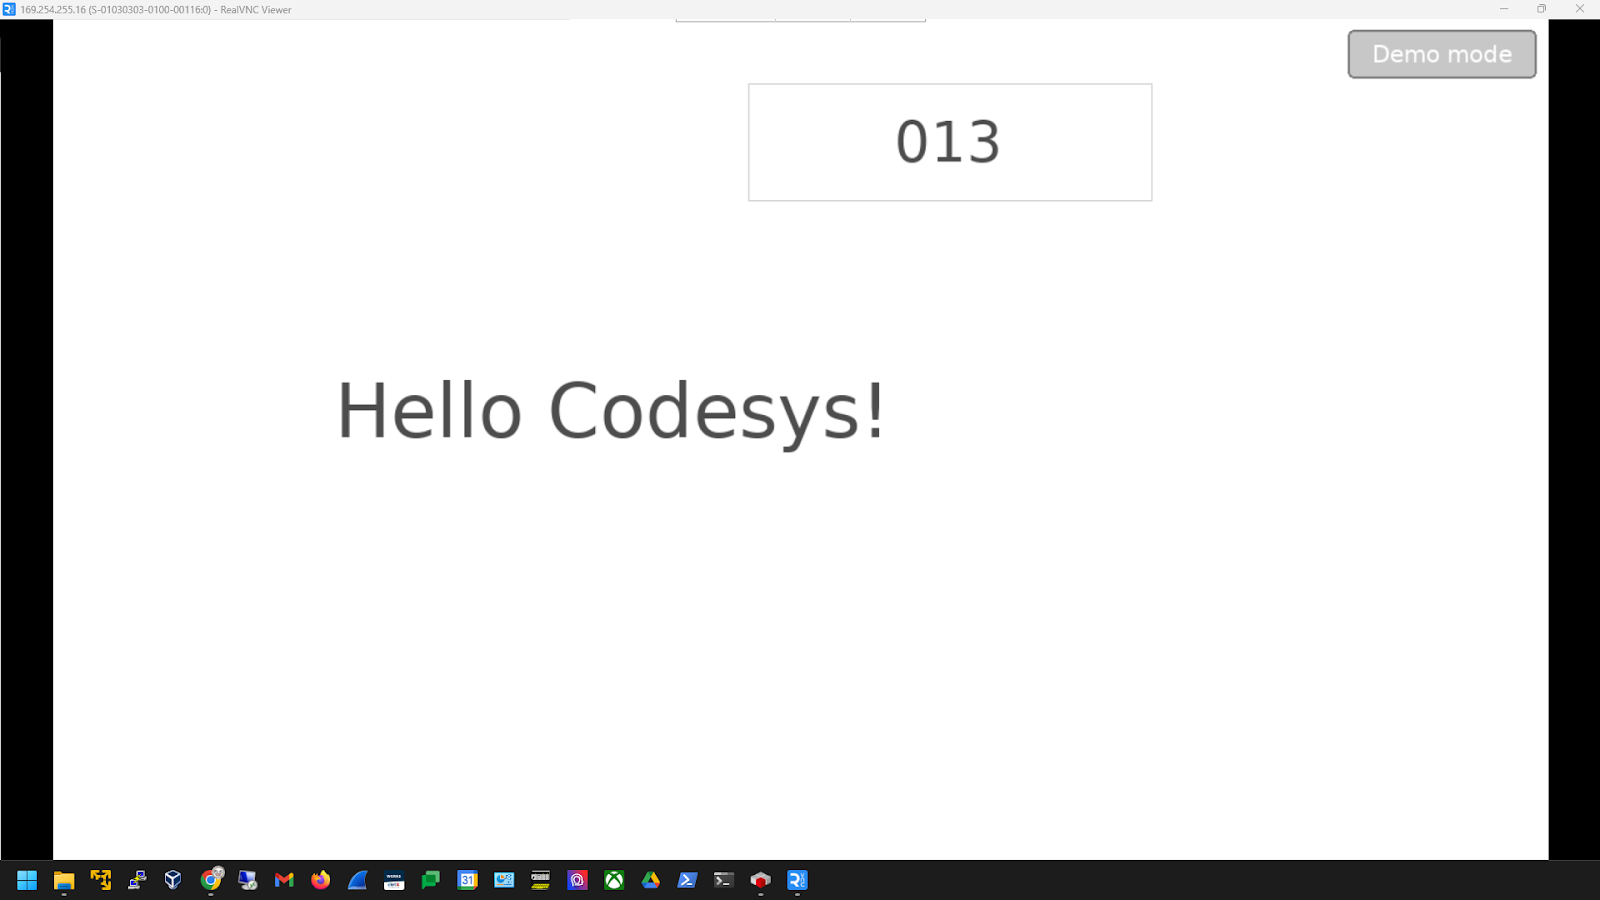
Done!The screen just created with Codesys is now displayed in VNC Viewer.
Implementation‐VNC Server with Password
The VNC Server of BERGHOF’s MC-PI CPUs can be password protected; you can enter the password in the VNC Server>Password field.
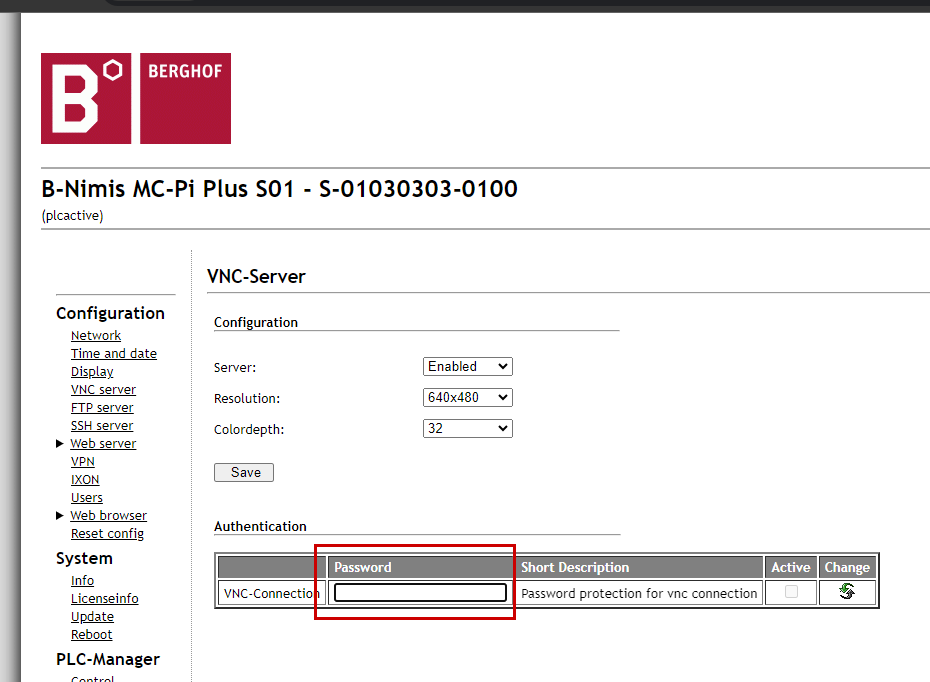
Click on the Change button to activate the password protection feature of VNC Server and set a password.
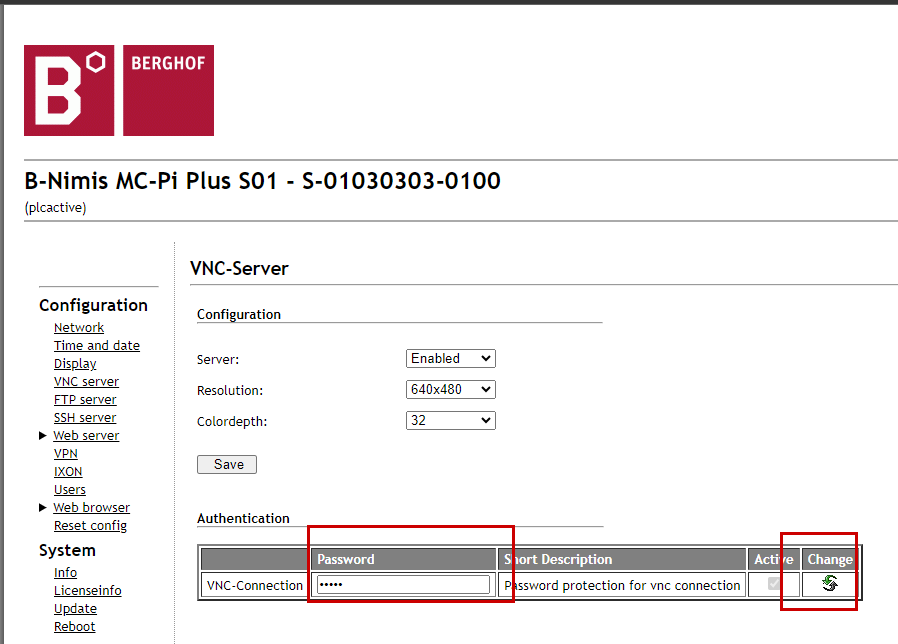
Finally, reboot the CPU.
Result
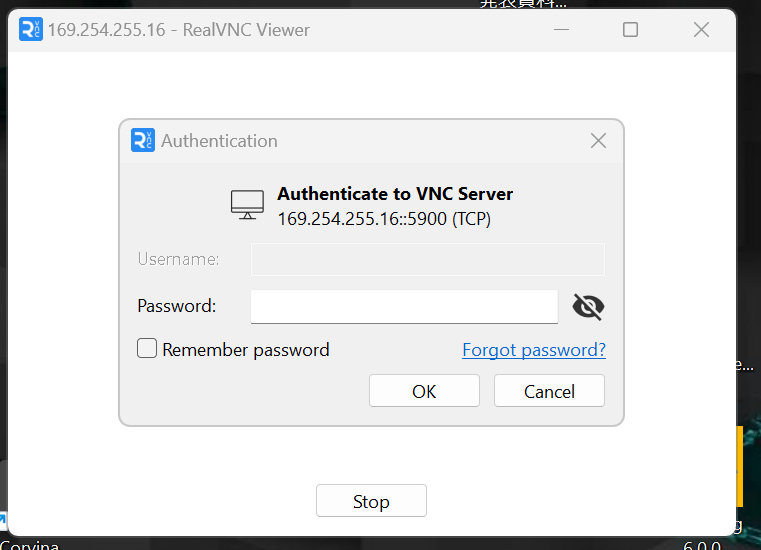
This time, when accessing the CPU’s VNC Server from VNC Viewer, a password is requested. Enter the password you have just set.
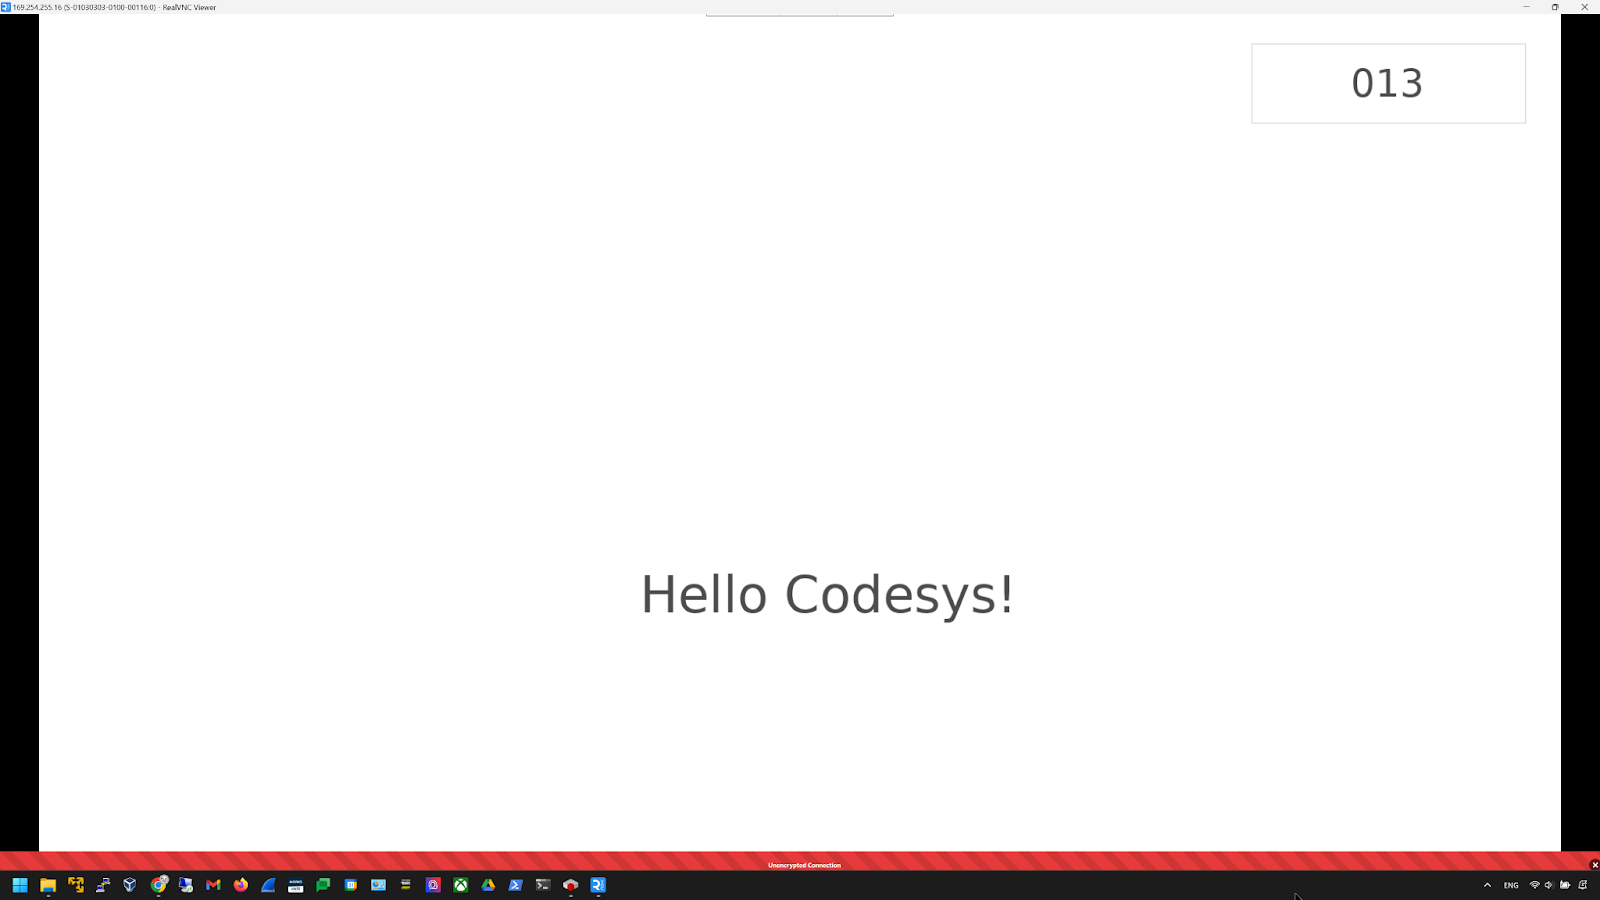
Done!The screen just created with Codesys is now displayed in VNC Viewer.
Implementation‐Target Display
Configure
To display Target on BERGHOF’s MC-PI CPU, first disable the VNC Server that you have just enabled.
Disable the VNC Server at Configuration>Server>Disabled.
Next, set Display>Visualization>Target.
Result
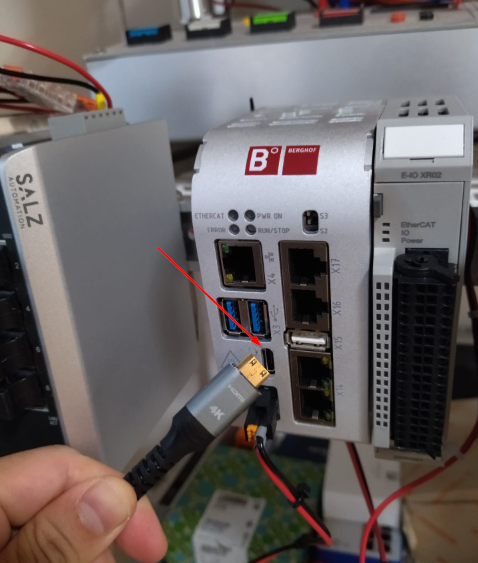
Connect a Mini HDMI cable between BERGHOF’s MC-PI CPU and Monitor.
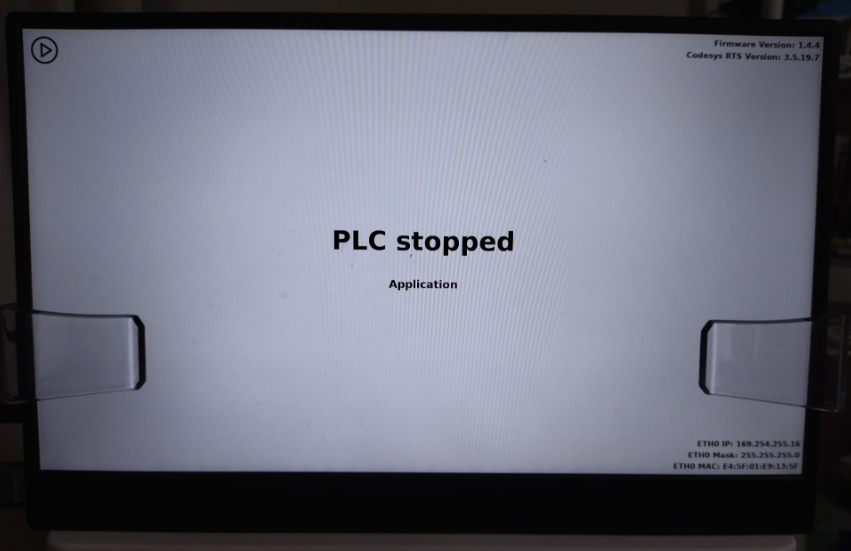
When the CPU is restarted, the RUN/STOP status of the CPU is displayed on the screen. Currently, it is in STOPPED mote.
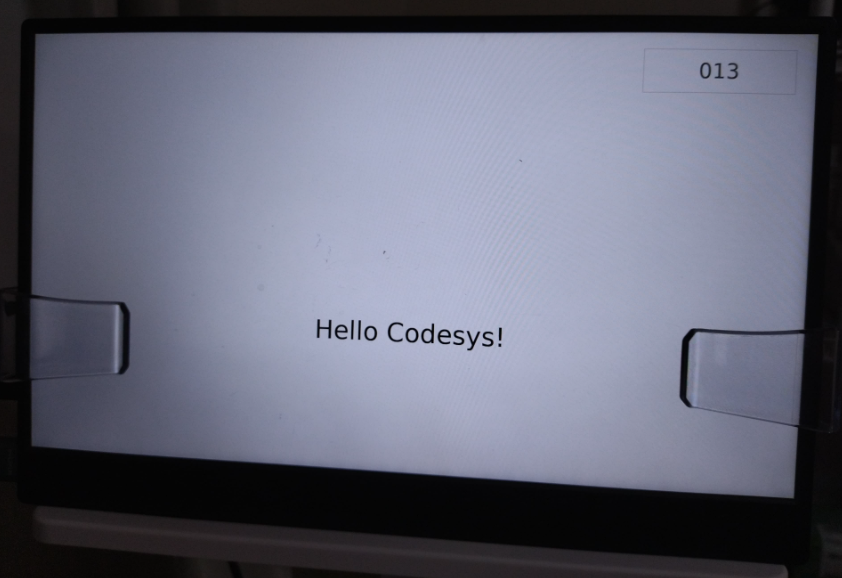
Done!The screen just created with Codesys is now displayed in VNC Viewer.
Implementation‐Web Visualization
Configure
To display on BERGHOF’s MC-PI CPU from the Browser, select Web from the Visualization Type.
Codesys Side
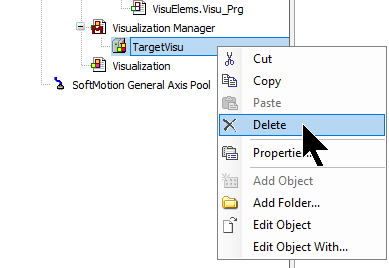
The next step is to add WebVisu on the Codesys side. Before that, delete the TargetVisu that was added earlier.
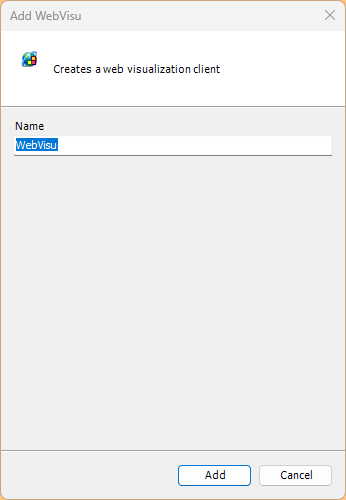
Next, add Visualization Manager>Add Object>WebVisu.
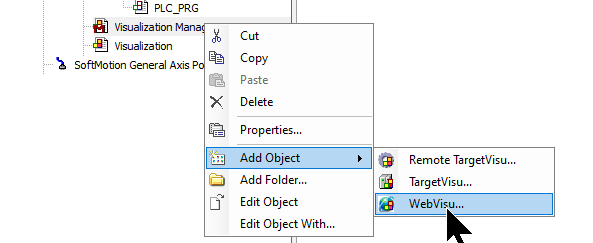
Add WebVisu with Add.
Result
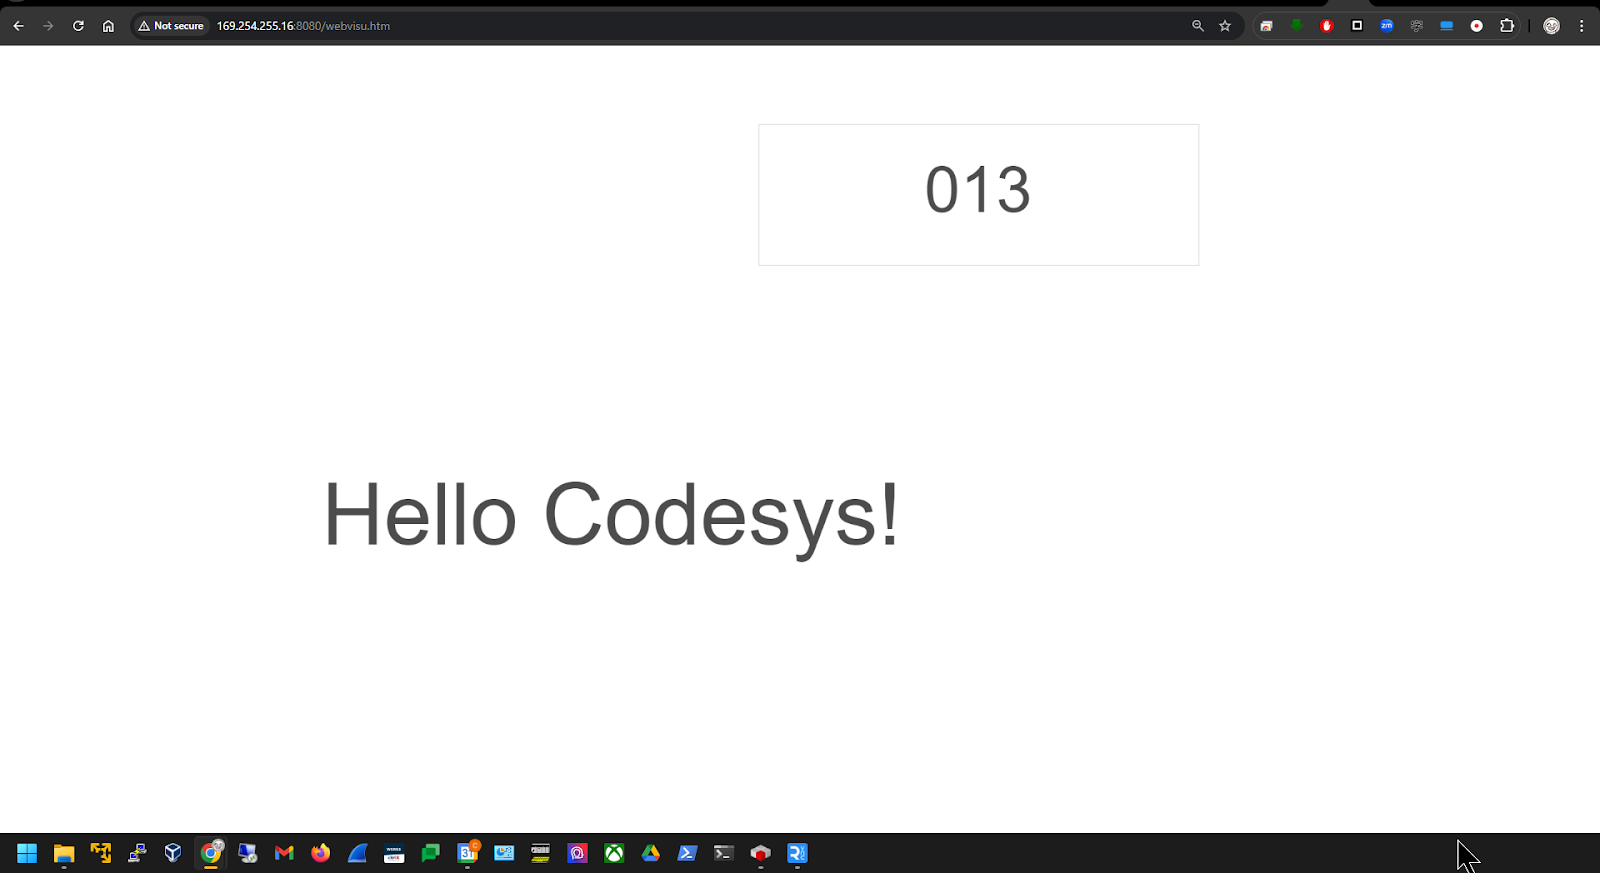
Finally, the following Link accesses the IP address of BERGHOF’s MC-PI CPU.
http://IPAddress:8080/webvisu.htm
Done!The screen just created with Codesys is now displayed in VNC Viewer.