This article will serve as a guideline for setting up EXOR’s X5 Wireless.
There are a few steps to set up X5 Wireless, but if you follow that article, anyone should be able to use X5 Wireless smoothly.
Let’s get started!

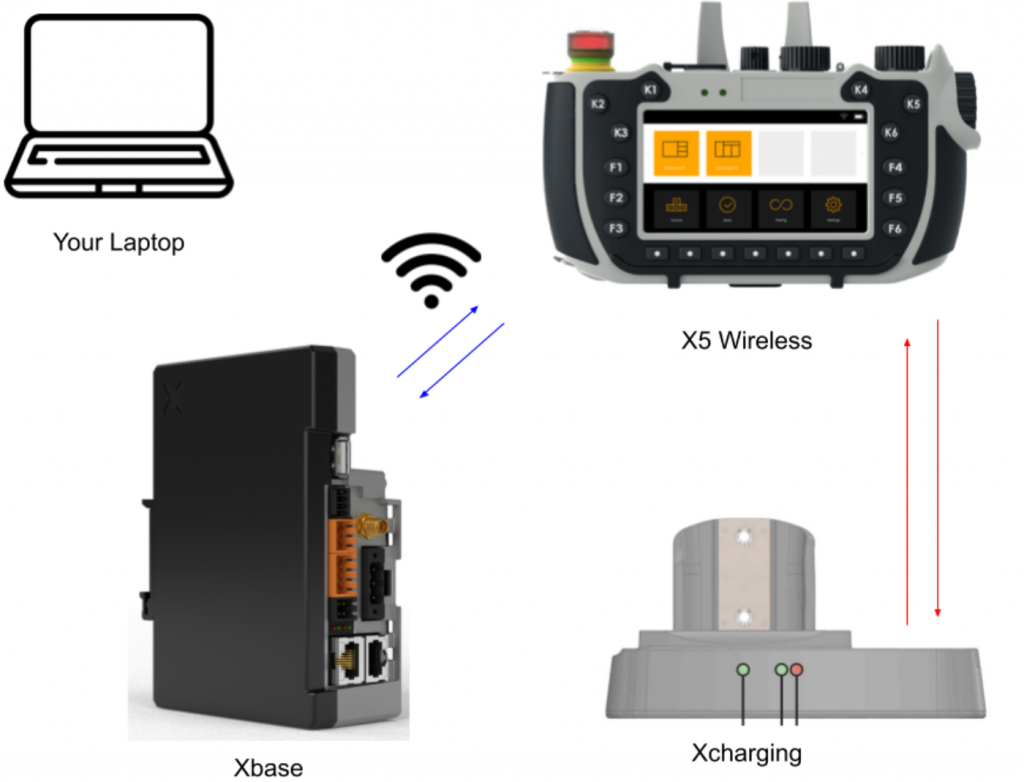
Basic hardware
This is the Hardware used in this article, X5 Wireless, XBase, XCharging and your own computer.
X5 Wireless
The X5 Wireless Mobile HMI is a small, lightweight device, also with keyboard, potentiometer and hand-held, which can be used in industrial applications with wireless connectivity and safety device certification. The X5 can also be programmed with JMobile.
In addition, it can be used in conjunction with Xbase as a peer-to-peer SIL3-rated Wi-Fi connection.

Layout
This is the X5 Wireless Layout.

LED
This is the system status showing the LEDs on the X5 Wireless.

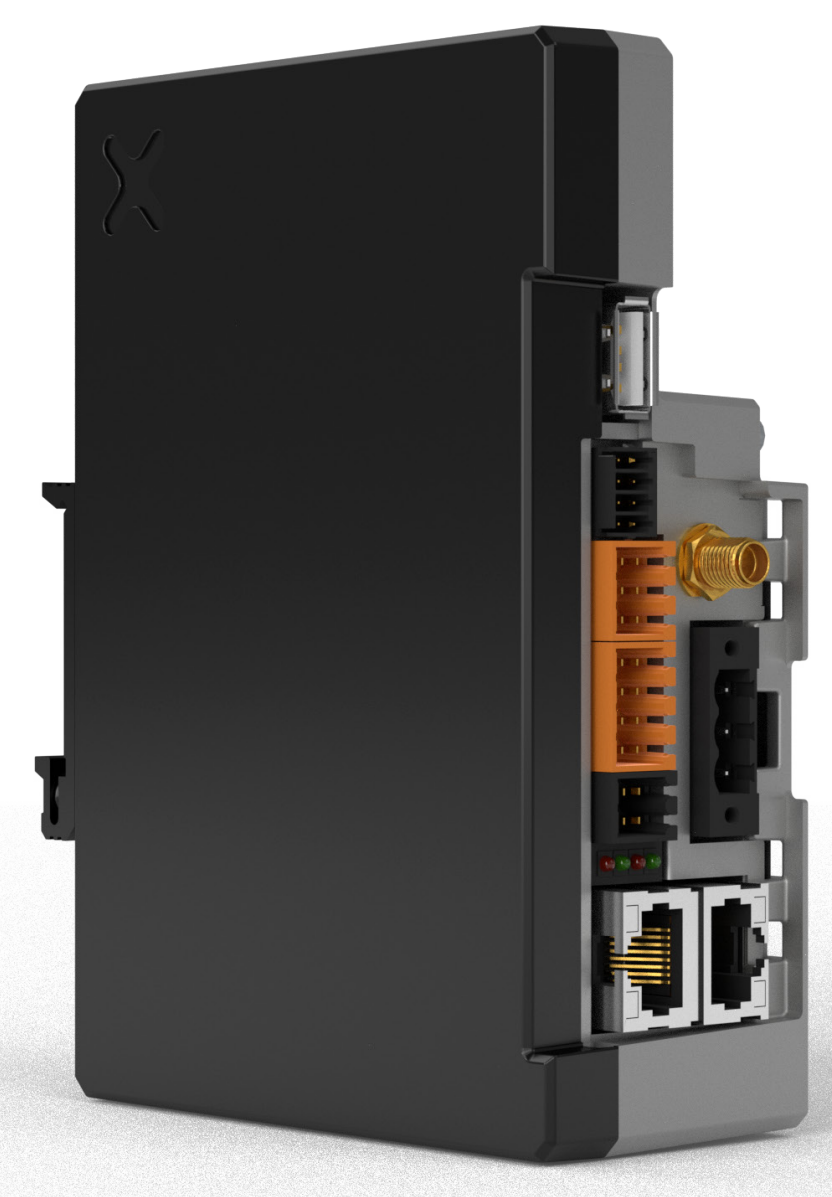
Xbase
Xbase is a rugged, compact controller designed as a companion device to wireless safety handheld HMI devices such as the X5. The device contains the same safety hardware as installed in the handheld device and provides hardware safety signals that can be connected to the machine’s safety circuits.
Safety wireless communication is based on Wi-Fi and supports the 2.4 GHz and 5 GHz bands.
The XBase and X5 combination can also be used for field interfacing to demanding systems such as AGVs, CNCs or robotic applications.
Xbase also allows the integration of JMobile HMI with HTML interface and Gateway functionality; Corvina security remote connectivity.
This is the main function of XBase.
- Linux-based open platform
- System configuration via web browser
- Two Ethernet ports for network isolation
- Dual-band Wi-Fi for secure communication to mobile devices
- Corvina secure remote connection support
- Protocol support for OPC UA Server and Client
Layout
This is the X5 Base Layout.

Connector
This is the name of each Connector in XBase.

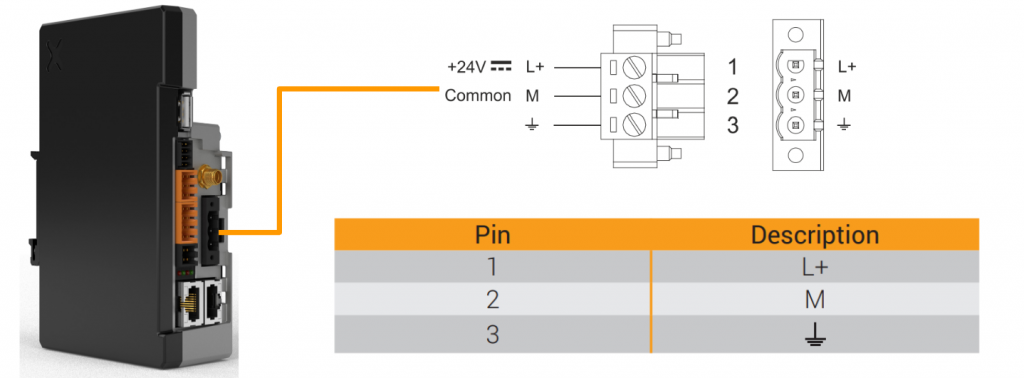
X1 Power Supply
This is the X1 Power Supply Connector.
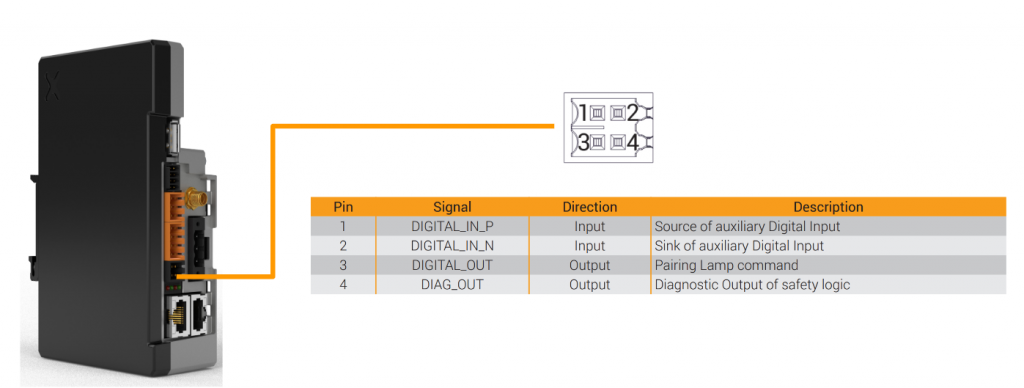
X5 Auxiliary I/O
This is the Connector of the “Auxiliary Input” (X5) on the Base Station.
X6 Safety Outputs
This is the Connector for “Safety Outputs” (X6) at the Base Station.

X7 Selector Outputs
This is the Connector of “Selector Outputs” (X7) in the Base Station.

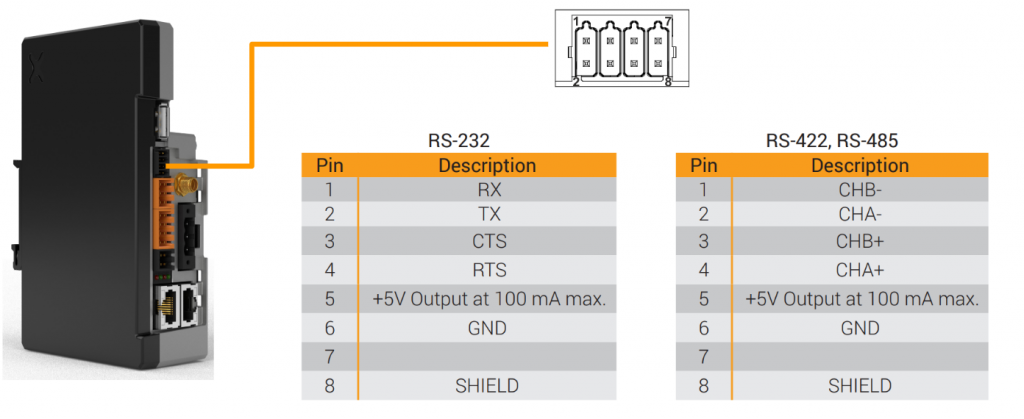
X8 Serial Port
This is the Connector of the “Serial Port” (X8) on the Base Station.
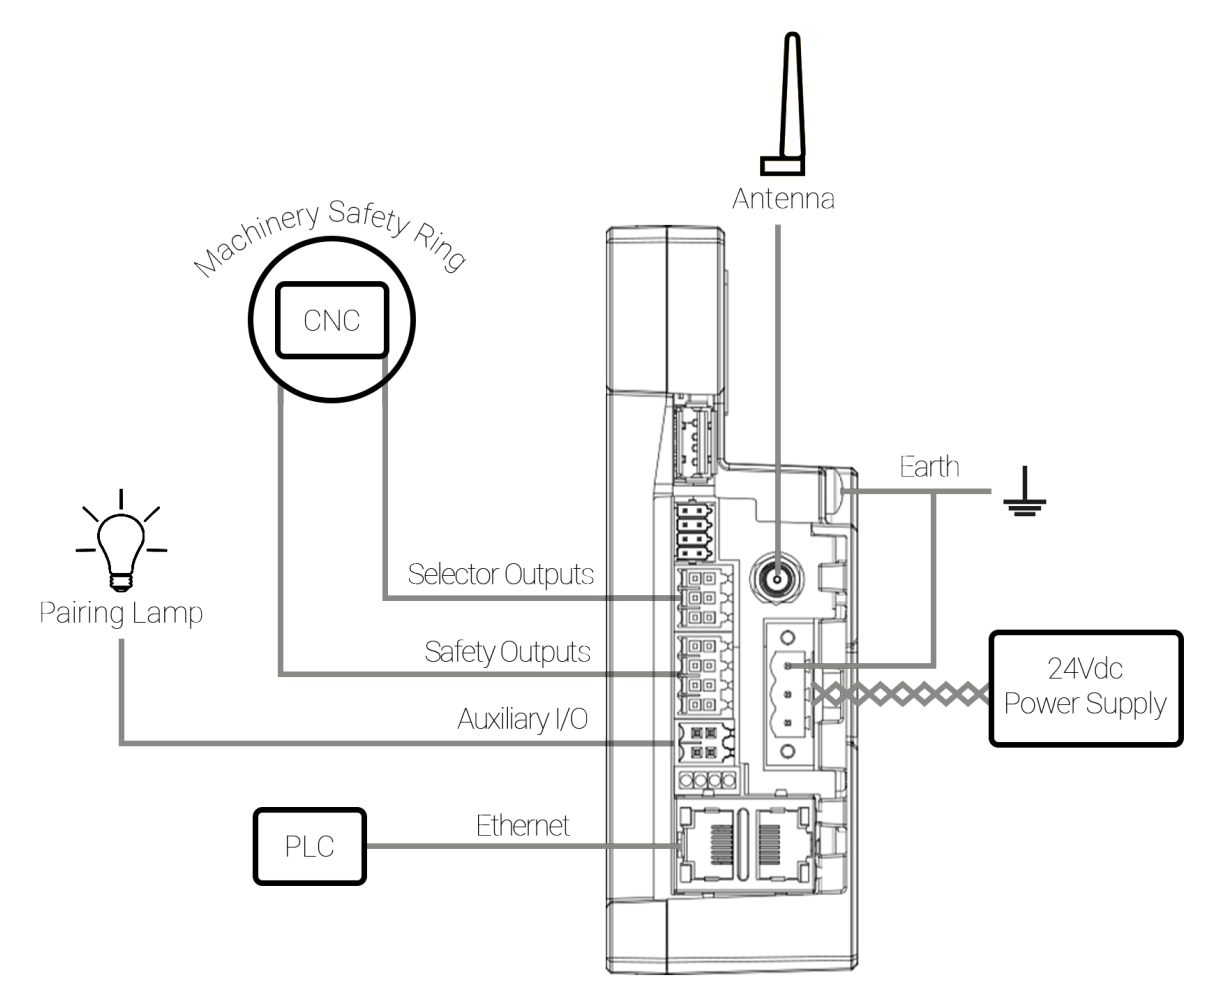
Example
This is an example of X5 Base wiring.
XCharging
This XCharging is required to fill the X5 Wireless battery.

Wiring
This is XCharging wiring.
Configuration
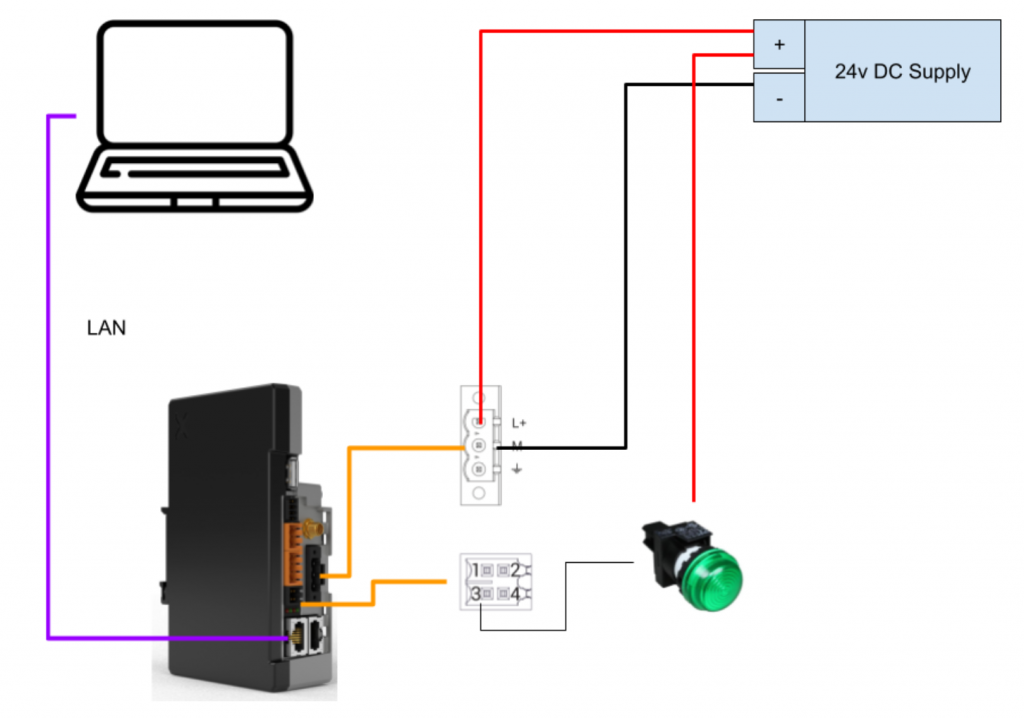
Wiring
This is the minimum wiring when using the XBase and X5 Wireless combination in this article.
X5 Base
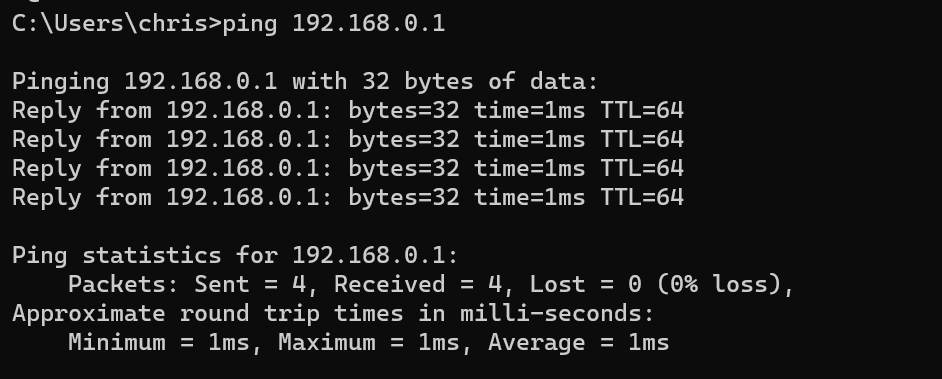
The default IP address of port Eth1 of the X5Base is 192.168.0.1/24. Check the communication from the Ping command.
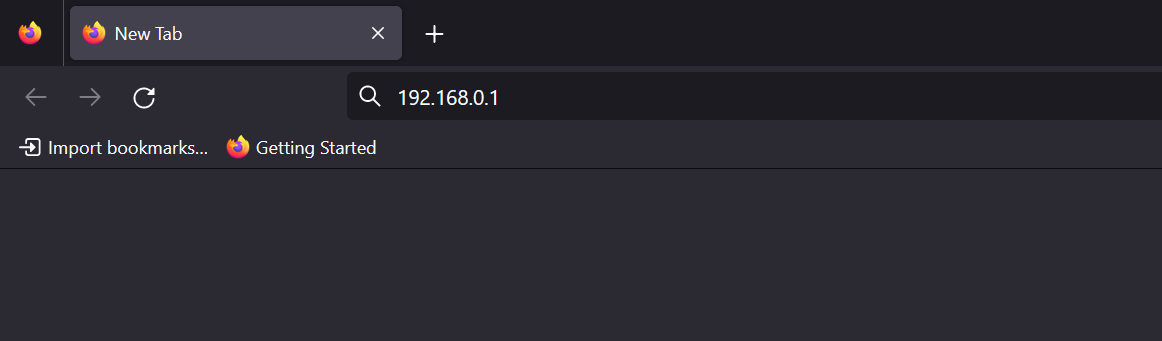
Access Web Server
Enter 192.168.0.1 in the Web Browser.
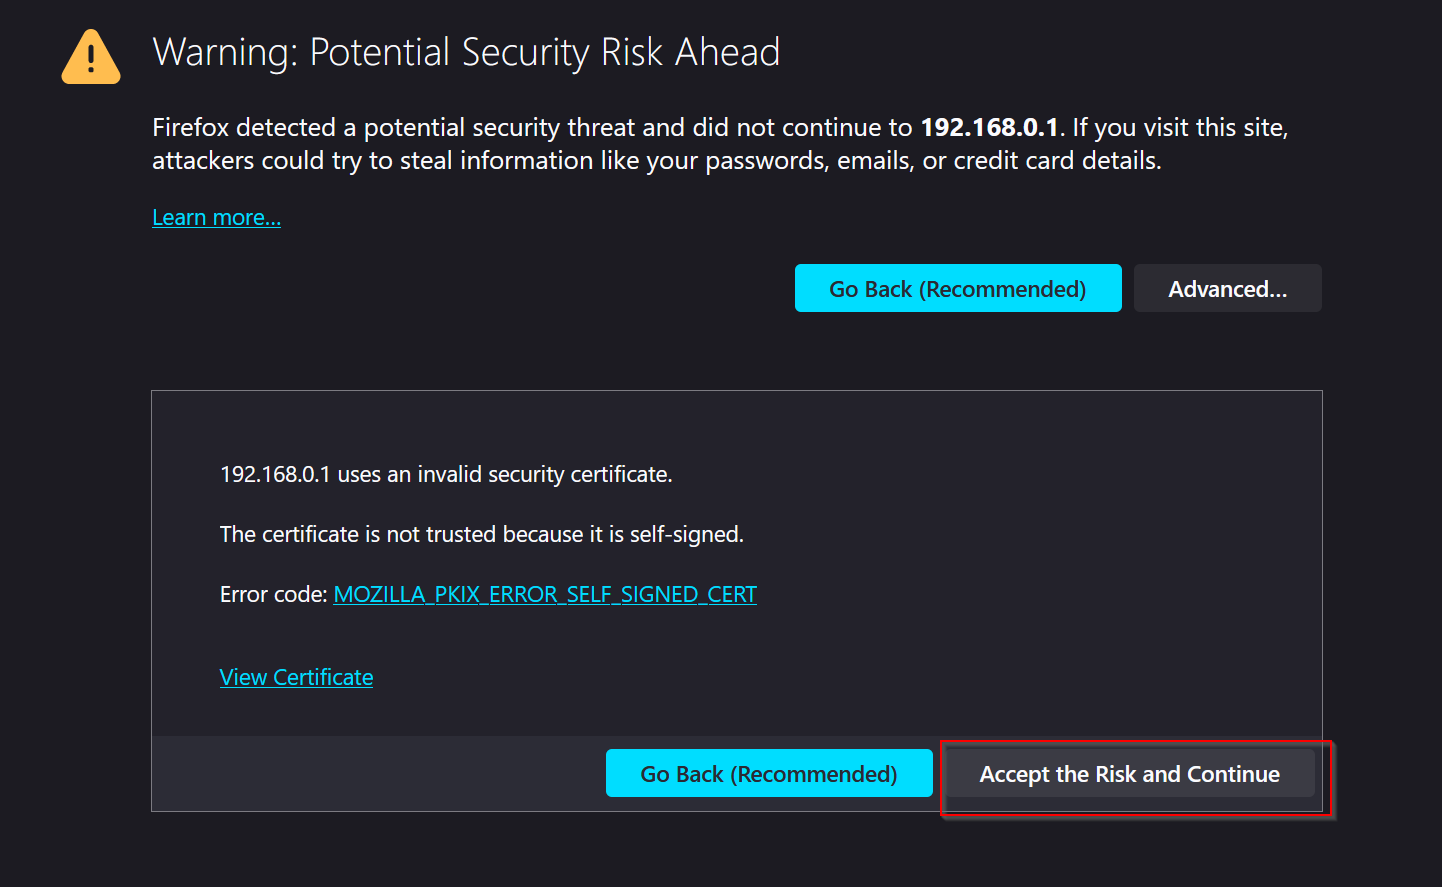
Click Accept the Risk and Continue.
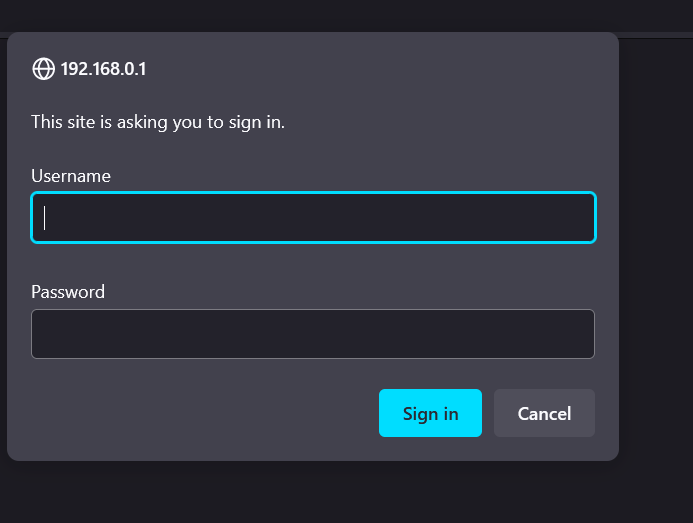
Username and Password must be entered and the Default settings are as follows.
Username:admin
Password:admin
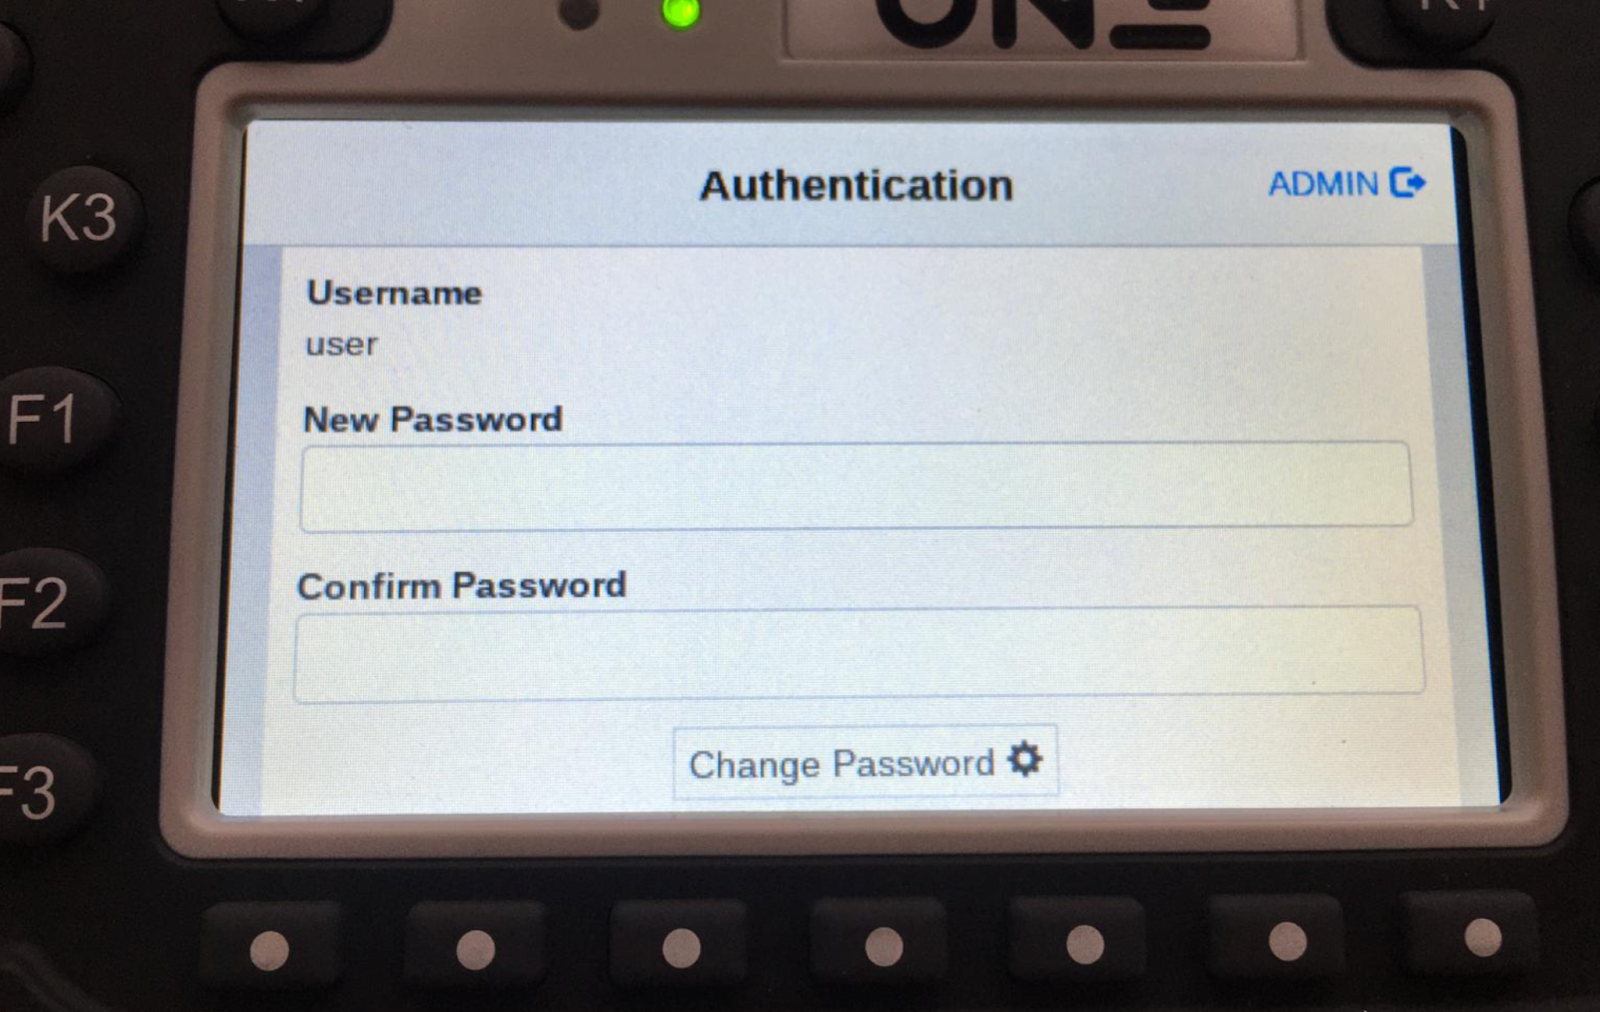
Setup User Password
The Password settings screen for the user account is displayed.
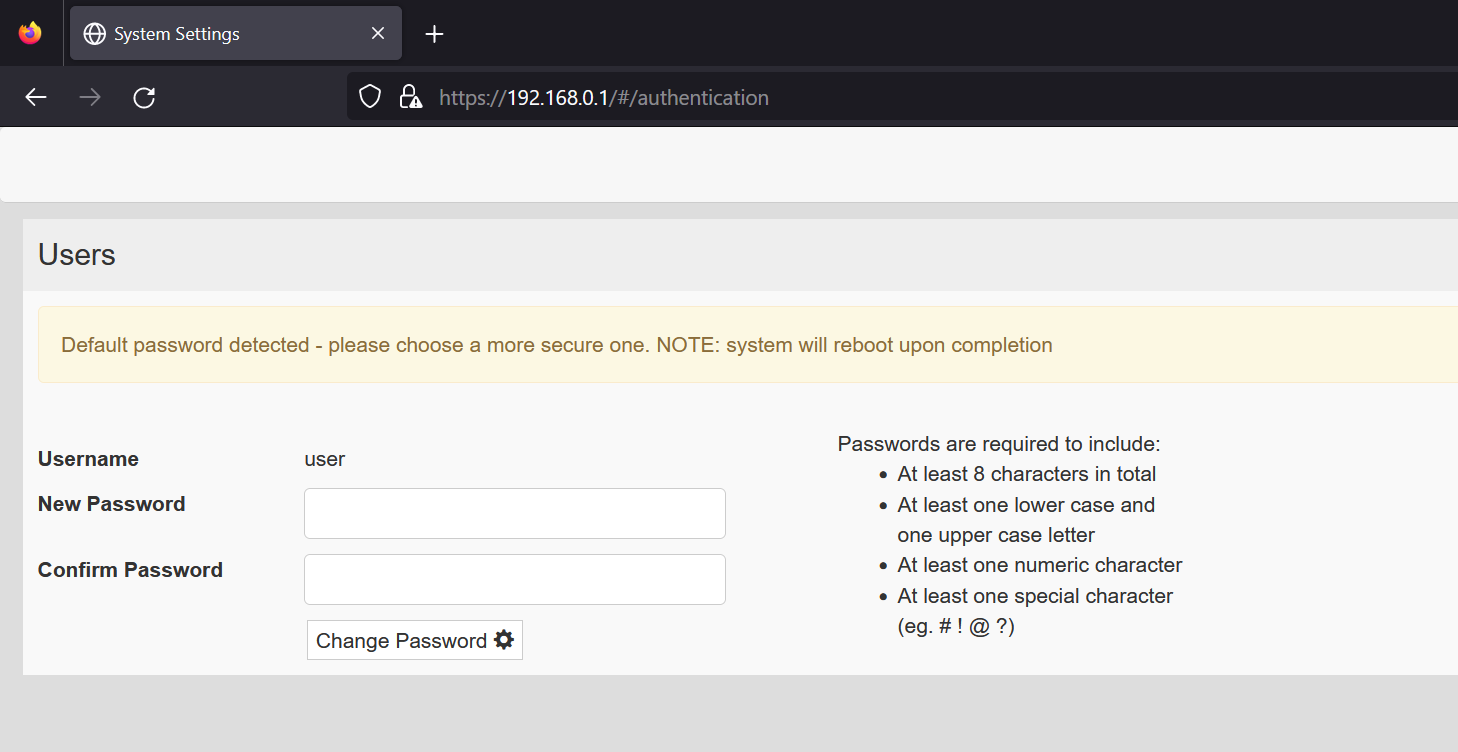
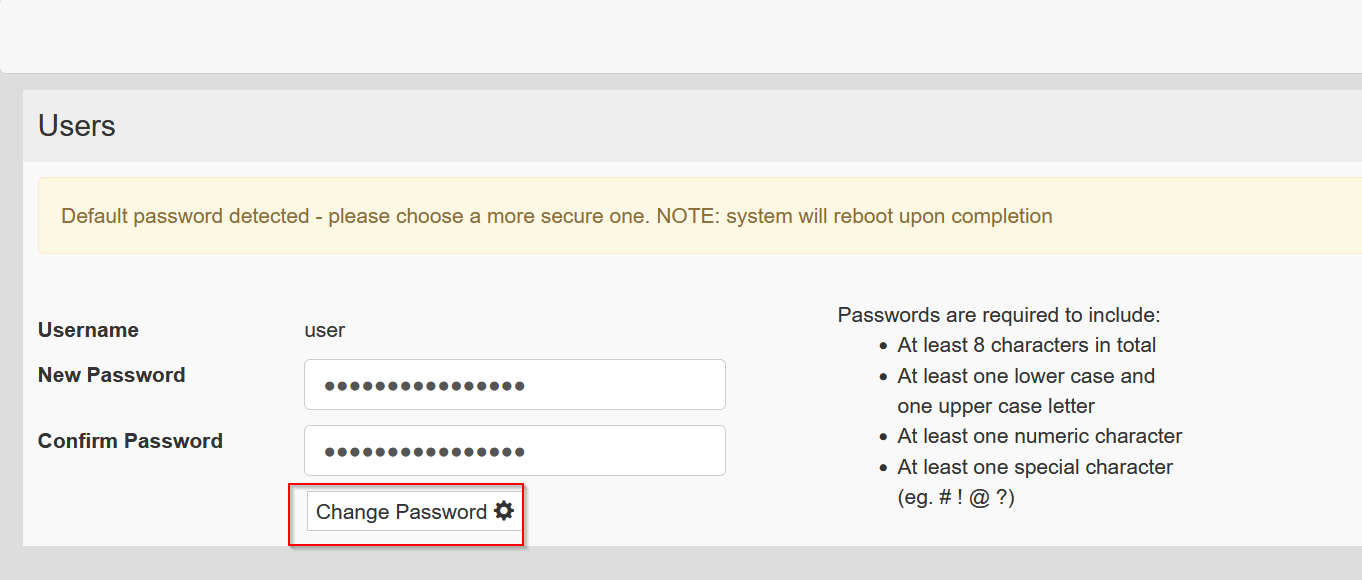
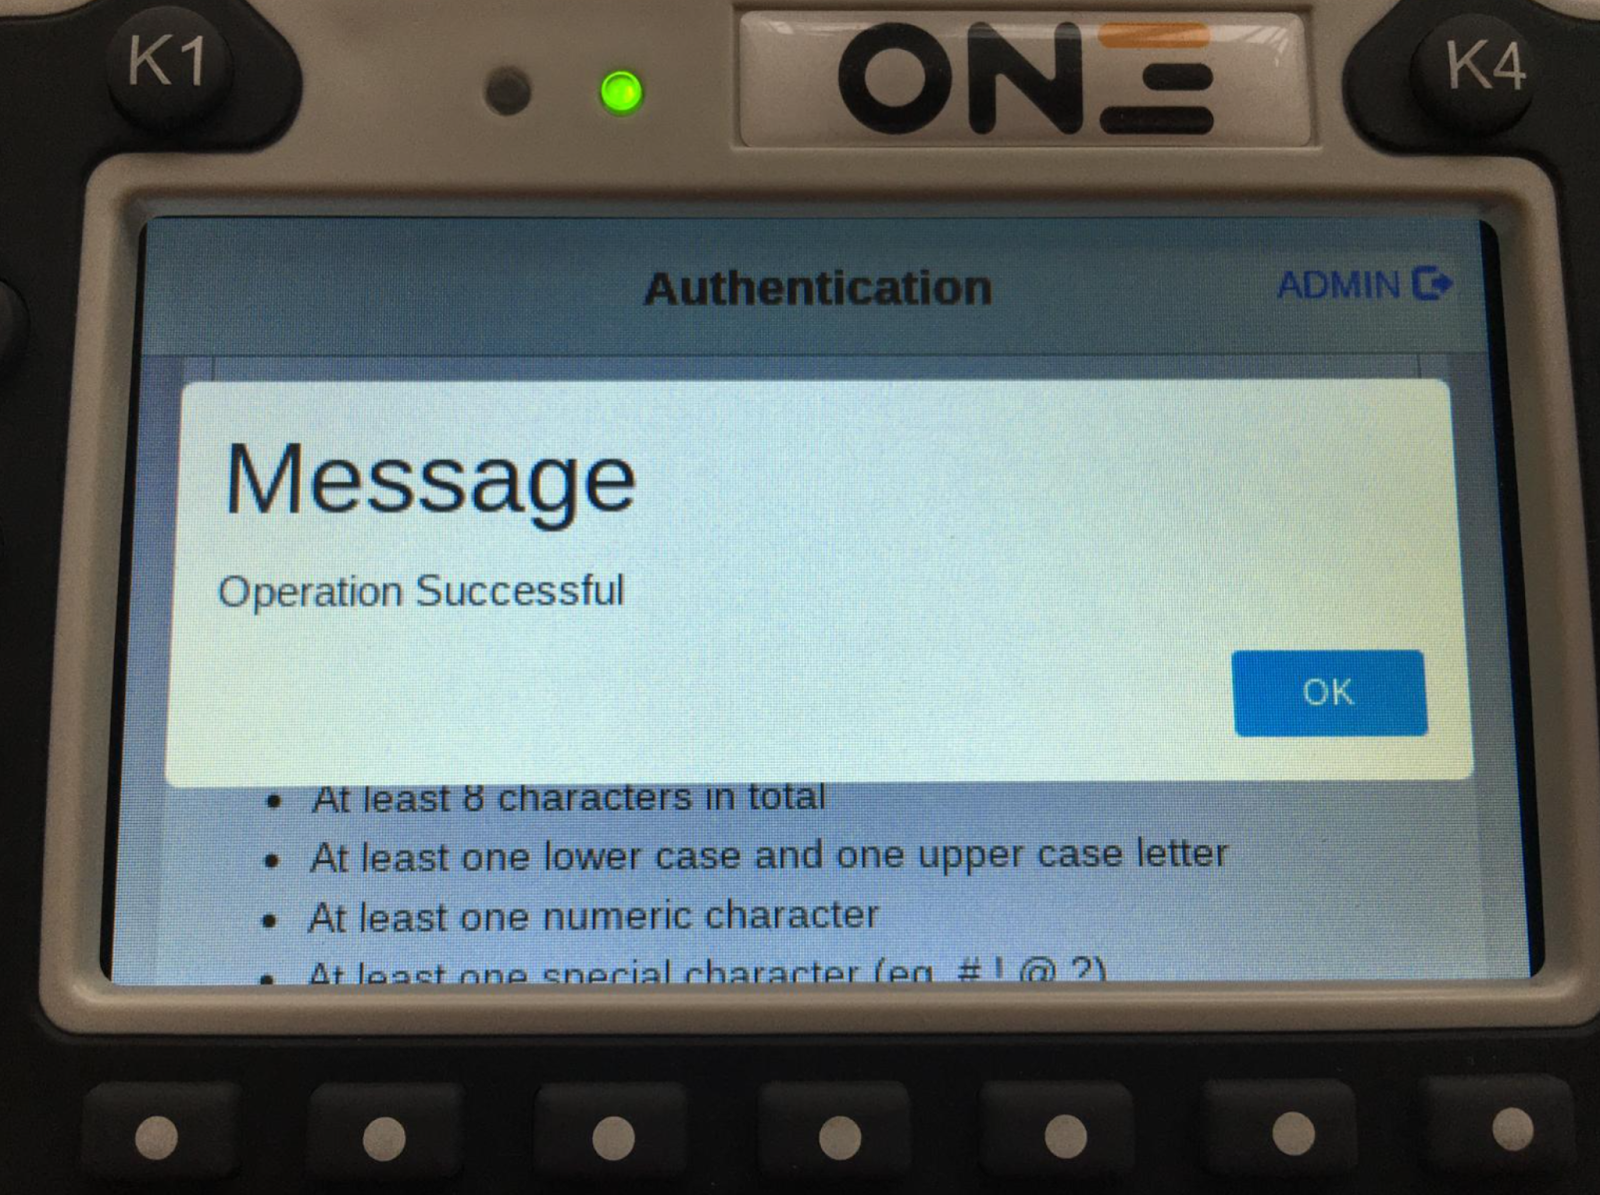
Set a password and click ‘Change Password’.
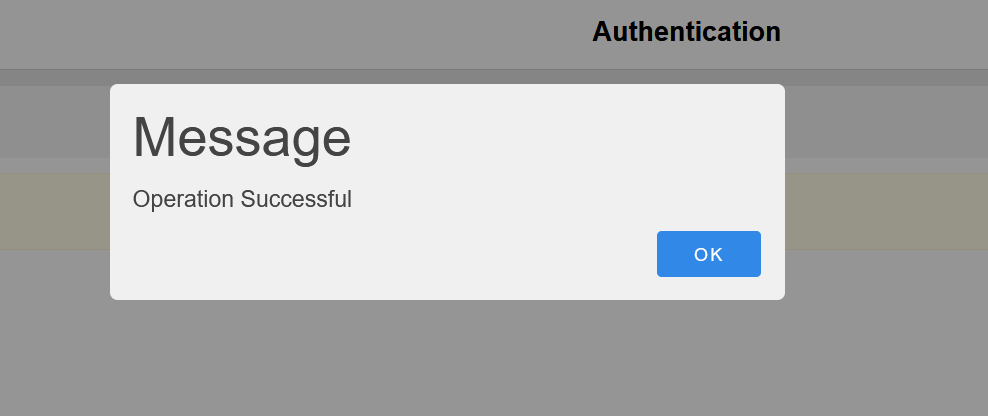
Done!The Password for the User account has been set.
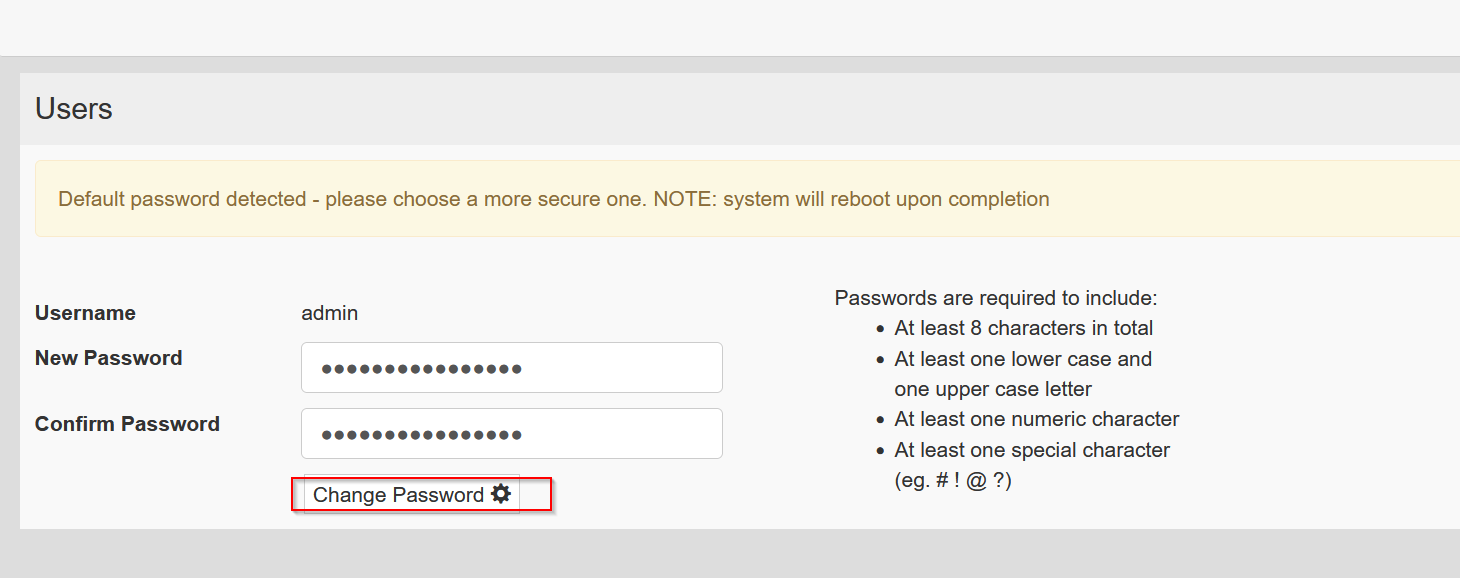
Setup admin Password
Set the Password in the same way for the admin account.
Language
Set the language of the X5 panel.

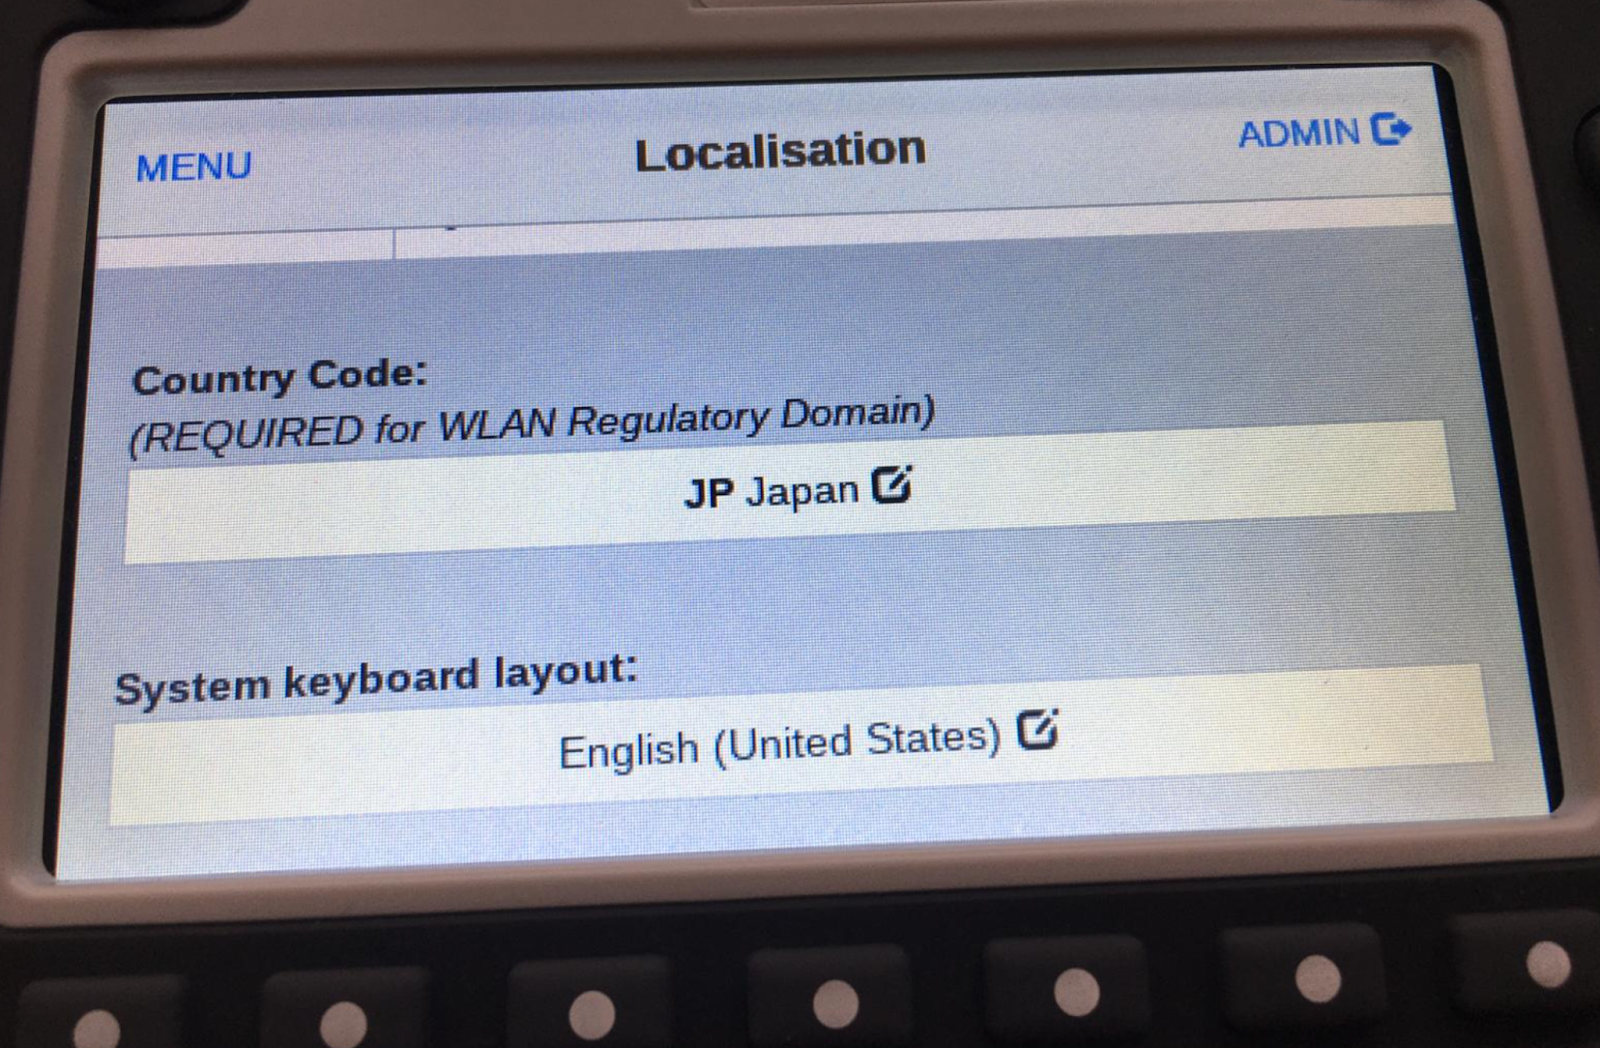
Country Code
Next, set the Country Code, as Wireless cannot be used without it.
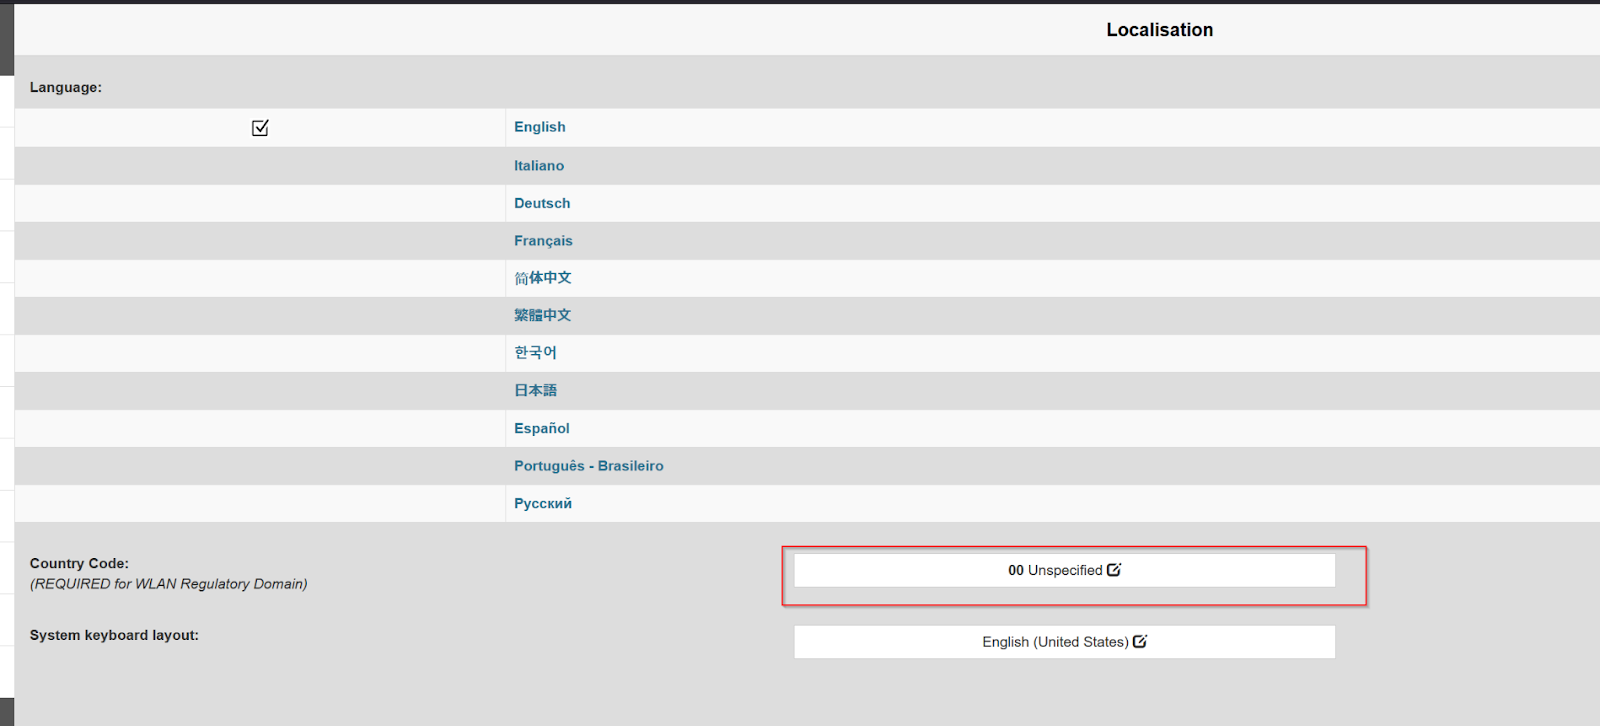
A list of Country Codes is displayed.

Set JP as you are in Japan.

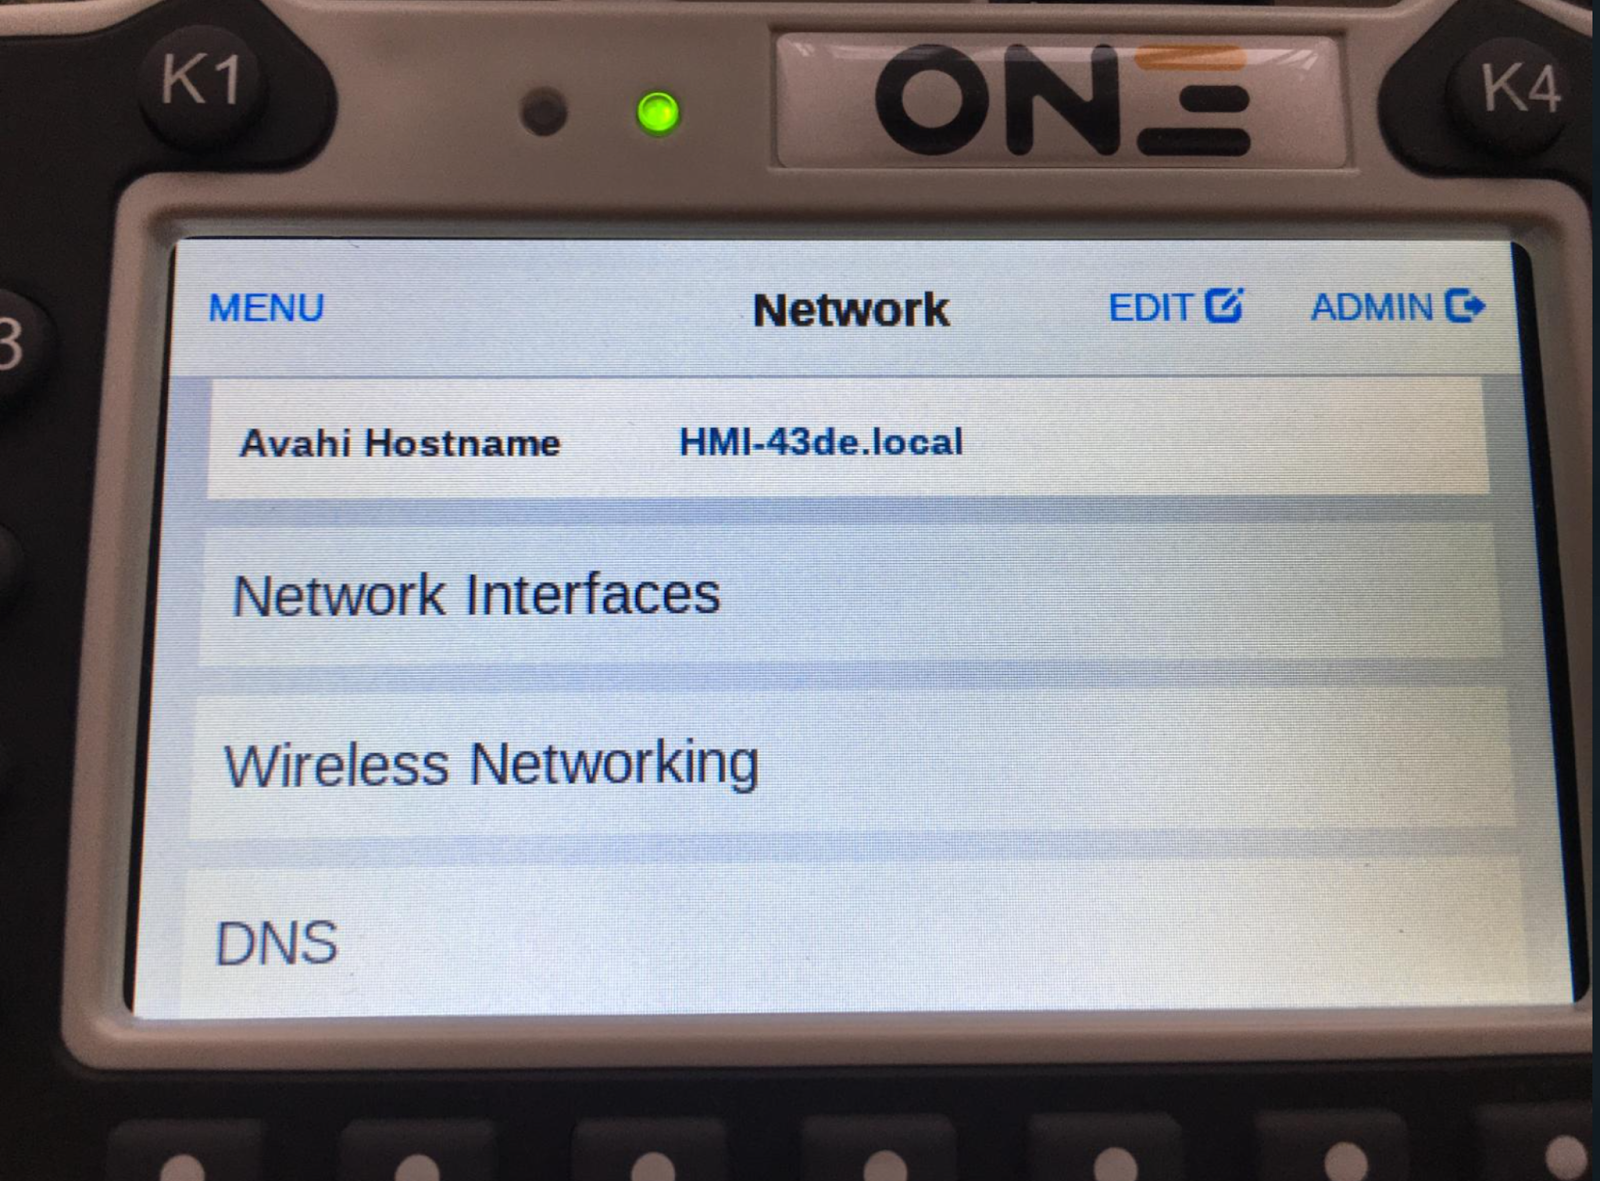
Network
The next step is to set up the Network relationship.
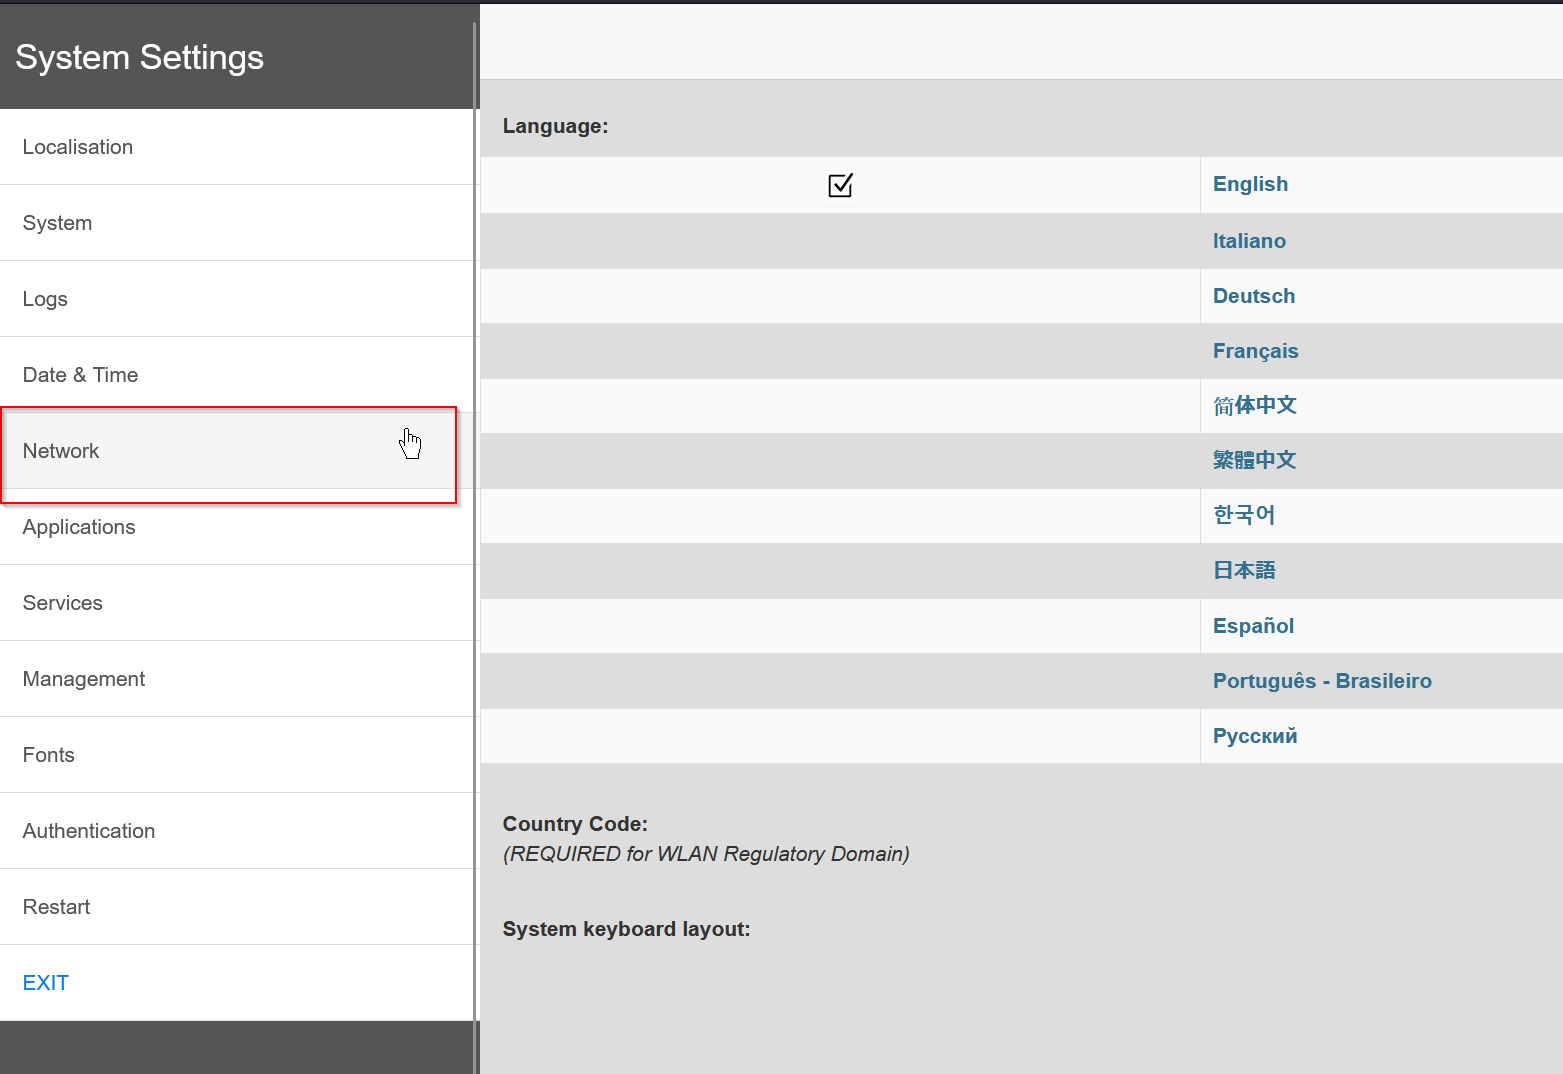
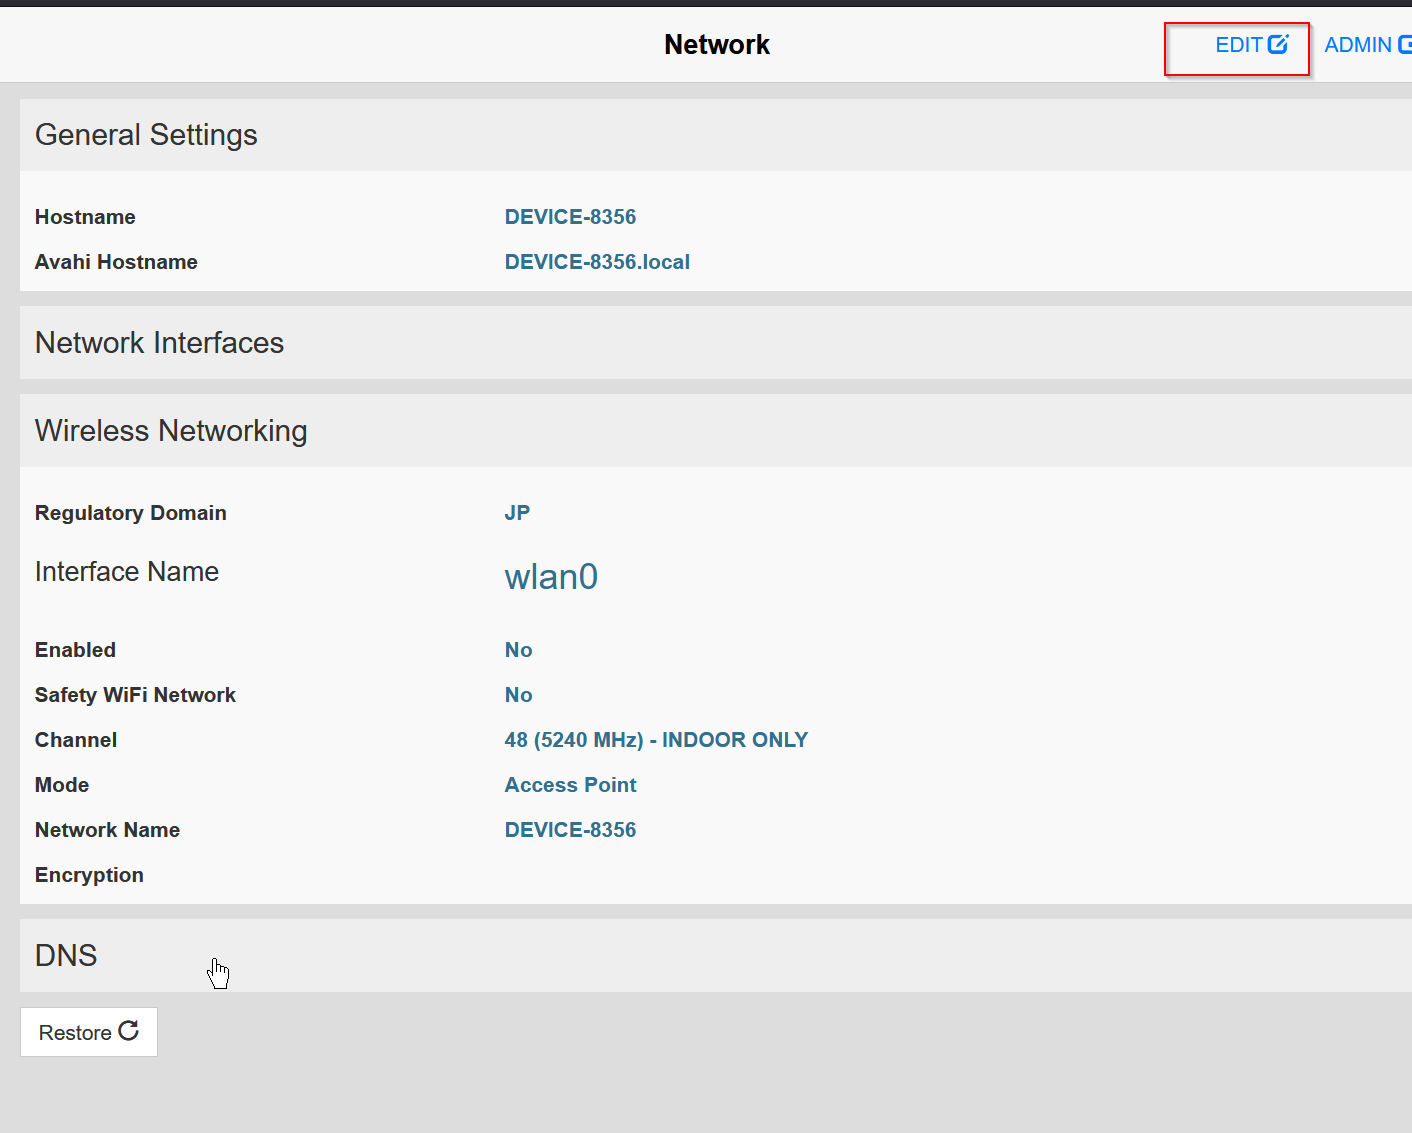
To connect to X5 Wireless, the Wireless Networking section must be configured.

Click on the EDIT button above.
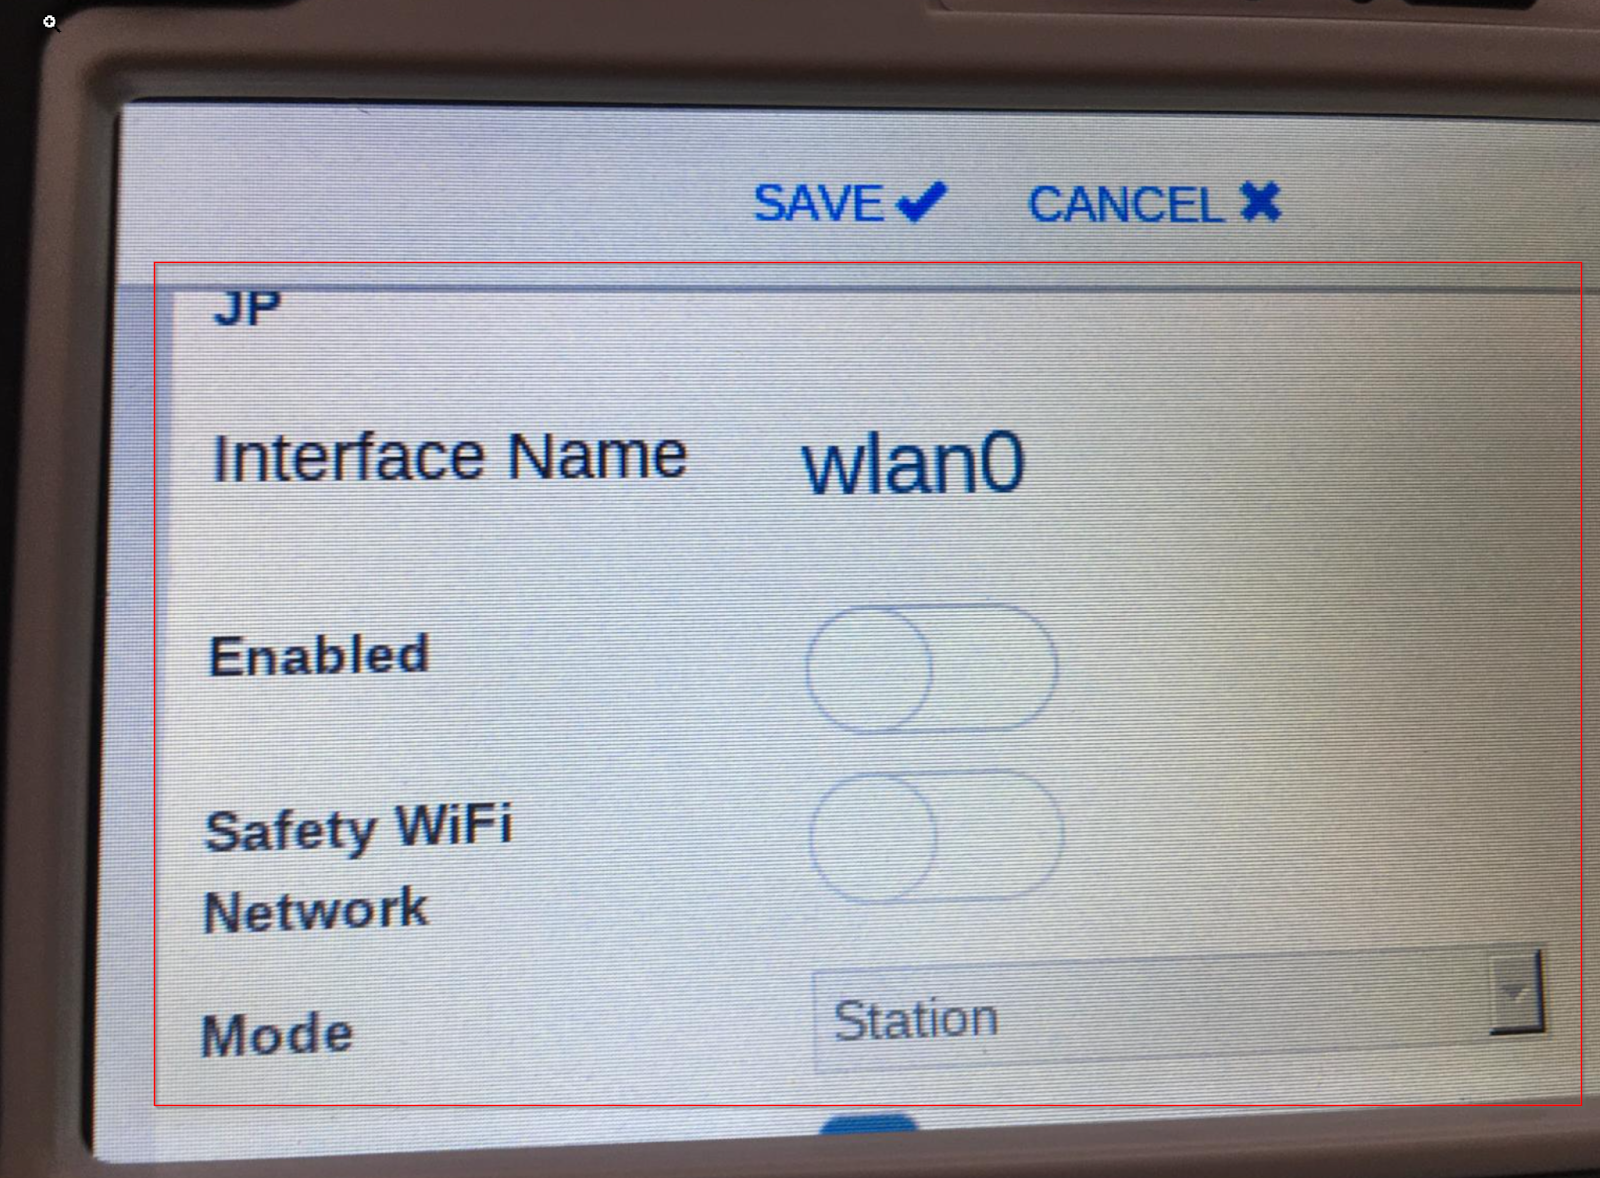
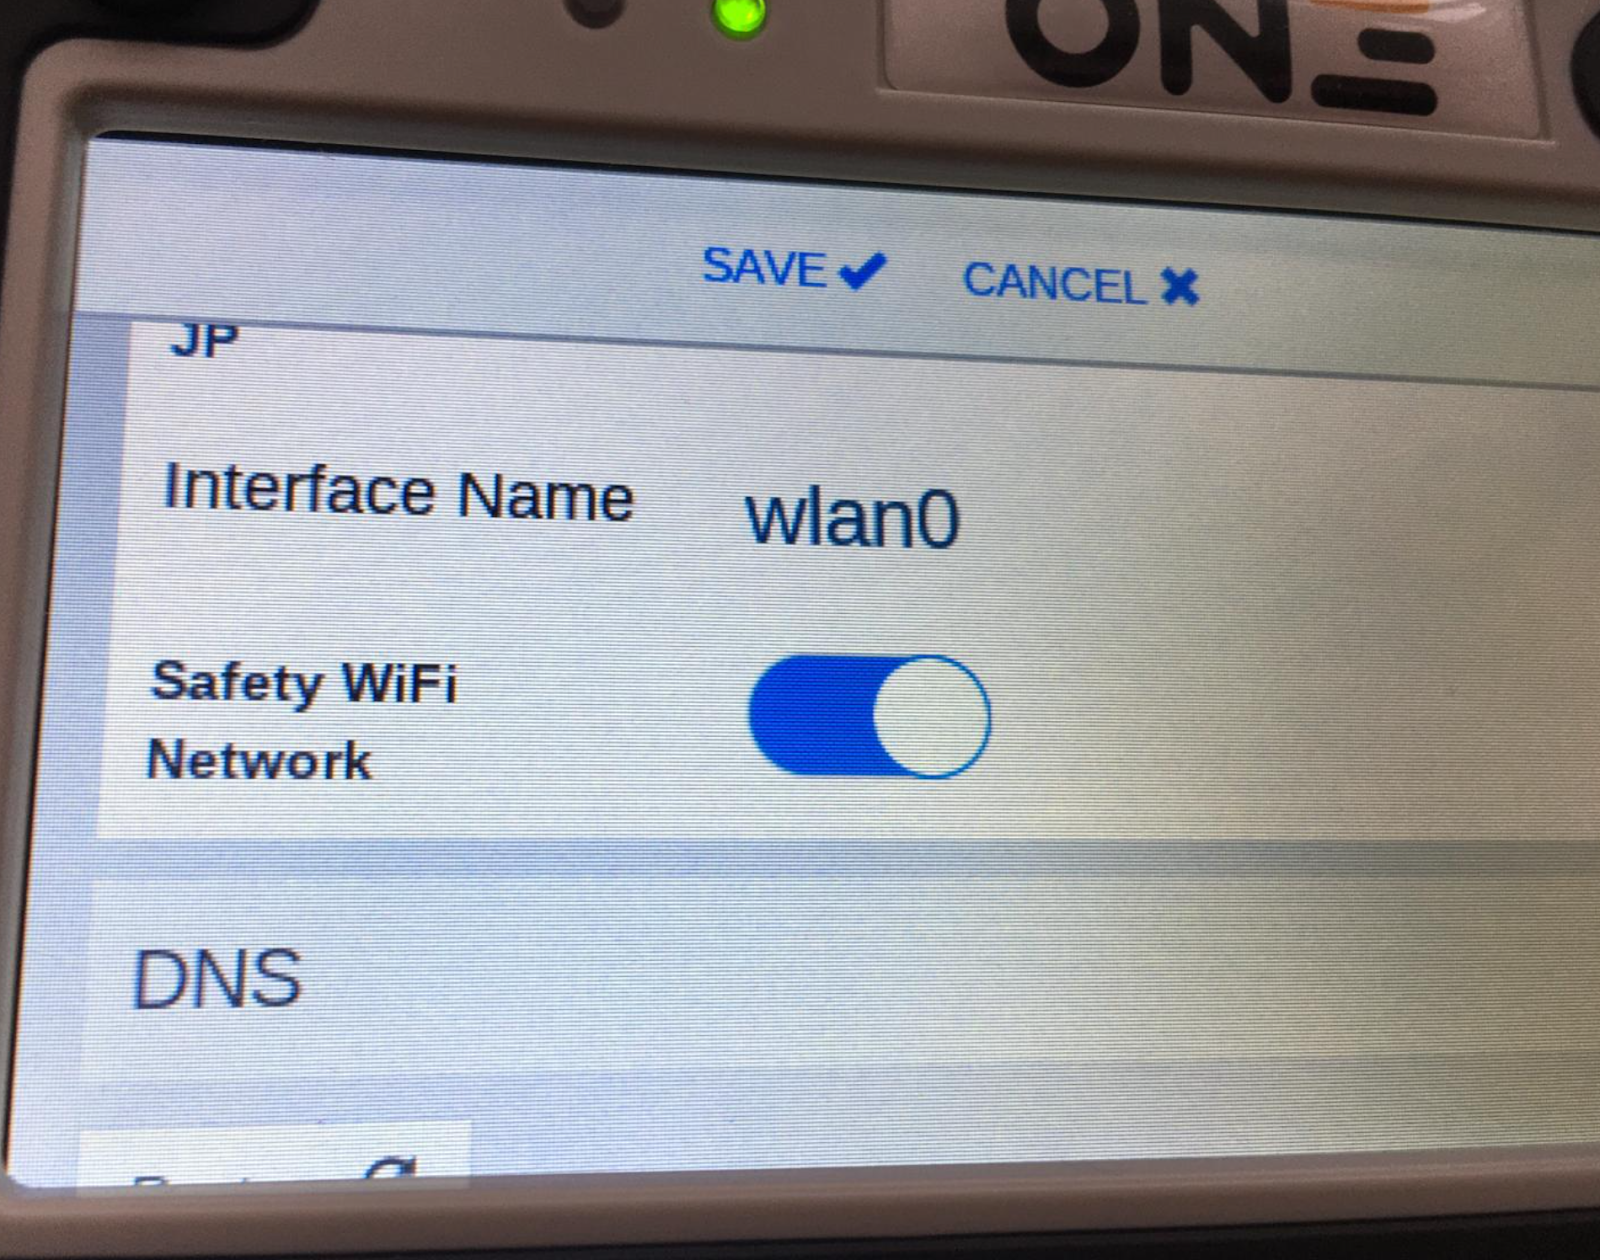
Enable “Enabled” and “Safety WiFi Network” in the Wirelss Network.
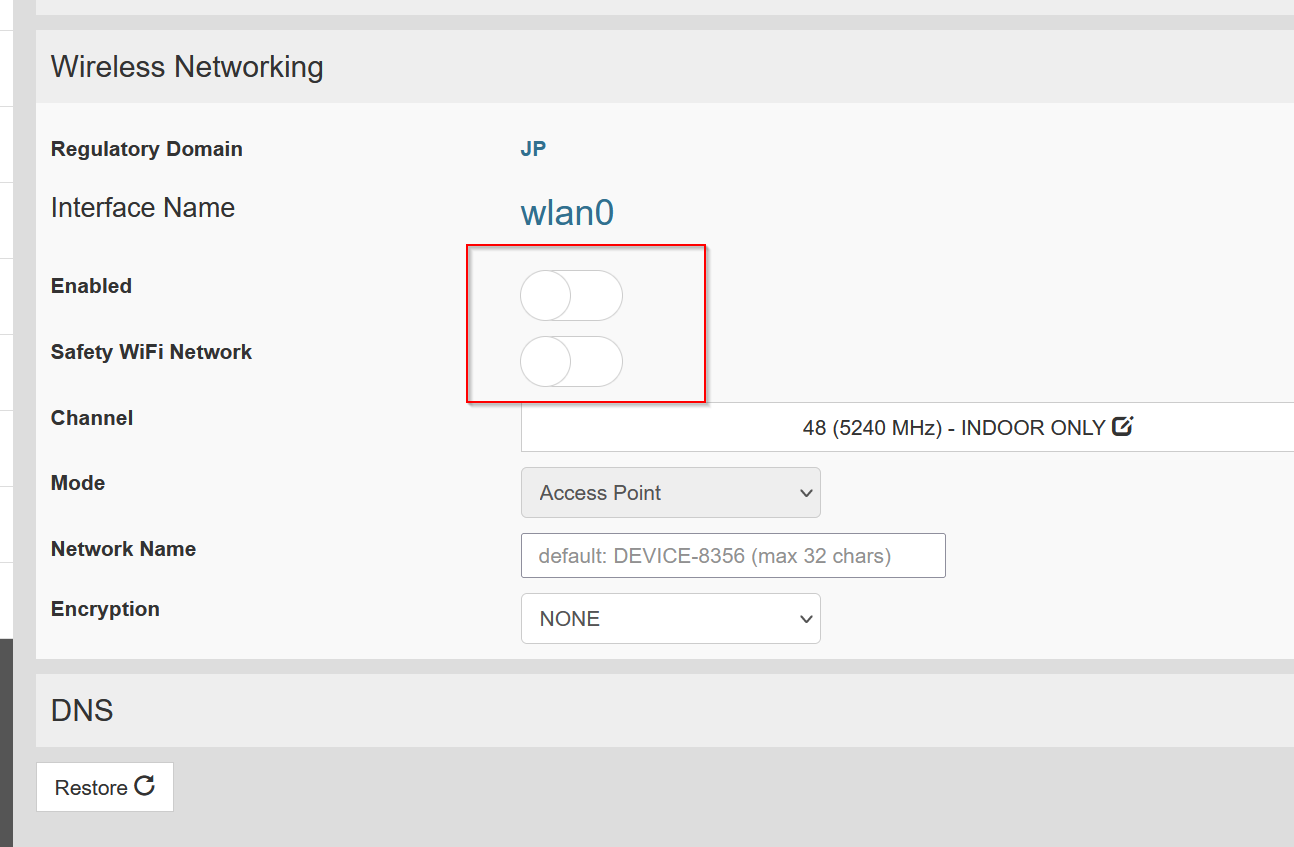
Setup your Password.
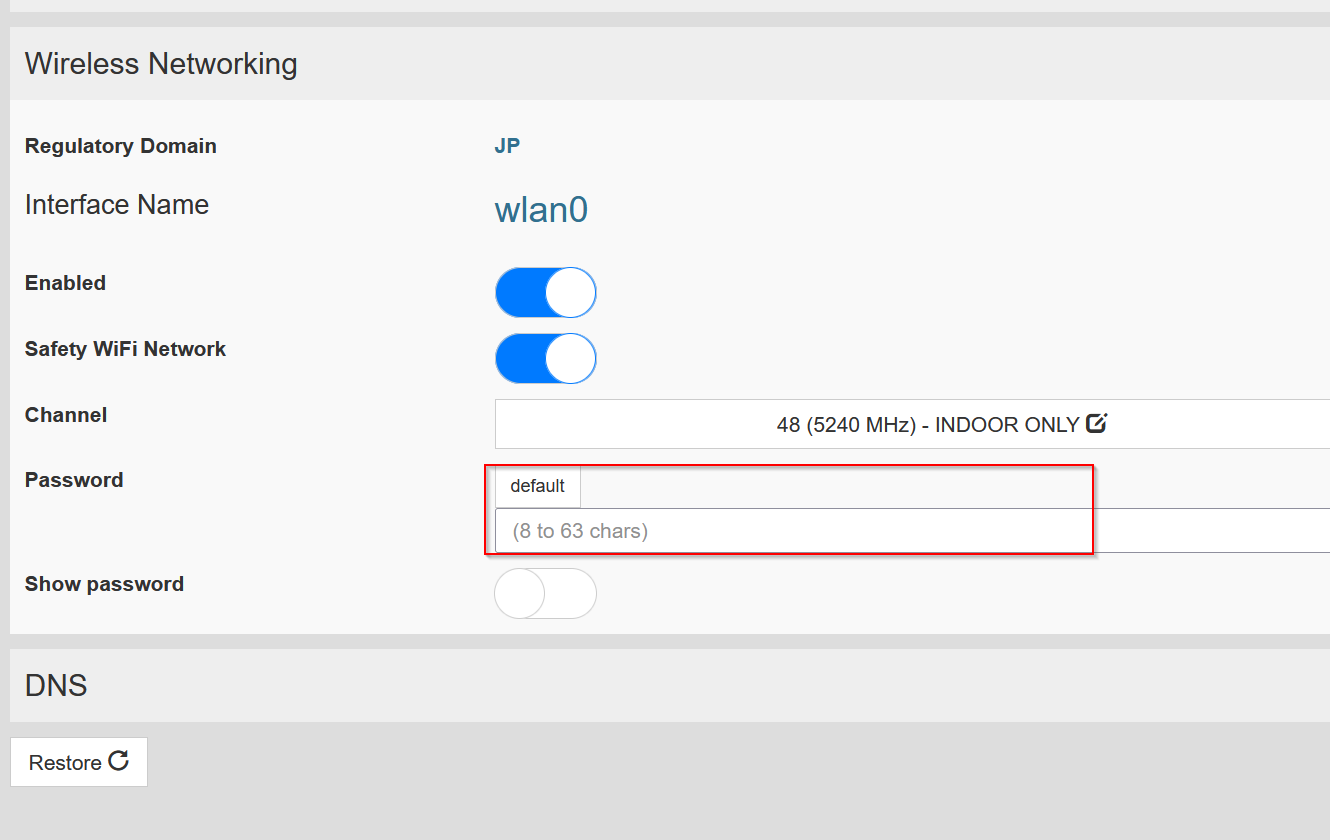
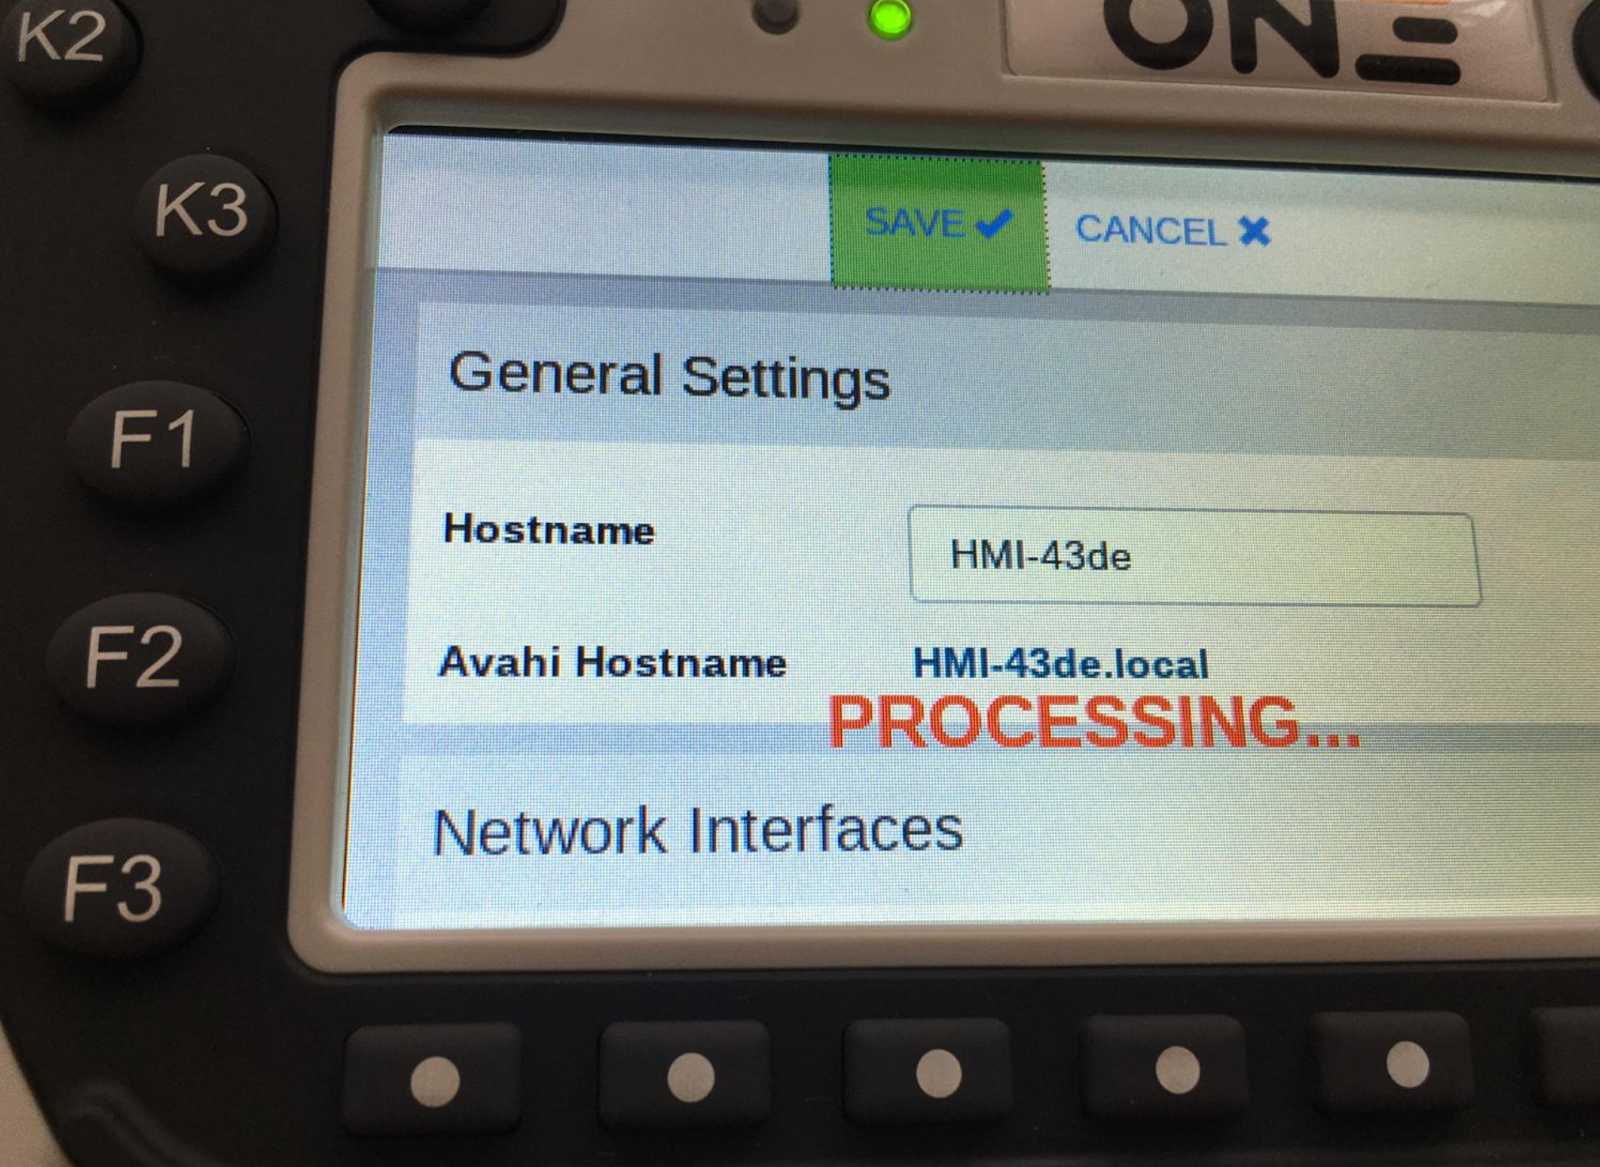
When all settings are complete, press the SAVE button to save the settings.

Done!
Install Runtime
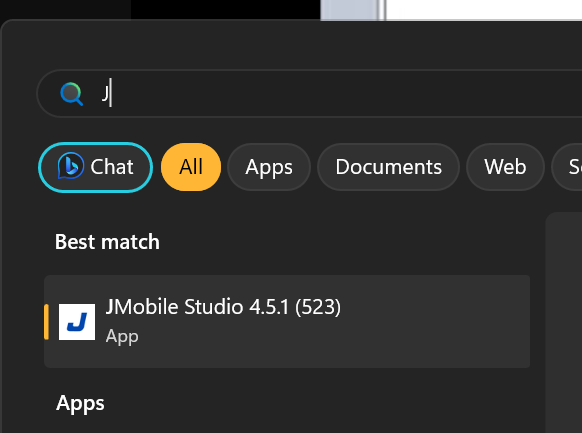
Next, start JMobile Studio and install Runtime on the X5 Base.
Click Run>Manage Target.
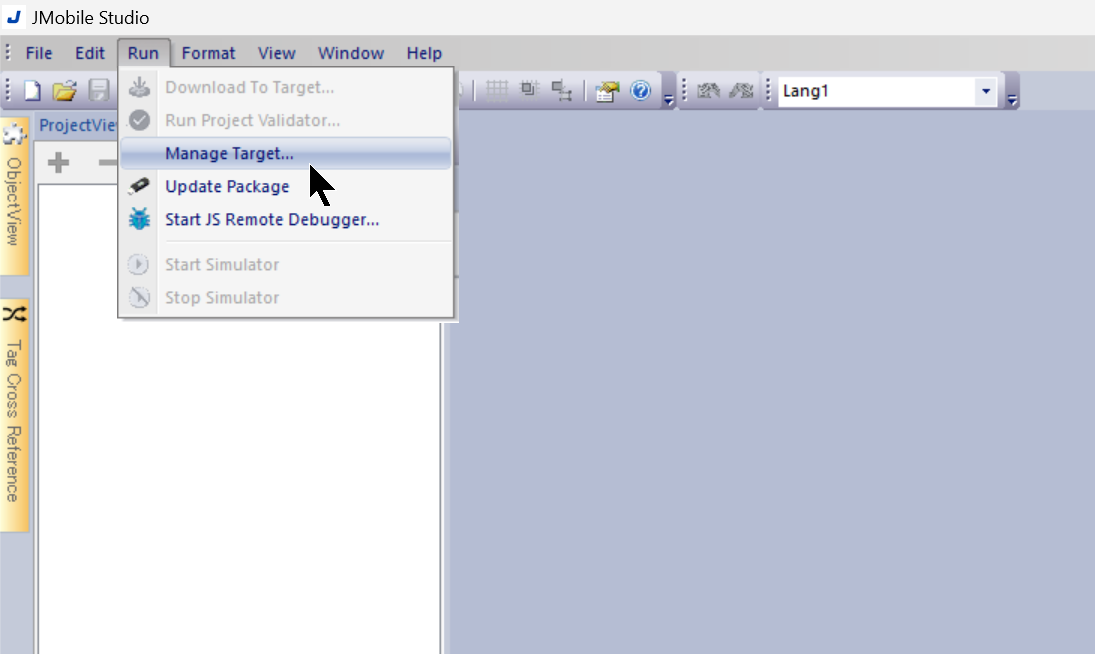
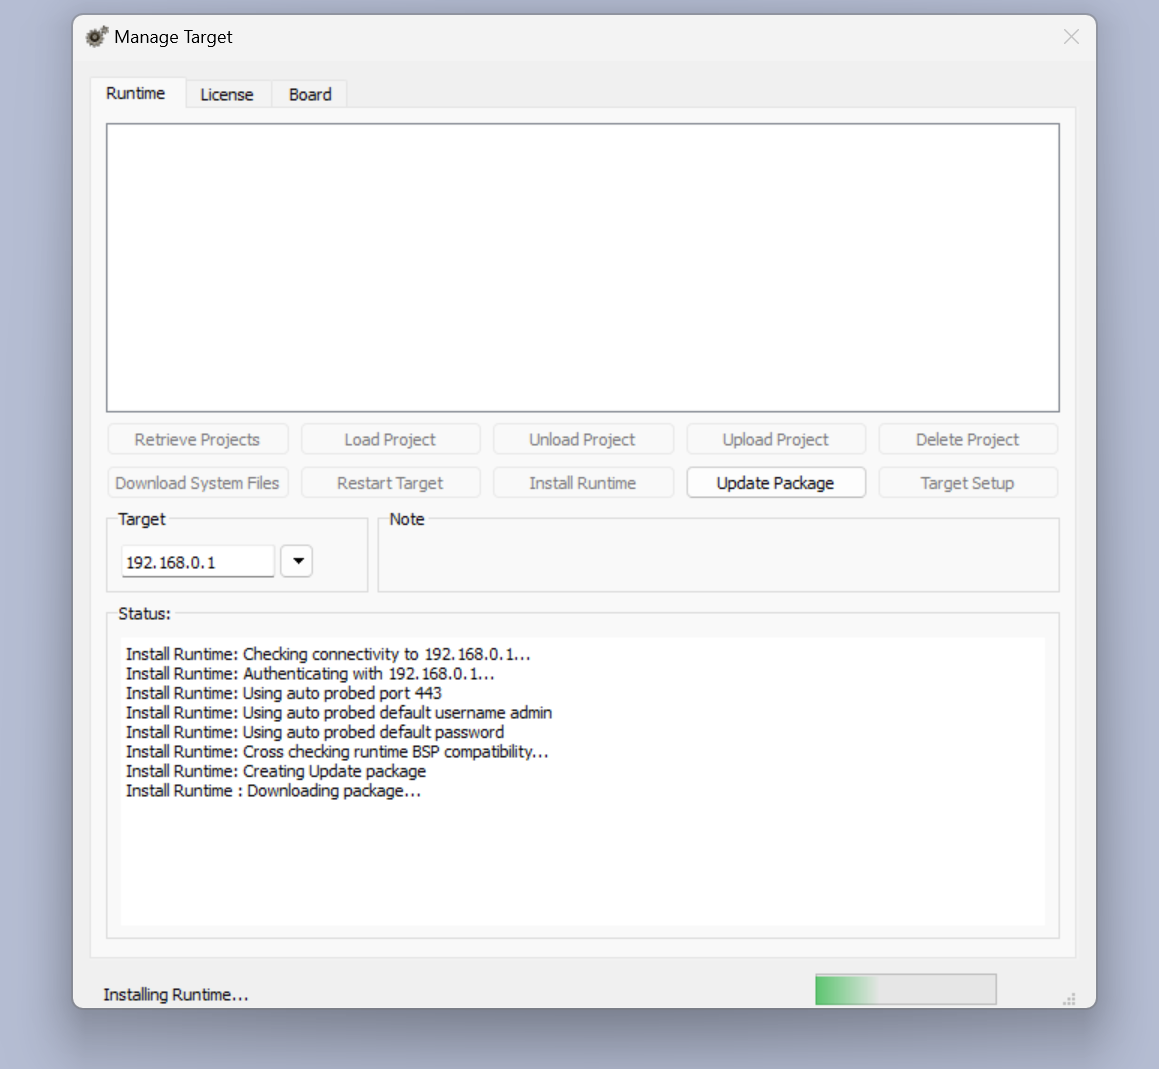
The Manage Target screen appears.

Set X5 Base from the Drop-Down List as Target.
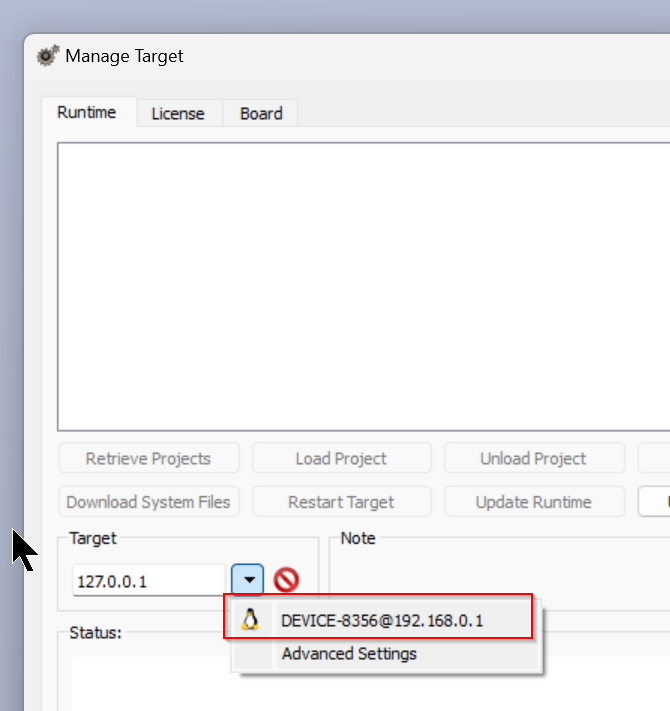
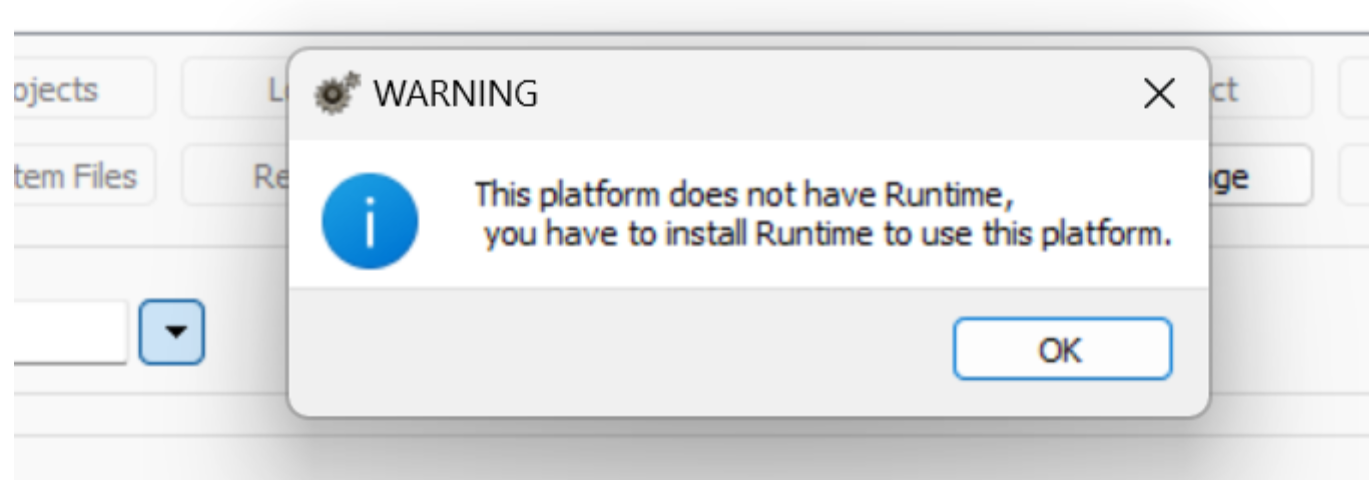
JMobile Studio will warn you that the relevant device does not currently have Runtime installed.
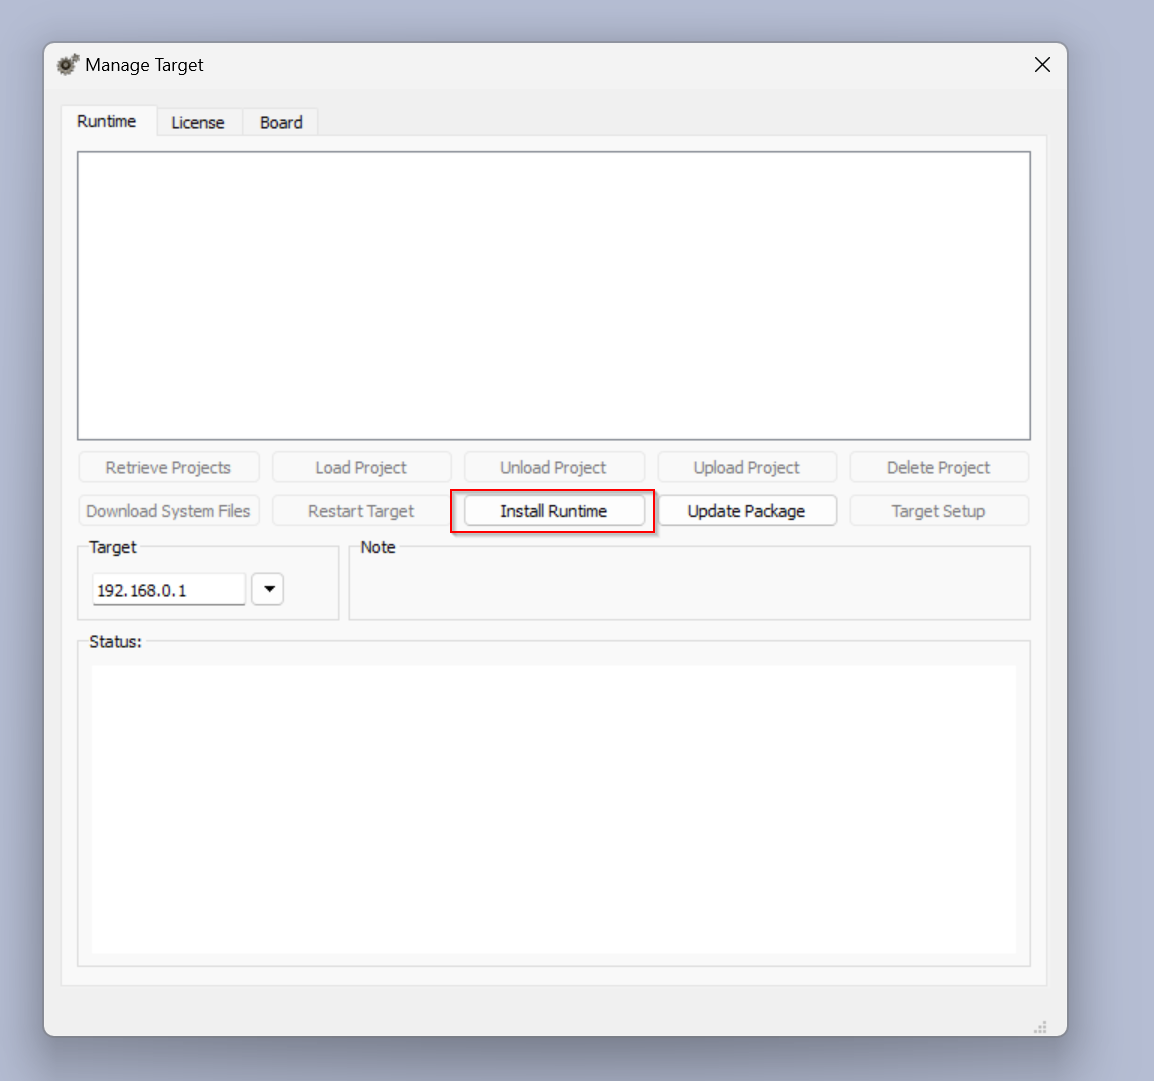
Click Install Runtime.
Enter the Password that you have just set for the X5 Base.
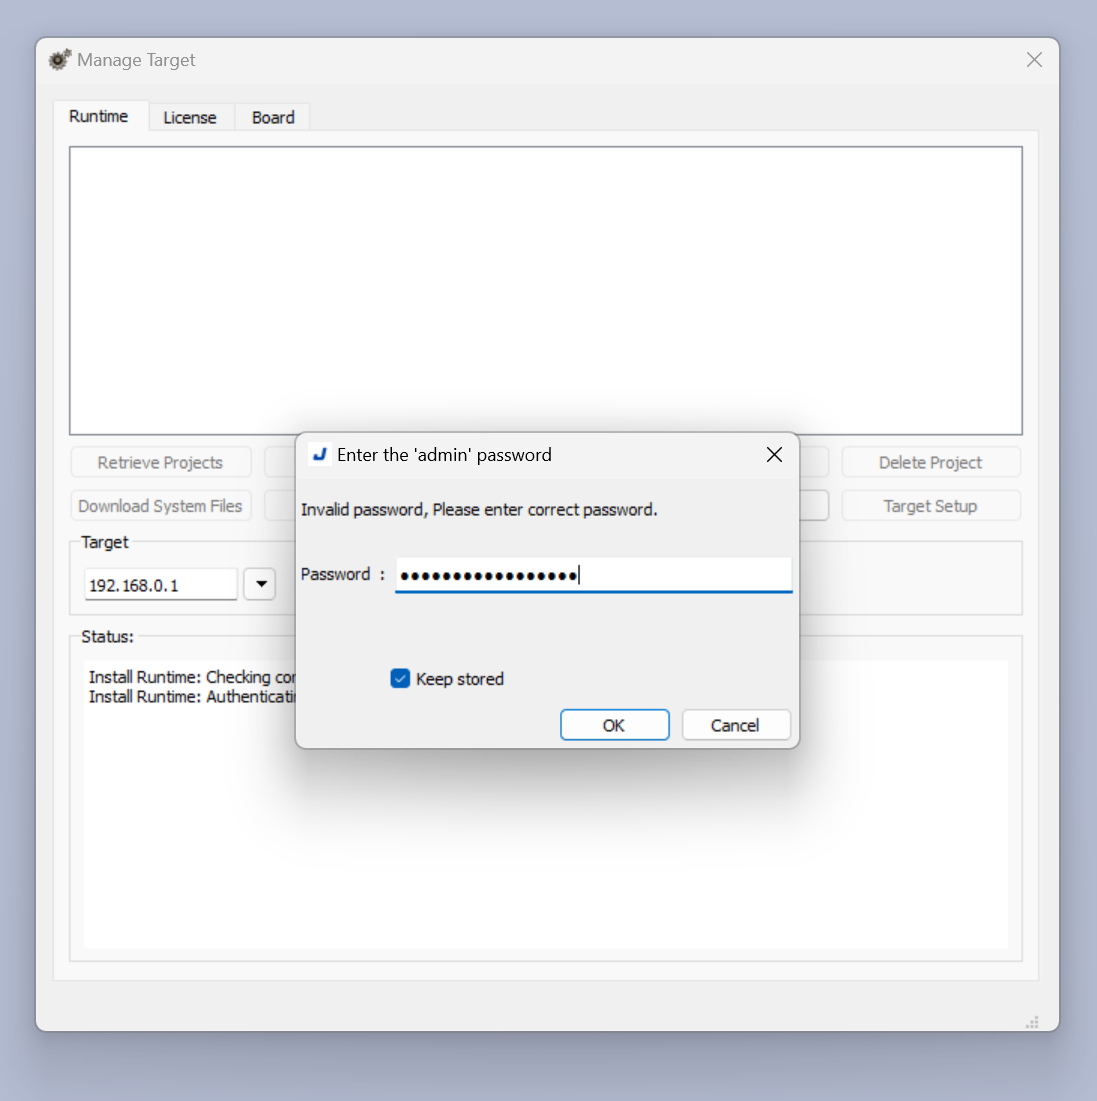
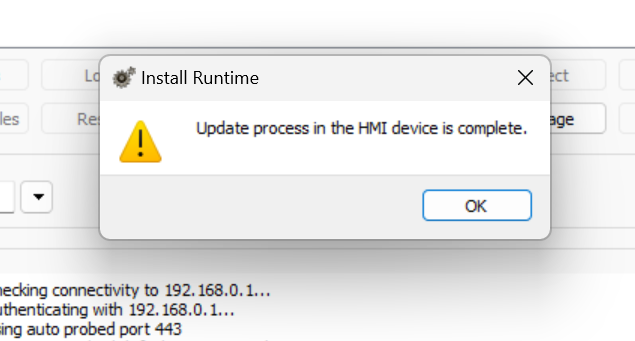
Just a second..
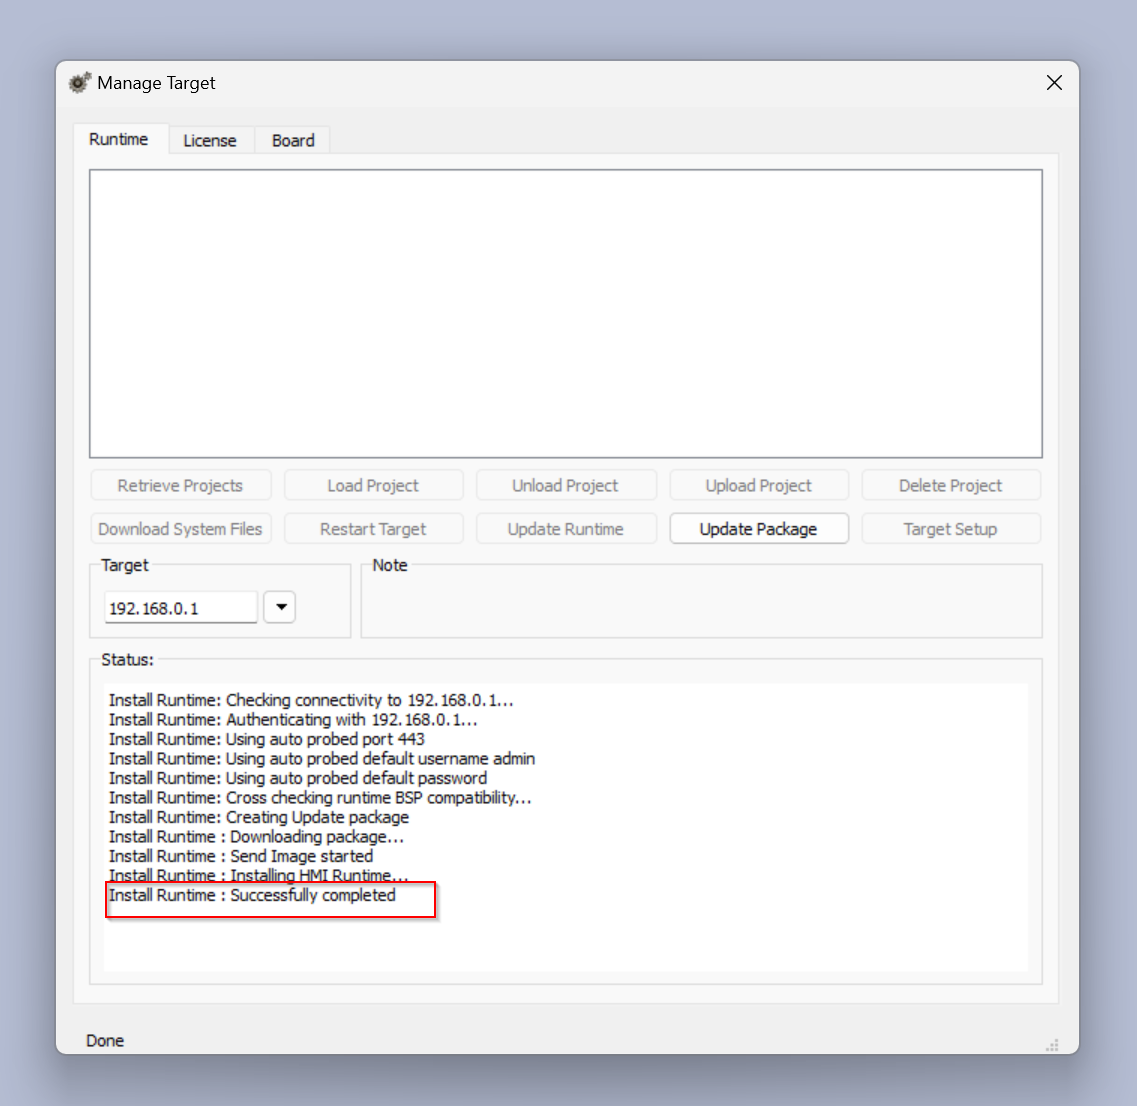
Done!
The message “Install Runtime; Successfully completed” is also displayed in Status.
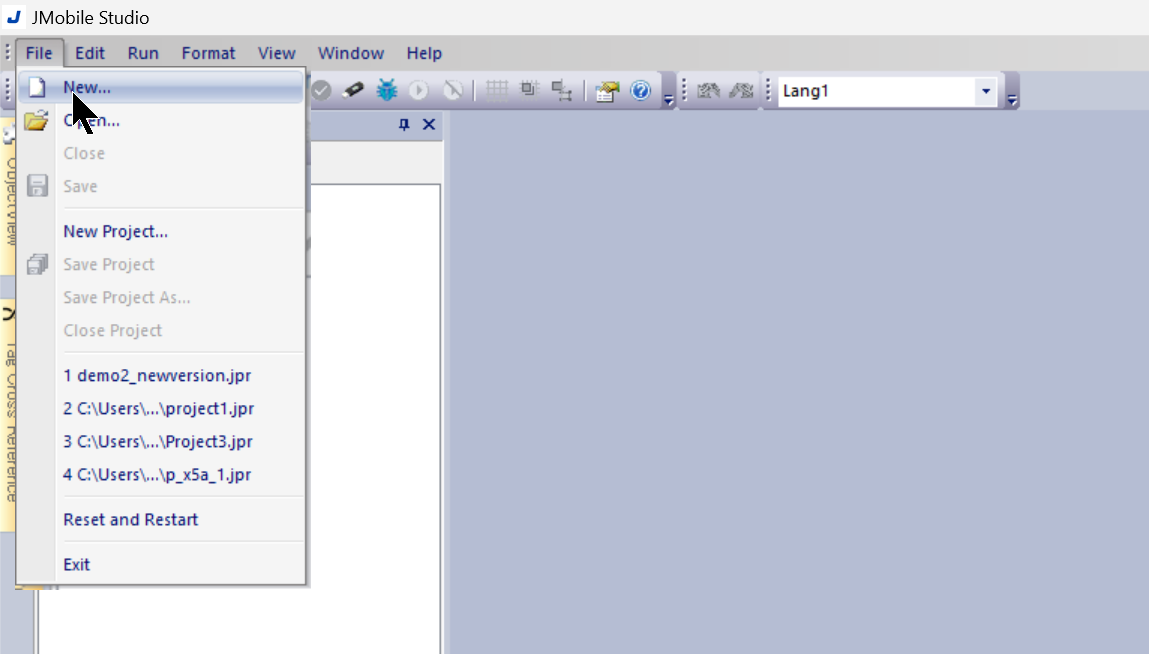
Creaete new Project
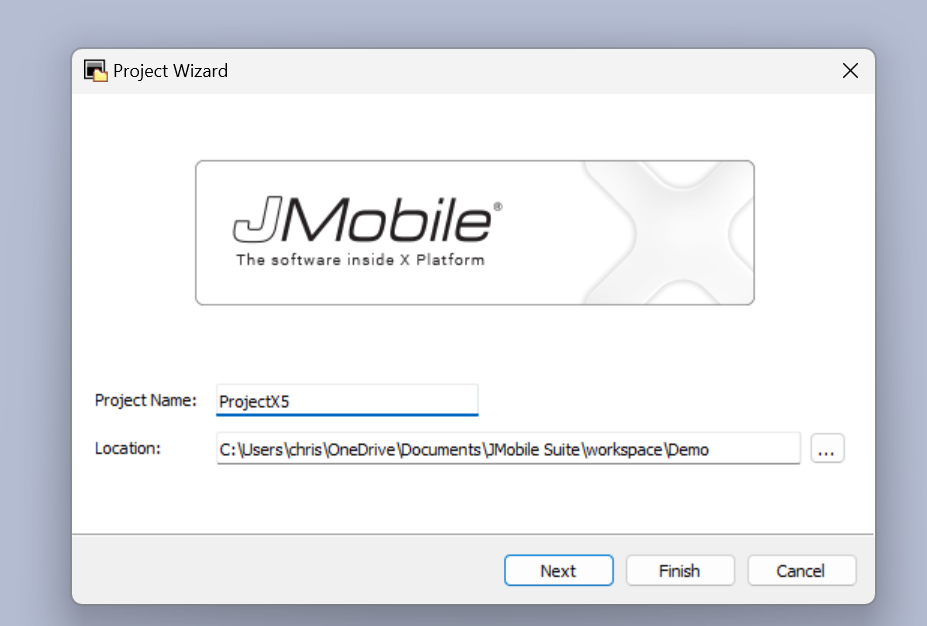
Now We need to create a new JMobile project and Go to File>New to transfer it to X5 Base.
Set the Project Name and proceed with Next.
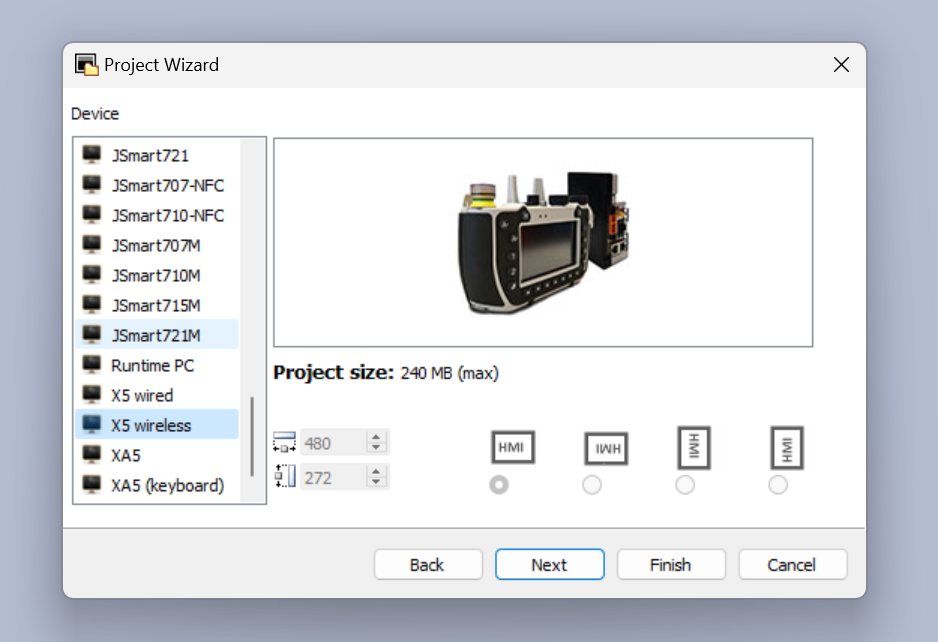
Set Device to X5 wireless and proceed with Next.
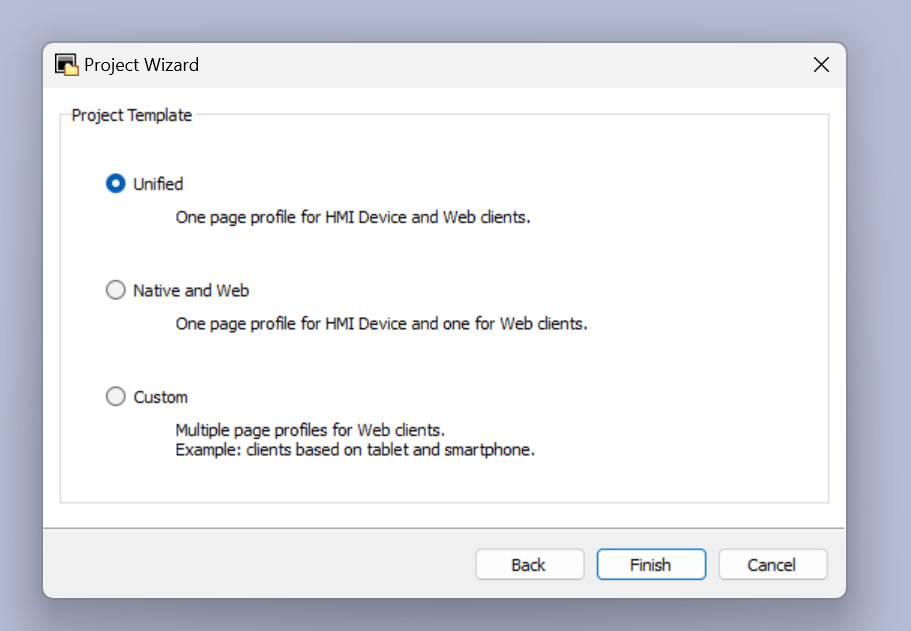
The Project Template should be set according to the application.
Done!

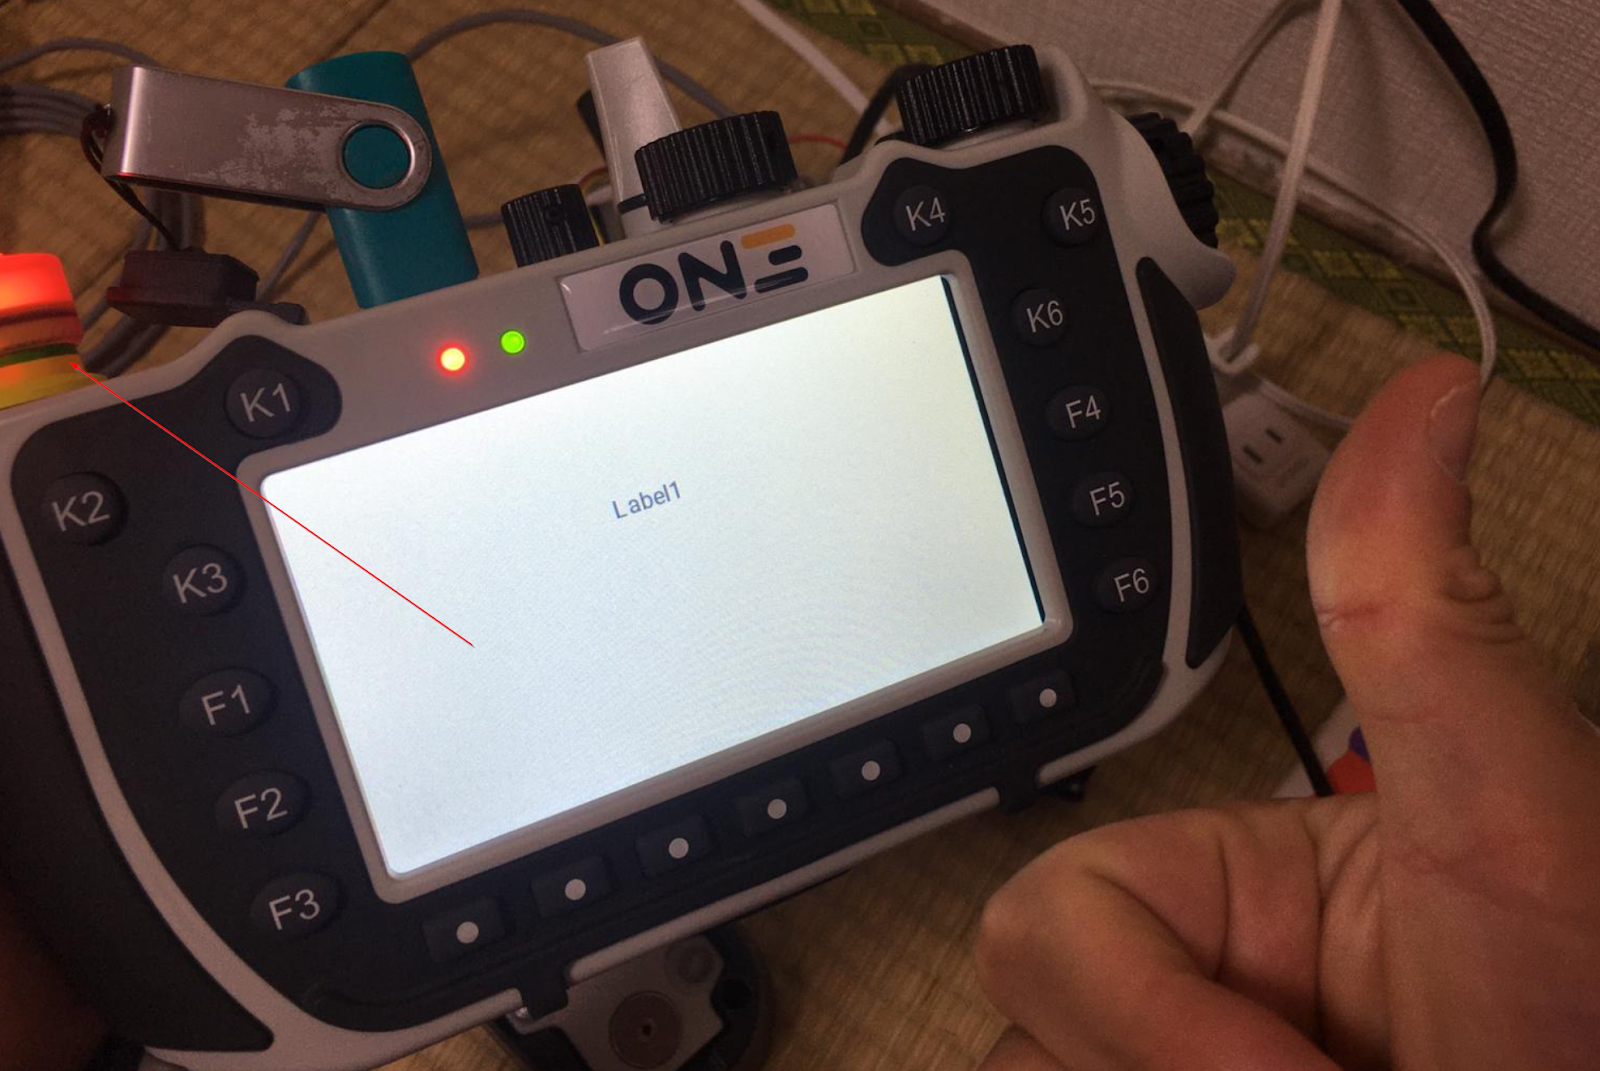
In this case, only one Label is added, as the main purpose is to check the connection between X5Base and X5 Wireless.

Download Project
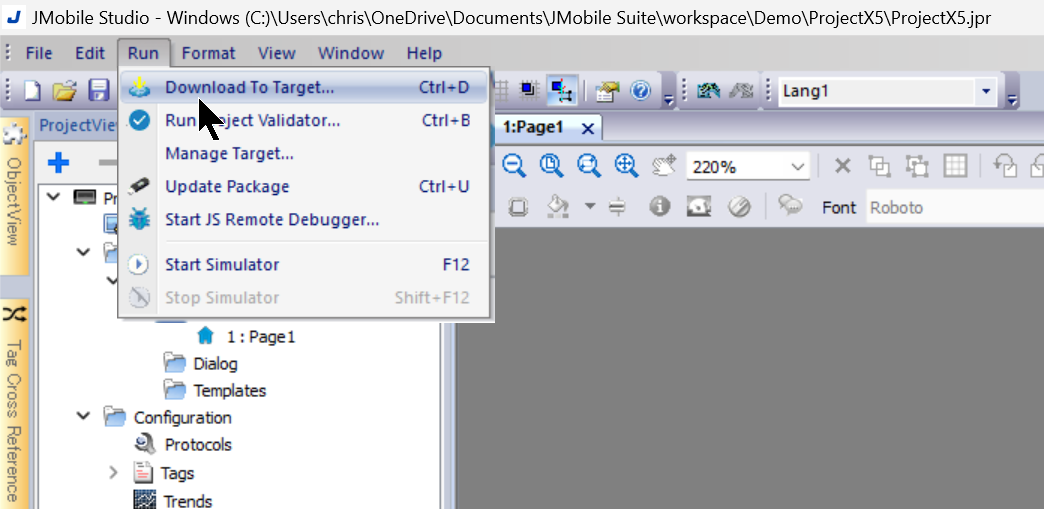
Click Run>Download To Target to download the project.
Select X5 Base from the Drop-Down List.
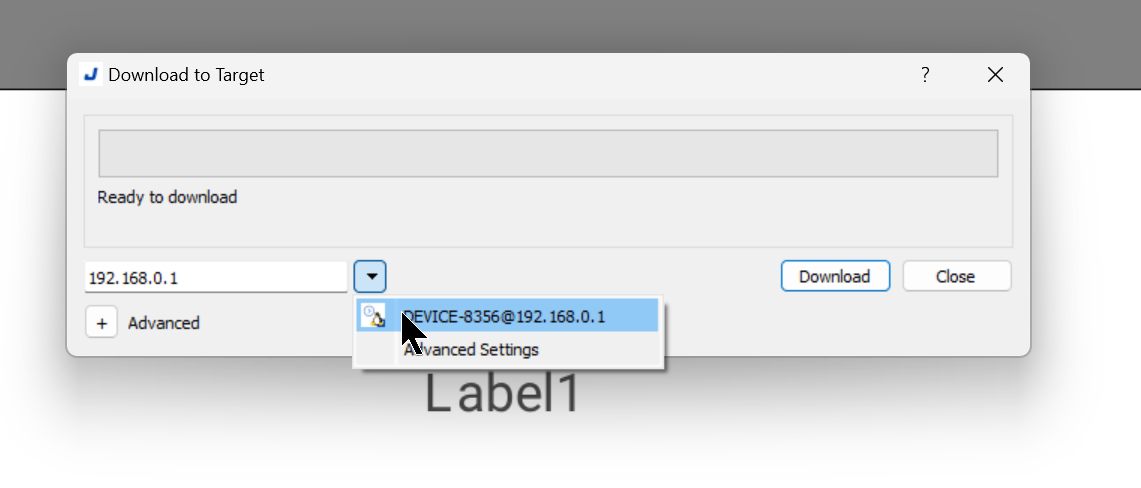
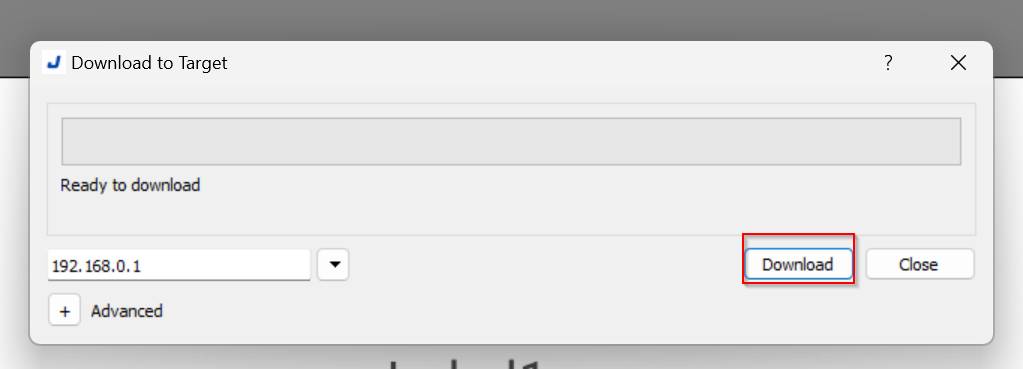
Click the Download button to transfer the project.
Enter the Password set in X5Base.
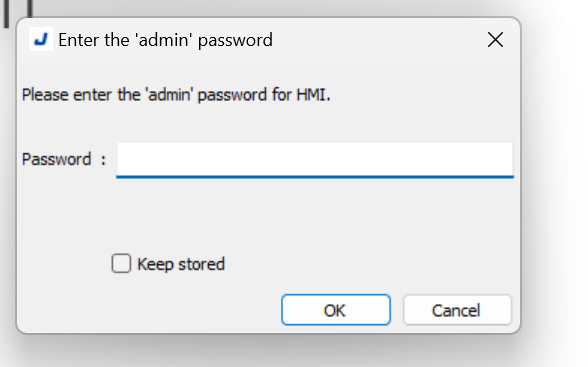
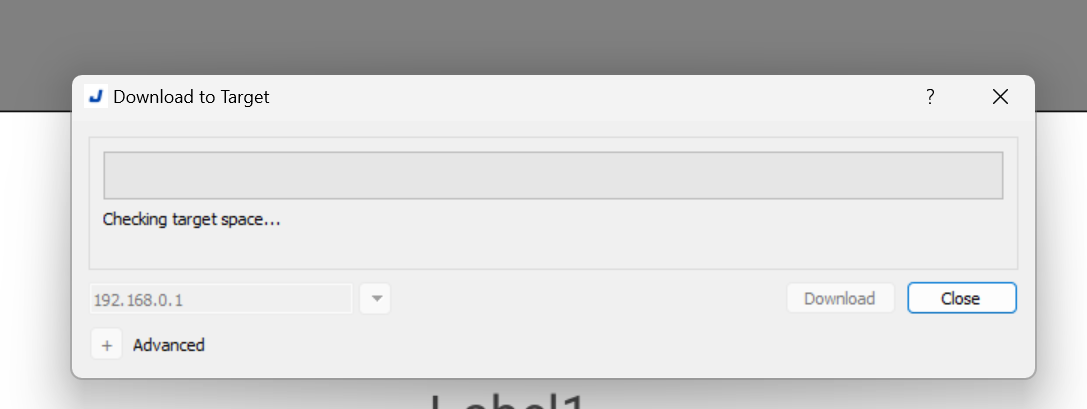
Just a seconds..
X5 Wirless Panel Side
Power ON your X5 Wireless
Press F2 and F5 simultaneously to power on the X5 Wireless panel.

The following video shows the actual operation.
Basic Configuration
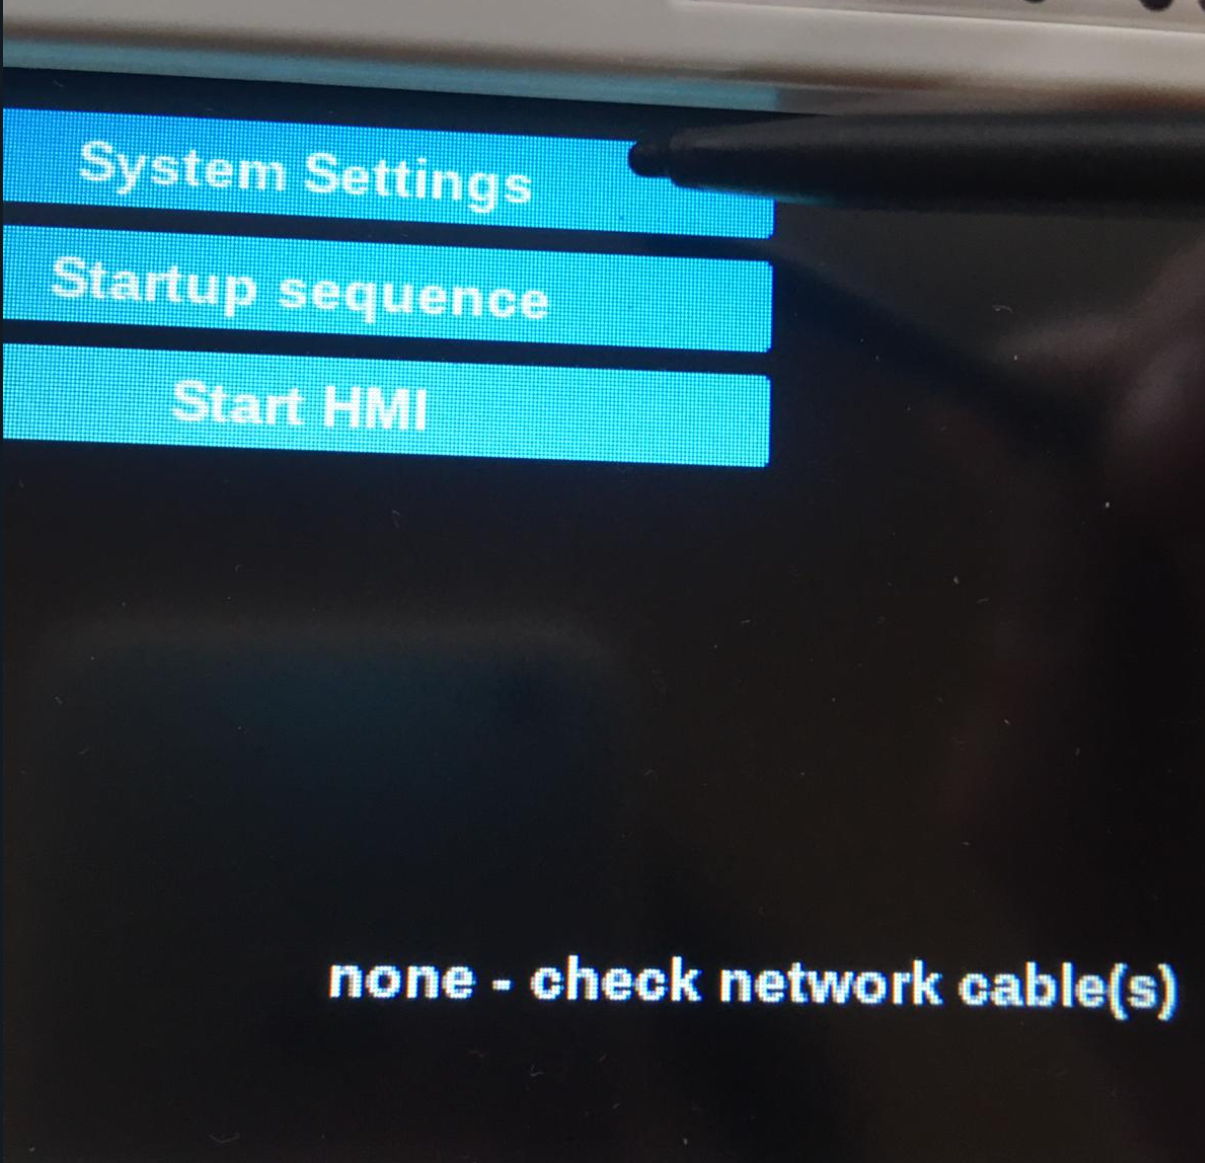
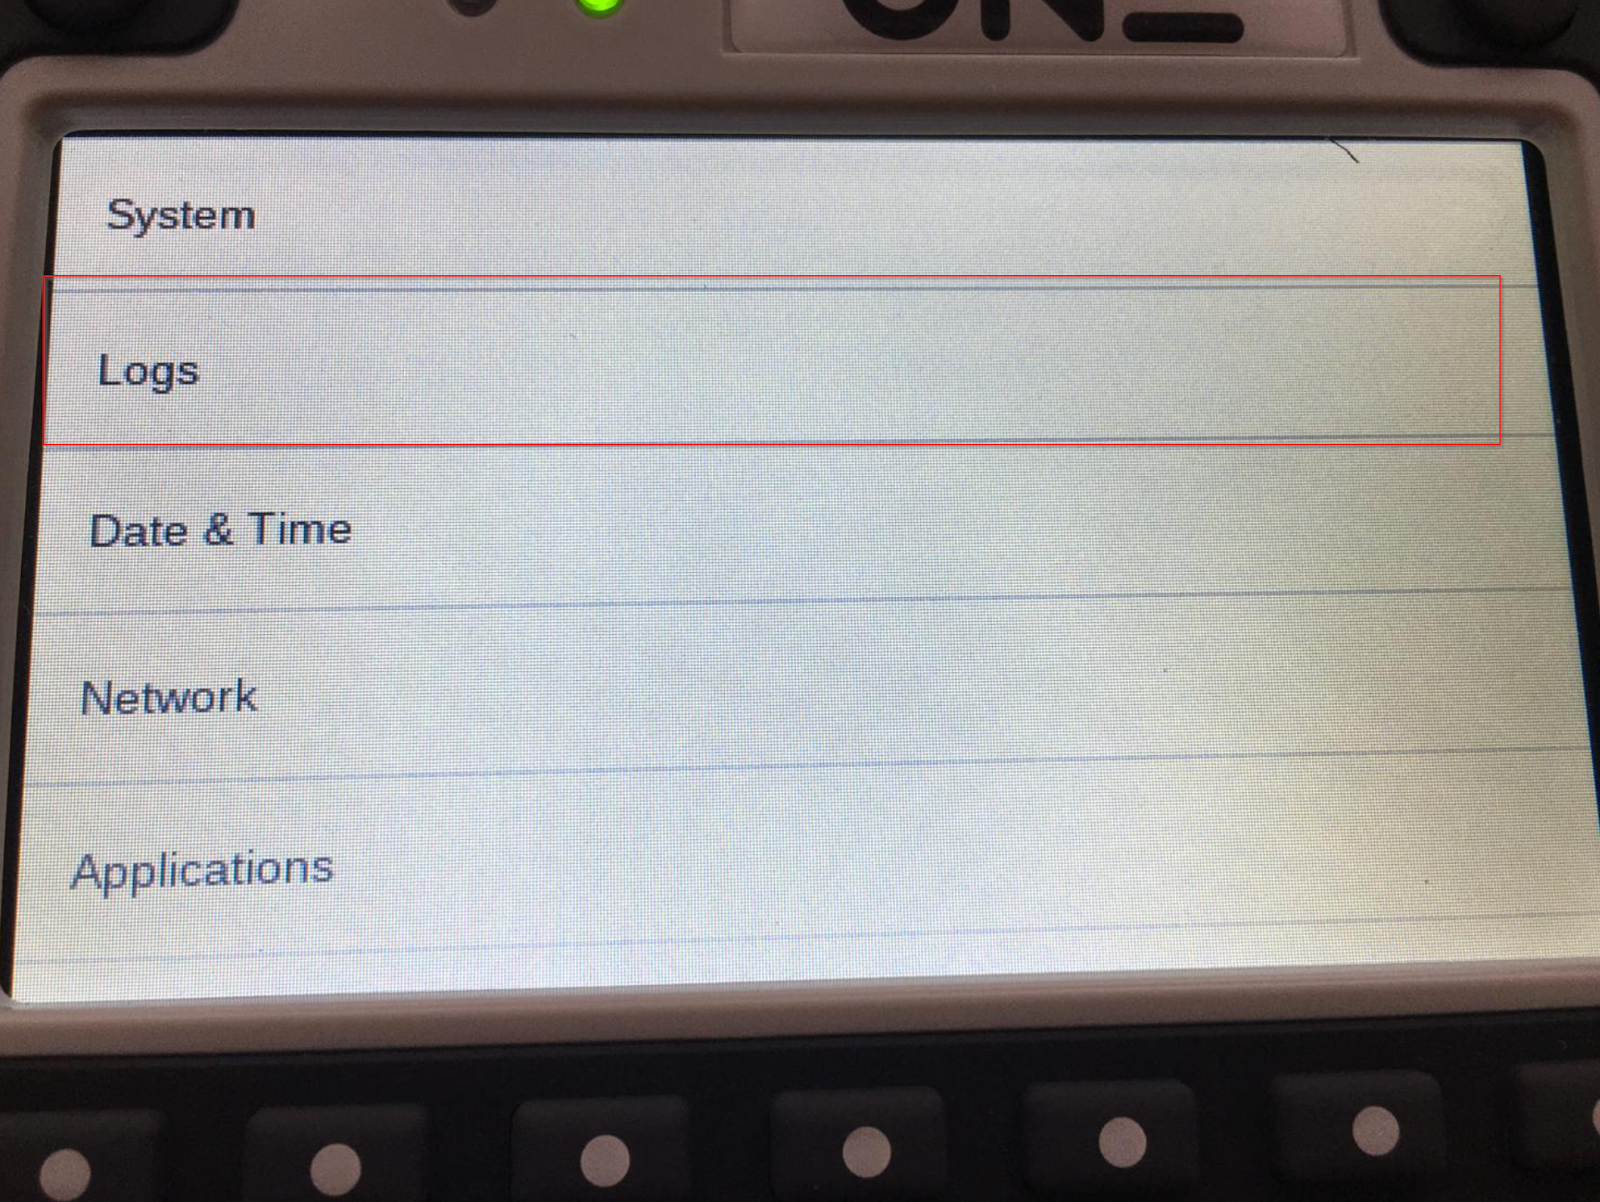
Click on ‘System Settings’ for basic settings of the X5 Wireless panel.
User Configuration
Set the Passwords for the user and admin accounts as in X5 Base.
Done!
Country Code
Set the Country Code as in X5 Base.
Network Interface
Now configure the Network settings for X5 Wireless.

Open Wireless Networking.
Enable Safety WiFi Network.
Done!
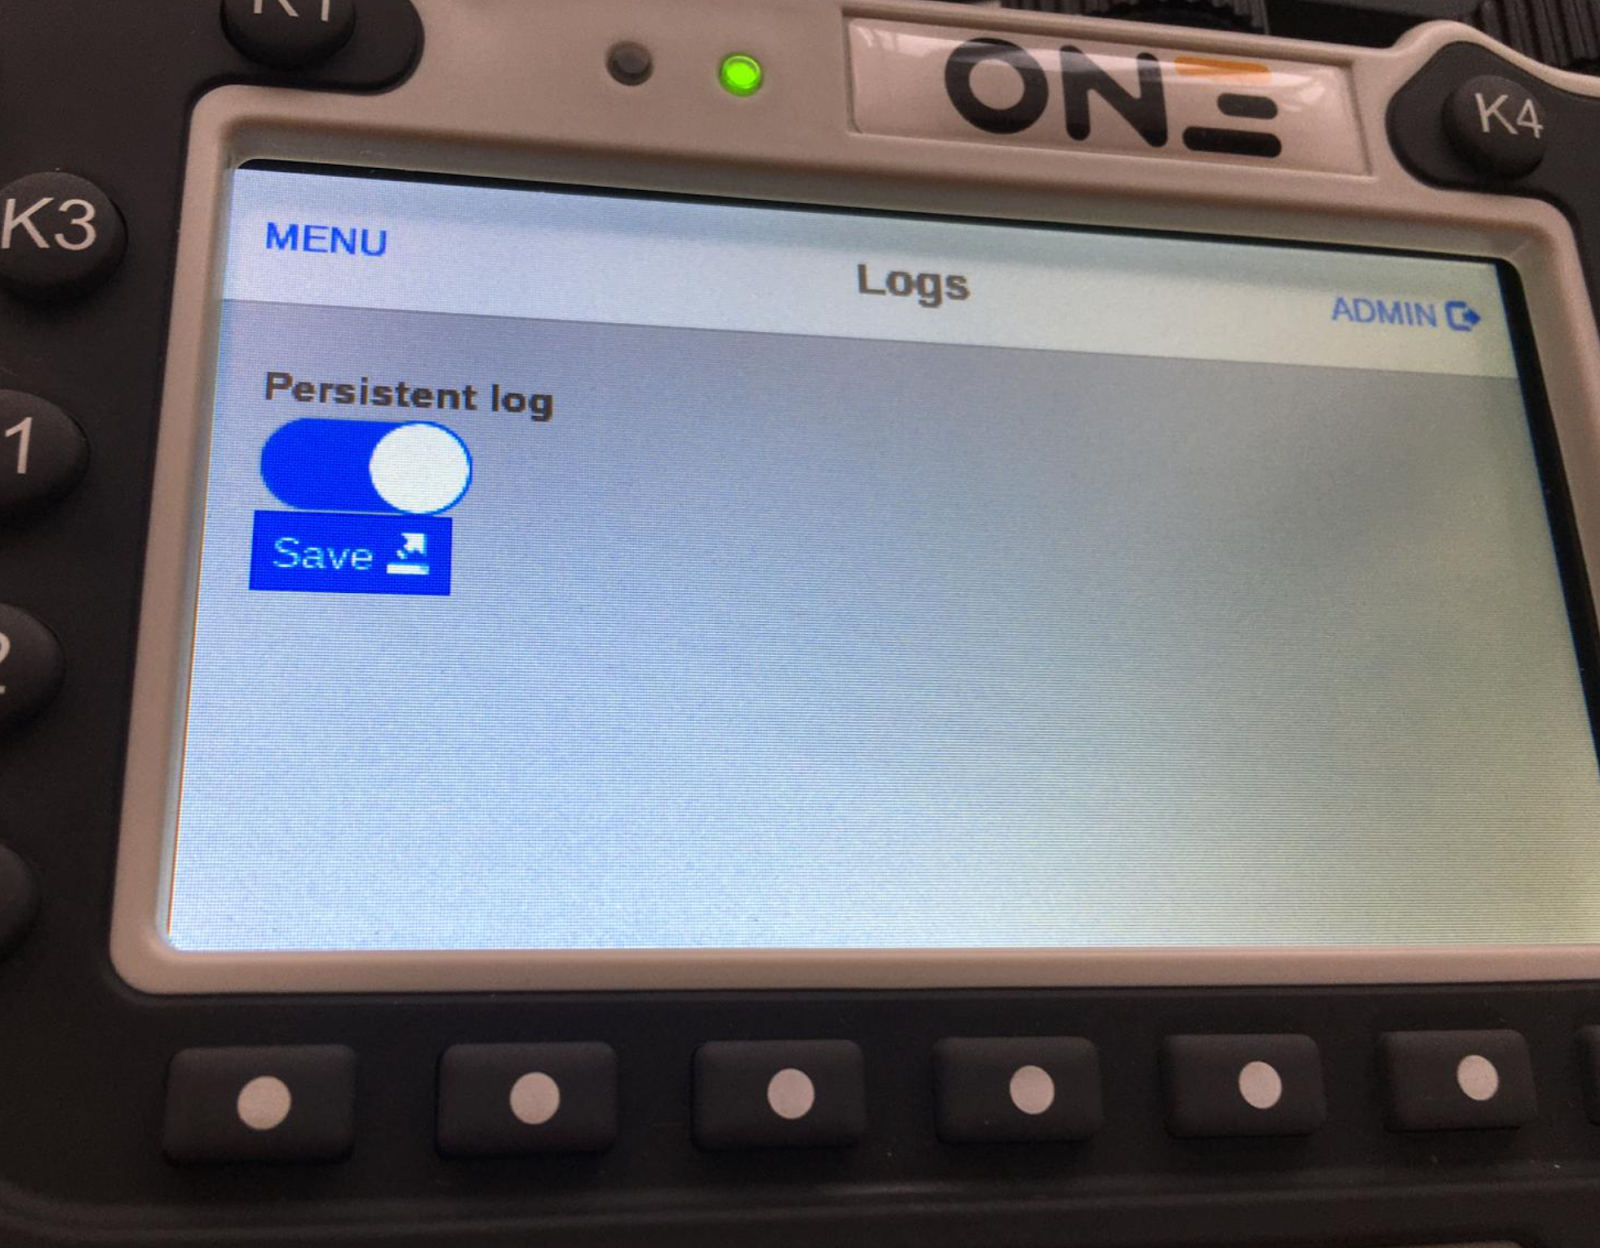
Click the SAVE button to save your settings.
Logs
The last step is to change the Logs File settings for TroubleShooting.
Enable Persistent logging.
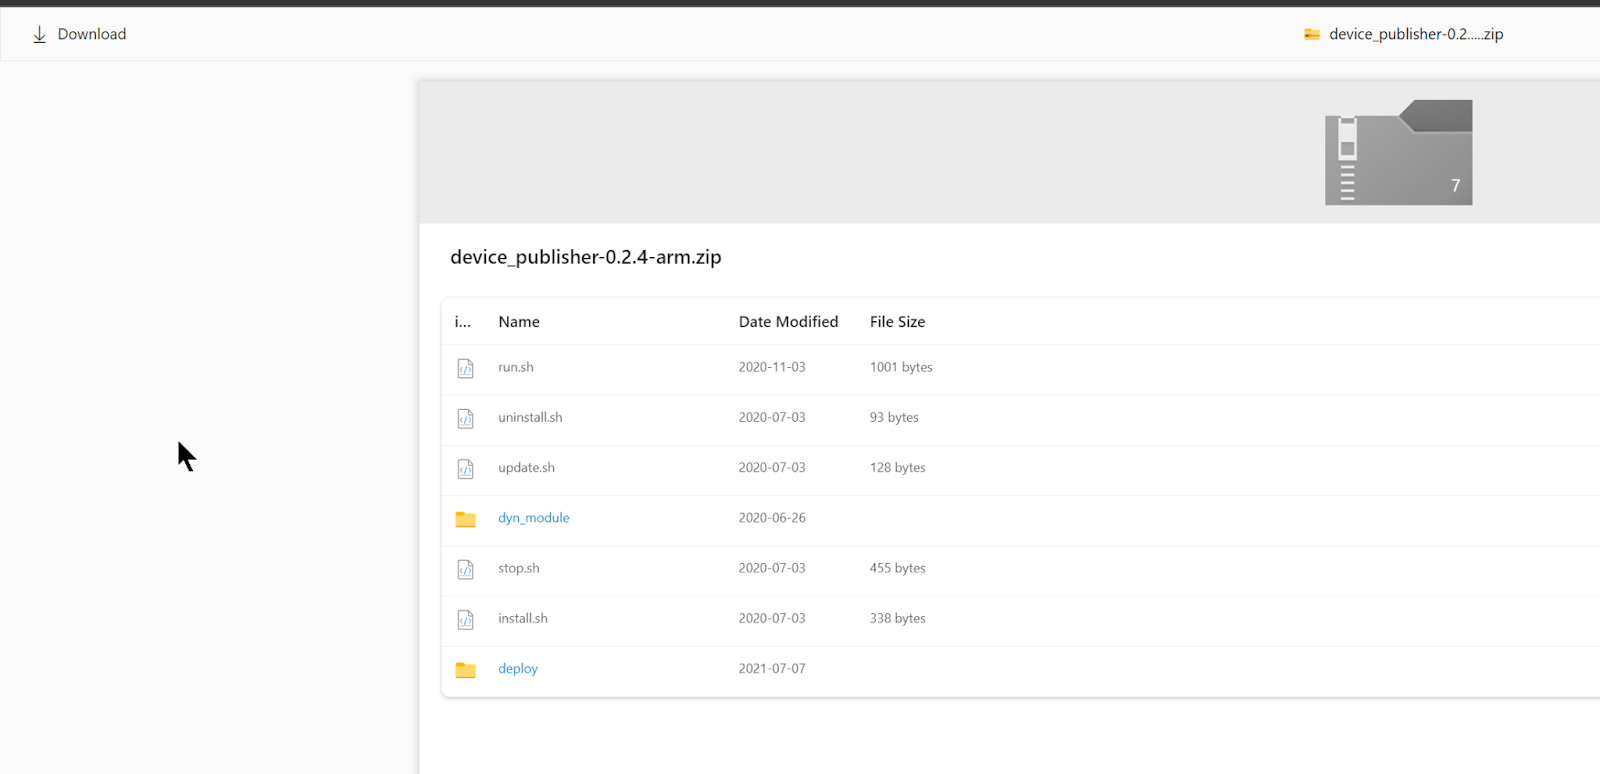
Download Device Publisher Packages
Download the Device Publisher Packages for X5 Wireless from the Link below.
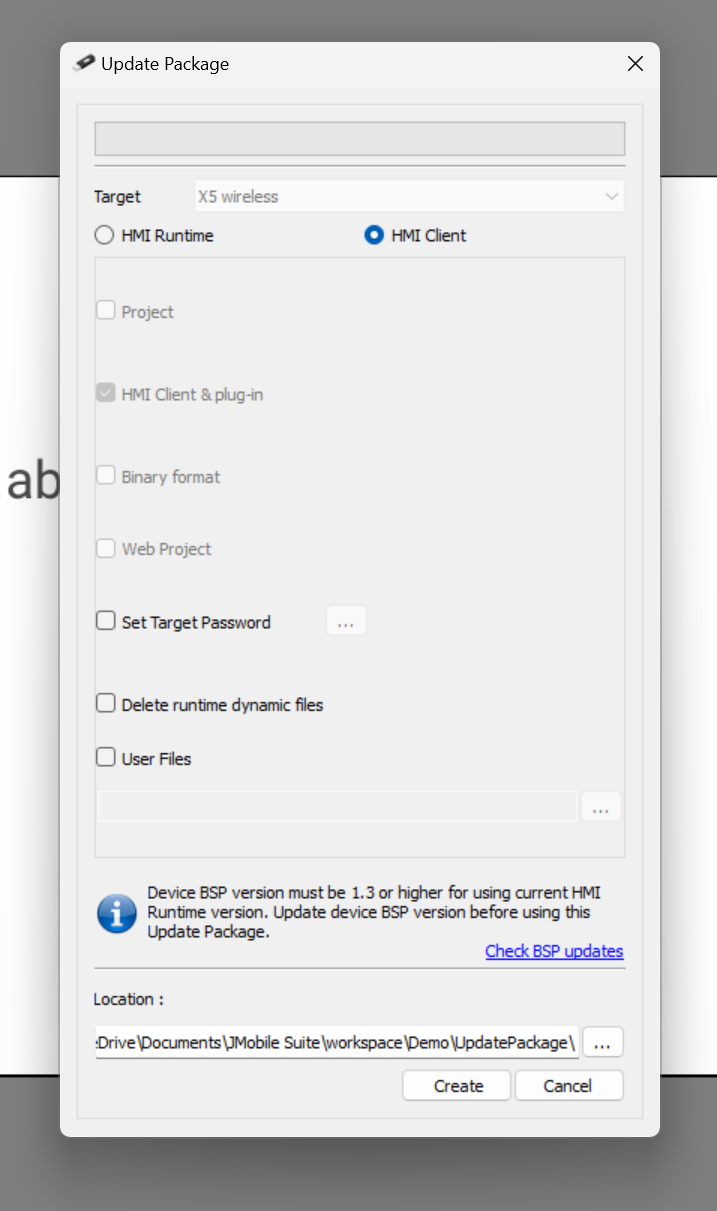
Create Update Package
Use JMobile Studio to prepare the JMobile update package, including the JMobile Client, on a USB flash drive.
Click Run>Update Package.
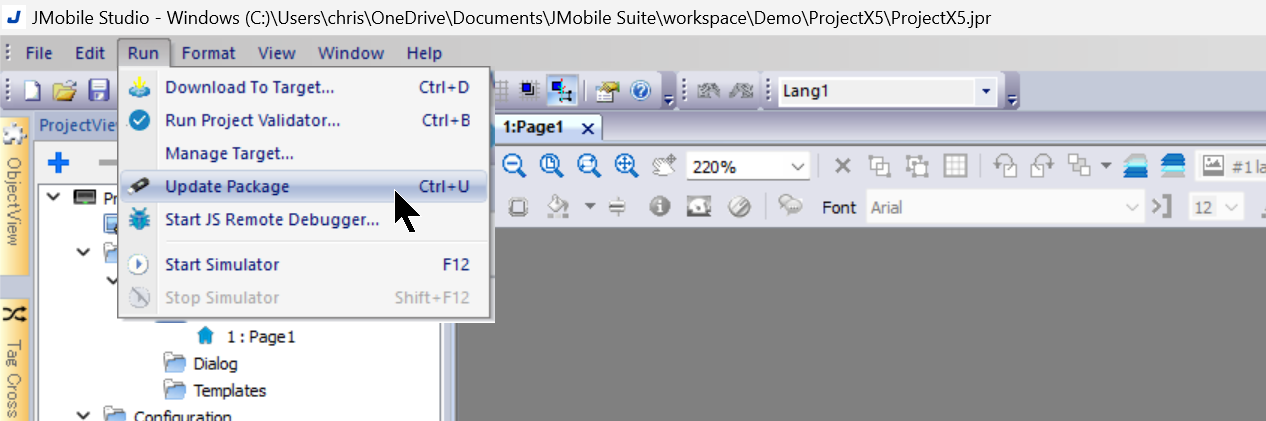
Configure the HMI Client and click the Create button to generate the Update Package.
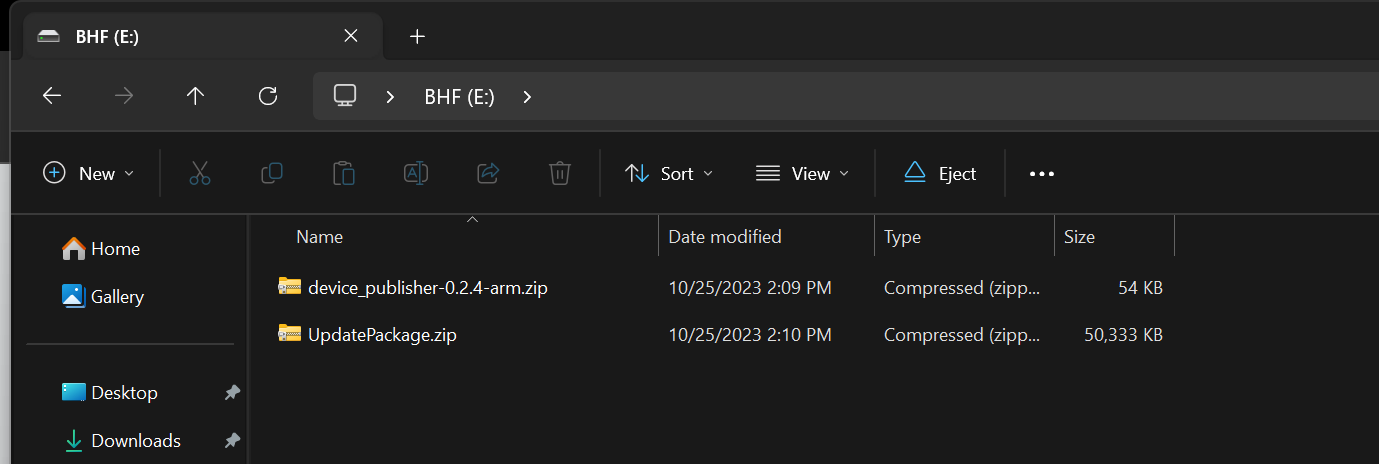
Copy File to USB
Store the UpdatePackages generated from JMobile Studio and the Device Publisher downloaded from the EXOR web on the USB.
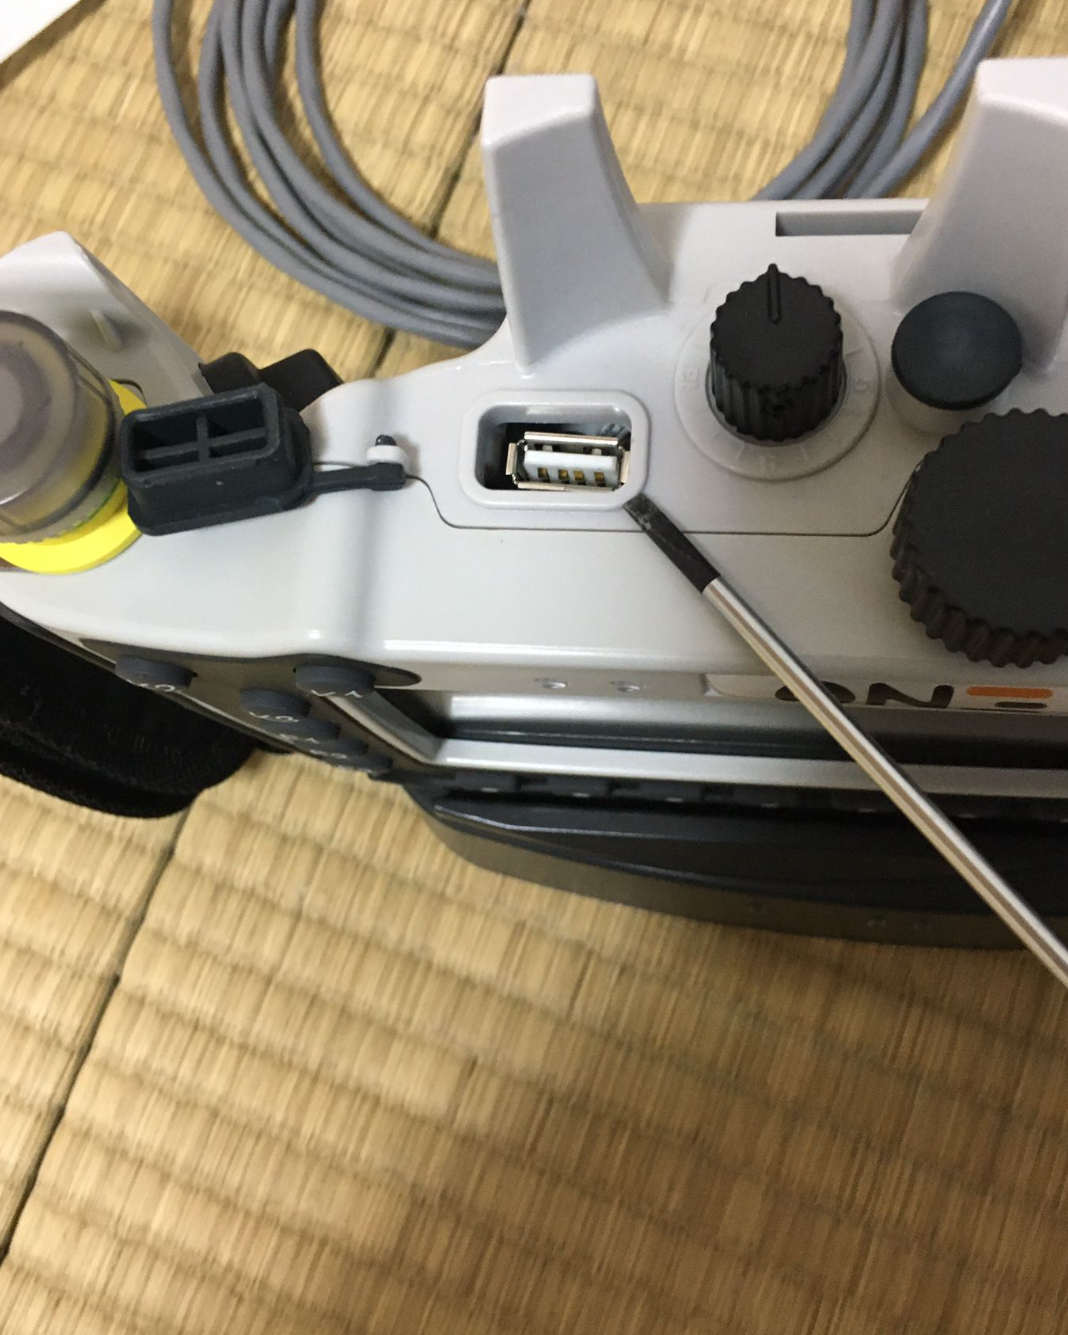
Insert the USB
Install the USB Drive in the location shown in the diagram below on the X5 Wireless.
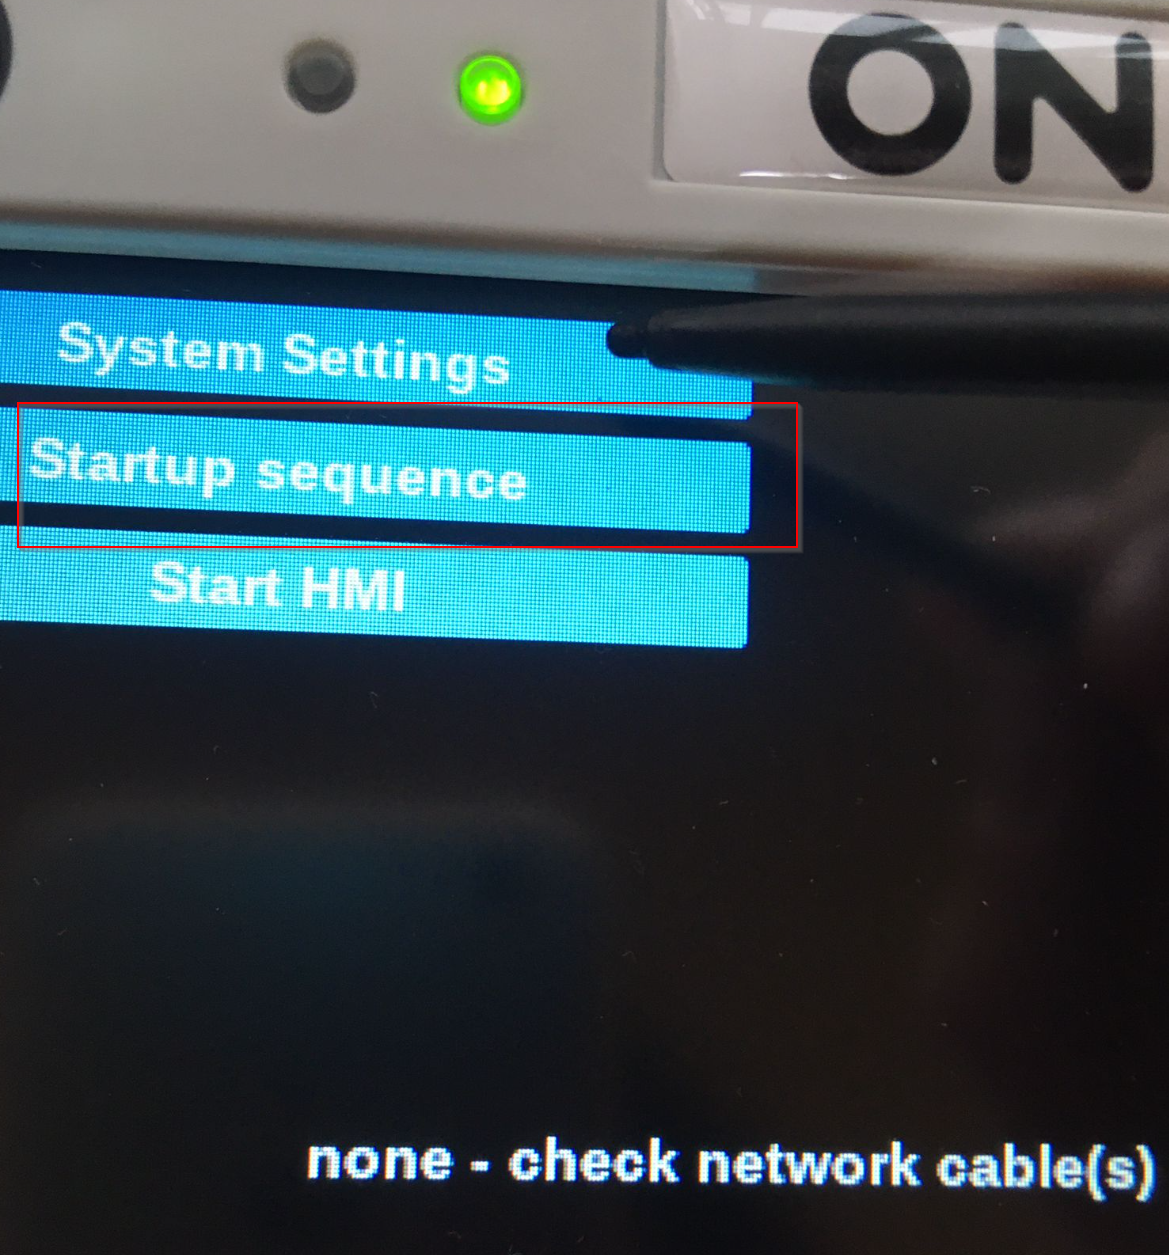
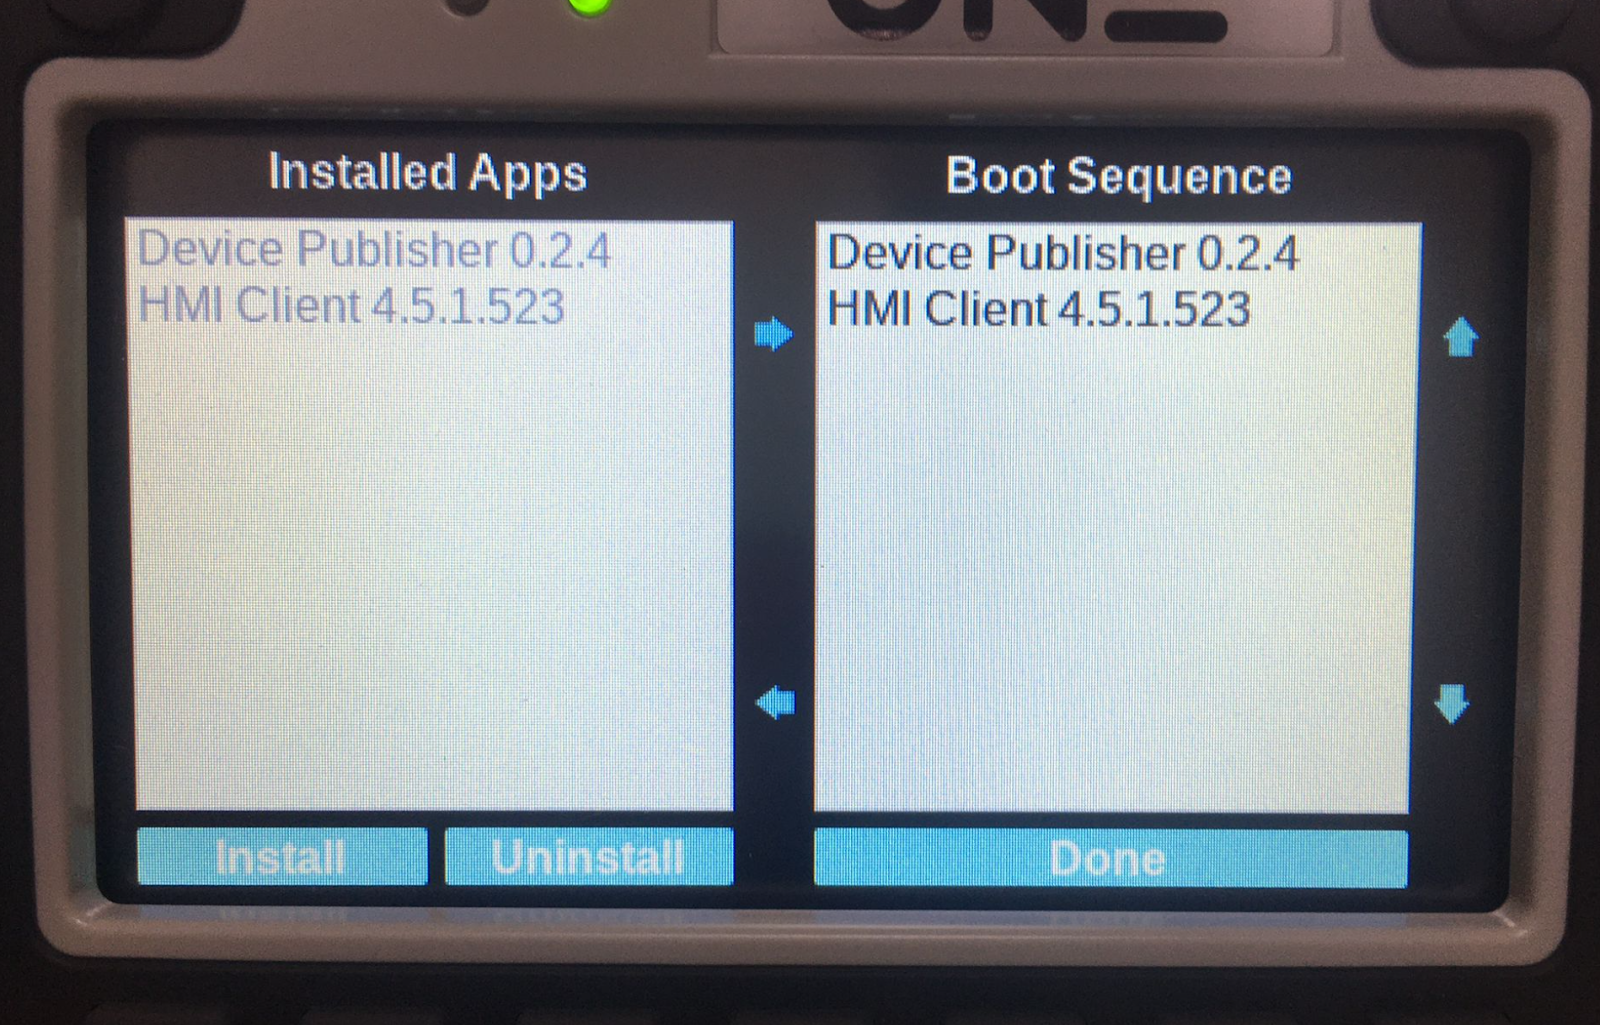
Configure Startup Sequence
Now set the Startup sequence for EXOR X5 Wireless.
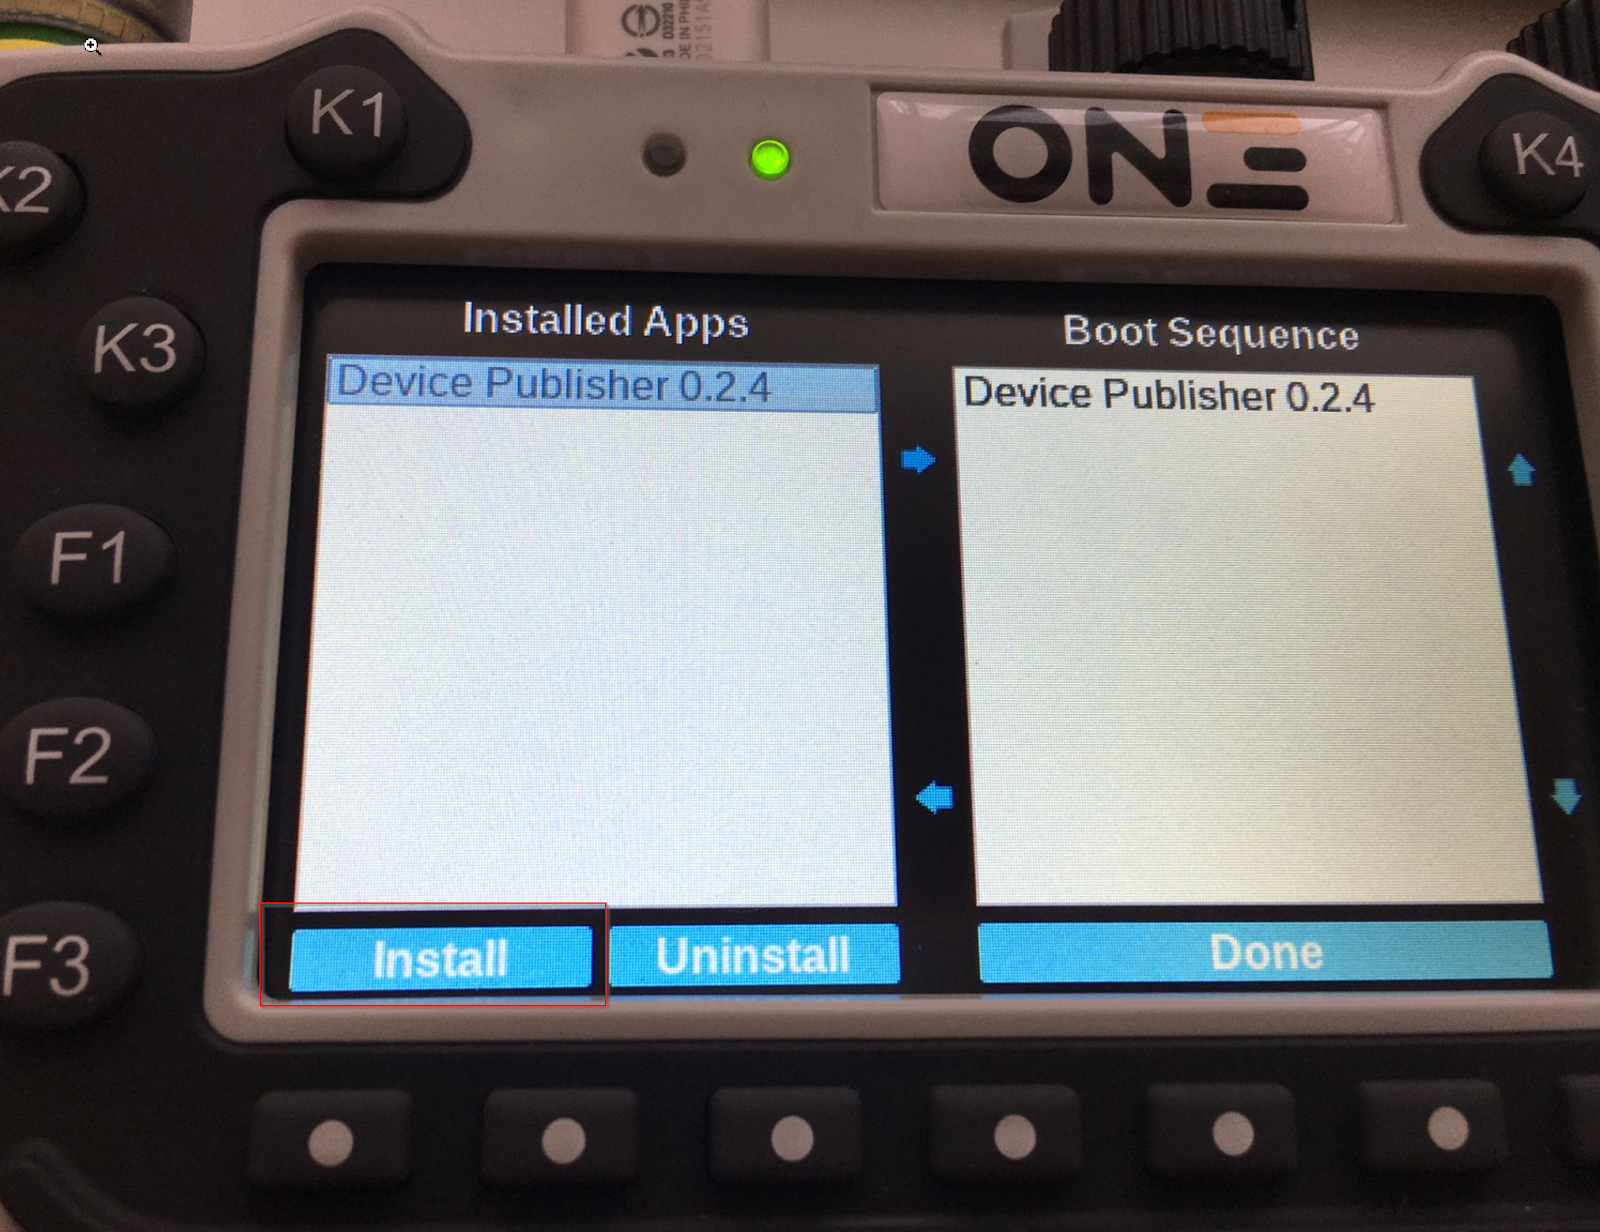
Currently only Device Publisher 0.2.4 is installed.
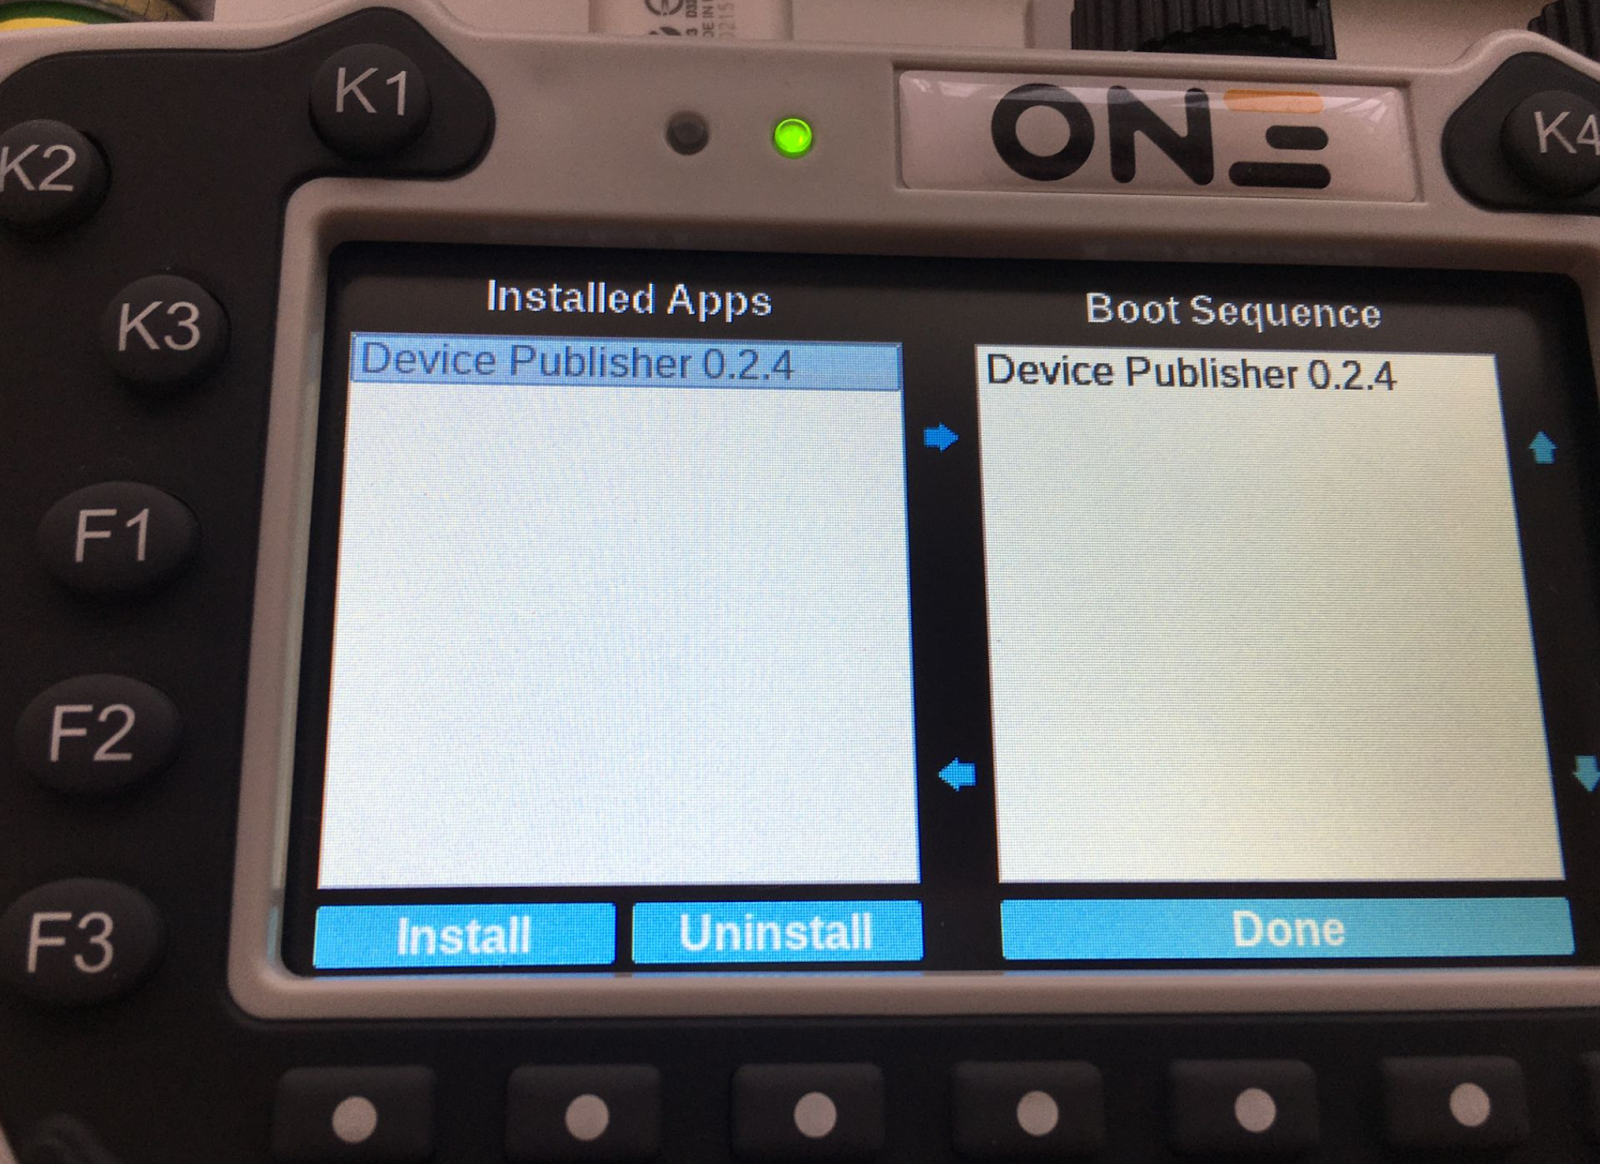
Click on the Install button.
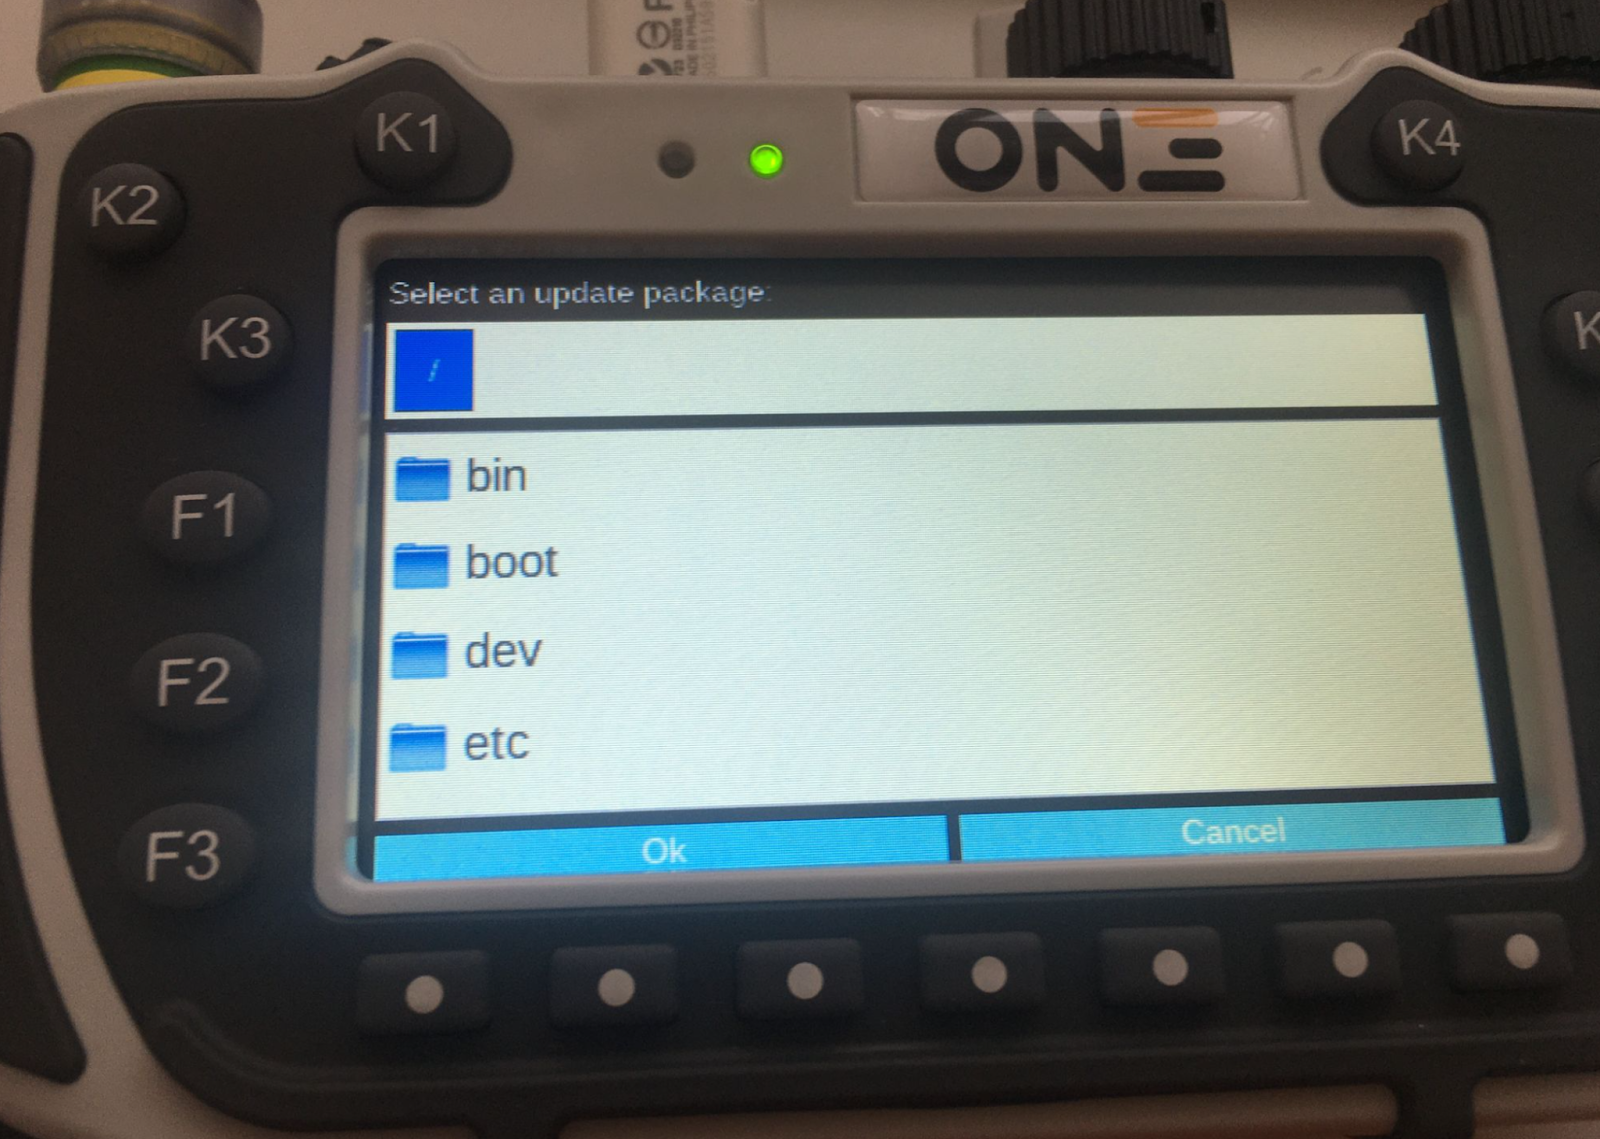
You will be accessing the X5 Wireless File System.
Scroll to the bottom and you will find a Folder called usbmemory.
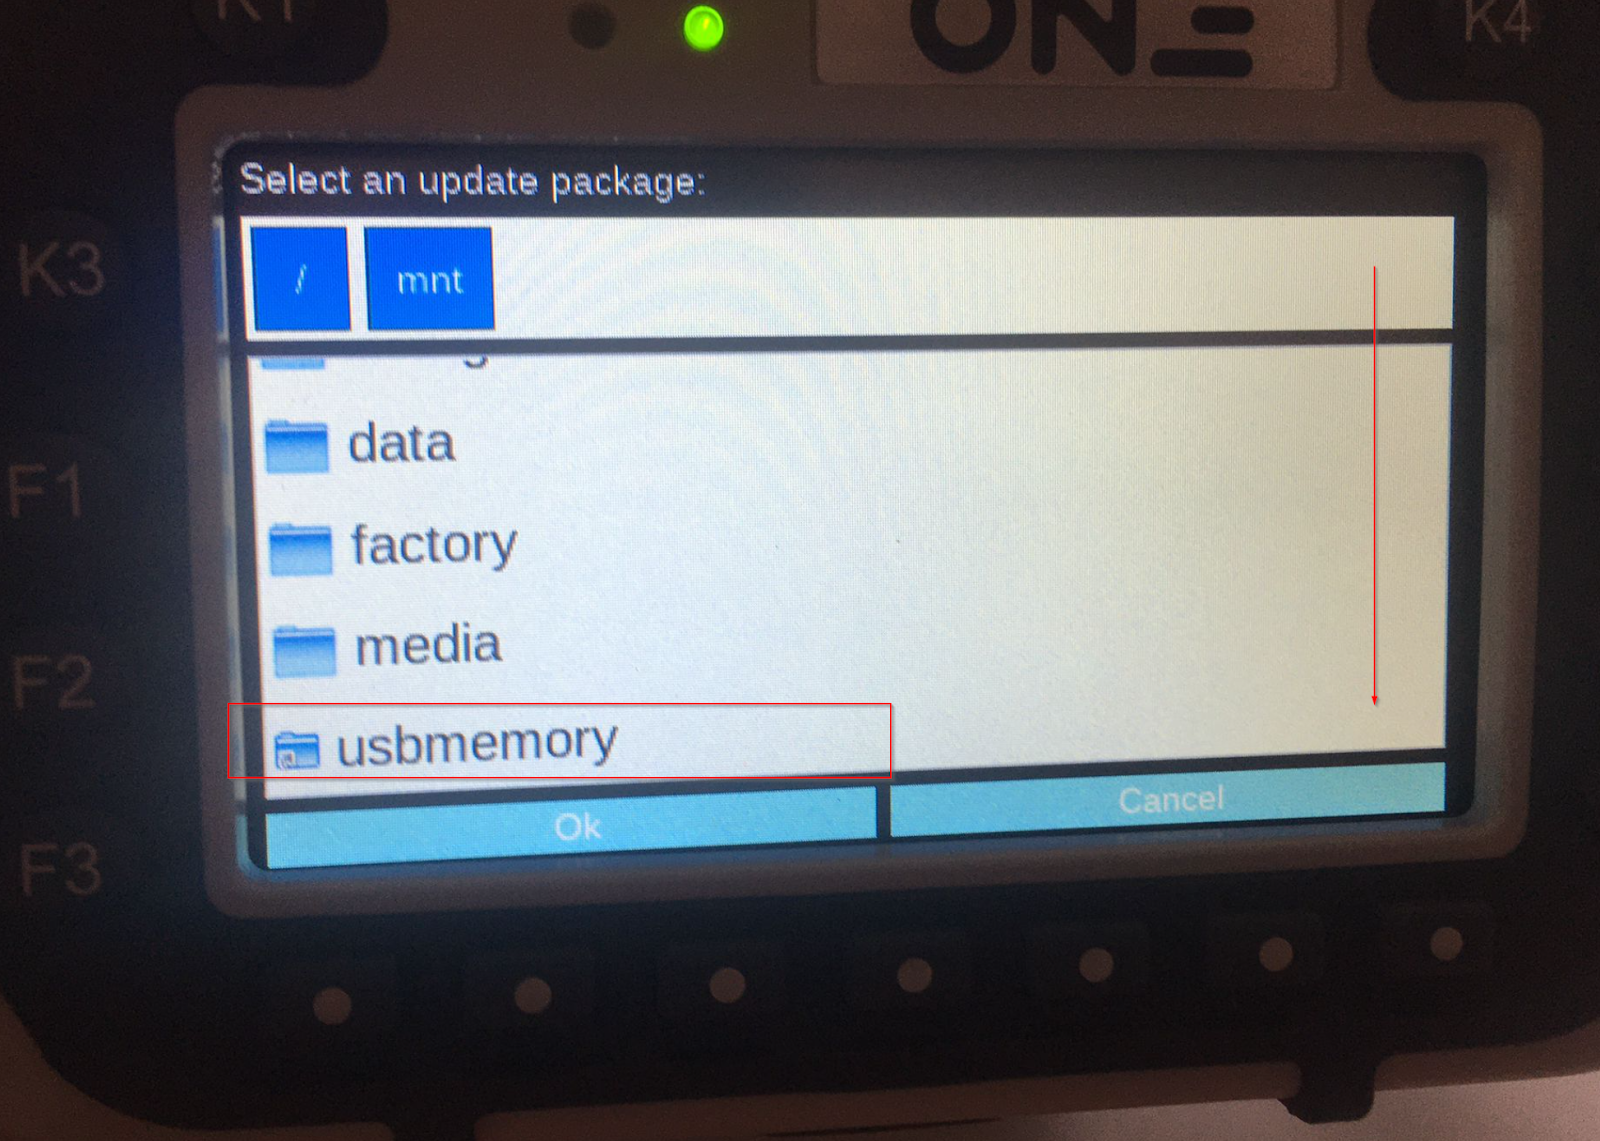
There was a ZIP stored earlier in the usbmemory Folder.
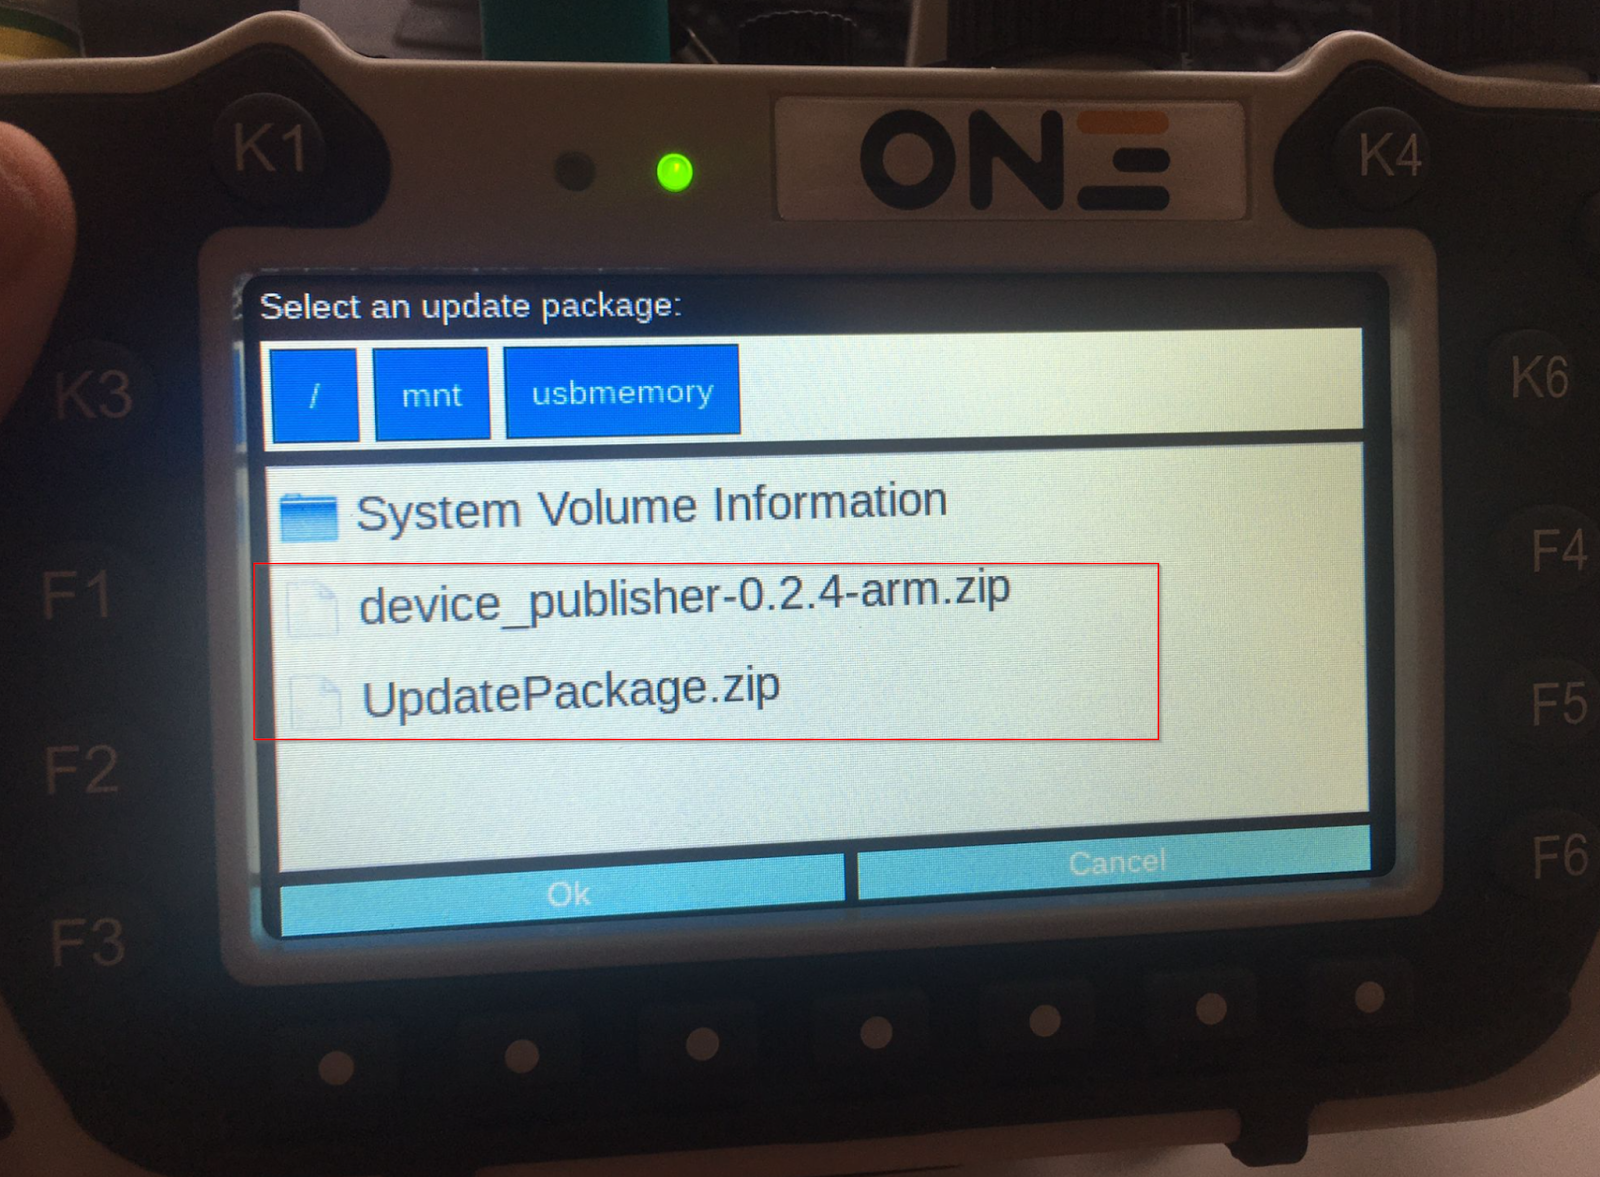
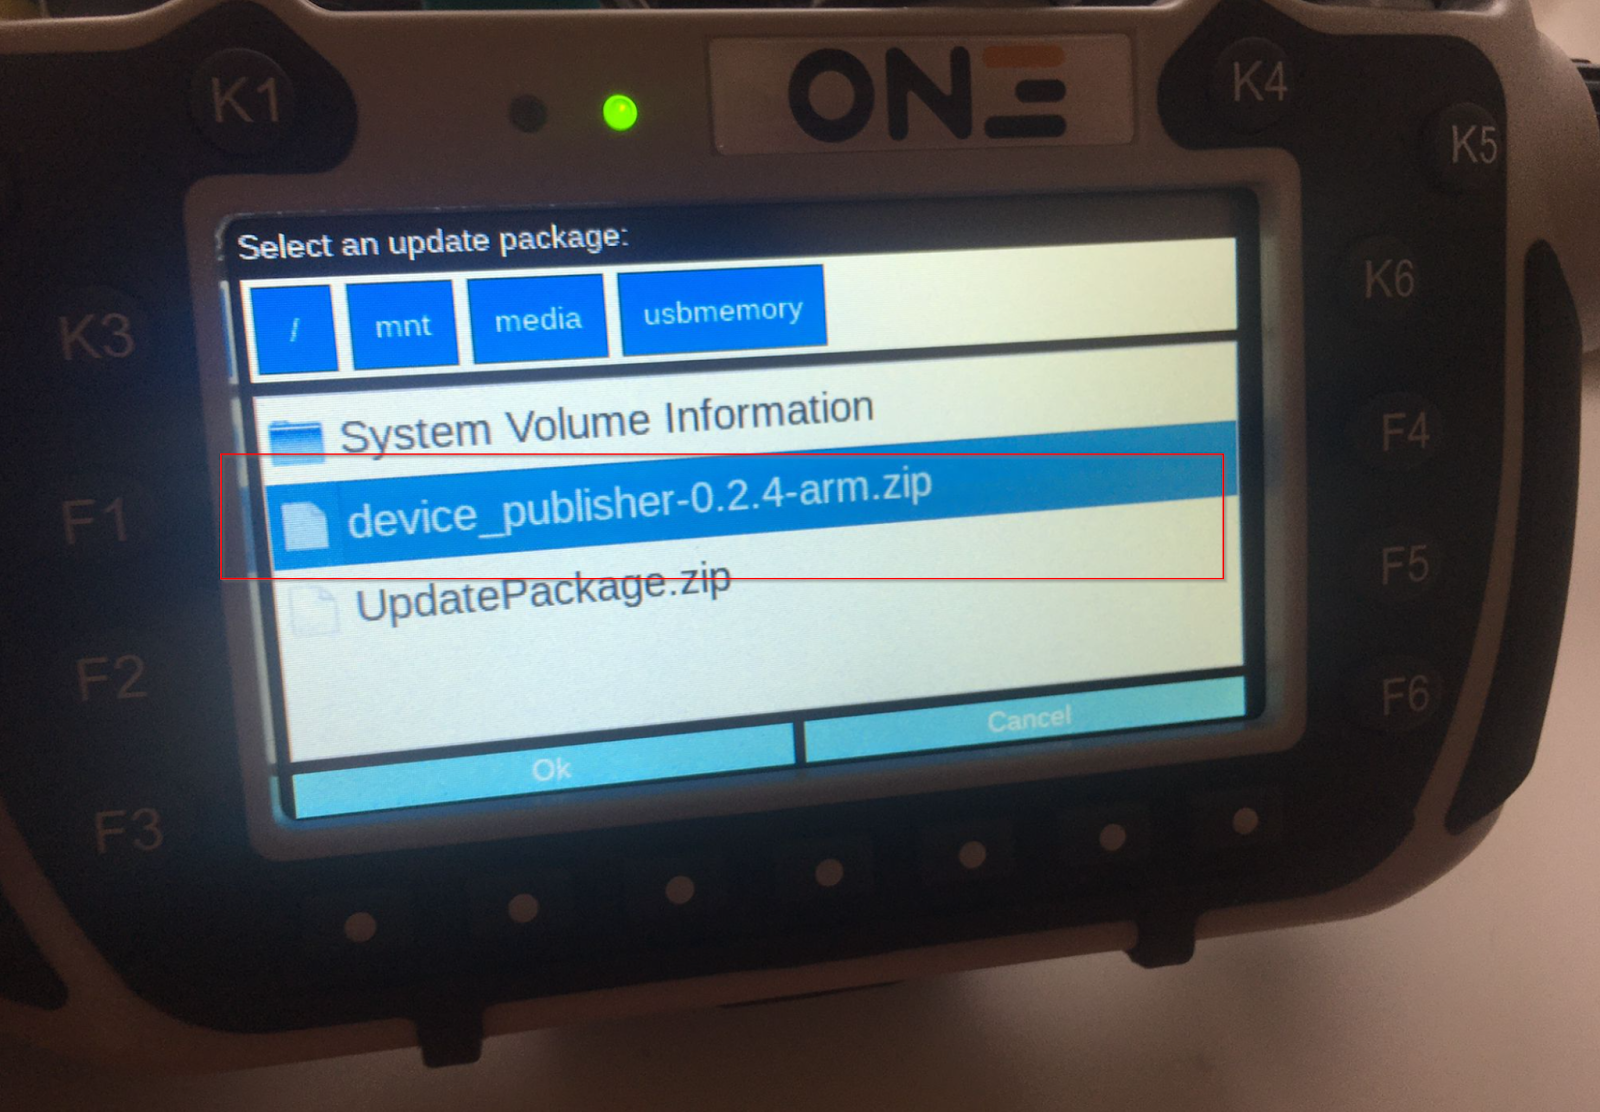
Select device_publisher-0.2.4-arm.zip >Ok.
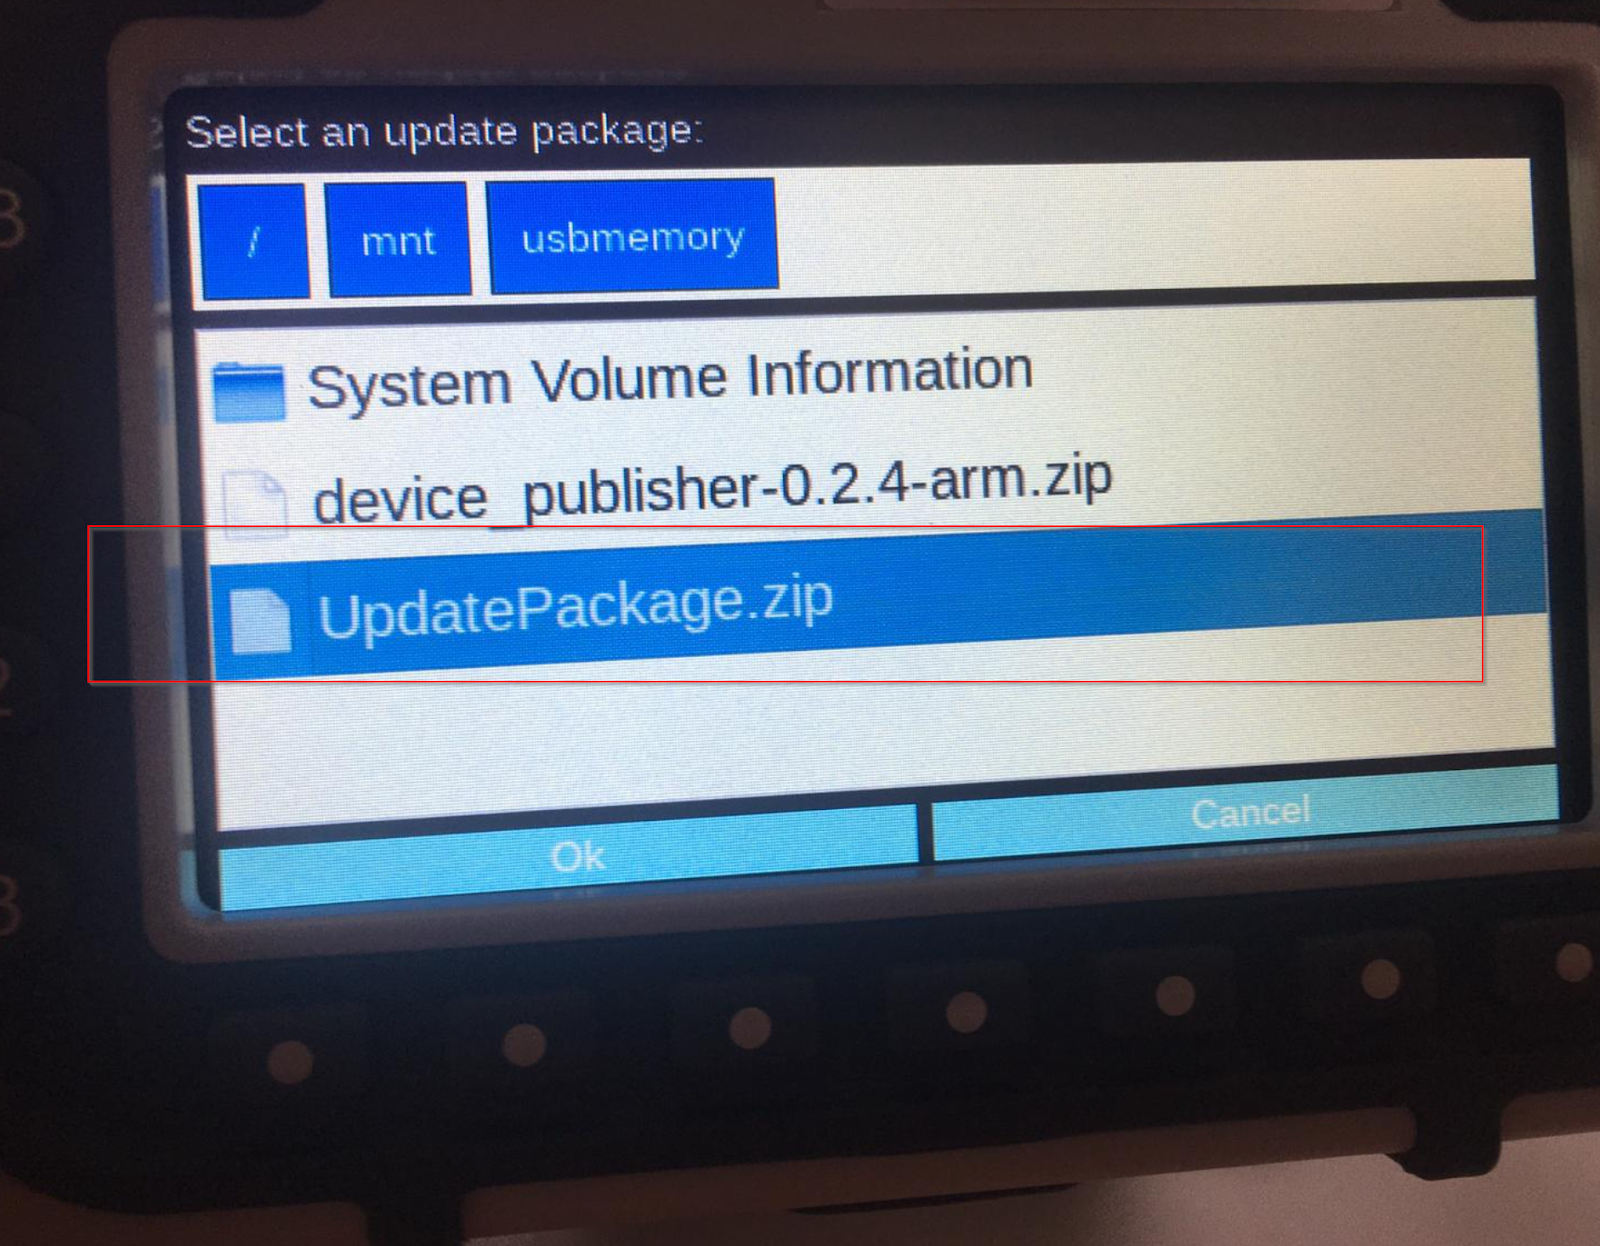
Select UpdatePackage.zip using the same operation.
Select HMI Client 4.5.X.XXX and click on arrow number 2.
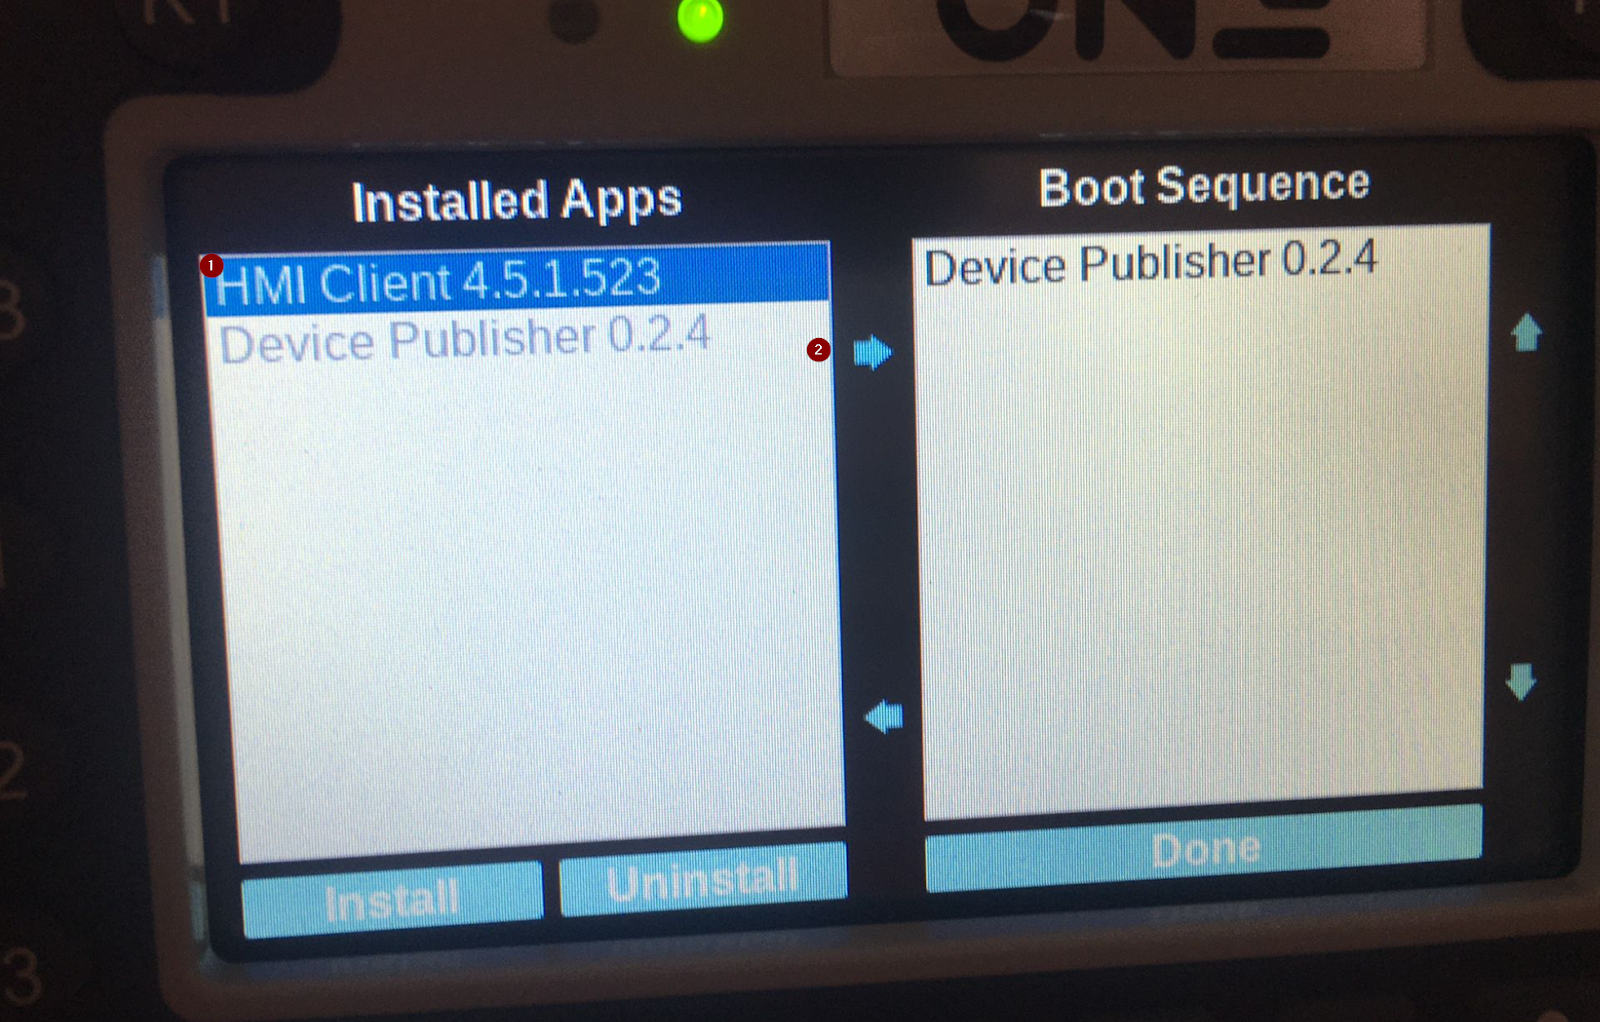
This is OK. Now when X5 Wireless is switched on, run the following Package.
- Device Publisher 0.2.4
- HMI Client 4.5.1.523
Configure Pair-up
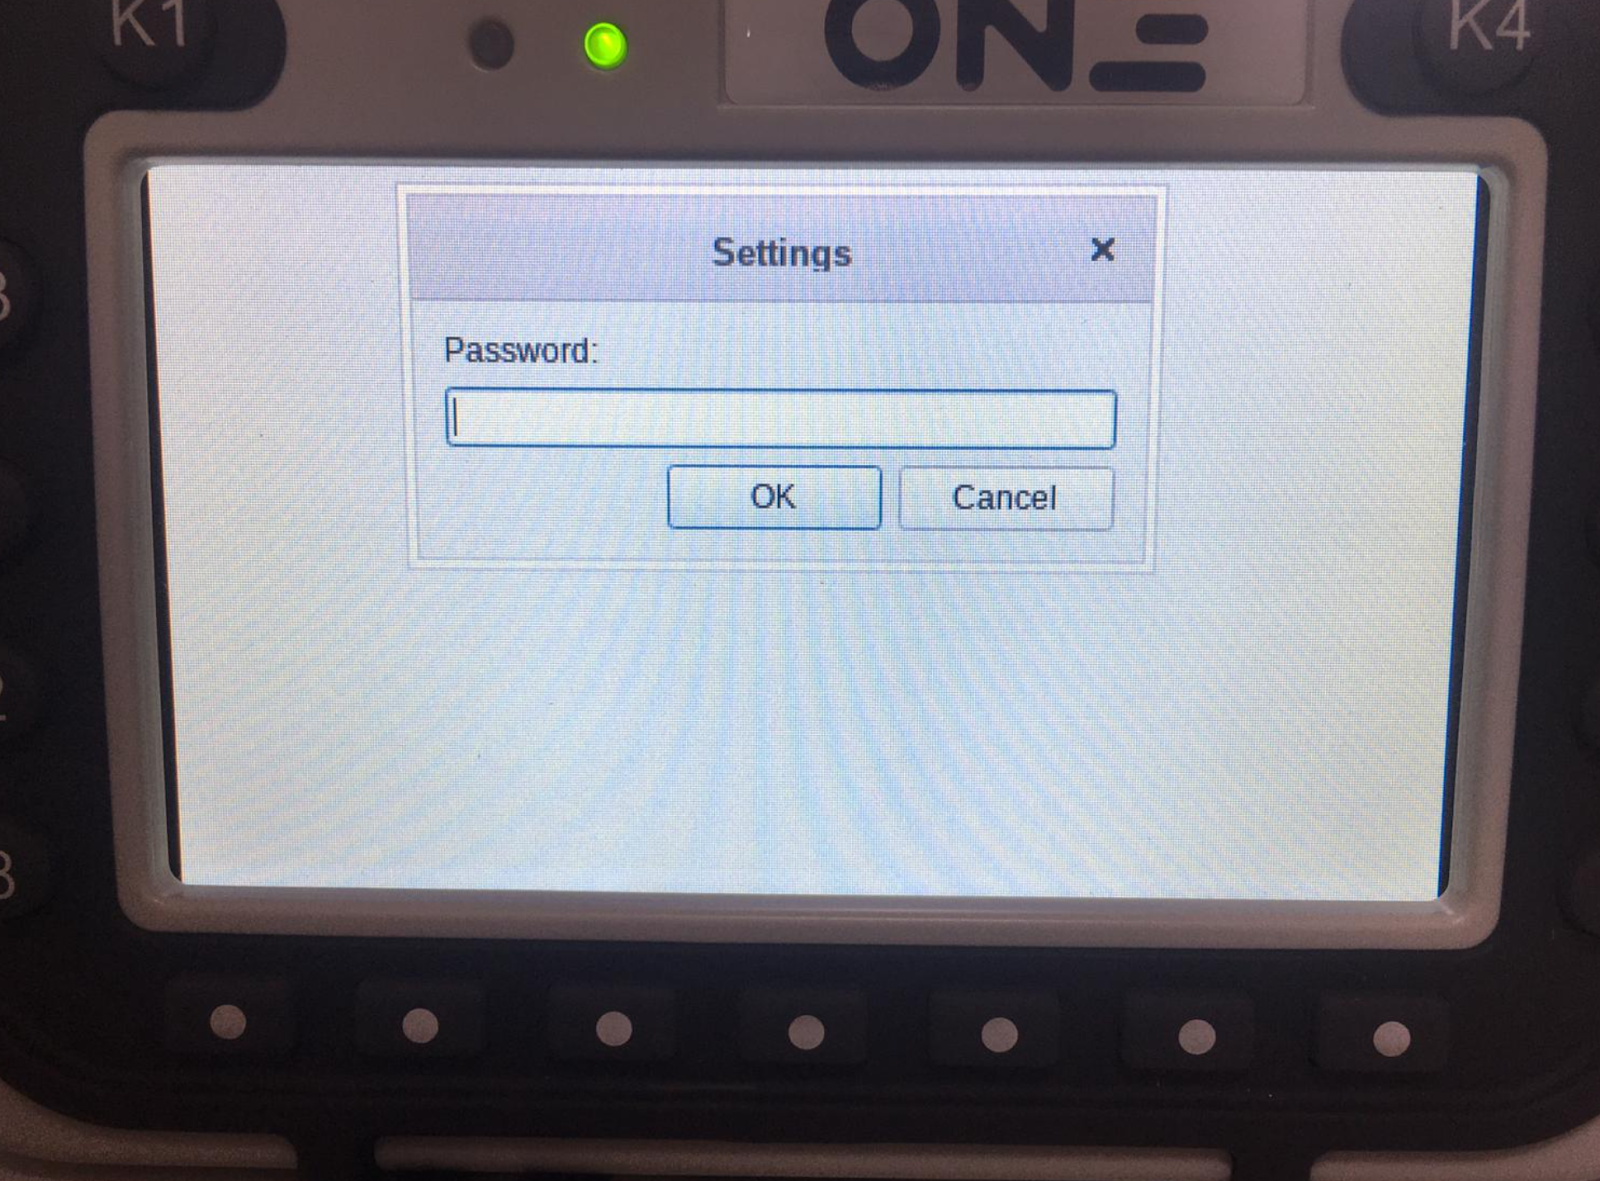
Switch the X5 Wireless back on and press K1 and K4 simultaneously to switch to the Pairing screen.
You will initially be asked to enter a Password.
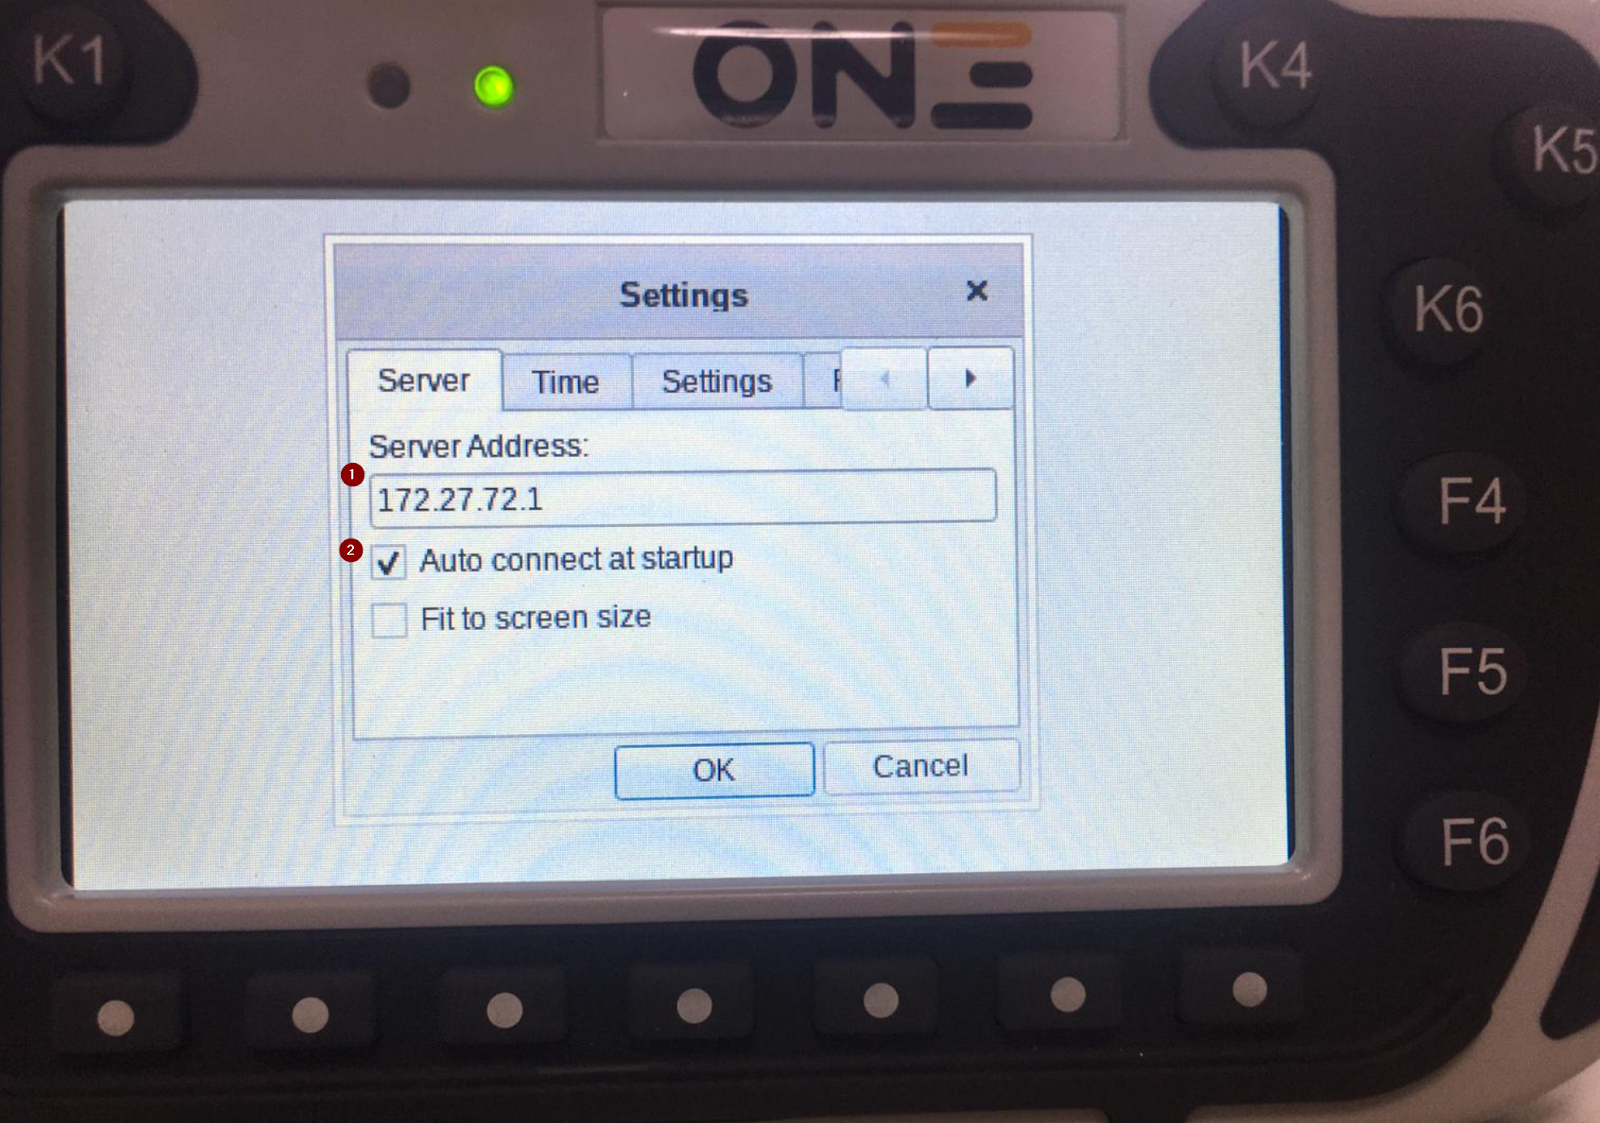
Set the Server address. Its IP Address is the Wireless IP address of the X5 base.
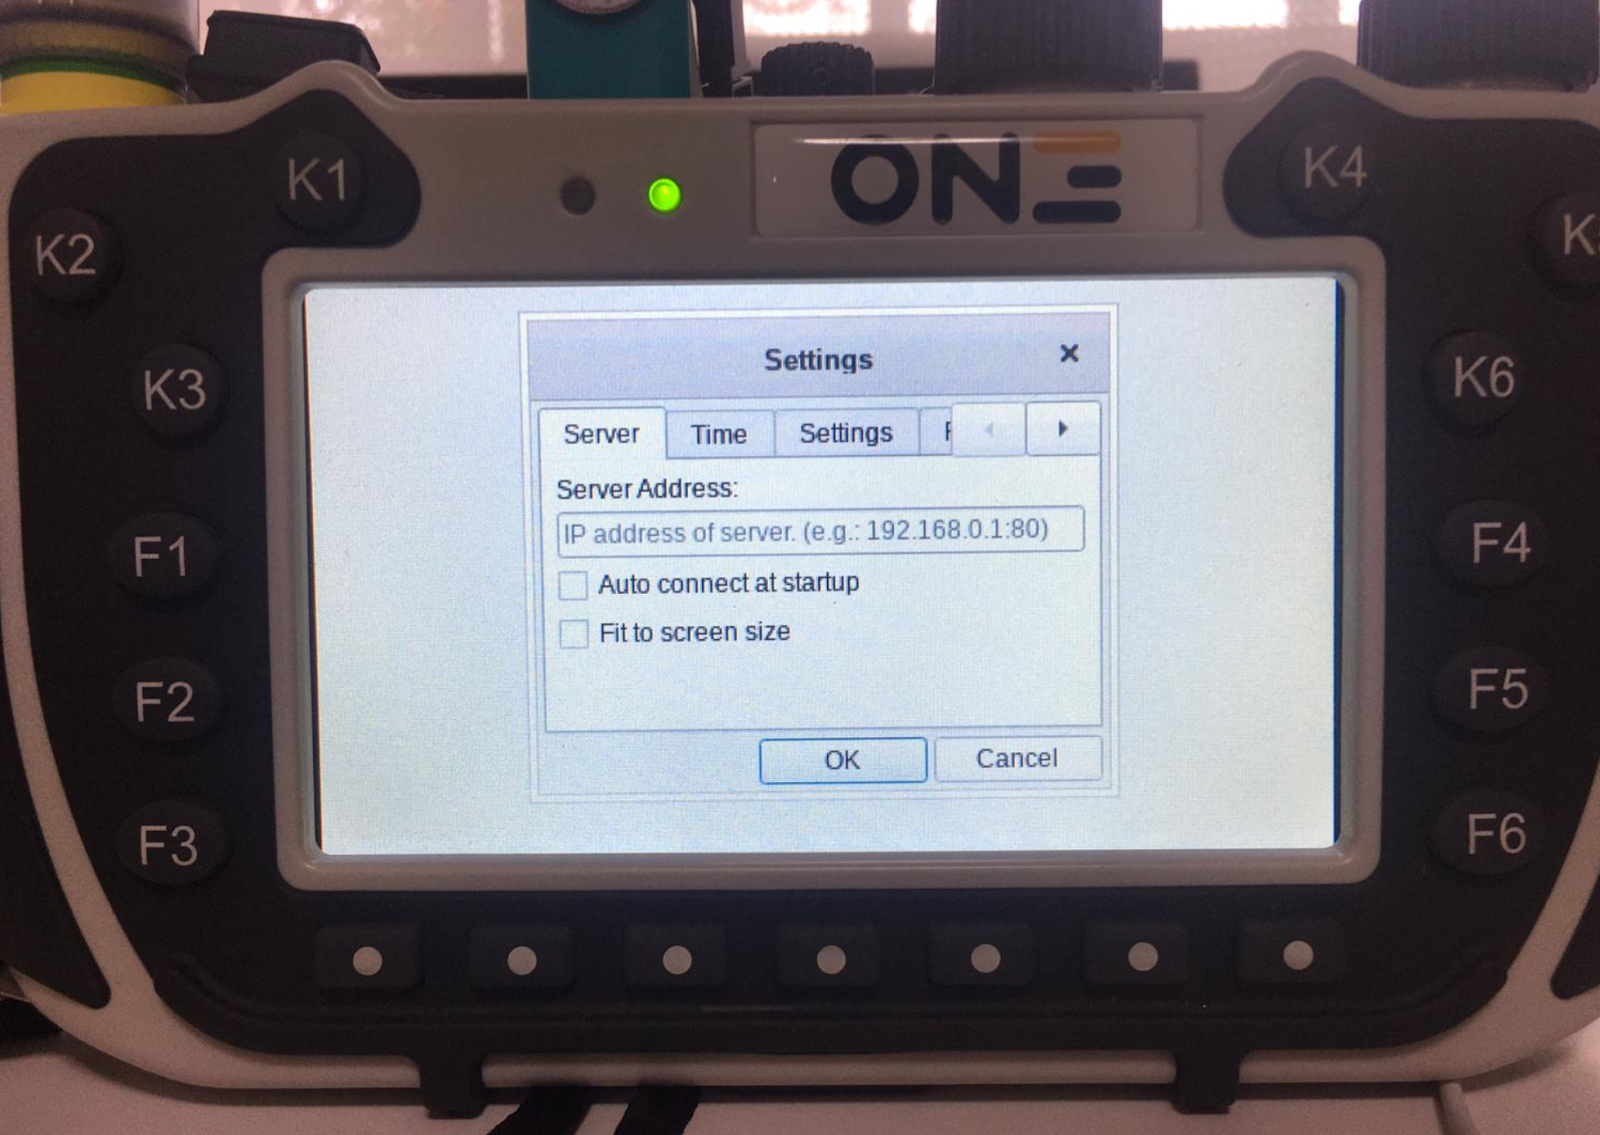
Default Server Address is http://172.27.72.1になります.
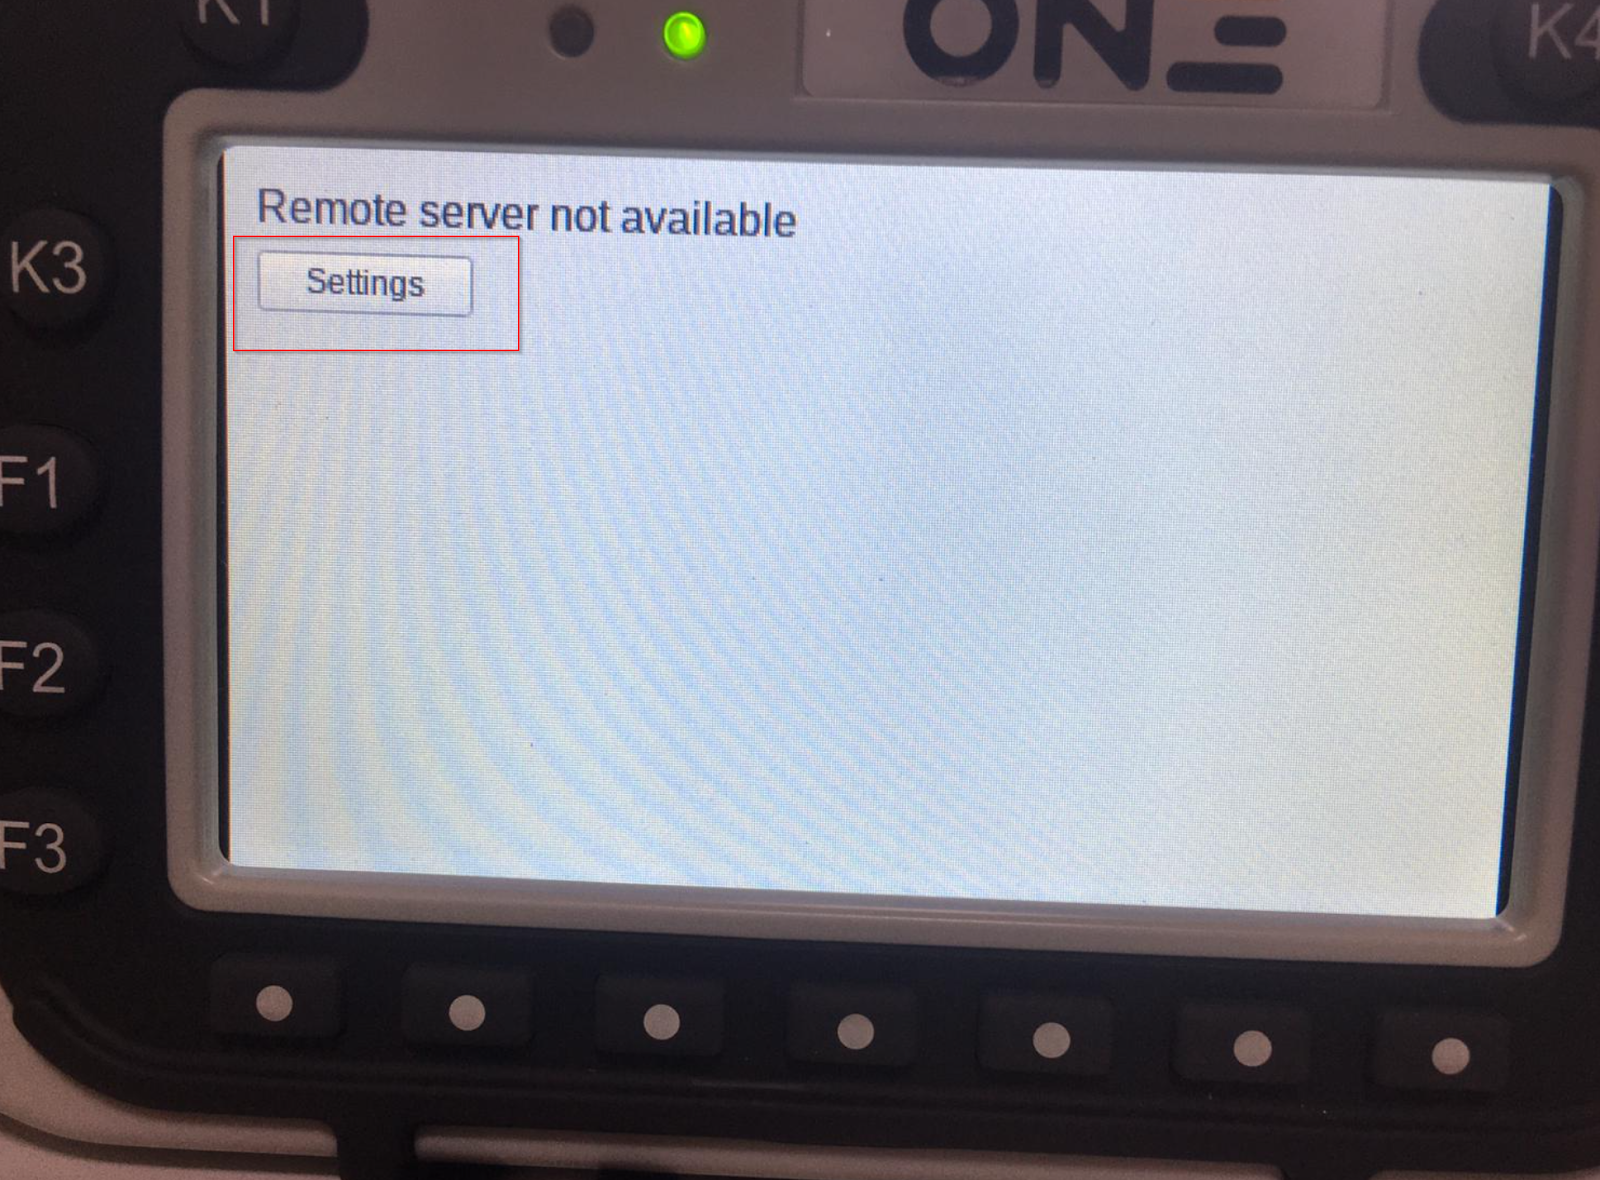
However, the message “Could not conenct to server” is displayed.
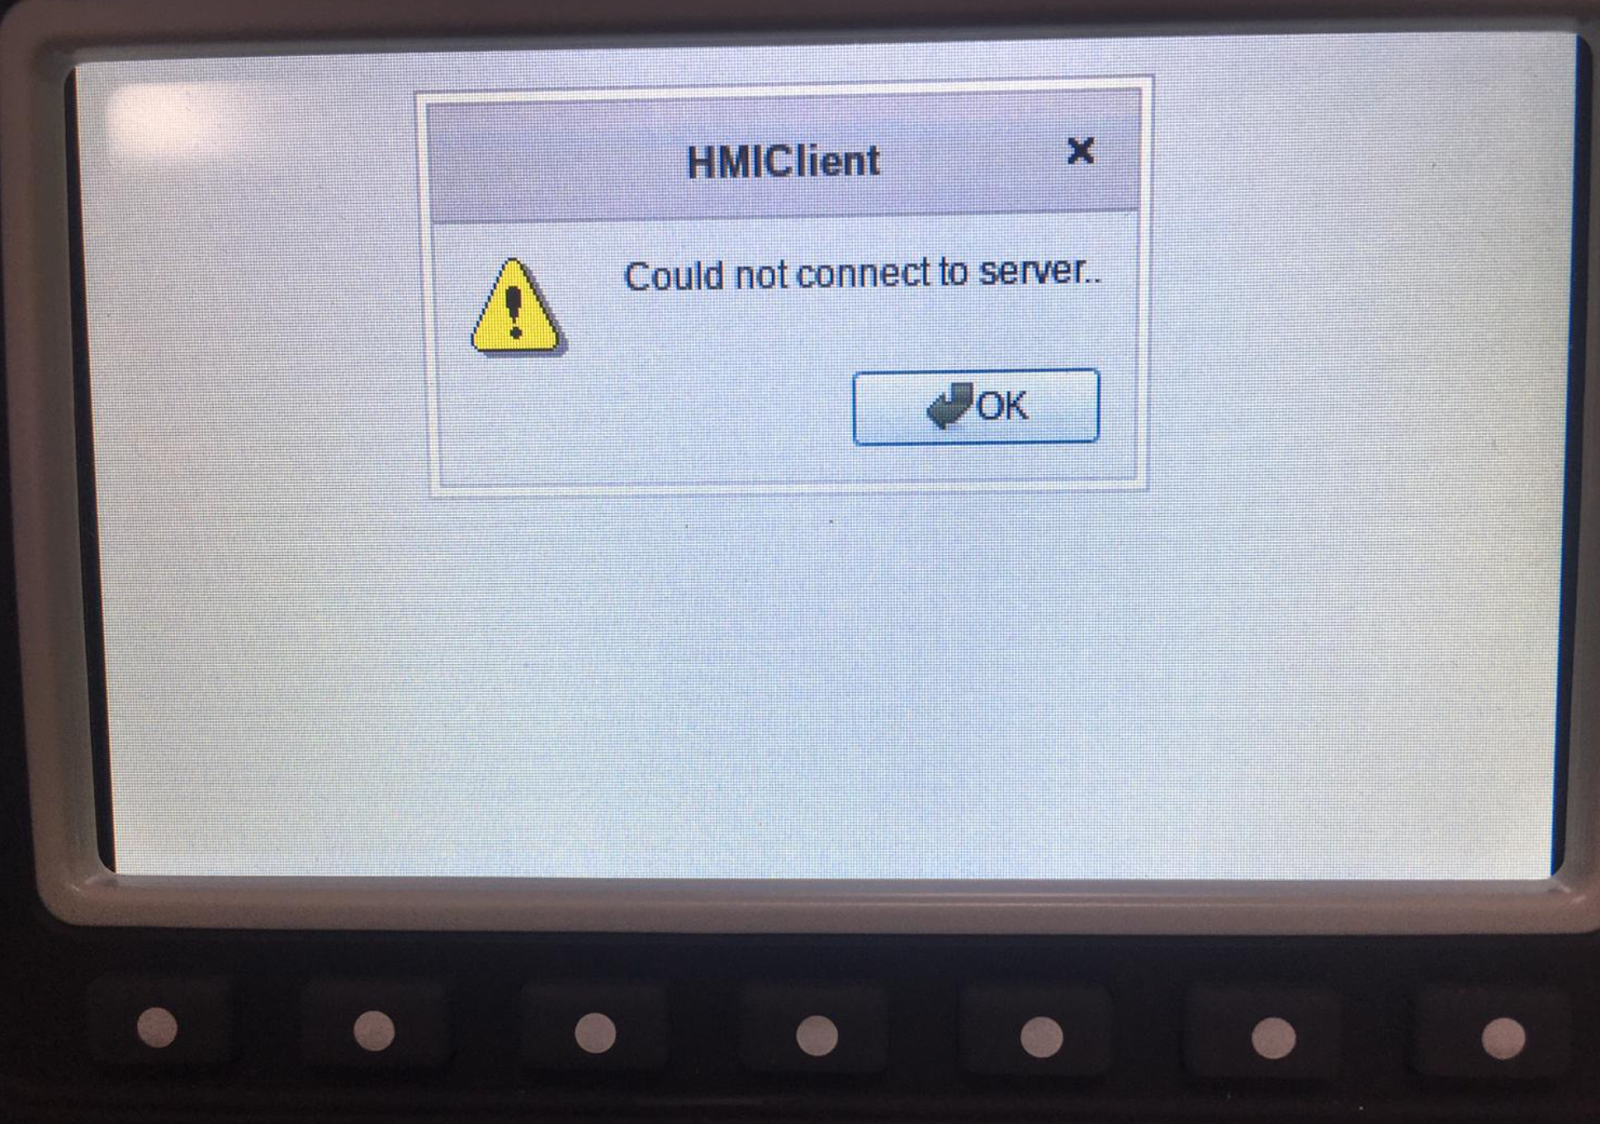
Click on the Settings button.
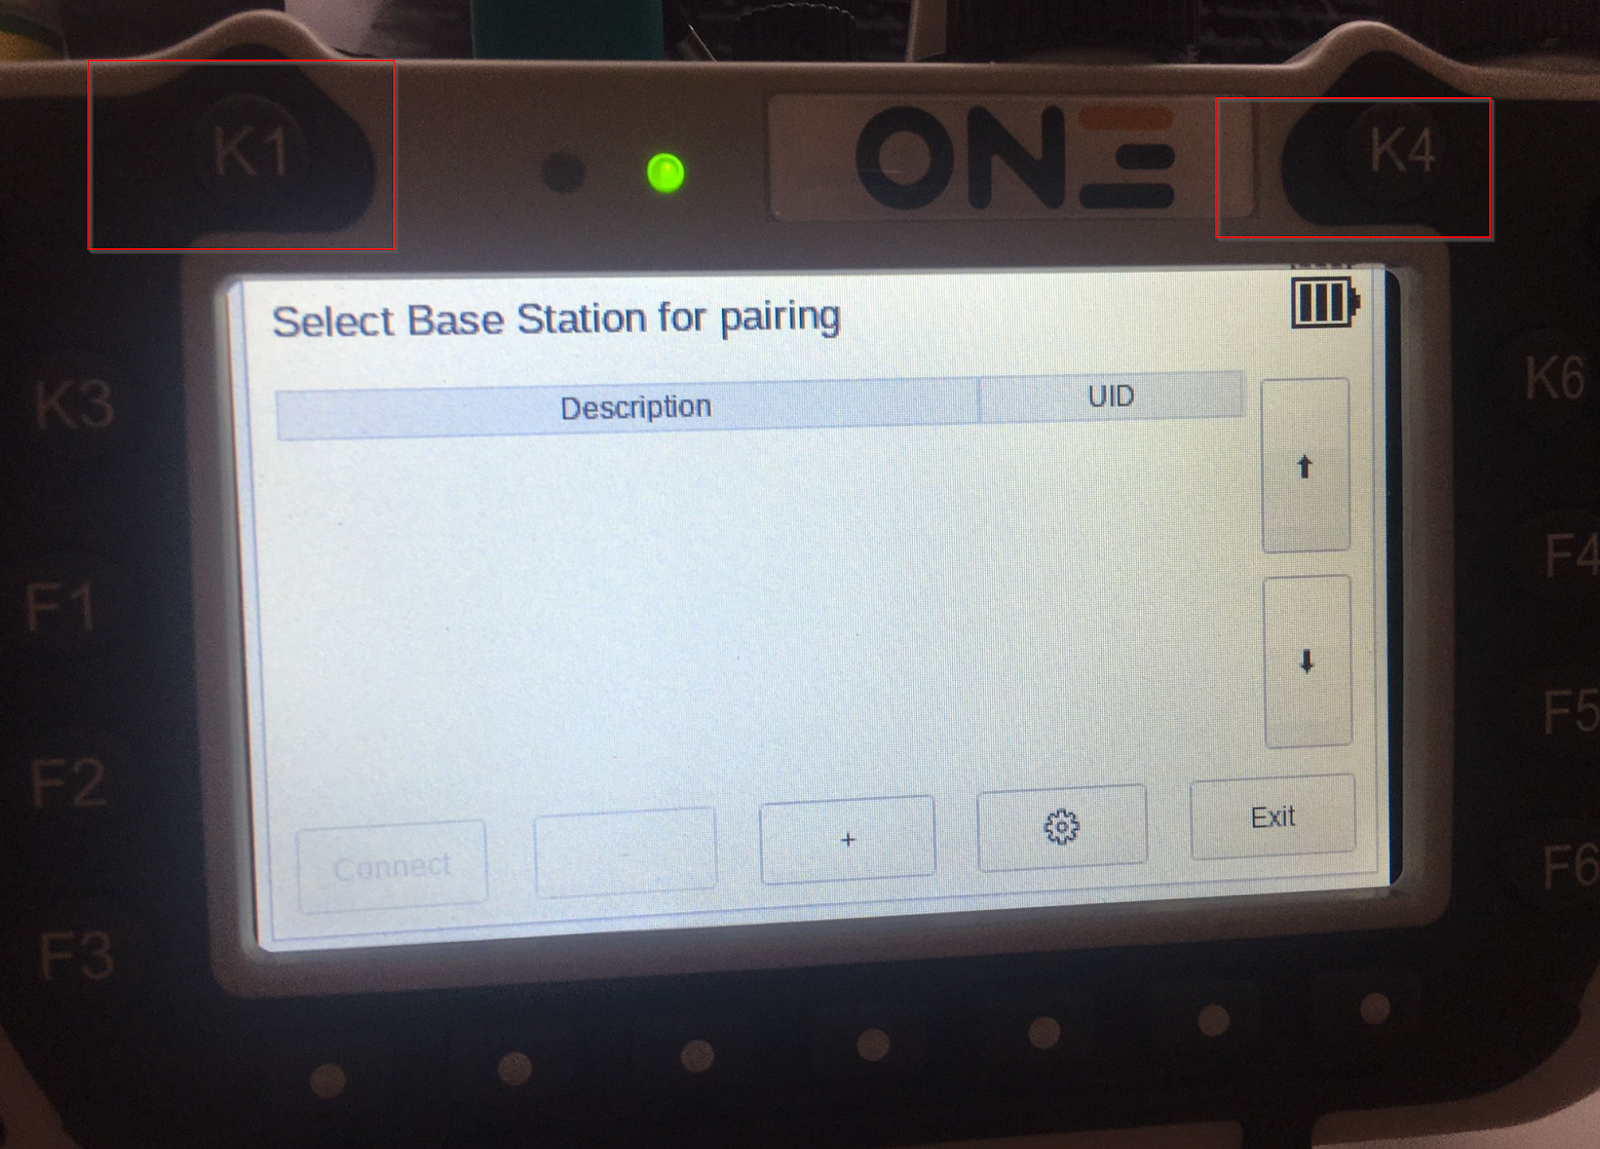
Select Base Station
Press K1 and K4 simultaneously to change to the Pairing screen.
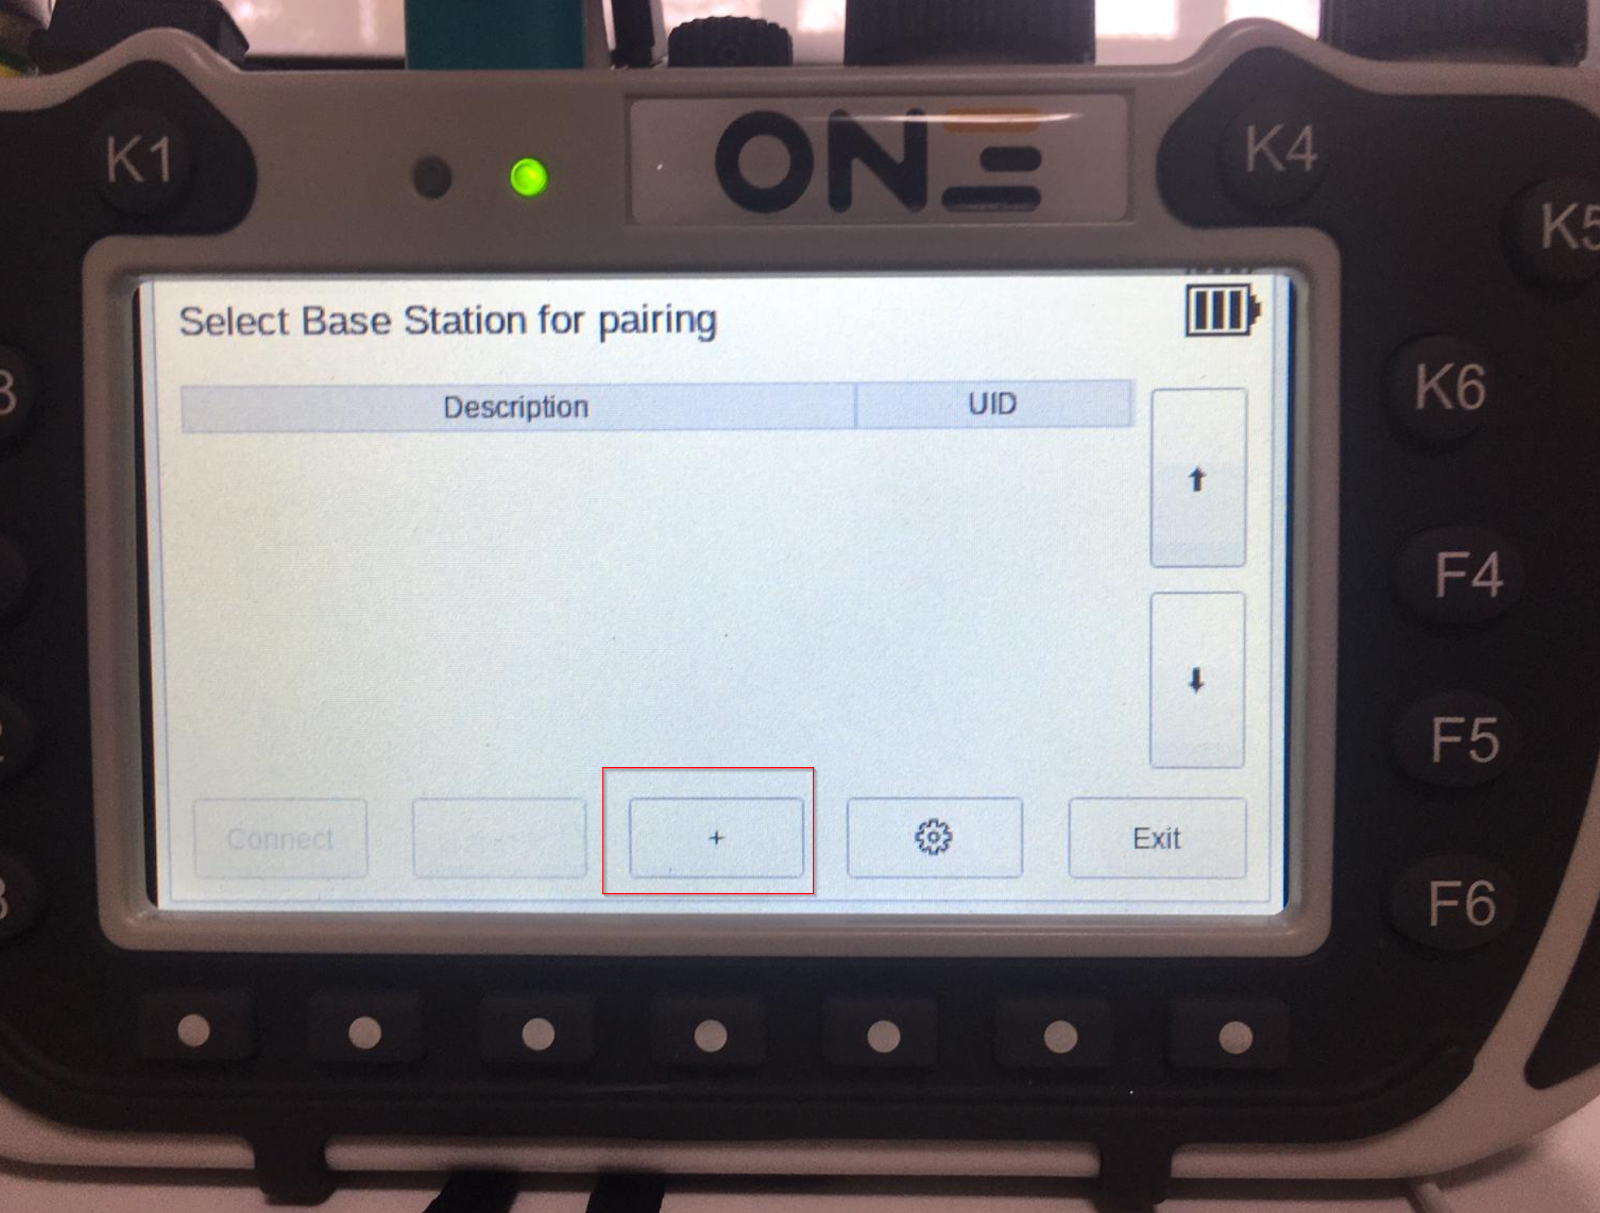
The Add Base Station screen appears.
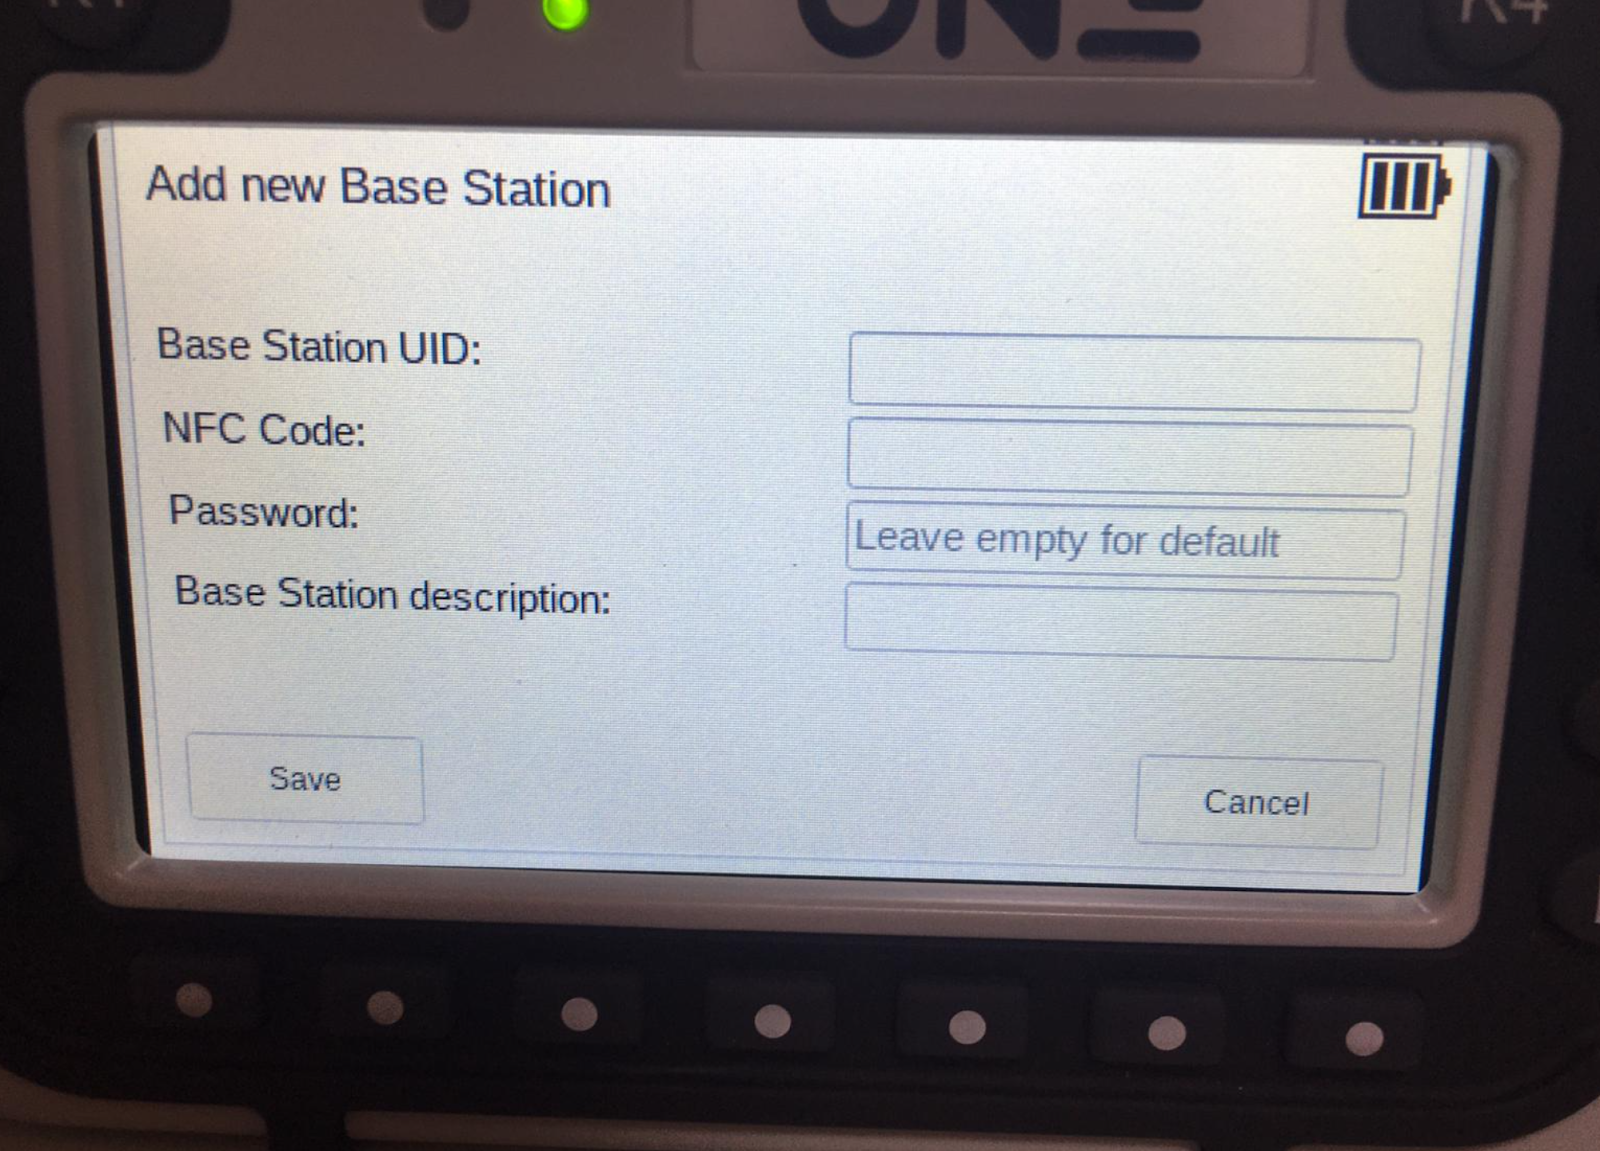
The only setting is the Base Station UID.
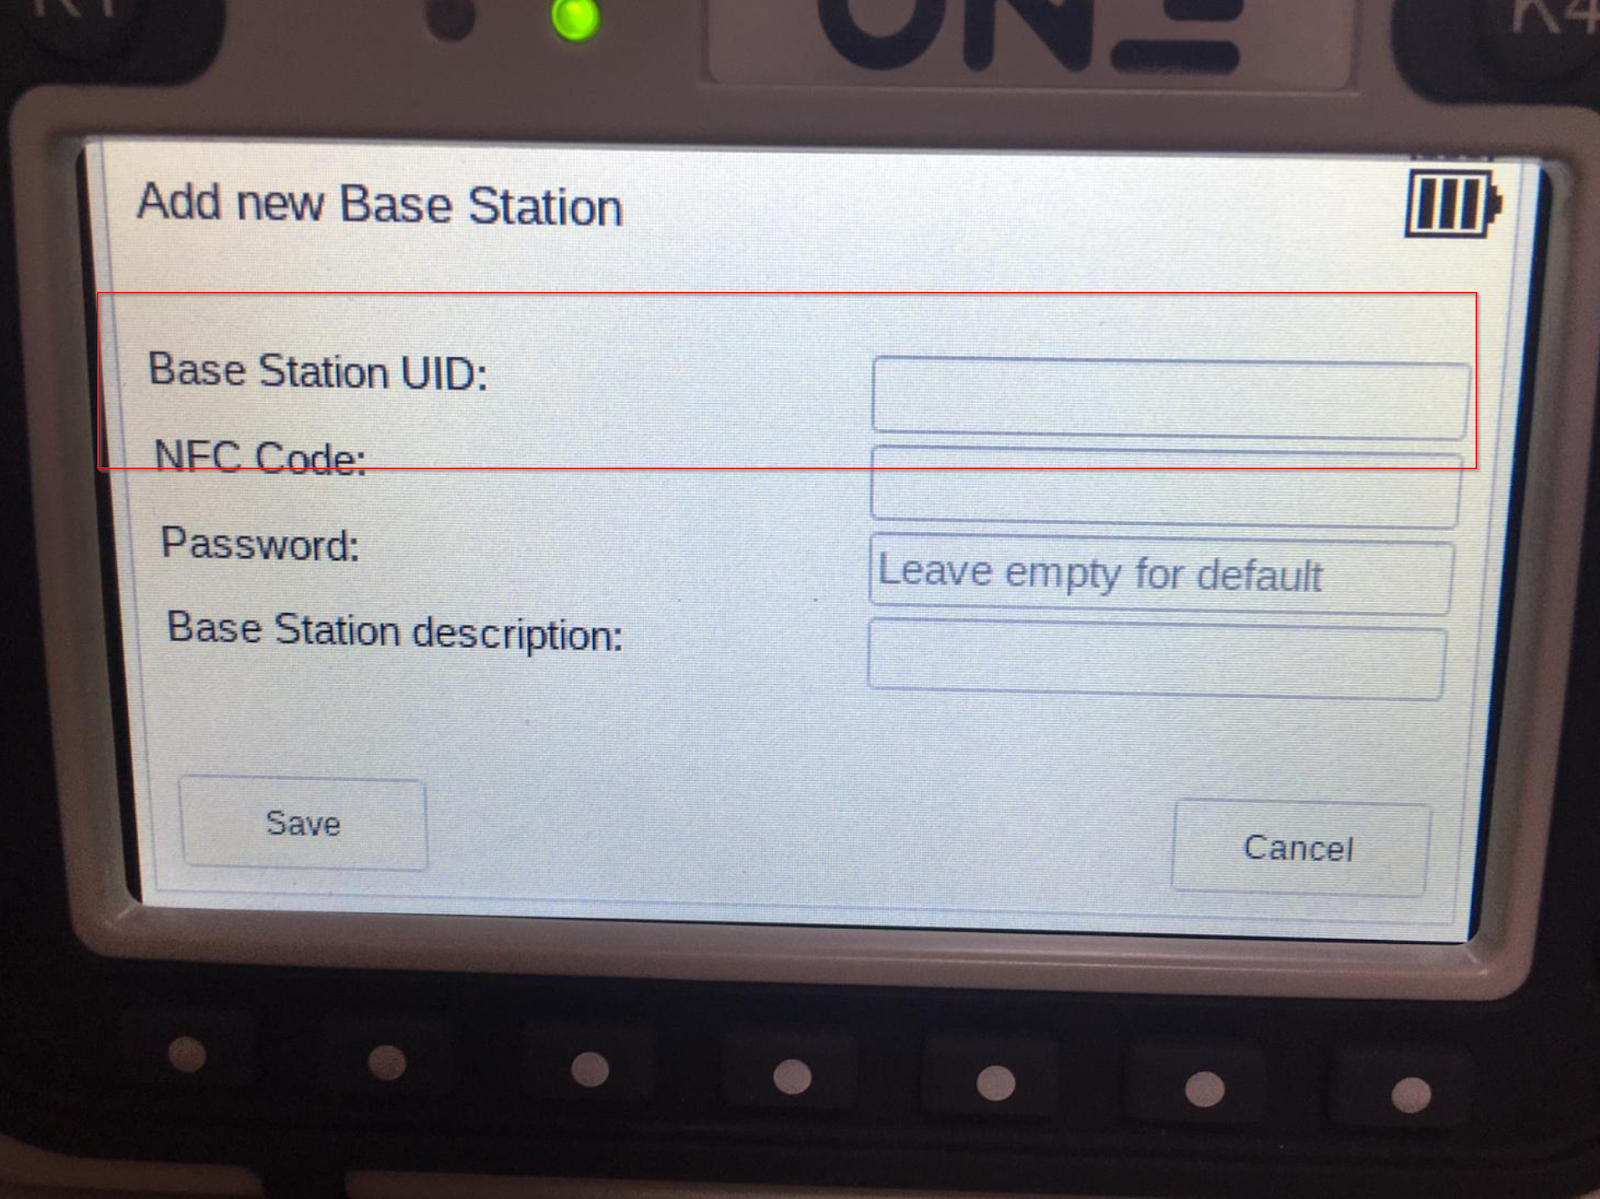
You will find the UID on the X5Base.
Done!
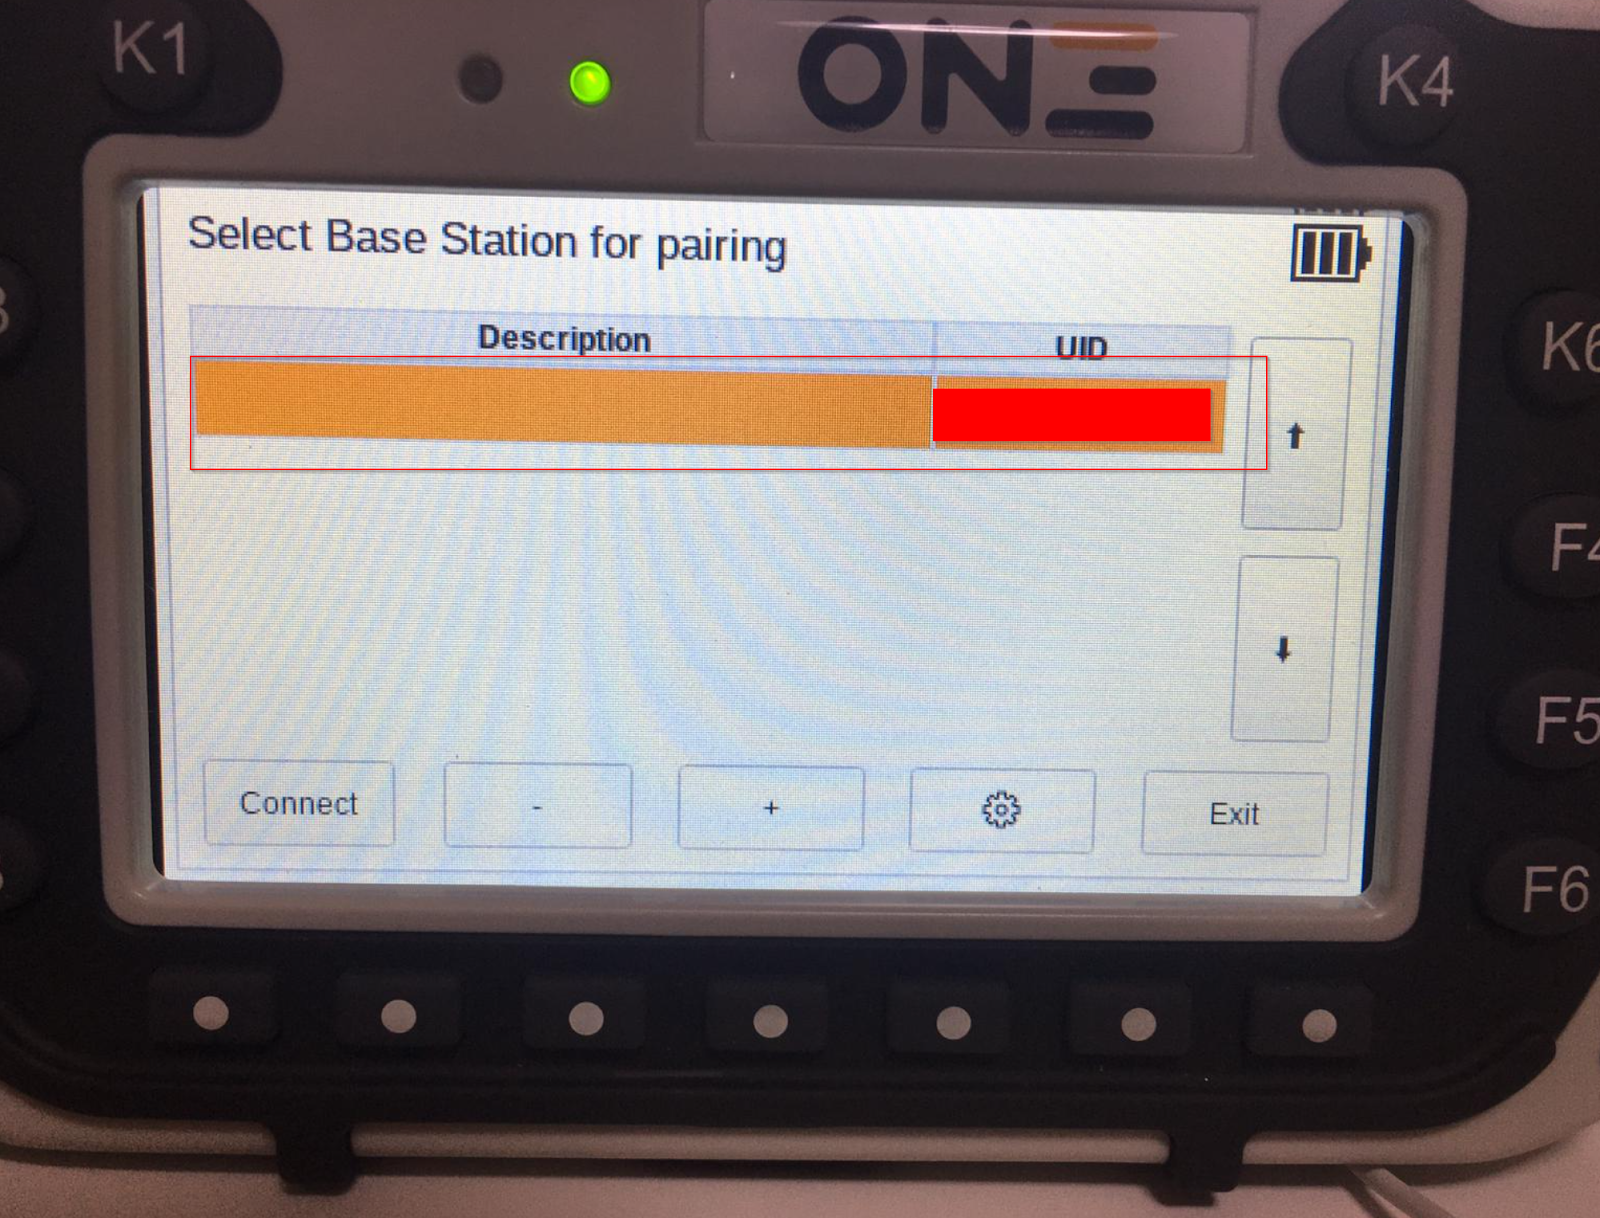
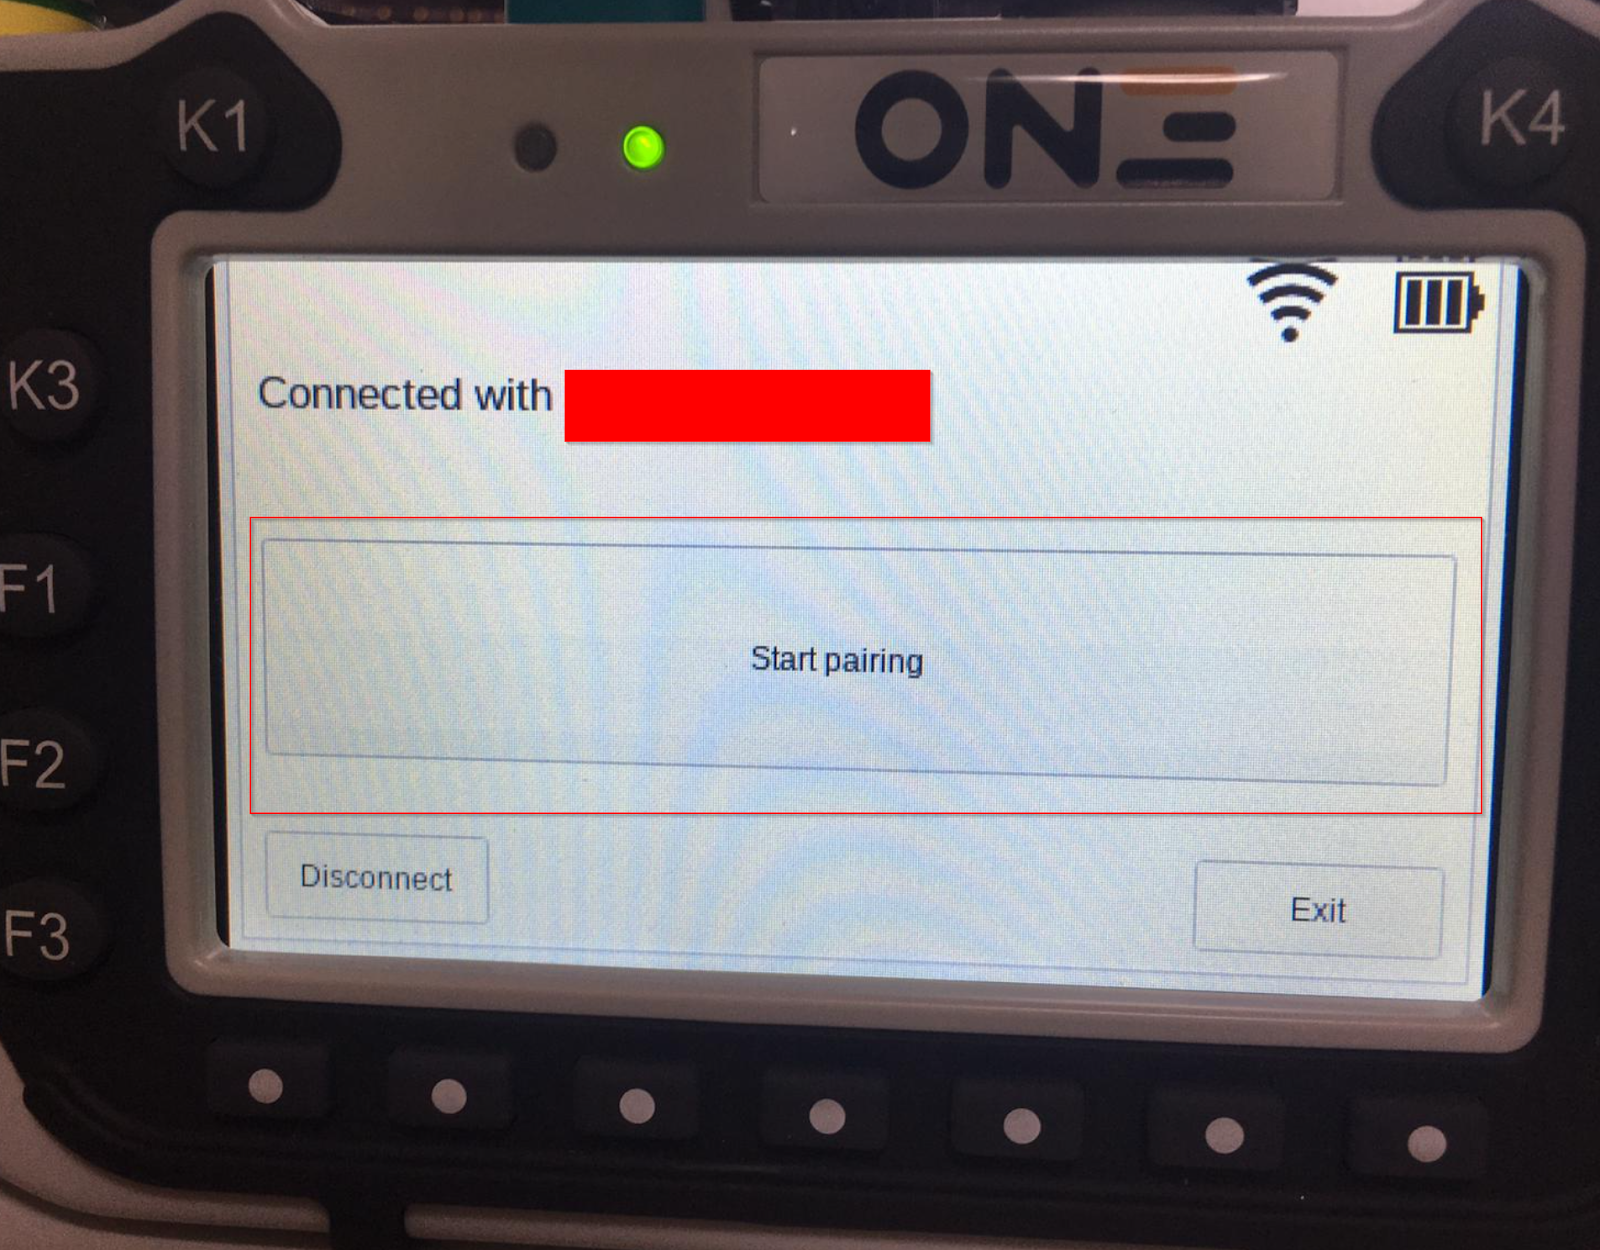
Click the Connect button to connect the X5 Wireless and X5 Base Station.
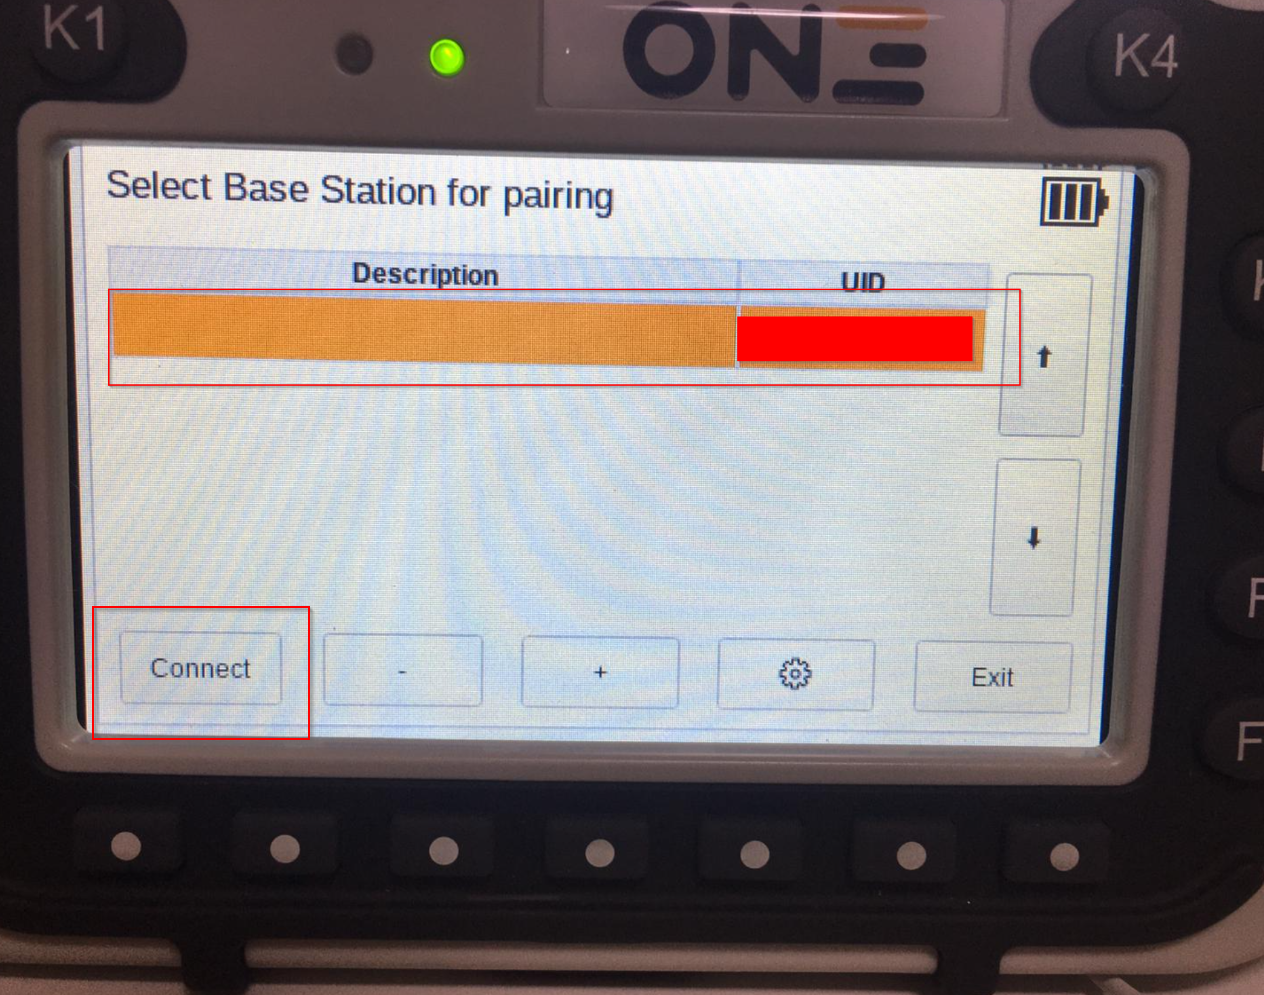
Just a second..

Done!Click on the Start pairing button to pair the X5 base.
Just a seconds..
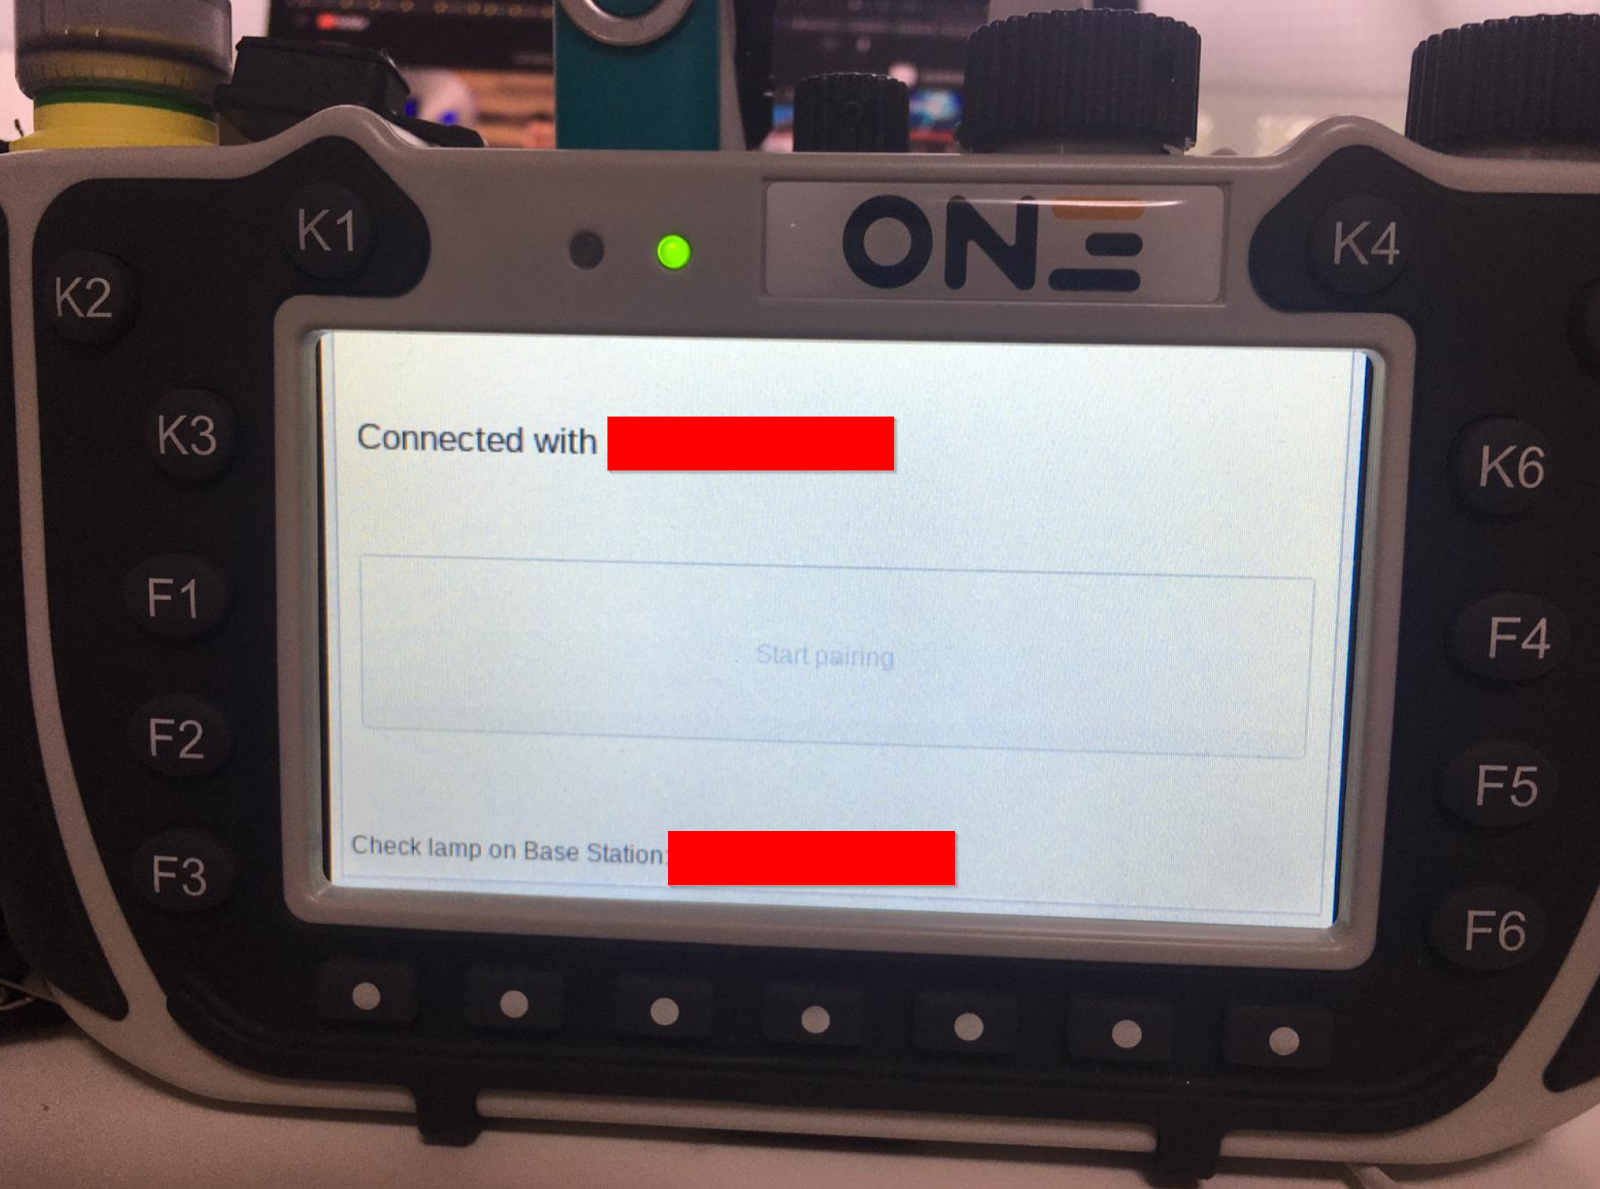
During paring, the lamp connected to output X3 of the X5Base will flash.
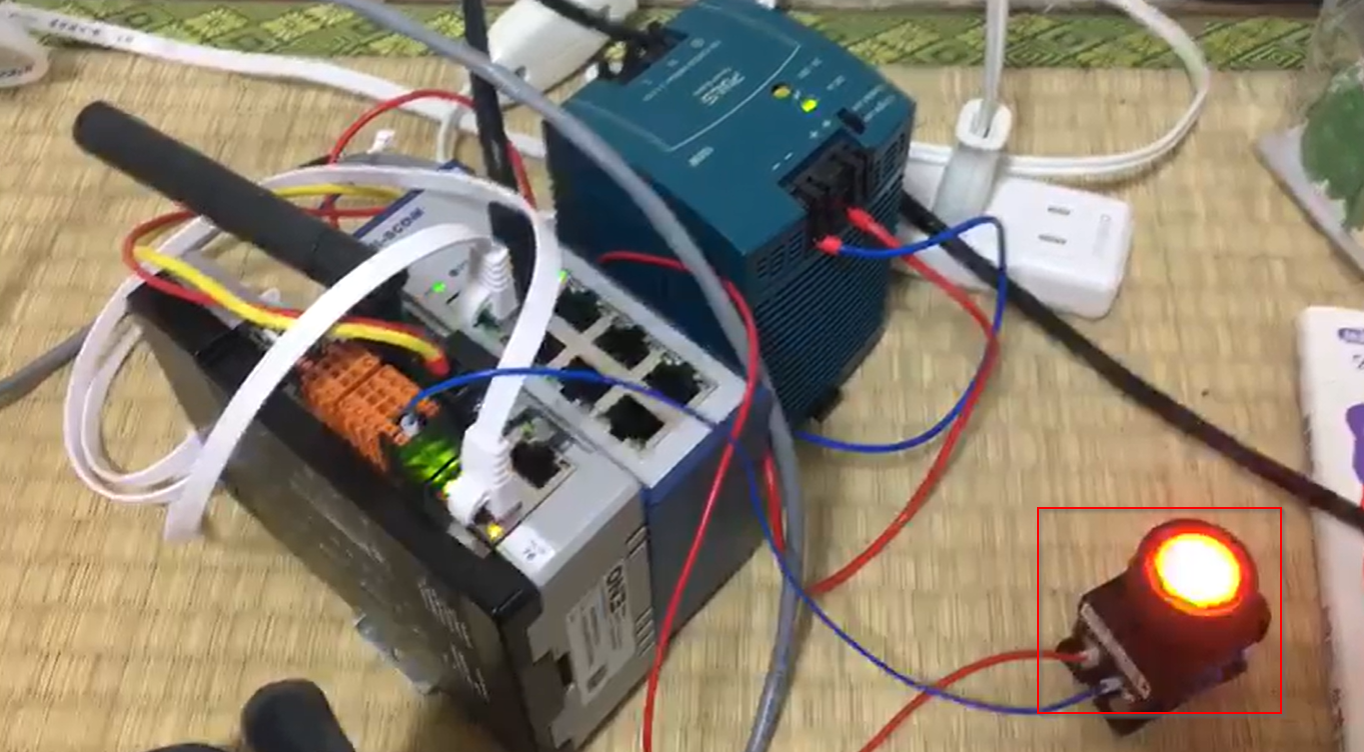
You can check the operation in the following video: after you click on the Pairing button, the lamp flashes randomly 1-5 times, Please count the number of flashes.
Then select the number of times it flashes.
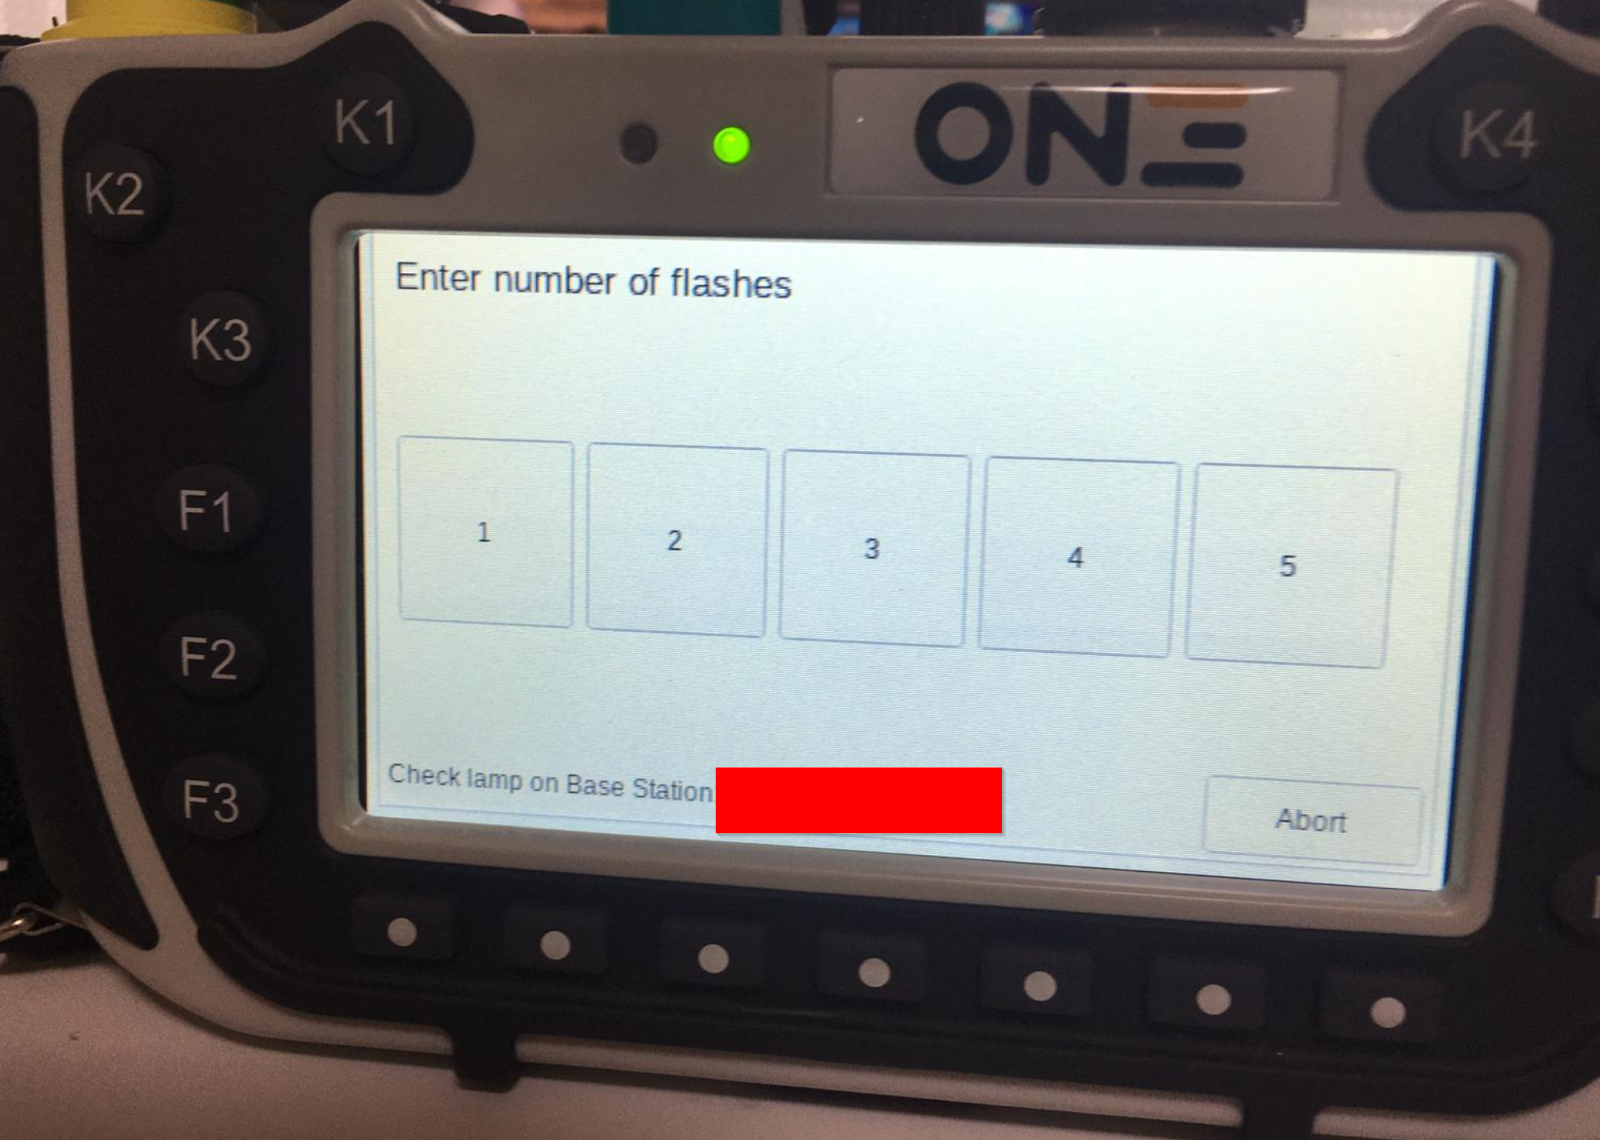
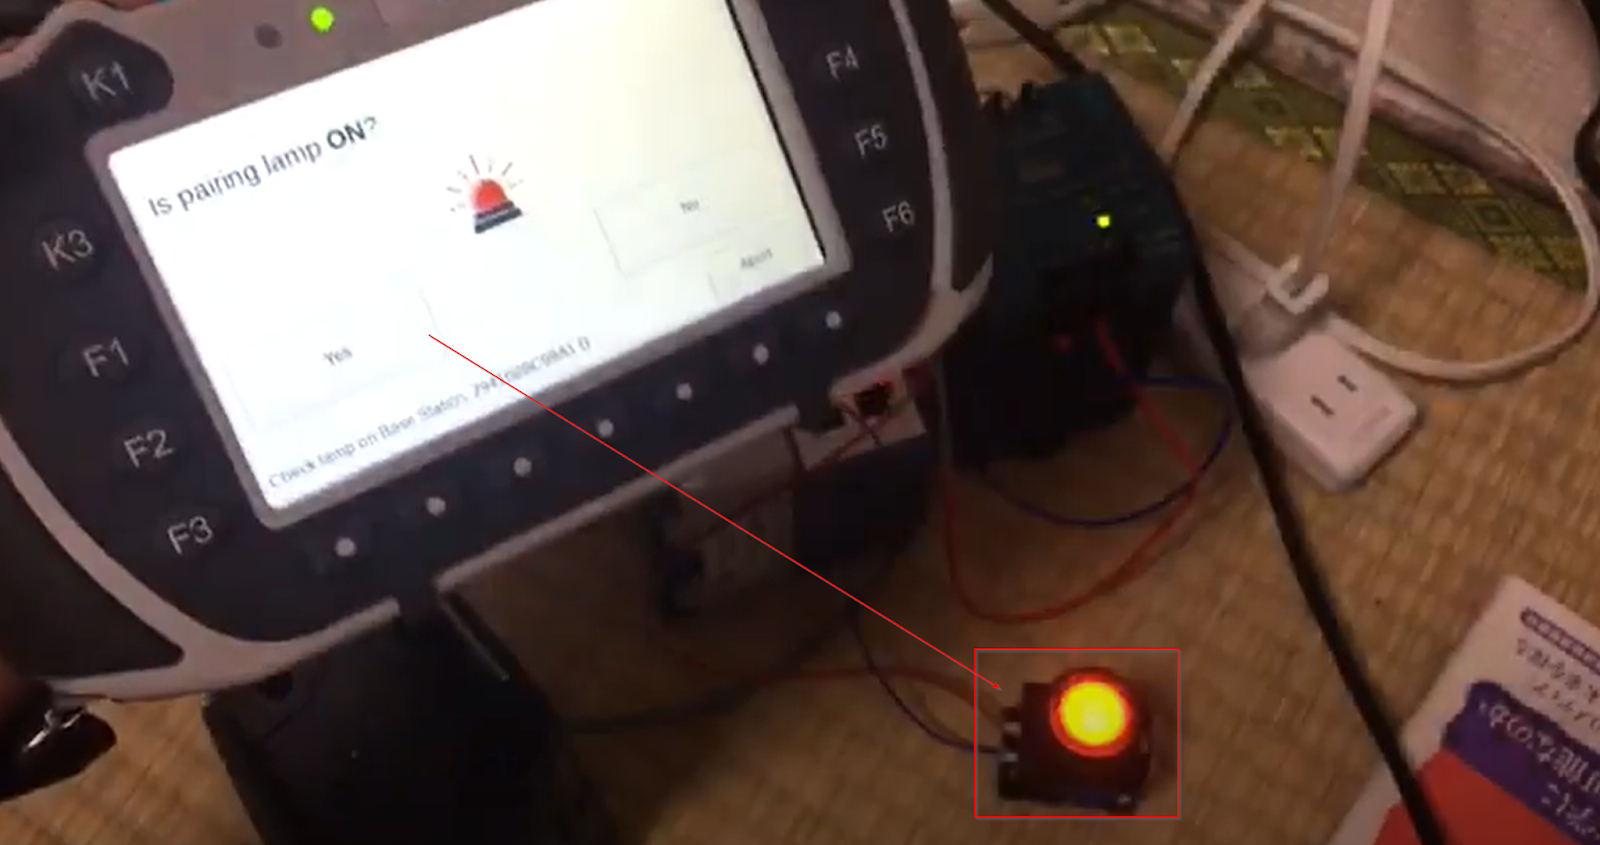
If the number of flashes matches the number of times the lamp has flashed, the screen changes to this one.
If output 3 is then set to True and the lamp is also outputting, click Yes.
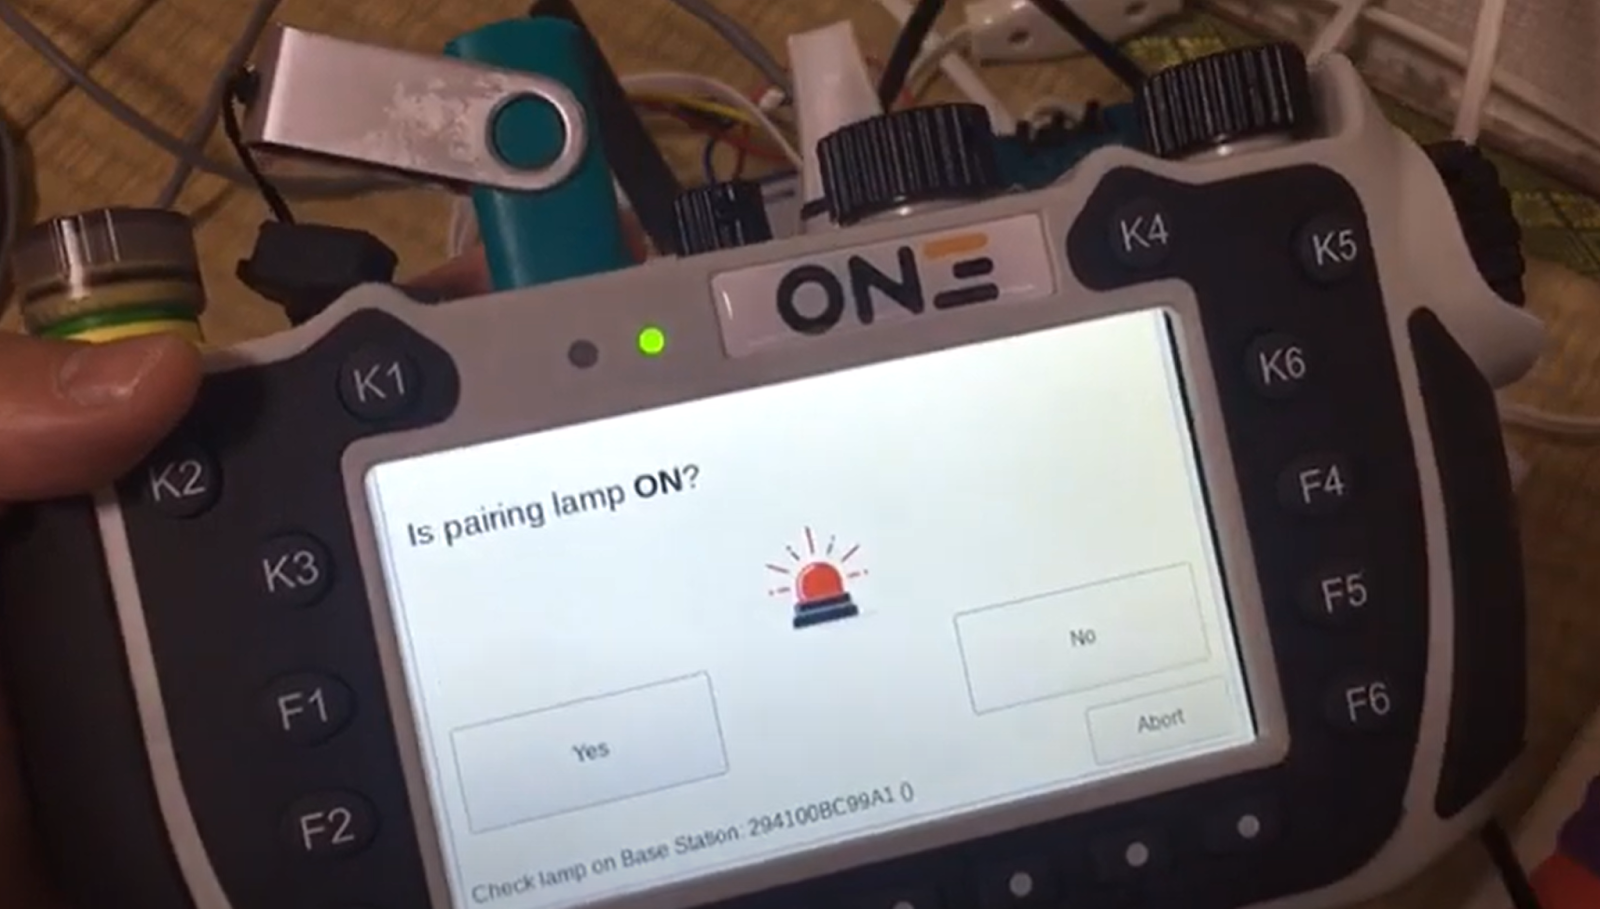
The diagram below shows.
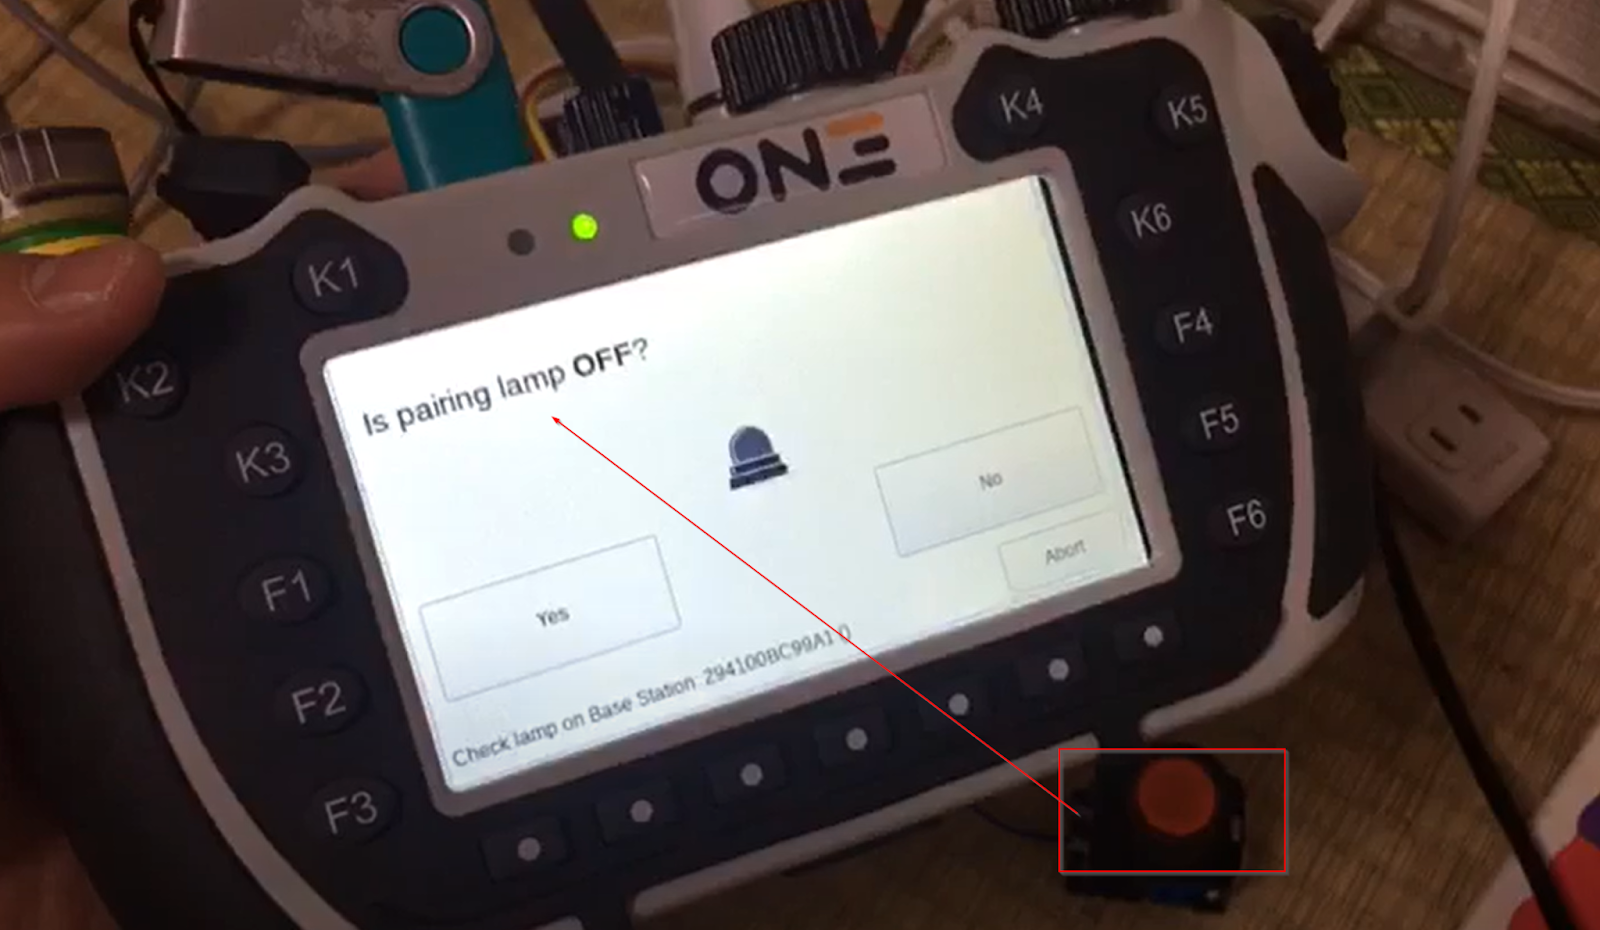
Next, X3 will be False and the LAMP connected to X3 will also be OFF. If the LAMP is switched OFF, click Yes.
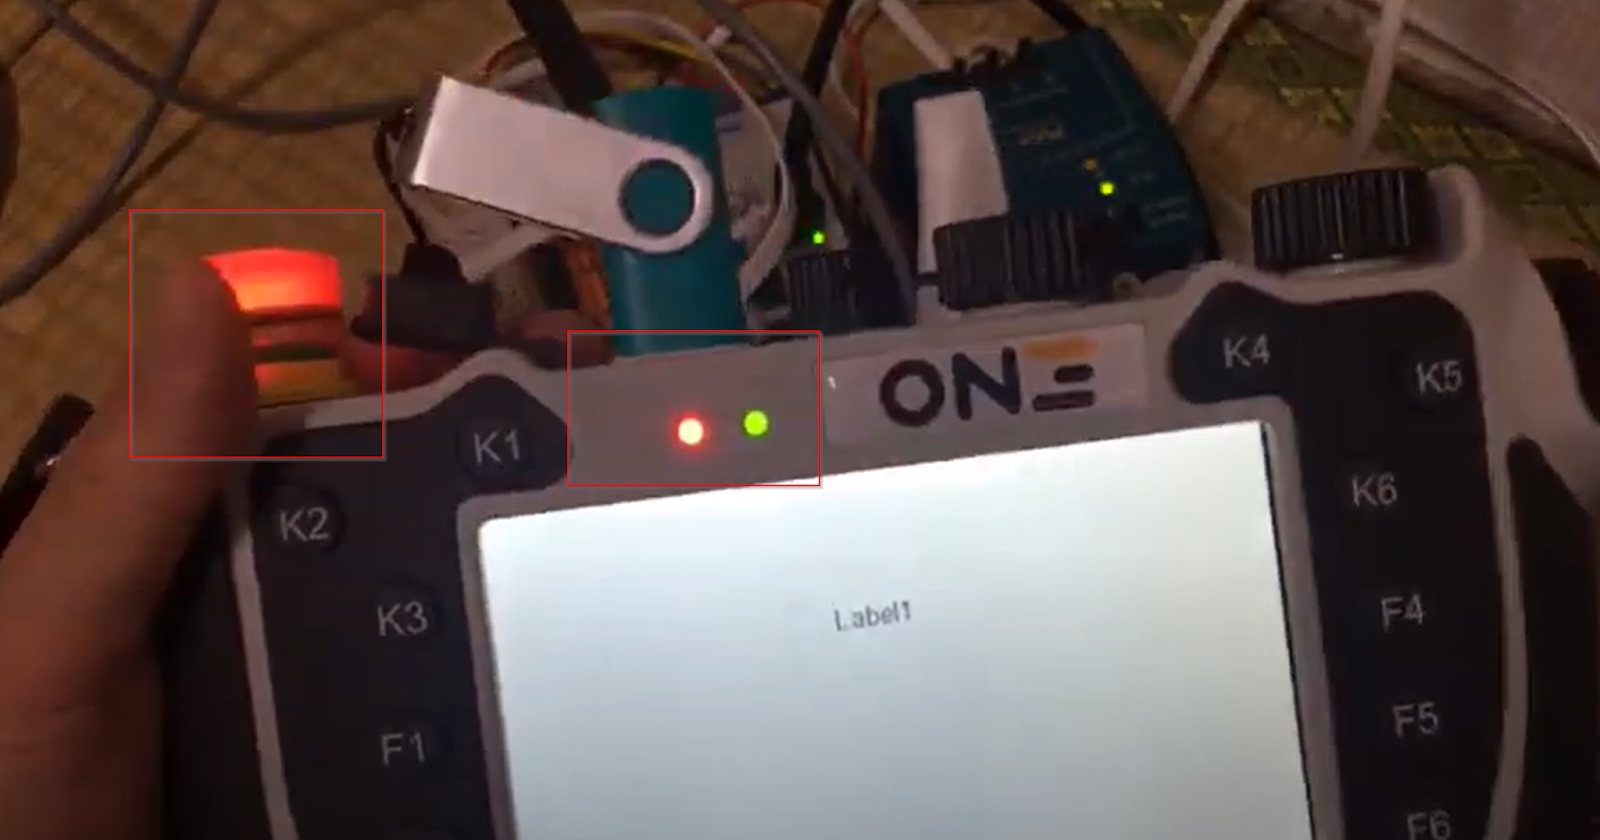
Finally, press the emergency stop once and release it again.
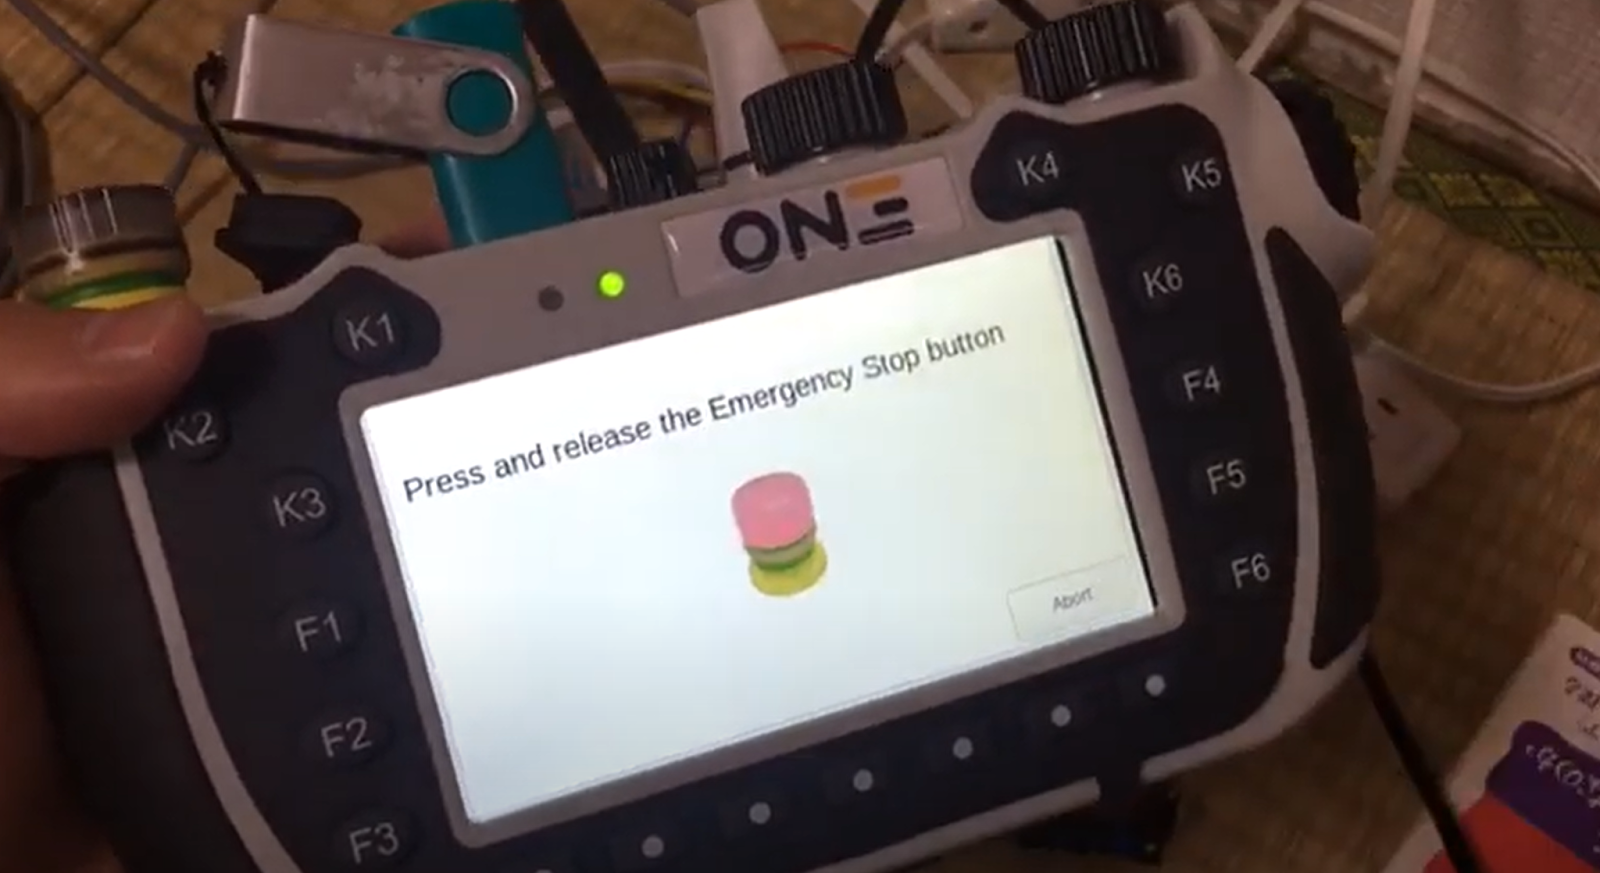
Done!Pairing-up was successful because the emergency stop lamp is on!
This video shows the operation of Pairing.
Result
Done!