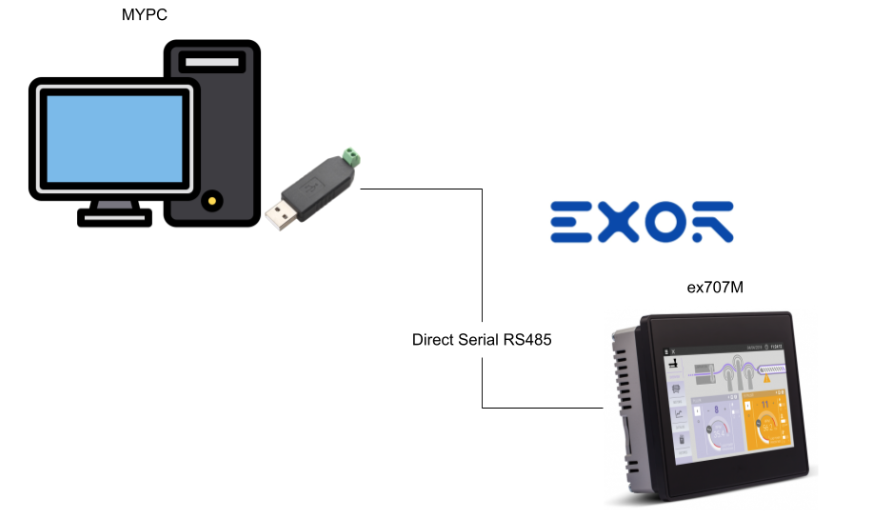
This article explains step-by-step how to establish RS485 communication between a PC and EXOR using Direct Serial from scratch.
Let’s enjoy the FA.
Foreword
Thank you from the bottom of my heart for visiting my technical blog and YouTube channel.
We are currently running the “Takahashi Chris” radio show with Full-san (full@桜 八重 (@fulhause) / X) which I deliver every Wednesday night.
Sharing, not hoarding, technical knowledge
We publish technical information related to factory production technology and control systems for free, through blogs and videos.
With the belief that “knowledge should be accessible to everyone,” we share practical know-how and real-world troubleshooting cases from our own field experience.
The reason we keep it all free is simple: to help reduce the number of people who struggle because they simply didn’t know.
If you’ve ever thought:
- “Will this PLC and device combination actually work?”
- “I’m having trouble with EtherCAT communication—can someone test it?”
- “I want to try this remote I/O, but we don’t have the testing environment in-house…”
Feel free to reach out!If lending equipment or sharing your configuration is possible, we’re happy to verify it and share the results through articles and videos.
(We can keep company/product names anonymous if requested.)
How can you support us?
Currently, our activities are nearly all unpaid, but creating articles and videos takes time and a proper testing environment.If you’d like to support us in continuing and expanding this content, your kind help would mean a lot.
Membership (Support our radio show)
This support plan is designed to enhance radio with Mr Full.
https://note.com/fulhause/membership/join
Amazon Gift List (equipment & books for content production)
Lists equipment and books required for content creation.
https://www.amazon.co.jp/hz/wishlist/ls/H7W3RRD7C5QG?ref_=wl_share
Patreon (Support articles & video creation)
Your small monthly support will help to improve the environment for writing and verifying articles.
https://www.patreon.com/user?u=84249391
Paypal
A little help goes a long way.
https://paypal.me/soup01threes?country.x=JP&locale.x=ja_JP
Just trying to share things that could’ve helped someone—if only they’d known.
Your support helps make knowledge sharing more open and sustainable.
Thank you for being with us.
soup01threes*gmail.com
Technical knowledge shouldn’t be kept to ourselves.
Reference Link
http://soup01.com/en/category/exor/
Direct Serial communication?
EXOR’s Direct Serial Communication is a universal protocol enabling low-level access to serial functions. Using this protocol, applications themselves can implement serial-based protocols (RS-232/485/422) without developing dedicated protocols.
Direct Serial supports both ASCII and binary modes.
The Token Queue Size parameter allows you to change the number of tokens stored in the queue. When the queue becomes full, the oldest tokens are discarded.
Rules
And there are four combinations for Direct Serial.
- Without rx-prefix and rx-suffix: The received stream is split into tokens according to GAP parameter detection.
- When an Rx-prefix is specified but no suffix is specified: All received characters before the prefix are ignored. Characters following the prefix are stored in the Token until a GAP parameter is detected.
- Specifying Rx-prefix and Rx-suffix: All characters between the suffix and prefix are stored in the Token. All received characters before the prefix or after the suffix are ignored until a Gap is detected or a new prefix is generated.
- When an RX-suffix is specified but no RX-prefix is specified: All characters received up to the suffix are stored in the Token, and all characters received after the suffix up to Gap detection are ignored.
Note that the rx-prefix and rx-suffix parameters are specified as hexadecimal strings, allowing any characters to be used (such as DLE, STX, CR, LF, etc.). That is, to define the string “STR ” as a prefix, you would define the string “535452 “.
Then, before placing the string into the receive queue, the prefix and suffix are removed (only the ‘payload’ is saved).
To send data using Direct Serial, ensure both of these conditions are met.
- The string to be sent is defined.
- Set “Tx-prefix” at the beginning and “Tx-suffix” at the end.
Then the entire string is sent immediately.
Working Flow..
- Reading a tag defined as a token receiver retrieves the preceding string from the queue. If no new token is present, an empty string is returned.
- Reading the tag defined as Length of Token Received retrieves the byte length of the token.
- Reading the tag defined as “Tokens Available” retrieves the number of tokens currently stored in the queue.
- Writing to a tag defined as a Token Acknowledge removes the Token from the queue, making it available for the next Token if present.
- Writing to tags defined as Token To Send can be sent immediately without using a queue.
Implementation
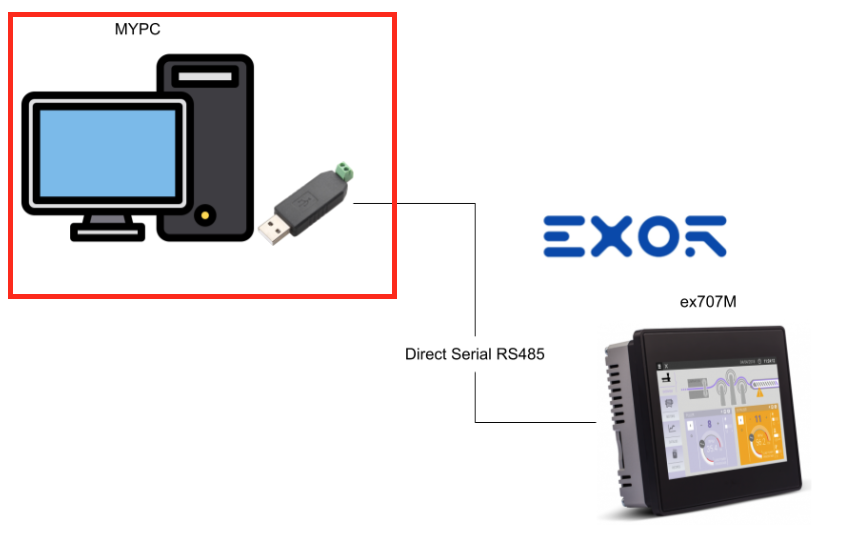
PC Side
First, let’s set up the PC side.
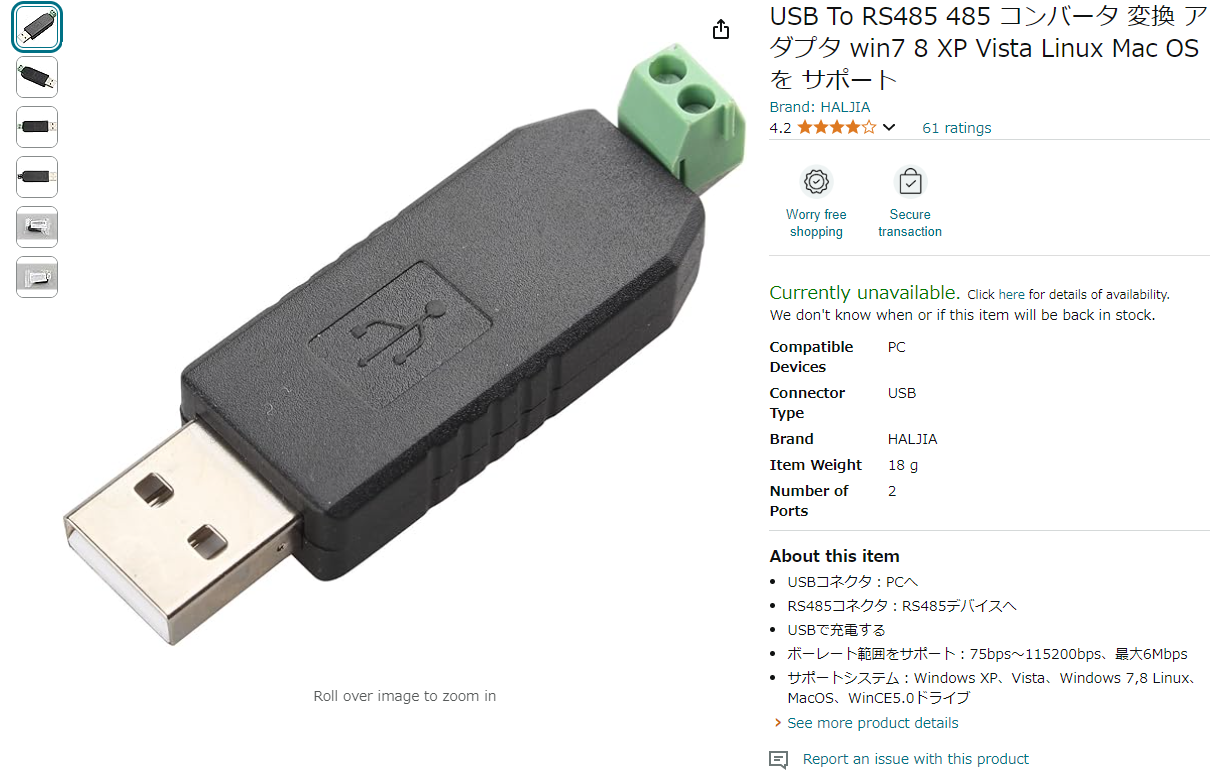
Driver
This is the USB-to-RS485 converter used in this article. It can be purchased on Amazon for under 1,000 yen.
Testtools
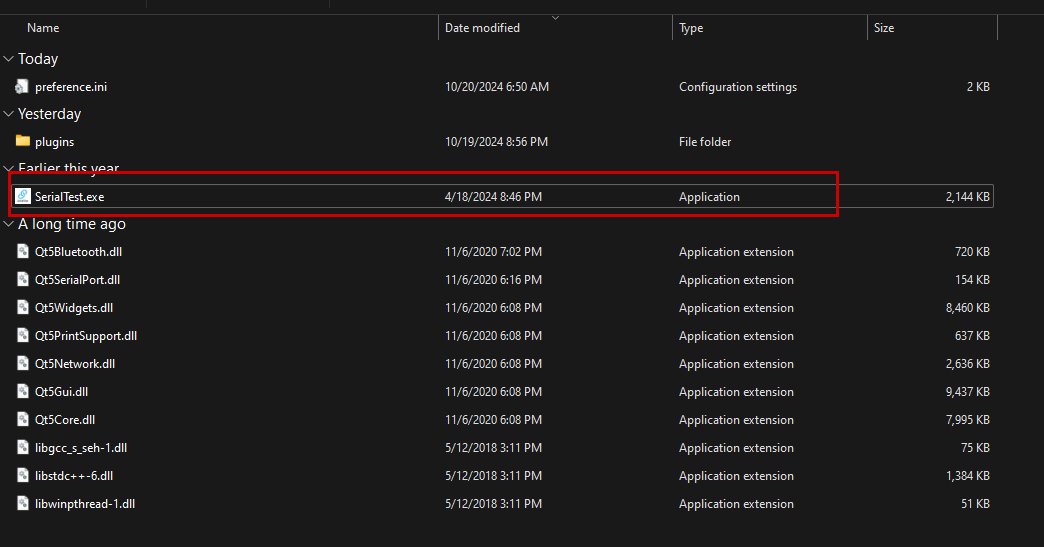
Use the SerialTest tool to perform communication tests between the PC and EXOR hardware.
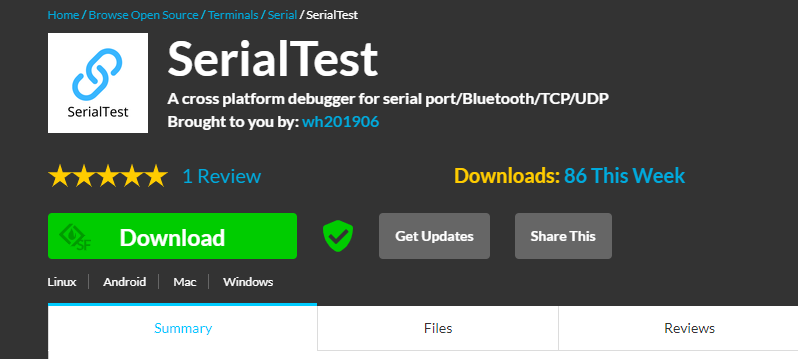
Extract the ZIP file downloaded from the side, then launch SerialTool.exe.
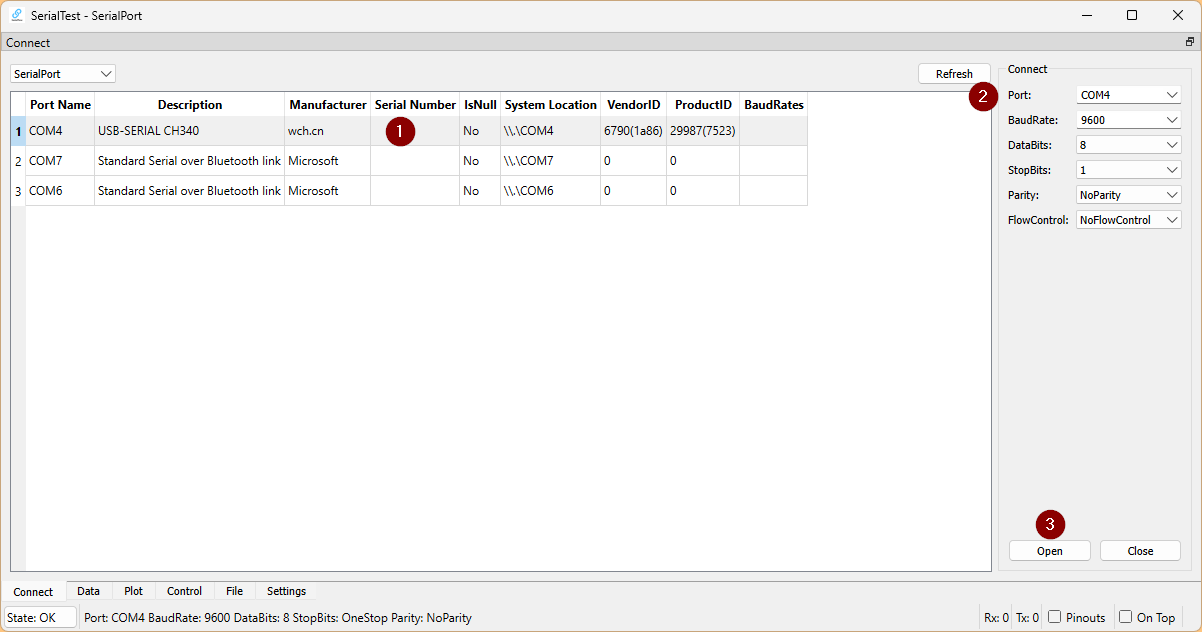
Select the USB→RS485 converter > Configure port settings, etc. > Start the port by clicking Open.
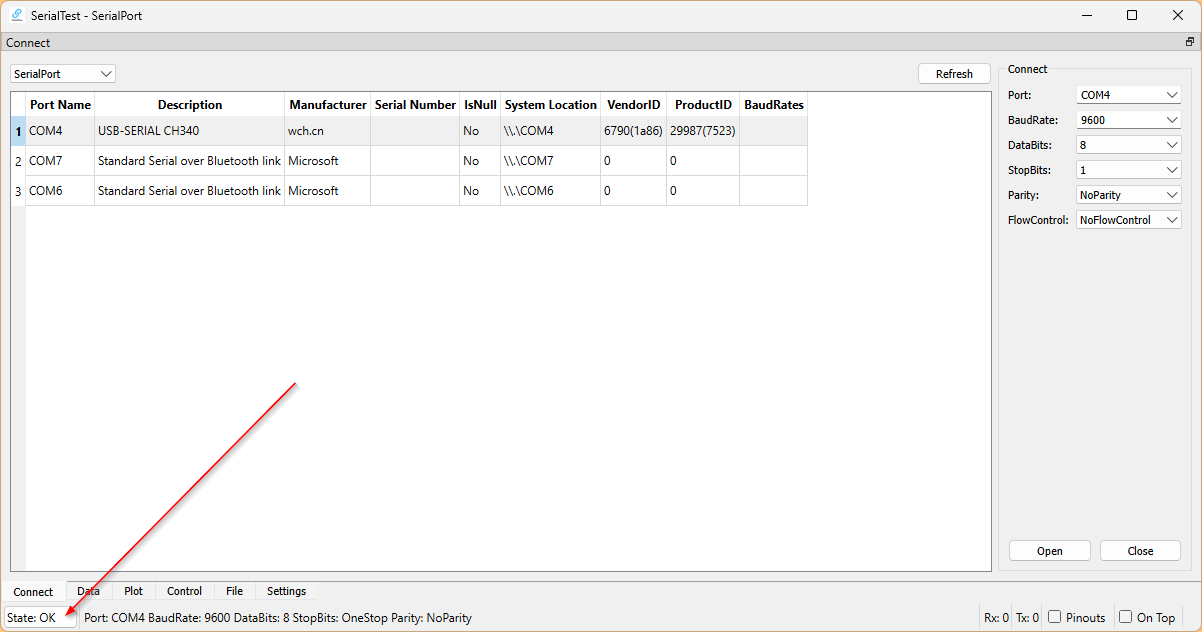
Done!
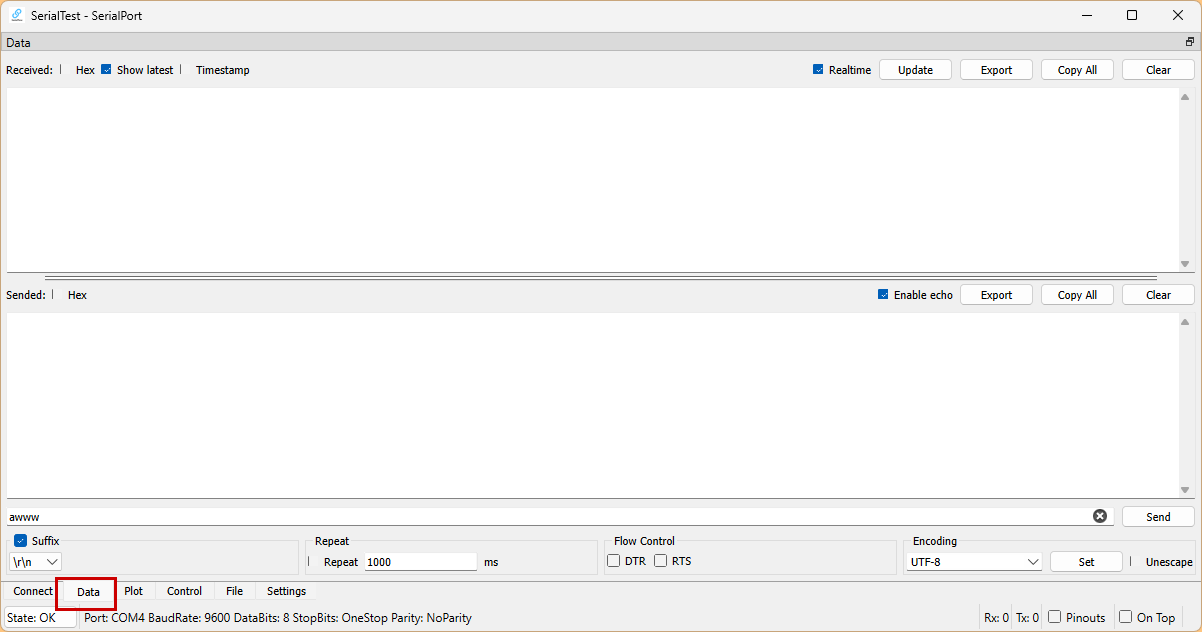
Next, open the Data Tab and send/receive data to the EXOR Hardware.
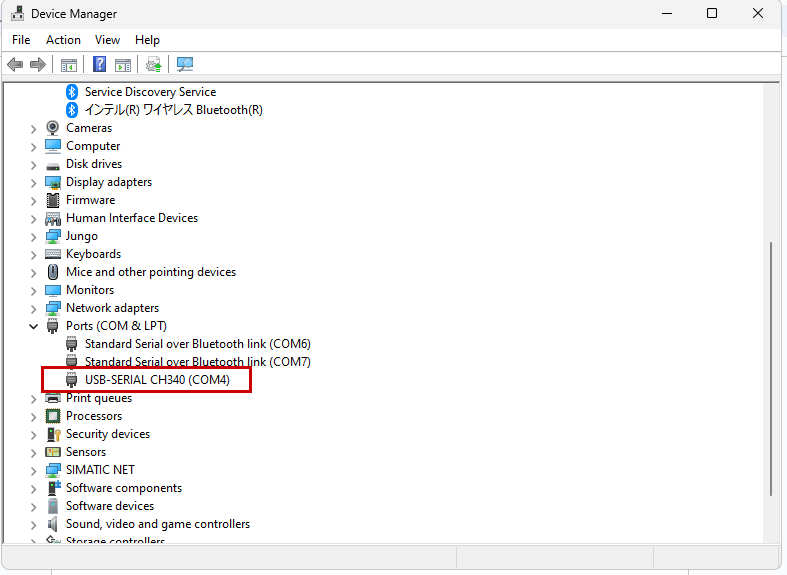
Device Manager
Also, after plugging the USB-to-RS485 converter into your PC, please verify that the COM port has been recognized.
EXOR Side
Next, we’ll configure the EXOR side.

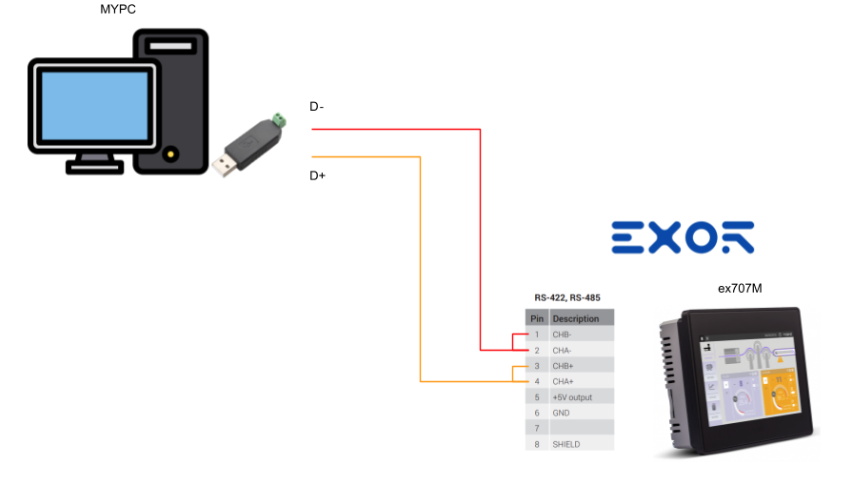
Wiring
This is the serial communication terminal block for the EXOR ex707M.
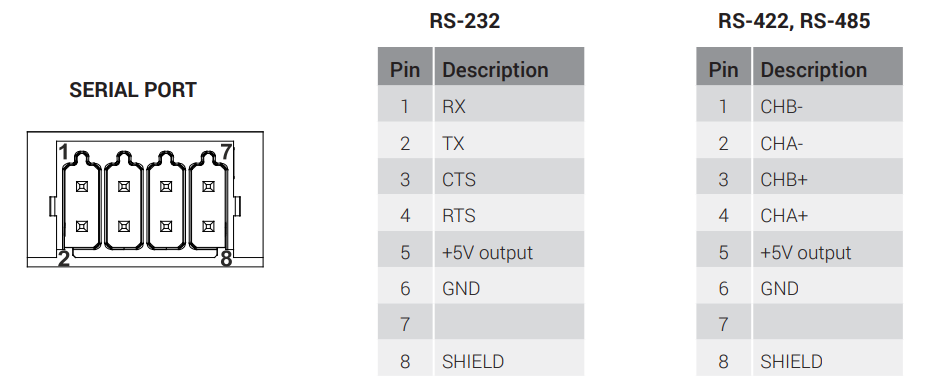
Please wire it accurately as shown in the diagram below.
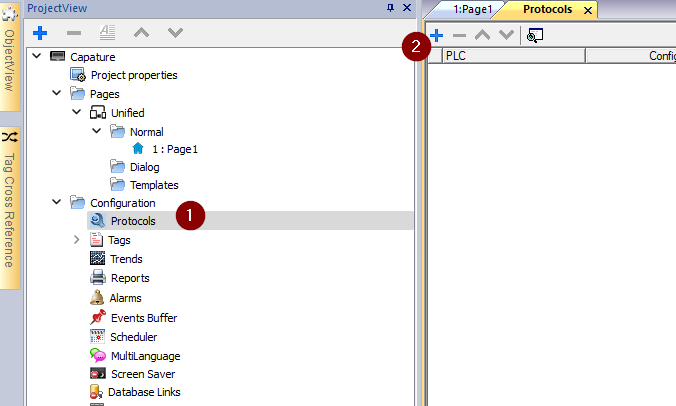
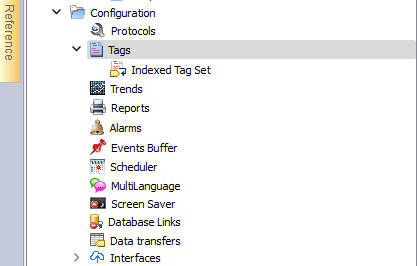
Add Protocol
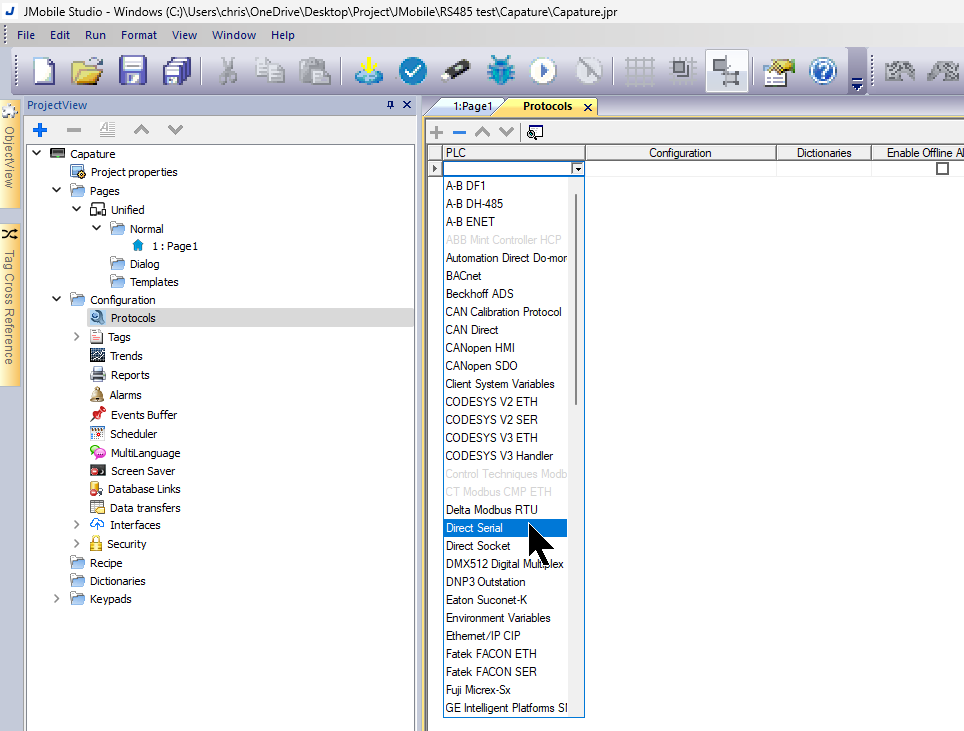
To add a Protocol to JMobile, click the Configuration > Protocol > + button.
Set Direct Serial from the Drop-List.
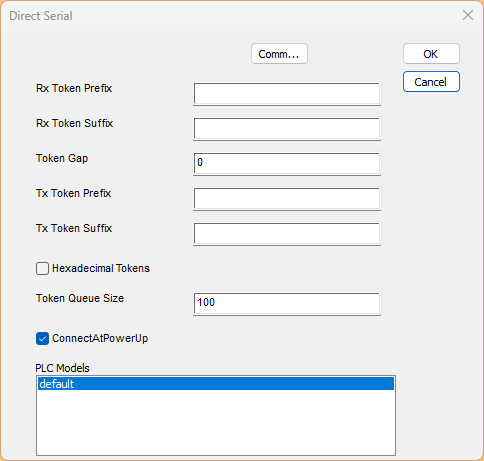
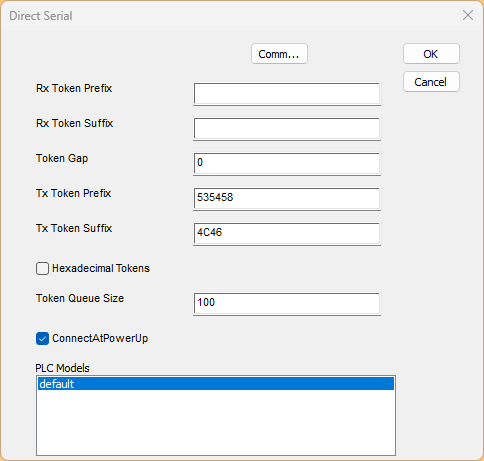
The Direct Serial configuration screen appears from JMobile. These parameters determine the driver’s behavior during RX and TX operations. Furthermore, all protocol parameters can be overwritten at runtime using the appropriate memory type, allowing for complete setup at runtime using tags. In that case, the settings using the memory type are saved to permanent storage.
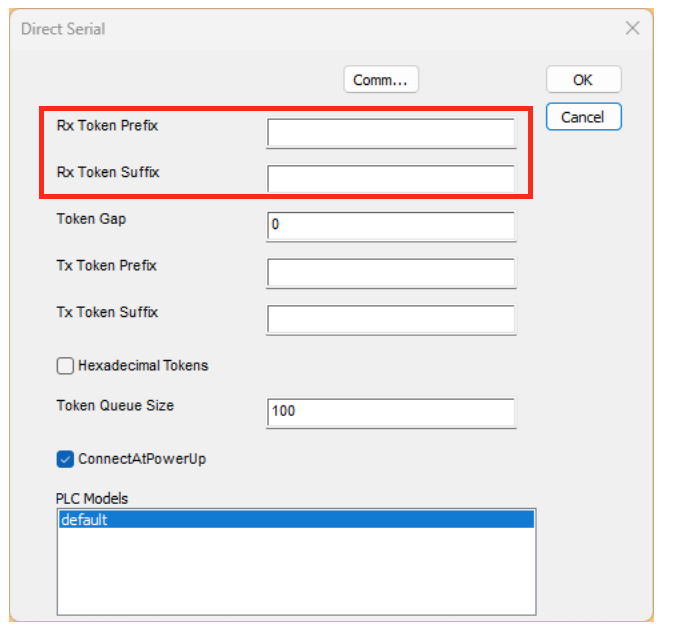
RX Token Prefix/Suffix
Specify the prefix and suffix of the Read Token as hexadecimal strings.
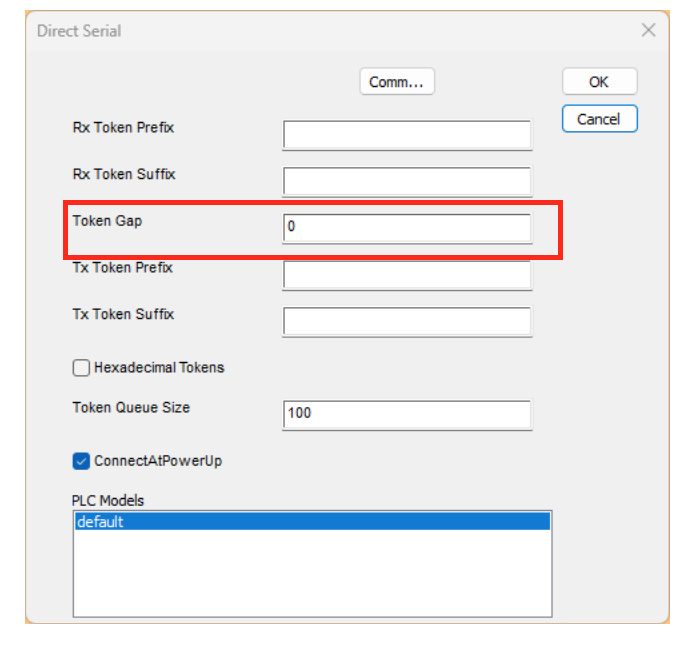
Token Gap
You can set the interval between tokens in milliseconds.
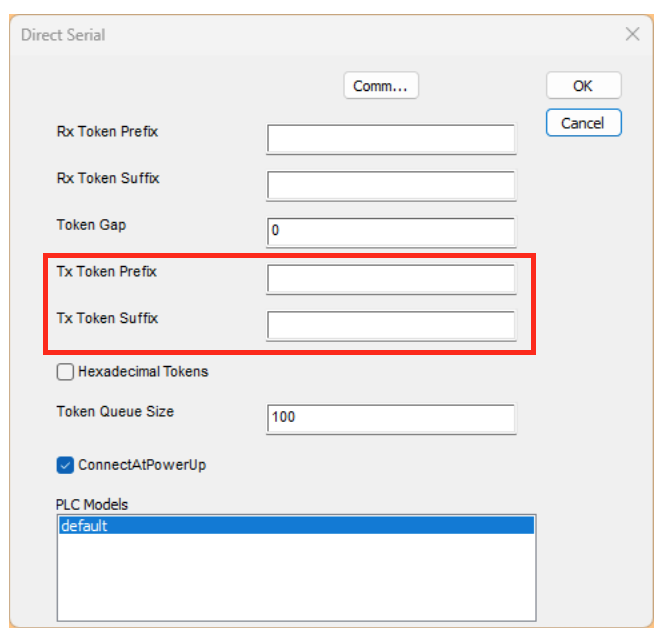
TX Token Prefix/Suffix
Specify the prefix and suffix of the Write Token as hexadecimal strings.
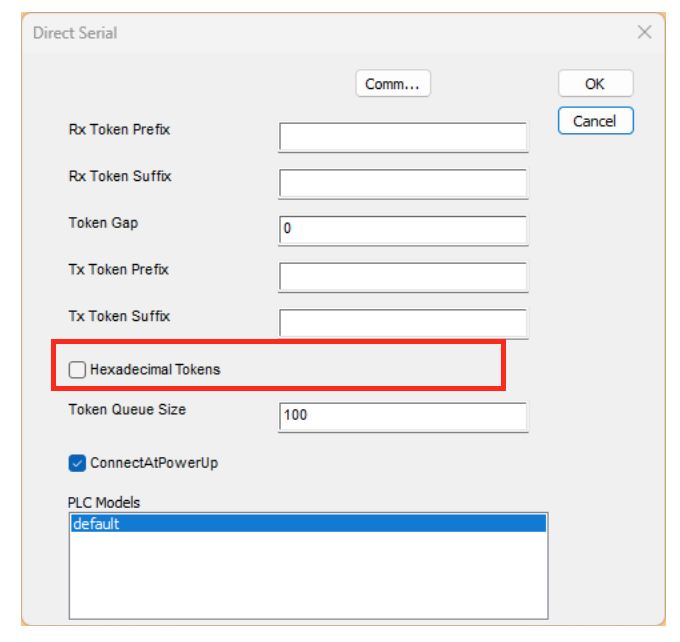
Hexadecimal Tokens
checked = The token is in hexadecimal.
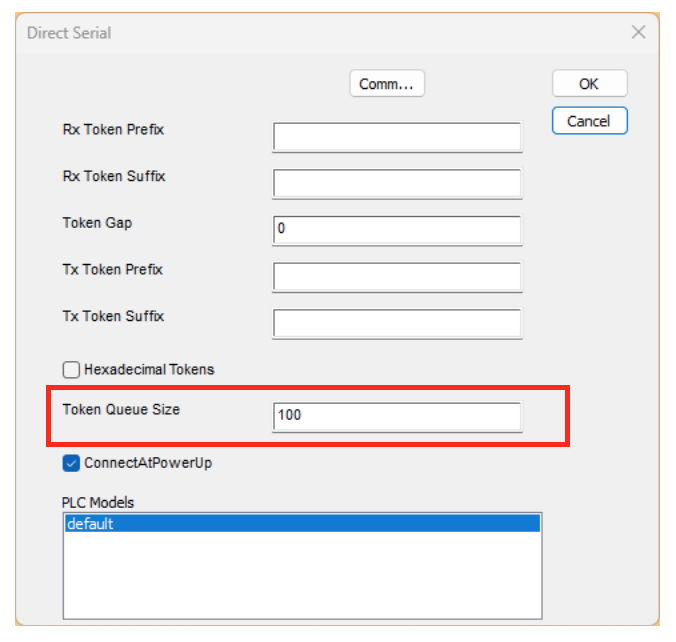
Token Queue Size
You can set the number of tokens in the queue to an integer value between 1 and 10,000.
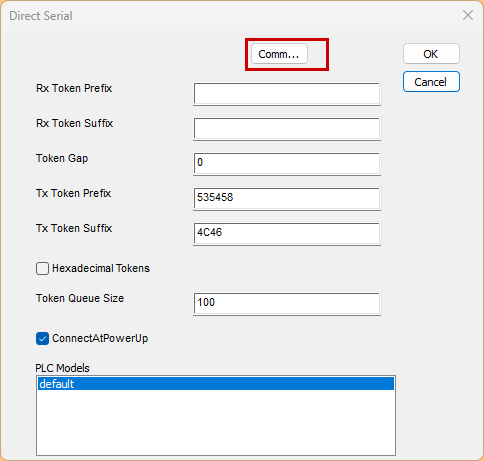
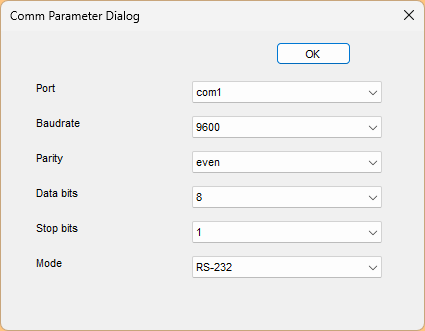
Comm
Next, configure the communication port.
Set the baud rate, parity, data bits, and stop bits according to your application.
Also, since we’ll be using RS-485 in this article, let’s set the Mode to RS-485.
Regarding the Port item, it varies depending on the actual port used on the EXOR hardware.
- The serial communication port built into the EXOR hardware is COM1.
-
When using PLCM03 and PLCM04 (additional serial ports):
- The module connected to Slot #1 or Slot #2 will be COM2.
-
When using two PLCM01 (CAN interface) units:
- Modules connected to Slot#1 or Slot#2 become CanPort 0.
- Modules inserted into Slot#3 or Slot#4 will be designated as CanPort 1.
For this article, we will be using the serial communication port built into the EXOR hardware. Please set the port to COM1.
Result
Done! That’s all right.
- The Tx Token Prefix is STR.
- Tx Token Suffix=LR.
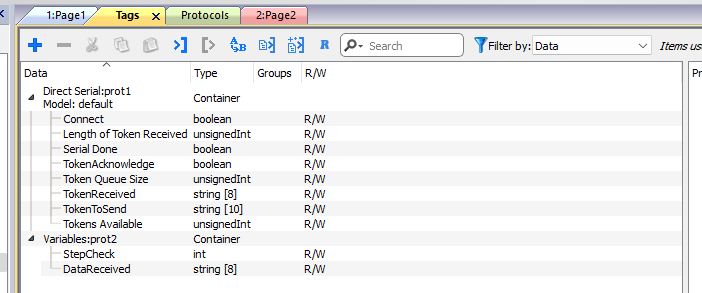
Tags
Next, add the required tag to use Direct Serial.
Screen
Next, we will create the communication confirmation screen.
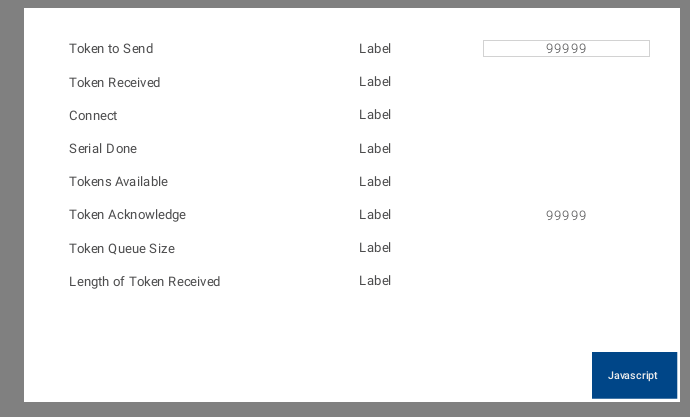
Screen-1
This is the Direct Serial operation screen.
- Enter a new string in the Token to Send field to send the data immediately.
- Token to Received displays the received data.
- When Connect=True, it means the port is operational.
- If Token Available is greater than 0, data will be received.
- Setting the Token Acknowledge to 1 removes one token from the queue.
- Token and Queue Size display the queue size set for the project.
- Length of Token Received indicates the current data size accumulated in the Queue.
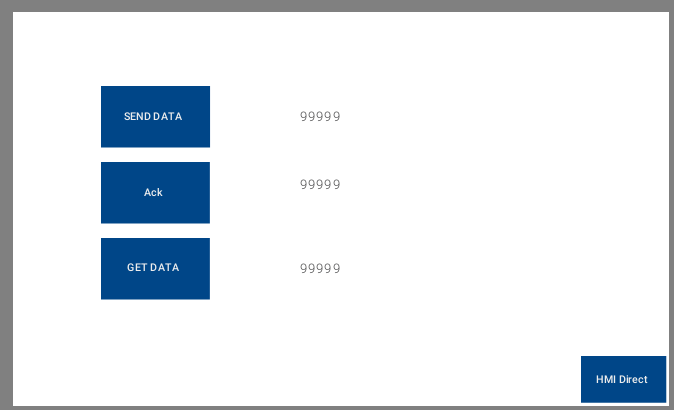
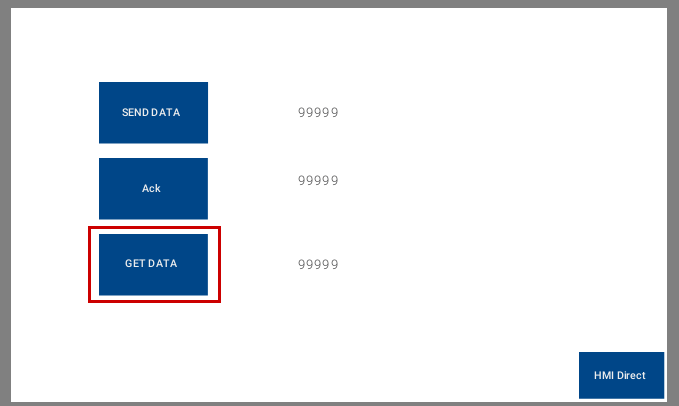
Screen-2
Three buttons have been added here to receive and send data from JavaScript.
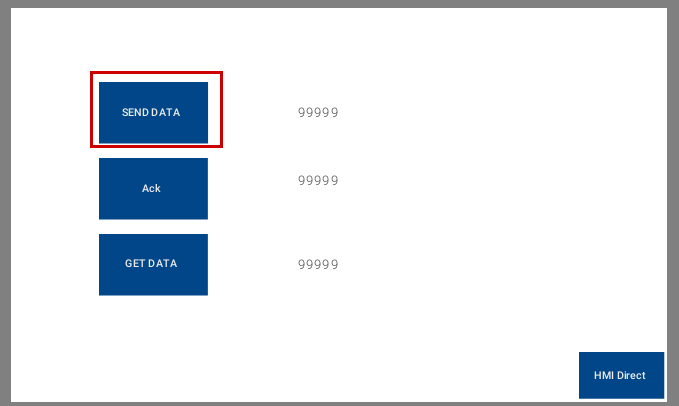
SEND DATA
Each time the SEND DATA button is pressed, JavaScript embedded within it writes a string to the TokenToSend tag and transmits the data.
function BtnStd2_btn_onMouseClick(me, eventInfo)
|
|---|
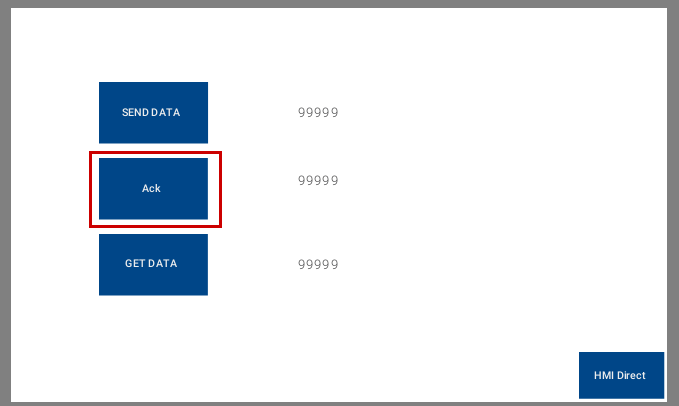
ACK
The ACK button has JavaScript embedded that clears the current receive buffer each time it is pressed.
function BtnStd3_btn_onMouseClick(me, eventInfo)
|
|---|
GET DATA
The GET DATA button has JavaScript embedded that displays the data from the receive buffer on the screen each time it is pressed.
function BtnStd4_btn_onMouseClick(me, eventInfo)
|
|---|
Result
You can see Screen-1 in action in this video.
EXOR.Direct RS485 communication-Demo1
You can see Screen-2 in action in this video.